收录机说明书(英文)
TEAC录音座说明书
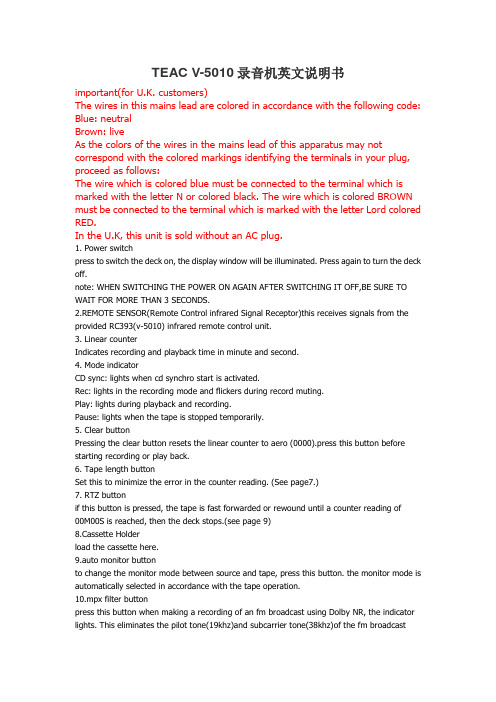
TEAC V-5010录音机英文说明书important(for U.K. customers)The wires in this mains lead are colored in accordance with the following code: Blue: neutralBrown: liveAs the colors of the wires in the mains lead of this apparatus may not correspond with the colored markings identifying the terminals in your plug, proceed as follows:The wire which is colored blue must be connected to the terminal which is marked with the letter N or colored black. The wire which is colored BROWN must be connected to the terminal which is marked with the letter Lord colored RED.In the U.K, this unit is sold without an AC plug.1. Power switchpress to switch the deck on, the display window will be illuminated. Press again to turn the deck off.note: WHEN SWITCHING THE POWER ON AGAIN AFTER SWITCHING IT OFF,BE SURE TO WAIT FOR MORE THAN 3 SECONDS.2.REMOTE SENSOR(Remote Control infrared Signal Receptor)this receives signals from the provided RC393(v-5010) infrared remote control unit.3. Linear counterIndicates recording and playback time in minute and second.4. Mode indicatorCD sync: lights when cd synchro start is activated.Rec: lights in the recording mode and flickers during record muting.Play: lights during playback and recording.Pause: lights when the tape is stopped temporarily.5. Clear buttonPressing the clear button resets the linear counter to aero (0000).press this button before starting recording or play back.6. Tape length buttonSet this to minimize the error in the counter reading. (See page7.)7. RTZ buttonif this button is pressed, the tape is fast forwarded or rewound until a counter reading of00M00S is reached, then the deck stops.(see page 9)8.Cassette Holderload the cassette here.9.auto monitor buttonto change the monitor mode between source and tape, press this button. the monitor mode is automatically selected in accordance with the tape operation.10.mpx filter buttonpress this button when making a recording of an fm broadcast using Dolby NR, the indicator lights. This eliminates the pilot tone(19khz)and subcarrier tone(38khz)of the fm broadcastwhich could affect operation of the dolby noise reduction system. to release this function, press the MPX FILTER button again.11.DOLBY NR Selectoroff: set to this position when you do not want to use any noise reduction system.**B: set to this position when making a recording using the dolly B noise reduction system, or playing back tapes recorded with Dolby B NR.**C: Set to this position when making a recording using the Dolby C noise reduction system, or playing back tapes recorded with Dolby C NR.12. Multi-Display Window(a)PEAK LEVEL METERthis meter shows the peak level of the input or playback signal. the meter has a peak hold feature; when the level exceeds-/db, the peak level is held for approx.2 seconds.(b)Tape type indicatorTape type indicator above the meter indicates the type of tape being used, the v-5010 has an auto tape selector function, with which the NORMAL, CRO2 or METAL indicator lights when a tape is loaded.(c) Calibration indicatorLights together with "level/bias" in the calibration mode.(d)Dolby nr b c indicatorLights when the Dolby nr selector is set to the **B or **C position(e)**HX PRO: the Dolby HX Pro indicator lights during the recording mode, indicating that the Dolby HX Pro circuit in the deck is operating. This is engaged automatically whenever the deck is used for recording.(f)MPX FILTER IndicatorLights when the multiplex filter has been activated.(g)LEVEL/BIAS IndicatorIndicates the level (sensitivity) and bias when calibration is performed.(h) tape/source indicatorindicates whether the deck is set for tape or source monitoring.(I)level indicator(v-7010 only)the level shown by the PEAK LEVEL METER is indicated numerically from 0 to 12 db, when the level reaches 13 db or more, the OVER indicator comes on and the level 12 db stays lit until the power is switched off or the MARGIN RESET button is pressed.13. Tape travel operation buttonsSTOP buttonPress to stop tape travel and release the current operation mode.Play button ( )Pressing this button causes the tape to run at normal speed. This button is also used to release the pause mode.pause button( )press to temporarily stop tape travel during recording or playback. in the pause mode, the pause indicator lights. to release the pause mode, press this button again or press the ( )button to restart the tape (the indicator goes out).record buttonif the record button is pressed, the deck enters the rec/pause mode.the REC and PAUSE indicators light.to start recording, press the ( )or( )button( )rewind buttonpress this button to rewind the tape at high speed.( )fast-forward buttonpress this button to advance the tape at high speed.14.timer switchPLAY: for timer playbackOFF: set to this position when not using a timer.REC: for timer recording(see bage10.)15.--- ---(cps) buttonthis button is used to activate the CPS(Computomatic program search) facility. for details, refer to page 9.16.open/close button( )press this button to open or close the cassette holder. as this deck employs a power loading mechanism, opening and closing the cassette holder is possible only when the power is on. even if the holder is open, it closes automatically and the corresponding operation is performed when the (-)button, etc. is pressed. the cassette holder can also be closed manually.17.cd sync buttonthis button is pressed when CD synchro dubbing is performed.(see page 10)18. Rec mute buttonPress this button during recording to leave a blank section between tunes(approx.4seconds).the deck will enter the record-pause mode, (see page 8)19. Calibration level controlsCal start button:Press this button to start the calibration operation. For details, refer to "calibra-tion procedure" on bage 9.Bias controls:Used to adjust the bias current to obtain the optimum recording characteristics for the tape used.Level controls:Used to adjust the tape's recording sensitivity (level).20.CD CHECK BUTTONPress this button when checking CD level.(see page 8)21. BALANCE ControlAdjust the balance of the input signals between the left and right channels to be recorded on tape.22. CD DIRECT Buttonif the CD DIRECT button is set to the on (-) position, the signals supplied from a CD player to the CD DIRECT IN connectors will have priority over the LINE IN signals, and will be recorded.23. REC LEVEL (-dB) Control:When recording, turn the REC LEVEL control clockwise to fade the input sound in and turn itcounterclockwise to fade the sound out, for smooth tune-to-tune transitions24. PHONES JackPlug stereo headphones into this jack for private listening or monitoring.25. PHONES LEVEL ControlAdjust the level of the signals output from the PHONES jack. This knob does not affect the level of the signals output from the OUTPUT jacks on the rear panel or the level indicated by the PEAK LEVEL METER.26. MARGIN RESET (V-7010 only)Press this button to release the peak hold memory.Remote control unit27. DISPLAY ButtonPress this button to switch off the multi display and the linear counter indication (illumination).OperationsPlayback and recordingTape length buttonThe linear counter of this deck indicates the recording/playback time in minute and second. To minimize the error in the counter reading due to the difference in tape length (duration), be sure to press the TAPE LENGTH button until the appropriate tape length appears.When the TAPE LENGTH button is pressed, the linear counter will indicate the tape length. TAPE LENGTH*since the linear counter is not a clock, there is a discrepancy between the actual recording/playback time and counter reading.*once the power is switched off,"C-60" appears when the power is switched on again.*after setting is complete, the tape length is indicated for approx.5 seconds’, after that, the counter indication is resumed.*set the tape length again after a cassette with a different length is loaded or the power is switched on.Stereo playback1. Press the POWER switch to ON.2. Press the OPEN/CLOSE (-) button and load the required cassette.3. Set the tape length. (See previous section.)4. Select the required NR system.5. Press the (-) button to start playback.6. Adjust the volume with the amplifier's control.7. To end playback, press the STOP buttonStereo recordingRecording from a stereo system:1. Press the power switch to on.2. Press the open/close (-) button and load the cassette on which the recording is to be made.3. Set the tape length.4. Select the NR system used in recording.5. Press the MPX FILTER button as required.6. Set the BIAS/LEVEL controls to their center click positions.7. Select the input using the CD DIRECT select button.Note:Since the audio signal is directly input to the CD DIRECT IN terminal, clearer sound can be recorded.When the CD DIRECT select button is set to ON (-), the signal is input via the CD DIRECT IN terminal whereas if it is set to OFF (-), the signals are input via the LINE IN terminals.8. Play the source to be recorded.9. Press the RECORD button. The REC and PAUSE indicators light.10. Adjust the recording level.Using the REC LEVEL/BALANCE controls, adjust the recording level of each channel.11. Press the () or () button to release the rec/pause mode and start recording.12. To end recording, press the stop button.Notes:*as this deck has an auto tape selector mechanism, be sure to use cassettes with tape detection holes. if the cassette does not have a detection hole, the optimum results will not be obtained with chrome and metal tapes.*as c-120 tapes are physically weak and could become entangled in the transport mechanism, do not use them.CAUTION:recording pre-recorded tapes, records, or other published or broadcast material may infringe copyright laws. check before recording.checking CD levelthis is only possible with certain CD players, including the TEAC CD-P4500.When the CD CHECK button is pressed, the deck enters the monitor state (SOURCE),allowing you to adjust the recording level with the CD player in the "fast play back"mode.1.set the deck to the STOP mode,then press the CD CHECK button.the linear counter will indicate "cdch".2.start the CD player and set to the fast playback mode.3.during fast playback,adjust the recording level using the REC LEVEL control and BALANCE control.4. To release the CD level check, press the STOP button.*the checking of CD level is possible when this deck is in the stop mode.*recording level adjustment using CD level check is only possible when the CD player is in the fast play mode; do not perform this adjustment when the CD player is in the normal play mode. *some CD players do not output signals at the correct level in the fast play mode.adjusting recording levelby setting the recording level appropriately, it is possible to make best use of any tape's characteristics.if the recording level is too low, hiss noise will be conspicuous in recording, conversely, if it is too high, the recording will contain distorted sound.1. set the AUTO MONITOR button to SOURCE. in the recording or rec/pause mode, it is automatically set to SOURCE.2. So that the beak in the source to be recorded indicates the specified level on the REC LEVELcontrol and BALANCE control.when the level reaches 13dB or more, OVER will light.A level from 0 to 12 dB is indicated.press this to clear the peak hold indication.margin reset(v-7010 only)Record muting operationthe ability to leave blank unrecorded (erased) sections on a tape during recording is a real advantage in many recording situations. for instance, you may want to eliminate undesired portions of an FM broadcast that you are recording, such as commercials, station break or announcements. you may also want to record a complete program with controlled spacing between tunes. such blank sections can easily be left using the REC MUTE function.*Automatic spacing operation-for a 4-second blank-(during recording)press the REC MUT button during recording. the tape continues t run, and a bland or about 4 seconds is left (the REC indicator flashes).After 4 seconds, the deck automatically switches to the record-pause mode (both the REC and PAUSE indicators light). to start recording the next tune, press the ()or ( )button (the PAUSE indicator goes off).*For a blank of more than 4 secondsduring recording, keep the REC MUTE button pressed for a longer blank section release the button to enter the record pause mode.*For a blank or less than 4 secondsafter pressing the REC MUTE or PAUSE button before the 4-second interval has expired,to cancel the muting mode and engage the record-pause mode. to restart recording press the ( )or( ) button.calibration procedureEach cassette tape has different characteristics depending on the manufacturer and type. By properly adjusting bias and level (sensitivity) according to the tape. It is possible to record making the most of the tape's characteristics.1. Load the cassette to be recorded.2. Press the CAL START button.(CALIBRATION, LEVEL, () LIGH.)3. Press the RECORD and () buttons to start recording. The built-in test tone will be recorded.4. Adjust the LEVEL controls (of both the L and R channels) so that the meter deflection comes to the () mark.--------------------------------------------------5. Press the CAL START button once again.----------------------------------------------------------(LEVEL goes out and BIAS comes on.)6. Adjust the BIAS controls (of both L and R channels) so that the meter deflectioncomes to the () mark.--------------------------Now, the optimum bias and level (sensitivity) have been set.Press the STOP button to end the calibration.Erase the recorded test tone or rewind the tape and record over it.*stick a seal, etc. on the front panel around the LEVEL and BIAS controls to facilitate setting the next time you made a recording with the same type of tape.Cps (computomatic program search) functionCPS allows the selection and playback of any tune up to 15 tunes ahead or before the one being played. This function operates by detecting blank spaces of at least 4 seconds between tunes. These blanks can be created using the REC MUTE facility.1.press the ()or() button repeatedly until the number of tunes to be skipped appears in the multi-display counter. refer to the chart "how to select any required tune using CPS"*if you count past the required number, keep on pressing the CPS button as 1 appears after 15 is indicated.*when the () button is pressed, tee next tune is counted as "1" and when the () button is pressed, the current tune is counted as "1".-------------------How to select any required tune using CPSEx: see (1).to select the 3rd tune past the current tape position,select"3"---------------------------------------current tape positionDirection of tape travelAhead Beforein example (1),if "t" is less than 4 seconds, it will not be counted as a blank space, designate the 3rd tune in this case .2. As the tape is fast-forwarded or rewound and blank spaces between runes are detected. the displayed number will be counted down untl it reaches"1",at which point playback will start.Notes on CPSCPS operates by detecting and counting blanks of about 4 seconds, normally the intervals between tunes .therefore, with the following types of tapes, search functions may not work correctly.*when the intervals between tunes cannot be detected.-intervals of less than 4 seconds.-high levels of noise in intervals (due to recording old scratched records, poor FM or AM reception, etc .)separate sounds are recorded on the right and left channels as on a language learning tape, etc.when parts of the program are likely to be detected as intervals between tunes:--long low level sections (in classical music, etc.)--momentary pauses in a speech at a conference, etc.--continuing low level portions created by fading out, etc.*in the case of tapes containing fade-outs, because the length of the blanks can differ depending on how fading out was performed, some tune intervals may be detected and others may not.this problem can be corrected using the REC MUTE facility.RTZ(Return to zero) functionto locate the position on tape corresponding to the linear counter reading of 00m00s,press the RTZ button.the fast forward or rewind of the tape starts. the moment a counter reading of 00m00s is found, the deck stops.note: this function does not work when the deck is in the record, rec/pause or rec/mute mode.to start playback from 00m00sWhile the tap is running after the RTZ button is pressed, press the () button.The deck temporarily stops at the 00m00s counter reading, then playback starts.*if the () button is pressed instead of the () button, the deck enters the pause mode at the 00m00s counter reading.to start playback, press the () or () button.*when the deck is in the recording mode, the RTZ button is disabled.CD Synchro dubbingBy combining the deck with a CD synchro compatible CD player (such as our CD-P4500) which has a CD/DECK SYNC terminal on the rear panel, dubbing (recording) interlocked with the CD player is possible.Preparation1.connect the deck's CD/DECD SYNC terminal to the CD player's CD/DECK SYNC terminal using an optional cable (with miniplugs at both ends.(see page 4.)2.perform programming of "time edit", etc. of the CD Player beforehand (refer to the instructions of the CD player).3.Either press the CD DIRECT button or set the source to CD using the amplifier's source select buttons.4.Set the recording level.(see page 8)1.Set the deck and the CD player to the stop mode.2.press the CD SYNC button on the deck. the CD player will automatically start in approx.1 sec following the start of recording and dubbing is performed.(the CD SYNC indicator lights.)(see the top chart below.)to temporarily stop during dubbing:to temporarily stop CD synchro dubbing(A) press the STOP button of the deck. the CD player will return to the beginning of the tune and stop there. to restart, press the deck's CD SYNC button.(B) press the stop button of the CD player. the deck enters the rec/pause mode. to restart, press the CD player's play button.*when the CD player has entered the pause mode. it stands by after returning to the beginning of the tune just played.*when recording is done up to the end of the tape, the CD player stands by after returning to the beginning of the tune just played.(note) if the CD player is connected to the stereo amplifier by the optical cable alone, synchro dubbing i not per formed. be sure to connect the analog output using the pin plug cords.timer-controlled operations(fig.8)timer-controlled recording1.connect your deck and stereo system to a commercially available audio timer as shown in the diagram.2.set the audio timer(optional) to ON.3.set the power switches of all components to ON, then tune to the station broadcasting the program to be recorded.4. Set the input select switch, the REC OUT selector, ate .of the amplifier to TUNER(refer to the instructions of the amplifier).5.load the cassette to be recorded, then set the recording level, DOLBY NR,BIAS,LEVEL controls as required.6. set the audio timer to the required start (power on) and stop(power off) times. when this setting is complete, the power to all components will be switched off.7. set the TIMER switch to REC.When the preset start time is reached, power will be supplied and recording will start.timer-controlled playback1.connect the power cords of all components as shown in the diagram.2.set the audio timer(optional) to ON.3. Set the stereo amplifier to TAPE.4. load a pre-recorded tape into the deck, then set the DOLBY NR as required.5. set the audio timer tor the required start (power on)and stop (power off) times. After these settings, the power to all components will be switched off.6. set the TIMER switch of this deck to PLAY.*when the preset start time is reached, playback will start in a few seconds.*be sure to set the TIMER switch to OFF upon completion of timer-controlled recording/playback.remote controlled operation (figs,4 and 5)the provided RC=394(V-7010) or RC-393 (V-5010) remote control unit allows the V-7010/V-5010 to be operated from a distance. the control buttons on the remote control unit function in almost the same way as those on the front panel of the V-7010/V-5010, but they have slightly different names, etc.precautions on remote control operation (fig.4)1.battery replacement1. remove the lid.2.insert 2 "AA" type dry batteries. be sure that the batteries are inserted withtheir negative and positive terminals positioned correctly.3. close the lid until it clicks.how often should the batteries be changed?the batteries will normally last about six months. however if you notice that the distance between the remote control unit and the V-7010/V05010 required for operation becomes shorter, the batteries should be changed. replace the batteries with two new ones.precautions regarding batteries*be sure to insert the batteries with the positive(+) and negative(-) terminals positioned correctly.*never use old and new batteries together.*replacement batteries should be of the same type. never use batteries of different types together.*rechargeable and non-rechargeable batteries can be used. refer to their precaution labels.*remove the batteries from the remote control unit when it will not be used for a long period of time.*when the batteries are weak, replace them as soon as possible.*do not heat or disassemble batteries and do not dispose of them by throwing them into a fire.2. remote control unit RC 394 or RC-393when operating using the remote control, point the front of the unit at the remote sensor of the V7010/V5010. The remote control unit can be used within the range shown in Fig.5.notes:*even if the remote control unit is operated within the effective range, remote control operation may be impossible if there is any obstruction between the V7010/V5010 and the remote control unit.*if the deck is operated in the vicinity of other appliances generating infrared rays. or if other remote control devices using infrared rays are used near the V-7010/V-5010, the deck may operate incorrectly. conversely, if the V-7010/V-5010's remote control unit is operated in the vicinity of other appliances which use an infrared remote control device. the other appliance may operate incorrectly.*When the unit will not be used for a long period of time (more than one month), remove the batteries to prevent them from leaking, if they do lead, wipe off the liquid inside the battery compartment and replace the batteries with new ones.*do not place books or other objects on the remote control unit as they could press the buttons and discharge the batteries.Dolby HX pro is an "active bias" technique that can improve the quality of audio tape recordings. high-level high frequencies can be recorded more accurately, without sacrificing signal-to-noise ratio, while such side effects of tape saturation as distortion are reduced.what is bias?bias is a very high-frequency signal generated within a tape deck and recorded on the tape simultaneously with the program material. this inaudible signal allows a low noise, low distortion recording and flat frequency response. different magnetic tape formulations require different amounts of bias for optimum performance. if the bias level is too high, high-frequency maximum output level (MOL) decreases. the problem of self-biasunfortunately, bias level is often influenced by the signal being recorded. the high frequencies contained in some music act as bias. this unpredictable source of bias is added to the existing bias, resulting in a loss of high-frequency response. as the high frequency content of the signal increases, the ability of the recorder to record high frequencies (MOL0 decreases. this phenomenon is called self-biasing.How Dolby HX pro solutionThe Dolby HX pro monitors the high frequency content of the program material and adjusts the recorder bias oscillator to maintain a constant total bias oscillator to maintain a constant total bias level. The result is improved high-frequency response and lower distortion. Depending on the type of tape, the improvement in headroom can be 6 dB or more.The benefitsWith Dolby HX Pro, it is easier to make more accurate recordings of the kind of music which contains high-level high frequencies. The improvement is similar to that of high-performance tape over conventional tape, so regardless of the type of tape used, the results will sound better.Most important of all, Dolby HX pro requires no decoding process. Once the tape is recorded with it, the improvements will be realized when playing the tape back on any machine.Example of improved frequency response using Dolby HX Pro function图:Maintenance (fib.7)The heads and tape path should be cleaned and demagnetized periodically.Cleaning the tape path*apply head cleaning fluid *to special cotton swabs or a soft cloth, and lightly rub the heads. Capstans and all metal parts in the tape path.*also clean the pinch rollers using rubber cleaning fluid**both are available as TEAC HC-2 and RC-2 in the U.S.A.or in the TEAC TZ-261 Tape Recorder cleaning kit in other areas.demagnetizing headsbe sure that the power is off, then demagnetize the heads using a TEAC E-3 demagnetizer or equivalent. for details of its use, read its instructions.troubleshootingbasic troubleshooting of a cassette tape deck is similar to troubleshooting any other electrical or electronic equipment. always check the most obvious possible causes first. to give you a few ideas of what to look for, check the following:.no power: is the power cord connected?.tape begins running when power is turned on. is the TIMER function switched on?.no audio output: have all connections been done correctly?.degraded sound quality: are the heads dirty or magnetized? are you using good quality tape? is the NR selector in the correct position?.unable to select the record mode: are the record protection tabs of the tape in place? TEAC V-5010录音机英文说明书重要的(英国客户)此电源线中的导线的颜色均按照下面的代码:蓝色:中性布朗:活导致该设备的电源线中的颜色可能与颜色标记的插头端子,请按以下步骤操作:是蓝色的电线必须连接到的终端,其被标记为与字母N或黑色。
录音机初始设置指南说明书
Legal Notices
In the United States, TV GUIDE and other related marks are registered marks of Gemstar-TV Guide International, Inc. and/or one of its affiliates. In Canada, TV GUIDE is a registered mark of Transcontinental, Inc. and is used under license by Gemstar-TV Guide International, Inc. Aux Etats Unis TV GUIDE et d’autres marques relatives sont des marques déposées de Gemstar-TV Guide International, Inc. et/ou d’une de ses sociétés affiliées. Au Canada TV GUIDE est une marque déposée de Transcontinental Inc., utilisée sous licence de GemstarTV Guide International, Inc.
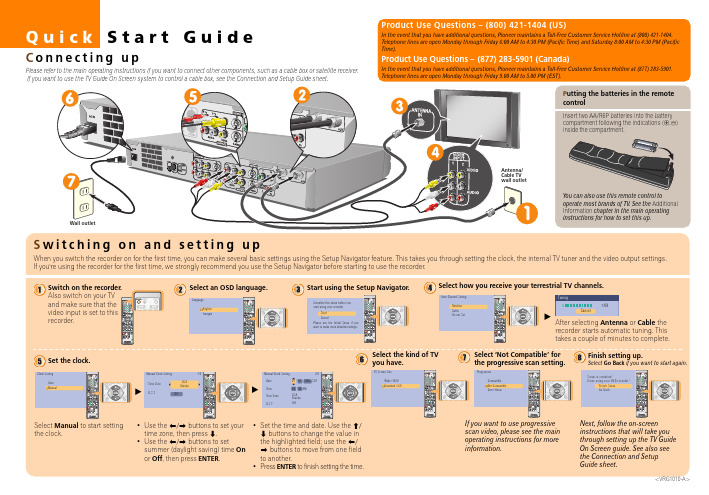
Quick Start Guide
Connecting up
Please refer to the main operating instructions if you want to connect other components, such as a cable box or satellite receiver. If you want to use the TV Guide On Screen system to control a cable box, see the Connection and Setup Guide sheet.
立体声耶链录音机AQ7170用户手册1说明书

Power Supply General Operation/ RadioUsing AC power1Check if the power voltage,as shown on the type plate located on thebottom of the set,corresponds to yourlocal power supply.If it does not,consultyour dealer or service center.2If your set is equipped with a voltage selector,adjust the selector so that itmatches with the local mains.3Connect the power cord to the ACINPUT inlet and the wall socket.The power cord is now connected and ready for use.4T o switch the set off completely,withdraw the power cord from the wall socket.5Install the unit near the AC outlet and where the AC power plug can be easily reached.•Disconnect the mains lead from the wall socket to protect your set during heavythunderstorms.Children could seriouslyinjure themselves as the free end of thecable may still be live if only the connector is removed from the MAINS socket at the back of the unit.Helpful hints :T o avoid unnecessary energy consumption,always adjust the Sourceselector to TAPE(OFF)after using theset.Also check that the tape deck keys arereleased.The type plate is located on the bottom of the set.General operationSwitching on and off and selectingfunctions1T o switch on,push the Source selector slider to TAPE or RADIO as desired.2T o switch off,push the Source selector to TAPE/OFF and check the cassette keysare released.Helpful hints:–To change from T APE to RADIO,or when you are switching off the set:first make sure you press the STOP•EJECT9/key to end playback and all the cassette keys are released.Adjusting volume•Adjust the volume with the VOLUME control.Radio reception1Adjust the Source selector to RADIO. 2Adjust the Band selector to select your desired waveband,MW,SW1,SW2or FM. 3Turn TUNING to tune to a station.-FM STEREO lights up when receivingstereo FM reception.-When receiving SW,you may also useFINE TUNING rotary to fine tune to astation.4T o switch off the radio,adjust the Source selector to TAPE(OFF)position.To improve radio reception:•For FM,SW2,extend and turn the tele-scopic antenna for best reception.Reduce its length if the signal is too strong.•For MW,SW1,the set uses a built-in antenna.Direct this antenna for best recep-tion by turning the whole set.T ape operation/recordingPlaying a tape (Cassette A or B)1Push the Source selector to TAPE2Press STOP•EJECT9/to open the cassette holder and insert a cassette and close the deck.3Press PLAY 1to start playback.4T o pause playback press PAUSE;.T o resume,press the key again.5By pressing F.F/REW5 or6,fast forwading/ rewinding of the tape ispossible in both directions.T o stop fastwinding,press 9//.6T o stop the tape,press 9//.Helpful hints:–During playback,the keys are automatically released at the end of a tape and the set isswitched off (unless PAUSE;mode has been activated.)–During fast forwarding/rewinding,the keys will not be released at the end of a tape.To switchoff the set,make sure the cassette keys arealso released.Non-stop playback from Cassette A to Cassette B1Push the Source selector to TAPE2Insert a cassette tape in both Cassette A and Cassette B,then close both decks.3Press PLAY 1on Cassette A to start play-back.4Press PLAY 1on Cassette B.•Cassette B is in standby for playback.5Cassette B playback will auto start when Cassette A comes to the end of the tape.•The playback will auto stop until the end of tape B.General information on recording •Recording is permissible insofar as copyright or.other rights of third parties are notinfringed.•For recording,use only NORMAL type cas-settes (IEC type I) on which the tabs havenot yet been broken.This deck is not suitedfor recording on CHROME (IEC II)orMETAL (IEC IV) type cassettes.•The best recording level is set automatically.Altering the VOLUME will not affect therecording.•T o protect a tape from accidental erasure, break out the tabs.If you wish to record again, cover the tabs with a piece of adhesive tape.Recording from the Radio(Cassette B only)1Select RADIO source.2T une to the desired radio station (see Radio reception).3Press9//on the Cassette B to open the cassette holder.Insert a blank tape and close the deck.4Press REC0to start recording.5For brief interruptions press ;.T o resume recording,press ;again.6T o stop recording,press 9//.Helpful hints:–When recording from radio stations,adjust DUBBING/BEAT CUT on the top panel to 1 or2,if necessary,to reduce interference.。
Philips 字典与录音设备说明说明书

Pocket MemoDictation andTranscription SetVoice recorder with slide-switchoperationTranscription foot controlVoice to text made easywith superior recording qualityThe Philips Dictation and Transcription Set allows you to turn voice into text evenquicker than before. The PocketMemo Digital Voice Recorder combines twomicrophones for superior audio quality with a robust yet lightweight ergonomicdesign. Together with the user-friendly software and convenient foot pedal,dictation and transcription has never been easier.Professional recording solution• Two microphones for superior stereo audio recordings• High recording quality in DSS and MP3 format• Wear-free ergonomic slide switch for efficient single-handed operation• Robust stainless steel casing for extra durability• Large color display and intuitive user interface for easy, convenient operation• Power saving features and Li-ion battery for extended use• Automatic file download via USB for quick transcription• Classic mode for clear and easy-to-use operationProfessional transcription solution• SpeechExec workflow software for easy data management• Ergonomic foot pedal for convenient playback control• Lightweight stereo headphones for enhanced wearing comfort• Priority information for getting urgent jobs processed firstNo 1 in SPS globalcustomer satisfactionsurvey 09/2017.Superior audio qualityThe built-in microphones deliver superior stereo audio recordings. The crystal clear recordings are perfectly suitable for speech recognition.DSS and MP3 recordingThe DSS format was developed for the use in digital voice recorders, achieving a high compression ratio with little loss of quality. The DSS format also allows you to store additional information in the file header, which facilitates the organization and the transcription of dictation files. The MP3 format is the common audio format for consumer audio storage, as well as a de facto standard encoding for the transfer and playback on digital audio players.Professional recording controlThe recorder is designed for single-handed operation of all recording and playback functions, allowing easy and quick file editing (insert, overwrite, append) via convenient push-button operation.Robust and ergonomic designThe asymmetrical and ergonomic shape fits perfectly into your hand. Its slim and lightweight design maximizes comfort, even when working over longer periods of time. The stainless steel creates a robust and highly durable protective shell around the device. The device is shockproof according to US military standard 516.6.Large color displayThe large full-color display offers sharp images, making it easier to see everything at first glance. The clear user interface is optimized for easy, intuitive operation.Extended battery lifeThe high-capacity Li-ion battery can be easily charged through a standard micro USB jack. The integrated light sensor guaranteesextended battery life, up to 50% longer than competition. The smart technology adjusts the brightness of the display, ensuring that your recorder will always be ready to work when you are.Automatic downloadWhen plugged in, the PocketMemo Voice Recorder automatically downloads your audio files directly onto the computer.SpeechExec workflow softwareThe SpeechExec Dictation Softwareorganizes the workflow of dictation files and resulting documents between author and transcriptionist, and allows you to monitor the status of your work.Priority settingsWith the included priority setting option, urgent recordings can be processed first. This makes sure important recordings are not overseen and helps you and yourtranscriptionists manage your workloads better.Classic modeMany users still love their analog devices for their simplicity and user-friendliness. The optional classic mode gives the user the look and feel of working with an analog device while retaining the advantages of digital technology and keep focused on the essentials.Ergonomic foot pedalThe foot control was developed incooperation with hospital ergonomists andday-to-day power users to ensure a perfectlysmooth transcription process with minimalphysical strain. Start, pause, rewind andfast-forward audio files with only a slightmovement of the foot tip, keeping your handsfree for uninterrupted typing. Magneticallycontrolled contact switches, rugged pedalsand a waterproof design make it extremelydurable and give the device and very long life.Professional stereo headphonesLightweight under-the-chin-style stereoheadphones designed to deliver excellentsound quality, with soft ear cushions forenhanced wearing comfort.SpecificationsConnectivityHeadphones: 3.5 mmMicrophone: 3.5 mmUSB: micro USB 2.0Docking connectorMemory card slotDisplayType: color TFTDiagonal screen size: 2.4 inches / 6.1 cm Resolution: 320 × 240 pixelsStorage mediaExchangeable memory cardMemory card types: SD/SDHC, up to 32 GB Mass storage class compliantData transfer speed: 6.75 MB/s read speed, 5.0 MB/s write speedAudio recordingRecording format: DSS (Digital Speech Standard), MP3, PCMBuilt-in microphones: 2 omnidirectional microphones for stereo recordingRecording modes: DSS QP (.ds2/mono), DSS SP (.dss/mono), MP3 (.mp3/stereo), PCM Voice (.wav/mono), PCM Stereo (.wav/stereo) Bit rate: 13.7 kbit/s (DSS SP), 28 kbit/s (DSS QP), 192 kbit/s (MP3), 353 kbit/s (PCM Voice), 705 kbit/s (PCM Stereo)Edit modes: insert (DSS), overwrite (DSS, MP3, PCM), append (DSS, MP3, PCM)Recording time (4 GB memory card): 700 hours (SP), 350 hours (QP), 50 hours (MP3), 27 hours (PCM Voice), 13 hours (PCM Stereo) Sample rate: 44.1 kHz (MP3), 22.05 kHz (PCM), 16 kHz (DSS QP), 12 kHz (DSS SP)SoundSpeaker type: built-in round, dynamic speakerSpeaker diameter: 28 mmAcoustic frequency response: 300 – 7500 Hz Speaker output power: > 200 mWPowerBattery type: Philips rechargeable Li-ion battery ACC8100Battery capacity: 1000mAhBattery lifetime: up to 30 hours of recording (DSS mode)Standby time: more than 200 daysCharging time (full charge): 3 hours DimensionsProduct dimensions (W × D × H):53 × 123 × 15 mm / 2.1 × 4.8 × 0.6 inchesWeight: 117 g/4.1 oz including battery andmemory cardFoot pedalConnectivity: USB plugProduct dimensions (W × H × D): 19.5 × 13 × 3.5cm/7.7 × 5.1 × 1.4 in.Weight: 0.660 kg/1.5 lb.Stereo headphonesStyle: under chinAcoustic system: openMagnet type: neodymiumDiaphragm: PET domeVoice coil: copperSound quality: optimised for voice playbackImpedance: 2 × 32 OhmMaximum power input: 2 × 10 mWSensitivity: 103 dBSpeaker diameter: 14 mm/0.6 in.Cable connection: one-sidedCable length: 3.0 m/10 ft.Connector: 3.5 mm, right-angled, stereoConnector finish: Gold-platedProduct dimensions (W × H × D): 16 × 15 × 1.8cm/6.3 × 5.9 × 0.7 in.Weight: 53 g/1.9 ozSystem requirements for PhilipsSpeechExec softwareProcessor: Intel dual core or equivalent AMDprocessor, 1 GHz or faster processorRAM: 4 GB (64 bit)Hard-disk space: 100 MB for SpeechExecsoftware, 4.5 GB for Microsoft .NETFrameworkOperating system: Windows 11 Pro, Windows10 Pro/Enterprise (64 bit)Issue date 2022-01-14Version 1.0/dictation© 2022 Speech Processing SolutionsGmbH. All rights reserved.Specifications are subject to change without notice. Trademarks are the property of KoninklijkePhilips N.V. or their respective owners.Graphics: DirectX-compliant graphics card with hardware acceleration recommended Sound: Windows-compatible sound device Browser: Internet Explorer 9 or higher, or the current version of Chrome or FirefoxFree USB portInternet connectionGreen specificationsCompliant to 2011/65/EU (RoHS)Lead-free soldered productOperation conditionsTemperature: -5° – 45° C/23° – 113° F Humidity: 10 % – 90 %, noncondensingPackage contentsPocketMemo Digital Voice RecorderDPM7200Foot Pedal ACC2330Stereo Headphones LFH0334SDHC memory cardSpeechExec Basic Transcription Software (2-year subscription included)SpeechExec Basic Dictation Sftware (2-year subscription included)Rechargeable batteryUSB cablePouchQuick start guideAvailable accessoriesPhilips Rechargeable Li-ion Battery ACC8100 Philips SDHC Memory Card ACC9008 Philips Telephone Pickup MicrophoneLFH9162Philips Meeting Microphone LFH9172Philips Docking Station ACC8120。
R-05 WAVE MP3 录音机说明书

The compact R-05 is easy to use, affordable, and packed with big-ticket features that raise the bar in its price class. Experience crystal-clear 24/96 capture, enhanced recording and editing features, and extended battery life (over 16 hours per charge). On stage, in rehearsal, at school, on the street, in the boardroom — whenever inspiration strikes, let the R-05 capture the moment with convenience and quality.Affordable Pocket Recorderwith Advanced FeaturesR-05WAVE/MP3 Recorder▼ High-quality stereo recording (24-bit / 96kHz) with the built-in stereo mic or external input▼Records directly to SD card with extended battery life (over 30 hours continuous playback, over 16 hours continuous recording)▼ Strong, attractive metallic exterior▼ Onboard editing functions; built-in reverb▼ Music-practice features (change tempo without changing pitch, loop playback, etc.)▼ Auto record start, auto song split, auto level adjust ▼ Pre Record function (captures 2 seconds of audio that precedes pressing REC)▼Use as a high-quality portable audio player (playsWAV and MP3 files)▼ Windscreen and tripod mount included R-05 Specifications[Recorder Part] ■ Tracks 2 (stereo) ■ Signal Processing AD/DA conversion: 24-bit, 44.1/48/88.2/96 kHz ■ Data Type [For Recording] *Stereo only, <WAVE> Sampling Rate: 44.1/48/88.2/96 kHz, Bit Depth: 16/24-bit <MP3 (MPEG-1 Audio Layer 3)> Sampling Rate: 44.1/48 kHz, Bit Rates: 64/96/128/160/192/224/320 kbps <WAVE + MP3> Sampling Rate: 44.1/48 kHz, Bit Depth: 16-bit, Bit Rates: 128 kbps [For Playback] <WAVE> Sampling Rate: 32/44.1/48/88.2/96 kHz, Bit Depth: 16/24-bit <MP3 (MPEG-1 Audio Layer 3)> Sampling Rate: 32/44.1/48 kHz, Bit Rates: 32 to 320 kbps or VBR (Variable Bit Rate) ■ Memory Card SD Card, SDHC format compatible [Input/Output] ■ Audio Inputs Internal Stereo Microphone, Mic input (Stereo miniature phone type, plug-in powered mic), Line input (Stereo miniature phone type), *The Internal/External Mic and the Line input can’t be used at the same time; only the Line input is effective. ■ Audio Output Phones (Stereo miniature phone type) ■ Nominal Input Level (Variable) Mic input: -33 dBu (MIC GAIN is H, Default input level), Mic input: -15 dBu (MIC GAIN is L, Default input level), Line input: -7 dBu (Default input level) ■ Input Impedance Mic input (MIC GAIN is H): 7 k Ω, Mic input (MIC GAIN is L): 5 k Ω, Line input: 8 k Ω ■ Output Level 20 mW + 20 mW (In case 16 Ω load) ■ Recommended Load Impedance 16 Ω or greater ■ Frequency Response 20 Hz to 40 kHz ■ USB Interface Mini-B type connector (support USB 2.0/1.1 mass storage device class) [Effects] (Playback only. Excludes playback in 88.2 kHz or 96 kHz.) ■ Reverb 4 types (Hall1, Hall2, Room, Plate) ■ Speed change 50 to 150 % of playback speed [Others] ■ Display 128 x 64 dot graphic display ■ Power Supply AC Adaptor, Alkaline dry battery LR6 (AA) type x 2 or Nickel Hydrogen battery (HR15/51) x 2 ■ Current Draw 290 mA (MAX) ■ Duration of continuous use with Alkaline battery operation: (These figures will vary depending on the actual conditions of use.) Playback: over 30 hours, Recording: over 16 hours ■ Dimensions 59.6 (W) x 103.0 (D) x 25.0 (H) mm/2-3/8 (W) x 4-1/16 (D) x 1 (H) inches ■ Weight 140 g/5 oz (including batteries) ■ Accessories Owner’s manual, Quick start guide, SD card, Batteries (two AA), USB cable (mini-B type), Windscreen * 0 dBu = 0.775 Vrms* The specifications are subject to change without notice.®ÊRecording Time (unit: minutes)* Each recording time is approximate. The times may change depending on the card specifications.* In case that there are plural files, the sum of recording time would be shorter than above.。
Zaxcom-Deva-IV-Deva-V-User-Manual-August-2007

Owner’s ManualDeva IV & Deva VHigh Resolution Digital Audio Recorder Rev : August 2007230 West Parkway, Unit 9, Pompton Plains, NJ 07444 USAT el: 973.835.5000 Fax: 973.835.6633Deva IV and Deva V Owner’s Manual Change History2007-08o Added EQ Sectiono Updated sections to include new features offered by the firmware.2005-04-14o Corrected references to status button going to home screen.o Other misc typographical corrections made.o Added Chapter 7.2005-04-03o Corrected various sections throughout the manual.Deva IV and Deva V Owner’s ManualChange History . . . . . . . . . . . . . . . . . . . . . . . . . . . . . . . . . . . . . . . . . . . . . . . . . . . . . . . . . . . . . . . . . . . . . . . .ii 2007-08 . . . . . . . . . . . . . . . . . . . . . . . . . . . . . . . . . . . . . . . . . . . . . . . . . . . . . . . . . . . . . . . . . . . . . . .ii2005-04-14 . . . . . . . . . . . . . . . . . . . . . . . . . . . . . . . . . . . . . . . . . . . . . . . . . . . . . . . . . . . . . . . . . . . . .ii2005-04-03 . . . . . . . . . . . . . . . . . . . . . . . . . . . . . . . . . . . . . . . . . . . . . . . . . . . . . . . . . . . . . . . . . . . . .iiOptions Available . . . . . . . . . . . . . . . . . . . . . . . . . . . . . . . . . . . . . . . . . . . . . . . . . . . . . . . . . . . . . . .1 Overview . . . . . . . . . . . . . . . . . . . . . . . . . . . . . . . . . . . . . . . . . . . . . . . . . . . . . . . . . . . . . . . . . . . . . . . . . . . . .1 DEVA IV, DEVA V Differences . . . . . . . . . . . . . . . . . . . . . . . . . . . . . . . . . . . . . . . . . . . . . . . . . . . . .1 Features . . . . . . . . . . . . . . . . . . . . . . . . . . . . . . . . . . . . . . . . . . . . . . . . . . . . . . . . . . . . . . . . . . . . . . . . . . . . . .2 Hints on Using Your Deva . . . . . . . . . . . . . . . . . . . . . . . . . . . . . . . . . . . . . . . . . . . . . . . . . . . . . . . . . . . . . . . .3 Getting to know your DEVA recorder . . . . . . . . . . . . . . . . . . . . . . . . . . . . . . . . . . . . . . . . . . . . . . . . . . . . . .4 Front Panel Descriptions . . . . . . . . . . . . . . . . . . . . . . . . . . . . . . . . . . . . . . . . . . . . . . . . . . . . . . . . . .4Left Side Panel Descriptions . . . . . . . . . . . . . . . . . . . . . . . . . . . . . . . . . . . . . . . . . . . . . . . . . . . . . . .5Right Side Panel Description . . . . . . . . . . . . . . . . . . . . . . . . . . . . . . . . . . . . . . . . . . . . . . . . . . . . . .6 Power . . . . . . . . . . . . . . . . . . . . . . . . . . . . . . . . . . . . . . . . . . . . . . . . . . . . . . . . . . . . . . . . . . . . . . . . . . . . . . . .7 Current Draw . . . . . . . . . . . . . . . . . . . . . . . . . . . . . . . . . . . . . . . . . . . . . . . . . . . . . . . . . . . . . . . . . .7Battery Display . . . . . . . . . . . . . . . . . . . . . . . . . . . . . . . . . . . . . . . . . . . . . . . . . . . . . . . . . . . . . . . . . .7 Microphone/Analog Line Input . . . . . . . . . . . . . . . . . . . . . . . . . . . . . . . . . . . . . . . . . . . . . . . . . . . . . . . . . . . .8 Selecting the Analog Input . . . . . . . . . . . . . . . . . . . . . . . . . . . . . . . . . . . . . . . . . . . . . . . . . . . . . . . .8Toggling Microphone and Line Input . . . . . . . . . . . . . . . . . . . . . . . . . . . . . . . . . . . . . . . . . . . . . . . . .9Toggling Phantom Power (48 VDC) . . . . . . . . . . . . . . . . . . . . . . . . . . . . . . . . . . . . . . . . . . . . . . . .10Toggling the High Pass Filter (HPF) . . . . . . . . . . . . . . . . . . . . . . . . . . . . . . . . . . . . . . . . . . . . . . . . .10Adjusting the Trim . . . . . . . . . . . . . . . . . . . . . . . . . . . . . . . . . . . . . . . . . . . . . . . . . . . . . . . . . . . . . .10Adjusting The Delay . . . . . . . . . . . . . . . . . . . . . . . . . . . . . . . . . . . . . . . . . . . . . . . . . . . . . . . . . . . .11 Digital Inputs . . . . . . . . . . . . . . . . . . . . . . . . . . . . . . . . . . . . . . . . . . . . . . . . . . . . . . . . . . . . . . . . . . . . . . . . .11 Storing the Data . . . . . . . . . . . . . . . . . . . . . . . . . . . . . . . . . . . . . . . . . . . . . . . . . . . . . . . . . . . . . . . . . . . . . . .13 Selecting a partition . . . . . . . . . . . . . . . . . . . . . . . . . . . . . . . . . . . . . . . . . . . . . . . . . . . . . . . . . . . . .13Selecting the Sample Rate . . . . . . . . . . . . . . . . . . . . . . . . . . . . . . . . . . . . . . . . . . . . . . . . . . . . . . . .13Selecting the Number of channels to Record . . . . . . . . . . . . . . . . . . . . . . . . . . . . . . . . . . . . . . . . .14Selecting the Prerecord Time . . . . . . . . . . . . . . . . . . . . . . . . . . . . . . . . . . . . . . . . . . . . . . . . . . . . .14 The Mix . . . . . . . . . . . . . . . . . . . . . . . . . . . . . . . . . . . . . . . . . . . . . . . . . . . . . . . . . . . . . . . . . . . . . . . . . . . . .15 Setting the Internal Mix . . . . . . . . . . . . . . . . . . . . . . . . . . . . . . . . . . . . . . . . . . . . . . . . . . . . . . . . . .15 Options to set Prior to Recording . . . . . . . . . . . . . . . . . . . . . . . . . . . . . . . . . . . . . . . . . . . . . . . . . . . . . . . .15 Selecting the Tone Level . . . . . . . . . . . . . . . . . . . . . . . . . . . . . . . . . . . . . . . . . . . . . . . . . . . . . . . . .15Setting the number of meters on the Home Screen . . . . . . . . . . . . . . . . . . . . . . . . . . . . . . . . . . .15Setting the Meter Labels . . . . . . . . . . . . . . . . . . . . . . . . . . . . . . . . . . . . . . . . . . . . . . . . . . . . . . . . .16 Time Code . . . . . . . . . . . . . . . . . . . . . . . . . . . . . . . . . . . . . . . . . . . . . . . . . . . . . . . . . . . . . . . . . . . . . . . . . . .16 Setting Time Code Options . . . . . . . . . . . . . . . . . . . . . . . . . . . . . . . . . . . . . . . . . . . . . . . . . . . . . .16Free Run . . . . . . . . . . . . . . . . . . . . . . . . . . . . . . . . . . . . . . . . . . . . . . . . . . . . . . . . . . 17Record Run . . . . . . . . . . . . . . . . . . . . . . . . . . . . . . . . . . . . . . . . . . . . . . . . . . . . . . . . 17C. JAM ALL . . . . . . . . . . . . . . . . . . . . . . . . . . . . . . . . . . . . . . . . . . . . . . . . . . . . . . . . 17C. JAM T.C.. . . . . . . . . . . . . . . . . . . . . . . . . . . . . . . . . . . . . . . . . . . . . . . . . . . . . . . . 17C. JAM. U.B.. . . . . . . . . . . . . . . . . . . . . . . . . . . . . . . . . . . . . . . . . . . . . . . . . . . . . . . . 17XTAL. . . . . . . . . . . . . . . . . . . . . . . . . . . . . . . . . . . . . . . . . . . . . . . . . . . . . . . . . . . . . 17AES. . . . . . . . . . . . . . . . . . . . . . . . . . . . . . . . . . . . . . . . . . . . . . . . . . . . . . . . . . . . . . . 17JAM TIMECODE (USER BITS) . . . . . . . . . . . . . . . . . . . . . . . . . . . . . . . . . . . . . . . . . 18ENTER TIMECODE (or USER BITS).. . . . . . . . . . . . . . . . . . . . . . . . . . . . . . . . . . . . 18 Analog Out, DB25 . . . . . . . . . . . . . . . . . . . . . . . . . . . . . . . . . . . . . . . . . . . . . . . . . . . . . . . . . . . . . .19Camera Connector, 10 Pin . . . . . . . . . . . . . . . . . . . . . . . . . . . . . . . . . . . . . . . . . . . . . . . . . . . . . . .20Power Connector . . . . . . . . . . . . . . . . . . . . . . . . . . . . . . . . . . . . . . . . . . . . . . . . . . . . . . . . . . . . . .20Time Code Connector . . . . . . . . . . . . . . . . . . . . . . . . . . . . . . . . . . . . . . . . . . . . . . . . . . . . . . . . . .20 Home Screen . . . . . . . . . . . . . . . . . . . . . . . . . . . . . . . . . . . . . . . . . . . . . . . . . . . . . . . . . . . . . . . . . . . . . . . . .23 TIME CODE Button . . . . . . . . . . . . . . . . . . . . . . . . . . . . . . . . . . . . . . . . . . . . . . . . . . . . . . . . . . . .23Headphone Button . . . . . . . . . . . . . . . . . . . . . . . . . . . . . . . . . . . . . . . . . . . . . . . . . . . . . . . . . . . . .23Mirror Status . . . . . . . . . . . . . . . . . . . . . . . . . . . . . . . . . . . . . . . . . . . . . . . . . . . . . . . . . . . . . . . . . .23CUR Total Folder . . . . . . . . . . . . . . . . . . . . . . . . . . . . . . . . . . . . . . . . . . . . . . . . . . . . . . . . . . . . . .24Deva IV and Deva V Owner’s Manual Scene Take Notes . . . . . . . . . . . . . . . . . . . . . . . . . . . . . . . . . . . . . . . . . . . . . . . . . . . . . . . . . . . . . .24View (‘V’) . . . . . . . . . . . . . . . . . . . . . . . . . . . . . . . . . . . . . . . . . . . . . . . . . . . . . . . . . . . . . . . . . . . . .24Meters . . . . . . . . . . . . . . . . . . . . . . . . . . . . . . . . . . . . . . . . . . . . . . . . . . . . . . . . . . . . . . . . . . . . . . .24Battery Display . . . . . . . . . . . . . . . . . . . . . . . . . . . . . . . . . . . . . . . . . . . . . . . . . . . . . . . . . . . . . . . . .25PRE . . . . . . . . . . . . . . . . . . . . . . . . . . . . . . . . . . . . . . . . . . . . . . . . . . . . . . . . . . . . . . . . . . . . . . . . . .25Sampling Rate . . . . . . . . . . . . . . . . . . . . . . . . . . . . . . . . . . . . . . . . . . . . . . . . . . . . . . . . . . . . . . . . . .25Time Code Frame Rate . . . . . . . . . . . . . . . . . . . . . . . . . . . . . . . . . . . . . . . . . . . . . . . . . . . . . . . . . .25Mirroring button . . . . . . . . . . . . . . . . . . . . . . . . . . . . . . . . . . . . . . . . . . . . . . . . . . . . . . . . . . . . . . .25CUR . . . . . . . . . . . . . . . . . . . . . . . . . . . . . . . . . . . . . . . . . . . . . . . . . . . . . . . . . . . . . . . . . . . . . . . . .25Total . . . . . . . . . . . . . . . . . . . . . . . . . . . . . . . . . . . . . . . . . . . . . . . . . . . . . . . . . . . . . . . . . . . . . . . . .25Folder . . . . . . . . . . . . . . . . . . . . . . . . . . . . . . . . . . . . . . . . . . . . . . . . . . . . . . . . . . . . . . . . . . . . . . . .25MetaData . . . . . . . . . . . . . . . . . . . . . . . . . . . . . . . . . . . . . . . . . . . . . . . . . . . . . . . . . . . . . . . . . . . . .26Status Button . . . . . . . . . . . . . . . . . . . . . . . . . . . . . . . . . . . . . . . . . . . . . . . . . . . . . . . . . . . . . . . . . .26Main Menu . . . . . . . . . . . . . . . . . . . . . . . . . . . . . . . . . . . . . . . . . . . . . . . . . . . . . . . . . . . . . . . . . . . . . . . . . . .26 Disk Mix . . . . . . . . . . . . . . . . . . . . . . . . . . . . . . . . . . . . . . . . . . . . . . . . . . . . . . . . . . . . . . . . . . . . . .26Output Mix . . . . . . . . . . . . . . . . . . . . . . . . . . . . . . . . . . . . . . . . . . . . . . . . . . . . . . . . . . . . . . . . . . .26Faders . . . . . . . . . . . . . . . . . . . . . . . . . . . . . . . . . . . . . . . . . . . . . . . . . . . . . . . . . . . . . . . . . . . . . . . .26Time Code . . . . . . . . . . . . . . . . . . . . . . . . . . . . . . . . . . . . . . . . . . . . . . . . . . . . . . . . . . . . . . . . . . . .26DEVA Setup . . . . . . . . . . . . . . . . . . . . . . . . . . . . . . . . . . . . . . . . . . . . . . . . . . . . . . . . . . . . . . . . . . .27Input Control . . . . . . . . . . . . . . . . . . . . . . . . . . . . . . . . . . . . . . . . . . . . . . . . . . . . . . . . . . . . . . . . . .27My DEVA . . . . . . . . . . . . . . . . . . . . . . . . . . . . . . . . . . . . . . . . . . . . . . . . . . . . . . . . . . . . . . . . . . . . .27Cue Mode . . . . . . . . . . . . . . . . . . . . . . . . . . . . . . . . . . . . . . . . . . . . . . . . . . . . . . . . . . . . . . . . . . . .27Tone On/Off . . . . . . . . . . . . . . . . . . . . . . . . . . . . . . . . . . . . . . . . . . . . . . . . . . . . . . . . . . . . . . . . . .27Headphone . . . . . . . . . . . . . . . . . . . . . . . . . . . . . . . . . . . . . . . . . . . . . . . . . . . . . . . . . . . . . . . . . . . .27Scene Take Note . . . . . . . . . . . . . . . . . . . . . . . . . . . . . . . . . . . . . . . . . . . . . . . . . . . . . . . . . . . . . . .27About DEVA . . . . . . . . . . . . . . . . . . . . . . . . . . . . . . . . . . . . . . . . . . . . . . . . . . . . . . . . . . . . . . . . . .27Disk Mix Menu . . . . . . . . . . . . . . . . . . . . . . . . . . . . . . . . . . . . . . . . . . . . . . . . . . . . . . . . . . . . . . . . . . . . . . . .27 Analog/Digital Toggle . . . . . . . . . . . . . . . . . . . . . . . . . . . . . . . . . . . . . . . . . . . . . . . . . . . . . . . . . . . .28Pre-Fader / Post-Fader . . . . . . . . . . . . . . . . . . . . . . . . . . . . . . . . . . . . . . . . . . . . . . . . . . . . . . . . . .28Preset . . . . . . . . . . . . . . . . . . . . . . . . . . . . . . . . . . . . . . . . . . . . . . . . . . . . . . . . . . . . . . . . . . . . . . . .28Phase Invert . . . . . . . . . . . . . . . . . . . . . . . . . . . . . . . . . . . . . . . . . . . . . . . . . . . . . . . . . . . . . . . . . . .28Clear All . . . . . . . . . . . . . . . . . . . . . . . . . . . . . . . . . . . . . . . . . . . . . . . . . . . . . . . . . . . . . . . . . . . . . .29 Output Mix Menu . . . . . . . . . . . . . . . . . . . . . . . . . . . . . . . . . . . . . . . . . . . . . . . . . . . . . . . . . . . . . . . . . . . . . .29 Faders . . . . . . . . . . . . . . . . . . . . . . . . . . . . . . . . . . . . . . . . . . . . . . . . . . . . . . . . . . . . . . . . . . . . . . . . . . . . . . .30 Preset . . . . . . . . . . . . . . . . . . . . . . . . . . . . . . . . . . . . . . . . . . . . . . . . . . . . . . . . . . . . . . . . . . . . . . . 30Analog/Digital Toggle . . . . . . . . . . . . . . . . . . . . . . . . . . . . . . . . . . . . . . . . . . . . . . . . . . . . . . . . . . . 30Clear All . . . . . . . . . . . . . . . . . . . . . . . . . . . . . . . . . . . . . . . . . . . . . . . . . . . . . . . . . . . . . . . . . . . . . 30Touch Faders Toggle . . . . . . . . . . . . . . . . . . . . . . . . . . . . . . . . . . . . . . . . . . . . . . . . . . . . . . . . . . . 31Time Code . . . . . . . . . . . . . . . . . . . . . . . . . . . . . . . . . . . . . . . . . . . . . . . . . . . . . . . . . . . . . . . . . . . . . . . . . . .31 Time Code Out . . . . . . . . . . . . . . . . . . . . . . . . . . . . . . . . . . . . . . . . . . . . . . . . . . . . . . . . . . . . . . . .31Timecode Run Mode . . . . . . . . . . . . . . . . . . . . . . . . . . . . . . . . . . . . . . . . . . . . . . . . . . . . . . . . . . . .31Frame Rate . . . . . . . . . . . . . . . . . . . . . . . . . . . . . . . . . . . . . . . . . . . . . . . . . . . . . . . . . . . . . . . . . . . .32Timecode Reference . . . . . . . . . . . . . . . . . . . . . . . . . . . . . . . . . . . . . . . . . . . . . . . . . . . . . . . . . . . .32Toggle Timecode Type . . . . . . . . . . . . . . . . . . . . . . . . . . . . . . . . . . . . . . . . . . . . . . . . . . . . . . . . . .32 DEVA Setup . . . . . . . . . . . . . . . . . . . . . . . . . . . . . . . . . . . . . . . . . . . . . . . . . . . . . . . . . . . . . . . . . . . . . . . . . .33 Internal Sample Rate . . . . . . . . . . . . . . . . . . . . . . . . . . . . . . . . . . . . . . . . . . . . . . . . . . . . . . . . . . . .33Reference Select . . . . . . . . . . . . . . . . . . . . . . . . . . . . . . . . . . . . . . . . . . . . . . . . . . . . . . . . . . . . . . .33Record Channels . . . . . . . . . . . . . . . . . . . . . . . . . . . . . . . . . . . . . . . . . . . . . . . . . . . . . . . . . . . . . . .34Pre-Record Time . . . . . . . . . . . . . . . . . . . . . . . . . . . . . . . . . . . . . . . . . . . . . . . . . . . . . . . . . . . . . . .34Tone and Reference Setup . . . . . . . . . . . . . . . . . . . . . . . . . . . . . . . . . . . . . . . . . . . . . . . . . . . . . . .34 Operating Mode . . . . . . . . . . . . . . . . . . . . . . . . . . . . . . . . . . . . . . . . . . . . . . . . . . . . . . . . . . . . . . . . . . . . . . .34 Transport Operation . . . . . . . . . . . . . . . . . . . . . . . . . . . . . . . . . . . . . . . . . . . . . . . . . . . . . . . . . . . .35GPI Remote Roll . . . . . . . . . . . . . . . . . . . . . . . . . . . . . . . . . . . . . . . . . . . . . . . . . . . . . . . . . . . . . . .35Serial Remote Roll . . . . . . . . . . . . . . . . . . . . . . . . . . . . . . . . . . . . . . . . . . . . . . . . . . . . . . . . . . . . . .35Deva IV and Deva V Owner’s ManualSerial Port Mode . . . . . . . . . . . . . . . . . . . . . . . . . . . . . . . . . . . . . . . . . . . . . . . . . . . . . . . . . . . . . . .35Command Monitor . . . . . . . . . . . . . . . . . . . . . . . . . . . . . . . . . . . . . . . . . . . . . . . . . . . . . . . . . . . . .35Master Output Mode . . . . . . . . . . . . . . . . . . . . . . . . . . . . . . . . . . . . . . . . . . . . . . . . . . . . . . . . . . . .35Slate Source . . . . . . . . . . . . . . . . . . . . . . . . . . . . . . . . . . . . . . . . . . . . . . . . . . . . . . . . . . . . . . . . . . .36 Headphone Options . . . . . . . . . . . . . . . . . . . . . . . . . . . . . . . . . . . . . . . . . . . . . . . . . . . . . . . . . . . . . . . . . . . .36 Headphone Mix Menu . . . . . . . . . . . . . . . . . . . . . . . . . . . . . . . . . . . . . . . . . . . . . . . . . . . . . . . . . . .36CAMERA INPUT. . . . . . . . . . . . . . . . . . . . . . . . . . . . . . . . . . . . . . . . . . . . . . . . . . . . 37Get Factory Presets . . . . . . . . . . . . . . . . . . . . . . . . . . . . . . . . . . . . . . . . . . . . . . . . . 37Store User Presets . . . . . . . . . . . . . . . . . . . . . . . . . . . . . . . . . . . . . . . . . . . . . . . . . . 37Get User Presets. . . . . . . . . . . . . . . . . . . . . . . . . . . . . . . . . . . . . . . . . . . . . . . . . . . . 37Phase Invert. . . . . . . . . . . . . . . . . . . . . . . . . . . . . . . . . . . . . . . . . . . . . . . . . . . . . . . . 37 METERS . . . . . . . . . . . . . . . . . . . . . . . . . . . . . . . . . . . . . . . . . . . . . . . . . . . . . . . . . . . . . . . . . . . . . . . . . . . . .37 Display # of Home screen Meters. . . . . . . . . . . . . . . . . . . . . . . . . . . . . . . . . . . . . . . . . . . . . . . . . .37Meter Vertical / Horizontal . . . . . . . . . . . . . . . . . . . . . . . . . . . . . . . . . . . . . . . . . . . . . . . . . . . . . . .37Meter Labels . . . . . . . . . . . . . . . . . . . . . . . . . . . . . . . . . . . . . . . . . . . . . . . . . . . . . . . . . . . . . . . . . .38Display Inputs . . . . . . . . . . . . . . . . . . . . . . . . . . . . . . . . . . . . . . . . . . . . . . . . . . . . . . . . . . . . . . . . . .38Display Outputs . . . . . . . . . . . . . . . . . . . . . . . . . . . . . . . . . . . . . . . . . . . . . . . . . . . . . . . . . . . . . . . .39 CLOCK . . . . . . . . . . . . . . . . . . . . . . . . . . . . . . . . . . . . . . . . . . . . . . . . . . . . . . . . . . . . . . . . . . . . . . . . . . . . .39 Enter Time . . . . . . . . . . . . . . . . . . . . . . . . . . . . . . . . . . . . . . . . . . . . . . . . . . . . . . . . . . . . . . . . . . . .39Set Date . . . . . . . . . . . . . . . . . . . . . . . . . . . . . . . . . . . . . . . . . . . . . . . . . . . . . . . . . . . . . . . . . . . . . .40Time Mode . . . . . . . . . . . . . . . . . . . . . . . . . . . . . . . . . . . . . . . . . . . . . . . . . . . . . . . . . . . . . . . . . . . .40Date Mode . . . . . . . . . . . . . . . . . . . . . . . . . . . . . . . . . . . . . . . . . . . . . . . . . . . . . . . . . . . . . . . . . . . .40 Memory . . . . . . . . . . . . . . . . . . . . . . . . . . . . . . . . . . . . . . . . . . . . . . . . . . . . . . . . . . . . . . . . . . . . . . . . . . . . .40 User Interface . . . . . . . . . . . . . . . . . . . . . . . . . . . . . . . . . . . . . . . . . . . . . . . . . . . . . . . . . . . . . . . . . . . . . . . . .40 Startup Screen . . . . . . . . . . . . . . . . . . . . . . . . . . . . . . . . . . . . . . . . . . . . . . . . . . . . . . . . . . . . . . . . .41Hold Key Time . . . . . . . . . . . . . . . . . . . . . . . . . . . . . . . . . . . . . . . . . . . . . . . . . . . . . . . . . . . . . . . .41False Start . . . . . . . . . . . . . . . . . . . . . . . . . . . . . . . . . . . . . . . . . . . . . . . . . . . . . . . . . . . . . . . . . . . .41Default STN Edit Position . . . . . . . . . . . . . . . . . . . . . . . . . . . . . . . . . . . . . . . . . . . . . . . . . . . . . . . .41Color Theme . . . . . . . . . . . . . . . . . . . . . . . . . . . . . . . . . . . . . . . . . . . . . . . . . . . . . . . . . . . . . . . . . .41Big STN . . . . . . . . . . . . . . . . . . . . . . . . . . . . . . . . . . . . . . . . . . . . . . . . . . . . . . . . . . . . . . . . . . . . . .41 MIX-12 . . . . . . . . . . . . . . . . . . . . . . . . . . . . . . . . . . . . . . . . . . . . . . . . . . . . . . . . . . . . . . . . . . . . . . . . . . . . . .41 Mix-12 Support . . . . . . . . . . . . . . . . . . . . . . . . . . . . . . . . . . . . . . . . . . . . . . . . . . . . . . . . . . . . . . . .42Meter Brightness . . . . . . . . . . . . . . . . . . . . . . . . . . . . . . . . . . . . . . . . . . . . . . . . . . . . . . . . . . . . . . .42Tone Button Assign . . . . . . . . . . . . . . . . . . . . . . . . . . . . . . . . . . . . . . . . . . . . . . . . . . . . . . . . . . . . .42 Input Control Menu . . . . . . . . . . . . . . . . . . . . . . . . . . . . . . . . . . . . . . . . . . . . . . . . . . . . . . . . . . . . . . . . . . . .42 Phantom Power . . . . . . . . . . . . . . . . . . . . . . . . . . . . . . . . . . . . . . . . . . . . . . . . . . . . . . . . . . . . . . . .42High Pass Filter . . . . . . . . . . . . . . . . . . . . . . . . . . . . . . . . . . . . . . . . . . . . . . . . . . . . . . . . . . . . . . . .43Setting High Pass Frequency . . . . . . . . . . . . . . . . . . . . . . . . . . . . . . . . . . . . . . . . . . . . . . . . . . . . . .43Mic/Line Level . . . . . . . . . . . . . . . . . . . . . . . . . . . . . . . . . . . . . . . . . . . . . . . . . . . . . . . . . . . . . . . . .44Clear All . . . . . . . . . . . . . . . . . . . . . . . . . . . . . . . . . . . . . . . . . . . . . . . . . . . . . . . . . . . . . . . . . . . . . .44Adjust Delay . . . . . . . . . . . . . . . . . . . . . . . . . . . . . . . . . . . . . . . . . . . . . . . . . . . . . . . . . . . . . . . . . .44Adjust Trim . . . . . . . . . . . . . . . . . . . . . . . . . . . . . . . . . . . . . . . . . . . . . . . . . . . . . . . . . . . . . . . . . . .45 My DEVA Menu . . . . . . . . . . . . . . . . . . . . . . . . . . . . . . . . . . . . . . . . . . . . . . . . . . . . . . . . . . . . . . . . . . . . . . .45 Internal HD . . . . . . . . . . . . . . . . . . . . . . . . . . . . . . . . . . . . . . . . . . . . . . . . . . . . . . . . . . . . . . . . . . .46Name Selected Folder. . . . . . . . . . . . . . . . . . . . . . . . . . . . . . . . . . . . . . . . . . . . . . . . 47Erase Current Folder . . . . . . . . . . . . . . . . . . . . . . . . . . . . . . . . . . . . . . . . . . . . . . . . 47Enable DVD Playback . . . . . . . . . . . . . . . . . . . . . . . . . . . . . . . . . . . . . . . . . . . . . . . . 47Sort Order. . . . . . . . . . . . . . . . . . . . . . . . . . . . . . . . . . . . . . . . . . . . . . . . . . . . . . . . . 47Folder Contents . . . . . . . . . . . . . . . . . . . . . . . . . . . . . . . . . . . . . . . . . . . . . . . . . . . . 47Edit STN (Scene, Take, Note). . . . . . . . . . . . . . . . . . . . . . . . . . . . . . . . . . . . . . . . . . 48 Mirror Drive # . . . . . . . . . . . . . . . . . . . . . . . . . . . . . . . . . . . . . . . . . . . . . . . . . . . . . . . . . . . . . . . . .48 Cue Mode Menu . . . . . . . . . . . . . . . . . . . . . . . . . . . . . . . . . . . . . . . . . . . . . . . . . . . . . . . . . . . . . . . . . . . . . .50 Prev Seg . . . . . . . . . . . . . . . . . . . . . . . . . . . . . . . . . . . . . . . . . . . . . . . . . . . . . . . . . . . . . . . . . . . . . .51Next Seg . . . . . . . . . . . . . . . . . . . . . . . . . . . . . . . . . . . . . . . . . . . . . . . . . . . . . . . . . . . . . . . . . . . . .51Enter Seg . . . . . . . . . . . . . . . . . . . . . . . . . . . . . . . . . . . . . . . . . . . . . . . . . . . . . . . . . . . . . . . . . . . . .51Deva IV and Deva V Owner’s Manual <<REW . . . . . . . . . . . . . . . . . . . . . . . . . . . . . . . . . . . . . . . . . . . . . . . . . . . . . . . . . . . . . . . . . . . . . .51>>FFWD . . . . . . . . . . . . . . . . . . . . . . . . . . . . . . . . . . . . . . . . . . . . . . . . . . . . . . . . . . . . . . . . . . . . .51Enter TCode . . . . . . . . . . . . . . . . . . . . . . . . . . . . . . . . . . . . . . . . . . . . . . . . . . . . . . . . . . . . . . . . . .51Folder Button . . . . . . . . . . . . . . . . . . . . . . . . . . . . . . . . . . . . . . . . . . . . . . . . . . . . . . . . . . . . . . . . . .51S.T. Button . . . . . . . . . . . . . . . . . . . . . . . . . . . . . . . . . . . . . . . . . . . . . . . . . . . . . . . . . . . . . . . . . . . .51Tone . . . . . . . . . . . . . . . . . . . . . . . . . . . . . . . . . . . . . . . . . . . . . . . . . . . . . . . . . . . . . . . . . . . . . . . . . . . . . . . .51 Headphone Mix . . . . . . . . . . . . . . . . . . . . . . . . . . . . . . . . . . . . . . . . . . . . . . . . . . . . . . . . . . . . . . . . . . . . . . .52 Left Headphone Mix . . . . . . . . . . . . . . . . . . . . . . . . . . . . . . . . . . . . . . . . . . . . . . . . . . . . . . . . . . . .52Right Headphone Mix . . . . . . . . . . . . . . . . . . . . . . . . . . . . . . . . . . . . . . . . . . . . . . . . . . . . . . . . . . .52Camera Input . . . . . . . . . . . . . . . . . . . . . . . . . . . . . . . . . . . . . . . . . . . . . . . . . . . . . . . . . . . . . . . . . .52Working Preset . . . . . . . . . . . . . . . . . . . . . . . . . . . . . . . . . . . . . . . . . . . . . . . . . . . . . . . . . . . . . . . .52Store User Presets . . . . . . . . . . . . . . . . . . . . . . . . . . . . . . . . . . . . . . . . . . . . . . . . . . . . . . . . . . . . .53Get User Presets . . . . . . . . . . . . . . . . . . . . . . . . . . . . . . . . . . . . . . . . . . . . . . . . . . . . . . . . . . . . . . .53Get Factory Presets . . . . . . . . . . . . . . . . . . . . . . . . . . . . . . . . . . . . . . . . . . . . . . . . . . . . . . . . . . . . .53Phase Invert . . . . . . . . . . . . . . . . . . . . . . . . . . . . . . . . . . . . . . . . . . . . . . . . . . . . . . . . . . . . . . . . . . .53Toggle On Recorded Tracks . . . . . . . . . . . . . . . . . . . . . . . . . . . . . . . . . . . . . . . . . . . . . . . . . . . . . .53 Scene Take Note . . . . . . . . . . . . . . . . . . . . . . . . . . . . . . . . . . . . . . . . . . . . . . . . . . . . . . . . . . . . . . . . . . . . . .54 Scene . . . . . . . . . . . . . . . . . . . . . . . . . . . . . . . . . . . . . . . . . . . . . . . . . . . . . . . . . . . . . . . . . . . . . . . .54Inc Scene . . . . . . . . . . . . . . . . . . . . . . . . . . . . . . . . . . . . . . . . . . . . . . . . . . . . . . . . . . . . . . . . . . . . .54Take . . . . . . . . . . . . . . . . . . . . . . . . . . . . . . . . . . . . . . . . . . . . . . . . . . . . . . . . . . . . . . . . . . . . . . . . .54Reset Take . . . . . . . . . . . . . . . . . . . . . . . . . . . . . . . . . . . . . . . . . . . . . . . . . . . . . . . . . . . . . . . . . . . .54Note . . . . . . . . . . . . . . . . . . . . . . . . . . . . . . . . . . . . . . . . . . . . . . . . . . . . . . . . . . . . . . . . . . . . . . . . .54Store Note . . . . . . . . . . . . . . . . . . . . . . . . . . . . . . . . . . . . . . . . . . . . . . . . . . . . . . . . . . . . . . . . . . . .54Clear Note . . . . . . . . . . . . . . . . . . . . . . . . . . . . . . . . . . . . . . . . . . . . . . . . . . . . . . . . . . . . . . . . . . . .55Stored Notes . . . . . . . . . . . . . . . . . . . . . . . . . . . . . . . . . . . . . . . . . . . . . . . . . . . . . . . . . . . . . . . . . .55Segment . . . . . . . . . . . . . . . . . . . . . . . . . . . . . . . . . . . . . . . . . . . . . . . . . . . . . . . . . . . . . . . . . . . . . .55Arrows . . . . . . . . . . . . . . . . . . . . . . . . . . . . . . . . . . . . . . . . . . . . . . . . . . . . . . . . . . . . . . . . . . . . . . .55About DEVA . . . . . . . . . . . . . . . . . . . . . . . . . . . . . . . . . . . . . . . . . . . . . . . . . . . . . . . . . . . . . . . . . . . . . . . . .55 Limiting . . . . . . . . . . . . . . . . . . . . . . . . . . . . . . . . . . . . . . . . . . . . . . . . . . . . . . . . . . . . . . . . . . . . . . . . . . . . . .57 Enabling limiting on a channel . . . . . . . . . . . . . . . . . . . . . . . . . . . . . . . . . . . . . . . . . . . . . . . . . . . . .57 Equalization . . . . . . . . . . . . . . . . . . . . . . . . . . . . . . . . . . . . . . . . . . . . . . . . . . . . . . . . . . . . . . . . . . . . . . . . . . .57 EQ Range . . . . . . . . . . . . . . . . . . . . . . . . . . . . . . . . . . . . . . . . . . . . . . . . . . . . . . . . . . . . . . . . . . . . .57Enabling the EQ . . . . . . . . . . . . . . . . . . . . . . . . . . . . . . . . . . . . . . . . . . . . . . . . . . . . . . . . . . . . . . . .57 Compression . . . . . . . . . . . . . . . . . . . . . . . . . . . . . . . . . . . . . . . . . . . . . . . . . . . . . . . . . . . . . . . . . . . . . . . . .58 Enabling Compression . . . . . . . . . . . . . . . . . . . . . . . . . . . . . . . . . . . . . . . . . . . . . . . . . . . . . . . . . . .58Copying Compression Settings . . . . . . . . . . . . . . . . . . . . . . . . . . . . . . . . . . . . . . . . . . . . . . . . . . . .58 Diagnostic “Secret Menu” . . . . . . . . . . . . . . . . . . . . . . . . . . . . . . . . . . . . . . . . . . . . . . . . . . . . . . . . . . . . . . .59 Getting to the 1967 Menu . . . . . . . . . . . . . . . . . . . . . . . . . . . . . . . . . . . . . . . . . . . . . . . . . . . . . . . .59Commands Available in 1967 Menu . . . . . . . . . . . . . . . . . . . . . . . . . . . . . . . . . . . . . . . . . . . . . . . .59 Updating the Firmware . . . . . . . . . . . . . . . . . . . . . . . . . . . . . . . . . . . . . . . . . . . . . . . . . . . . . . . . . . . . . . . . .60*B and *P Diagnostic Flags . . . . . . . . . . . . . . . . . . . . . . . . . . . . . . . . . . . . . . . . . . . . . . . . . . . . . . . . . . . . . . .61 *B Flag . . . . . . . . . . . . . . . . . . . . . . . . . . . . . . . . . . . . . . . . . . . . . . . . . . . . . . . . . . . . . . . . . . . . . . .61*P Flag . . . . . . . . . . . . . . . . . . . . . . . . . . . . . . . . . . . . . . . . . . . . . . . . . . . . . . . . . . . . . . . . . . . . . . .61 Reading the Startup Screen . . . . . . . . . . . . . . . . . . . . . . . . . . . . . . . . . . . . . . . . . . . . . . . . . . . . . . . . . . . . . .61 Warranty Policy . . . . . . . . . . . . . . . . . . . . . . . . . . . . . . . . . . . . . . . . . . . . . . . . . . . . . . . . . . . . . . . . . . . . . . .63。
шение Electric 文档中文名称说明书
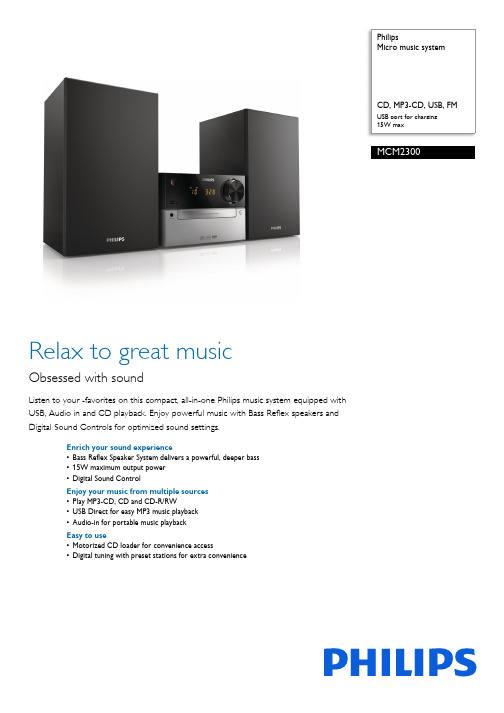
PhilipsMicro music systemUSB port for charging15W maxMCM2300Relax to great musicObsessed with soundListen to your favorites on this compact, all-in-one Philips music system equipped withUSB, Audio in and CD playback. Enjoy powerful music with Bass Reflex speakers andDigital Sound Controls for optimized sound settings.Enrich your sound experience•Bass Reflex Speaker System delivers a powerful, deeper bass•15W maximum output power•Digital Sound ControlEnjoy your music from multiple sources•Play MP3-CD, CD and CD-R/RW•USB Direct for easy MP3 music playback•Audio-in for portable music playbackEasy to use•Motorized CD loader for convenience access•Digital tuning with preset stations for extra convenienceIssue date 2022-04-24Version: 3.0.612 NC: 8670 001 11793EAN: 69 59033 84804 9© 2022 Koninklijke Philips N.V.All Rights reserved.Specifications are subject to change without notice. Trademarks are the property of Koninklijke Philips N.V. or their respective SpecificationsMicro music systemCD, MP3-CD, USB, FM USB port for charging, 15W maxHighlightsBass Reflex Speaker SystemBass Reflex Speaker System delivers a deep bass experience from a compact loudspeaker box system. It differs from a conventional loudspeaker box system in the addition of a bass pipe that isacoustically aligned to the woofer to optimize the low frequency roll-off of the system. The result is deeper controlled bass and lower distortion. The system works by resonating the air mass in the bass pipe to vibrate like a conventional woofer.Combined with the response of the woofer, the system extends the overall low frequency sounds to create a whole new dimension of deep bass.Audio-inThe Audio in connectivity allows direct playback of Audio in content from portable media players.Besides the benefit of enjoying your favorite music in the superior sound quality delivered by the audio system, the Audio in is also extremely convenient as all you have to do is to plug your portable MP3 player to the audio system.USB Direct for easy MP3 musicThanks to the complete file transferability, you can easily enjoy the convenience and fun of accessing more digital music via the built-in USB Direct.Digital Sound ControlDigital Sound Control offers you a choice of pre-set balanced, clear, powerful, warm and bright controls you can use to optimise the frequency ranges for different musical styles. Each mode uses graphic equalizing technology to automatically adjust the sound balance and enhance the most important sound frequencies in your chosen music style.Ultimately, Digital Sound Control makes it easy for you get the most out of your music by precisely adjusting the sound balance to match the type ofmusic you are playing.Sound•Sound enhancement: digital sound control •Maximum output power (RMS): 15WLoudspeakers•Speaker drivers: 3" woofer•Speaker types: bass reflex speaker systemAudio playback•Disc playback modes: fast forward/backward, next/previous track search, repeat/shuffle/program •Playback media: CD, CD-R/RW, MP3-CD, USB flash drive•USB Direct playback modes: fast backward/fast forward, play/pause, previous/next, repeat, shuffle, stopTuner/Reception/Transmission•Tuner bands: FM mono, FM stereo •Station presets: 20•Antenna: FM fixed pigtail antenna•Tuner enhancement: auto digital tuning, auto scanConnectivity•USB: USB host •Audio in (3.5mm)Convenience•Alarms: CD Alarm, Radio Alarm, USB alarm •Clock: On main display, sleep timer •Display type: LED display •Loader type: trayAccessories•Included accessories: AC Power Cord, FM antenna, User Manual•Remote control: 21-key remote Dimensions•Main unit width: 180 mm •Main unit height: 121 mm •Main unit depth: 247 mm•Main speaker dimensions (W x D): 150 x 125 mm •Main speaker height: 238 mm •Packaging width: 577 mm •Packaging height: 312 mm •Packaging depth: 185 mm •Gross weight: 4.67 kg •Net weight: 3.55 kgPower•Power supply: 100-240VAC, 50/60Hz。
Olympus LS-P4 3Mic HighFidelity 录音机说明书
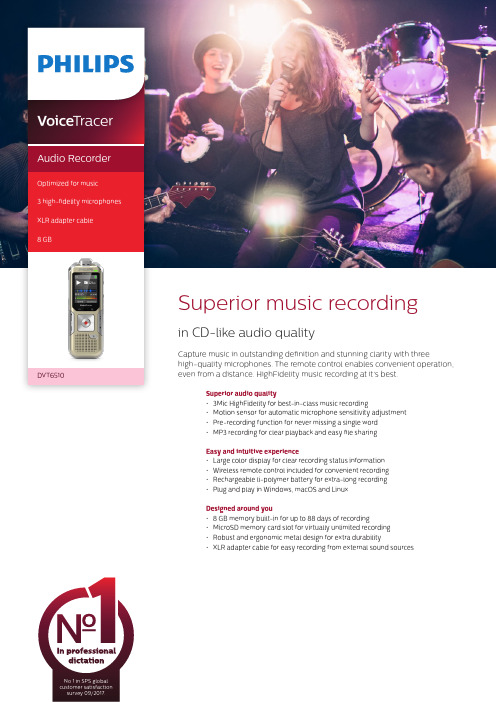
Superior audio quality• 3Mic HighFidelity for best-in-class music recording• Motion sensor for automatic microphone sensitivity adjustment • Pre-recording function for never missing a single word • MP3 recording for clear playback and easy file sharing Easy and intuitive experience• Large color display for clear recording status information • Wireless remote control included for convenient recording • Rechargeable li-polymer battery for extra-long recording • Plug and play in Windows, macOS and Linux Designed around you• 8 GB memory built-in for up to 88 days of recording • MicroSD memory card slot for virtually unlimited recording • Robust and ergonomic metal design for extra durability• XLR adapter cable for easy recording from external sound sourcesNo 1 in SPS global customer satisfaction survey 09/2017.Voice TracerAudio RecorderOptimized for music 3 high-fidelity microphones XLR adapter cable 8 GBSeveral key components are needed to record music as naturally as possible in CD-like audio quality: high signal-to-noise ratio, highly dynamic microphones to capture soft tones as well as loud drums, a high-quality microphone suspension to avoid pickup of grip noise, a strong left and right channel separation for human ear live-like effect.Motion sensorThe built-in motion sensor detects the recorder when it is placed on a desk or held and selects the microphone sensitivity to suit the recording situation preventing you from accidently blocking the audio you want to record.Pre-recording functionThe pre-recording function allows you to record the last five seconds before you press the record key. The device switches into a standby mode and records a five-second loop without saving it. Press the record key to save the five-second loop. This feature allows you to spontaneously record important parts of a conversation.MP3 recordingCapture your recordings in MP3. The popular file format allows you to play back your files virtually anywhere and simply share them with rge color displayThe large color display offers sharp images, making it easier to see and read everything at first glance. The clear user interface supports eight languages and is optimized for easy,intuitive operation.Wireless remote control The included remote control enablesconvenient placement of the recorder to best meet the needs of the audio environment while maintaining ease of operation. Start, pause, and stop recording, without havingto clumsily reach over things even from a distance.Extra long battery lifeThe high-capacity Li-polymer battery can be easily charged through a standard micro USB jack. This guarantees extended battery life for extra-long recording ensuring that your recorder will always be ready to work when you are.Plug and playThanks to Plug and Play in Windows, macOS and Linux, you can quickly access your recordings without installing any additional software. The recorder is automatically displayed as a removable drive once connected to your computer via USB. It can also be used as a convenient way to store, back up and share files.8 GB internal memoryCapture and store up to 88 days of continuous recording thanks to the 8 GB of internal memory.MicroSD memory card slotVirtually unlimited recording and storage capacity thanks to a microSD memory card slot supporting up to 32 GB of additional memory.Robust metal designIts robust and lightweight design maximizes comfort and the metal surface creates a robust shell around the device. With the integrated fold-out stand you can conveniently position the recorder towards the sound source. Two ergonomically placed soft keys allow for convenient, quick and direct access to the most important functions.XLR adapter cableThe XLR adapter cable allows you to directly connect your instruments to the recorder for an even crisper and more accurate recording. This is perfect for recording electric guitars or keyboards for instance.Connectivity Headphones: 3.5 mmMicrophone: 3.5 mm, stereo, without phantom power supplyXLR adapter cable: XLR female to 3.5 mm male (an additional phantom power supply might be required for recording with an external microphone)MicroSD card socket USB: high-speed USB 2.0DisplayType: LCD color display BacklightDiagonal screen size: 1.77”/4.5 cm Resolution: 128 × 160 pixels Audio recordingBuilt-in microphone: 3 Mic System, high-sensitivity, HQ Stereo, low-noise microphone Recording formats: MPEG1 layer 3 (MP3), PCM (WAV)Recording modes: PCM 1411 kbps, SHQ 192 kbps, HQ 96 kbps, SP 64 kbps, LP 8 kbps Sample rate: 44,1 kHz (PCM/SHQ), 32 kHz (HQ), 22 kHz (SP), 16 kHz (LP)Bit rate: 8, 64, 96, 192, 1411 kbps File overwrite and append mode Record monitor functionRecording time: 2280 h (LP), 284 h (SP), 190 h (HQ), 90 h (SHQ), 12 h (PCM)Silent recording mode Pre-recording mode SoundSound enhancement: ClearVoice Frequency response: 50–20,000 Hz Signal-to-noise ratio: > 60 dB Speaker output power: 110 mW Speaker diameter: 28 mm Storage mediaBuilt-in memory capacity: 8 GB Built-in memory type: NAND Flash Mass storage class compliantSpecificationsTunerFrequency range: 87.5–108 MHz Station presets: 20Auto digital tuning Tuner bands: FM stereoMusic playbackCompression format: MP3, WMA Equalizer settings: Jazz, Pop, Classic ID3 tag supportMP3 bit rates: 8–320 kbpsWMA bit rates: 48–320 kbps (44 kHz), 64–192 (48 kHz), stereoConvenienceFirmware upgradeable Keypad lockMulti language: English, French, German, Spanish, Italian, Russian, Polish, Simplified ChineseVariable playback speed Voice volume indicator Voice-activated recording AutoAdjust+ recordingAutoZoom+ recording: 15 m zoom Calendar searchInstant one-touch recordingOptimized for notes, conversations, lectures and interviews, meetings PowerLi-polymer built-in batteryBattery lifetime: up to 50/25 hours in LP record mode (built-in memory / microSD memory card)System requirements Free USB portOperating system: Windows 10/8/7, macOS 10, Linux Design and finishingColour(s): Champagne/silver shadow Green specifications Lead-free soldered product Package contents Recorder Remote control XLR adapter cable Carry case USB cable Quick start guideProduct dimensionsProduct dimensions (W × H × D): 4.5 × 12.5 × 1.8 cm / 1.75 × 4.9 × 0.71 inch Weight: 85 g/3.0 oz.Issue date 2018-03-09Version 1.0/dictation© 2018 Speech Processing Solutions GmbH. All rights reserved.Specifications are subject to change without notice. Philips and the Philips shield emblem are registered trademarks of Koninklijke Philips N.V. and are used under license. All trademarks are the property of their respective owners.。