Mini Protean电泳槽安装使用指南
MiniPROTEANTetra简单操作介绍

2. 将电泳芯放入 Mini-PROTEAN Tetra Cell 电泳槽内 Mini-PROTEAN Tetra 电泳槽有 2 个放电泳装置的位置:电泳芯位于后面 , 辅助电泳芯
Mini PROTEAN Tetra 简单操作介绍
第一部分 组成
为更好的使用 Mini-PROTEAN Tetra 电泳仪器,请在使用前熟悉各组件的安装和拆卸(参见 图 1、2)。
图 1. 安装 Mini-PROTEAN Tetra 电泳槽
图 2.安装 Mini-PROTEAN Tetra cell 制胶框和灌胶架
至短玻板顶端,注意不要产生气泡 ix. 迅速在玻板中间插入合适的电泳梳。注意梳子两端位于垫片之间,梳脊与短板顶端齐
平
x. 浓缩胶聚合 30-45min xi. 小心移出电泳梳,用蒸馏水或电泳缓冲液冲洗梳孔 xii. 用毕,用去离子水或蒸馏水
冲洗灌胶架和制胶框
b. 连续聚丙烯酰胺胶 i. 制备胶单体溶液(不加 AP 及 TEMED) (参见第 4 章制胶公式 ),真空除气泡约 15min ii. 在处理后的胶液中加入 AP 及 TEMED,用玻管或一次性塑料吸管缓缓加入玻板间至短玻 板顶端,注意不要产生气泡 iii.将合适的电泳梳插入玻板中间。注意梳子两端位于垫片之间,梳脊与短板顶端齐平 iv. 胶聚合 45-60min v. 小心移出电泳梳,用蒸馏水或电泳缓冲液冲洗梳孔 vi. 用毕,用去离子水或蒸馏水冲洗灌胶架和制胶框
17 µl 400 µl
1.5 mm 厚 160 µl
66 µl 66 µl 40 µl 730 µl
30 µl 680 µl
外部尺寸: 16 cm (L) x 12 cm (W) x 18 cm (H) 预制胶兼容性: Ready Gel 预制胶电压限制: 600 V DC and 30 w 毛重: 2.0 kg
电泳槽安全操作及保养规程

电泳槽安全操作及保养规程一、前言电泳槽是一种常见的表面处理设备,广泛应用于汽车、建材、冶金等领域。
使用电泳槽需要注意安全操作和及时保养,以确保设备的正常运行和工作效率,提高生产效益。
本文将介绍电泳槽的安全操作和保养规程。
二、电泳槽安全操作1. 穿戴个人防护装备在操作电泳槽时,必须穿戴个人防护装备,包括橡胶手套、防护眼镜、面罩、工作服等。
这些装备可以保护身体免受化学品和电泳液的侵害。
2. 遵守设备使用指南在使用电泳槽之前,必须仔细阅读设备使用指南,并按照要求进行操作。
操作过程中应注意设备的电气安全和流体安全,并在机器操作前,进行操作员安全培训。
3. 注意电泳槽的电气安全电泳槽是一种涉及电气的设备,操作人员应该了解相关的安全知识。
如果需要更改电路或更换电源线路,必须关闭电源开关,并在更改之前释放电路中的电荷。
4. 避免化学品泼溅在操作电泳槽时,应该避免化学品泼溅。
发生泼溅时,应立即清洗,切勿用手触摸眼睛、嘴巴和皮肤。
工作完成后,注意及时清洗涂料的残余并以正确方式处理化学废品。
5. 避免电泳液中毒电泳液是一种化学品,对人健康有一定的影响。
在使用电泳槽时,应确保室内通风良好,并避免长时间接触电泳液。
三、电泳槽保养规程1. 定期检查设备应定期检查电泳槽设备的机械部件、电气部件和管道连接,确保设备处于正常运行状态。
若发现设备故障或异常,应及时联系技术人员维修并进行标准化操作。
2. 定期更换电泳液电泳液在使用一定时间后,粘度会增大,浓度会降低,不利于电泳过程,所以应及时更换。
定期更换电泳液可以有效延长设备的使用寿命。
3. 定期清洗设备定期清洗电泳槽设备能够确保设备一直保持正常运行状态。
在清洗过程中,应注意切勿使用过于刺激性的清洗剂,应使用专业的清洗剂,以避免腐蚀电泳槽设备。
4. 定期保养设备电泳槽设备的保养也是一个重要的环节,在使用一段时间后,各部件会产生摩擦和磨损,需要进行保养、维护。
对于电泳槽设备,保养包括调整电流和电压、更换滤网和导电和补充导电液等。
电泳线全线操作说明
1、检查各处理槽液位是否正常。自来水、蒸汽、天然汽、压缩空气是否正常供应。
2、打开电源,检查各控制柜工作灯是否正常亮起;是否有正常工作声音。正常后开启各工作水泵、风机、冷水系统、纯水及超滤系统、输送系统、烘干室、整流器的工作电源。
3、开通蒸汽,开启热水槽、预脱脂、脱脂、磷化槽循环水泵;开启烘干室循环风机和燃烧机,等这些槽液和烘干室的温度加热到规定工作温度。
3、电泳部分根据要求进行循环。
4、关闭热水系统及制冷系统。
5、当下件完成后,板链停止运行时。
6、关闭烘干室。
中国联合工程公司 电泳设备操作规程 5
7、15 分钟后关闭通风机。
8、关闭各相关控制电源。
4,打开制冷系统及和电泳有关系统Байду номын сангаас将电泳槽的温度调到规定温度。
5,板链输送机手动运行到位,与自行葫芦联机运行。
6、调整其它部分处于运行状态。
7,在上件位吊工作吊筐开始工作。
关机:
1、当剩下最后一挂工件要进入板链输送线上时,自行小车按停止按钮。
2、关闭前处理部分相关用电设备电源。
最新版美国伯乐水平电泳槽安装手册subcell GT REVC

Sub-Cell® GT Agarose Gel Electrophoresis Systems Instruction ManualCatalog # 170-4401 to 170-4406170-4481 to 170-4486WarrantyBio-Rad Laboratories warrants the Sub-Cell GT, Wide Mini-Sub® Cell GT, and Mini-Sub Cell GT electrophoresis systems against defects in materials and workmanship for 1 year. If any defects occur in the instrument during this warranty period, Bio-Rad Laboratories will repair or replace the defective parts free. The following defects, however, are specifically excluded:1. Defects caused by improper operation.2. Repair or modification done by anyone other than Bio-Rad Laboratories or an authorized agent.3. Use of fittings or other spare parts supplied by anyone other than Bio-Rad Laboratories.4. Damage caused by accident or misuse.5. Damage caused by disaster.6. Corrosion due to use of improper solvent or sample.This warranty does not apply to parts listed below:1. Platinum Electrode WiresTo insure the best performance from the Sub-Cell GT electrophoresis systems, become fully acquainted with these operating instructions before use. Bio-Rad recommends that you first read these instructions carefully. Assemble and disassemble the unit completely without casting a gel. After these preliminary steps, you should be ready to cast and run a gel.Bio-Rad also recommends that all Sub-Cell GT system components and accessories be inspected for damage, cleaned as recommended in this manual, and rinsed thoroughly with distilled water before use.Record the following for your records:Model __________________________________________________Catalog No. _____________________________________________Date of Delivery _________________________________________Warranty Period ________________________________________Serial No. _______________________________________________Invoice No. ______________________________________________Purchase Order No. _____________________________________For any inquiry or request for repair service, contact Bio-Rad Laboratories after confirming the model and serial number of your instrument.Table of ContentsPage Section 1 General Information 11.1 Introduction 11.2 Safety 11.3 System Components 21.4 Specifications 4 Section 2 Operating Instructions 42.1 DNA Gel Preparation 42.2 Casting Agarose Gel Slabs 62.3 Electrophoresis 82.4 Nucleic Acid Staining and Visualization 92.5 Note on Blotting 10 Section 3 Gel and Electrophoresis Reagent Preparation 10 Section 4 Care and Maintenance 114.1 Cleaning Sub-Cell GT Components 114.2 Compatible Cleaning Agents 114.3 Maintenance Schedule 124.4 Electrode Replacement 124.5 RNase Decontamination 13 Section 5 Troubleshooting 13 Section 6 Product Information 146.1 Sub-Cell GT Systems 146.2 Sub-Cell GT System Accessories 156.3 Related Bio-Rad Products 17 Section 7 References 19Safety lidElectrical cablesElectrical leads Gel casting gatesFixed heightcombMini-Sub Cell GT BaseSafety lid removal tabComb slotsBanana plug/electrode wire assembly UV-transparent gel trayFluorescent ruler Fixed heightcomb Leveling feetUV-transparent gel tray Gel caster Cam lever Fluorescent ruler Leveling bubble Gel stageFig.1.1. Mini-Sub Cell GT components.5. Boil and swirl the solution until all of the small translucent agarose particles are dissolved. With the smallflask still in place, set aside to cool to 60°C before pouring.2.2 Casting Agarose Gel SlabsThere are several ways to cast agarose submarine gels using the Sub-Cell GT systems. Gels may be cast with a UV-transparent plastic (UVTP) tray directly on the gel stage of the Sub-Cell GT bases using the gel casting gates. Gels may also be cast on the removable UVTP trays with the aid of the gel caster or with standard laboratory tape.Casting gels on the base stage with the UVTP tray1. Level the cell using the leveling bubble provided.2. Place the UVTP tray on the gel stage.Note: The Mini-Sub Cell GT requires the 7 x 7 cm UVTP tray for casting in the GT base. The Wide-Mini-Sub Cell GT requires the 15 x 7 cm UVTP tray and the Sub-Cell GT system requires the 15 x 15 cm UVTP tray for casting in the GT base.3. Slide the gel casting gates into the slots at opposite ends of the GT gel stage. Insure that the gates areevenly seated in the slots and the gates uniformly contact all edges of the UVTP tray. The weight of the gates provides a tight seal to prevent any leakage problems during gel casting*.*Note: If leakage occurs while pouring the gel on the casting tray atop the stage, chill the casting gates in the freezer for 2-3 minutes. Place the casting gates into the slots when ready to pour the gel. The chilled casting gates will prevent the gel solution from leaking out of the tray and into the chambers. 4. Place the comb(s) into the appropriate slot(s) of the trays so that the sample wells are near the cathode(black). DNA samples will migrate toward the anode (red) during electrophoresis.5. Prepare the desired concentration and amount of agarose in 1x electrophoresis buffer (see Section 2.1).When the agarose solution has cooled to 50—60°C, pour the molten agarose between the gates.Warning: Hot agarose (>60°C) may cause the tray to warp or craze and will decrease the lifetime of the tray. Warping may also result in sample wells of uneven depth.6. Allow 20—40 minutes for the gel to solidify at room temperature.7. Carefully remove the comb from the solidified gel. Remove the gel casting gates.8. Submerge the gel beneath 2 to 6 mm of 1x electrophoresis buffer (see Section 3, Gel andElectrophoresis Reagent Preparation). Use greater depth overlay (more buffer) with increasing voltages to prevent pH and heat effects.Removable tray (UVTP) gel casting using a Gel Caster or Mini-Gel Caster1. Level the Gel Caster or Mini-Gel Caster using the leveling feet in the gel caster and the leveling bubbleprovided.2. Disengage and slide the movable wall to the open end of the Gel Caster or Mini-Gel Caster by turningand lifting the cam peg upward.Note: If casting more than one gel with the Gel Caster, add the removable gel casting wall to the gel caster. The removable wall will allow casting using two 15 x 10 cm trays, four 7 x10 cm trays or one15 x 10 cm and one 15 x15 cm trays.3. Place the open edge of the UVTP tray against the fixed wall of the Gel Caster or Mini-Gel Caster.4. Slide the movable wall against the edge of the UVTP tray (Figure 2.1).2.5 Note on BlottingNucleic acids within the gel can be transferred to membranes using the techniques of Southernand northern blotting. It is beyond the scope of this instruction manual to include blotting procedures. Consult references #1 and #2 for blotting techniques. Bio-Rad offers a full line of nitrocellulose and positively charged nylon membranes, as well as vacuum and electrophoretic blotting apparatus for Southern and northern blotting.Section 3Gel and Electrophoresis Reagent PreparationRNA agarose formaldehyde gelsFor 100 ml of a 1% agarose formaldehyde gel prepare as follows:62 ml of 1.6% melted agarose20 ml 5x MOPS electrophoresis buffer (1x final concentration)18 ml 12.3 M (37.5%) formaldehyde (2.2 M final concentration)Caution: Formaldehyde solutions and formaldehyde vapors are toxic. When handling solutions or gels that contain formaldehyde use a chemical hood. Always wear gloves, safety glasses, and a laboratory coat when using formaldehyde. See the MSDS for safety information.Nucleic acid electrophoresis buffers1—2DNA agarose gel electrophoresis is usually performed using either Tris-Acetate-EDTA (TAE) or Tris-Borate-EDTA (TBE). While TAE buffers provide faster electrophoretic migration of linear DNA and better resolution of supercoiled DNA, TBE buffers have a stronger buffering capacity for longer or highervoltage electrophoresis runs. Bio-Rad offers premixed 50x TAE and 10x TBE buffers for use with the Sub-Cell GT systems. RNA formaldehyde gels require a MOPS [3-(N-morpholino)-propanesulfonic acid] electrophoresis buffer.1x Tris-Acetate-EDTA (TAE)–40 mM tris (pH 7.6), 20 mM acetic acid, and 1 mM EDTA.50x Stock (1 liter)–dissolve in 600 ml distilled water:242 g Tris base (FW = 121)57.1 ml glacial acetic acid100 ml 0.5 M EDTA (pH 8.0).Fill to a final volume of 1 liter with distilled water.1x Tris-Borate-EDTA (TBE)–89 mM tris (pH 7.6), 89 mM boric acid, 2 mM EDTA10x Stock (1 liter)–dissolve in 600 ml distilled water:108 g Tris base (FW = 121)55 g boric acid (FW = 61.8)40 ml 0.5 M EDTA (pH 8.0)Fill to a final volume of 1 liter with distilled water.1x MOPS Buffer (RNA Gels)–0.02 M MOPS [3-(N-morpholino)-propanesulfonic acid] (pH 7.0), 8 mM sodium acetate, 1 mM EDTA (pH 8.0)5x Stock (1 liter)–dissolve in 600 ml DEPC-treated distilled water:20.6 g MOPS13.3 ml 3 M sodium acetate (DEPC treated), pH 7.410 ml 0.5 M EDTA (DEPC-treated), pH 8.0Fill to a final volume of 1 liter with DEPC-treated distilled water.Caution: DEPC is a suspected carcinogen. Always wear gloves, safety glasses, and a laboratory coat.Use caution when handling DEPC containing solutions. Consult the DEPC MSDS (Material Safety Data Sheet) for more information.DNA and RNA sample loading dye1-2A convenient 10x sample buffer stock consists of 50% glycerol, 0.25% bromophenol blue, and 0.25% xylene cyanole FF in 1x TAE buffer. Only 1—10 ml of the 10x loading dye should be prepared.RNA sample preparation1-2Prior to loading RNA onto an agarose formaldehyde gel prepare each RNA sample as follows:6 µl RNA in DEPC-treated water10 µl 5x MOPS buffer (final concentration 1.67x)9 µl 12.3 M formaldehyde (final concentration 3.7 M)25 µl formamide (final concentration 50% v/v)Caution: Formamide is a teratogen. Always wear gloves, safety glasses, and a laboratory coat. Use caution when handling formamide. Consult the formamide MSDS for more information.Ethidium bromide solutionAdd 10 mg of EtBr to 1 ml distilled water. Bio-Rad offers EtBr solutions (10 mg/ml).Section 4Care and Maintenance4.1 Cleaning Sub-Cell GT Components1. All Sub-Cell GT system parts should be washed with a mild detergent solution in warm water.Note: Be careful not to snag or break the electrode wire in the GT base while cleaning.2. Rinse all parts thoroughly with warm water or distilled water and air dry, if possible.4.2 Compatible Cleaning AgentsChemically compatible cleaners must be used to insure long life of parts. These include:• Aqueous solutions of soaps and mild detergents:Bio-Rad Cleaning Concentrate (catalog number 161-0722)Dishwashing liquid• Organic solvents:HexaneAliphatic hydrocarbonsDo not leave plastic parts to soak in detergents more than 30 minutes. A short detergent rinse typically is all that is required.Caution: Do not use the following chemicals to clean Sub-Cell GT parts. Exposure to these chemicals may cause the plastic parts to crack, craze, etch, or warp.• Chlorinated hydrocarbonsCarbon tetrachlorideChloroform• Aromatic hydrocarbonsBenzenePhenolTolueneMethyl ethyl ketoneAcetoneElectrode wire chamberFig. 4.1. Removal of banana plug/electrode wire assembly.Life Science Group10-0082 0100 Sig 110910016027 Rev C US/EGBio-RadLaboratories, Inc.Web site USA 800 424 6723 Australia 61 2 9914 2800 Austria 01 877 89 01 Belgium 09 385 55 11 Brazil 55 31 3689 6600 Canada 905 364 3435 China 86 20 8732 2339Czech Republic 420 241 430 532 Denmark 44 52 10 00Finland 09 804 22 00 France 01 47 95 69 65 Germany 089 31 884 0 Greece 30 210 777 4396 Hong Kong 852 2789 3300Hungary 36 1 459 6100 India 91 124 4029300 Israel 03 963 6050 Italy 39 02 216091 Japan 03 6361 7000 Korea 82 2 3473 4460 Mexico 52 555 488 7670 The Netherlands 0318 540666New Zealand 0508 805 500 Norway 23 38 41 30 Poland 48 22 331 99 99 Portugal 351 21 472 7700 Russia 7 495 721 14 04 Singapore 65 6415 3188 South Africa 27 861 246 723Spain 34 91 590 5200 Sweden 08 555 12700 Switzerland 061 717 95 55 Taiwan 886 2 2578 7189 United Kingdom 020 8328 2000。
WIX-miniDNA迷你水平电泳仪使用说明书

4.让凝胶溶液完全凝结,室温下 30~45min(待胶略凝结时,也可以放入 4℃冰箱,可大大缩短凝结时间)。 小心拔出梳子,将凝胶安放到电泳槽内,加样孔一侧靠近阴极(黑色)。
5.向电泳槽内加入电泳缓冲液,至少没过凝胶 2mm。(注意:TAE 缓冲液,一般用 2~3 次就要更换, TBE 缓冲液则可使用 10 次左右。)
装箱单如下:
配件
数量
配件
数量
主槽
1个
上盖及电源线
1套
可换电极
1对
制胶架
1个
凝胶托盘
1个 7×10 cm, 1 个 7×7 cm, 1 个
梳子
3把 9/16 齿,0.75mm 厚 9/16 齿,1.0mm 厚 9/16 齿,1.5mm 厚
使用说明书
1份
保修卡
1份
合格证
1个
1.3 技术参数
尺寸 托盘面积(W×L)
梳子
可同时制胶数 最大缓冲液
重量(净重)
266×115×113mm 7×10cm、7×7cm 9/16 齿,0.75mm 厚 9/16 齿,1.0mm 厚 9/16 齿,1.5mm 厚
1块 300ml 1Kg
1
仪器工作所需电源为直流电源。仪器所能承受的最大电源参数如下:
最大电压
150V
最大功率
10W
韦克斯科技(北京)有限公司
WIX-miniDNA 迷你水平电泳仪 使用说明书
韦克斯科技(北京)有限公司
北京市昌平区昌流路 738 号东联同创科技园 10 号楼
第一章 产品介绍 1.1 简介 1.2 结构组成 1.3 主要技术参数
电泳超滤机的使用操作方法
电泳超滤机的使用操作方法
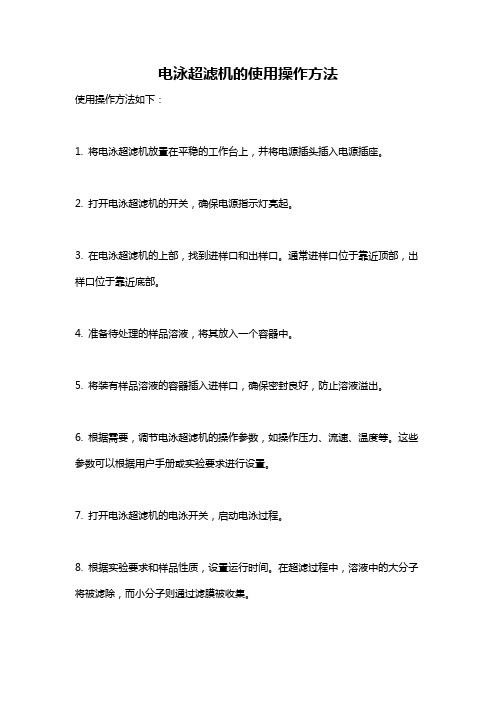
使用操作方法如下:
1. 将电泳超滤机放置在平稳的工作台上,并将电源插头插入电源插座。
2. 打开电泳超滤机的开关,确保电源指示灯亮起。
3. 在电泳超滤机的上部,找到进样口和出样口。
通常进样口位于靠近顶部,出样口位于靠近底部。
4. 准备待处理的样品溶液,将其放入一个容器中。
5. 将装有样品溶液的容器插入进样口,确保密封良好,防止溶液溢出。
6. 根据需要,调节电泳超滤机的操作参数,如操作压力、流速、温度等。
这些参数可以根据用户手册或实验要求进行设置。
7. 打开电泳超滤机的电泳开关,启动电泳过程。
8. 根据实验要求和样品性质,设置运行时间。
在超滤过程中,溶液中的大分子将被滤除,而小分子则通过滤膜被收集。
9. 完成电泳过程后,关闭电泳超滤机的电泳开关。
10. 从出样口取出收集的小分子溶液。
11. 关闭电泳超滤机的电源开关,将电源插头拔出电源插座。
12. 清理电泳超滤机,将滤膜和其他部件进行清洗,并进行必要的维护保养。
注意事项:
- 在操作过程中,需遵循电泳超滤机的使用说明和安全操作规范。
- 根据实验要求,选择合适的滤膜材料和孔径大小。
- 在操作过程中,注意保持实验环境的清洁和卫生。
- 注意电泳超滤机的维护保养,及时清洗和更换滤膜等部件,以保证其正常运行。
电泳操作指导书
一、除油:工件在除油槽中尽量浸泡半小时,并及时清除除油槽表面漂浮物,以确保工件出槽时被二次污染,及时添加除油剂,确保除油槽浓度正常,工件经清洗后工件表面水膜均匀、不挂水珠为除油干净。
二、磷化:电泳磷化膜厚度只需2-3微米,因此应严格控制磷化时间,正常磷化时间为6-10分钟,时间短则工件生锈,时间长则工件磷化膜太厚,影响工件电泳外观,磷化槽要定期除渣,严格控制磷化槽的总酸及游离酸度,以确保磷化质量。
三、电泳前纯水洗:由于工件磷化后经运输及上挂工件经过了二次污染,因此电泳前该道纯水洗尤为重要,定期检查喷嘴是否被杂物堵塞(2-3天)并进行及时的清理,电泳过程中必须保持此道纯水槽不断溢流(即把纯水阀及排水阀均开启),以保障尽可能少的把工件上遗留的杂质带入电泳槽中。
2-3天把该道纯水进行一次彻底更换,四、电泳:电泳槽温度正常控制在25-35度之间,否则电泳工件极易出现异常,温度低则漆膜上不去,温度高漆膜容易堆积。
施工电压视工件的大小及多少进行调整,以确保漆膜的厚度。
曼飞轮壳电泳电压控制在60v左右,电泳漆与蒸馏水混合后其浓度为10-15%,PH 值8-9,控制漆槽涂料固体份在正常范围内(比重计在25-30),如长时间不生产或者产量较低时应及时补加助溶剂,以确保漆膜流平,生产时必须同时开启阳极循环系统,发现有膜管破损及时关闭该膜管的循环,生产一周至十天排放一半左右阳极液,并补加纯水即可。
电泳槽原则上循环24小时不可停止,如槽液固体含量、溶剂含量及PH值正常可夜间停循环。
主副循环尽量交替使用,每月及时更换过滤袋。
五、电泳后水洗:将产品上面的一层附漆冲洗干净,以不再有异物附着为宜,否则烘干后会产生不良现象,如有异常问题应及时处理,千万不要放入烘箱内烘烤。
定期检查喷嘴堵塞情况(2-3天)并进行及时的清理,以确保工件表面浮漆清洗干净,后纯水洗槽每天生产后及时排放,第二天生产前注入纯水。
六、烘干:在烘干过程中视产品的厚薄及产品对光泽要求而定,铸铁薄壁件控制在180-200℃,保温25-30分钟;厚大件控制在控制在210-230℃,保温35-40分钟。
电泳涂装操作规范
电泳涂装操作规范阴极电泳涂装的主要装置:主要装置有:电沉积槽、循环装置、超滤装置、过滤装置、热交换装置、阳极装置、水洗装置、电沉积液配制装置、烘烤装置、直流电源供给装置等。
1、电沉积槽电沉积槽可用环氧玻璃钢衬里的铁槽,或PVC塑料槽。
有主副二槽,一般副槽为主槽的十分之一容量。
设计时应考虑被涂工件在槽中距离底部为10~20cm,距阳极不小于15cm,工件浸入工作液面下面5~10 cm,若连续式涂装必须认真考虑两个工件间的距离,减少工件间的互相碰撞与影响。
电泳槽底部设计尽可能避免产生死角。
2、循环装置为了电沉积涂料工作液的稳定,应装有循环装置,超滤装置、过滤装置、阳极液循环和热交换循环。
电泳槽循环必须保证工作液在距槽底部300mm处的流速为0.3~0.4米/秒,而液面流速一般为0.2米/秒左右,循环量为每小时4~6次循环。
循环泵可选用磁力泵、离心泵或液下轴流泵等,主轴及叶轮等部位必须采用耐腐蚀材质,转速为1500转/分为宜。
3、阳极装置阳极板为耐酸不锈钢,将其放入装有离子交换膜的阳极箱中,极板应与槽体绝缘,通常采用齐平式的阳极箱装置。
阴极面积与阳极面积比为2:1~4:1,极板位置应根据涂装效果来调整。
阳极液是通过贮液槽用泵循环,以确保阳极液的导电程度,阳极液的电导率为500~1000us/cm,电导率过高时可通过更换去离子水加以调整。
4、超滤装置超滤有卷式和管式两种。
超滤装置是电沉积涂装的主要辅助装置,选用合适的超滤装置,它将提供足够的超滤液,供涂装后工件的后冲洗,同时也可以选择性地清除槽液中某些低分子物质或电解质等,达到槽液净化的目的。
当超滤液电导过高,可排放部分超滤液,更换去离子水,添加部分助溶剂和有机酸加以调整。
5、过滤装置为及时清除电沉积涂料工作液的杂质粒子,系统应设有过滤装置,一般有过滤筒和过滤袋二种。
6、烘烤装置烘烤装置须考虑对被涂材质的耐热及厚薄加以综合考虑。
为确保涂膜质量,可采用对流方式以提高热传导的效果,达到涂层颜色均匀的目的。
电泳设备操作规程
电泳设备操作规程
《电泳设备操作规程》
一、设备检查
1. 检查电泳设备的外观,确保设备表面干净整洁。
2. 检查电泳槽、电源、电极和其他配件的连接情况,确保无松动和损坏。
3. 检查电泳缓冲液和试样准备情况,确保实验所需材料齐全。
二、设备准备
1. 打开电泳设备主电源,确保设备正常通电。
2. 将电泳槽内注入足够的电泳缓冲液。
3. 将试样按照实验要求加载到电泳槽中。
三、设备操作
1. 设置电泳条件,如电场强度、电泳时间等。
2. 启动电泳设备,确保设备正常运行。
3. 在电泳过程中定时查看实验进展情况,及时调整电泳条件。
四、设备结束
1. 当实验结束后,关闭电泳设备主电源。
2. 将试样从电泳槽中取出,并进行后续实验处理。
3. 清洁电泳设备及配件,确保设备清洁干净。
五、设备维护
1. 定期对电泳设备进行检查和维护,确保设备正常运行。
2. 注意保养电泳设备,如清洁、除锈、防尘等工作。
3. 定期更换电泳缓冲液和其他耗材,避免实验受到影响。
六、注意事项
1. 操作人员需穿戴实验室个人防护用具,确保安全操作。
2. 操作人员需严格按照实验操作规程进行操作,避免出现错误。
3. 经验不足或操作不熟练的人员需要在有经验或资质人员的指导下进行操作。
以上为电泳设备的操作规程,操作人员需严格遵守,确保实验的顺利进行和安全。
蛋白电泳和转印系统说明
乌鲁木齐海关:我单位采购进口设备说明如下:1、设备:小型Trans-Blot 转印槽一台2、产地:美国BIO-RAD公司3、结构:作为Mini-PROTEAN 4电泳系统的一个组件,小型Trans-Blot转印槽能容纳2个凝胶支架转印夹,用于在Mini-PROTEAN4 电泳槽内电转印两种小凝胶。
4、特点:1小时内转印2块7.5X10cm凝胶;也可以进行低强度的过夜转印。
电极丝相距4cm,以产生强电场保证有效的蛋白转印。
颜色标记的转印夹和电极,确保转印过程中凝胶正确的定向。
内置BIO-ICE 冷却装置,快速吸收转移过程中产生的热量。
既可作为完整的独立设备,又可作为一个模块与Mini-PROTEAN Tetra转印槽的缓冲液槽和盖兼容。
5、用途:用途:此设备用于实验室,从事动植物遗传育种、种质资源研究及基因工程方面的教学与科研工作。
主要应用于核酸转印、Western 杂交。
乌鲁木齐海关:我校采购进口设备说明如下:1、设备: Trans-Blot SD电泳系统(含电泳槽、电泳电源)壹台2、产地:美国3、结构:该电泳系统由电泳槽及电泳电源两部分组成,电泳槽由专用电泳介质,经化学处理的玻璃板,缓冲液槽、铜质电极组成,电泳电源由供电变压器、开关电源、及供电控制部分组成。
无分析装置。
4、工作原理:电泳系统是利用电泳现象对基因进行分离。
电泳槽是样品分离的场所,利用蛋白分子在琼脂糖凝胶电泳中迁移率与其分子量大小的对数成反比的原理,利用该仪器,灌制凝胶并通过电泳电源提供恒定电压条件,达到分离蛋白的目的。
电泳电源是建立电泳电场的装置,根据做电泳试验时的要求方便地控制电泳过程中所需电压、电流或功率。
工作原理是把交流电网的电能转换为适合电泳过程中使用的低压直流电.5、半干转印槽利用电转移法在电场的作用下将DNA目标分子由凝胶转到支持膜上。
半干转印是将胶和纤维素膜夹在电泳缓冲液浸湿的滤纸间,滤纸与电极直接接触。
- 1、下载文档前请自行甄别文档内容的完整性,平台不提供额外的编辑、内容补充、找答案等附加服务。
- 2、"仅部分预览"的文档,不可在线预览部分如存在完整性等问题,可反馈申请退款(可完整预览的文档不适用该条件!)。
- 3、如文档侵犯您的权益,请联系客服反馈,我们会尽快为您处理(人工客服工作时间:9:00-18:30)。
Mini Protean电泳槽安装使用指南
1.将短玻璃板放在带有边条的长玻璃板上,做成玻璃板夹心
2.将玻璃夹心放入灌胶架,短玻璃板冲前。
两块玻璃板底部齐平
3.锁紧夹子(绿色),夹紧玻璃板夹心,做成灌胶模块
4.把灰色的橡胶垫放在灌胶架底部,将灌胶模块放在灰色的胶垫上,灌胶架上部有一透明夹子,用此夹子夹住长玻璃板
5.灌入新鲜配置好的凝胶溶液(无须任何封边),如用梳子,水平放好梳子
常用聚丙烯酰胺凝胶电泳凝胶的配方见下
6.凝胶凝固后,取出梳子,加入准备好的样品。
把玻璃板夹心(凝胶)从灌胶架上取下。
7.把玻璃板夹心放入电泳架,短玻璃板面冲里,做成电泳模块。
8.把电泳模块完全插入电泳架。
9.合上电泳架上的密封夹。
注:如只跑一块胶,在另一侧放入随仪器配的挡板;在装配的过程中,会觉得很紧,为正常现象。
10.将整个装配好的电泳架放入电泳槽。
11.加入电泳液,内槽没过短玻璃板,外槽略低于内槽电泳液。
12.盖上电泳槽的盖子,将电泳电极和电泳仪相连接,正极对正极,负极对负极(红对红,黑对黑)。
13.在电泳仪上设定电泳电压或电流,开始电泳。
一般SDS-PAGE可用200V恒压,大约35min能完成电泳。
也可用低电压如120V等,时间较长但效果更好。
具体条件根据样品摸索。
14.电泳完成后,关闭电泳仪,拔出电极线
15.打开盖子,取出电泳模块,打开密封夹,取出玻璃板(凝胶)
16.轻轻用撬胶板(绿色)撬开玻璃板,让凝胶滑入缓冲液或蒸馏水中
17.清洗电泳槽,玻璃板。