长条8头激光灯功能说明书
Devon Chandelier 8 Light 装置说明书

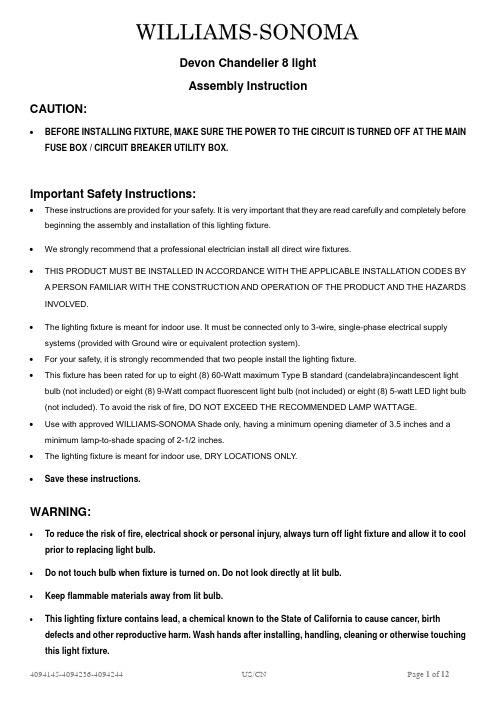
Devon Chandelier 8 lightAssembly InstructionCAUTION:•BEFORE INSTALLING FIXTURE, MAKE SURE THE POWER TO THE CIRCUIT IS TURNED OFF AT THE MAIN FUSE BOX / CIRCUIT BREAKER UTILITY BOX.Important Safety Instructions:•These instructions are provided for your safety. It is very important that they are read carefully and completely before beginning the assembly and installation of this lighting fixture.•We strongly recommend that a professional electrician install all direct wire fixtures.•THIS PRODUCT MUST BE INSTALLED IN ACCORDANCE WITH THE APPLICABLE INSTALLATION CODES BYA PERSON FAMILIAR WITH THE CONSTRUCTION AND OPERATION OF THE PRODUCT AND THE HAZARDSINVOLVED.•The lighting fixture is meant for indoor use. It must be connected only to 3-wire, single-phase electrical supply systems (provided with Ground wire or equivalent protection system).•For your safety, it is strongly recommended that two people install the lighting fixture.•This fixture has been rated for up to eight (8) 60-Watt maximum Type B standard (candelabra)incandescent light bulb (not included) or eight (8) 9-Watt compact fluorescent light bulb (not included) or eight (8) 5-watt LED light bulb (not included). To avoid the risk of fire, DO NOT EXCEED THE RECOMMENDED LAMP WATTAGE.•Use with approved WILLIAMS-SONOMA Shade only, having a minimum opening diameter of 3.5 inches and a minimum lamp-to-shade spacing of 2-1/2 inches.•The lighting fixture is meant for indoor use, DRY LOCATIONS ONLY.•Save these instructions.WARNING:•To reduce the risk of fire, electrical shock or personal injury, always turn off light fixture and allow it to cool prior to replacing light bulb.•Do not touch bulb when fixture is turned on. Do not look directly at lit bulb.•Keep flammable materials away from lit bulb.•This lighting fixture contains lead, a chemical known to the State of California to cause cancer, birth defects and other reproductive harm. Wash hands after installing, handling, cleaning or otherwise touching this light fixture.Pre-assembly:•Remove all parts and hardware from box along with any plastic protective packaging.•Do not discard any contents until after assembly is complete to avoid accidentally discarding small parts or hardware.•For your safety and convenience, assembly by two people is recommended.TOOLS REQUIRED (not included):Parts Included:(B) Hex Nut (1)(C) Lock Washer (1)(D) Mounting Plate (1)(F) Threaded Tube (1)(H) Canopy (1)(I) Hanging Loop (1)(J) Canopy Nut (1)(K) Closeable Links with Screw Caps (2)(L) Chain (1)(M) Fixture Loop (1)(N) Terminal Box (1)(O) Pole (4)(P) Shade (8)(Q) Socket (8)(R) Fixture Body (1)Hardware Enclosed:(A) Plastic Wire Nut Connectors (3)(E) Green Ground Screw (1)(G) Mounting Screws (2)To adjust the suspension length of the fixture:1. Note: The adjustment or shortening of the lighting fixture’s suspension length is only needed if the factory set chainlength is not appropriate for your installation. We recommend that you adjust the chain to the proper desired length before cutting the electrical cord. Determine the lighting fixture suspension length from the ceiling for the product installation, allowing the extra cord length for the outlet junction box wire connections as noted below.2. (See A1 & A2) The chain length may be shortened from either end. Use two pairs of pliers to gently pry the link apartalong a split-line formed in each link so that a space is created large enough for the link to be removed from the remaining chain. Use a cloth or folded piece of paper between the pliers and the link to protect the finish of the link during bending. Once the Chain (L) is at the desired length, reattach the Chain (L) as shown in the diagram below.3. (See A4) Weave the fixtures 2 wire power cord and bare ground wire through every other loop to the top of Chain (L).4. (See A5) If needed, cut off the extra power cord length on the 2 wire cord and bare ground wire so that they all are atleast 6 inches (152.4 mm) long within the outlet junction box (J-box).Assembly & Installation Instructions:SHUT OFF THE MAIN ELECTRICAL SUPPLY FROM THE MAIN FUSE BOX/CIRCUIT BREAKER.Carefully unpack all fixture parts and hardware and lay them on a clear workspace.1. Insert the bottom loop of Chain (L) and FixtureLoop (M) into the Closeable Link (K),tighten theCloseable Link Screw Cap.2. Slide the Canopy Nut (J) over the upper endof Chain (L).3. Slide the Canopy (H) over the upper end ofChain (L).4. Insert the top loop of Chain (L) and HangingLoop (I) into the Closeable Link (K),tighten theCloseable Link Screw Cap.1. Attach the Threaded Tube (F) into the threadedbore of the Hanging Loop (I) and rotate theThreaded Tube (F) clockwise until it is tightlyengaged within the Hanging Loop (I).2. Attach the Hex Nut (B), Mounting Plate (D) ontothe top end of the Threaded Tube (F) so that a portion of the Threaded Tube (F) extendsbeyond the Mounting Plate (D).Position the Lock Washer (C) first and then theHex Nut (B) onto the top end of Threaded Tube(F).Tighten the Hex Nut (B) until tight using pliersso that the Hanging Loop (I) is no firmly securedto the middle of the Mounting Plate (D).Weave the fixture 2 wire power cord and bare ground wire through every other loop to the top of Chain (L),and then through the Hanging Loop (I) and Threaded Tube (F).With the help of another person to hold the weightof lighting fixture,attach the Mounting Plate (D) onto the junction box using two Mounting Screws (C) with a screwdriver.To Make the Wire Connections” Below.Slide the Canopy (H) upward along the chain withthe upper rim of the canopy pressed gentlyagainst the ceiling surface.Position the Canopy Nut (J) against the Hanging Loop (I) and rotatethe nut clockwise to engage it with the threaded portion of the Hanging Loop (I) until secure.Donot over tighten this nut.1. Insert the specified light bulbs into the SocketDO NOT EXCEED THESPECIFIED2. Clip the Shade (P) onto the bulb and make sure It is horizontal.4094145-4094236-4094244 US/CN Page 10 ofTo Make the Wire Connections:1. Gently pull existing wire down from the ceiling junction box and allow wires to hang. The HOT or LIVE wire is usuallyblack. The NEUTRAL wire is usually white. Check to see if there is a ground wire that is usually green or green with a yellow stripe or exposed copper metal wire. If needed, use a pair of wire strippers to remove about 1/2 inch of insulation from each wire.2. Carefully inspect the fixtures wires. The NEUTRAL FIXTURE WIRE has FINE LONGITUDINAL RIDGES runningalong its length. The HOT FIXTURE WIRE is SMOOTH and the BARE COPPER WIRE is the GROUND WIRE. If you have any doubt and cannot identify the power-supply wires with confidence, then we recommend that you ask an electrician and that you not continue with the installation.3. With the help of another person to hold the weight of the fixture, attach the fixture wires to the junction box wires asshown in the illustrations.If the junction box DOES NOT have a GROUND WIRE, wrap the fixture's bare ground wire around the Green Ground Screw (E) and insert the screw into the Mounting Plate (D), marked as “GND”, andtighten screw to secure the wire.Connect the GROUND FIXTURE WIRE to the GROUND J-BOX WIRE using the Plastic Wire Nut Connector (A) and wrap the connection with electrical tape. Be sure that no wire strands are exposed.Connect the NEUTRAL FIXTURE WIRE to the NEUTRAL J-BOX WIRE first and then connect the HOT FIXTURE WIRE to the HOT J-BOX WIRE using the Plastic Wire Nut Connectors (A). Wrap these connections with electrical tape. Be sure that no wire strands are exposed.NOTE:IT IS IMPERATIVE THAT THE JUNCTION BOX IN YOUR HOME BE PROPERLY GROUNDED!DO NOT REVERSE THE HOT AND NEUTRAL CONNECTIONS OR SAFETY WILL BE COMPROMISED.4. Check the wiring connections and if all looks good, gently tuck the wire connections neatly into the ceiling junctionbox.Care instructions:• Wipe clean with a soft, dry cloth or static duster.• Always avoid the use of harsh chemicals or abrasive cleaners as they may cause damage to the fixture’s finish.Thank you for your purchaseStores | catalog | USA 1.877.812.6235。
八眼射灯使用说明

八眼射灯使用说明八眼射灯是一种常见的舞台照明设备,它具有多个灯泡,可以产生强烈的光束,用于照亮舞台上的演员或其他物体。
本文将为您详细介绍八眼射灯的使用方法和注意事项,帮助您更好地了解和运用这一设备。
一、八眼射灯的基本结构和功能八眼射灯由八个独立的灯泡和控制系统组成。
每个灯泡都可以独立调节亮度和灯光颜色,以满足不同的照明需求。
八眼射灯的灯光可以通过控制系统进行远程控制,调整灯光的亮度、颜色和灯光效果,以实现舞台上的各种照明效果。
二、八眼射灯的使用方法1. 安装八眼射灯:首先,将八眼射灯固定在舞台或灯架上,确保灯泡的位置稳固且灯光能够照射到需要照明的区域。
2. 连接电源:将八眼射灯的电源线插入稳定的电源插座,并确保电源线连接正确。
3. 设置灯光效果:打开八眼射灯的控制系统,通过控制系统的按钮或面板,调整灯光的亮度、颜色和灯光效果。
根据舞台上的演出需要,选择合适的灯光效果,如静态照明、闪烁、渐变等。
4. 调整灯光位置:根据舞台上的演出需要,调整八眼射灯的灯光位置,确保灯光能够照射到需要照明的区域,同时避免灯光直接照射到演员或观众的眼睛,以免造成不适。
5. 控制灯光切换:根据演出的需要,通过控制系统切换不同的灯光模式和效果,如快速切换、渐变切换等,以营造出更加丰富多样的舞台效果。
三、八眼射灯的注意事项1. 使用前检查:在使用八眼射灯之前,务必检查灯泡是否完好无损,电源线是否正常,以确保设备的正常运行。
2. 避免过热:长时间使用八眼射灯可能会导致灯泡过热,因此在使用过程中应注意灯泡的散热,避免过热引起火灾等安全事故。
3. 避免触摸灯泡:八眼射灯的灯泡在使用过程中会发热,因此应避免直接触摸灯泡,以免烫伤。
4. 定期维护:八眼射灯在长时间使用后,灯泡可能会损坏或灯光效果不佳,因此建议定期检查和更换灯泡,以保持设备的正常运行。
5. 注意安全:在使用八眼射灯时,应注意安全操作,避免灯光直接照射到观众的眼睛,以免造成不适或眼睛受伤。
八眼激光灯使用说明

八眼激光灯使用说明八眼激光灯作为一种高精度、高效率的光学工具,在科研、工业、医疗等领域发挥着日益重要的作用。
本文将详细阐述八眼激光灯的使用方法、注意事项以及维护保养等内容,旨在帮助用户更好地掌握其操作技巧,确保安全有效地使用这一设备。
一、设备概述八眼激光灯是一种先进的光学设备,它通过八个独立的激光发射器产生高强度、高方向性的光束。
这些光束可以经过精确的调节和校准,以实现各种复杂的光学操作。
八眼激光灯通常采用先进的固体激光技术,具有长寿命、低功耗、稳定性高等优点。
二、使用步骤1. 开机准备在使用八眼激光灯之前,请确保工作环境整洁、干燥,并检查设备电源线是否完好。
接通电源后,按下主机上的开机按钮,等待设备启动。
2. 校准激光在设备启动后,需要对激光进行校准。
通过调节每个激光发射器的位置和角度,确保八个光束能够准确地汇聚在预定的工作区域。
校准过程中,请使用专业的校准工具,并遵循设备制造商提供的校准指南。
3. 设置参数根据具体的应用需求,设置合适的激光功率、频率和脉冲宽度等参数。
这些参数的设置将直接影响到激光灯的工作效果和安全性。
请务必在了解各参数含义和范围的基础上进行操作。
4. 开始工作当校准和参数设置完成后,即可开始使用八眼激光灯进行工作。
在工作过程中,请密切关注设备运行状态,如发现异常情况,请立即停机检查。
5. 关机与断电工作结束后,按下主机上的关机按钮,等待设备完全关闭后再断开电源。
请勿在设备运行过程中直接断电,以免损坏设备或造成安全隐患。
三、注意事项1. 安全防护:八眼激光灯产生的激光具有高能量和高方向性,可能对眼睛和皮肤造成伤害。
在使用过程中,请务必佩戴专业的激光防护眼镜和防护服,并确保工作区域内无其他人员。
2. 遵守操作规范:在使用八眼激光灯时,请严格遵守设备制造商提供的操作规范和安全指南。
未经专业培训的人员不得擅自操作设备。
3. 环境要求:八眼激光灯对工作环境有一定的要求,请确保工作区域整洁、干燥、无尘埃。
列组合型数码调光器说明书N E 1 0

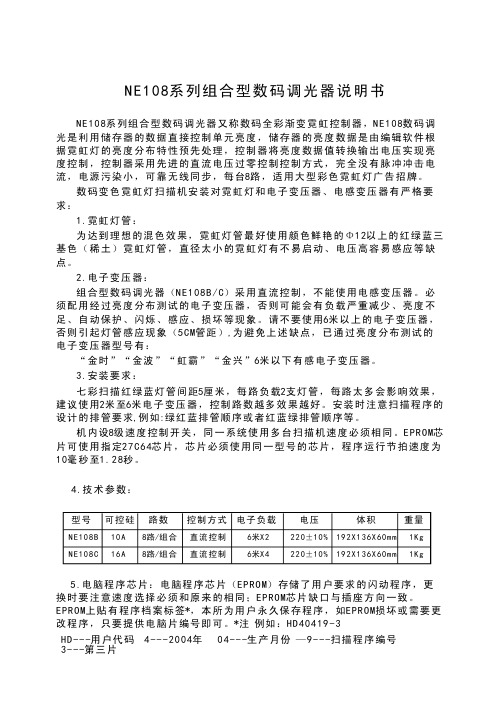
NE108系列组合型数码调光器说明书NE108系列组合型数码调光器又称数码全彩渐变霓虹控制器,NE108数码调光是利用储存器的数据直接控制单元亮度,储存器的亮度数据是由编辑软件根据霓虹灯的亮度分布特性预先处理,控制器将亮度数据值转换输出电压实现亮度控制,控制器采用先进的直流电压过零控制控制方式,完全没有脉冲冲击电流,电源污染小,可靠无线同步,每台8路,适用大型彩色霓虹灯广告招牌。
数码变色霓虹灯扫描机安装对霓虹灯和电子变压器、电感变压器有严格要求:1.霓虹灯管:为达到理想的混色效果,霓虹灯管最好使用颜色鲜艳的Φ12以上的红绿蓝三基色(稀土)霓虹灯管,直径太小的霓虹灯有不易启动、电压高容易感应等缺点。
2.电子变压器:组合型数码调光器(NE108B/C)采用直流控制,不能使用电感变压器。
必须配用经过亮度分布测试的电子变压器,否则可能会有负载严重减少、亮度不足、自动保护、闪烁、感应、损坏等现象。
请不要使用6米以上的电子变压器,否则引起灯管感应现象(5CM管距),为避免上述缺点,已通过亮度分布测试的电子变压器型号有:“金时”“金波”“虹霸”“金兴”6米以下有感电子变压器。
3.安装要求:七彩扫描红绿蓝灯管间距5厘米,每路负载2支灯管,每路太多会影响效果,建议使用2米至6米电子变压器,控制路数越多效果越好。
安装时注意扫描程序的设计的排管要求,例如:绿红蓝排管顺序或者红蓝绿排管顺序等。
机内设8级速度控制开关,同一系统使用多台扫描机速度必须相同。
EPROM芯片可使用指定27C64芯片,芯片必须使用同一型号的芯片,程序运行节拍速度为10毫秒至1.28秒。
4.技术参数:型号可控硅路数控制方式电子负载电压体积重量NE108B10A8路/组合直流控制6米X2220±10%19213660mm1KgX X NE108C16A8路/组合直流控制6米X4220±10%192X136X60mm1Kg5.电脑程序芯片:电脑程序芯片(EPROM)存储了用户要求的闪动程序,更换时要注意速度选择必须和原来的相同;EPROM芯片缺口与插座方向一致。
Philips EasySmart LED T8绿色智能灯泡说明书

TechnicalApplication GuidePhilips is now introducing a new line of connected LED lighting products with EasySmart technology. Philips InstantFit LED T8 with EasySmart technology is compatible with verified1 electronic ballasts. It is the easiest way to replace fluorescent lamps with connected LED lamps without rewiring the fixture. It is true plug and play. The lamp offers standard ZigBee based connectivity that easily interoperates with various control devices. Compared with a non-connected LED solution, EasySmart technology realizes more energy savings by enabling advanced control options.Product FeaturesBallast Compatibility•Innovative driver design that enables a “plug-and-play” LED solution•Compatible with verified1 electronic ballast•Quick and easy installationConnectivity•ZigBee based wireless interface•Reliable and secure wireless communication, nominal range 40 feet•Up to 50 lamps in one network•Easy commissioning and (re-)configuration from the floorControl Functionality•Automatic on/off and dimming based on occupancy detection and daylight variation•Personal dimming and scene setting with Zigbee wireless switch•High-end trimming to help save energy and extend lamp lifeEnergy Savings•Energy savings of 50% or more* when used with advanced control such as dimming, occupancy sensing and daylight harvesting.•DLC listed.User comfort•Uniform light output with advanced optical design.•Personal light setting to enhance user comfort and productivity•Typical CRI 82Reliability•Reliable operation between -20°C and +45°C ambient temperature.•Tested to B50 L70 requirement. Lamps are rated for 50,000 hours.•200,000 switching cycles.Safety•Over voltage and over temperature protection.•Complies with relevant UL and CSA safety requirements.•Shatterproof polycarbonate (PC) material.Environment•No Mercury.•Low Carbon Footprint.System OverviewCommunication between lamps, switch and sensors is ZigBee based.To facilitate the installation, Philips provides an IR tool as accessory. Your control device manufacturer will provide a tool (ie: mobile app) to commission the sensor and switch.* Philips InstantFit LED T8 with EasySmart technology uses ZigBee protocol to communicate with each other and 3rd party control devices.* IR programming tool communicates with individual lamp via infrared.* 50% energy savings compared to an F32T8 when dimmed at least 30% for 10% of the time product is on.ApplicationsSpectral Power DistributionPhotometric Diagrams1 x TLED 14W 3000K 160D 9290012811 1 x 2000 lm1 x TLED 14W 3500K 160D 9290012812 1 x 2000 lm1 x TLED 14W 4000K 160D 9290012813 1 x 2100 lm1 x TLED 14W 5000K 160D 9290012814 1 x 2100 lmLifetime and Lumen MaintenancePhilips InstantFit LED T8 with EasySmart technology has a lifetime of 50,000 hours. This is defined as the number of hours when 50% of a large group of identical lamps drops below 70% of its initial lumens.Lifetime and DimmingDimming can help extend lifetime (ie: dimming 30% can extend lifetime by 9,000 hours)Lifetime and Failure RateLifetime vs. Failure rate @T a 25°C Lifetime vs. Failure Rate vs. T caseTemperatureOperating Temperature T operating min -20°C max +45°C Storage Temperature T storage min -40°C max +65°C Maximum case temperature of tube atT case+37°CT amb=25°CDimensionsDimensions (mm)Product A1 A2 A3 D1D2 14T8/481198.11205.21212.325.627.8Technical Specs and Order information*test based on reference instant-start ballastPlease visit /EasySmart for latest information on ballast compatibility.Product DescriptionBare Lamp Watts* Average System Watts* Standby Power* Initial Lumens Lifetime (hrs) Cap Base Length (in) Bulb Type CCTRF RangeProduct number14T8/48-3000 IF 10/1 EasySmart 14W 16.5W <0.5W 2000lm 50,000 G13 48 T8 3000K 40ft 929001281104 14T8/48-3500 IF 10/1 EasySmart 14W 16.5W <0.5W 2000lm 50,000 G13 48 T8 3500K 40ft 929001281204 14T8/48-4000 IF 10/1 EasySmart 14W 16.5W <0.5W 2100lm 50,000 G13 48 T8 4000K 40ft 929001281304 14T8/48-5000 IF 10/1 EasySmart14W16.5W<0.5W2100lm50,000G1348T85000K40ft929001281404AccessoriesOrdering Code Product Number Product Description473504 929001390604 EasySmart IR Programming Tool 10/1Control CompatibilityPhilips InstantFit LED T8 with EasySmart technology now works with:Product DescriptionBrand Model ID/OrderCodeLeviton DLDNK-01W Intellect Decora Lumina RF 1-Button multi-function BLE keypad with room controller and LED feedbackfunctionality, 120-277VAC, 50/60Hz, WhiteLeviton DLDNK-02W Intellect Decora Lumina RF 2-Button multi-function BLE keypad with room controller and LED feedbackfunctionality, 120-277VAC, 50/60Hz, WhiteLeviton DLDNK-04W Intellect Decora Lumina RF 4-Button multi-function BLE keypad with room controller and LED feedbackfunctionality, 120-277VAC, 50/60Hz, WhiteLeviton DLDNK-08W Intellect Decora Lumina RF 8-Button multi-function BLE keypad with room controller and LED feedbackfunctionality, 120-277VAC, 50/60Hz, WhiteLeviton ZSC04-IxW Lumina RF PIR Occupancy Sensor, 450 sq ftLeviton ZSC15-IxW Lumina RF PIR Occupancy Sensor, 1,500 sq ftLeviton LURPC-00W Lumina RF Wireless PhotocellLeviton FREE Neuron AppProduct must be used with compatible control devices. Please visit /EasySmart for latest information on control compatibility.Approbation & CertificatesPhilips InstantFit LED T8 with EasySmart technology strictly follows applicable legislation and standard. The product complies with UL, CSA, NSF and RoHS.Product is DLC qualified:Philips is a member of ZigBee Alliance. Product is ZigBee certified.Application Notes•Product is dimmable by wireless control•Suitable for damp locations•Reliable operation between -20°C to + 45°C ambient temperature•Suitable to replace T8 fluorescent lamps that operate on instant-start ballasts. Please refer to /EasySmart for latest ballast compatibility list.•Require use of shunted lamp holders•Not intended for use in emergency luminaires•Not compatible with luminaires that use a remote starter•Modifications to the product void the limited warranty. For warranty information, please see /warranties•You are required to read and understand the Quick Installation Guide and all warnings, cautions and other materials related to installation published at: /EasySmart before commencing installation work.Footnotes1 Verified as compatible by Philips. Visit /EasySmart for latest ballast compatibility guide.。
8路彩灯说明书

目录1绪论 (1)1.1课题背景 (1)1.2 彩灯控制器的发展 (2)1.3课题研究内容 (2)2研究方案与预期成果 (2)2.1研究方案 (2)2.2预期成果 (3)3系统硬件设计 (3)3.1设计任务 (3)3.2题目设计 (3)3.3设计题目原理 (3)3.4原理框图 (4)3.5各部分电路图 (4)3.6芯片功能介绍 (6)4软件系统设计 (12)4.1软件平台 (12)4.2软件功能 (12)4.3软件分析手段 (13)4.4设计仿真结果 (13)5系统硬件焊接与调试 (14)5.1焊接技术 (14)5.2元件清单 (17)5.3实物图 (17)总结 (18)致谢 (19)参考文献 (20)8路彩灯控制器的设计摘要:在现代生活中,彩灯作为一种装饰,既可以增强人们的感观,起到广告宣传的作用,又可以增添节日气氛,不仅可以获得良好的观赏效果,而且可以省电。
本设计主要是实现八路彩灯的循环控制,利用555定时器设计多谐振荡器,输出一定频率的脉冲,利用138译码器译码得到不同的输出信号,决定彩灯的循环变化,利用计数器74LS90进行信号的脉冲激励和一块74138的控制以实现彩灯的循环控制。
利用译码器和计数器等设计实现彩灯控制电路,改变电路的不同工作状态,控制彩灯变幻出循环的闪烁效果。
设计电路实用,也可以通过计算机仿真直观地看到循环彩灯的控制效果,综合运用所学数字电路知识,学会设计和调试方法,从而产生浓厚兴趣。
如果稍微改动控制电路,可以更加完善,完成对彩灯多种变换亮法设计。
关键词设计原理芯片功能软件介绍焊接技术1绪论1.1课题背景彩灯控制电路应用越来越丰富我们的生活,成为我们生活不可缺少的一部分。
新中国成立后,彩灯得到了更大的发展,特别是随着我国科学技术的发展,彩灯更是花样翻新,奇招频出,传统的灯工艺和现代科学技术紧密结合,将电子、建筑、机械、遥控、声学、光导纤维等新技术、彩灯的设计制作,把形、色、光、声、动相结合,思想性、知识性、趣味性、艺术性相统一。
八眼射灯使用说明

八眼射灯使用说明一、概述八眼射灯是一种多功能照明设备,具有强大的照明效果和灯光效果,广泛应用于舞台表演、演唱会、夜总会等场合。
本文将详细介绍八眼射灯的使用方法和注意事项,帮助用户正确、安全地使用该设备。
二、八眼射灯组成部分八眼射灯主要由以下几个组成部分组成:1.灯罩:外部采用金属材质,可有效散热。
2.光源:采用LED灯珠,具有高亮度和节能环保的特点。
3.控制面板:设有多种控制按钮和旋钮,用于调节灯光亮度、颜色、模式等参数。
4.电源插口:用于连接电源线,接通电源后供电使用。
三、使用方法使用八眼射灯前,请务必先阅读使用说明,并按照以下步骤进行操作:1. 连接电源将八眼射灯的电源插头插入相应的电源插座,并确认灯光指示灯是否亮起,表示设备已正常供电。
2. 打开开关按下开关按钮,启动八眼射灯,此时灯光开始工作。
3. 调节亮度通过旋钮或按钮,调节八眼射灯的亮度,适应不同场景的需求。
4. 选择模式根据需要,选择八眼射灯的工作模式。
八眼射灯通常具有多种模式,如常亮模式、闪烁模式、渐变模式等,通过控制面板上的相应按钮或旋钮进行选择。
5. 切换颜色八眼射灯可以呈现多种不同的颜色。
可通过控制面板上的颜色调节按钮或旋钮,实现颜色的切换和调节。
四、注意事项在使用八眼射灯时,请遵守以下几点注意事项,以确保使用安全和不损坏设备:1. 避免过度使用八眼射灯虽然具有强大的照明效果,但过度使用可能会导致灯珠过热,影响寿命。
因此,在使用过程中应注意避免连续工作时间过长。
2. 防止水和潮气八眼射灯属于室内照明设备,不适用于室外使用。
使用时应避免与水或潮气接触,以防电气短路或损坏设备。
3. 避免剧烈震动八眼射灯具有一定的灵敏度,需要放置在稳固的支架上,避免受到剧烈震动,以免影响正常使用和寿命。
4. 定期保养定期清理八眼射灯的灯罩和散热孔,保持良好的散热效果。
定期检查灯珠是否正常,如有故障及时更换。
五、常见问题及解决方法在使用八眼射灯过程中,可能会遇到一些常见问题,下面列举几个常见问题及相应的解决方法:1. 八眼射灯亮度不稳定可能是电源供应不稳定,可以检查电源线是否松动、插座是否正常,或更换电源供应。
LARISA-W-CLIP8 LED灯说明书

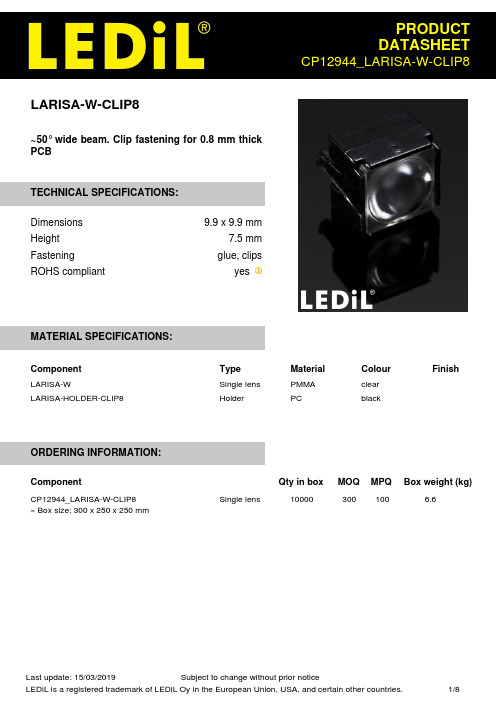
LARISA-W-CLIP8~50° wide beam. Clip fastening for 0.8 mm thickPCBTECHNICAL SPECIFICATIONS:Dimensions9.9 x 9.9 mmHeight7.5 mmFastening glue, clipsROHS compliant yesMATERIAL SPECIFICATIONS:Component Type Material Colour Finish LARISA-W Single lens PMMA clearLARISA-HOLDER-CLIP8Holder PC blackORDERING INFORMATION:Component Qty in box MOQ MPQ Box weight (kg)Single lens 10000 300 100 6.6CP12944_LARISA-W-CLIP8» Box size: 300 x 250 x 250 mmSee also our general installation guide: /installation_guidePHOTOMETRIC DATA (MEASURED):LEDXB-D FWHM / FWTM 45.0° / 78.0°Efficiency 84 %Peak intensity 1.3 cd/lm LEDs/each optic 1Light colourWhiteRequired components:LEDXD16FWHM / FWTM 56.0° / 86.0°Efficiency 80 %Peak intensity 0.9 cd/lm LEDs/each optic 1Light colourWhiteRequired components:LEDXQ-E HD FWHM / FWTM 46.0° / 80.0°Efficiency 84 %Peak intensity 1.2 cd/lm LEDs/each optic 1Light colourWhiteRequired components:LEDLUXEON A FWHM / FWTM 63.0° / 91.0°Efficiency 86 %Peak intensity 0.8 cd/lm LEDs/each optic 1Light colourWhiteRequired components:PHOTOMETRIC DATA (MEASURED):LEDLUXEON Rebel FWHM / FWTM 47.0° / 78.0°Efficiency 88 %Peak intensity 1.3 cd/lm LEDs/each optic 1Light colourWhiteRequired components:LEDLUXEON Rebel ES FWHM / FWTM 52.0° / 85.0°Efficiency 87 %Peak intensity 1.1 cd/lm LEDs/each optic 1Light colourWhiteRequired components:LEDLUXEON Z FWHM / FWTM 32.0° / 68.0°Efficiency 85 %Peak intensity 2.1 cd/lm LEDs/each optic 1Light colourWhiteRequired components:LEDLUXEON Z ES FWHM / FWTM 37.0° / 69.0°Efficiency 88 %Peak intensity 1.7 cd/lm LEDs/each optic 1Light colourWhiteRequired components:PHOTOMETRIC DATA (MEASURED):LEDNCSxx19A FWHM / FWTM 39.0° / 73.0°Efficiency 85 %Peak intensity 1.5 cd/lm LEDs/each optic 1Light colourWhiteRequired components:LEDNF2x757A FWHM / FWTM 37.0° / 72.0°Efficiency 84 %Peak intensity 1.7 cd/lm LEDs/each optic 1Light colourWhiteRequired components:LEDNF2x757G FWHM / FWTM 40.0° / 75.0°Efficiency 83 %Peak intensity 1.4 cd/lm LEDs/each optic 1Light colourWhiteRequired components:LEDNVSxx19A FWHM / FWTM 45.0° / 80.0°Efficiency 84 %Peak intensity 1.2 cd/lm LEDs/each optic 1Light colourWhiteRequired components:PHOTOMETRIC DATA (MEASURED):LED Duris S5 (2 chip)FWHM / FWTM41.0° / 76.0°Efficiency85 %Peak intensity 1.5 cd/lmLEDs/each optic1Light colour WhiteRequired components:LED OSLON Square ECFWHM / FWTM46.0° / 83.0°Efficiency82 %Peak intensity 1.1 cd/lmLEDs/each optic1Light colour WhiteRequired components:LED OSLON SSL 150FWHM / FWTM55.0° / 81.0°Efficiency86 %Peak intensity 1.2 cd/lmLEDs/each optic1Light colour WhiteRequired components:PHOTOMETRIC DATA (SIMULATED):LED XQ-E HIFWHM / FWTM47.0° / 73.0°Efficiency94 %Peak intensity 1.5 cd/lmLEDs/each optic1Light colour WhiteRequired components:LED NCSxE17AFWHM / FWTM30.0° / 60.0°Efficiency88 %Peak intensity 2.5 cd/lmLEDs/each optic1Light colour WhiteRequired components:LED OSLON SSL 80FWHM / FWTM49.0° / 80.0°Efficiency83 %Peak intensity 1.2 cd/lmLEDs/each optic1Light colour WhiteRequired components:GENERAL INFORMATION:NOTE: The typical beam angle will be changed by different color, chip size and chip position tolerance. The typical total beam angle is the full angle measured where the luminous intensity is half of the peak value.MATERIALS:As part of our continuous research and improvement processes, and to ensure the best possible quality and availability of our products, LEDiL reserves the right to change material grades without notice.PRODUCT DATA USER AGREEMENT AND DISCLAIMER:The measured data in the provided downloadable LEDiL Product Datasheets and Mechanical 2D-Drawings is rounded and provided as reference for planning. LEDiL Oy's optical specifications have been verified by conducting performance testing of the products in accordance with the company's quality system. The reported data are averaged results of multiple measurements with typical variation. LEDiL Oy reserves the right to without prior notification make changes and improvements to its products.LEDiL Oy assumes neither warranty, nor guarantee nor any other liability of any kind for the contents and correctness of the provided data. The provided data has been generated with highest diligence but the provided data may in reality not represent the complete possible variation range of all intrinsic parameters. Therefore, in certain cases a deviation from the provided data could occur.LEDiL Oy reserves the right to undertake technical changes of its products without further notification which could lead to changes in the provided data. LEDiL Oy assumes no liability of any kind for the possible deviation from any provided data or any other damage resulting from the usage of the provided data.The user agrees to this disclaimer and user agreement with the download or usage of the provided files.LEDiL OyJoensuunkatu 13FI-24240 SALOFinlandLEDiL Inc.228 West Page Street Suite DSycamore IL 60178USALedil Optics Technology (Shenzhen) Co., Ltd.# 405 , Block BCasic Motor Building Shenzhen 518057P.R.CHINALocal sales and technical support/where_to_buyShipping locations Salo, FinlandHong Kong, ChinaDistribution Partners /where_to_buyMouser ElectronicsAuthorized DistributorClick to View Pricing, Inventory, Delivery & Lifecycle Information:L edil:CP12944_LARISA-W-CLIP8。
