OpenGL完整安装手册
OpenGL完全教程 第一章 初始化OpenGL
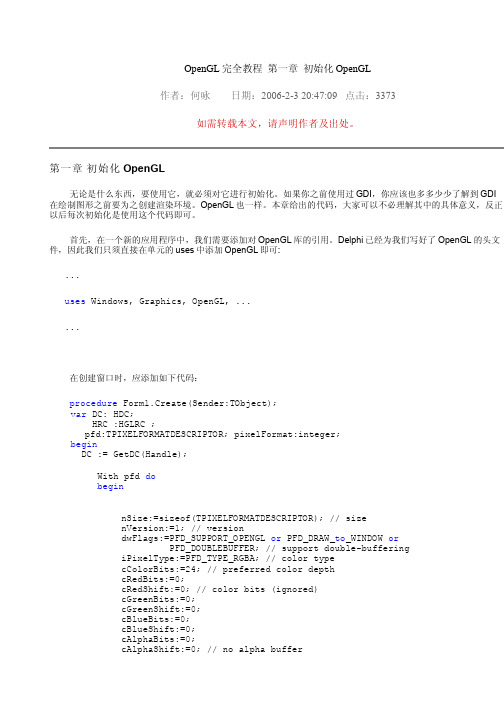
OpenGL完全教程 第一章 初始化OpenGL作者:何咏 日期:2006-2-3 20:47:09 点击:3373如需转载本文,请声明作者及出处。
第一章初始化OpenGL无论是什么东西,要使用它,就必须对它进行初始化。
如果你之前使用过GDI,你应该也多多少少了解到GDI 在绘制图形之前要为之创建渲染环境。
OpenGL也一样。
本章给出的代码,大家可以不必理解其中的具体意义,反正以后每次初始化是使用这个代码即可。
首先,在一个新的应用程序中,我们需要添加对OpenGL库的引用。
Delphi已经为我们写好了OpenGL的头文件,因此我们只须直接在单元的uses中添加OpenGL即可:...uses Windows, Graphics, OpenGL, ......在创建窗口时,应添加如下代码:procedure Form1.Create(Sender:TObject);var DC: HDC;HRC :HGLRC ; pfd:TPIXELFORMATDESCRIPTOR; pixelFormat:integer;beginDC := GetDC(Handle);With pfd dobeginnSize:=sizeof(TPIXELFORMATDESCRIPTOR); // sizenVersion:=1; // versiondwFlags:=PFD_SUPPORT_OPENGL or PFD_DRAW_to_WINDOW orPFD_DOUBLEBUFFER; // support double-bufferingiPixelType:=PFD_TYPE_RGBA; // color typecColorBits:=24; // preferred color depthcRedBits:=0;cRedShift:=0; // color bits (ignored)cGreenBits:=0;cGreenShift:=0;cBlueBits:=0;cBlueShift:=0;cAlphaBits:=0;cAlphaShift:=0; // no alpha buffercAccumBits:=0;cAccumRedBits:=0; // no accumulation buffer,cAccumGreenBits:=0; // accum bits (ignored)cAccumBlueBits:=0;cAccumAlphaBits:=0;cDepthBits:=16; // depth buffercStencilBits:=0; // no stencil buffercAuxBuffers:=0; // no auxiliary buffersiLayerType:=PFD_MAIN_PLANE; // main layerbReserved:=0;dwLayerMask:=0;dwVisibleMask:=0;dwDamageMask:=0;end;pixelFormat := ChoosePixelFormat(DC, @pfd);if (pixelFormat = 0) thenexit;if (SetPixelFormat(DC, pixelFormat, @pfd) <> TRUE) thenexit;hRc := wglCreateContext(DC);wglMakeCurrent(DC,HRC);end;上面的代码是Windows下初始化OpenGL的固定代码。
opengl教程OpenGL教程的简单介绍1.下载并安装OpenGLOp

opengl教程OpenGL教程的简单介绍1.下载并安装
OpenGLOp
以下是OpenGL教程的简单介绍:
1. 下载并安装OpenGL:OpenGL是一个图形库,用于开发2D 和3D图形应用程序。
可以在OpenGL官方网站上下载OpenGL的SDK,并根据安装指南安装。
2. 熟悉基本概念:学习OpenGL需要先了解基本概念,例如OpenGL中的顶点、纹理、光线和Shader等。
可以在OpenGL官方网站上找到相关教程。
3. 绘制基本形状:学习如何绘制基本的图形,例如线条、方框、圆形和球体等。
可以通过学习如何使用OpenGL的基本绘图函数和参数,从基础开始学习OpenGL的用法。
4. Shader编程:了解如何编写Shader程序,并将其应用于OpenGL绘图过程中。
可以通过学习Shader程序的基本结构和语法,深入了解实现高级图形效果的方法。
5. 应用场景:OpenGL广泛应用于游戏开发、虚拟现实、科学计算、CAD和数据可视化等领域。
学习如何将OpenGL应用于实际项目中,例如创建游戏场景、模拟物理运动等。
总之,学习OpenGL需要掌握基本概念和绘制基本形状的基本技能。
通过不断的实践,了解和应用OpenGL的各种功能、工具和技巧,可以提高自己的图形编程水平。
同时也需要了解OpenGL的应用场景和工作流程,以更好地应用OpenGL进行实际项目。
Opengl上机步骤.ppt

• 然后看main函数。 int main(int argc, char *argv[]),这个是带命令行 参数的main函数,各位应该见过吧?没见过的同 志们请多翻翻书,等弄明白了再往下看。
注意main函数中的各语句,除了最后的return之 外,其余全部以glut开头。这种以glut开头的函数 都是GLUT工具包所提供的函数,下面对用到的 几个函数进行介绍。
• 1、glClear,清除。 GL_COLOR_BUFFER_BIT表示清除颜色, glClear函数还可以清除其它的东西,但这 里不作介绍。
2、glRectf,画一个矩形。四个参数分别表 示了位于对角线上的两个点的横、纵坐标。
3、glFlush,保证前面的OpenGL命令立即 执行(而不是让它们在缓冲区中等待)。 其作用跟fflush(stdout)类似。
点击OK
• (3)链接OpenGL libraries:在Visual C++ 中先单击Project,再单击Settings,再找到 Link单击,最后在Object/library modules 的最前面加上opengl32.lib Glut32.lib Glaux.lib glu32.lib 。
• 6、glutDisplayFunc,设置一个函数,当需 要进行画图时,这个函数就会被调用。 7、glutMainLoop,进行一个消息循环。
• 在glutDisplayFunc函数中,我们设置了 “当需要画图时,请调用myDisplay函数”。 于是myDisplay函数就用来画图。观察 myDisplay中的三个函数调用,发现它们都 以gl开头。这种以gl开头的函数都是 OpenGL的标准函数,下面对用到的函数进 行介绍。
1、glutInit,对GLUT进行初始化,这个函数必须 在其它的GLUT使用之前调用一次。其格式比较 死板,一般照抄这句glutInit(&argc, argv)就可以 了。
现代 OpenGL 教程 01 - 入门指南说明书
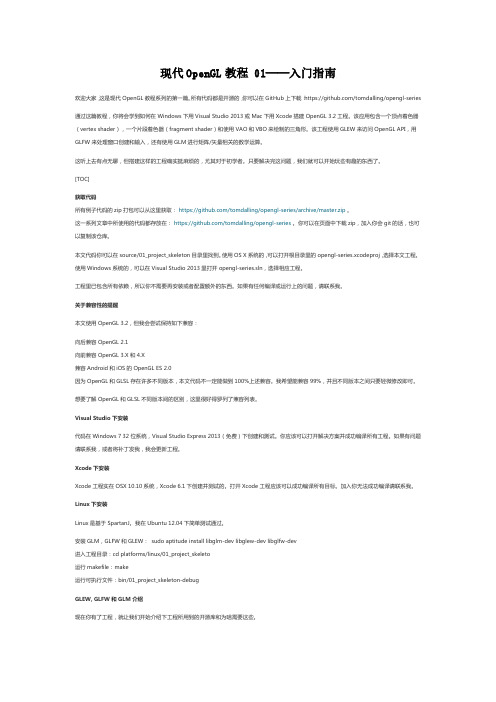
现代OpenGL教程 01——入门指南欢迎大家,这是现代OpenGL教程系列的第一篇。
所有代码都是开源的,你可以在GitHub上下载:https:///tomdalling/opengl-series 通过这篇教程,你将会学到如何在Windows下用Visual Studio 2013或Mac下用Xcode搭建OpenGL 3.2工程。
该应用包含一个顶点着色器(vertex shader),一个片段着色器(fragment shader)和使用VAO和VBO来绘制的三角形。
该工程使用GLEW来访问OpenGL API,用GLFW来处理窗口创建和输入,还有使用GLM进行矩阵/矢量相关的数学运算。
这听上去有点无聊,但搭建这样的工程确实挺麻烦的,尤其对于初学者。
只要解决完这问题,我们就可以开始玩些有趣的东西了。
[TOC]获取代码所有例子代码的zip打包可以从这里获取:https:///tomdalling/opengl-series/archive/master.zip。
这一系列文章中所使用的代码都存放在:https:///tomdalling/opengl-series。
你可以在页面中下载zip,加入你会git的话,也可以复制该仓库。
本文代码你可以在source/01_project_skeleton目录里找到。
使用OS X系统的,可以打开根目录里的opengl-series.xcodeproj,选择本文工程。
使用Windows系统的,可以在Visual Studio 2013里打开opengl-series.sln,选择相应工程。
工程里已包含所有依赖,所以你不需要再安装或者配置额外的东西。
如果有任何编译或运行上的问题,请联系我。
关于兼容性的提醒本文使用OpenGL 3.2,但我会尝试保持如下兼容:向后兼容OpenGL 2.1向前兼容OpenGL 3.X和4.X兼容Android和iOS的OpenGL ES 2.0因为OpenGL和GLSL存在许多不同版本,本文代码不一定能做到100%上述兼容。
OpenGL使用手册

OpenGL函数使用手册(一)OpenGL函数库格式:<库前缀><根命令><可选的参数个数><可选的参数类型> 库前缀有gl、glu、aux、glut、wgl、glx、agl 等等,1,核心函数库主要可以分为以下几类函数:(1)绘制基本的几何图元函数。
如:glBegain().(2)矩阵操作、几何变换和投影变换的函数。
如:矩阵入栈glPushMatrix(),还有矩阵的出栈、转载、相乘,此外还有几何变换函数glTranslate*(),投影变换函数glOrtho()和视口变换函数glViewport()等等。
(3)颜色、光照和材质函数。
(4)显示列表函数,主要有创建、结束、生成、删除和调用显示列表的函数glNewList()、glEndList()、glGenLists()、glDeleteLists()和glCallList()。
(5)纹理映射函数,主要有一维和二维纹理函数,设置纹理参数、纹理环境和纹理坐标的函数glTexParameter*()、glTexEnv*()和glTetCoord*()等。
(6)特殊效果函数。
(7)选着和反馈函数。
(8)曲线与曲面的绘制函数。
(9)状态设置与查询函数。
(10)光栅化、像素函数。
2,OpenGL实用库(The OpenGL Utility Library)(GLU)包含有43个函数,函数名的前缀名为glu.(1)辅助纹理贴图函数。
(2)坐标转换和投影变换函数。
(3)多边形镶嵌工具。
(4)二次曲面绘制工具。
(5)非均匀有理B样条绘制工具。
(6)错误反馈工具,获取出错信息的字符串gluErrorString()3,OpenGL辅助库包含有31个函数,函数名前缀名为aux这部分函数提供窗口管理、输入输出处理以及绘制一些简单的三维物体。
4,OpenGL工具库(OpenGL Utility Toolkit)包含大约30多个函数,函数前缀名为glut,此函数由glut.dll来负责解释执行。
Autodesk MapGuide 6.5 Service Pack 1安装指南说明书
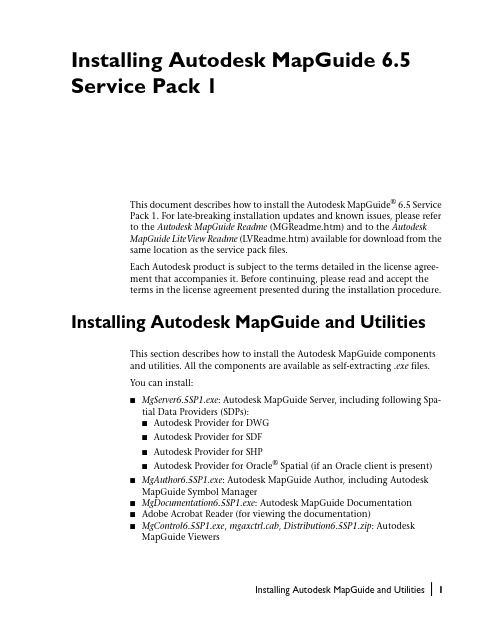
Installing Autodesk MapGuide 6.5 Service Pack 1This document describes how to install the Autodesk MapGuide® 6.5 ServicePack 1. For late-breaking installation updates and known issues, please referto the Autodesk MapGuide Readme (MGReadme.htm) and to the AutodeskMapGuide LiteView Readme (LVReadme.htm) available for download from thesame location as the service pack files.Each Autodesk product is subject to the terms detailed in the license agree-ment that accompanies it. Before continuing, please read and accept theterms in the license agreement presented during the installation procedure. Installing Autodesk MapGuide and Utilities This section describes how to install the Autodesk MapGuide componentsand utilities. All the components are available as self-extracting .exe files.You can install:■MgServer6.5SP1.exe: Autodesk MapGuide Server, including following Spa-tial Data Providers (SDPs):■Autodesk Provider for DWG■Autodesk Provider for SDF■Autodesk Provider for SHP■Autodesk Provider for Oracle® Spatial (if an Oracle client is present)■MgAuthor6.5SP1.exe: Autodesk MapGuide Author, including Autodesk MapGuide Symbol Manager■MgDocumentation6.5SP1.exe: Autodesk MapGuide Documentation■Adobe Acrobat Reader (for viewing the documentation)■MgControl6.5SP1.exe, mgaxctrl.cab, Distribution6.5SP1.zip: AutodeskMapGuide ViewersInstalling Autodesk MapGuide and Utilities|1■Utilities, including:■MgRasterWorkshop6.5SP1.exe: Autodesk MapGuide Raster Workshop■MgSDFLoader6.5SP1.exe: Autodesk MapGuide SDF Loader■MgSDFComponentToolkit6.5SP1.exe: Autodesk MapGuide SDF Compo-nent Toolkit■MgDynamicAuthoringToolkit6.5SP1.exe: Autodesk MapGuide Dynamic Authoring ToolkitBefore Y ou Install Autodesk MapGuideBefore installing Autodesk MapGuide, be sure your server and clientcomputers meet or exceed the platform and system requirements forAutodesk MapGuide.Component Platform and System RequirementsAutodesk MapGuide Server and Spatial Data Providers: •Autodesk Provider for SDF •Autodesk Provider for DWG •Autodesk Provider for SHP •Autodesk Provider for Oracle Spatial •Intel® Pentium®-based PC•Microsoft Windows® 2000 Server (Service Pack 4) or •Microsoft Windows® 2003 Server R2with one of the following:•Microsoft Internet Information Server 4, 5, or 6 (IIS 6 with Windows 2000/2003 Server only)You also need:•Microsoft Data Access Components (MDAC): MDAC2.8 RTM•128MB RAM•310 MB free disk space (plus space for your data)•VGA or higher resolution video adapterAutodesk MapGuide Author and Symbol Manager •Intel Pentium-based PC•Microsoft Windows 2000 Pro (Service Pack 4) or •Microsoft Windows XP Pro (Service Pack 2)•32MB RAM•240 MB free disk space•Super VGA or better video display•Mouse or compatible pointing device2|Installing Autodesk MapGuide 6.5 Service Pack 1Installing Autodesk MapGuide and Utilities |3Also, be sure to consider the following pre-installation requirements: ComponentPlatform and System Requirements Autodesk MapGuide Viewers Autodesk MapGuide Viewer ActiveX Control •Intel 486- or Pentium-based PC •Microsoft Windows XP Home Edition or Professional(Service Pack 2), Windows 2000 Pro (Service Pack 4),or Microsoft Windows 2003 Server R2•16 MB RAM•Mouse or compatible pointing device•Microsoft Internet Explorer 6.x or 7.x (MicrosoftInternet Explorer 6.x only on Windows 2000 Pro(Service Pack 4))Autodesk MapGuide Viewer Java Edition, Windows •Intel 486- or Pentium-based PC•Microsoft Windows XP Home Edition or Professional(Service Pack 2), Windows 2000 Pro (Service Pack 4),or Microsoft Windows 2003 Server R2•16 MB RAM•Mouse or compatible pointing device•Microsoft Internet Explorer 6.x or 7.x (MicrosoftInternet Explorer 6.x only on Windows 2000 Pro(Service Pack 4))ComponentPre-Installation Requirements All components •Uninstall all Autodesk MapGuide 6.5 componentsbefore installing Autodesk MapGuide 6.5 Service Pack1.Autodesk MapGuide Server •Microsoft Windows Installer (MSI) must be present onyour computer. MSI is included with MicrosoftWindows 2000/2003. If you do not have MSI on yourcomputer, the Autodesk MapGuide Server installationprogram will install the MSI software for you. You willthen need to restart your computer and manuallyrestart the Autodesk MapGuide Server installation.•If you have Autodesk MapGuide for VISION* Serverinstalled, you must uninstall it before installingAutodesk MapGuide Server Release 6.5 SP1.Autodesk MapGuide Viewers •If you will be using Microsoft Internet Explorer, youmust install it before installing Autodesk MapGuideViewer.•If you are installing Autodesk MapGuide Viewer JavaEdition, be sure to uninstall any previous versions first.Backup MapGuide Security/User AuthenticationWhen uninstalling Autodesk MapGuide Server 6.5, the existing Authentica-tion Security may be lost. You can prevent this by exporting the necessaryregistry key before uninstalling the existing server. The data can be foundunder <HKEY_LOCAL_MACHINE\SOFTWARE\Autodesk\MapGuideServer\6.5\Authentication>. Export the whole registry key to a .reg file. Afterinstalling Autodesk MapGuide Server 6.5 Service Pack 1, double-click the .regfile to import the settings. Confirm the settings are correct by viewing theUsers/Groups and Access Keys tabs within the Server Administrator.Backup UDL/ADL filesBefore uninstalling Autodesk MapGuide Server 6.5, you should back up thefolder containing the UDL and ADL files that point to the user data sources.These can be found in the path indicated by the Autodesk MapGuide ServerAdministrator. For convenience, save a copy of the Raster Image and Data-source file paths to a text file for simple copy-and-paste into the ServerAdministrator after you install Autodesk MapGuide Server 6.5 Service Pack 1.To install Autodesk MapGuide components and utilities1Log on with administrative privileges.2Close all open applications.3Uninstall Autodesk MapGuide 6.5 before you install Autodesk MapGuide6.5 SP1.4Select the component file you want to install and double-click it. Repeat this step until you have installed all of the components you want toinstall.5Restart your computer after installing all MapGuide components and utilities.4|Installing Autodesk MapGuide 6.5 Service Pack 1Installing Autodesk MapGuide LiteViewThis section describes how to install Autodesk MapGuide LiteView, which isavailable from the service pack web site as a self-extracting file calledMgLiteView6.5SP1.exe.Before Y ou Install Autodesk MapGuide LiteViewBefore installing Autodesk MapGuide LiteView, be sure your server and clientcomputers meet or exceed the platform and system requirements forAutodesk MapGuide LiteView.Component Platform and System RequirementsAutodesk MapGuide LiteView Server•Minimum Intel Pentium II•Microsoft Windows 2000 Server (Service Pack 4) or•Microsoft Windows 2003 Server R2with the following:•Microsoft Internet Information Server 6You also need:•128MB RAM•25 MB free disk space•Super VGA or better video display•Mouse or compatible pointing device•Autodesk MapGuide Server 6.5 SP1 (installed onanother machine or locally)•Apache Tomcat 3.3.1a (or other third-party applicationserver)•JDK 1.3.0_2If selected during installation, Apache Tomcat 3.3.1a willbe automatically installed along with JDK 1.3.0_2. Anadditional 55 MB of disk space is required to install ApacheTomcat and the JDK.Client (Browser) Requirements•Internet Explorer 6.x or 7.x•Other browsers that support the PNG image displayand XML 1.0 specificationInstalling Autodesk MapGuide LiteView|5Also, be sure to consider the following pre-installation requirements:Component Pre-Installation RequirementsAutodesk MapGuide LiteView The following software is included on the AutodeskMapGuide LiteView CD:•Apache Tomcat application server Version 3.3.1a•Sun J2SE 1.3.0_2If selected during installation, Apache Tomcat will beautomatically installed along with JDK 1.3.0_2.The following software is not included on the AutodeskMapGuide LiteView CD, and must be installed beforeinstalling Autodesk MapGuide LiteView:•Autodesk MapGuide Server Release 6.5 SP1•Macromedia® ColdFusion® (To run the AutodeskMapGuide LiteView sample application.)To install Autodesk MapGuide LiteView1Log on with administrative privileges.2Close all open applications.3Double-click the MgLiteView6.5SP1.exe file.4From the Autodesk MapGuide LiteView Setup screen, select Next. Com-plete the installation by following the instructions on the subsequentscreens.During the installation, you will be asked to select an application server touse with Autodesk MapGuide LiteView. You can select Apache Tomcat3.3.1a (provided on the installation CD) or Macromedia JRun 3.0.1 (if it isalready installed on your machine). If you select Apache Tomcat, it will beautomatically installed along with JDK 1.3.0_2. The installer will automat-ically configure Autodesk MapGuide LiteView and either Tomcat or JRunfor you. Alternatively, you can select Manual Setup to configure yourapplication server manually after installation.5Also during the installation, you can type a branding message, for exam-ple, a copyright symbol, followed by the year and the name of the organi-zation. This message will then appear at the lower-left corner of allAutodesk MapGuide LiteView maps generated with a REQUEST=mapstatement.6To complete the installation, specify the installation location and paths that Autodesk MapGuide LiteView will use to find MWF files.7When you have completed the installation, select Finish from theinstaller.6|Installing Autodesk MapGuide 6.5 Service Pack 1Installation Notes for Autodesk MapGuide LiteView■After installation is complete, Autodesk MapGuide LiteView tools, com-mands, and documentation are available from: Start Menu ➤ Programs ➤ Autodesk MapGuide Release 6.5 ➤ Autodesk MapGuide LiteView 6.5■To test the installation, see “Testing the LiteView Installation” in Chapter2 of the Autodesk MapGuide LiteView Servlet Administrator’s Guide.■To change configuration settings (such as the MWF search path) manually after installation, see Chapter 3 of the Autodesk MapGuide LiteView Servlet Administrator’s Guide.■By default, Apache Tomcat 3.3.1a runs in a console window. To run Apache Tomcat as a Microsoft Windows service, see Chapter 5 of the Autodesk MapGuide LiteView Servlet Administrator’s Guide.■The installation program does not migrate settings from a previous release of Autodesk MapGuide LiteView.■The installation program will not overwrite an existing configuration file (config.ini), if that file is newer than the one on the installation CD.© Copyright 2007 Autodesk, Inc. All rights reserved.Installing Autodesk MapGuide LiteView|78。
linuxopengl使用例子 -回复
linuxopengl使用例子-回复Linux OpenGL使用例子:从入门到精通OpenGL是一款跨平台的图形库,用于开发高性能的图形应用程序。
在Linux环境下,使用OpenGL进行图形编程可以获得很好的性能和灵活性。
本篇文章将介绍Linux环境下如何使用OpenGL进行图形编程,并提供一些使用例子,以帮助读者更好地理解和运用OpenGL。
一、安装OpenGL在Linux环境下安装OpenGL非常简单。
通常,OpenGL的开发库和工具已经包含在Linux系统中。
只需使用包管理工具(如apt、yum等)命令行安装即可。
在大多数Linux发行版中,执行以下命令以检查OpenGL是否安装:glxinfo grep "OpenGL version"如果输出信息类似“OpenGL version string: 4.6.0 NVIDIA 470.57.02”,则表示OpenGL已安装。
二、编写OpenGL程序为了编写OpenGL程序,首先需要选择一种编程语言。
C/C++是最常用的编程语言用于OpenGL开发。
本文以C语言为例,介绍OpenGL编程的基本步骤。
1. 引入头文件和库在编写OpenGL程序时,首先需要引入相应的头文件和库。
在C语言中,可以使用以下命令引入OpenGL相关的头文件:#include <GL/gl.h>#include <GL/glu.h>#include <GL/glut.h>同时,在编译时需要链接相应的库,可以使用以下命令:gcc -o myprogram myprogram.c -lGL -lGLU -lglut2. 初始化窗口OpenGL程序通常需要一个窗口来显示图形。
下面是一个简单的例子,展示了如何使用OpenGL初始化一个窗口:int main(int argc, char argv) {glutInit(&argc, argv);glutInitDisplayMode(GLUT_RGB GLUT_DOUBLE);glutInitWindowSize(800, 600);glutCreateWindow("My OpenGL Program");...return 0;}在上述代码中,首先调用`glutInit`方法初始化GLUT库,接着使用`glutInitDisplayMode`方法设置显示模式,`glutInitWindowSize`方法设置窗口大小,最后使用`glutCreateWindow`方法创建窗口。
OpenGL教程_基本图元
OpenGL教程1.第一课:说起编程作图,大概还有很多人想起TC的#include <graphics.h>吧?但是各位是否想过,那些画面绚丽的PC游戏是如何编写出来的?就靠TC那可怜的640*480分辨率、16色来做吗?显然是不行的。
OpenGL作为当前主流的图形API之一,它在一些场合具有比DirectX更优越的特性。
1、与C语言紧密结合。
OpenGL命令最初就是用C语言函数来进行描述的,对于学习过C语言的人来讲,OpenGL是容易理解和学习的。
如果你曾经接触过TC的graphics.h,你会发现,使用OpenGL作图甚至比TC更加简单。
2、强大的可移植性。
微软的Direct3D虽然也是十分优秀的图形API,但它只用于Windows系统(现在还要加上一个XBOX游戏机)。
而OpenGL不仅用于Windows,还可以用于Unix/Linux等其它系统,它甚至在大型计算机、各种专业计算机(如:医疗用显示设备)上都有应用。
并且,OpenGL的基本命令都做到了硬件无关,甚至是平台无关。
3、高性能的图形渲染。
OpenGL是一个工业标准,它的技术紧跟时代,现今各个显卡厂家无一不对OpenGL提供强力支持,激烈的竞争中使得OpenGL性能一直领先。
总之,OpenGL是一个很优秀的图形软件接口。
至于究竟有多优秀,去看看DOOM3和QUAKE4等专业游戏就知道了。
OpenGL官方网站(英文)下面我将对Windows下的OpenGL编程进行简单介绍。
学习OpenGL前的准备工作第一步,选择一个编译环境现在Windows系统的主流编译环境有V isual Studio,Broland C++ Builder,Dev-C++等,它们都是支持OpenGL 的。
但这里我们选择V isual Studio 2005作为学习OpenGL的环境。
第二步,安装GLUT工具包GLUT不是OpenGL所必须的,但它会给我们的学习带来一定的方便,推荐安装。
OPENGL基础教程
OpenGL Step by Step 第一、准备好OpenGL。
第二、准备好开发环境。
1.OpenGL库和头文件2.GLUT库3.GLAUX库第三、准备好窗口。
第四、建立OpenGL应用程序框架。
第五、OpenGL原理与程序基本框架。
第六、坐标变换。
第八、法向与封闭实心物体第八、颜色与表面材质第九、颜色、颜色模型及表面材质第九、法向与面的朝向第十、光照效果第十、表面纹理细节第十一、表面纹理第十二、运动、相对运动、反向运动第十三、帧缓冲第十四、雾第十五、α融合OPENGL 基础教程 (4)1.前言 (4)1.1 OPENGL 简介及发展 (4)1.2 OPENGL与DIRECTX的关系 (6)1.3 OPENGL的准备工作 (6)2. 基本图元的绘制 (7)2.1 点、直线和多边形 (7)2.2 绘制三角形和四边形 (8)2.3 绘制三棱锥 (12)2.4 绘制圆 (13)2.5 绘制五角星............................................................................. 错误!未定义书签。
2.6 绘制正弦函数图形 (13)2.7 小结 (14)3. 基于VC的OPENGL建模程序 (15)3.1 openGL几何图元——点 (15)3.2 openGL几何图元——线 (21)3.3 绘制矩形 (25)3.4 绘制圆 (28)3.5 绘制五角星 (29)3.6 绘制正弦曲线 (30)3.7 清除屏幕颜色 (32)3.8 绘制多边形 (33)3.9 OPENGL中的颜色设置 (36)3.10 在3D空间中画直线 (42)OPENGL 基础教程1.前言1.1OPENGL 简介及发展OpenGL是OpenGraphicsLib的缩写,是一套三维图形处理库,也是该领域的工业标准。
计算机三维图形是指将用数据描述的三维空间通过计算转换成二维图像并显示或打印出来的技术。
OpenGL安装
OpenGL版本与OpenGL扩展机制1 opengl的版本区别(在opengl官方文档中有详细说明)针对Opengl不同版本的升级是主要是扩展指令集。
1.1 opengl1.11995年,SGI推出了更为完善的OpenGL 1.1版本。
OpenGL 1.1的性能比1.0版提高甚多。
其中包括改进打印机支持,在增强元文件中包含OpenGL的调用,顶点数组的新特性,提高顶点位置、法线、颜色、色彩指数、纹理坐标、多边形边缘标识的传输速度,引入了新的纹理特性等等。
1.2 opengl1.32001年8月,ARB发布OpenGL 1.3规范,它增加了立方纹理贴图、纹理环境、多重采样、纹理框架压缩等扩展指令,但是改进程度非常有限。
1.3 opengl1.42002年7月,ARB正式发布OpenGL 1.4,它也只加入了深度纹理/阴影纹理、顶点设计框架、自动纹理贴图等简单的功能。
1.3 opengl1.52003年的7月,ARB公布OpenGL 1.5规范。
OpenGL 1.5内包含ARB制定的“正式扩展规格绘制语言”(OpenGL Shading Language v1.0),该语言用于着色对象、顶点着色、片断着色等扩展功能,同时也将作为下一代OpenGL 2.0版本的内核。
OpenGL 1.5的变化还增加了顶点缓冲对象(可提高透视性能)、非乘方纹理(可提高纹理内存的使用效率)以及阴影功能、隐蔽查询功能等等。
其主要内容包括l 顶点Buffer Object:进行顶点配列方式可以提高透视性能l Shadow功能:增加用来比较Shadow映射的函数l 隐蔽查询(QUERY):为提高Curling性能采用非同步隐蔽测试l 非乘方纹理(Texture):提高mipmap等纹理内存的使用效率l OpenGL Shading Language v.1.0:用于着色(shader)对象、顶点着色以及片断着色技术(fragment shader )的扩展功能1.4 opengl2.0OpenGL 1.0推出后的相当长的一段时间里,OpenGL唯一做的只是增加了一些扩展指令集,这些扩展指令是一些绘图功能,像是ClearCoat、Multisample、视频及绘图的整合工具(某些是通过OpenML的努力而开发出来的,它本身属于OpenGL ARB扩展指令之一。
- 1、下载文档前请自行甄别文档内容的完整性,平台不提供额外的编辑、内容补充、找答案等附加服务。
- 2、"仅部分预览"的文档,不可在线预览部分如存在完整性等问题,可反馈申请退款(可完整预览的文档不适用该条件!)。
- 3、如文档侵犯您的权益,请联系客服反馈,我们会尽快为您处理(人工客服工作时间:9:00-18:30)。
OpenGL的完整安装手册要对得起1个财富值
说起编程作图,大概还有很多人想起TC的#include <graphics.h>吧?
但是各位是否想过,那些画面绚丽的PC游戏是如何编写出来的?就靠TC那可怜的640*480分辨率、16色来做吗?显然是不行的。
本帖的目的是让大家放弃TC的老旧图形接口,让大家接触一些新事物。
OpenGL作为当前主流的图形API之一,它在一些场合具有比DirectX更优越的特性。
1、与C语言紧密结合。
OpenGL命令最初就是用C语言函数来进行描述的,对于学习过C语言的人来讲,OpenGL 是容易理解和学习的。
如果你曾经接触过TC的graphics.h,你会发现,使用OpenGL作图甚至比TC更加简单。
2、强大的可移植性。
微软的Direct3D虽然也是十分优秀的图形API,但它只用于Windows系统(现在还要加上一个XBOX游戏机)。
而OpenGL不仅用于Windows,还可以用于Unix/Linux等其它系统,它甚至在大型计算机、各种专业计算机(如:医疗用显示设备)上都有应用。
并且,OpenGL 的基本命令都做到了硬件无关,甚至是平台无关。
3、高性能的图形渲染。
OpenGL是一个工业标准,它的技术紧跟时代,现今各个显卡厂家无一不对OpenGL提供强力支持,激烈的竞争中使得OpenGL性能一直领先。
总之,OpenGL是一个很NB的图形软件接口。
至于究竟有多NB,去看看DOOM3和QUAKE4等专业游戏就知道了。
OpenGL官方网站(英文)
下面将对Windows下的OpenGL编程进行简单介绍。
学习OpenGL前的准备工作
第一步,选择一个编译环境
现在Windows系统的主流编译环境有Visual Studio,Broland C++ Builder,Dev-C++等,它们都是支持OpenGL的。
我选择Visual Studio 2008和VC6++作为学习OpenGL的环境。
第二步,安装GLUT工具包
GLUT不是OpenGL所必须的,但它会给我们的学习带来一定的方便,推荐安装。
Windows环境下的GLUT下载地址:(大小约为150k)
/resources/libraries/glut/glutdlls37beta.zip
无法从以上地址下载的话请使用下面的连接:
/upfile/200607311626279.zip
Windows环境下安装GLUT的步骤:
1、将下载的压缩包解开,将得到5个文件
2、在“我的电脑”中搜索“gl.h”,并找到其所在文件夹
如果是VC++6,则应该将glut.h复制在“D:\Program Files\MicrosoftVisualStudio\VC98 \Include\GL文件夹”)。
如果是VisualStudio2008,把glut.h复制到x:\Program Files\Microsoft\Visual Studio 9.0\VC\include\GL文件夹中,如果没有GL这个文件夹则可以自己新建一个。
(x是你安装VS 的盘符号,如果装的是VC++的话,里面有个gl文件,Visual Studio 2008则需要自己去新建一个)
3、把解压得到的glut.lib和glut32.lib放到静态函数库所在文件夹(即与include并排的lib 文件夹下)。
4、把解压得到的glut.dll和glut32.dll放到操作系统目录下面的system32文件夹内。
(典型的位置为:C:\Windows\System32)
第三步,建立一个OpenGL工程
无论VisualStudio2008还是VC++6:
选择File->New->Project,然后选择Win32 Console Application,(不是win32 application).选择一个名字,然后按OK。
在谈出的对话框左边点Application Settings,找到Empty project 并勾上,选择Finish。
然后向该工程添加一个代码文件,取名为“OpenGL.c”,注意用.c来作为文件结尾。
搞定了,就跟平时的工程没什么两样的。
注意:包含头文件(即lib):需检查以下(关键):
*.dll 当然是复制到windows/system32中
*.lib
如果是VC6.0,复制到*/VC98/Lib 中
如果是VS2008,复制到*/VC/lib 中
Glut.h
如果是VC6.0,复制到*/VC98/include/gl 中
如果是VS2008,复制到*/VC/include/gl (没有gl目录就新建一个) 中
#include <GL/glut.h> D:\glutdlls37beta\glut.h
#pragma comment(lib, "opengl32.lib")
#pragma comment(lib, "glu32.lib")
#pragma comment(lib, "glut32.lib")
第一个OpenGL程序
一个简单的OpenGL程序如下:(注意,如果需要编译并运行,需要正确安装GLUT,安装方法如上所述)
#include <GL/glut.h>
void myDisplay(void)
{
glClear(GL_COLOR_BUFFER_BIT);
glRectf(-0.5f, -0.5f, 0.5f, 0.5f);
glFlush();
}
int main(int argc, char *argv[])
{
glutInit(&argc, argv);
glutInitDisplayMode(GLUT_RGB | GLUT_SINGLE);
glutInitWindowPosition(100, 100);
glutInitWindowSize(400, 400);
glutCreateWindow("第一个OpenGL程序");
glutDisplayFunc(&myDisplay);
glutMainLoop();
return 0;
}
该程序的作用是在一个黑色的窗口中央画一个白色的矩形。
下面对各行语句进行说明。
首先,需要包含头文件#include <GL/glut.h>,这是GLUT的头文件。
本来OpenGL程序一般还要包含<GL/gl.h>和<GL/glu.h>,但GLUT的头文件中已经自动将这两个文件包含了,不必再次包含。
然后看main函数。
int main(int argc, char *argv[]),这个是带命令行参数的main函数,各位应该见过吧?没见过的同志们请多翻翻书,等弄明白了再往下看。
注意main函数中的各语句,除了最后的return之外,其余全部以glut开头。
这种以glut开头的函数都是GLUT工具包所提供的函数,下面对用到的几个函数进行介绍。
1、glutInit,对GLUT进行初始化,这个函数必须在其它的GLUT使用之前调用一次。
其格式比较死板,一般照抄这句glutInit(&argc, argv)就可以了。
2、glutInitDisplayMode,设置显示方式,其中GLUT_RGB表示使用RGB颜色,与之对应的还有GLUT_INDEX(表示使用索引颜色)。
GLUT_SINGLE表示使用单缓冲,与之对应的还有GLUT_DOUBLE(使用双缓冲)。
更多信息,请自己Google。
当然以后的教程也会有一些讲解。
3、glutInitWindowPosition,这个简单,设置窗口在屏幕中的位置。
4、glutInitWindowSize,这个也简单,设置窗口的大小。
5、glutCreateWindow,根据前面设置的信息创建窗口。
参数将被作为窗口的标题。
注意:窗口被创建后,并不立即显示到屏幕上。
需要调用glutMainLoop才能看到窗口。
6、glutDisplayFunc,设置一个函数,当需要进行画图时,这个函数就会被调用。
(这个说法不够准确,但准确的说法可能初学者不太好理解,暂时这样说吧)。
7、glutMainLoop,进行一个消息循环。
(这个可能初学者也不太明白,现在只需要知道这个函数可以显示窗口,并且等待窗口关闭后才会返回,这就足够了。
)
在glutDisplayFunc函数中,我们设置了“当需要画图时,请调用myDisplay函数”。
于是myDisplay函数就用来画图。
观察myDisplay中的三个函数调用,发现它们都以gl开头。
这种以gl开头的函数都是OpenGL的标准函数,下面对用到的函数进行介绍。
1、glClear,清除。
GL_COLOR_BUFFER_BIT表示清除颜色,glClear函数还可以清除其它
的东西,但这里不作介绍。
2、glRectf,画一个矩形。
四个参数分别表示了位于对角线上的两个点的横、纵坐标。
3、glFlush,保证前面的OpenGL命令立即执行(而不是让它们在缓冲区中等待)。
其作用跟fflush(stdout)类似。