Bugzilla使用指南
教你如何搭建Bugzillla服务器
一.安装MYSQL和MYSQLCC (Mysql Center Control, mysql管理器,可以直接在这个里面管理数据库,MYSQLCC可以不装)。
安装完mysql后运行mysql\bin\winmysqladmin.exe,如果屏幕右下角系统托盘图标出现的图标为绿色,则正常启动了。
二.安装ActivePerl。
双击ActivePerl-5.8.8.820-MSWin32-x86-274739.msi(作用:解析cgi代码)。
三.配置mysql数据库1.运行C:\mysql\bin\下的winmysqladmin.exe文件,已运行的就不要运行了。
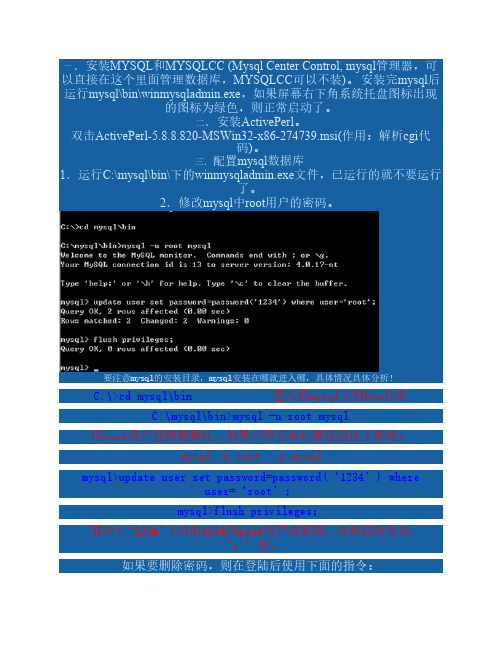
2.修改mysql中root用户的密码。
要注意mysql的安装目录,mysql安装在哪就进入哪,具体情况具体分析!C:\>cd mysql\bin进入到mysql下的bin目录C:\mysql\bin>mysql -u root mysql用root用户登陆数据库,如果已经有密码要使用以下格式:mysql -u root -p mysqlmysql>update user set password=password(‘1234’) whereuser=‘root’;mysql>flush privileges;其中(‘1234’)内的1234为root用户的密码,注意最后要加‘;’号。
如果要删除密码,则在登陆后使用下面的指令:GRANT USAGE ON *.* TO root@localhost IDENTIFIED BY '';FLUSH PRIVILEGES;创建完root用户的密码后不要退出,继续。
3.创建ljq用户(管理bugzilla数据库),并赋予相应权限。
使用以下语句创建:mysql> grant all on bugzilla.* to ljq@locaalhost identified by‘1234’;mysql> flush privileges;其中以上的“all”表示具有所有权限,bugzilla.*表示数据库bugzilla中的所有表,‘1234’表示用户ljq的密码。
Bugzilla使用说明 之一 用户管理
Bugzilla使用说明之一用户管理
bugzilla的用户均为电子邮件格式,除了系统配置初期的高级管理员admin@以外,若要使用系统还需要对应建立普通的使用者。
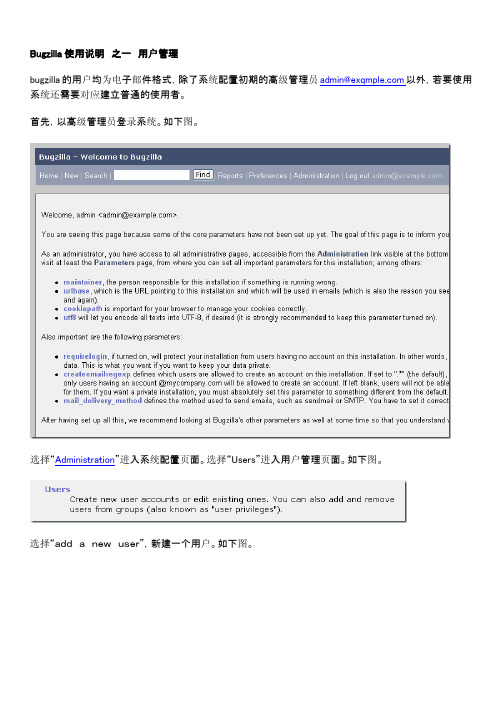
首先,以高级管理员登录系统。
如下图。
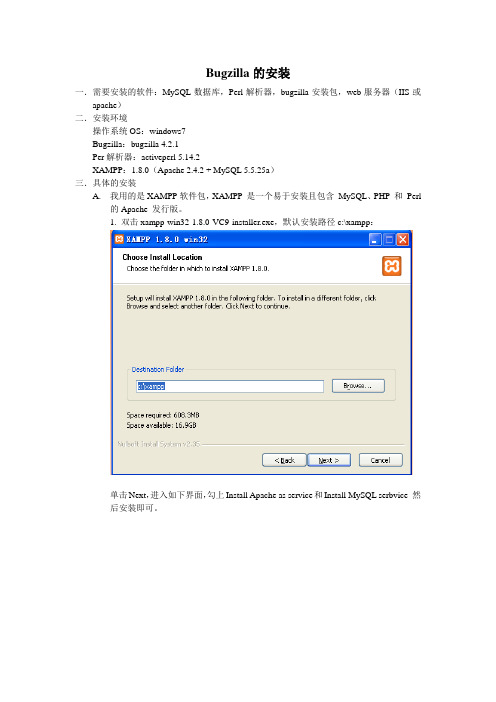
选择“Administration”进入系统配置页面。
选择“Users”进入用户管理页面。
如下图。
选择“addanewuser”,新建一个用户。
如下图。
输入新用户信息,然后选择“Add”。
为新建的用户分配权限。
仅给此用户编辑bug信息的权限。
查看用户列表,看到刚刚建立的新用户:tom@
使用tom@登录,验证新用户建立是否成功。
以上,完成了新建用户和分配权限的工作。
下面,介绍一下如何删除一个用户。
Bugzilla默认的设置是不允许删除用户的,但是同个高级管理员的配置设定后,是可以删除用户的。
使用高级管理员登录,进入配置页面。
设置允许删除用户即可。
OK。
用户的创建,删除,权限的设定到此为止说明完毕。
bugzilla安装教程
Bugzilla的安装一.需要安装的软件:MySQL数据库,Perl解析器,bugzilla安装包,web服务器(IIS或apache)二.安装环境操作系统OS:windows7Bugzilla:bugzilla 4.2.1Per解析器:activeperl 5.14.2XAMPP:1.8.0(Apache 2.4.2 + MySQL 5.5.25a)三.具体的安装A.我用的是XAMPP软件包,XAMPP 是一个易于安装且包含MySQL、PHP 和Perl的Apache 发行版。
1. 双击xampp-win32-1.8.0-VC9-installer.exe,默认安装路径c:\xampp:单击Next,进入如下界面,勾上Install Apache as service和Install MySQL serbvice 然后安装即可。
2.配置MySQL在浏览器地址栏中输入http://localhost/phpmyadmin/,管理MySQL,在Databases中Create database为bugzilla。
点击Create即可。
B. 安装ActivePerl双击打开安装文件,默认安装即可。
默认安装路径为:C:\Perl\检查Perl是否安装成功:在命令提示窗口输入perl -v,出现如下图示,则安装成功。
将perl加入注册表,可通过如下方式:1. 新建一个文本文档,在其中输入如下内容:Windows Registry Editor Version 5.00[HKEY_CLASSES_ROOT\.cgi][HKEY_CLASSES_ROOT\.cgi\Shell][HKEY_CLASSES_ROOT\.cgi\Shell\ExecCGI][HKEY_CLASSES_ROOT\.cgi\Shell\ExecCGI\Command]@="c:\\Perl\\bin\\perl.exe -T"2. 将文件名称改为cgi.reg3. 双击运行,添加注册表。
bugzilla使用手册(缺陷管理系统使用说明书V1.0版).
缺陷管理系统《使用说明书》目录1序言 (4)1.1 什么是Bugzilla (4)1.2为什么使用Bugzilla (4)2BUGZILLA基本操作 (5)3BUG提交过程 (5)4BUG处理流程 (7)5对于BUG的不同处理情况 (9)6有关权限说明 (10)7查询操作 (10)8管理员操作指南 (13)1序言1.1 什么是BugzillaBugzilla是Mozilla公司向我们提供的一个开源的免费缺陷跟踪工具。
作为一个产品缺陷的记录及跟踪工具,它能够为我们建立一个完善的Bug跟踪体系,包括报告Bug、查询Bug记录并产生报表、处理解决、管理员系统初始化和设置四部分。
并具有如下特点:●基于Web方式,安装简单、运行方便快捷、管理安全。
有利于缺陷的清楚传达。
本系统使用数据库进行管理,提供全面详尽的报告输入项,产生标准化的Bug报告。
提供大量的分析选项和强大的查询匹配能力,能根据各种条件组合进行Bug统计。
当错误在它的生命周期中变化时,开发人员、测试人员、及管理人员将及时获得动态的变化信息,允许你获取历史纪录,并在检查错误的状态时参考这一记录。
●系统灵活,强大的可配置能力。
Bugzilla工具可以对软件产品设定不同的模块,并针对不同的模块设定开发人员和测试人员;这样可以实现提交报告时自动发给指定的责任人;并可设定不同的小组。
设定不同的用户对Bug记录的操作权限不同,可进行有效的控制管理。
允许设定不同的严重程度和优先级,可以在错误的生命期中管理错误,从最初的报告到最后的解决,都有详细的记录,确保了错误不会被忽略,同时,可以让开发人员将注意力集中在优先级和严重程度高的错误上。
●自动发送Email通知相关人员。
根据设定的不同责任人,自动发送最新的动态信息,有效的帮助测试人员和开发人员进行沟通。
1.2为什么使用BugzillaBUGZILLA是一个拥有强大功能的缺陷跟踪系统。
它可以使我们更好的在软件开发过程中跟踪软件错误的处理过程,为开发和测试工作以及产品质量的度量提供数据支持,从而有效的保证软件产品的质量。
Linux下Bugzilla的安装与配置
Linux下Bugzilla的安装与配置Linux下Bugzilla的安装是在Linux学习中的一个重点,也是广大Btest学员学习Linux的一个难点,因为牵扯到很多知识和技能,而在我们的教材中的安装过程的讲解又分布在几章的内容当中。
这篇文章,结合教材的知识体系及内容进度,把Bugzilla的安装做一个总结,这个安装配置顺序是完全按照教材顺序,有利于学员按照教材进行学习总结。
一、Perl模块的安装1、准备工作(1)在Linux中的/root路径下创建一个bugzilla文件夹,并在其中创建一个modules文件夹(路径可以自己设定)(2)把这章所需要的软件上传到Linux中,其中包括bugzilla-2.18rc2.tar、httpd-2.0.40-21.i386、modules文件夹下的所有模块。
∙在SecureCRT中进入bugzilla目录,输入命令rz,出现上传文件对话框,在此找到并选择软件bugzilla-2.18rc2.tar、httpd-2.0.40-21.i386,然后点击“Add”,再点击“ok”,即实现上传∙在SecureCRT中进入刚建立modules目录,输入命令rz ,出现上传文件对话框,在此找到所需的模块,并全部选择后,点击“Add”,再点击“ok”,即实现上传二、检查bugzilla需要的模块1、进行解包在bugzilla目录下,输入命令tar –xzvf bugzilla-2.16.4.tar.gz即可实现解包2、解包完成后,使用命令ls 查看文件,可以看到解包后得到一个文件夹:bugzilla-2.18rc2 ,进入此文件夹3、在bugzilla-2.18rc2目录下,检验模块,输入命令perl checksetup.pl4、查看检查结果,即可了解哪些模块没有安装,以下六个必备模块还没有安装:AppConfig (v1.52)CGI (v2.93)Date::Format (v2.21)DBI (v1.36)DBD::mysql (v2.1010)Template (v2.08)其中DBD模块在本章中先不进行安装,因为这个模块需要先安装mysql,其他模块均可安装三、Perl的模块安装1、安装AppConfig (v1.52)(1)进入自己建立的modules目录,找到AppConfig-1.56.tar.gz(2)解包:tar-xzvfAppConfig-1.56.tar.gz(3)解包完,会生成名为AppConfig-1.56的文件夹,进入此文件夹(4)编译成Makefile文件perlMakefile.PL编译完,查看此目录,会看到新生成的Makefile文件(5)编译生成模块make(6)测试模块(此步可以省略)maketest(7)安装模块make install(8)进入bugzilla-2.18rc2 目录,输入命令perlchecksetup.pl此时可以看到AppConfig (v1.52)模块已经安装2、安装CGI (v2.93)(1)进入自己建立的modules目录,找到CGI.pm-3.05.tar.gz(2)解包:Tar -xzvfCGI.pm-3.05.tar.gz(3)解包完,会生成名为CGI.pm-3.05的文件夹,进入此文件夹(4)编译成Makefile文件perlMakefile.PL编译完,查看此目录,会看到新生成的Makefile文件(5)编译生成模块make(6)测试模块maketest(7)安装模块make install(8)进入bugzilla-2.18rc2 目录,输入命令perlchecksetup.pl此时可以看到CGI (v2.93)模块已经安装3、按照同样的方法安装Date::Format (v2.21)软件为TimeDate-1.16.tar.gz4、安装DBI (v1.36)(1)安装DBI时,需要两个支持工具,这两个工具位于CD2中,所以先装载CD2,再进行挂载Mount /dev/cdrom /mnt/cdrom(2)挂载后,进入/RedHat/RPMS目录,找到gcc-3.2.2-5.i386.rpm包,进行安装rpm –ivh gcc-3.2.2-5.i386.rpm(3)找到zlib-devel-1.1.4-8.i386.rpm包,进行安装rpm –ivh zlib-devel-1.1.4-8.i386.rpm(注意及时卸载光驱)(4)为DBI模块设置环境变量,命令export LANG=c(5) 安装DBI (v1.36),软件为DBI-1.45.tar.gz(安装步骤参考前面)tar -xzvf DBI-1.45.tar.gzcd DBI-1.45perl Makefile.PLmakemake testmake install5、安装Template (v2.08),软件包为Template-Toolkit-2.14.tar.gz注意:在输入完命令perlMakefile.PL后,会有询问:It requires access to an existing test database. [y]此处回答为n 即可,后面的问题同样回答n6、注意:DBD::mysql (v2.1010)模块没有安装,到第五章安装完mysql 以后再安装该模块四、Apache的安装1、首先检查是否已经安装了httpd服务rpm –qa httpd如果没有出现任何信息,表示没有安装2、进入bugzilla目录,可以看到httpd的安装包httpd-2.0.40-21.i386.rpm ,进行安装rpm-ivhhttpd-2.0.40-21.i386.rpm3、再次检查httpdrpm-qahttpd此时可以看到如下信息:httpd-2.0.40-214、启动httpd,命令/etc/rc.d/init.d/httpd start会出现信息:Starting httpd: [OK]五、Apache配置1、apache的配置文件为/etc/httpd/conf/httpd.conf,进入/etc/httpd/conf目录,编辑httpd.conf文件,vihttpd.conf2、在命令状态下,输入:/ServerName查找ServerName字符串,找到#ServerName :80在该行的下一行添加一行:ServerName192.168.94.40:80保存退出3、检查语法是否正确,输入命令httpd-t出现提示:Syntax OK表示修改语法正确4、修改/etc/hosts 文件,进入/etc 目录,编辑hosts 文件vihosts5、在hosts文件中添加一行:192.168.94.20zhaotest注:zhaotest为linux主机名称6、重新启动httpd/etc/rc.d/init.d/httpdrestart出现信息:Stopping httpd: [OK]Starting httpd: [OK]表明启动成功7、测试,在Windows IE地址栏中输入192.168.94.40 ,如果出现apache的测试页面,表明配置成功六、mysql的安装和启动1、mysql依赖于三个安装包中,分别是:MySQL-server-4.0.21-0.i386.rpmMySQL-client-4.0.21-0.i386.rpmMySQL-devel-4.0.21-0.i386.rpm2、在SecureCRT中进入bugzilla目录,输入命令rz ,上传三个安装包文件3、安装三个包:rpm-ivhMySQL*.rpm4、启动mysql数据库/etc/rc.d/init.d/mysqlstart5、查看mysql进程ps-ef | grep mysql七、使用、配置mysql1、连接到mysqlmysql-uroot注意:初始安装的MySQL,超级用户没有口令2、设置口令,在mysql提示符下,输入命令Set password for root=password("123456") ;为root设置口令为123456 ,注意sql语句以“;”结束3、创建数据库bugsCreatedatabasebugs ;4、创建用户bugsGrantselect, insert , update , delete , index , alter , create , locktables , createtemporarytables , drop , referencesonbugs.*tobugs@localhost identified by '123456';5、把数据写入到数据库Flushprivileges;6、退出数据库exit或quit注意:(1)mysql中的sql语句是不区分大小写的,所以在mysql提示符下的输入不必在意大小写(2)mysql语句必须要以分号“;”结束(3)退出语句exit和quit后可以不写分号八、安装DBD模块(由于我们分两次安装,如果重新启动过Linux,需要再设置一次环境变量exportLANG=c)1、在modules目录下,找到DBD-mysql-2.9004.tar.gz ,进行解包和安装,注意安装之前一定保证启动mysql2、进入bugzilla-2.18rc2目录,再次检查模块3、注意:安装如果出现问题,可以通过下面方法尝试解决:(1)在进行到make 命令时,可能会出现下列错误提示:Makefile:89: *** missing separator.Stop.设置环境变量export LANG=c把生成的DBD-mysql-2.9004目录删除rm-r-fDBD-mysql-2.9004 后再重新解包,编译(2)提示mysql有问题(a)ps -ef | grep mysql 查看进程(b)kill-91758杀掉进程(1758为进程号,以实际为准)(c)servicemysqlstart 启动服务九、sendmail 的安装1、首先加载CD1,进入目录RedHat/RPMS找到文件sendmail-8.12.8-4.i386.rpmrpm-ivhsendmail-8.12.8-4.i386.rpm2、卸载CD1,再加载CD3,进入目录RedHat/RPMS,找到文件sendmail-cf-8.12.8-4.i386.rpm rpm-ivh sendmail-cf-8.12.8-4.i386.rpm十、sendmail 的配置首先进入/etc/mail 目录1、配置文件sendmail.mc(1)打开文件sendmail.mcvisendmail.mc(2)在命令状态下,输入/DAEMON_OPTIONS查找字符串:DAEMON_OPTIONS(`Port=smtp,Addr=127.0.0.1, Name=MTA')dnl (3)在该字符串前面加上dnl ,把该行注释掉,即:dnl DAEMON_OPTIONS(`Port=smtp,Addr=127.0.0.1, Name=MTA')dnl 保存退出(4)执行命令m4 /etc/mail/sendmail.mc > /etc/mail/sendmail.cf输出新的配置文件2、配置文件access(1)打开文件accessvi access(2)在文件中添加192.168.94 RELAY(注意:网段根据实际确定)保存退出(3)执行命令makemap hash /etc/mail/access.db< /etc/mail/access建立索引文件(会比较慢,大概10-20分钟)3、配置文件local-host-names(1)打开文件local-host-namesvi local-host-names(2)在文件中添加设置本地域名,以进行本地传递4、修改hosts文件,用于接收邮件hosts文件位于/etc目录下(1)进入/etc目录,打开hosts文件vihosts(2)添加linux服务器的IP地址和别名,内容如下:192.168.94.40 5、修改完以上配置文件,重启sendmail/etc/rc.d/init.d/sendmail restart(注意可能时间会比较慢)十一、安装配置POP3和IMAP1、加载CD2,进入RedHat/RPMS目录,找到文件imap-2001a-18.i386.rpm和imap-devel-2001a-18.i386.rpm ,进行安装rpm –ivh imap*.rpm2、进入目录/etc/xinetd.d目录3、找到imap文件和ipop3 这两个文件,分别进行修改,把原来内容中disable的值由yes 变为no保存退出4、重新启动/etc/rc.d/init.d/xinetdrestart5、添加一个用户,并设置密码Adduser zhaodspasswd zhaods密码:123十二、在windows客户机上配置outlook1、其中,邮件地址为:zhaods@为前面设置的服务器的域名(邮箱的具体配置可以参考另一篇拙作<<Bugzilla的使用>>)2、给自己发一封邮件,看是否可以收到十三、配置bugzilla配置文件1、在自己的bugzilla安装路径下(如本例为/root/bugzilla/bugzilla-2.18rc.2目录),找到文件localconfigvilocalconfig2、找到$index_html=0改为:$index_html=1这样会生成一个index.html文件,该文件指向index.cgi3、找到$db_ pass=…‟改为:$db_ pass=…123456‟注意:单引号中为创建bugs用户的密码,一定与前面设置的相同修改后保存退出4、在bugzilla安装路径,输入命令:perlchecksetup.pl创建bugs数据库中的表最后将提示输入如下信息:∙Enter the e-mail address of the administrator:输入:zhaods@说明:要求输入bugzilla管理员e-mail地址,注意是自己前面配置的邮箱帐户,这是登录bugzilla的帐户∙You entered 'zhaods@'.Is this correct? [Y/n]说明:确认刚才输入的e-mail地址是否正确,回答y 即可∙Enter the real name of the administrator:输入:zhaods说明:输入真实姓名∙Enter a password for the administrator account:输入:123说明:登录bugzilla的密码,可以与前面不同,但一定要记住∙Please retype the password to verify:输入:123说明:进行密码确认(6)这时将出现如下信息:'zhaods@' is now set up as an administrator account. 表示帐户创建成功(7)这时,可以到mysql数据库中查看A、输入命令:mysql -uroot -p123456进入mysqlB、在mysql提示符下输入命令:use bugs;连接bugs数据库C、在mysql提示符下输入命令:Show tables;可以看到bugs数据库中已经创建好了表(8)退出mysql即可十四、进一步配置apache1、进入/etc/httpd/conf 目录,输入命令vihttpd.conf2、在命令状态,输入/DocumentRoot找到,DocumentRoot "/var/www/html",将引号中的内容替换为bugzilla的安装路径,本例为/root/bugzilla/bugzilla-2.18rc2 ,替换完结果为:DocumentRoot“/root/bugzilla/b ugzilla-2.18rc2”说明:指定Apache服务器存放网页的根目录3、找到DirectoryIndex在这一行加上:index.cgi把它放在第一位,即:DirectoryIndexindex.cgi index.html index.html.var说明:因为bugzilla的首页为index.cgi,当我们访问bugzilla服务器时,就会返回这个主页4、找到AddHandler cgi-script .cgi去掉前面的#说明:把cgi文件当作程序运行,而不是当作文本文件显示5、找到ServerName在行#ServerName :80 下面添加如下内容:ServerName192.168.94.40:80(这项在前面的练习中可能已经加上了)6、搜索字符串/Directory找到如下内容:<Directory />Options FollowSymLinksAllowOverride None</Directory>每行前面添加#,把这四行内容注释掉,否则会禁止访问bugzilla的页面7、注意:如果前面练习了虚拟主机的配置,需要把前面练习虚拟主机时添加的代码注释掉或者删除掉8、保存退出十五、其他修改及配置1、修改/etc/hosts 文件,添加一行:192.168.94.20 zhaodszhaods为主机名(这项在前面的练习中可能已经做完)2、启动apache/etc/rc.d/init.d/httpd restart3、更改权限:chmod-R777/root注意:一定要有参数–R,是对bugzilla-2.18rc2所在的根路径及其下面的子路径设置权限十六、在Windows IE中访问bugzilla(1)启动IE浏览器,在地址栏中输入地址:192.168.94.40如果看到这只可爱的大蚂蚁,恭喜你,配置成功啦!(2)进行登录点击首页Log In 链接,出现登录界面在Login后面的文本框中输入登录帐户:zhaods@在Password后面的文本框中输入密码:123然后点击Login按钮十七、在Linux中再创建一个用户addusermytest1passwdmytest1密码:123十八、在OutLook中为mytest1用户创建邮箱:mytest1@(与前面创建的方法相同)十九、在bugzilla页面,点击Log Out 链接,登出刚才的帐户二十、点击New Account 链接,创建一个新用户在E-mail address文本框中输入刚才建立的帐户mytest1@在Real name 文本框中输入真实姓名点击Create Account二十一、这时系统会告诉你帐户已经创建,我们到OutLook中去接收bugzilla发送过来的登录密码,用该账户mytest1@和此密码即可登录bugzilla。
Bugzilla操作指南
Bugzilla操作流程 Bugzilla操作流程: 操作流程
Bugzilla操作指南1 Bugzilla操作指南1:注册 操作指南
打开IE在地址栏里输入:http://192.168.1.251/bugzilla进入bugzilla主页面,正常情况下应该显 示如下界面
点击New Account,输入注册用的E-mail,随后在E-mail中会收到一封来自bugzilla的邮件,根 据第一段下给出的相对地址,在IE中输入http://192.168.1.251/cgi-bin/bugzilla/相对地址, 进入注册页面,输入real name、密码以及密码确认,然后点击send就完成了。
4.用户管理 1)“Edit”一栏中的Users Users参数选项介绍如下: 这里主要用来查看和添加用户 Users
点击进入后可以修改用户相关信息
2)修改用户
name: Login name:登陆名称,这里设置email的名称 name: Real name:真实名称 Password: Password:可以为用户设置一个新密码 text: Disable text:如果这里不为空则用户帐号将被禁用,这里用来解释被禁原因 access: Group access: 在组访问设置里面有两列构选框, 第一列(左边列):可以为别的用户设置成为这个组的成员,既是说如果我把一个用户某一组第一列勾选,则授权 这个用户就可以添加其他用户到这个组,相当于管理这个组。 第二列(右边列):成为这个组的成员。 由下图中的勾选及提示就可看出:
4.查询My Bugs
这个选项在Saved Searches下作为一个默认的保存查询,点击这里可以看到当前用户提交的所有bug
Bugzilla操作指南5 保存My Bugzilla操作指南5:保存My Bugs 操作指南 我们可以在Search页面中保存自己的搜索: 例如我们查找状态(status)为all,产品(product)为GEB4.0的所有bug
Bugzilla用户指南说明书

About the T utorialBugzilla is an open-source tool used for issues and bugs tracking system. It is widely used as a bug-reporting tool for all types of testing functions. This tutorial introduces the readers to the basic features and usage of Bugzilla. This tutorial will guide the readers on how to utilize this tool in reporting and maintaining the bug status.AudienceThis tutorial has been prepared for beginners to help them understand how to use the Bugzilla tool. This tutorial will give you enough understanding of the various components of Bugzilla with suitable examples.PrerequisitesAs a reader of this tutorial, you should have a basic understanding of bug lifecycle and contents to provide in a bug.Copyright & DisclaimerCopyright 2017 by Tutorials Point (I) Pvt. Ltd.All the content and graphics published in this e-book are the property of Tutorials Point (I) Pvt. Ltd. The user of this e-book is prohibited to reuse, retain, copy, distribute or republish any contents or a part of contents of this e-book in any manner without written consent of the publisher.We strive to update the contents of our website and tutorials as timely and as precisely as possible, however, the contents may contain inaccuracies or errors. Tutorials Point (I) Pvt. Ltd. provides no guarantee regarding the accuracy, timeliness or completeness of our website or its contents including this tutorial. If you discover any errors on our website or in this tutorial, ******************************************1T able of ContentsAbout the Tutorial (1)Audience (1)Prerequisites (1)Copyright & Disclaimer (1)Table of Contents (2)1.BUGZILLA – OVERVIEW (4)2.BUGZILLA – INSTALLATION PREREQUISITES (6)3.BUGZILLA ─ INSTALLAT ION (5)4.BUGZILLA – SAMPLE WEB APPLICATION (10)5.BUGZILLA – NEW ACCOUNT CREATION (11)6.BUGZILLA – LOGIN (14)7.BUGZILLA – LOGGING A NEW BUG (16)8.BUGZILLA – CLONE A BUG (21)9.BUGZILLA – UNDERSTANDING A BUG (24)10.BUGZILLA – EDITING A BUG (27)11.BUGZILLA – REPORTS (30)12.BUGZILLA – GRAPHICAL REPORTS (32)13.BUGZILLA – TABULAR REPORTS (36)214.BUGZILLA – DUPLICATE (39)Generate Duplicate Reports (39)Changing the Parameters (41)15.BUGZILLA – BROWSE FUNCTION (43)16.BUGZILLA – SIMPLE SEARCH (46)17.BUGZILLA – QUICK SEARCH (49)18.BUGZILLA – ADVANCE SEARCH (51)19.BUGZILLA – CUSTOM SEARCH (54)20.BUGZILLA – BUG LISTS (58)21.BUGZILLA – PREFERENCES (68)22.BUGZILLA – GENERAL PREFERENCES (70)23.BUGZILLA – EMAIL PREFERENCES (73)Global and Specific Options (73)User Watching Feature (74)Ignore Bugs Feature (75)24.BUGZILLA – SAVED SEARCHES (76)25.BUGZILLA – ACCOUNT INFORMATION (80)26.BUGZILLA – PERMISSIONS (82)3Bugzilla 4 Bugzilla is an open-source tool used to track bugs and issues of a project or a software. It helps the developers and other stakeholders to keep track of outstanding problems with the product∙It was written by Terry Weissman in TCL programming language in 1998. ∙∙Later, Bugzilla was written in PERL and it uses the MYSQL database. ∙∙Bugzilla can be used as a Test Management tool since it can be easily linked with other test case management tools like Quality Centre , ALM , Testlink , etc. ∙∙Bugzilla provides a powerful, easy to use solution to configuration management and replication problems. ∙∙ It can dramatically increase the productivity and accountability of an individual by providing a documented workflow and positive feedback for good performance. Most commercial and defect-tracking software vendors charged enormous licensing fees in the starting days of Bugzilla. As a result, Bugzilla quickly became a favorite among the open-source users, due to its genesis in the open-source browser project with Mozilla. It is now the most precious defect-tracking system against which all the others are measured.Bugzilla puts the power in an individual’s hand to improve the value of business while providing a usable framework for natural attention to detail and knowledge store to flourish. Bugzilla – Key FeaturesBugzilla has many keys as well as advanced features, which makes it unique. Following is a list of some of Bugzilla’s most significant features:∙Bugzilla is powerful and it has advanced searching capabilities. ∙ Bugzilla supports user configurable email notifications whenever the bug status changes.∙ Bugzilla displays the complete bug change history.∙ Bugzilla provides inter bug dependency track and graphic representation.∙ Bugzilla allows users to attach Bug supportive files and manage it.∙ Bugzilla has integrated, product-based, granular security schema that makes it more secure.∙ It has complete security audit and runs under the Perl’s taint mode.∙Bugzilla supports a robust, stable RDBMS (Rational Data Base Management System) back end.1.Bugzilla5 ∙It supports Web, XML, E-Mail and console interfaces. ∙Bugzilla has a wide range of customized, user preferences features. ∙It supports localized web user interface. ∙ Extensive configurability as it allows to be configured with other test management tools for a better user experience.∙ Bugzilla has a smooth upgrade pathway among different versions.In the next chapter, we will discuss the prerequisites for installing Bugzilla.Bugzilla 6To install and run Bugzilla on the server, the core requirement is to have Perl installed. This means that Bugzilla can be installed on any platform, where Perl can be installed; including Windows, Linux and Mac OS X.Hardware Requirements∙It is recommended to have a 4 GB RAM or more. ∙∙Should have a Fast Processor, for instance, at least 3GHz or more. ∙∙ The hard disk space depends on the size of the team and the number of defects. A 50GB hard disk memory is a quite enough.Software RequirementsBugzilla requires a database server, a web server and Perl. In all the cases, (the newer, the better) the newer releases have more bug fixes, but they are still supported and they still get security fixes from time to time.∙ Perl: Bugzilla 4.4 and older requires Perl 5.8.1 or newer , but Bugzilla 5.0 and newer will require Perl 5.10.1 or newer. It is not recommend installing Perl 5.8.x at this stage. Instead, install Perl 5.12 or newer, as these newer versions have some useful improvements, which will give better user experience.∙ Database Server: Bugzilla supports MySQL, PostgreSQL, Oracle and SQLite. MySQL and PostgreSQL are highly recommended, as they have the best support from Bugzilla and are used daily by the Bugzilla developers. Oracle has several known issues and is a 2nd-class citizen. It should work decently in most cases, but may fail miserably in some cases too. SQLite is recommended for testing purposes only for small teams. If MySQL is used, version 5.0.15 is required by Bugzilla 4.x, but highly recommended version 5.5 or newer. For PostgreSQL installation, version 8.3 is required.∙Web Server: Bugzilla has no minimum requirements for its web server. It is recommended to install Apache 2.2, although Bugzilla works fine with IIS too (IIS 7 or higher recommended). To improve performances in Apache, recommend to enable its mod_perl module. 2.Bugzilla 7The Bugzilla GIT website is the best way to get Bugzilla. Download and install GIT from the website – https:///download and Run it.Where, "X.X" is the 2-digit version number of the stable release of Bugzilla (e.g. 5.0) The another way to download Bugzilla is from the following link –https:///download/ and move down to the Stable Release section and select the latest one from the list as shown in the following screenshot. Click on Download Bugzilla 5.0.3.Bugzilla comes as a 'tarball' (.tar.gz extension), which any competent Windows archiving tool should be able to open.3.8PERL ModulesBugzilla requires a number of Perl modules to be installed. Some of them are mandatory, and some others, which enable additional features, are optional.In ActivePerl , these modules are available in the ActiveState repository, and are installed with the ppm tool. Either it can use it on the command line or just type ppm and the user will get a GUI.Install the following mandatory modules with the following command.Some of the most important PERL modules have been described below.∙ CGI.pm – It is an extensively used Perl module for programming the CGI (Common Gateway Interface) web applications. It helps to provide a consistent API for receivingand processing user inputs.∙ Digest-SHA – The Digest-SHA1 module allows you to use the NIST SHA-1 message digest algorithm from within the Perl programs. The algorithm takes as input a message of arbitrary length and produces as output a 160-bit "fingerprint" or "message digest" of the input. ∙TimeDate – TimeDate is a class for the representation of time/date combinations, and is part of the Perl TimeDate project.9∙DateTime –DateTime is a class for the representation of date/time combinations, and is part of the Perl DateTime project.∙DateTime-TimeZone –This class is the base class for all time zone objects. A time zone is represented internally as a set of observances, each of which describes the offset from GMT for a given time period.∙DBI –It is the standard database interface module for Perl. It defines a set of methods, variables and conventions that provide a consistent database interface independent of the actual database being used.∙Template-Toolkit –The Template Toolkit is a collection of Perl modules, which implement a fast, flexible, powerful and extensible template processing system. It can be used for processing any kind of text documents and is input-agnostic.∙Email-Sender –The Email-Sender replaces the old and problematic email send library, which did a decent job at handling the simple email sending tasks, but it was not suitable for serious use for a several reasons.∙Email-MIME –This is an extension of the Email-Simple module. It is majorly used to handle MIME encoded messages. It takes a message as a string, splits it into its constituent parts and allows you to access the different parts of the message.∙URI –A Uniform Resource Identifier is a compact string of characters that identifies an abstract or physical resource. A URI can be further classified as either a Uniform Resource Locator (URL) or a Uniform Resource Name (URN).∙List-MoreUtils –It provides some trivial but commonly needed functionality on lists, which is not going to go into the List-Util module.∙Math-Random-ISAAC –The ISAAC (Indirection, Shift, Accumulate, Add, and Count) algorithm is designed to take some seed information and produce seemingly random results as the output.∙File-Slurp – This module provides subs that allow you to read or write files with one simple call. They are designed to be simple, have flexible ways to pass in or get the file content and are very efficient.∙JSON-XS –This module converts the Perl data structures to JSON and vice versa. The primary goal of JSON-XS is to be correct and its secondary goal is to be fast.∙Win32 –The Win32 module contains functions to access Win32 APIs.∙Win32-API –With this module, you can import and call arbitrary functions from the Win32's Dynamic Link Libraries (DLL), without having to write an XS extension.10DateTime-TimeZone-Local-Win32 –This module provides methods for determining the local time zone on a Windows platform.11End of ebook previewIf you liked what you saw…Buy it from our store @ https://。
最新bugzilla使用手册
b u g z i l l a使用手册Bugzilla试用手册目录登录 (3)创建产品 (4)用户管理 (6)Bug的管理 (7)设置(Preferences)功能 (10)参数 (11)标志 (11)字段值 (12)用户组 (12)其它 (14)当你第一次运行后,安装Bugzilla的checksetup.pl,它会提示输入管理员用户名(电子邮件地址)和这个“超级用户”的密码。
如果由于某种原因,你删除“超级用户”帐户,重新运行checksetup.pl会再次提示此用户名和密码。
登录Bugzilla首页默认显示为三个模块。
选择“fille a bug”按钮,出现登录界面。
登录之后会出现一个欢迎界面和bugzilla的介绍信息。
创建产品1.创建产品当用户登录系统后,选择界面上方的“administarator”连接,出现管理的各个功能和介绍。
点击页面中的“product”连接;之后再点击“Add”。
填写新产品信息,bugzilla提供的产品信息很简介,只有产品名称、产品描述和版本。
填写完产品信息后,点击“Add”按钮,系统提示产品创建成功,但需要创建一个组件。
2. 添加组件在创建项目后,提示要创建一个组件,点击“Edit components”按钮为产品创建组件。
填写组件相关信息并指定相关负责人。
3. 编辑版本添加了一个组件后,下面为产品添加版本。
编辑项目,点击“Edit versions”---“Add”。
4.编辑组访问控制在编辑项目中,点击“Edit Group Access Controls”链接。
编辑完成后,点击“submit”按钮即可。
用户管理1.添加用户依然在“Administrator”页面中点击“Users”链接。
然后点击“add a new user”链接。
在添加用户时有“禁用”选项,而且还一个关于“禁用”的文本框,提示,文本框内容非空时,则此帐号将被禁用,而且文本中应该说明禁用的原因。
- 1、下载文档前请自行甄别文档内容的完整性,平台不提供额外的编辑、内容补充、找答案等附加服务。
- 2、"仅部分预览"的文档,不可在线预览部分如存在完整性等问题,可反馈申请退款(可完整预览的文档不适用该条件!)。
- 3、如文档侵犯您的权益,请联系客服反馈,我们会尽快为您处理(人工客服工作时间:9:00-18:30)。
Bugzilla使用指南
绪言
什么是Bugzilla
Bugzilla是一个错误跟踪系统,用于对软件产品程序开发过程的错误跟踪。
它的强大功能表现在以下几个方面:
1.强大的检索功能
2.用户可配置的通过Email公布Bug变更
3.历史变更记录
4.通过跟踪和描述处理Bug
5.附件管理
6.完备的产品分类方案和细致的安全策略
7.安全的审核机制
8.强大的后端数据库支持
9.Web,Xml,Email和控制界面
10.友好的网络用户界面
11.丰富多样的配置设定
12.版本间向下兼容
为什么使用Bugzilla
Bugzilla是一个拥有强大功能的错误跟踪系统。
它可以使我们更好的在软件开发过程中跟踪软件错误的处理过程,为开发和测试工作以及产品质量的度量提供数据支持,从而有效的保证软件产品的质量。
新建一个Bugzilla账号
1.点击“Open a new Bugzilla account”链接,输入你的Email地址(如
:XXX@office)然后点击“Create Account”。
2.稍候,你会收到一封邮件。
邮件中包含你的登录账号(与你的Email相同)和口
令,这个口令时Bugzilla系统随机生成的,你可以根据你的需要进行变更。
3.在页面的黄色页角中点击“Log In”链接,而后输入你的账号和口令。
最后点击
“Login”
产品和结构(Product and Component)
Bug记录按产品分类,每种产品按功能拆分成几类。
以Bugzilla产品为例,它由以下几部分构成:
l Administration
l Bugzilla-General
l Creating/Changing Bug
l Documentation
l Email
l Installation
l Query/Buglist
l Reporting/Charting
l User Accounts
l Changing Passwords
l User Interface
Bug报告状态分类和Bug处理意见(Status and Resolution):
1.Bug报告状态分类(Status)
l待确认的(Unconfirmed)
l新提交的(New)
l已分配的(Assigned)
l问题未解决的(Reopened)
l待返测的(Resolved)
l待归档的(Verified)
l已归档的(Closed)
2.Bug处理意见(Resolution)
l已修改的(Fixed)
l不是问题(Nvalid)
l无法修改(Wontfix)
l以后版本解决(Later)
l保留(Remind)
l重复(Duplicate)
l无法重现(Worksforme)
指定处理人(Assigned To)
l可以指定一个处理人
l如不指定处理人,则系统指定管理员为默认处理人
超链接(URL)
l输入超链接地址,引导处理人找到与报告相关联的信息
概述(Summary)
l概述部分“Summary”的描述,应保证处理人在阅读时能够清楚提交者在进行什么操作的时候发现了什么问题。
l如果是通用组件部分的测试,则必须将这一通用组件对应的功能名称写入概述
中,以便今后查询。
硬件平台和操作系统(Platform and OS)
l测试应用的硬件平台(Platform),通常选择“PC”
l测试应用的操作系统平台(OS)
版本(Version)
l产生Bug的软件版本
Bug报告优先级(Priority)
l分五个等级即P1-P5,P1的优先级别最高之后逐级递减
Bug状态(Severity)
l Blocker,阻碍开发和/或测试工作
l Critical,死机,丢失数据,内存溢出
l Major,较大的功能缺陷
l Normal,普通的功能缺陷
l Minor,较轻的功能缺陷
l Trivial,产品外观上的问题或一些不影响使用的小毛病,如菜单或对话框中的文字拼写或字体问题等等
l Enhancement,建议或意见
报告人(Reporter)
l Bug报告提交者的账号
邮件抄送列表(CC List)
l Bug报告抄送对象,该项可以不填
l如需要抄送多人,可将邮件地址用“,”分隔
从属关系(Bug “ID” depends on,Bug “ID” blocks)
l“Bug “ID” depends on”如果该Bug必须在其他Bug修改以后才能够修改,则在此项目后填写那个Bug的编号
l“Bug “ID” blocks”如果该Bug的存在影响了其他Bug的修改,则在此项目后填写被影响的Bug编号
附加描述(Additional Comments)
l在Bug跟踪过程中测试与开发人员通过这里进行沟通
l开发人员可以在这里填写处理意见和处理记录
l测试人员可以在这里填写返测意见和对在返测过程中发现的新问题进行描述
Bug查找
l可以通过页脚中的“Query”链接进入查找界面
l根据查找的需要在界面中选择对象或输入关键字
l查找功能能够进行字符或字串的匹配查找
l查找功能具有布尔逻辑检索功能
l你可以通过在查找页面中选择“Remember this as my default query”将当前检索页面中设定的项目保存。
以后可以从页脚中的My bugs中直接调用这个项目进行检
索
l你还可以通过在“Remember this query, and name it:”后面输入字符,将你当前检索页面中设定的项目保存命名,同时选中“and put it in my page footer”。
则以后
这个被命名的检索将出现在页脚中。
(有关如何在页脚中设定显示的项目请参见
1.5.3)
Bug列表
l如果你运行了Bug检索功能,系统会根据你的需要列出相关的项目
l你可以通过列表页脚附近的“Change Columns”设定在列表中显示的Bug记录中的字段名称
l如果你拥有必要的权限,你还可以通过“Change several bugs”修改列表中罗列出的Bug的记录。
例如:修改Bug的所有者
l通过“Send mail to bug owners”你可以给列表中罗列的Bug记录的所有者发信l如果你对查找的结果不满意,希望重新调整检索设定。
你可以通过“Edit this query”实现
l通常情况下,检索结果中只显示最基本的信息。
你可以通过“Long Format”显示更详细的内容
用户属性设置(Edit prefs)
1账号设置(Account Settings)
l在这里你可以改变你账号的基本信息,如口令,Email地址,真实姓名
l为了安全起见,在此页进行任何更改之前你都必须输入你当前的口令
l当你变更了你的Email地址,系统会给你的新老Email地址分别发一封确认邮件,你必须到邮件中指定的地址对你的更改进行确认
2Email设置(Email Settings)
l你可以在此通过选择告诉系统,你希望在什么条件下收到和你相关的邮件
3页脚(Page Footer)
l设定“Preset Queries”是否在页脚中显示
4用户权限(Permissions)
你可以在此查看自己账号现在的权限。