快速安装指南
鱼眼高清网络摄像机快速安装指南说明书

一、前言感谢您购买我司产品,如对本公司产品有疑问或需要,请随时和我们联系。
此内容(手册)的目的是确保用户正确使用本产品,以避免危险或财产损失。
在使用产品之前,请认真阅读此手册并妥善保存以备日后参考。
如果用户因没有按照以下安全说明,致使设备不能正常使用或损坏等情况,我司恕不负责,感谢您的配合。
二、安全使用注意事项1.电源要求Ÿ请在安装使用设备过程中,严格遵守当地各项电气安全规定。
Ÿ请使用满足安全电压要求的电源,在设备运行之前检查供电电源是否正确。
Ÿ请在安装配线时装入易于使用的断电设备,以便必要时进行紧急断电。
请保护电源软线免受踩踏或紧压,特别是在插头、电源插座和从装置引出的接点处。
Ÿ请在断电状态下连接电源、告警、音频、RS485等线缆,严禁在设备上电的情况下连线。
2.使用环境要求Ÿ请勿将摄像机对准强光(如灯光照明、太阳光等处)聚焦,否则容易引起过亮或漏光现象 (这并非摄像机故障) 也将影响摄像机寿命。
Ÿ请在允许的湿度和温度范围内运输、使用和存储设备。
Ÿ请勿将设备置于潮湿、多尘、极热、极冷、强电磁辐射或照明条件不稳定等场所。
Ÿ请勿让任何液体流入设备,以免内部元件受损。
Ÿ请勿阻挡设备附近的通风口,以免热量积蓄。
Ÿ请在运送设备时,重新以出厂时的包装进行包装,或用同等品质的材质包装。
Ÿ请勿在运输、存储及安装过程中重压、剧烈震动、浸泡设备。
工作环境工作电源DC12V±10%/POE功耗20W Max温度-40℃~ +70℃湿度10%~95%(无凝结)海拔高度-60m~3000m大气压86kPa~106kPa3.日常维护与保养Ÿ请勿直接触碰设备发热部件,以免烫伤。
Ÿ镜头沾染灰尘或油脂时,用棉布或镜头清洁布擦拭。
若遇污垢难以清除,蘸上少量镜片清洁液,自镜头中心向外旋转轻轻擦拭,直到干净为止。
禁止使用有机溶剂(苯、酒精等)对镜头和护罩前脸进行除尘、清洁。
Ÿ请不要以任何方式拆卸或修改产品。
(对未经认可的修改或维修导致的问题,本公司不承担任何责任)。
快速安装指南

快速安装指南欢迎阅读本快速安装指南,帮助您迅速有效地完成安装。
无论您是新手还是有经验的用户,本指南将为您提供详细的步骤和技巧,帮助您顺利安装。
准备工作1. 材料准备:在开始安装前,请确保您已准备好所需材料,例如工具、零件和配件等。
安装步骤1. 确认安装位置:在开始安装前,请先选择合适的安装位置,根据需要考虑支撑能力、空间需求等因素。
2. 检查并清洁安装区域:在安装前,请确保安装区域干净、整洁,并清除任何障碍物以确保安全性。
3. 安装支撑结构:根据安装要求,安装支撑结构,确保其稳固可靠。
4. 安装关键部件:根据安装说明,逐步安装关键部件,确保正确位置对齐和固定。
5. 连接管路和线缆:根据相关说明,连接管路和线缆,并确保其连接紧固无松动。
6. 连接电源和调试:正确地连接电源,并按照说明进行系统的初步调试。
技巧与注意事项1. 阅读安装说明:在开始安装前,请仔细阅读相关的安装说明和警示标志,确保充分理解安装步骤和安全须知。
2. 使用合适的工具和设备:确保使用正确的工具和设备进行安装,以确保安全和效果。
3. 仔细检查安装质量:在每个安装步骤完成后,请进行仔细检查,确保固定牢固、连接紧密,并排除任何异常情况。
4. 考虑维护和保养:在安装完成后,请考虑设备的维护和保养,以延长使用寿命和保持性能。
故障排除如果在安装过程或安装后遇到任何问题,请参考以下故障排除步骤:1. 查阅用户手册:在解决问题之前,请先仔细查阅用户手册或安装指南,以寻找可能的解决方案。
2. 与供应商联系:如果问题仍然存在,请及时与产品供应商或售后服务团队取得联系,寻求专业支持。
总结本快速安装指南为您提供了一系列步骤和技巧,帮助您快速安装设备。
请确保在安装过程中仔细阅读并遵循安全操作指南,并始终关注安全和质量。
如果需要进一步的帮助或有任何疑问,请随时与相关专业人员联系。
祝您顺利完成安装!。
KEBA KeContact P20 P30 快速安装指南说明书

KeContact P20/P30Quick Installation GuidePay attention to the handling instructions, safety notes andinstallation guidelines in the “KeContact P20/P30 Installationmanual”!WARNING!Not observing the safety instructions can result in risk of death,injuries and damage to the device! KEBA AG assumes no liability forclaims resulting from this!∂Electrical hazard!The installation, commissioning and maintenance of the chargingstation may only be performed by correctly trained, qualified andauthorized electricians who are fully responsible for thecompliance with existing standards and installation regulations.∂Only connect voltages and circuits in the right-hand connectionarea (Ethernet, terminals for control lines) that have a secureseparation to dangerous voltages (e.g. sufficient isolation).①Specifications for the electrical connectionThe charging station is set to 10 amps in the delivery state.Set the maximum EVSE current capacity by setting the DIP-switches incoordination with your installed line circuit breaker (see chapter “DIP-switchsettings”).The mains supply line must be hardwired to an existing house installation andcorrespond to the nationally applicable legal conditions.Selection of the RCD circuit breaker:∂Each charging station must be connected to a separate RCD circuit breaker. Noother circuits may be connected to this RCD circuit breaker.∂Residual-current device of at least type A (30 mA triggering current).If the vehicles to be charged are not known (e.g. semi-public area), measuresmust be taken for protection where DC residual currents (>6 mA) occur. This canbe realized, for example, through device version KC-P30-xxxxxxx2, the use of anRCD type specifically intended for electric vehicles or with a RCD type B. Thevehicle manufacturer specifications must also be observed.∂If a charging station is protected with a type B residual-current device, everyupstream residual-current device, even those not assigned to the chargingstation, must either be type B or equipped with a DC residual-current detectiondevice.Dimensioning the Line circuit breaker:∂Determine the nominal current in accordance with the specifications on the typeplate, in coordination with the desired charging current (DIP switch settings for thepre-adjusted maximum EVSE current capacity) and the mains supply line.I DIPswitch ≤ I Breaker ≤ I Cable ≤ I Rating②Opening the connector panelCover screwsUnscrew the two cover screws[S] on the bottom side of thehousing cover.Remove the housing cover.Removing the connector panel coverUnscrew the four screws withwhich the connector panel coveris mounted and remove theconnector panel cover.③Preparing the cable insertionBreaking out the cable insertionopeningsPlace the housing on a stablesupport pad and use a hammerand flathead screwdriver tocarefully break out the requiredcable insertion openings.Then insert the correspondingfeedthroughs (cable glands ordouble-membrane seals)Use the cable gland whenconnecting from above!④Mounting the charging stationMark and drill the four holes using the supplied drilling template and a spiritlevel.Water drainageThe water drainage from the top side tothe rear side of the charging station mustbe ensured. Therefore, observe thefollowing:∂Only a vertical installation of thecharging station is permitted.∂The charging station must bemounted at an angle of 90° (noinclination is permitted!).Mounting the charging stationTurn the hanger bolts into theanchors until the thread stillprotrudes approx. 2 cm ('x').Use the shims[A]to compensatefor any unevenness and toensure a water drainage behindthe device.Position and mount the chargingstation using the suppliedwashers and nuts.[A]…shim[B]…charging station housing[C]…washer[D]…nut⑤Electrical connectionThe cable sheathing must reach into the housing.Connecting the mains supply lineShorten the connection wires tothe appropriate length; theseshould be kept as short aspossible.The PE conductor must be longerthan the remaining conductors!Strip approx.12 mm from theconnection wires.Wire end sleeves arerecommended for finely strandedwires.Perform the connection of themains supply line[L1], [L2], [L3],[N] and [PE].1-phase connectionIt is also possible to perform a 1-phaseconnection of the charging station. Usethe terminals [L1],[N] and [PE].Supply terminalsThe supply terminals are designed asspring-type terminals.Insert the flathead screwdriver(blade with 5.5 mm) into thesupply terminal as shown on thepicture.Terminal data:- inflexible (min.-max): 0.2 – 16 mm²- flexible (min.-max):0.2 – 16 mm²- AWG (min.-max):24 – 6- flexible (min.-max) with wire endsleeve:Without/with plastic sleeve0.25 – 10 / 0.25 – 10 mm²- Stripping length: 12 mm- Flathead screwdriver: 5.5 mm⑥DIP-switch settingsPosition of the DIP-switches DSW1/2[DSW1]…configuration [DSW2]…addressingAmperage settings with DSW1Example setting for 16A .SETTING THE AMPERAGE (DSW1) (*1)Curr entD1.6D1.7D1.8FigureMin. cable cross section10A OFF OFFOFF ≥1.5 mm²13A ONOFFOFF≥ 1.5 mm²16AOFFON OFF ≥ 2.5 mm²20A ON ON OFF ≥ 2.5 mm²25A OFF OFF ON ≥ 4.0 mm²32A ON OFF ON ≥ 6.0 mm²(*1) Preadjusted maximum current value for the EV charger (control pilot duty cycle).■…Indicates the position where to push down the DIP switch.⑦ General commissioning process1.Remove all residual installation and connection materials from the connection area.2.Before commissioning, check all screw and terminal connections for firm seating!3.Check whether all unused cable glands are properly sealed with blind plugs or dummy screw fittings.4.Ensure that the voltage of the mains supply line is switched on.After 15 to 20 seconds, the status LED must flash green slowly.The device performs a self test every time it is switched on.5.Perform the specified initial tests according to the locally applicable regulations and laws.6.Close the connector panel cover to the charging station.7.Mount the housing cover.Commissioning modeThe charging station can be placed into a commissioning mode for supporting the initial system test. During this, a self-test of the device is performed (interlocking,contactor activation, current measurement, etc.) and a possible error is indicated.After successful test without connected vehicle, the contactor is switched for limited time in order to facilitate the initial tests. A normal charging procedure is not possible in commissioning mode. The interlocking of the connector socket is activated to prevent a cable from being plugged in.Switching on the charging station in commissioning mode via the supply voltage leads for security reasons in an error state (white-red-red-red) to prevent an unattended activation.Activating the commissioning modeSet the DIP-switch DSW2.8 to ON .Perform a reset of the charging station. To do this press the [Service button] for 1 second .The commissioning mode is now activated and is indicated by the orange status LED (lights continuously).You now have the option for approximately 10 min. to contact with standard test probes using the measuring device ( e.g. Astaco® test probes from BEHA) and to perform the necessary tests.After 10 min. have elapsed, the contactor is deactivated in the charging station is taken out of service.Deactivating the commissioning modeDSW2.8 = OFFSet the DIP-switch DSW2.8 to OFF again.Perform a reset of the charging station. To do this, press the[Service button] for 1 second or switch the power supply voltage off/on.The charging station starts up again in normal mode and is ready for operation.⑧ Closing the charging stationHousing markTighten the four screws until the mark on the connector panel cover is even with the housing surface.The connector panel cover must seal the housing properly.Fitting the housing coverFit the housing cover at the top and push the cover downwards slightly.Make sure that the housing cover is seated correctly at the top in the housing guides.Cover screwsSecure the housing cover at the bottom using the two cover screws [S].© KEBA 2014-2017Subject to alteration in the course of technical advancement. No guarantee is offered for the accuracy of the information provided. All rights reserved.All brand and product names are trademarks of their respective companies. Technical information in this document is subject to change without notice.Document: Revision 3.10 / Release date: 19.07.2017 / Article no.: 93408KEBA AG, Postfach 111, Gewerbepark Urfahr, A-4041 Linz; /emobility。
NPort 5100A 系列设备服务器快速安装指南说明书

NPort 5100A SeriesQuick Installation GuideSecond Edition, June 20101. OverviewNPort 5100A series device servers are compact, palm-sized data communication devices that allow you to control RS-232 (NPort 5110A), RS-422/485 (NPort 5130A), and RS-232/422/485 (NPort 5150A) serialdevices over a TCP/IP-based Ethernet.Note: “-T” indicates an extended temperature model.2. Package ChecklistBefore installing the NPort 5100A series device server, verify that the package contains the following items:1 NPort 5100A serial device server4 stick-on padsDocument & Software CDQuick Installation GuideProduct Warranty StatementOptional AccessoryDK-35A: DIN-Rail Mounting Kit (35 mm)Notify your sales representative if any of the above items are missing or damaged.3. Hardware IntroductionAs shown in the following figures, NPort 5100A series device servers have one male DB9 port for transmitting RS-232 (NPort 5110A),RS-422/485 (NPort 5130A), or RS-232/422/485 (NPort 5150A) serialdata.NOTE: The NPort 5110A, NPort 5130A, and NPort 5150A have thesame form factor.Reset Button—Press and hold the Reset button for 5 seconds to loadfactory defaults: Use a pointed object, such as a straightened paper clip ortoothpick, to depress the reset button. This will cause the Ready LED toblink on and off. The factory defaults will be loaded once the Ready LEDstops blinking (after about 5 seconds). At this point, release the resetbutton.LED Indicators—NPort 5100A’s top panel has three LED indicators,which are described in the following table.LEDNameLEDColorLED FunctionReadyRedSteady on: Power is on and the NPort is booting up.Blinking: Indicates an IP conflict, or DHCP orBOOTP server is not responding properly.GreenSteady on: Power is on and the NPort is functioningnormally.Blinking: The NPort has been located by the NPortAdministrator’s Location function.Off Power is off, or a power error..LinkOrange 10 Mbps Ethernet connection.Green 100 Mbps Ethernet connection.Off Ethernet cable is disconnected.Tx/RxOrange Serial port is receiving data.Green Serial port is transmitting data.OffNo data is being transmitted or received through theserial port.Adjustable pull high/low resistor for RS-422/485 (150 KΩ or 1 KΩ)Jumpers are used to set the pull high/lowresistor value s. The default is 150 KΩ. Shortthe jumpers to set this value to 1 KΩ. Do notuse the 1 KΩ setting with RS-232 mode, sincedoing so will degrade the RS-232 signals andshorten the communication distance.4. Hardware Installation InformationSTEP 1: After removing the NPort 5100A series device server from thebox, connect the NPort 5100A series device server to a network. Use astandard straight-through Ethernet cable to connect to a hub or switch.When setting up or testing the NPort 5100A series device server, youmight find it convenient to connect directly to your computer’s Ethernetport. In this case, use a cross-over Ethernet cable.STEP 2: Connect the NPort 5100A series device server’s serial port to aserial device.STEP 3: Connect the power adaptor.STEP 4: Placement options.In addition to placing the NPort 5100A on a desktop or other horizontalsurface, you may also make use of the DIN-Rail or Wall Mount options,as illustrated below.Wall Mount DIN-RailP/N: 1802051000021— 1— — 2 — — 3 —5. Software Installation InformationTo install NPort Administration Suite, insert the NPort Document & Software CD into your computer’s CD-ROM drive. Once the NPort Installation CD window opens, click on the Installation button, and then follow the instructions on the screen.To view detailed information about NPort Administration Suite, click on the Documents button, and then select “NPort 5100A Series User’s Guide” to open the pdf version of the user’s guide.6. Pin AssignmentsEthernet Port PinoutsPin Number Ethernet1 Tx+2 Tx-3 Rx+6Rx-NPort 5110A—DB9 male (RS-232) port pinoutsPin Number RS-2321 DCD2 RxD3 TxD4 DTR5GND6 DSR7 RTS8 CTS9 --- NPort 5130A—DB9 male (RS-422/485) port pinoutsPin Number RS-422/485 (4W)RS-485 (2W)1 TXD-(A) ---2 TXD+(B)---3 RXD+(B) Data+(B)4 RXD-(A) Data-(A)5 GND GND6 --- ---7 --- ---8 --- ---9 --- ---NPort 5150A—DB9 male (RS-232/422/485) port pinoutsPin Number RS-232 RS-422/485 (4W)RS-485 (2W)1 DCD TXD-(A) ---2 RxD TXD+(B) ---3 TxD RXD+(B)Data+(B)4 DTR RXD-(A) Data-(A)5 GND GND GND6 DSR --- ---7 RTS --- ---8 CTS --- ---9 --- --- ---7. SpecificationsPower RequirementsPower Input 12 to 48 VDCPower Consumption NPort 5110A: 82.5 mA@12V, 47.3 mA@24VNPort 5130A: 89.1 mA@12V, 49.5 mA@24VNPort 5150A: 92.4 mA@12V, 52.8 mA@24VOperating Temperature 0 to 60°C (32 to 140°F), for standard models-40 to 75°C (-40 to 167°F), for -T modelsOperating Humidity 5 to 95% RHDimensions 75.2 × 80 × 22 mm(2.96 × 3.15 × 0.87 in)←with ears52 × 80 × 22 mm(2.05 × 3.15 × 0.89 in)←without earsSerial Line Protection 15 KV ESD for serial portLevel 1 Surge, EN61000-4-5Magnetic Isolation 1.5 KV for EthernetPower Line Protection Level 2 Burst (EFT), EN61000-4-4Level 3 Surge, EN61000-4-5Regulatory Approvals FCC Class A, CE Class A, UL, LVDClick here for online support:/supportThe Americas: +1-714-528-6777 (toll-free: 1-888-669-2872)Europe: +49-89-3 70 03 99-0Asia-Pacific: +886-2-8919-1230China: +86-21-5258-9955 (toll-free: 800-820-5036)2010 Moxa Inc. All rights reserved.Reproduction without permission is prohibited.—4— —5 — — 6 —。
多语言快速安装指南说明书
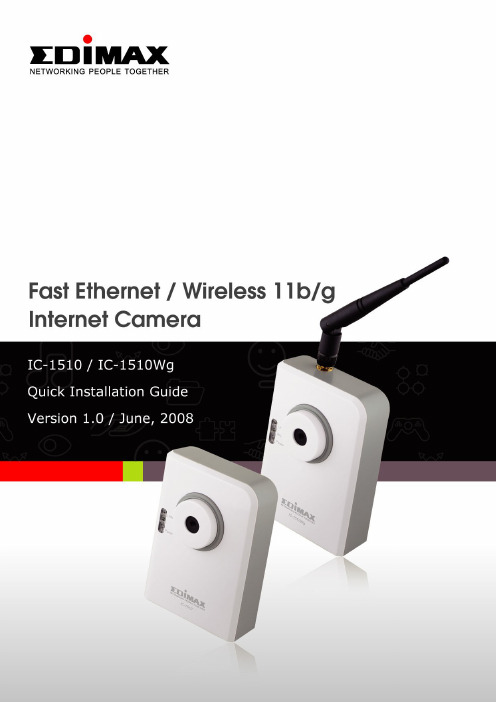
Multi-Languages QIG in Driver CD================================================== Český:Českého průvodce rychlou instalací naleznete na přiloženém CD sovladačiDeutsch: Finden Sie bitte das deutsche QIG beiliegend in der Treiber CD Español: Incluido en el CD el QIG en EspañolFrançais:Veuillez trouver l‟français QIG ci-joint dans le CDItaliano: Incluso nel CD il QIG in ItalianoMagyar: A magyar telepítési útmutató megtalálható a mellékelt CD-n Nederlands: De nederlandse QIG treft u aan op de bijgesloten CDPolski: Skrócona instrukcja instalacji w języku polskim znajduje się na załączonej płycie CDPortuguês: Incluído no CD o QIG em PortuguesРусский: Найдите QIG на pусскoм языке на приложеном CD Romana: Cd-ul cuprinde Ghid de instalare rapida in limba romanaSlovensky: Anglického sprievodcu rýchlou inštaláciou nájdete na priloženom CD s ovládačmi.Türkçe: Ürün ile beraber gelen CD içinde Türkçe Hızlı Kurulum Kılavuzu'nu bulabilirsinizCopyright by Edimax Technology Co, LTD. all rights reserved. No part of this publication may be reproduced, transmitted, transcribed, stored in a retrieval system, or translated into any language or computer language, in any form or by any means, electronic, mechanical, magnetic, optical, chemical, manual or otherwise, without the prior written permission of this Company.This company makes no representations or warranties, either expressed or implied, with respect to the contents hereof and specifically disclaims any warranties, merchantability or fitness for any particular purpose. Any software described in this manual is sold or licensed "as is". Should the programs prove defective following their purchase, the buyer (and not this company, its distributor, or its dealer) assumes the entire cost of all necessary servicing, repair, and any incidental or consequential damages resulting from any defect in the software. Further, this company reserves the right to revise this publication and to make changes from time to time in the contents hereof without obligation to notify any person of such revision or changes.The product you have purchased and the setup screen may appear slightly different from those shown in this QIG. For more detailed information about this product, please refer to the User's Manual on the CD-ROM. The software and specifications could be subjected to change without notice. Please visit our web site for the update. All right reserved including all brand and product names mentioned in this manual are trademarks and/or registered trademarks of their respective holders .Content1.Product Information (1)2.Check your package contents (1)3.System Requirement (1)4.Hardware Installation (2)4.1.LED and Focusing (2)4.2.Camera Ports (3)4.3.Installation Procedure (4)5.Locate the IP Address (5)6.Web Management Interface (9)7.Software Installation (12)work Configuration (18)work Setting (19)8.1.2.Wireless Settings (IC-1510Wg Only) (21)9.Firmware Upgrade (24)1. Product Information⏹Complies with IEEE802.3, 802.3u standards⏹Complies with Wireless 802.11b/g standards with WEP, WPA and WPA2encryption (IC-1510Wg only)⏹Supports high speed hardware-based Motion-JPEG compression⏹Supports video resolution :640x480 (VGA), 320x240 (CIF) and160x120(QCIF)⏹Supports Snapshot-to-Email on events and predetermined schedulerecordings in AVI format⏹Supports Auto Brightness/Contrast/Hue Control⏹Built-in manual focus lens2. Check your package contents⏹One Internet Camera⏹One Power Adapter⏹One Camera Stand⏹One 100cm Category 5 Ethernet Cable⏹One Quick Installation Guide⏹One CD (Including User‟s Manual/ Multi-Language QIG/ Utility & Viewer) ⏹One Antenna(* IC-1510Wg Only)If any of the above items are missing, please contact your supplier.3. System RequirementSystem requirement for PC, MAC or Notebook PC to access the Internet Camera as following:⏹OS System: Windows 98, ME, 2000, XP + SP2, Server 2003⏹CPU: Intel Pentium III 750MHz above or Intel Celeron 1GHz above⏹Memory Size: 128MB (256MB recommended)⏹VGA Card Resolution: 800 x 600 or above4.Hardware Installation4.1.LED and FocusingThe Camera head and its focus ring allow you to modify the aim and focus of the Camera. To adjust the Camera‟s focus, rotate the dark focus ring.There are three LEDs indicating the camera status and networking status. • PowerWhen the camera is power on and ready for access, the LED will light. • LANWhen the Internet Camera is linking to wired network, the LED is lighting. The LED is flashing when video is transmitted or received through wired network. • WLANWhen the Internet Camera is linking to wireless network, the LED islighting. The LED is flashing when video is transmitted or received through wireless network.4.2. Camera PortsThe Camera features two ports and a Reset button. • Antenna connectorThe Standard reverse SMA connector is for any antennas with reverseSMA connector can connect to the Internet Camera.•PowerThe Power port is where you can connect the power adapter. •LANThe LAN port is where you can connect the Ethernet network cable. •Reset1. If problems occur with your Internet Camera, press the reset buttonwith a pencil tip (for less than 2 seconds) and the Internet Camera will reboot itself with your configurations.2. If problems persist or you experience extreme problems or you forgotyour password, press the reset button for longer than 5 seconds. The Internet Camera will reset itself to the factory default settings (warning: your original configurations will be replaced with the factorydefault settings).4.3. Installation Procedure1. Unpack the Internet Camera package and verify that all the items listed inthe Chapter 1 are provided.2. Connect the Internet Camera to your network by attached the networkcable from the switch/router to the LAN port of the Internet Camera.3. Connect the power adapter to the Internet Camera and plug the poweradapter to power outlet. The Internet Camera will be powered on. When the Internet Camera is ready, the Ready LED will light.Note: It is highly recommended to use the power adapter shipped with the Internet Camera, do NOT use any other power adapter from any sources.5. Locate the IP AddressDefault IP address of this IP camera is 192.168.2.3. If you wish to assign another IP address to this IP camera, you have to log onto the web configuration interface of the camera first.If the left three fields of the IP address of your computer is not 192.168.2.XXX , you‟ll have to change the IP address of your computer first:1. Click …Start‟ -> …Control Panel‟2. Double-click …Network Connections‟ icon.3. Right-click …Local Area Connection‟, and click …Properties‟.4. Select …Internet Protocol (TCP/IP)‟, and then click …Properties‟.5. In …IP address‟ field, please fill in any IP address begins with …192.168.2‟,and ends with a value greater than 2 and less than 254 (You can use the example in the picture …192.168.2.239‟). In Subnet mask field, please fill …255.255.255.0‟. Please keep all other fields empty, and click …OK‟.If you changed the IP address of this IP camera and you forget it, there‟re 2 methods to recover it:a. Press and hold the …Reset‟ button located at the bottom of this IPcamera, to clear all settings of the IP camera and reset the IP address back to 192.168.2.3. You‟ll lose all settings in the IP camera.b. Ask network administrator to check the DHCP release table, if thecamera was set to obtain the IP address by DHCP, a new record will be added to DHCP release table on DHCP server when the IP camera isconnected to the local area network6. Web Management InterfaceMake sure the IP camera is correctly powered (Power LED is on), and then launch Internet Explorer and type the IP address of the IP camera in address bar of Internet Explorer. You should be prompted to input the user name and password:Default user name is …admin‟ (in lower case) and password is …1234‟. Click …OK‟ to continue after user name and password has entered.If you‟re rejected, maybe the password has been modified previously. This should not happen if this is a newly-purchased camera, however, if you get the camera from someone else, the password would be changed. Please try to obtain the correct user name / password, or you‟ll have to reset the ca mera. After logged on, you should see the following messages at the top of Internet Explorer:This IP camera requires a special ActiveX control (A.K.A. …Plugin‟) to work. Please click on the message, and select …Install ActiveX Control…‟:When y ou‟re prompted, click …Install‟ to continue.You should be able to see the image from camera now:Note: If you see one of these messages (or both):ORYour computer may not have the display capability that this IP camera requires, or you don’t have Microsoft DirectX® installed. Please download Microsoft DirectX® from Microsoft’s website (), and try again. In some cases, your computer is able to display the image from IP camera correctly, but you’ll still see these messages. If this happens, just ignore them.7. Software InstallationFollow the simple steps below to run the Install Wizard to guide you quickly through the Installation process. The following installation is implemented in Windows XP. The installation procedures in Windows 2000/XP/Server 2003 /Vista are similar.1. Insert the CD shipped along with the Internet Camera into your CD-ROMdrive. The “Autorun.exe” program should be executed automatically. If not, run “Autorun.exe” manually from “Autorun” folder in the CD.2. The Install Wizard will show four selections, select the program you want toinstall or click “Exit” to install the program later. The following installation steps are the demonstration of “Setup Utility”3. The system will start the installation procedures. Click “Next” to continueinstallation.4. If you wish to install the software program in an alternate location, click“Change”; otherwise click “Next” to move on to the next step.5. Click “Install” to start installing the program.6. The system will install the program automatically.7. Click “Finish” to complete the software installation.8. When the installation is completed. The system will auto run ”Administrator Utility “. On the Internet Camera first page, the cameras found in thenetwork are listed in the left window. Choose the one you want to configure and click “Setting Wizard” to precede.If the camera is new and is not configured with your network, please go to next section “8 Network configurations”to set up the configuration9. Please enter the default password “1234” and click “OK” to login to the IPsetup page.10. Internet Camera is working through the network (TCP/IP Protocol). The IPaddress setting must be correct, or you cannot access to the camera. The wizard program will detect the IP address status of your networkautomatically and suggest a free IP address for the Camera. You canaccept the suggested value or enter the value manually. If you enter the value manually, please be aware that the “Subnet Mask” must be the same for both the camera and the PC. Click “Finish” to apply the configuration.11. This wizard will pop up a window to ask you if you want to run the “CameraViewer” and see the video of the Camera immediately. Select “OK” to run “Camera Viewer”.12. The “Camera Viewer” will show the video automatically. Congratulations,you can use the camera through the network to view the video from now on.8. Network ConfigurationsWhen you click the “Detail Setting”, a screen will pop up for you to enter the “Administrator Name” and “Password”. The default value is as follows. Name: “Admin”Password: “1234”If the name and password you enter are correct, you can start to setup the network configuration of this IP camera.8.1.1.Network SettingInternet Camera Name recommended to name a meaningful name for the camera.IP Address Enter an unused IP Address within the IP address range used on your LAN. If the IP Address of your LAN is from the 192.168.2.1 to 192.168.2.254, you can set an unused IP Address from the range for the camera, for example: 192.168.2.250.Subnet Mask The Subnet Mask field must match the subnet setting on your LAN. For example: 255.255.255.0.Gateway The Gateway is used to forward frames to destinations in a different subnet on the Internet. The Gateway setting must be the same with the gateway used by the PCs on your LAN.DNS Server DNS Server (Domain Name Server) that translates names to IP addresses. Set the same DNS Server as the PCs on your LAN.Video Port video streaming in the network. The default port setting is “4321”. If you want to view the video from the camera, the port setting should be correct.Web Port This camera support web connection, the default web port is 80. Since the web server may use port 80, you can use a different port for the camera. If you change the web port from 80 to 8080, you must type http://192.168.2.3:8080 to connect the camera through the web browser.8.1.2. Wireless Settings (IC-1510Wg Only)You must configure the wireless settings from wired environment. Then you can remove the wired cable and start wireless connection.Utility will site survey automatically or you can press “Refresh” button to survey the AP router manually.After site survey procedure, there will show existing AP SSID.Then press “Connect” to connect AP router or press “Add to Profile” to configure the Wireless WEP and WPA encryption.There are WEP (Open System/Shared Key) ,WPA-PSK,WPA2-PSK and WPANone encryption settings. You can choose one to match AP router wireless settings.After set the profile, Please remove the LAN cable then IP Camera will connect to AP router automatically.LED Status DiagramWired Setting EnvironmentWireless Setting Environment9. Firmware UpgradeHere provides several tools to upgrade the firmware of this IP camera, clear all settings, or switch LED notification off.The descriptions of every setting in this menu will be given below:After all settings are completed, click …OK‟ to save settings, or click …Cancel‟ to abort and discard changes.R&TTE Compliance StatementThis equipment complies with all the requirements of DIRECTIVE 1999/5/EC OF THE EUROPEAN PARLIAMENT AND THE COUNCIL of March 9, 1999 on radio equipment and telecommunication terminal Equipment and the mutual recognition of their conformity (R&TTE)The R&TTE Directive repeals and replaces in the directive 98/13/EEC (Telecommunications Terminal Equipment and Satellite Earth Station Equipment) As of April 8, 2000.SafetyThis equipment is designed with the utmost care for the safety of those who install and use it. However, special attention must be paid to the dangers of electric shock and static electricity when working with electrical equipment. All guidelines of this and of the computer manufacture must therefore be allowed at all times to ensure the safe use of the equipment.EU Countries Intended for UseThe ETSI version of this device is intended for home and office use in Austria, Belgium, Denmark, Finland, France, Germany, Greece, Ireland, Italy, Luxembourg, Bulgaria, Cyprus, Czech Republic, Estonia, Hungary, Latvia, Lithuania, Malta, Poland, Romania, Slovakia, Slovenia, the Netherlands, Portugal, Spain, Sweden, and the United Kingdom.The ETSI version of this device is also authorized for use in EFTA member states: Iceland, Liechtenstein, Norway, and Switzerland.EU Countries not intended for useNonePlease check the declaration of conformity on 。
快速安装指南说明书

Quick Installation GuideCTT050 CTT049 CTT048 CTT055Bypass trayCTT063CTT032CTT033CTT074CTT075CTT029Loading Papertray1CTT062CTT148CTT300CTT073Read this manual carefully before you use the product and keep it handy for future reference. For safe and correct use, please be sure to read the Safety Information before using the machine. This manual briefl y describes the procedure for installing this machine. For more details about other information, see User Guide in the CD-ROM.Place to InstallSP 200SF/201SF/202S/202SF10 cm(4.0”)45 cm (17.8”)20 cm (7.9”)20 cm (7.9”)40 cm (15.8”)SP 200S/201S10 cm(4.0”)45 cm (17.8”)10 cm (4.0”)20 cm (7.9”)40 cm (15.8”)SP 200/200N10 cm(4.0”)45 cm (17.8”)10 cm (4.0”)20 cm (7.9”)40 cm (15.8”)Power Source220-240 V, 50/60 Hz, 5 AUnpackingRemove the adhesive tape.CTT054CTT096CTT045Installing the Driver for USB and Reading the ManualCXP065CXP066CXP067CXP068CXP069Connection123CTT0931. Port For Handset2. Port For External Telephone3. Port For LINECTT071CTT144CTT097 Using the Fax FunctionSP 200SF/201SF/202SF OnlyConnecting the HandsetCTT143CTT052CTT064CTT078ConnectionFor details about specifying network settings, see "Software Installation Guide".CTT136CTT13712CTT139Selecting the TelephoneLine TypePress the [] key.CTT006Press the [▼] or [▲] keys to select [FaxFeatures], and then press the [OK]key.Press the [▼] or [▲] keys to select[Comm. Settings], and then press the[OK] key.Press the [▼] or [▲] keys to select[Dial/Push Phone], and then press the[OK] key.Press the [▼] or [▲] keys to select thetelephone line type appropriate foryour telephone service, and then pressthe [OK] key.Press the [] key to return tothe initial screen.Selecting the TelephoneNetwork Connection TypePress the [] key.Press the [▼] or [▲] keys to select [FaxFeatures], and then press the [OK]key.Press the [▼] or [▲] keys to select[Comm. Settings], and then press the[OK] key.Press the [▼] or [▲] keys to select[PSTN / PBX], and then press the [OK]key.Press the [▼] or [▲] keys to select[PSTN] or [PBX], and then press the[OK] key.Press the [] key to return tothe initial screen.Setting the Outside LineAccess NumberIf you have selected PBX, use the followingprocedure.Press the [] key.Press the [▼] or [▲] keys to select [FaxFeatures], and then press the [OK]key.Press the [▼] or [▲] keys to select[Comm. Settings], and then press the[OK] key.Press the [▼] or [▲] keys to select [PBXAccess Number], and then press the[OK] key.Enter the outside line access numberusing the number keys, and then pressthe [OK] key.Press the [] key to return tothe initial screen.Basic Operation forSending a FaxPress the [] key.CTT102Place the original on the exposure glassor in the ADF.Enter the fax number using the numberkeys.Press the [] key.When you place original on the exposure glassand Memory Transmission mode is enabled,perform the following steps to scan the subse-quent pages of the original.Press the [1] key within 60 seconds,place the next original on the exposureglass, and then press the [OK] key.Repeat this step until all originals are scanned.Press the [2] key to start sending thefax.© 2013EN CN M133-8697Quick Installation Guide。
V2416A系列快速安装指南说明书

– 1 –– 2 – – 3 –P/N: 1802024160031*1802024160031*V2416A Series Quick Installation GuideEdition 2.2, June 2019OverviewThe V2416A-C2 uses the Intel® Celeron® 1047UE processor and the V2416A-C7 uses the Intel® Core™ i7-3517UE processor. Both models feature 4 RS-232/422/485 serial ports, dual 10/100/1000 Mbps LAN ports, 3 USB 2.0 hosts, and 2 CFast sockets. The computers provide 2 DVI-I outputs, making them particularlywell-suited for industrial applications such as rolling stock, SCADA, and automation systems.Most importantly, the V2416A computers come with 2hot-swappable storage trays for additional storage media, such as hard disks or solid-state drives. The hot swap support makesstorage replacement convenient, fast, and easy, and each storage tray has its own LED to indicate whether or not a storage module is plugged into the V2416A.Package ChecklistBefore installing your V2416A computer, verify that the package contains the following items: • V2416A series embedded computer • Wall-mounting kit• 8 screws for hot-swappable HDD trays • 8 HDD soft washers• 2 keys for hot-swappable HDD trays• Documentation and software CD or DVD • Quick installation guide (printed) •Warranty cardNOTE: If any of the above items are missing or damaged, notify your sales representative.V2416A Panel Layout V2416A Front ViewV2416A Rear ViewLED IndicatorsThe following table describes the LED indicators located on the front and rear panels of the V2416A.LED Name LED Color LED Function Power Green Power is on and functioning normallyOffPower is off or power error existsStorage Yellow CFast card/HDD/SSD is transmitting dataOff CFast card/HDD/SSD is not transmittingdataLAN (1 or 2) Green100 Mbps Ethernet modeYellow1000 Mbps Ethernet mode Off 10 Mbps or no activityTX (P1-P4) Green Serial port is transmitting dataOff Serial port is not transmitting dataRX (P1-P4) Yellow Serial port is receiving dataOff Serial port is not receiving dataL1/L2 Green Disk is inserted correctly into storage trayBlinking Disk is ready to be removed Off Storage tray is emptyInstalling the V2416AThe V2416A can be DIN-rail mounted, wall mounted, or VESA mounted. Some mounting kits may need to be purchased separately. Refer to the V2416A Hardware User’s Manual for detailed installation instructions.Connector DescriptionPower ConnectorConnect the 12 to 48 VDC LPS or Class 2 power line to V2416A’s M12 A-coded power connector. If the power is supplied properly, the Power LED will light up. The OS is ready when the Ready LED glows a solid green.Grounding the V2416AGrounding and wire routing help limit the effects of noise due to electromagnetic interference (EMI). Run the ground connection from the ground screw to the grounding surface prior to connecting the power.SG (Pin 5): The shielded ground(sometimes called protected ground) contact is the central pin of the power input connector. Connect the SG wire to an appropriate grounded metal surface.DVI-I OutputsThe V2416A comes with 2 DVI-I female connectors for the DVI display. The DVI output interfaces are located on the front panel of the product. Be sure to use the correct cable to connect the computer to the display.– 4 –– 5 –– 6 –/supportThe Americas: +1-714-528-6777 (Toll-free: 1-888-669-2872)Europe: +49-89-3 70 03 99-0 Asia-Pacific: +886-2-8919-1230India: +91-80-4172-9088 China: +86-21-5258-9955 (Toll-free: 800-820-5036)2019 Moxa Inc. All rights reserved.CFast SlotThe V2416A has 2 CFast sockets. One slot is located on the front panel for OS storage and the other slot is located inside the V2416A for backup storage. Both slots support CFast Type-I/II with DMA mode.To install an OS CFast card, remove the outer cover and insert the CFast card in the socket. When finished, push the cover into the socket and refasten the screws.To install a CFast card for backup storage, purchase a CFast card through Moxa’s CTO* service. Refer to the V2416A datasheet for more information.*CTO = Configure to order USB HostsThe V2416A has one USB port with an M12 D-coded connector on the front panel, and two USB ports with type-A connectors on the rear panel. These USB ports can be used to connect flash disks for storing large amounts of data.Hot-swappable Storage TraysThe V2416A computers have two slots for additional storage media. Both slots support hot swapping for convenient, fast, and easy storage expansion. Refer to the Hardware User’s Manual for detailed storage installation.To eject a storage unit, first press the hot-swap button for that tray. When the LED starts to blink, unfasten the two screws for the corresponding storage tray, rotate the lock counterclockwise using the key provided in the package, and then pull out the hot-swappable storage tray. Ethernet PortsTwo 10/100/1000 Mbps Ethernet ports using M12 X-codedconnectors are located on the front panel. The pin assignments are shown below:Serial PortsThe serial ports use DB9 connectors. Each port can be configured by software for RS-232, RS-422, or RS-485. The pin assignments for the ports are shown in the following table: Pin RS-232 RS-422 RS-485 (4-wire) RS-485(2-wire)1 DCD TxDA(-) TxDA(-) –2 RxD TxDB(+) TxDB(+) –3 TxD RxDB(+) RxDB(+) DataB(+)4 DTR RxDA(-) RxDA(-) DataA(-)5 GND GND GND GND6 DSR – –– 7 RTS – – – 8 CTS – ––DI/DOThe V2416A comes with a 6-channel digital input and 2-channel digital output on the terminal block connectors. Audio InterfaceThe V2416A comes with an M12 A-coded audio connector for audio input and audio output, allowing users to connect a speaker or an earphone. Pin No. Audio1 Line in – Right2 GND3 Line in – Jack Detect4 Line in – Left5 Line out – Left6 Line out – Jack Detect7 Line out – Right 8GNDReset ButtonPress the “Reset” Button on the rear panel of the computer to reboot the system automatically. The Ready LED will blink on and off for the first 5 seconds, and then maintain a steady glow once the system has rebooted. Real-Time Clock (RTC)The V2416A’s real-time clock is powered by a lithium battery. You can easily replace the battery yourself using an optional battery kit*. However, please note that there is a risk of explosion if the battery is replaced by an incorrect type of battery. Refer to the V2416A Hardware User's Manual or contact a qualified Moxasupport engineer if you have any questions about the RTC battery. *Moxa offers an RTC battery kit that you can use to easily replace the battery. For details, check the optional accessories section of the V2416A datasheet.Powering on the V2416ATo power on the V2416A, connect the power cable to the V2416A’s M12 A-coded power connector (located on the rear panel). Press the power button to turn on the computer. Note that the Shielded Ground wire should be connected to the central pin of theconnector. It takes about 30 seconds for the system to boot up. Once the system is ready, the Power LED will light up.Configuring the Ethernet InterfaceW7E users should follow these steps:1. Go to Start → Control Panel → Network and Internet →View network status and tasks → Change adapter setting .2. In the Local Area Connection Properties screen, click InternetProtocol (TCP/IP) and then select Properties . Select Internet Protocol Version 4, and then click Properties . 3. Click OK after inputting the proper IP address and netmask.。
GPON家庭网关快速安装指南说明书

快速安装指南物品清单:GPON家庭网关设置计算机27103501555 REV2.1.0硬件连接一本快速安装指南一根网线一个电源适配器一台GPON家庭网关11. 请使用设备配套的电源适配器。
2. 请将设备安放在平坦、通风、无强光 直射的环境中。
4. 雷雨天气请将设备电源及所有连线拆 除,以免遭雷击破坏。
5. 远离热源,确保设备在正常的温度环 境下工作(0℃~ 40℃)。
6. 在存储、运输和运行环境中,请注意 防水防潮,请确保设备在正常的湿度 环境下工作(10%~90%RH不凝结)。
7. 请勿直视设备上的光纤接口,以免视 力受损。
3. 请保持设备清洁,避免灰尘污染。
警示连接完成后,请检查指示灯是否正常。
如果指示灯显示不正常,请检查连接是否正确。
电源插座机顶盒电视计算机电话网线网线电话线GPON光纤线GWindows XP系统请按以下步骤进行设置。
Windows XPWindows 7、Windows 8或Windows 8.1系统请按以下步骤进行设置,图片以Windows 7系统设置为例。
Windows 7/8/Vista 双击“Internet 协议版本4 (TCP/IPv4)”。
禁用(B)状态(U)诊断(A)桥接(G)创建快捷方式(S)删除(D)重命名(M)属性(R)本地连接选择“自动获得IP地址”和“自动获得DNS服务器地址”,点击“确定”。
返回上一个界面,点击“确定”。
右键单击桌面右下角的网络图标 ,选择“打开网络和共享中心”,点击“更改适配器设置”,右键单击“本地连接(以太网)”,选择“属性”。
231Internet 协议4 (TCP/IPv4) 属性确定 本地连接 属性双击“Internet 协议 (TCP/IP)”。
打开(0)资源管理器(X )搜索计算机(C)映射网络驱动器(N)断开网络驱动器(I)创建快捷方式(S)删除(D)重命名(M)属性(R)选择“自动获得IP地址”和“自动获得DNS服务器地址”,点击“确定”。
- 1、下载文档前请自行甄别文档内容的完整性,平台不提供额外的编辑、内容补充、找答案等附加服务。
- 2、"仅部分预览"的文档,不可在线预览部分如存在完整性等问题,可反馈申请退款(可完整预览的文档不适用该条件!)。
- 3、如文档侵犯您的权益,请联系客服反馈,我们会尽快为您处理(人工客服工作时间:9:00-18:30)。
快速安装指南
本指南致力于为用户提供一份简洁明了的快速安装指南,旨在帮助
用户尽快完成安装过程。
请您按照以下步骤操作,以确保安装顺利进行。
1. 准备工作
在开始安装之前,请确保您已经准备好以下材料和工具:
- 目标设备(如电脑、手机等)
- 安装介质(如光盘、USB驱动器等)
- 相关连接线或适配器
- 必要的身份验证信息
- 相关软件或应用的许可证信息
2. 确认系统需求
在安装之前,请仔细阅读并确认您的设备是否满足系统需求。
这
些要求通常包括操作系统版本、处理器类型、内存容量、存储空间等。
如果您的设备不满足需求,建议您进行相应的升级或更换,以确保软
件或应用的正常运行。
3. 安装过程
3.1 插入安装介质
将安装介质插入设备中,并确保设备识别和加载介质。
如果您使用的是光盘安装介质,请在光驱中放入光盘并关闭托盘;如果您使用的是USB驱动器安装介质,请将驱动器插入可用的USB接口。
3.2 启动安装程序
重新启动设备,并按照设备提示进入引导或启动选项。
选择从安装介质启动,并等待系统加载安装程序。
3.3 语言和区域设置
在安装程序开始运行后,您将被要求选择适合您的语言及区域设置。
根据您的需求进行选择,然后继续进行下一步。
3.4 许可协议
阅读许可协议,并在同意协议内容后勾选相应选项,以确认您理解并接受相关条款和条件。
3.5 目标安装位置
在安装前,请选择安装的目标位置。
通常情况下,您可以选择安装在默认位置或自定义位置。
确保所选位置有足够的可用空间。
3.6 安装
点击“安装”按钮开始安装过程。
安装过程可能需要一些时间,请耐心等待。
3.7 设置和配置
安装完成后,您可能需要设置和配置相关选项,如账户信息、网
络设置、隐私选项等。
根据您的需求进行设置,然后继续进行下一步。
4. 完成安装
根据安装程序的提示,您可以选择重启设备以完成安装。
在重新
启动后,您将能够使用并享受所安装的软件或应用。
请注意,本指南仅提供一般化的安装步骤。
具体安装过程可能因不
同的软件或应用而有所差异。
在实际安装时,请参考相关的官方文档
或手册,以获得更详细和准确的指导。
祝您安装顺利!。