
世光Sekonic L-478D L-478DR 测光表 中文说明书
官方网站下载。有关操作的详细说明,请参阅在光盘上的操作说明书。 要使用此软件,必需要在电脑上先安装好并通过USB电缆来连接本测光 表。 ※2 曝光文档能反映出这部数码相机系统曝光的特性(会影响曝光量的图像传 感器、快门速度和光圈等独特的变化)。首先,要通过试拍,然后使用数 据传输软件去创建曝光文档。
操作说明书
专业测光表
L-478D / L-478DR
感謝閣下购买LITEMASTER PRO L-478D/L-478DR 专业测光表。 在使用前请仔细阅读本书,充分了解其性能后可以正确地安全操作本测光表。
专业测光表L-478D/L-478DR(下称L-478D/L-478DR)配备了给今天 的数码相机更精确曝光的"曝光文档"配置、先进的无绕电摇控闪光灯功能 (L-478DR)和其它特色的功能,可以处理各种各样的拍摄意图。无论您是单 反相机摄像师、电影摄影师或硬照摄影师等,本测光表都能满足你的需要。 您可使用数据传输软件※1来设置曝光文档※2 到L-478D/L-478DR(同时可储 存10个曝光文档),以达到更精确的曝光值显示。而且,在测量时,你可以 即刻检查主体是否在曝光范围内。 此外,你也可以在数据传输软件上设置个人预设功能和用户设置。 ※1 数据传输软件是光盘上在光盘上已有提供,你也可从
4 基本操作............................................................................................................. 22 4-1. 基本操作流程图...................................................................................................................... 22 4-2. 测光体的设置............................................................................................................................ 23 4-2-1. 入射式测量的设置(测光球/平面)............................................................. 23 4-2-2. 反射光测量的设置............................................................................................... 24 4-3. 测量模式的设置...................................................................................................................... 25
3 操作画面..............................................................................................................12 3-1. 画面上的操作............................................................................................................................ 12 3-2. 画面的锁定和解锁................................................................................................................ 14 3-3. 画面流程概要............................................................................................................................ 14 3-4. 测量画面....................................................................................................................................... 16 3-4-1. 状态/标题列.............................................................................................................. 16 3-4-2. 测量画面操作显示区.......................................................................................... 17 3-4-3. 测量功能选择图标............................................................................................... 19 3-5. 信息画面....................................................................................................................................... 20 3-6. 设置画面....................................................................................................................................... 20 3-7. 菜单画面....................................................................................................................................... 21
亡和污染环境。 ● 请不要用取景器(另购)直接看太阳,这会对眼睛造成伤害。 ●(只用于L-478DR)请勿修改无线电装置,否则可能会导致违反无线电通讯法律,从而受到惩
处。
● 请不要在雨中、潮湿地方使用。请不要湿手碰它。 以上情况使用「同步线闪光模式」可能会有触电的危险,或导致产品故障。
●请勿自行拆开本机去修理或改装。如有故障,请交给有资格和授权的人员和经销商办理维修事 儿。
2枚7号(AAA)锰电池 软包
挂帶 抗眩光薄膜
● 有关另购配件的资料,请参阅「7.另购配件」(请阅64页)。
3
■ 安全守则
在使用本产品前,请先仔细阅读本篇安全守则以确保您的安全。
若在操作时不遵守此符号下给的资讯,可能会导致使用者受伤或 死亡。
若操作时不遵守此符号下给的资讯,可能会导致使用者受轻伤或 损坏测光表。
2 安裝挂带................................................................................................................9 2-1. 安裝挂带...........................................................................................................................................9 2-2. 安裝电池...........................................................................................................................................9 2-3. 开/关电源.................................................................................................................................... 10 2-4. 检查电池电量............................................................................................................................ 11 2-5. 在使用中更换电池................................................................................................................ 11 2-6. 自动关机功能............................................................................................................................ 11
SEKONIC L-508 世光508 操作手册
SEKONIC Zoom Master L-508 Operating ManualCongratulations on your purchase of a Sekonic Zoom Master L-508 Exposure Meter.The Zoom Master L-508 is the latest addition to the extensive line of Sekonic Exposure Meters which have been market leaders for over four decades.It was designed to be the ultimate meter, a do-all instrument for the most demanding pros.It is the first zoom spot meter on the market. Nine camera-quality lens elements are required to accomplish its 1° to 4° zoom range.Its sealed housing and controls make it water and moisture resistant.Yes, you can use it in the rain, but it is not an underwater meter.Its large LCD display makes readings easy and lights up automatically in dark surroundings.In order not to crowd the controls, four functions which are less frequently used, are confined to DIP switches, located in the battery compartment.Because of its many features, the L-508 requires this rather extensive manual. But since you will never use them all at the same time, once you have learned all about it, it is simple and its use will become second nature.The Zoom Master L-508 has undergone extensive quality controls at every step of manufacture. Please read this instruction manual thoroughly, to be able to take advantage of its many features and to obtain the long service life it is designed for. Thank you for your confidence in Sekonic.Table of Contents1. Parts Designation (1)2. Explanation of the Liquid Crystal Display (LCD) .........................................................2-33. Before Using ........................................................................................................4-51. Attach the strap (4)2. Inserting the battery (4)3. Checking battery capacity (4)4. Replacing battery during measurementor when using the memory function (5)5. Auto Power Off function (5)6. Setting main ISO film speed (5)7. Setting second ISO film speed (ISO 2) (5)4. Basic Operation ...................................................................................................6-91. Incident or Reflected Spot Measuring (6)2. Setting measuring mode (7)3. Setting DIP switches (8)4. When set for incident light (8)5. When set for reflected light (spot metering) (9)5. Measurment .....................................................................................................10-181. Measuring Ambient Light (10)1-1 Shutter Speed Priority mode (10)1-2 Aperture Priority mode (10)1-3 EV mode (11)1-4 Cinematography (12)2. Measuring Flash Light (13)2-1 Cord Flash mode (13)2-2 Auto Reset Cordless Flash mode (15)2-3 Cord Multiple Flash (cumulative) mode (16)2-4 Cordless Flash Cumulative mode (17)6. Advanced Functions ..........................................................................................19-241. Memory function (19)2. Averaging function (19)3. Brightness Difference function (20)4.How to use the L508 as an incident Illuminance (LUX) Meter (22)5.How to use a reflected luminance (cd/mz) meter (23)6.How to change the compensating function (24)7. Accessories (25)8. Technical Data ..................................................................................................26-279. Safety Guide (27)10.Care and Maintenance (28)1. Parts Designation16. Zoom Lens Ring15. Zoom Lens Protective Glass14. Memory button13. Memory Clear button12. Booster Outlet11. ISO (main) button10. Mode set button9. Strap eyelet1. Lumisphere UP/DOWN ring2. Lumisphere3. Liquid Crystal Display (LCD)4. Average/r EV (Brightness Difference) button5. Set/change Dial6. ISO 2 button7. Power button (ON/OFF switch)8. Synchro terminal22. DIP Switches23. Battery Compartment17. Incident /ReflectedSpot Selector Switch18. Viewfinder Eyepiece19. Measuring button20. BatteryCompartment Cover¼” Tripod Socket24. Zoom Lens Cap25. Synchro Terminal Cap2. Explanation of the Liquid Crystal DisplayNOTE: For explanation purposes, the display illustrated here shows all icons andreadouts simultaneously. Actual display will never show as above.Auto Electro-Luminescent DisplayIn low light (EV 3 or less), a blue backlight will automatically illuminate the entire LCD. When usingthe Mini Light Receptor or a Booster (optional accessories) the LCD will be illuminated aftermeasuring, regardless of the ambient light level.The LCD will not be automatically illuminated during measuring, or in Cordless Flash mode.The Electro-luminescent backlight will automatically turn off 10seconds after last operation.2.Explanation of the Liquid Crystal Display[1] Measuring Mode IconsAmbient (see page 10)Auto-Reset Cordless Flash (see page 15)Cord Flash (see page 13)[2] Incident/ Reflected Spot Function Icons (see page 6)Lights when in Incident modeLights when in Reflected Spot mode[3] ISO DisplayISO Displays ISO film settingDisplays second ISO film setting when ISO 2 button is depressed[4] +/- Compensation IndicatorLights when +/- Compensation is set[5] Digital aperture value, Aperture Priority, EV Brightness Difference, Average function, EV displaylights when in Aperture Priority (f/stop) mode (see page 10)lights When Using brightness difference function (See Page 20)lights when using Averaging function (see page 19)lights when using EV mode (see page 11)[6] Analog Aperture and Memory ScaleDisplays marks at apertures indicating full or half f/stop values for measurement, memory, averagevalues[8] Battery Power Indicator (see page 4)[9] Memory / Multiple Flash Indicator Displaylights when reading is memorized (see page 19)lights when in Multi (cumulative) flash measurement mode (see page 16)3. Before Using1. Attach the strapAttach the Strap 26 by passing the small end loop through theeyelet 9 and passing the other end of strap through it.WARNING•Please place in a location where an infant cannot reach and accidentally get the strapwrapped around his neck. There is danger of strangulation.2. Inserting the battery• Requires one 1.5 v AA size battery. Accepts any of thefollowing types:Manganese battery (R6P)Alkaline battery (LR6)Lithium battery (FR6)1. Open the Battery compartment cover latch 21, and re-move the Battery compartment cover 20 .2. Insert the battery, observing the polarity with the +,- marksin the battery chamber.3. Align the tabs of the Battery compartment cover with thenotches in the back of the meter, and press down to closethe Battery cover latch.NOTE:•Nickel cadmium (NiCad) and nickel hydroxide (NiH) rechargeable batteries cannot beused.•To prevent loss of All-weather seal, be careful that dirt does not get stuck on the rubberseal and that the seal is not damaged.•Remove battery if meter is not used for an extended period. Batteries can leak anddamage the exposure meter. Dispose of used batteries properly.If the LCD does not light, check that the battery capacity is sufficient, and check that thebattery positive and negative terminals are not reversed.3. Checking battery capacity• When the Power button 7 is ON, the battery power indicator on the LCD is lit.(Lit) Battery power level is good.(Lit) Battery power level is low. Have a spare battery ready.(Blinking) Replace battery immediately.Reference:• If the Measuring Button is pressed continuously, the battery life at normal roomtemperature will be as follows:Manganese battery approximately 10 hoursAlkaline battery approximately 20 hoursLithium battery approximately 35 hoursWe recommend you always have a spare battery on hand.3. Before Using4. Replacing battery during measurement or when using the memory function• Always turn the power OFF before replacing batteries. If batteries are removed with the power ON, measurements and settings in memory can no longer be recalled.• If after replacing the battery, or during measurements, strange screens (displays that have not been set) appear in the LCD, or nothing happens, no matter what button is pushed,remove the battery and wait at least ten seconds and then replace the battery. This allows thesoftware to automatically reset, and is not a malfunction.WARNING:• Never place batteries in fire, short, disassemble, or heat them. The batteries might breakdown, and cause an accident, injury or pollute the environment.5. Auto Power Off function• To conserve battery power, the meter will turn off about twenty minutes after last use.• Whether the Auto Power Saving feature turns the power off or the Power button 7 is pressed, the settings and measured values remain stored in memory. When the Power button ispressed again the last settings are displayed.6. Setting main ISO film speed• Hold down the ISO button 11 and turn the Set/changedial 5to select ISO speed for the film being used.• You can also change the ISO film speed after takingmeasurements. The new value is automaticallydisplayed.7. Setting second ISO film speed• This feature is useful when using a second film withdifferent ISO speed, using Polaroid™ proofing film, orfor exposure correction (when using a filter, close-upphotography, etc.).1. Hold down the ISO 2 button 6 and turn the Set/changedial to select ISO speed of the film being used.2. Once this is set, after taking a measurement, themeasured value for the second film speed will bedisplayed when the ISO 2 button is depressed.3. You can also change the second ISO film speed after takingmeasurements. The new value is automatically is displayed. 4. Basic Operation4. Basic Operation2.Setting measuring mode• Hold down the Mode set button 10 and turn theSet/change dial 5 to select the desired mode. The modeswitching sequence is shown in the chart below:4. Basic Operation3. Setting DIP Switches•Switches for setting modes that are used infrequently are housed in the Battery compartment23 of the meter. Select the mode you want prior to beginning measurements.•The DIP switches can be set by sliding the DIP switch 22 for the mode you want to select in theON position.* TIME 0.5If DIP switch 1 is ON, the shutter speed will be displayed in half steps.If DIP switch 1 is OFF, the shutter speed is displayed in full steps.* F NO.If DIP switch 2 is ON, Aperture Priority mode (ambient light) can be set.* EVIf DIP switch 3 is ON, EV (exposure value) mode (ambient light) can be set.* MULTIIf DIP switch 4 is ON, Multiple Flash mode (cumulative) can be set.4. When set for Incident light• Measurement of incident light uses Lumisphere or recessed Lumisphere. You can switchbetween Lumisphere and recessed function by firmly rotating the Lumisphere UP/DOWN ring 1until it clicks.•When the Lumisphere is raisedThis is used to photograph people, buildings, and other three dimensional objects.•When the Lumisphere is lowered (flat diffuser function)This is used to photograph manuscripts, paintings or other flat copy. It can also be used formeasuring illumination contrast (see page 20) or illumination levels (see page 22), or brightnessdifference (see page 20).NOTE:•If the device is used with the UP/DOWN ring in a middle position, distributed light qualitywill change, and suitable measurements cannot be made.•Do not push the Lumisphere down manually.4. Basic Operation5. When set for reflected light (spot metering)• This method measures the brightness (luminance) of the light reflected from the subject. It isuseful for distant objects such as landscapes, when you cannot go to the position of thesubject, or for metering subjects that generate light (neon signs, etc.), highly reflectivesurfaces or translucent subjects (stained glass, etc.).• The spot metering area can be selected by turning theZoom Lens ring 16 while looking through theviewfinder from the camera position.• Take the measurement by aligning the circle insidethe viewfinder with the subject area to be measured.CAUTION:•Do not look directly at the sun through the viewfinder, to prevent eye injury.NOTE:•Do not attempt to take a direct meter reading off the sun, because it may cause damageto the photo cell.•If bright light enters through the eyepiece, an accurate exposure cannot be obtained, soplace your eye as close to the eyepiece as possible.•For correct exposure take measurements of objects beyond 1 meter (3.3 feet).Reference:•If the reading will not stabilize because your hands are shaking when takingmeasurements, we recommend you place the meter on a tripod.•If you cannot clearly see the spot circle in the finder, we recommend you select aDiopter correction lens suited to your own eyesight. (see page 25)5. Measurement1. Measuring ambient lightIn this measurement mode, we have the choice of shutter priority mode, aperture priority mode andEV mode. Hold down the Mode set button 10 and turn the Set/chanpe dial 5 to select ambientmeasurement mode1-1Shutter Speed Priority mode1. Hold down the Mode set button 10 and turn theSet/change dial to select shutter Speed Prioritymode.2. Turn the Set/change dial to set the desired shutterspeed.3. Press the Measuring button 19 to make ameasurement. Release the Measuring button tocomplete the measurement. The measured value(aperture value) at that time will be displayed.While pressing the Measuring button, the metermeasures continuously until it is released.Reference:• You can set shutter speeds from 30 minutes to 1/8000 seconds. After 1/8000 the shutterspeeds of 1/200 and 1/400 can be set.• By moving the DIP switch Time 0.5 up or down (see page 8), the shutter speed canbe set in 1.0 or 0.5 (full or half) steps.• "E.u" (Exposure under) or "E.o" (Exposure over) appears when the combination ofshutter speed and aperture is not possible for the measured light level. Changing theshutter speed and or aperture with the Set/change dial will allow you to find acombination that is possible.• If the "E.u" or "E.o" readout blinks, this indicates that the light level is beyond themeasurement range of the light meter.1-2 Aperture Priority modeOpen the Battery compartment cover 20 and slide the F No.DIP switch (see page 8) to the ON position.1. Hold down the Mode set button and turn the Set/change dial to select aperture priority mode.2. Turn the Set/change dial to set the desired f stopvalue.3. Press the Measuring button 19to make ameasurement.Release the Measuring button to complete themeasurement. The measured value (shutterspeed) at the time will be displayed.While pressing the Measuring button, the metermeasures continuously until it is released.Reference:•You can set f stops from F1.0 to F128 (full f stops)•Even after taking the measurement, you can change the f stop value by turning the Set/change dial, to display a new measured value (shutter speed).1-3 EV modeOpen the Battery compartment cover 20 and slide the EV DIP switch (see page 8) to the ONposition.1. Hold down the Mode set button 10 and turn theSet/change dial 5 to select EV value mode.2. Press the Measuring button to make ameasurement. Release the Measuring button tocomplete the measurement. The measured value(EV value) at that time will be displayed.At the same time, the shutter speed will bedisplayed in the digital display area, and thecorresponding f stop will be displayed in theanalog display area.While pressing the measuring button, the metermeasures continuously until it is released.Reference:•"E.u" (Exposure under) or "E.o" (Exposure over) appears when the combination of shutterspeed and aperture is not possible for the measured light level. Changing the shutterspeed and or aperture with the Set/change dial will allow you to find a combination thatis possible.If the "E.u" or "E.o" readout blinks, this indicates that the light level is beyond themeasurement range of the light meter.1-4 Cinematography1. Hold down the Mode set button 10 and turn theSet/change dial 5 to select ambient light shutterspeed priority mode.2. Turn the Set/change dial to select the Cine Speedfor the camera that will be used. Cine Speed isdisplayed after 1/8000, 1/200, 1/400 and the unitare in frames per second (FPS). The followingCine Speeds will display:2, 3, 4, 6, 8, 12, 16, 18, 24, 25, 30, 32, 36, 40, 48,60, 64, 72, 96, 120, 128, 150, 200, 240, 256, 300and 360 FPS.• The shutter opening angle that these speedsare based on, is 180 degrees. For other anglesmake the following ISO film speed corrections.* Example of correction value-1/3: Decrease ISO film speed by 1/3 stop, example: ISO 100 -1/3 stop = ISO 80+1/3: Increase ISO film speed by 1/3 stop, example: ISO 100 +1/3 stop = ISO 1254. Press the Measuring button 19 to make ameasurement. Release the Measuring button tocomplete the measurement. The measured value(f stop value) will be displayed.While pressing the measuring button, the metermeasures continuously until it is released.2. Measuring flash lightThis method of measurement can be done in the following modes; with cord, without cord, multiple flash with cord, and multiple flash without cord. The measured value displayed is the sum of the flash portion and the ambient light portion.2-1 Cord Flash modeThe most positive method to assure proper synchronization and measurement of flash units.Connect the meter with the flash with a synchronization cord. Be sure to replace Synchro terminal cap after your measurement.1. Connect the flash synchro cord to the Synchroterminal 8 on the exposure meter.2. Hold down the Mode set button 10and turn theSet/change dial 5 to select flash measurementwith cord mode.3. Turn the Set/change dial to set shutter speed.When setting shutter speed, first check thesettings to confirm that they correspond to thesettings on the camera.4. Press the Measuring button 19to trigger the flash.The measured value (f stop value) will be displayed.CAUTION:• There is danger of electric shock if the meter is handled with wet hands, during rain, inareas splashed by water or where there is a lot of moisture, if you use cordsynchronized flash.• Under such conditions, it is recommended that you use the meter in the flash cordlessmode, and keep the Synchro terminal cap in place.NOTE:• The electronic fire unit may fire when you connect the Synchro cord or operate thePOWER Switch.• For flash units with extremely low electric trigger voltage, the flash may not fire. In thiscase, make measurements in flash mode without cord (see page 15).Reference:• The shutter speed can be set in single or half steps from 1 second to 1/1000 of asecond. After 1/1000 sec, the meter can be set at the following intermediate speeds: 1/75, 1 /80, 1 /90, 1 /100, 1 /200, or 1 /400.• If the film speed is changed after the measurement is taken, the new convertedmeasured value (f stop value) will be displayed.• If the shutter speed is changed after the measurement is taken, the measurement (fstop) is cleared to 0 and you must take the measurement again.• E.u" (Exposure under) or "E.o" (Exposure over) appears when the combination ofshutter speed and aperture is not possible for the measured light level. Change theshutter speed with the Set/change dial and take measurements again.• If the "E.u" or "E.o" readout blinks, this indicates that the light level is beyond of themeasurement range of the light meter.-13--14-5. Measurement2-2 Auto-reset cordless flash modeMeasurements are made by the meter receiving the light from the flash. This measurementmode is used when the Synchro cord will not reach because of the distance between theflash and meter or when use of the Synchro cord is inconvenient.2. Turn the Set/change dial to set shutter speed.When setting shutter speed, first check thesettings to confirm that they correspond to thesettings available on the camera.4. If the 90 second period is exceeded and the blinking mark stops, press the Measuringbutton again to return to ready to measure.NOTES:• If the shutter speed is changed after measurement, the measure (f stop) is cleared to 0and you must take the measurement again.• When firing a flash, if the flash brightness is low compared to the ambient light, themeter may fail to detect the light. In this case, make measurements using the flash withcord mode.• Rapid start fluorescent lamps and special lighting are sometimes mistaken for flash, andaccidentally measured. In this case, make measurements using the flash with cordmode.• The meter's tripod socket permits mounting it to a tripod or light stand and placing itstrategically when using cordless flash mode.5. MeasurementReference:• Setting the shutter speed is the same as measurement (see page 14) of "Flash modewith cord" of section 2-1 .• A new converted value is displayed when the film speed is changed after taking themeasurement.• Readings over and under the measuring range are the same as measurement (seepage 14) of "Cord Flash mode" of section 2-1 .2-3 Cord multiple flash (cumulative) modeThese measurements are used when the light generated by the flash is inadequate for properexposure. The repeated flash pops can be accumulated until the desired aperture is displayed.The accumulation can be repeated up to nine times.1. Slide DIP switch to MULTI (see page 8) to the ONposition.Hold down the Mode set button 10 and turn theSet/change dial 5 to select flash measurementwith cord cumulative mode (MLT will display onthe LCD).2. Turn the Set/change dial 5 to set shutter speed. When setting shutter speed, first checkthe settings to confirm that they correspond to the settings available on the camera.3. Connect the Flash synchro cord to the meter'ssynchro terminal 8.4. Press the Measuring button 19 to trigger a flash. The measured f stop value at that timewill be displayed. Each time this is repeated, the accumulated f stop value and thenumber of cumulative flashes is displayed.CAUTION:• There is danger of electric shock if the meter is handled with wet hands, during rain, inareas splashed by water or where there is a lot of moisture.Under such conditions, it is recommended that you use the meter in the flash cordlessmode, and keep the Synchro terminal cap in place.5. MeasurementNOTE:• The flash unit may flash when you connect the synchro cord or operate the POWER switch.• When firing a flash to make measurements, check the camera's synchronizing range and set the proper shutter speed.• For flash units with low electric trigger voltage, the flash may not fire. In this case, make measurements in flash mode without cord (see page 15).• A new converted f stop is displayed when the film speed is changed after taking the measurement.• If the shutter speed is changed after measurement, the number of cumulative flashes and the f stop value are cleared to 0 and you must take the measurement again.Reference:• Setting the shutter speed as measurement (see page 14) of "Flash mode with cord" of Section 2-1.• Readings over and under the measuring range, are the same as measurement (see page 14) of "Flash mode with cord" of section 2-1. 2-4 Cordless flash cumulative modeThese measurements are used when the light generated by the flash is inadequate for proper exposure. The repeated flash pops can be accumulated until the desired aperture is displayed. The accumulation can be repeated up to nine times.1. Slide DIP switch to MULTI (see page 8) to the ON position.2. Hold down the Mode set button 10 and turn theSet/change dial 5 to select flash measurement without cord cumulative measurement mode. (MLT will display on the LCD).Turn the Set/change dial to set shutter speed. When setting shutter speed, first change the settings to confirm that they correspond to the settings available on the camera.3. When the light from the flash is received, the measured value (f stop) is displayed. Eachtime this is repeated, the accumulated value for the aperture and the number of cumulative flashes is displayed.5. Measurement4. The ready to measure mode will be displayed for approximately 90 seconds. If the 90second period is exceeded and the blinking mark stops, press the Measuring button 19 again. The measured value (f stop) of the previous time reverts to 0 and the meter is in ready to measure mode. NOTE:• If the shutter speed is changed after measurement, the (f stop) value and the number of cumulative flashes are cleared to 0 and you must take the measurement again. • When firing a flash, if the flash brightness is low compared to the ambient light, the meter may fail to detect the light. In this case, make measurements using the flash with cord mode.• Rapid start fluorescent lamps and special lighting are sometimes mistaken for flash and accidentally measured. In this case, make measurements using the flash with cord mode.Reference:• Setting the shutter speed is the same as measurement (see page 14) of "Flash mode with cord" of Section 2-1.• "E.u" (Exposure under) or "E.o" (Exposure over) appears when the combination of shutter speed and aperture is not possible for the measured light level. Change the shutter speed with the Set/change dial and take measurements again.• If the "E.u." or "E.o" readout blinks, this indicates that the light level is beyond of the measurement range of the light meter.6. Advanced Functions1. Memory functionThis meter can store up to three measured values in memory for each measurement mode.(incident light mode, -3 values, reflected light mode, -3 values). This feature can be used in thefollowing modes: ambient light (shutter speed priority only) EV, flash (with and without cord).1. Press the Measuring button 19 and take a measure-ment.2. Press the Memory button 14 placing the measuredvalue in memory.The number of values in memory is displayed on theLCD. The f stop value corresponding to the measuredvalue is displayed in the analog section. By repeatingthis operation, up to three values can be stored inmemory.• Memory can be cleared by pressing the Memory clearbutton 13 or changing measurement mode.NOTE:• The memory function cannot be used in "ambient light aperture priority mode" or "flashcumulative mode."• Measured values for the fourth and subsequent times will be displayed but cannot bestored in memory.• When the incident / reflected selection dial is moved, the memory remains on the analogdisplay, but when you press Memory clear button all values in memory are erased.2.Averaging functionThis displays the average of two or three of the values in memory.1. Press the Measuring button 19 and take ameasurement.2. Press the Memory button placing the measured valuein memory.6. Advanced Functions3. When the Ave/r EV button 4 is pressed, an averagevalue for the two or three measurements display on theLCD. The value in memory and the average values aredisplayed on the analog scale. An "A" appears in LCDto indicate this is an average.• The average mode can be canceled by pressing theAve/ r EV button.3. Brightness difference functionThis function is useful for evaluating studio lighting and checking the evenness of the lighting set-upacross the subject area.Take a measured value at a certain point as a standard value. The difference between the standardvalue and a new measured value is displayed as EV and the f-stop in analog scale.Example of adjusting lights using brightness measurement with shutter speed priority mode.1. Turn the Lumisphere UP/DOWN ring 1to lower it tothe DOWN position.2. Turn any secondary light source off. Point theLumisphere toward the main light source, from theposition of the subject and take a measurement. Pressthe Memory button 14and store the value in memory.3. Press the Average/ r EV button and display the "A"mark on the LCD.。
测光表的详细家底

测光表的详细家底测光表详细家底什么是测光表?这玩意儿干嘛的?这东西怎么来的?这东西都有什么样儿的?这玩意儿有用么?。
测光表,也叫曝光计,英文Exposure Meter。
顾名思义这是个测量光用的仪器。
具体到世界上第一块测光表是何时何地由何人发明早已无穷考证,可见在人们基于对光的好奇而目测又无法满足这种好奇心的时候起就有人打起用某种东西来测量光的主意。
人们想要知道光的“质”,也想知道“量”。
这个“质”,就是我们通过棱镜所看到的折射出的七彩的光线,而“量”,即是我们肉眼对物体明暗感知的直接依据。
至今,在图片、电影摄影,工业测量等等方面,均有相应功能的测光设备得以应用。
就当代测光表广泛应用于摄影开始,反射式测光表一直有着极高的普及率;而当上世纪早些时候那个二战时期服役于美国空军做高空摄影侦查的Don Norwood上校与另一个名为Karl Freund(著名工业、电影用测光产品品牌Spectra创始人)的人发明了入射式测光表以来,测光表的家族又增填了一位举足轻重的角色。
到底是要入射光测光还是反射光测光?对于我们(摄影爱好者及摄影师包括电影摄影师群体)在实际应用中而言,曝光主要是基于两种测光基准进行的:一种是测量照射在被摄物上面的光,而另一种则是测量由物体上反射出来的光。
前者即入射光(环境光)测光,后者即反射光测光。
先来说说反射光测光:这也许是自打有测光表出现以来在摄影师群体中流传最普及,用户最多的测光方式了。
它是由测光表上的光敏元件直接读取由被测物上反射出来的光的亮度从而给出一个曝光基准。
在我们生活的这个世界中,可以说绝大部分场景都包含着范围极宽广、分布极细腻的色调。
像是仅仅能反射出2%的光线的我们眼中的黑色物体和能反射出95%光线的白色物体,以及更多的反射率介乎于黑白之间的形形色色的物体。
让我们假设一个又纯黑色与纯白色物体组成的场景来举例。
在一块反射式测光表上黑色物体将会给出一个非常低的读数,而白色物体则给出一个很高的读数。
测光表SEKONIC-858D使用手册

⌞ᝅ
或本手册如有更改,恕不另行通知。 ●● 本操作手册中的界面可能与您使用的测光表的实际显示不同。(颜色、字母等)
或对其充电(可充电电池除外)。它们可能会爆炸和引起火灾,造成严重伤害或损害 环境。
聚氯乙烯 (PVC) 电缆和电线注意事项
●● 操作本产品上的电线或与本产品一起销售的附件相关的电线时,会接触铅,加利福 尼亚州认为这种化学物质会引起癌症和先天缺陷或其他生殖危害。操作后请洗手。
ii
小心
●● 请勿用湿手操作本产品,或将其置于雨中或可能溅到水、淹没或接触水分的地方。 如果使用“有线闪光模式”,则有触电的危险。这也可能导致产品受损。
*1 世界上第一台手持式测光表(截至 2016 年 9 月,由 SEKONIC 调查。) *2 从 下载数据传输软件,并将其安装在电脑上。
URL: /support/downloads/dtssoftwareformacandwindows.aspx 要使用本软件,请使用 USB 线(迷你 B 型,市售)将电脑连接到 L-858D。 *3 曝光文档包含指示您正在使用的数码相机的每个典型特性(相机和测光表之间的曝光补正量、 裁剪点和动态范围)的信息。要创建曝光文档,必须提前进行拍摄,并使用数据传输软件。
[ 新功能和性能 ] 1 2.7 英寸液晶彩色触控面板
通过将常用功能分配到屏幕底部的功能按钮增强可操作性。 2 闪 光持续时间分析(1/40 至 1/55,500 秒,t0.1 至 t0.9,这能够以 0.1 为一档改变) 3 HSS(高速同步)模式下的曝光测量 4 改 善较低的光测量性能(从入射光测量时的 -5 EV 开始,从反射光测量时的 -1 EV 开
LICHEN 数显折射仪 说明书

USER ’S INSTRUCTIONS使用说明书使用产品前请仔细阅读本使用说明书,并请妥善保管数显折射仪目录前言 (1)一、概述 (2)二、产品结构 (2)三、产品特点 (2)四、技术参数 (3)五、仪器安装 (3)六、使用说明 (3)1、清洁棱镜 (3)2、校准 (3)3、测量 (3)4、关机 (3)5、清洗 (4)七、维护保养 (4)九、保修声明 (4)十、开箱检查 (4)十一、装箱清单 (5)前言感谢您选择力辰科技数显折射仪,为获得更好的使用体验,请认真阅读本使用说明书,并遵守安全操作规范!请妥善保管本使用说明书以便需要时查阅!注意事项:请确保只有受过相关训练的人员才能操作使用本仪器。
请遵守安全规范、人身安全和事故防止等相关规范。
每次使用前请注意检查仪器和配件确保无损。
高温、低温待测液进行测量时,先放入棱镜座中,等待约20秒,使棱镜座充分导热后再测量,防止出现误差。
每一种溶液测试完以后,请用蒸馏水洗净样品槽,并用绒布擦拭干净,请勿使用硬质材料擦拭样品槽,以免划伤棱镜表面。
请根据处理介质的种类,选择合适的防护装置。
处理有毒、易挥发介质时,请在合适的通风橱中进行。
如待测液体具有腐蚀性,请在测量完成后,请立即进行清洗,避免腐蚀性溶液对棱镜和金属表面的持续损伤。
避免使产品接触过多的灰尘、强大的震动以及温度骤变。
请保持取液管和擦镜布的清洁干燥。
如长时间不用,请取出电池,将折射仪放置在干燥、无尘、无腐蚀性气体环境中保存。
一、概述数显折射仪,也称为数显糖度仪,数显浓度仪,水果糖度计。
具有广泛的衡量范围,适用于测量各类果汁、食品、饮料以及某些化学品或工业溶剂如切削油、清洗液和防冻剂等。
二、产品结构:1、LCD显示:显示测量值Brix(%),电量及温度。
2、样品槽:样品槽为新型合金,底部是玻璃棱镜。
3、“开始”键:按此键开始测量,长按两秒关机。
4、“归零”键:用于测量前调零。
5、“背光”键:用于开关液晶背光。
L-758测光表使用说明书(SEKONIC)

目录
安全注意事项 目录 1. 部件名称................................................................................................................1
1. 测光表部件 ......................................................................................................1 2. 附件 .................................................................................................................2 2. 液晶显示屏(LCD)的说明...................................................................................3 3. 准备使用................................................................................................................7 1. 扣上挂带 ..........................................................................................................7 2. 安装电池 ..........................................................................................................7 3. 检查电池电量...................................................................................................7 4. 在测量过程中或使用记忆功能时更换电池........................................................8 5. 自动关机功能...................................................................................................8 6. 设定ISO1的感光度...........................................................................................8 7. 设定ISO 2的感光度..........................................................................................8 8. 转盘上锁或解锁 ...............................................................................................9 9. 测量按钮和记忆按钮的配置 ...........................................................................10 4. 基本操作..............................................................................................................11 1. 入射光或反射光点测量 ..................................................................................11 2. 设定测量模式.................................................................................................12 3. 入射光测量模式 .............................................................................................13 4. 反射光测量模式(点测光) ...........................................................................14 5. 测量 .....................................................................................................................15 1. 测量现场光 ....................................................................................................15
Gossen MAVO-MONITOR USB 光线测量仪操作指南说明书
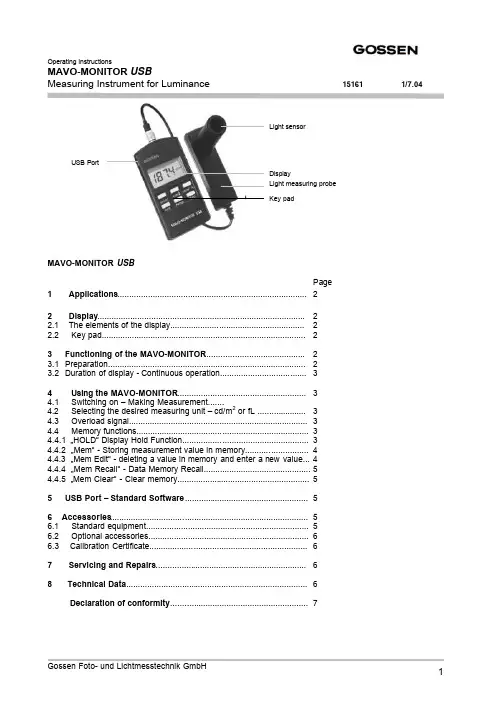
Operating InstructionsMAVO-MONITOR USBMeasuring Instrument for Luminance 151611/7.04MAVO-MONITOR USBPage1 Applications (2)2 Display (2)2.1 The elements of the display (2)2.2 Key pad (2)3 Functioning of the MAVO-MONITOR (2)3.1Preparation (2)3.2 Duration of display - Continuous operation (3)4 Using the MAVO-MONITOR .......................................................34.1 Switching on – Making Measurement.......4.2 Selecting the desired measuring unit – cd/m 2 or fL .....................34.3 Overload signal.............................................................................34.4 Memory functions..........................................................................34.4.1 …HOLD“ Display Hold Function......................................................34.4.2 …Mem“ - Storing measurement value in memory...........................44.4.3 …Mem Edit“ - deleting a value in memory and enter a new value...44.4.4 …Mem Recall“ - Data Memory Recall..............................................54.4.5 …Mem Clear“ - Clear memory.........................................................55USB Port – Standard Software (5)6 Accessories (5)6.1 Standard equipment (5)6.2 Optional accessories (6)6.3 Calibration Certificate....................................................................67 Servicing and Repairs (6)8 Technical Data (6)Declaration of conformity ...........................................................7USB Port1 ApplicationsThe MAVO-MONITOR Luminance Meter is a handy, easy to use and high precision measuring instrument. It allows the accurate measurement of the luminance in cd/m² or fL. The MAVO-MONITOR is ideally suited for contact measurements with the light measuring probe placed direct on luminous or backlighted surfaces (monitors, TV sets,light boxes, light panels). When combined with the MAVO-SPOT Attachment (optional accessory), it can be used for spot metering the luminance at a distance from 34 cm to ∞, the measuring angle being 1 degree. (Monitors, with the ambient light being taken into consideration in the measurement - lighting and illumination of work stations, streets, airports, museums, projection screens). The light sensor is color corrected, i.e. its spectral responsitivity has been matched to the spectral photonic vision of the human eye (V λ). The accuracy class for luminance meters has been defined in the Standard Specification DIN 5032, Part 7. The MAVO MONITOR fully complies with the requirements of ClassB.Consequently all the important types of light can be measured with high precision, without the necessity to apply additional corrrection factors. The MAVO-MONITOR is provided with a data memory with 100 measurement value locations, which can be read and processed direct with the keys and display, but also through the integrated USB Port and the standard software provided with the instrument.cd/m² = Candela per m² 1 cd/m2 = 0.2919 fL = 0.0929 cd/ft2fL = footLambert 1 fL = 3.426 cd/m2 = 0.3183 cd/ft21 cd/ft2 = 10.76 cd/m2 = 3.142 fL2 Display2.1Description of display 2.2 Key pad1 Display of measured value and1Switching on/offMemory indication 2Range key – Memory/Measuring range2 Measurement Unit 3cd/m2fL- Select measurement unit3 Display …HOLD… indication4Hold - Function4 Multiplying factor for measurement value5Range key – Memory/Measu5 Auto ranging – automatic range selection6Mem – Memory key6 Low Battery3Functioning of the MAVO-MONITOR3.1PreparationFirst remove the snap-on cover and open the battery compartment at the back of the meter. Insert the battery included with the meter (1.5 V size AA, IEC LR6) in the battery compartment.Care should be taken to place the battery correctly accordingto the polarity indications “+“ and “-“ in the battery compartment.When the battery warning symbol ( ) appears in the display,the battery must be replaced.The values in the measurement data memory and also the presetindividual values will be maintained, even when the battery is changed.3.2 Duration of Display – Continuous operationIf for approx. 4 minutes none of the keys of the MAVO-MONITOR is pressed, the instrument will be switched off automatically. During the last 4 seconds before automatic switch off an acoustic signal will sound. By pressing any one of the keys, you can override the automatic switch off. When the instrument is switched off, the values stored in the data memory and also the preset individual values will be maintained.You can override the automatic switch off, when switching on the instrument and simultaneously keep the HOLD key depressed.The measuring unit (cd/m² or fL) in the display will blink and indicate that the continuous operation mode is on.4Using the MAVO-MONITOR4.1Switching on – Making MeasurementPress the on/off key and the MAVO-MONITOR is immediately in the measuring mode and is measuring at the rate of 2 times per second. The instrument is in the function …AUTO“, i.e. the MAVO-MONITOR willselect the best suited measuring range for the existing light level. By pressing one of the range keys, one of the measuring ranges can be locked. Browsing up or down through additional measuring ranges isaccomplished by briefly pressing one of the range keys. If both keys are pressed and held simultaneously,the instrument is returned to …AUTO RANGING“.4.2Selecting the desired measurement unit cd/m 2or fL Use the key cd/m 2 fL to select the desired unit for the read-out – cd/m² or fL.4.3Overload DisplayWhen exceeding one of the measuring ranges …OL“ (Overload) appears in the display.4.4Memory FunctionsThe MAVO-MONITOR is provided in addition to the …Display Hold“ also with a memory for data up to 100measurement values.This function allows several measurement operations in the field and read-out at a later time. The data stored in the memory will be maintained, even when the instrument is turned off or the battery is changed.4.4.1…HOLD“ Display Hold FunctionThe display HOLD function allows you to measure even at very low light levels, where it would be difficult to read the display. By pressing the HOLD key, the last value measured is held on the display to be read at brighter light. Pressing the HOLD key again will return the MAVO-MONITOR to the measuring function.The function HOLD is the basic function for all the memory functions.674.4.2…Mem“ – Storing measurement value in memoryThe measurement value to be memorized is locked by the Hold key in thedisplay. By pressing the key Mem you will enter the value to be stored inthe next free memory location. An acoustic signal confirms …value stored inmemory“.The display indicates the stored measurement value alternating with thenumber of the memory location for a few seconds. Subsequently, theMAVO-MONITOR will return to the measuring function. When the memoryis completely filled, the display will show …FLL“.4.4.3…Mem-Edit“ – Deleting a value in memory and entering a new valueThe Mavolux offers the function …Mem Edit“ for correcting a value stored inthe memory. Measure again, press the Hold key and the new value islocked. Then by pressing one of the range keys, you can browse throughthe memory.At the memory location to be corrected press nowthe key Mem . An acoustic signal confirms …valuestored in memory“. In the display the measurementvalue stored is indicated for a few secondsalternating with the number of the memorylocation. Subsequently theMAVO-MONITOR will return to measuringfunction.4.4.4…Mem Recall“ –Data memory RecallStart in the function …Measuring“ and press the key Mem.Press one of the range keys to browse through thedata memory. The current memory location isindicated in the display alternating with themeasurement value stored in the memory.By pressing any one of the other keys or when forabout ten seconds no further memory data will berecalled with the Range keys, the MAVO-MONITOR will return to the measuring function. 4.4.5…Mem-Clear“ – Clear memoryThe MAVO-MONITOR must be in function …HOLD“.When pressing simultaneously the Range keys, you clear the complete measuring data memory. The cancelling is confirmed by an acoustic signal and three dashes in the display.5USB Port – Standard SoftwareThe MAVO-MONITOR is equipped with a USB Port which allows the meter to be connected to a PC with the USB cable (supplied).The CD Rom supplied with the MAVO-MONITOR contains, among other information, a Standard Software which allows you to start the PC operation immediately.More details about the PC operational functions are also available on that CD-Rom.6Accessories6.1 Standard Equipment- Leather carrying case-Battery-Standard Software on CD-ROM-USB-cable-Instruction Manual6.2 Optional Accessories- MAVO-SPOT (ordering no. M494G) AttachmentFor precision spot metering of the luminance, non contact, at a distance from 34 cm to ∞, withmeasuring angle of 1 degree. The ambient light is being taken into consideration in the measurement.The light sensor is color corrected, i.e. its spectral responsitivity is adapted to the photonic vision of the human eye. (V λ) according to DIN 5032, Part 7, Class B. TheMAVO-MONITOR with attached MAVO-SPOT is especially suited for inspecting and constancy testing of viewing monitors in medical imaging applications according to DIN 6868/57. Other applications: Projection screens, street surfaces and street lighting, illumination of tunnels and sport areas.- CALCULATOR, calculating disk (ordering no. 5999V0380)For converting the value measured with the MAVO-MONITOR into photographic shutterspeed/f-stop combinations based on the film speeds.6.3Calibration Certificate (Optional)Calibration reference: Scientific Standard Lamps, type Wi 41G of the PTB (Physikalische Technische Bundesanstalt Braunschweig – National Standard Institute of Germany). Depending on how the instrument is being used we recommend a recalibration interval between 12 and 18 months. For this purpose please13contact our Calibration Service Department (telephone +49 911 8602 172).7Servicing and RepairsNo special maintenance is required, if the MAVO-MONITOR is handled correctly.Keep the outside surfaces clean. Use a slightly dampened cloth for cleaning. Do not use cleansers, abrasives or solvents.Should the instrument nevertheless not work to your satisfaction or if you will require repeated calibration with Test Certificate, please send the MAVO-MONITOR to:GOSSEN Foto- und Lichtmesstechnik GmbHThomas-Mann-Strasse 16 – 20D – 90471 Nürnberg8Technical DataLight Sensor Silicon photo diode with V (λ) filterClassification Class B according to DIN 5032, Part 7 (CIE 69)Measuring Rate 2 measurements per secondLCD display50 mm x 25 mmRead-out 7 segments, 31/2 digits, 13 mmOverload signal…OL“ in the displayMemory for measurement values100 memory locations, display indication …FLL“ = memory fullPort USB 1.1Power SupplyBattery one 1.5 V alkaline – manganese cell, size AA (IEC LR 6) or suitable rechargeable battery Battery life approx. 45 hours continuous operation with alcaline – manganese batteryBattery test Automatic display of … … symbol, when battery voltage drops below 1.0 Volts External When the MAVO-MONITOR is connected to a PC, power will be supplied by the PC via the USB cable.Weights and DimensionsHousing PlasticsDimensions Measuring instrument: 65 x 120 x 19 mm (2,56 x 4,73 x 75“)(without carrying case)Measuring Probe:31 x 105 x 30 mmWeight Measuring instrument with measuring probeapprox. 265 g – without batteryMeasuring probe Aperture: approx. 18.5 mm ∅Sensor surface area:6,5 x 6,5 mmLength of cable approx. 1.5 m; available in 3m, 5m and 10 meters, on special order.Electromagnetic Compatibility (EMC)The MAVO-MONITOR meets the Specifications 89/336/EWG dt. 01.01.1996Characteristics Mavo-Monitor USBMeas. Quantity Measuring Range Resolution Resolution in Candela/m2 (cd/m2)in footLambert (fL)in cd/m2in fL Luminance I0.01... 19.990.001... 1.9990.010.001 II0.1... 199.90.01... 19.990.10.01III 1... 1 9990.1... 199.910.1IV10... 19 990 1... 1 999101 Most Important Error Limits Mavo-Monitor USBCharacteristics Admissible Error perDIN 5032 Klasse B Maximum Error Mavo-Monitor USBV(λ)-Matching (f1)6%≤ 3.0%Linearity (f3)2%≤ 1.0%Adjustment Error (f11)1%≤ 0.8%Total Error (f ges)10%≤ 8.0%EG - KONFORMITÄTSERKLÄRUNGDECLARATION OF CONFORMIT YDokument-Nr./ Document.No.:103/2004Hersteller/ Manufacturer:GOSSEN Foto- und Lichtmesstechnik GmbHAnschrift / Address:Thomas-Mann-Str.16-2090471 NürnbergProduktbezeichnung/ Product name:Leuchtdichtemessgerät/Luminance MeterTyp / Type:MAVO-MONITOR USBBestell-Nr / Order No:M504G / M506GDas bezeichnete Produkt stimmt mit den Vorschriften folgender Europäischer Richtlinien überein, nachgewiesen durch die vollständige Einhaltung folgender Normen:The above mentioned product has been manufactured according to the regulations of the following European directives proven through complete compliance with the following standards: Nr. / No.Richtlinie Directive73/23/EWG 73/23/EEC Elektrische Betriebsmittel zur Verwendunginnerhalb bestimmter Spannungsgrenzen- Niederspannungsrichtlinie–Anbringung der CE-Kennzeichnung : 2003Electrical equipment for use within certain voltagelimits- Low Voltage Directive -Attachment of CE mark : 2003EN/Norm/Standard IEC/Deutsche Norm VDE-Klassifikation/ClassificationEN 61010-1 : 1993 EN 61557-3 : 1997IEC 61010-1 : 1992IEC 61557-3 : 1997VDE 0411-1 : 1994VDE 0413-3 : 1997Nr. / No.Richtlinie Directive89/336/EWG 89/336/EEC Elektromagnetische Verträglichkeit- EMV - RichtlinieElectromagnetic compatibility-EMC directiveFachgrundform / Generic Standard: EN 61326 : 2002Nürnberg, den 24. Juni 2004___________________________________________________ _____________________________________Ort, Datum / Place, date: Vorsitzender der GeschäftsführungDiese Erklärung bescheinigt die Übereinstimmung mit den genannten Richtlinien,This declaration certifies compliance with the above mentionedbeinhaltet jedoch keine Zusicherung von Eigenschaften. Die Sicherheitshinweise directiv es but does not include a property assurance. The safetyder mitgelieferten Produktdokumentationen sind zu beachten.notes given in the product documentations which are part of the supply, must be observed.Gossen Foto- und Lichtmesstechnik GmbH is also a leading provider for other interesting light measuring instrumemts:-MAVOLUX 5032 C USB: Digital precision instrument for measuring the illuminance in lx or fc, classified acc. to DIN 5032, Part 7 and CIE 69 in Class C. Ideally suited for use in industry, trade institutes and inspection authorities, also for very high light intensities.-MAVOLUX 5032 B USB: Digital precision instrument for measuring the illumenance in lx or fc, classified acc. to DIN 5032, Part 7 and CIE 69 in Class B. Especially wide measuring range and high sensitivity for inspection and certification, suited for checking emergency lighting, but also for very high light intensities. -MAVO-MAX: For monitoring the ambient light in the surroundings of monitors according to theIEC 61223-2-5 (QS-RL dt. 20/11/2003). The use of the MAVO-MAX allows extending the requiredrepeat test intervalls of the …veil luminance“ and the …maximum contrast“ at medical imaging displays –to six month.。
世光L-308S测光表使用中文说明书
Table of Contents
Safety Precautions Table of Contents 目录
1. Parts Designation 各.....部....分....图....解......................................................... 1 2. Explanation of the Liquid Crystal Display (LCD)L..C...D....图....示.....详....解.... 2 3. Before Using .使....用....前.....事....项................................................................ 3
世光测光表L-308s使用手册
FLASHMATE
Operating Manual
s SAFETY PRECAUTIONS
This manual uses the following safety labels for WARNING and CAUTION
that you must follow.
CAUTION
q There is a danger of electric shock if the meter is handled with wet hands, during rain, in areas splashed by water or where there is a lot of moisture, if you use cord flash mode. Also, such action may damage the product.
LCD屏 Up Button 向上键 Down Button 向下键
测光表(Exposuremeter)
测光表(Exposuremeter)测光表(Exposure meter)大画幅公社测光表(Exposure meter)是测量被摄物体表面亮度或发光体发光强度的一种仪器,在摄影中被用来确定适当的曝光时间。
测光表是专业摄影中必不可少的工具,在胶片感光度和快门速度已知的情况下它给出获得最佳曝光的光圈值。
1仪器介绍测光表是测量被摄物体表面亮度或发光体发光强度的一种仪器。
在摄影过程中测光表可通过各种已知条件和根据瞬间变化的客观条件准确地提供被摄物体的照度或亮度,为摄影者提供拍摄时所使用的光圈和快门的组合参数。
测光表是专业摄影中必不可少的工具。
测光表的种类很多,它们各自的结构特点、测光区域、测光方式、感光效果、显示方式、选用光敏元件等均不相同。
根据测光表测光形式的不同,可分为入射式照度测光表和反射式亮度测光表两大类。
它们分别测得到达被摄物体表面的平均照度光强或被摄体表面的平均反射光亮度。
目前的测光表都兼有测量入射光和反射光的两种功能。
2规格结构⒈内建无视差5度角观景窗提供立即而迅速的窄角景物光线测量。
⒉全球第一台防水测光仪,可免于潮湿及水气的腐蚀。
⒊独特内建照度球及照度盘组合:照度球的收缩(平面扩散功能)以利对比光线测量。
⒋多重曝光模式用于累进闪光测量。
⒌光圈或快门优先曝光模式。
⒍量测值之数位及类比资料显示于大而清晰易读的LCD面板上。
⒎在各模式下保留其曝光测量值:入射,对比,反射。
⒏有线或无线闪光测量:在无线模式下延长待机时间(90秒),重复闪光测量勿需重设。
⒐自动检查电池电力,以1/10刻度增加表示。
⒑光圈显示,以全停或半停加1/10格。
⒒一个1.5V的AA电池即可驱动Sekonic L-408。
3仪器种类老测光表测光表根据所测光线的不同可分两类,即反射光测光表(reflected light meter)和入射光测光表(incident light meter)。
反射光测光表是用来测量景物反射出来的光线的,测量的是亮度。
测距仪使用方法范文
测距仪使用方法范文激光测距仪使用方法近期总有一些购买了激光测距仪的网友问我怎么使用,由于有些测距仪不含中文说明书或者说明书描述复杂不容易短时间理解,故本人提供目前市场上比较热门的几款激光测距仪的使用方法,这几款测距仪的操作方法和其他大部分牌子的测距仪的使用方法类似。
首先介绍的是美国博士能精英系列激光测距仪Bushnell ELITE 1500的使用方法:1.将9V电池按正确极性装入电池安装处;2.轻按“发射键”测距仪内部电源即打开!通过目镜可看见测距仪处于准备测量状态3.通过长按“模式键”可直接切换单位:米(M)或码(Y)4.在打开电源,单位切换好以后,通过测距仪目镜中的“内部液晶显示屏”瞄准被测物体。
轻按“发射键”,测量的距离立即会显示在“内部液晶显示屏”上。
5.用户可通过“+/-2屈光度调节器”来调节被测物体,远近的清晰度。
瞄准越近的物体,“屈光度调节器”因往左旋转;相反,瞄准越远的物体,“屈光度调节器”因往右旋转。
其次是介绍高性价比激光测距仪德国奥尔法800AH:1.调节测距仪目镜视度,使视场内的物体清晰。
2.按‘ON/ADJUST 按钮,镜内显示‘+’,将中心圆对准待测目标(不能为强吸收光线的目标如玻璃),‘MODE’一般置于标准状态,再次持续按下‘ON/ADJUST按钮3秒钟左右,目标距离显示,若不适用15秒后自动关机。
3.每按‘MODE’按钮一次,即可改变模式。
接通电源时,处于上一次的使用模式。
4.800AH有四种模式:(1)无字母显示(标准模式)----为目标的斜线距离;(2)‘BEELINE----为目标的直线距离; (3)‘HIGH’----为目标的高度;(4)‘ANGLE’----为目标与测试点的俯仰角;5.要进行距离单位转换时,需按下‘MODE’按钮3秒以上。
三.介绍的是拉斯维加斯SHOT Show展最佳望远镜式激光测距仪称号的Trueyard/图雅得SP1500H的用法:由于图雅得SP1500H、SP2000H的操作方法和奥尔法800AH的基本相同,在这里就不再重复介绍了。
世光Sekonic L-478D L-478DR 测光表 中文说明书
4பைடு நூலகம்
■ 目录
■ 盒内附件...............................................................................................................3
■ 安全守则...............................................................................................................4
亡和污染环境。 ● 请不要用取景器(另购)直接看太阳,这会对眼睛造成伤害。 ●(只用于L-478DR)请勿修改无线电装置,否则可能会导致违反无线电通讯法律,从而受到惩
处。
● 请不要在雨中、潮湿地方使用。请不要湿手碰它。 以上情况使用「同步线闪光模式」可能会有触电的危险,或导致产品故障。
●请勿自行拆开本机去修理或改装。如有故障,请交给有资格和授权的人员和经销商办理维修事 儿。
● 本产品附带的光盘不适用于音乐光盘播放器。可能导致听觉、扬声器或耳机受损。 ● 请用手指轻按显示屏操作。请勿使用原子笔或铅笔等尖锐的物品去代替,否则会损坏显示屏。 ●(只适用于L-478DR)本产品符合无线电法所列明的低功率无线电设备的技术标准许可证,您不
需要为这领取相关应用许可证。请务必遵守以下几点。 ·请不要拆卸或修改本产品的无线应用。法律禁止拆卸或修改本产品的无线应用。 ·请不要揭下机背上的标签。法律要求使用时要标签。 ·本产品可能不符合日本国国外的无线电法。
指出注意事项或在使用上有关的特别事项。请阅读此事项,避免 不正确使用本测光表。
提供有关在使用本测光表时的参考资讯和相关有帮助的功能。建 议阅读参考事项。