ABAQUS 6.14 RELEASE NOTES
abaqus6.14.4安装教程

abaqus6.14.4安装教程安装步骤:[安装环境]:Win7/Win8/Win101.右击软件压缩包,选择解压到“ABAQUS 6.14.44(64bit)”选项2.按快捷键Win+R键打开运行面板,并输入cmd3.输入ipconfig/all按回车4.找到主机名,选中并按右键(即复制)5.在CRACK中右键以记事本形式打开license.lic文件6.将this_host替换为刚才复制的主机名,保存并关闭文件备用7.右键我的电脑,选择属性,在打开的窗口选择高级系统设置,在窗口下方找到环境变量,在系统变量中点击新建变量,在变量名中输入LM_LICENSE_FILE在变量值中输入27011@主机名,点击确定8.选择以下目录,点击install.exeabaqus6.14-4\win86_64\license\Windows\Disk1\InstData\VM9.点击Next10.选择第二个复选框,点击Next11.点击Next,安装许可证文件12.点击Done,关闭窗口13.将刚才CRACK里的文件复制到刚才安装许可证的文件夹(默认为C:\SIMULIA\License)14.打开许可证文件夹下的lmtools.exeServicesSuccessful,关闭窗口录下的install.exe18.点击Next19.点击Next20.点击Next21.选择Product,点击Next22.在第一个框里输入27011@主机名,点击Next23.点击Next24.选择安装路径,默认为C:\SIMULIA\Abaqus(建议安装在除C盘以外的磁盘中,可在D盘新建一个文件夹D:\SIMULIA\Abaqus)点击Next25.选择安装路径。
默认为C:\Temp(建议安装在除C盘以外的磁盘中,可在D盘新建一个文件夹D:\Temp),点击Next26.点击install,之后点击Next27.点击Done28.汉化,打开C:\SIMULIA\Abaqus\6.14-4\CAEresources\Configuration 安装目录的locale.txt文件,将zh_CN=0改为zh_CN=1即可。
Abaqus6.14+VS2013+IVF2013+帮助文档
Abaqus6.14+VS2013+IVF2013+帮助文档此为abaqus6.14安装子程序,安装帮助文档和安装主程序。
若不需要子程序,那就不需要安装一、二。
若不需要帮助文档,不需要安装三。
三者并无关联,但若都需要安装,安装顺序务必按照一二三四来!一、安装VS20131、cn_visual_studio_ultimate_2013_with_update_5_x86_dvd_6816649加载到虚拟光驱,安装并激活VS20132、点继续。
3、选择安装目录,勾选我同意按钮,下一步4、勾选1和3,点安装,安装完后点启动。
5、单击菜单栏的“帮助”菜单,在下拉子菜单中单击“注册产品”,弹出如下图所示的窗口,单击“更改我的产品许可证”,在弹出的对话框中输入破解Key即可。
二、安装IVFXE20131、打开w_fcompxe_novsshell_2013_sp1.1.1392、下一步;我同意,下一步;选择第三个,下一步3、选第二个,下一步4、找到Intel_Visual_Fortran_XE2013.lic ,下一步6、选NO,下一步7、选customize8、32位选第一个,64位选第二个;下一步9、下一步10、设置安装路径,下一步11、默认选第四个,下一步12、下一步13、安装三、安装ABAQUS帮助文档。
1、打开帮助文档中的setup.exe2、下一步3、下一步4、下一步5、默认选第一个,下一步6、下一步7、下一步8、选择安装目录,下一步,选yes,点安装,等待安装完成。
9、选done ,完成、四、安装abaqus主程序1、把ABAQUS_6.14-1_x64_Win_Linux.iso 载入虚拟光驱,运行2、选第一个3、next4、ok5、next6、next7、默认选第一个,next8、复制好hostname,等下要用,点next9.选第二个,next10、选择许可证的安装路径,然后next11、done12、先别next,打开License文件夹,用记事本打开ABAQUS.lic,用hostname替换红圈内,不要多空格13、把License文件夹内所有文件复制到*\SIMULIA\License内,并替换。
Abaqus6.14安装教程
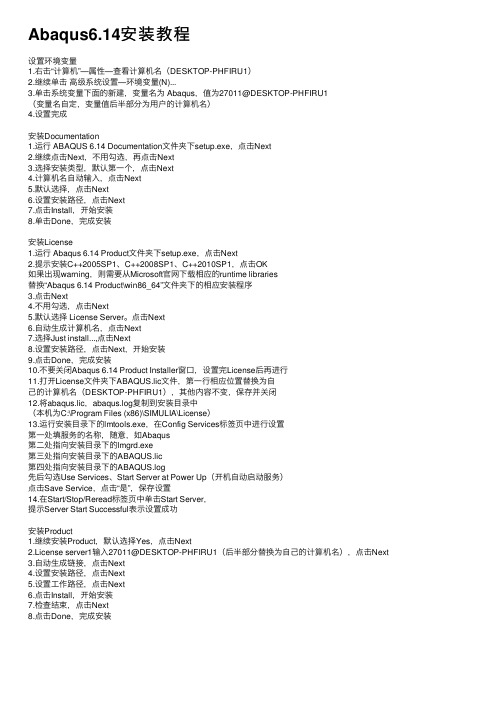
Abaqus6.14安装教程设置环境变量1.右击“计算机”—属性—查看计算机名(DESKTOP-PHFIRU1)2.继续单击⾼级系统设置—环境变量(N)...3.单击系统变量下⾯的新建,变量名为 Abaqus,值为27011@DESKTOP-PHFIRU1(变量名⾃定,变量值后半部分为⽤户的计算机名)4.设置完成安装Documentation1.运⾏ ABAQUS 6.14 Documentation⽂件夹下setup.exe,点击Next2.继续点击Next,不⽤勾选,再点击Next3.选择安装类型,默认第⼀个,点击Next4.计算机名⾃动输⼊,点击Next5.默认选择,点击Next6.设置安装路径,点击Next7.点击Install,开始安装8.单击Done,完成安装安装License1.运⾏ Abaqus 6.14 Product⽂件夹下setup.exe,点击Next2.提⽰安装C++2005SP1、C++2008SP1、C++2010SP1,点击OK如果出现warning,则需要从Microsoft官⽹下载相应的runtime libraries替换“Abaqus 6.14 Product\win86_64”⽂件夹下的相应安装程序3.点击Next4.不⽤勾选,点击Next5.默认选择 License Server。
点击Next6.⾃动⽣成计算机名,点击Next7.选择Just install...,点击Next8.设置安装路径,点击Next,开始安装9.点击Done,完成安装10.不要关闭Abaqus 6.14 Product Installer窗⼝,设置完License后再进⾏11.打开License⽂件夹下ABAQUS.lic⽂件,第⼀⾏相应位置替换为⾃⼰的计算机名(DESKTOP-PHFIRU1),其他内容不变,保存并关闭12.将abaqus.lic,abaqus.log复制到安装⽬录中(本机为C:\Program Files (x86)\SIMULIA\License)13.运⾏安装⽬录下的lmtools.exe,在Config Services标签页中进⾏设置第⼀处填服务的名称,随意,如Abaqus第⼆处指向安装⽬录下的lmgrd.exe第三处指向安装⽬录下的ABAQUS.lic第四处指向安装⽬录下的ABAQUS.log先后勾选Use Services、Start Server at Power Up(开机⾃动启动服务)点击Save Service,点击“是”,保存设置14.在Start/Stop/Reread标签页中单击Start Server,提⽰Server Start Successful表⽰设置成功安装Product1.继续安装Product,默认选择Yes,点击Next2.License server1输⼊27011@DESKTOP-PHFIRU1(后半部分替换为⾃⼰的计算机名),点击Next3.⾃动⽣成链接,点击Next4.设置安装路径,点击Next5.设置⼯作路径,点击Next6.点击Install,开始安装7.检查结束,点击Next8.点击Done,完成安装。
abaqus 关联问题:Abaqus 6.14-1 + Microsoft Visual Studio 2012 + Intel Parallel Studio XE
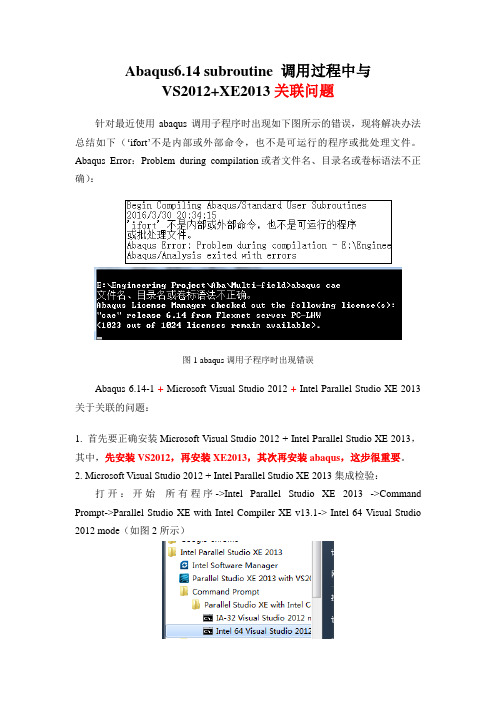
Abaqus6.14 subroutine 调用过程中与VS2012+XE2013关联问题针对最近使用abaqus调用子程序时出现如下图所示的错误,现将解决办法总结如下(‘ifort’不是内部或外部命令,也不是可运行的程序或批处理文件。
Abaqus Error:Problem during compilation或者文件名、目录名或卷标语法不正确):图1 abaqus调用子程序时出现错误Abaqus 6.14-1 + Microsoft Visual Studio 2012 + Intel Parallel Studio XE 2013关于关联的问题:1. 首先要正确安装Microsoft Visual Studio 2012 + Intel Parallel Studio XE 2013,其中,先安装VS2012,再安装XE2013,其次再安装abaqus,这步很重要。
2. Microsoft Visual Studio 2012 + Intel Parallel Studio XE 2013集成检验:打开:开始所有程序->Intel Parallel Studio XE 2013 ->Command Prompt->Parallel Studio XE with Intel Compiler XE v13.1-> Intel 64 Visual Studio 2012 mode(如图2所示)(a)Intel 64 Visual Studio 2012 mode路径图(b)Intel 64 Visual Studio 2012 mode打开运行图图2 Intel 64 Visual Studio 2012 mode3. 在图2(b)中光标闪处输入-> %comspec% /k ""D:\Program Files (x86)\Microsoft Visual Studio 11.0\VC\vcvarsall.bat"" x86_amd64(vcvarsall.bat的存放路径),然后Enter运行(运行结果如图3所示)。
《ABAQUS6.14超级学习手册》
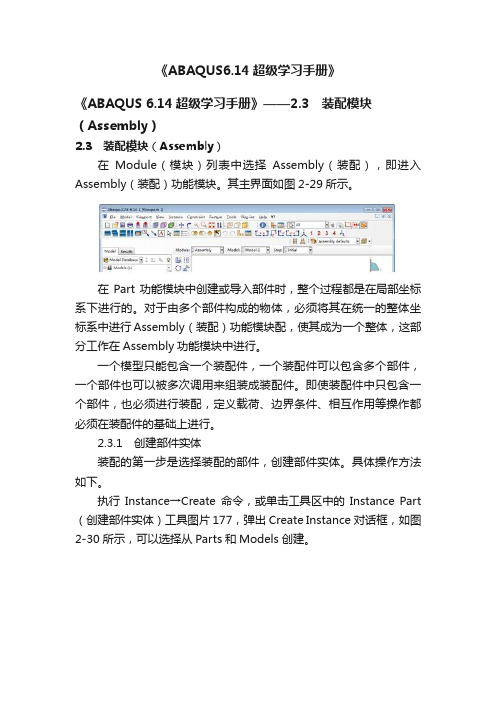
《ABAQUS6.14超级学习手册》《ABAQUS 6.14超级学习手册》——2.3 装配模块(Assembly)2.3 装配模块(Assembly)在Module(模块)列表中选择Assembly(装配),即进入Assembly(装配)功能模块。
其主界面如图2-29所示。
在Part功能模块中创建或导入部件时,整个过程都是在局部坐标系下进行的。
对于由多个部件构成的物体,必须将其在统一的整体坐标系中进行Assembly(装配)功能模块配,使其成为一个整体,这部分工作在Assembly功能模块中进行。
一个模型只能包含一个装配件,一个装配件可以包含多个部件,一个部件也可以被多次调用来组装成装配件。
即使装配件中只包含一个部件,也必须进行装配,定义载荷、边界条件、相互作用等操作都必须在装配件的基础上进行。
2.3.1 创建部件实体装配的第一步是选择装配的部件,创建部件实体。
具体操作方法如下。
执行Instance→Create命令,或单击工具区中的Instance Part (创建部件实体)工具图片 177,弹出Create Instance对话框,如图2-30所示,可以选择从Parts和Models创建。
该对话框包括三部分,其中,Parts(部件)栏内列出了所有存在的部件,单击鼠标左键进行部件的选取,既可以单选,也可以多选,只不过多选时在单击的同时要借助键盘上的Shift键或Ctrl键。
Instance Type(实体类型)选项用于选择创建实体的类型,有两个选项。
•Dependent(mesh on part):用于创建非独立的部件实体,为默认选项。
当对部件划分网格时,相同的网格被添加到调用该部件的所有实体中,特别适用于线性阵列和辐射阵列构建部件实体。
•Independent(mesh on instance):用于创建独立的部件实体,这种实体是对原始部件的复制。
此时需要对装配件中的每个实体划分网格,而不是原始部件。
abauqs6.14 亲试可用安装说明

5、选择第一项,点击next
6、自动生成计算机名,此处请将自己的Hostname保存下来,复制储存后,点击Next
7、选择第二项,然后next
8、选择许可证安装位置,点击next,默认为C:\SIMULIA
9、弹出提示窗口,点击yes,安装结束后,点击done,完成安装
13.切换至 "Start/Stop/ReRead"页点击"Start Server",提示Server Start Successful.如果提示失败,需要重新操作直到成功,关闭窗口进行下一步。
三、安装ABAQUS 6.14
14、继续刚才的安装窗口,选择yes,然后点击next
15、弹出提示窗口,提示安装HPC MPI,点击OK
16、在License server1中输入27011@+保存的Hostname,如本机输入27011@ADOFH-20140712I,点击next
17、提示输入在线帮助文档,没有可以不填,点击next,弹出警告窗口,点击continue
18、选择安装目录,默认是C:\SIMULIA\Abaqus,可以根据自己需要设置,弹出创建窗口,点击yes
19、设置工作目录,默认C:\Temp,可以根据自己需要设置,点击next,同样弹出创建窗口点击yes
20、点击安装Install,审核点击next,安装完成,点击done ,完成安装
注:Abaqus安装完毕后不会自动生成快捷方式,进入目录下运行,如C:\SIMULIA\Abaqus\6.13-1\installation_info\client_install\Abaqus 6.13-1\Abaqus CAE文件,右键可以点击发送到桌面快捷方式方便下次运行。
Abaqus软件使用英文教程SIMULIA_Abaqus_6.14__6.14-1_.6142SE_Install_Instructions

Abaqus Student EditionInstallation InstructionsBefore you begin:1.Make sure you have administrator privileges, as this is required for the Abaqus StudentEdition installation.2.Turn off all anti-virus software.3.If your PC has Windows User Access Control active, we recommend turning UAC down to itslowest settings.4.Only 64-bit Windows operating systems are allowed, not 32-bit Windows. If you areunsure, try the following: Start -> Run“cmd” and type “systeminfo” in the commandwindow. If the “System type” field says “X86-based PC, you have a 32-bit OS. If it says “X64-based PC”, you have a 64-bit OS.The Abaqus Student Edition installation consists of 3 basic sections.a)Abaqus HTML Documentation Installationb)Abaqus Product Installationc)Abaqus Installation VerificationDetailed steps for all sections are included below. The images shown below are from an installation of Abaqus 6.14-2 Student Edition on Windows 8. Other operating systems may look slightlydifferent.Step 1Download the Abaqus Student Edition executable file.Abaqus_6.14-2SE_win86_64, for 64-bit Windows, is 1.77 GB in size.Double-click the executable to begin the file extraction and installation process. Click Yes .Step 3Allow at least 5 minutes for the installation data to extract to your machine.When it is complete, the Abaqus Product Installer will launch automatically.Read and accept the terms of the license agreement to continue. Click Next .Read the information and Click Next to continue with the installation.If there are no previous Abaqus installations on your computer, you will be asked to provide an installation directory. Otherwise, the Abaqus 6.14 Student Edition will be installed in the same directory as any previous installations.Choose your installation directory and click Next .Choose the location for all your Abaqus job files and click Next .Review the information in the Pre-installation Summary. Click Install when you are ready to proceed. The Abaqus Student Edition installation will begin.First, the Abaqus Student Edition HTML Documentation is installed. This process may take up to 30 minutes to complete.After the documentation installation completes the Abaqus Student Edition product installation will proceed without further input.Step 11Once the Abaqus product installation has completed, the product verification begins automatically.After verification completes, a results panel is displayed for your review.If any errors are displayed, click the verify.html link for additional information and troubleshooting.Step 13After clicking Next the final screen will appear, giving you the necessary information to launch the Abaqus Student Edition software. Clicking Done will finish the installation and exit the window.Execute the newly installed Student Edition product:On Windows 7 and earlier, from the shortcuts in the Start menu under Programs -> Abaqus 6.14 Student EditionOn Windows 8, from the icons in the Apps screen under section Abaqus 6.14 Student EditionKnown issue:On Windows 8, uninstall of Abaqus 6.14 Student Edition will uninstall the Abaqus product but not the documentation.o To uninstall Abaqus 6.14-2 Student Edition documentation:1.Ensure your account has Administrator privileges.2.From the Start screen, select Desktop.unch File Explorer (Folder icon in the lower left of the taskbar).4.From File Explorer in field at the top of the window, launch theuninstaller executable from the installation directory.For example:If your Abaqus installation directory was C:\SIMULIA it would be locatedat:C:\SIMULIA\Documentation\installation_info\v6.14\html_uninstaller\Uninstall Abaqus 6.14 Student Edition.exe5.Follow the prompts to perform the uninstallation.。
Abaqus 6.14 新版本功能

Abaqus 6.14新版本发布一、接触和约束1.接触和约束概览①Abaqus/Standard--边-边接触,用于壳/体单元--使用惩罚接触改善了能量计算②Abaqus/Explicit--妥善处理壳接口处的壳偏移--并行热关系域2.Abaqus/Standard中的边-边接触--允许一般接触中的边与边的接触建模--边可以是实体特征边,或壳单元和梁单元的周长边--梁单元包括管,梁和桁架单元--6.13中已经采用了梁-梁接触3.Abaqus/Exlpicit:复杂接触二、材料1.材料概览--在PRF中继续有效--适用于焊料合金的三款蠕变模型--综合Czone复合冲击求解--适用于牵引-分离弹性的不同张/压响应--支持不可压缩行为的UMAT杂交元--Standard中用户自定义单元缺失--新的输出变量2.并行流变框架(PRF)改进--幂律蠕变模型--非线性随动强化--长时响应--输入3.蠕变模型改进·三种新的蠕变模型--Anand--Darveaux--双电源·非常适用于焊料合金建模·Abaqus/Standard4.Abaqus的更多综合CZone求解*MATERIAL, NAME=Material-1*CRUSH STRESS, DEPENDENCIES=number_of_FV_dependenciesStress, Angle, Temp, Fv1, Fv2,...*CRUSH STRESS VELOCITY FACTORScaling_Factor, Relative_velocity5.牵引-分离弹性改进·聚合单元在拉伸和压缩时采用不同的弹性刚度--拉伸和压缩过程中的粘合行为·Abaqus/Standard和Abaqus/Explicit6.杂交元的UMAT支持·此前,使用杂交元时,UMAT实现的几乎不可压缩超弹性材料的响应与Abaqus原有材料收敛不匹配。
- 1、下载文档前请自行甄别文档内容的完整性,平台不提供额外的编辑、内容补充、找答案等附加服务。
- 2、"仅部分预览"的文档,不可在线预览部分如存在完整性等问题,可反馈申请退款(可完整预览的文档不适用该条件!)。
- 3、如文档侵犯您的权益,请联系客服反馈,我们会尽快为您处理(人工客服工作时间:9:00-18:30)。
4.5
Flexible body generation
4.6
5. Analysis techniques
Defining a local coordinate system for materials in Eulerian elent to adaptive mesh refinement
3.10
Bidirectional import of parameters using the CATIA V6 Associative Interface
3.11
4. Analysis procedures
The AMS eigensolver can extract coupled structural-acoustic eigenmodes
This documentation and the software described in this documentation are subject to change without prior notice.
No part of this documentation may be reproduced or distributed in any form without prior written permission of Dassault Systèmes or its subsidiary.
11.2
4.1
AMS eigensolver performance improvements
4.2
Specifying additional volume in a fluid cavity
4.3
K–epsilon realizable turbulence model in Abaqus/CFD
4.4
Matrix quality check
5.5
i
CONTENTS
Enhancements to CZone for Abaqus for composite crush simulation
5.6
Vehicle ride comfort and durability co-simulation
5.7
Logical-Physical co-simulation using Abaqus and Dymola
6.7
7. Elements
Support for coupled temperature–pore pressure elements in Abaqus/CAE
7.1
Linear pyramid acoustic element
7.2
8. Prescribed conditions
Initial conditions on damage initiation
8.1
Enhancements for prescribed conditions in Abaqus/CFD
8.2
Acoustic base motion for SIM-based procedures
8.3
9. Constraints
New attachment method for mesh-independent fasteners
6.4
Different stiffness in tension versus compression for traction-separation elasticity
6.5
Eulerian elements with anisotropic materials
6.6
Element deletion controlled by state variables
3.3
Monitoring an optimization process
3.4
Additional criteria for creating soft elements
3.5
New design responses
3.6
Specifying the rate at which optimization data are saved
The Abaqus Software is available only under license from Dassault Systèmes or its subsidiary and may be used or reproduced only in accordance with the terms of such license. This documentation is subject to the terms and conditions of either the software license agreement signed by the parties, or, absent such an agreement, the then current software license agreement to which the documentation relates.
Dassault Systèmes and its subsidiaries, including Dassault Systèmes Simulia Corp., shall not be responsible for the accuracy or usefulness of any analysis performed using the Abaqus Software or the procedures, examples, or explanations in this documentation. Dassault Systèmes and its subsidiaries shall not be responsible for the consequences of any errors or omissions that may appear in this documentation.
CONTENTS
Contents
1. Introduction to Abaqus 6.14
Key features of Abaqus 6.14
1.1
Abaqus products
1.2
Changes in interpretation of input data
1.3
Changes in interpretation of input data for Abaqus/CAE
10.2
Enhancement to the contact detection tool in Abaqus/CAE
10.3
11. Execution
Job execution control enhancements
11.1
GPGPU acceleration of the AMS eigensolver
Other company, product, and service names may be trademarks or service marks of their respective owners. For additional information concerning trademarks, copyrights, and licenses, see the Legal Notices in the Abaqus 6.14 Installation and Licensing Guide.
1.4
2. General enhancements
Accessing the Learning Community from Abaqus/CAE
2.1
3. Modeling
Sizing optimization
3.1
Optimization across multiple models
3.2
Viewing the progression of an optimization by combining output database files
3.7
Writing optimization files
3.8
Switching the context for model instances in Abaqus/CAE
3.9
Associating geometric faces created from an orphan mesh with the mesh
5.12
6. Materials
Enhancements to parallel rheological framework
6.1
Enhancements to creep models
6.2
User-defined frequency domain viscoelastic behavior
6.3
New hybrid formulations for user-defined material behavior
Abaqus Release Notes
ABAQUS 6.14
RELEASE NOTES
Abaqus Release Notes
Legal Notices
CAUTION: This documentation is intended for qualified users who will exercise sound engineering judgment and expertise in the use of the Abaqus Software. The Abaqus Software is inherently complex, and the examples and procedures in this documentation are not intended to be exhaustive or to apply to any particular situation. Users are cautioned to satisfy themselves as to the accuracy and results of their analyses.