课题_QML基础——QML国际化(中文示例)
qml regularexpressionvalidator 汉字

qml regularexpressionvalidator 汉字(原创实用版)目录1.QML 简介2.RegularExpressionValidator 的作用3.在 QML 中使用 RegularExpressionValidator 的示例4.汉字在 QML 中的应用正文1.QML 简介QML(Qt Meta-Language)是一种用于创建 Qt 应用程序的用户界面的脚本语言。
它是 Qt Quick 的组成部分,允许开发人员使用简单的文本和图形描述界面元素,如按钮、文本框和列表视图等。
QML 是一种声明式语言,意味着它主要描述界面的结构和行为,而不是具体的实现细节。
2.RegularExpressionValidator 的作用在 QML 中,RegularExpressionValidator 是一个用于验证文本输入的控件。
它可以确保用户输入的内容符合指定的正则表达式规则。
如果输入的内容不符合规则,RegularExpressionValidator 会显示错误消息,并阻止用户提交表单。
3.在 QML 中使用 RegularExpressionValidator 的示例下面是一个在 QML 中使用 RegularExpressionValidator 的简单示例:```qmlimport QtQuick 2.15import QtQuick.Controls 2.15ApplicationWindow {visible: truewidth: 400height: 300TextField {id: textFieldtext: "请输入汉字:"anchors.centerIn: parentRegularExpressionValidator {id: regexValidatorregularExpression: "u4e00-u9fa5" // 匹配汉字的正则表达式textField: textFielderrorMessage: "请输入有效的汉字"}}}```在这个示例中,我们创建了一个 TextField,用于输入文本。
QML语法
4. 表达式 JavaScript 表达式可以用于分配属性的值, 表达式可以包括其他的对象与属性的引用,在这种情况下就会建立约束关系,当该表达式改 变值时,该属性将会随之自动更新。
例:demo3
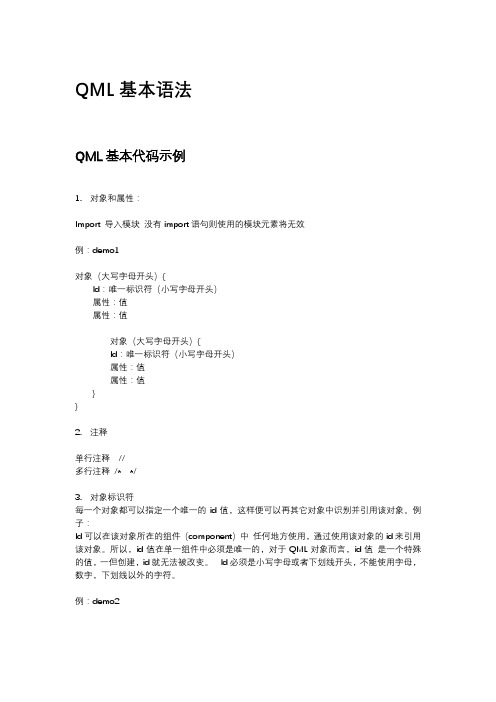
单行注释 // 多行注释 /* */
3. 对象标识符 每一个对象都可以指定一个唯一的 id 值,这样便可以再其它对象中识别并引用该对象。例 子: Id 可以在该对象所在的组件(component)中 任何地方使用,通过使用该对象的 id 来引用 该对象。所以,id 值在单一组件中必须是唯一的,对于 QML 对象而言,id 值 是一个特殊 的值,一但创建,id 就无法被改变。 Id 必须是小写字母或者下划线开头,不能使用字母, 数字,下划线以外的字符。
QMport 导入模块 没有 import 语句则使用的模块元素将无效
例:demo1
对象(大写字母开头){ Id:唯一标识符(小写字母开头) 属性:值 属性:值
对象(大写字母开头){ Id:唯一标识符(小写字母开头) 属性:值 属性:值 } }
2. 注释
QML基础——入门教程

QML基础——⼊门教程QML⼊门教程(1)QML是什么?QML是⼀种描述性的脚本语⾔,⽂件格式以.qml结尾。
语法格式⾮常像CSS(参考后⽂具体例⼦),但⼜⽀持javacript形式的编程控制。
它结合了QtDesigner UI和QtScript的优点。
QtDesigner可以设计出.ui界⾯⽂件,但是不⽀持和Qt原⽣C++代码的交互。
QtScript可以和Qt原⽣代码进⾏交互,但是有⼀个缺点,如果要在脚本中创建⼀个继承于QObject的图形对象⾮常不⽅便,只能在Qt代码中创建图形对象,然后从QtScript中进⾏访问。
⽽QML可以在脚本⾥创建图形对象,并且⽀持各种图形特效,以及状态机等,同时⼜能跟Qt写的C++代码进⾏⽅便的交互,使⽤起来⾮常⽅便。
如何使⽤?在Qt C++⽂件中通过QDeclarativeView加载,就像使⽤UiLoader加载.ui⽂件⼀样。
不过本⽂不会去介绍如何在Qt C++中使⽤QML,⽽是把重点放在QML的语法上,不过别担⼼看不到.qml⽂件的效果。
Qt提供了⼀个⼯具QML Viewer可以查看.qml⽂件⽣成的效果,该程序在Qt的bin⽬录下,应⽤名字叫qml(Windows下叫qml.exe)。
所以你在看到别⼈提供的.qml⽂件时,你可以⽤下⾯命令qml filename.qml 查看.qml的执⾏结果,咱们的第⼀个Hello,World⽣成界⾯如下开始QML吧上⾯的Hello,World源代码如下:import Qt 4.7Rectangle{id:pagewidth:500; height:200color:"lightgray"Text{id:helloTexttext:"Hello World! 2012"font.pointSize:24; font.bold:truey:30;anchors.horizontalCenter:page.horizontalCenter}}第1⾏是Qt QML的统⼀⽤法,指明当前QML会使⽤Qt-4.7⾥已经定义好的类型,⽐如第3⾏的Rectangle和第8⾏的Text。
QtQML和QtQuick简介以及QML实例

QtQML和QtQuick简介以及QML实例从 Qt 4.7 开始,Qt 引⼊了⼀种声明式脚本语⾔,称为 QML(Qt Meta Language 或者 Qt Modeling Language),作为 C++语⾔的⼀种替代。
⽽ Qt Quick 就是使⽤ QML 构建的⼀套类库。
QML 是⼀种基于 JavaScript 的声明式语⾔。
在 Qt 5 中,QML 有了长⾜进步,并且同 C++ 并列成为 Qt 的⾸选编程语⾔。
也就是说,使⽤ Qt 5,我们不仅可以使⽤ C++ 开发 Qt 程序,⽽且可以使⽤ QML。
虽然 QML 是解释型语⾔,性能要⽐ C++ 低⼀些,但是新版 QML 使⽤ V8,Qt 5.2 ⼜引⼊了专为QML 优化的 V4 引擎,使得其性能不再有明显降低。
在 Nokia 发布 Qt 4.7 的时候,QML 被⽤于开发⼿机应⽤程序,全⾯⽀持触摸操作、流畅的动画效果等。
但是在 Qt 5 中,QML 已经不仅限于开发⼿机应⽤,也可以⽤户开发传统的桌⾯程序。
QML ⽂档描述了⼀个对象树。
QML 元素包含了其构造块、图形元素(矩形、图⽚等)和⾏为(例如动画、切换等)。
这些QML 元素按照⼀定的嵌套关系构成复杂的组件,供⽤户交互。
——摘⾃《Qt学习之路2》helloworld实例:新建项⽬如图:选择Qt Quick Application,组件选择Qt Quick 2.1创建项⽬成功之后,Qt会为我们⾃动⽣成⼀系列⽂件:我们真正需要关注的是:main.qml ⾥⾯的内容1 import QtQuick 2.12 import QtQuick.Window 2.034 Window {5 visible: true6 width: 3607 height: 36089 MouseArea {10 anchors.fill: parent11 onClicked: {12 Qt.quit();13 }14 }1516 Text {17 text: qsTr("Hello World")18 anchors.centerIn: parent19 }20 }如上述代码所⽰,⼀个 QML ⽂档分为 import 和 declaration 两部分。
QML学习例子

1.介绍QML是一种描述语言,主要是对界面效果等的一种描述,它可以结合javaScript来进行更复杂的效果及逻辑实现。
比如做个游戏,实现一些更有趣的功能等2.简单的例子import Qt 4.7Rectangle{width:200height:200color:"blue"}代码是绘制一个蓝色的矩形,宽200高200,import包含一个qt4.7的包3.基本元素的介绍(自己翻译意思会有出入,敬请见谅)基本可视化项Item基本的项元素在QML中所有可视化的向都继承他Rectangle基本的可视化矩形元素Gradient定义一个两种颜色的渐变过程GradientStop定义个颜色,被Gradient使用Image在场景中使用位图BorderImage(特殊的项)定义一张图片并当做边界AnimatedImage为播放动画存储一系列的帧Text在场景中使用文本TextInput显示可编辑为文本IntValidator int验证器DoubleValidator double验证器RegExpValidator验证字符串正则表达式TextEdit显示多行可编辑文本基本的交互项MouseArea鼠标句柄交互FocusScope键盘焦点句柄Flickable提供一种浏览整张图片的一部分的效果,具体看例子Flipable提供一个平面,可以进行翻转看他的前面或后面,具体看例子状态State定义一个配置对象和属性的集合PropertyChanges使用一个State描述属性的改变StateGroup包含一个状态集合和状态变换ParentChange重新定义父集,也就是换个父节点AnchorChanges在一个状态中改变anchors动画和变换Behavior默认的属性变换动画SequentialAnimation对定义的动画串行播放ParallelAnimation对定义的动画并行播放PropertyAnimation属性变换动画NumberAnimation对实数类型属性进行的动画Vector3dAnimation对QVector3d进行的属性ColorAnimation颜色进行的变换动画RotationAnimation对旋转进行的变换动画ParentAnimation对父节点进行变换的动画,改变绑定的父节点AnchorAnimation对anchor进行改变的动画PauseAnimation延迟处理SmoothedAnimation允许属性平滑的过度SpringAnimation一种加速的效果PropertyAction允许在动画过程中对属性的直接改变ScriptAction允许动画过程中调用脚本Transition在状态变换中加入动作变化工作中的数据Binding在创建的时候绑定一些数据到一些属性ListModel定义链表数据ListElement定义ListModel的一个数据项VisualItemModel包含可视化项(visual items)到一个view中,相当是一个容器VisualDataModel包含一个model和一个delegate,model包含需要的数据,delegate设计显示的项的信息,具体的去看例子Package他的目的是把VisualDataModel共享给多个view,具体还要学习XmlListModel特殊的一个模式使用XPath表达式,使用xml来设置元素,参考例子XmlRole XmlListModel的一个特殊的角色试图ListView提供一个链表显示模型试图GridView提供一个网格显示模型试图PathView提供一个内容沿着路径来显示的模型Path定义一个PathView使用的轨迹PathLine定义一个线性的轨迹PathQuad定义一个二次贝塞尔曲线的轨迹PathCubic定义一个三次贝塞尔曲线的轨迹PathAttribute允许绑定一个属性上,具体看例子PathPercent修改item分配的轨迹不是很明了其中的意思WebView允许添加网页内容到一个canvas上定位器Column整理它的子列(纵)Row整理它的子行(横)Grid设置它的子到一个网格上Flow目的是不让他的子项重叠在一起实用Connections明确连接信号和信号句柄Component封装QML items想一个组件一样Timer提供时间触发器QtObject基本的元素只包含objectName属性Qt qml全局Qt object提供使用的枚举和函数WorkerScript允许在QML使用线程Loader控制载入item或组件Repeater使用一个模型创建多个组件SystemPalette为Qt palettes提供一个通道FontLoader载入字体根据名字或URLLayoutItem允许声明UI元素插入到qtGraphicsView布局中变换Scale分派item缩放行为Rotation分派item旋转行为Translate分派item移动行为4.基本元素的使用例子1. 位置是0,0宽高分别是200Item {x: 0; y: 0;width: 200; height: 200;}2. 位置是:0,0宽高分别是200,颜色是红色Rectangle {x: 0; y: 0;width: 200; height: 200;color: "red"}3.分别在总高度的0颜色红色总高度的1/3黄色总高度的1是绿色Rectangle{width:100;height:100gradient:Gradient{GradientStop{position:0.0;color:"red"}GradientStop{position:0.33;color:"yellow"}GradientStop{position:1.0;color:"green"}}}4.设置一张图片Image {source: "../Images/button1.png"}5.他将一张图片分成9部分当图片进行缩放的时候A.1 3 7 9位置的都不会进行缩放B. 2 8将根据属性horzontalTileMode进行缩放C.4 6将根据属性verticalTileMode进行缩放D.5将根据属性horzontalTileMode和verticalTileMode进行缩放BorderImage {width: 180; height: 180//分割1~9块的4个点是根据border设置的坐标来实现的//本别是距离坐标上边右边下边的距离border { left: 30; top: 30; right: 30; bottom: 30 }horizontalTileMode: BorderImage.StretchverticalTileMode: BorderImage.Stretchsource: "../Images/button1.png"}6.主要用于播放gif图片Rectangle {width: animation.width; height: animation.height + 8AnimatedImage { id: animation; source: "animation.gif" }Rectangle {property int frames: animation.frameCountwidth: 4; height: 8x: (animation.width - width) * animation.currentFrame / framesy: animation.heightcolor: "red"}}7.显示文本(具体的其他设置请看文档)Text{text:"text"}8.下面是设置一个输入文本框,框中的字符串是Text,并设置鼠标可以选择文本TextInput{text:"Text"selectByMouse:true;//鼠标可以选择}9.int型验证器,和输入框结合后就是只能输入整型数据TextInput{//最高可以输入100,最低输入10IntValidator{id:intval;bottom:10;top:100;}width:100;height:20;text:"";//使用校验器validator:intval;}10.只能输入浮点数TextInput{//最高可以输入100,最低输入10decimals最多有多少位小数//notation表示是使用科学计数法还是(默认),还是直接的小数当获取里面的数据DoubleValidator{id:intval;decimals:4;bottom:10;top:100;notation:Double Validator.StandardNotation}width:100;height:20;text:"";//使用校验器validator:intval;}11.使用正则表达式TextInput{//使用一个正则表达式来控制输入的字符串///^[a-zA-Z]{1}[0-1]{0,2}[a-z]{1,3}$/表示开始位置必须是一个大写或小写字母//接下来是0~2个的数字而且是0或1,在接下来是1~3个的小写字母RegExpValidator{id:intval;regExp:/^[a-zA-Z]{1}[0-1]{0,2}[a-z]{1,3}$/;}width:100;height:20;text:"";//使用校验器validator:intval;}12.显示一段hello world的html文本和相同TextEdit {width: 240text: "<b>Hello</b><i>World!</i>"font.family: "Helvetica"font.pointSize: 20color: "blue"focus: true}13.主要是用来判断鼠标事件的区域Rectangle{x: 0; y: 0;width: 100; height:100;Rectangle{id: mousrectx: 20; y: 20;width: 20; height: 20;color: "blue"MouseArea{//使用父的区域作为鼠标判断的区域及x:20;y:20;width:20;height:20;anchors.fill: parent;//但鼠标按下后mousrect变成红色,当鼠标松开后变成蓝色onPressed: { mousrect.color = "red";}onReleased: { mousrect.color = "blue";}}}}14.不是很清楚说的什么,好像是说同一个时刻只有一个item有焦点15.显示一个200x200的框,框中显示图片上200x200的部分Flickable {width: 200; height: 200//设置使用图片的宽高,而现实的是200x200的现实框contentWidth: image.width; contentHeight: image.heightImage { id: image; source: "../Images/need.png" }}16.包含两个面,一个前面,一个后面,实现一个控件前后的翻转效果,并且在后面可以添加一些控制Flipable {id: flipablewidth: 240height: 240property int angle: 0property bool flipped: falsefront: Image { source: "front.png" } //前面back: Image { source: "back.png" } //后面//旋转动画前后面交换transform: Rotation {origin.x: flipable.width/2; origin.y: flipable.height/2axis.x: 0; axis.y: 1; axis.z: 0 //rotate around y-axisangle: flipable.angle}states: State {name: "back"PropertyChanges { target: flipable; angle: 180 }when: flipable.flipped}transitions: Transition {NumberAnimation { properties: "angle"; duration: 1000 } }MouseArea {anchors.fill: parentonClicked: flipable.flipped = !flipable.flipped}17.//当鼠标按下后改变myRect的颜色Rectangle {id: myRectwidth: 100; height: 100color: "black"MouseArea {id: mouseAreaanchors.fill: parentonClicked: myRect.state == 'clicked' ? myRect.state = "" : myRect.state = 'clicked';}//设置状态states: [State {name: "clicked"PropertyChanges { target: myRect; color: "red" }}}18.//当鼠标按下后改变状态//状态里面的属性改变包含了文本和颜色的改变Text {id: myTextwidth: 100; height: 100text: "Hello"color: "blue"states: State {name: "myState"//当这个状态被设置的时候,将改变myText的文本和颜色PropertyChanges {target: myTexttext: "Goodbye"color: "red"}}MouseArea { anchors.fill: parent; onClicked: myText.state = 'myState' } }19.一个状态组中可以包含很多的状态和变化,而状态也可以和变换绑定.20.在状态中可以对脚本中的函数进行调用// Sc.jsfunction changeColor() //返回蓝色{return "blue";}// test.qmlimport"Sc.js" as CodeRectangle{id: rectwidth: 50; height: 50color: "red"MouseArea {anchors.fill: parentonClicked: rect.state = "first" //鼠标按下改变状态}states: State {name: "first"; StateChangeScript{name: "myScript";script: rect.color = Code.changeColor();}}}21.把指定的item换一个item父节点Item {width: 200; height: 100Rectangle {id: redRectwidth: 100; height: 100color: "red"}//本来blueRect的父节点是Item当鼠标按下后他被设置到redRect上Rectangle {id: blueRectx: redRect.widthwidth: 50; height: 50color: "blue"states: State {name: "reparented"//改变父节点ParentChange { target: blueRect; parent: redRect; x: 10; y: 10 }}MouseArea { anchors.fill: parent; onClicked: blueRect.state = "reparented" } }}22.Rectangle {id: windowwidth: 120; height: 120color: "black"Rectangle { id: myRect; width: 50; height: 50; color: "red" }states: State {name: "reanchored"AnchorChanges { //改变myRect的anchors属性target: myRectanchors.top: window.topanchors.bottom: window.bottom}PropertyChanges {target: myRectanchors.topMargin: 10anchors.bottomMargin: 10}}//鼠标事件MouseArea { anchors.fill: parent; onClicked: window.state = "reanchored" } }23.Rectangle {id: rectwidth: 100; height: 100color: "red"//针对宽度的动画Behavior on width {NumberAnimation { duration: 1000 }MouseArea {anchors.fill: parentonClicked: rect.width = 50}}24.串行播放多个动画Rectangle {id: rect1width: 500; height: 500Rectangle{id: rect;color: "red"width: 100; height: 100//串行播放多个动画,先横向移动,在纵向移动SequentialAnimation{running: true;NumberAnimation {target:rect; properties:"x"; to: 50; duration: 1000 } NumberAnimation {target:rect; properties:"y"; to: 50; duration: 1000 } }}}25.Rectangle {id: rect1width: 500; height: 500Rectangle{id: rect;color: "red"width: 100; height: 100//并行播放动画,同时横向和纵向移动ParallelAnimation{running: true;NumberAnimation {target:rect; properties:"x"; to: 50; duration: 1000 } NumberAnimation {target:rect; properties:"y"; to: 50; duration: 1000 } }}}26.Rectangle {id: rectwidth: 100; height: 100color: "red"states: State {name: "moved"PropertyChanges { target: rect; x: 50 }}transitions: Transition {//属性动画这里是当属性x或y发生变化的时候,就播放这样一个动画PropertyAnimation { properties: "x,y"; easing.type: Easing.InOutQuad } }MouseArea{anchors.fill: parent;onClicked: rect.state = "moved";}}27.Rectangle {width: 100; height: 100color: "red"//对当前item的x进行移动,目标移动到x=50NumberAnimation on x { to: 50; duration: 1000 }}28.29.颜色的过度Rectangle {width: 100; height: 100color: "red"ColorAnimation on color { to: "yellow"; duration: 1000 } }30.默认是绕z轴进行的旋转Item {width: 300; height: 300Rectangle {id: rectwidth: 150; height: 100; anchors.centerIn: parentcolor: "red"smooth: truestates: State {name: "rotated"; PropertyChanges { target: rect; rotation: 180 }}transitions: Transition {RotationAnimation { duration: 1000; direction: RotationAnimation.Counterclockwise }}}MouseArea { anchors.fill: parent; onClicked: rect.state = "rotated" } }31.一个切换父节点的动画,平滑的过度Item{width:200;height:100Rectangle{id:redRectwidth:100;height:100color:"red"}Rectangle{id:blueRectx:redRect.widthwidth:50;height:50color:"blue"states:State{name:"reparented"ParentChange{target:blueRect;parent:redRect;x:10;y:10}}transitions:Transition{ParentAnimation{NumberAnimation{properties:"x,y";duration:1000}}}MouseArea{anchors.fill:parent;onClicked:blueRect.state="reparented"} }}32.Item{id:containerRectangle{id:myRectwidth:100;height:100color:"red"}states:State{name:"reanchored"AnchorChanges{target:myRect;anchors.right:container.right} }transitions:Transition{//smoothlyreanchormyRectandmoveintonewposition AnchorAnimation{duration:1000}}//当控件加载完成后Component.onCompleted:container.state="reanchored"}33.延迟效果Item {id: containerwidth: 200; height: 200Rectangle {id: myRectcolor: "red"SequentialAnimation {running: true;NumberAnimation {target: myRect;to: 50; duration: 1000; properties: "x"; } PauseAnimation { duration: 5000 } //延迟100毫秒NumberAnimation {target: myRect; to: 50; duration: 1000; properties: "y"; } }}}34.平滑过度Rectangle {width: 800; height: 600color: "blue"Rectangle {width: 60; height: 60x: rect1.x - 5; y: rect1.y - 5color: "green"Behavior on x { SmoothedAnimation { velocity: 200 } }Behavior on y { SmoothedAnimation { velocity: 200 } }}Rectangle {id: rect1width: 50; height: 50color: "red"}focus: trueKeys.onRightPressed: rect1.x = rect1.x + 100Keys.onLeftPressed: rect1.x = rect1.x - 100Keys.onUpPressed: rect1.y = rect1.y - 100Keys.onDownPressed: rect1.y = rect1.y + 100}35.平滑的过度过程,在动画结束的时候有种弹性的效果Item {width: 300; height: 300Rectangle {id: rectwidth: 50; height: 50color: "red"Behavior on x { SpringAnimation { spring: 2; damping: 0.2 } }Behavior on y { SpringAnimation { spring: 2; damping: 0.2 } } }MouseArea {anchors.fill: parentonClicked: {rect.x = mouse.x - rect.width/2rect.y = mouse.y - rect.height/2}}}36.主要是在动画过程中直接的改变一个属性transitions:Transition{...PropertyAction{target:theImage;property:"smooth";value:true} ...}38.在动画过程中嵌入脚本的调用SequentialAnimation {NumberAnimation { ... }ScriptAction { script: doSomething(); }NumberAnimation { ... }}39.Rectangle {id: rectwidth: 100; height: 100color: "red"MouseArea {id: mouseAreaanchors.fill: parent}states: State {name: "moved"; when: mouseArea.pressedPropertyChanges { target: rect; x: 50; y: 50 }}transitions: Transition {NumberAnimation { properties: "x,y"; easing.type: Easing.InOutQuad } }}40.Item {width: 300; height: 300Text {id: app; text: "xxxfa"}TextEdit { id: myTextField; text: "Please type here..." }//把myTextField和app的enteredText属性进行绑定Binding { target: app; property: "enteredText"; value: myTextField.text } }41.直接看效果Rectangle{width:200;height:200ListModel{id:fruitModelListElement{name:"Apple"cost:2.45}ListElement{ name:"Orange" cost:3.25}ListElement{ name:"Banana" cost:1.95}}Component{id:fruitDelegateRow{spacing:10Text{text:name}Text{text:'$'+cost}}}ListView{anchors.fill:parent model:fruitModel delegate:fruitDelegate }}42.请参照43.把可视化图元添加到链表试图Rectangle {width: 100; height: 100;VisualItemModel {id: itemModelRectangle { height: 30; width: 80; color: "red" } Rectangle { height: 30; width: 80; color: "green" } Rectangle { height: 30; width: 80; color: "blue" } }ListView {anchors.fill: parentmodel: itemModel}}44.看下面效果Rectangle {width: 200; height: 100 VisualDataModel {id: visualModelmodel: ListModel { ListElement { name: "Apple" } ListElement { name: "Orange" } }delegate: Rectangle { height: 25width: 100Text { text: "Name:" + name} }}ListView {anchors.fill: parentmodel: visualModel}}45.具体请参考declarative/modelviews/package46.从网络获取xml,暂时没有测试成功47.参考48.看效果Rectangle {width: 200; height: 400; ListModel {id: fruitModel ListElement {name: "Apple"cost: 2.45}ListElement {name: "Orange"cost: 3.25}ListElement {name: "Banana"cost: 1.95}}GridView {anchors.fill: parent model: fruitModel delegate: Column{Text {text:"name" + name} Text {text:"cost"+ cost}}}}49.看例子Rectangle{width:200;height:400; ListModel{id:fruitModel ListElement{ name:"Apple"cost:2.45}ListElement{ name:"Orange" cost:3.25}ListElement{ name:"Banana" cost:1.95}}PathView{ anchors.fill:parentmodel:fruitModeldelegate:Column{Text{text:"name"+name}Text{text:"cost"+cost}}path:Path{startX:120;startY:100PathQuad{x:120;y:25;controlX:260;controlY:75} PathQuad{x:120;y:100;controlX:-20;controlY:75} }}}50.具体的看运行的例子Rectangle{width:200;height:400;ListModel{id:fruitModelListElement{ name:"Apple"cost:2.45}ListElement{ name:"Orange"cost:3.25}ListElement{ name:"Banana"cost:1.95}}PathView{anchors.fill:parent model:fruitModel delegate:Column{Text{text:"name"+name} Text{text:"cost"+cost}}path:Path{startX:150;startY:120 PathLine{x:200;y:80;} PathLine{x:100;y:80;} PathLine{x:150;y:120;} }}}51.参考52.还要看53.可以直接针对一些属性进行改变Rectangle{width:200;height:400; ListModel{id:fruitModelListElement{ name:"Apple"cost:2.45}ListElement{ name:"Orange"cost:3.25}ListElement{ name:"Banana"cost:1.95}}PathView{anchors.fill:parent model:fruitModel delegate:Item{id:delitem;width:80;height:80; Column{//这里使用图片试试Rectangle{width:40;height:40; scale:delitem.scale; color:"red"}Text{text:"name"+name} Text{text:"cost"+cost}}}//path:Path{startX:120;startY:100PathAttribute{name:"Scale";value:1.0} PathQuad{x:120;y:25;controlX:260;controlY:75} PathAttribute{name:"Scale";value:0.3} PathQuad{x:120;y:100;controlX:-20;controlY:75} }}}54.具体请看QML文档55.import QtWebKit 1.0WebView {url: ""preferredWidth: 490preferredHeight: 400scale: 0.5smooth: false}56横向排列Rectangle{width: 100; height: 100;//纵向排列Column {spacing: 2Rectangle { color: "red"; width: 50; height: 50 } Rectangle { color: "green"; width: 20; height: 50 } Rectangle { color: "blue"; width: 50; height: 20 } }}57Rectangle{width: 100; height: 100;//横向排列Row {spacing: 2Rectangle { color: "red"; width: 50; height: 50 } Rectangle { color: "green"; width: 20; height: 50 } Rectangle { color: "blue"; width: 50; height: 20 } }}58Rectangle{width:100;height:100;//网格排列Grid{columns:3spacing:2Rectangle{color:"red";width:50;height:50} Rectangle{color:"green";width:20;height:50} Rectangle{color:"blue";width:50;height:20} Rectangle{color:"cyan";width:50;height:50} Rectangle{color:"magenta";width:10;height:10} }}59Rectangle{width: 100; height: 100;//网格排列Flow {spacing: 2width: 100; height: 100;Rectangle { color: "red"; width: 50; height: 50 }Rectangle { color: "green"; width: 20; height: 50 } Rectangle { color: "blue"; width: 50; height: 20 }Rectangle { color: "cyan"; width: 50; height: 50 }Rectangle { color: "magenta"; width: 10; height: 10 }}}60下面是3中情况下会使用的,具体的不好翻译Multiple connections to the same signal are required有多个连接要连接到相同的信号时Creating connections outside the scope of the signal sender 创建的连接在范围之外Connecting to targets not defined in QML创建的连接没有在QML中定义的Rectangle{width: 100; height: 100;MouseArea {id: areaanchors.fill: parent;}Connections {target: areaonClicked: { console.log("ok");}}}61组件是可以重用的QML元素,具体还是看QML的文档翻译不是很好Item {width: 100; height: 100//定义一个组件他包含一个10x10的红色矩形Component {id: redSquareRectangle {color: "red"width: 10height: 10}}//动态的载入一个组件Loader { sourceComponent: redSquare }Loader { sourceComponent: redSquare; x: 20 }}62Item {width: 200; height: 40;//和QTimer差不多Timer {interval: 500; running: true; repeat: trueonTriggered: time.text = Date().toString() //使用javascript获取系统时间}Text { id: time }}63他是不可见的只有objectName一个属性通过这个属性我们可以在c++中找到我们想要的对象//MyRect.qmlimport Qt4.7Item{width:200;height:200Rectangle{anchors.fill:parentcolor:"red"objectName:"myRect"}}//main.cppQDeclarativeViewview;view.setSource(QUrl::fromLocalFile("MyRect.qml"));view.show();QDeclarativeItem*item=view.rootObject()->findChild<QDeclarativeItem*>("my Rect");if(item)item->setProperty("color",QColor(Qt::yellow));64提供全局有用的函数和枚举,具体的看QML文档65.使用它可以把操作放到一个新的线程中,使得它在后台运行而不影响主GUI 具体可以看QML中它的文档66.可以参考还有QML中的文档67他可以创建很多相似的组件,QML中还有几个例子Row {Repeater {model: 3Rectangle {width: 100; height: 40border.width: 1color: "yellow"}}}68具体看效果和文档Rectangle{SystemPalette{id:myPalette;colorGroup:SystemPalette.Active}width:640;height:480color:myPalette.windowText{anchors.fill:parenttext:"Hello!";color:myPalette.windowText}}69.载入一种字体,可以是网络上的,也可以是本地的Column {FontLoader { id: fixedFont; name: "Courier" }FontLoader { id: webFont; source: "/myfont.ttf" } Text { text: "Fixed-size font"; font.family: }Text { text: "Fancy font"; font.family: }}70不清楚71对缩放的控制Rectangle {width: 100; height: 100color: "blue"Rectangle{x: 50; y: 50;width: 20; height: 20;color: "red"//这里是在当前矩形的中间位置沿x轴进行3倍缩放transform: Scale { origin.x: 10; origin.y: 10; xScale: 3}}}72Rectangle {width: 100; height: 100color: "blue"//绕位置25,25旋转45度transform: Rotation { origin.x: 25; origin.y: 25; angle: 45}}73Row {Rectangle {width: 100; height: 100 color: "blue"//沿y轴正方向移动20个像素transform: Translate { y: 20 } }Rectangle {width: 100; height: 100 color: "red"//沿y轴负方向移动20个像素transform: Translate { y: -20 } }}。
QML基础——QML国际化(中文示例)

QML基础——QML国际化(中文示例)在Qt程序中如何使用多国语言已经在《Qt的国际化和本地化》这篇文章中有所介绍,本文则针对如何对出现在QML中的字符串进行国际化进行专门介绍。
本本将通过一个很小的中文例子程序,向大家一步步讲解如何使得出现在QML代码中的字符串显示成中文。
示例程序可通过本文末尾所附链接下载。
更多阅读可以参照“QML的国际化”修改pro在Qt的pro文件中首先加入以下几行:CONFIG += localize_deploymentSYMBIAN_SUPPORTED_LANGUAGES += zh_CNSYMBIAN_LANG.zh_CN = 31TRANSLATIONS = displayChinese_zh_CN.ts其中CONFIG += localize_deployment是为了可以为应用程序添加中文名称。
然后加入以下几行:symbian {addFiles.sources = qml/displayChinese/displayChinese_zh_CN.qm addFiles.path = .DEPLOYMENT += addFiles}这是为了程序在手机上能够找到需要的qm文件标记字符串出现在QML 中的字符串如果需要翻译则可以通过使用qsTr(), qsTranslate(),QT_TR_NOOP(), 或QT_TRANSLATE_NOOP() 来进行标记。
例如在本例程中:Text {text: qsTr("display Chinese character.")anchors.centerIn: parent}使用了qsTr()。
只有这样做过标记之后,translator才知道“display Chinese character”。
是需要被翻译的,以便于后面进行处理生成中文目标语言的ts文件首先需要启动命令行,例如如果我们安装的是QtSDK 1.1 beta 则启动下图所示command prompt:在命令行中进入我们项目的根目录,然后输入以下命令:lupdate qml/displayChinese/main.qml -ts qml.ts这样就会生成一个名为qml.ts的文件了.然后我们在命令行中继续输入:lupdate displayChinese.pro -ts app.ts从而生成app.ts文件翻译用Qt Linguist打开上一步生成的qml.ts 和app.ts,将我们翻译的文字输入进去即可,最后保存文件,完成。
QML基础——入门教程
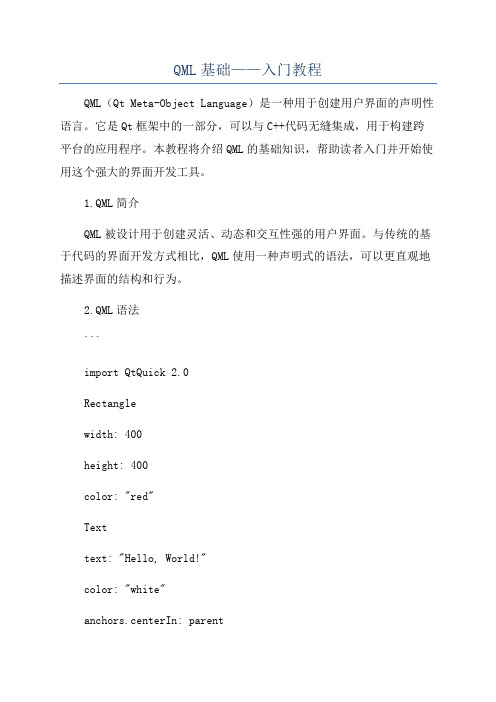
QML基础——入门教程QML(Qt Meta-Object Language)是一种用于创建用户界面的声明性语言。
它是Qt框架中的一部分,可以与C++代码无缝集成,用于构建跨平台的应用程序。
本教程将介绍QML的基础知识,帮助读者入门并开始使用这个强大的界面开发工具。
1.QML简介QML被设计用于创建灵活、动态和交互性强的用户界面。
与传统的基于代码的界面开发方式相比,QML使用一种声明式的语法,可以更直观地描述界面的结构和行为。
2.QML语法```import QtQuick 2.0Rectanglewidth: 400height: 400color: "red"Texttext: "Hello, World!"color: "white"anchors.centerIn: parent}}```这个示例代码创建了一个窗口,并在窗口中间显示了一个白色的文本。
在QML中,通过设置属性值来改变界面的样式和行为。
3.QML组件和属性QML中的组件是构成界面的基本元素,例如按钮、文本框和图片等。
每个组件都有一组属性,用于控制组件的外观和行为。
在上面的示例代码中,Rectangle和Text都是组件,而width、height、color和text等都是属性。
4.QML布局QML提供了多种布局方式,用于指定组件在界面中的位置和大小。
常用的布局方式包括垂直布局(ColumnLayout)、水平布局(RowLayout)和网格布局(GridLayout)等。
使用布局可以使界面的调整更加灵活和简单。
5.QML信号与槽在QML中,可以使用信号与槽机制来实现组件之间的交互。
通过定义信号和槽,可以使一个组件在特定条件下触发一个动作,然后其他组件可以对其进行响应。
这样可以实现各种用户界面的交互效果。
6.QML与C++集成由于QML是基于Qt框架的一部分,因此可以与C++代码无缝集成。
QML的语言(中文)

QML的语⾔(中⽂)QML的语⾔介绍QML 是⼀种描述程序的⽤户界⾯的说明性的设计语⾔。
从表现上两者看起很像。
在QML 中,⽤户界⾯被规定为具有属性的对象树。
本简介是为了很少或没有编程经验的⼈。
JavaScript是⽤来作为QMl的脚本语⾔,所以你可能想了解多⼀点关于它(JavaScript的:权威指南),然后潜⼊QML第更深。
这度如HTML 和CSS等Web技术的基本理解有帮助的,但QML不是必需的。
QML的基本语法QMl看起来想下⾯这样:import Qt 4.7Rectangle {width: 200height: 200color: "blue"Image {source: "pics/logo.png"anchors.centerIn: parent}}其对象是指定类型⼀对⼤括号之后。
对象类型总是以⼀个⼤写字母开始。
在上⾯的例⼦,有两个对象,⼀个矩形和图像。
在括号之间的,我们可以指定对象的有关信息,如它的性能。
属性规定格式为“property: value”。
我们可以看到的图像有⼀个名为source的属性,它已被指派值“pics / logo.png”的value。
⽤冒号分隔。
每个属性可以占⽤⼀个⾏:Rectangle {width: 100height: 100}或者⼀⾏多个属性(加上“:”):Rectangle { width: 100; height: 100 }import语句导⼊了Qt模块,它包含了标准QML的所有元素。
如果没有这个import语句,Rectangle和Image内容将⽆法使⽤。
Expressions表达式除了赋值属性,你也可以指定⽤JavaScript编写的表达式。
Rotation{ angle: 360 * 3 }Angle(⾓度),Rotation(旋转)这些表达式可以包含其他对象属性的引⽤,在这种情况下,⼀个具有约束⼒的建⽴:当值变更的表达,表达的属性已经分配的是⾃动更新该值。
- 1、下载文档前请自行甄别文档内容的完整性,平台不提供额外的编辑、内容补充、找答案等附加服务。
- 2、"仅部分预览"的文档,不可在线预览部分如存在完整性等问题,可反馈申请退款(可完整预览的文档不适用该条件!)。
- 3、如文档侵犯您的权益,请联系客服反馈,我们会尽快为您处理(人工客服工作时间:9:00-18:30)。
QML基础——QML国际化(中文示例)
在Qt程序中如何使用多国语言已经在《Qt的国际化和本地化》这篇文章中有所介绍,本文则针对如何对出现在QML中的字符串进行国际化进行专门介绍。
本本将通过一个很小的中文例子程序,向大家一步步讲解如何使得出现在QML代码中的字符串显示成中文。
示例程序可通过本文末尾所附链接下载。
更多阅读可以参照“QML的国际化”
修改pro
在Qt的pro文件中首先加入以下几行:
CONFIG += localize_deployment
SYMBIAN_SUPPORTED_LANGUAGES += zh_CN
SYMBIAN_LANG.zh_CN = 31
TRANSLATIONS = displayChinese_zh_CN.ts
其中CONFIG += localize_deployment是为了可以为应用程序添加中文名称。
然后加入以下几行:
symbian {
addFiles.sources = qml/displayChinese/displayChinese_zh_CN.qm
addFiles.path = .
DEPLOYMENT += addFiles
}
这是为了程序在手机上能够找到需要的qm文件
标记字符串
出现在QML 中的字符串如果需要翻译则可以通过使用qsTr(), qsTranslate(), QT_TR_NOOP(), 或QT_TRANSLATE_NOOP() 来进行标记。
例如在本例程中:
Text {
text: qsTr("display Chinese character.")
anchors.centerIn: parent
}
使用了qsTr()。
只有这样做过标记之后,translator才知道“display Chinese character”。
是需要被翻译的,以便于后面进行处理
生成中文目标语言的ts文件
首先需要启动命令行,例如如果我们安装的是QtSDK 1.1 beta 则启动下图所示command prompt:
在命令行中进入我们项目的根目录,然后输入以下命令:
lupdate qml/displayChinese/main.qml -ts qml.ts
这样就会生成一个名为qml.ts的文件了.
然后我们在命令行中继续输入:
lupdate displayChinese.pro -ts app.ts
从而生成app.ts文件
翻译
用Qt Linguist打开上一步生成的qml.ts 和app.ts,将我们翻译的文字输入进去即可,最后保存文件,完成。
然后在命令行中输入:lconvert app.ts qml.ts -o displayChinese_zh_CN.ts
这是为了将两个ts文件合并起来。
最后的效果如图:
其中QtApplicationCaptions就是指的程序呈现在用户面前的名称(我们这里起名叫QML中文应用程序),而QtPackageNames是指的安装
sis时给用户的提示信息中的名称。
生成运行时所需的qm文件
上一步做完之后,我们点选择File 菜单中的release就可以生成qm文件了。
加载翻译文件
要想使得翻译起作用,还需要在Qt程序的main函数中进行设定,例如:
QString locale = QLocale::system().name();
QTranslator translator;
bool success = translator.load( QString("displayChinese_") + locale);
app.installTranslator(&translator);
至此,整个示例程序就完成了,下面我们看一下效果。
程序截图
本程序对QML中的字符串进行了多语言处理,并且给应用程序起了一个中文名字,只是没有处理软键,不过原理都是一样的,具体可以参阅《Qt 的国际化和本地化》。
下面是示例程序在N8上截图,当我们的N8语言设置为中文的时候就是第一幅图,当我们的N8语言设置为英文的时候就是第二副图。
当手机语言设定为中文时:。