
F5 转发IP的配置
A SNAT is an object that maps an original client IP address to a translation address defined on the BIG-IP device. When the BIG-IP system receives a request from a client IP address, and if the client IP address in the request is defined in a SNAT, the BIG-IP system translates the source IP address of the incoming packet to the SNAT address.When the BIG-IP system translates the source IP address of the incoming packet to the SNAT address, the web server sees request as originating from the SNAT address, not the original client IP address. If the web servers are required to log the original client IP address for requests, the SNAT address translation behavior can become problematic.It may be necessary for the BIG-IP system to insert the original client IP address in an HTTP header and configure the web server receiving the request to log the client IP address instead of the SNAT address.Note: HTTP requests processed by the BIG-IP WebAccelerator module will also experience a source address translation.The client IP address is inserted as an HTTP header named X-Remote-Addr. No configuration is required on the BIG-IP for the X-Remote-Addr HTTP header to be inserted. For information about using the X-Remote-Addr HTTP header to preserve the original client IP ad dress for traffic being translated by a WebAccelerator, refer to SOL7441: Using the X-Remote-Addr HTTP header to preserve the original client IP address for traffic being translated by a WebAccelerator.To configure the BIG-IP system to insert the original client IP address in an X-Forwarded-For HTTP header, you can use one of the following methods:∙Enable Insert X ForwardedFor in the HTTP profile∙iRuleEnabling the Insert XForwardedFor in the HTTP profileTo configure the BIG-IP system to insert the original client IP address in an X-Forwarded-For HTTP header, perform the following procedure:1. Log in to the BIG-IP Configuration utility.2. Click Local Traffic.3. Click Profiles.4. Click HTTP from the Service s drop-down menu.5. Click the Create button.6. Type a name for the HTTP profile.7. Select the check box next to Insert XForwarded For.A drop-down menu appears.8. Select Enabled from the drop-down menu.9. Click Finished.You must now associate the new HTTP profile with the virtualserver.iRuleTo configure the BIG-IP system to insert the original client IP address in an X-Forwarded-For HTTP header using an iRule, perform the following procedure:1. Log in to the BIG-IP Configuration utility.2. Click Local Traffic.3. Click iRules.4. Click the Create button.5. Type a name in the Name field.6. Copy and paste the following iRule in the Definition field:7.when HTTP_REQUEST {8. HTTP::header insert X-Forwarded-For[IP::remote_addr]}9. Click the Finished button.You must now associate the new iRule with the virtual server. Configuring the web server to extract the IP address from the HTTP headerOnce you have configured the BIG-IP system to insert the original client IP address in an HTTP header using an X-Forwarded-For HTTP header, you must also configure the webserver to extract the IP address from the HTTP header, and log the IP address to the web server log file.Important: For specific details about using HTTP header information in log files, ref er to the documentation provided by the vendor for your specific web server.Apache web serverYou can configure an Apache web server to extract the IP address from the X-Forwarded-For HTTP header and log the IP address to the web server log file by adding the appropriate logging directives to the Apache httpd.conf file. For example:LogFormat "%v %{X-Forwarded-For}i %l %u %t \"%r\" %>s %b" X-Forwarded-For CustomLog /var/log/apache/-xforwarded.log X-Forwarded-ForRefer to the Apache logging documentation for more details.Microsoft IIS web serverYou can configure the Microsoft IIS web server to extract the IP address from theX-Forwarded-For HTTP header and log the IP address to the web server log file. To do so, you will need to download and install the IIS X-Forwarded-For ISAPI Log Filter from.The IIS ISAPI filter will look for the X-Forwarded-For HTTP header in the HTTP request. If the IIS ISAPI filter finds an X-Forwarded-For HTTP header in the HTTP request, it will replace the client IP address in the W3SVC log traces with the value of the X-Forwarded-For HTTP header.To download and install the IIS X-Forward-For ISAPI Filter, perform the following procedure:1. Log on to .2. In the upper right corner, search for X-Forwarded-For.3. In the DevCentral Re sults section, click IIS X-Forward-ForISAPI Filter.4. In the article, click CodeShare to download the .zip file.5. To install the filter, add it to your Microsoft IIS website using theMicrosoft IIS manager utility.A recent customer issue came up where they were load balancing servers but we unable to get the true client address logged in their IIS logs. They had their servers fronted by a BIG-IP and when clients would make requests the address passed to the server was the internal address of the BIG-IP and not that of the client.This is a common issue with proxies and fortunately there is a standard for forwarding client information. It is the HTTP X-Forwarded-For header which is handled by most proxies. So, I set out to find an existing ISAPI filter to replace the c-ip (client ip) log value in IIS with the contents of the X-Forwarded-For header (if it exists). I was amazed to find that I couldn't find a single instance of any open source (or even commercial) filter that would do this.So, I dug out V isual Studio and whipped up a filter that does just that. It's very basic and contains no user configuration so all you need to do is plug it into your Web Applications list of ISAPI Filters within the IIS Administration and you're set to go.We've released the source under the iControl End User License Agreement (available in any iControl SDK download). Y ou can download it in the CodeShare section of DevCentral. If you find a way to optimize this filter, please let me know and I'll update the sources here.After 24-hours of posting, a customer already returned some performance testing on the filter indicating that it only effected the traffic by less than 1 percent. I'm sure there are ways to optimize the memory allocation in the filter to speed this up a bit more, but I'll leave that for the community to work on.Oh, and it should be noted that the X-Forwarded-For header isn't supported the same way across all proxy products so you'll want to make sure you test this out before using it. It is expecting the header to only contain an IP Address as it does a straight substitution on the value in the c-ip section of the log entry.。
F5 BIG-IP负载均衡配置指南.

1 概述...............................................................................................................................................1-1
5 BIG-IP 备机网络配置......................................................................................错误!未定义书签。
5.1 配置 VLAN......................................................................................................................错误!未定义书签。 5.2 配置 IP .............................................................................................................................错误!未定义书签。 5.3 配置主备同步关系 .......................................................................................................... 错误!未定义书签。
7 配置验证...........................................................................................................错误!未定义书签。
F5负载均衡 BigIP配置手册

外网F5配置步骤:一、登录到F5 BIG-IP管理界面:1、初次使用:①、打开F5 BIG-IP电源,用一根网线(直连线和交叉线均可)连接F5 BIG-IP的3.1管理网口和笔记本电脑的网口,将笔记本电脑的IP地址配置为“192.168.1.*”,子网掩码配置为“255.255.255.0”。
②、用浏览器访问F5 BIG-IP的出厂默认管理IP地址https://192.168.1.245或https://192.168.245.245③、输入出厂默认用户名:admin,密码:admin④、点击Activate进入F5 BIG-IP License申请与激活页面,激活License。
⑤、修改默认管理密码。
2、以后登录:通过F5 BIG-IP的自身外网IP登录。
①、假设设置的F5自身外网IP为61.1.1.2,就可以通过https://61.1.1.2/登录。
②、还可以通过SSH登录,用户名为root,密码跟Web管理的密码相同。
二、创建两个VLAN:internal和external,分别表示内网和外网。
1、创建VLAN:internal(内网)在“Network→VLANs”页面点击“create”按钮:①、Name栏填写:internal(填一个英文名称)②、Tag栏填写:4093(填一个数字)③、Interfaces栏:将Available列的“1.1”拉到Untagged列。
1.1表示F5 BIG-IP的第一块网卡。
2、创建VLAN:external(外网)在“Network→VLANs”页面点击“create”按钮创建VLAN:①、Name栏填写:external(填一个英文名称)②、Tag栏填写:4094(填一个数字)③、Interfaces栏:将Available列的“1.2”拉到Untagged列。
1.2表示F5 BIG-IP的第二块网卡。
三、创建F5 BIG-IP的自身IP:分别对应internal(内网)和external(外网)。
F5 BIG-IP配置方法

3.3 什么是pool?
Pool的特性
3.4 什么是iRule?
案例:上海联通GPRS加速系统物理连接图
GGSN
Cisco 6506
Si
FW
Internet
F5-LB
Sun X4200M2 WFS服务器
4.1 负载均衡器本地管理
•
• • • • • •
负载均衡器本地管理可利用设备正面面板左侧 管理接口,配置192.168.1.*/24网段地址,负载 均衡器管理地址分别为: LB:192.168.1.245/24 然后使用https://192.168.1.245进行操作界面的 管理。 负载均衡器(LB)WEB登录:admin 密码:shUnicom123 负载均衡器(LB)命令行登录:root 密码:shUnicom123
2.1 网络中存在的问题
• 随着互联网技术的发展,应用类型呈爆炸式增长,网络应用的问题也 层出不穷: • 服务器压力不均衡,无法充分利用服务器资源,不能保证服务器正常 工作。 • 网络应用攻击类型越来越多,越来越复杂。 • 无法保证员工随时随地与公司网络保持安全便捷的远程接入。 • 网络中大量重复数据的传输占用大量带宽,造成严重网络延时。 • 突发流量时,众多非关键应用抢占关键应用带宽,不能保证关键应用 的性能。 • 对相同内容的反复访问占用服务器资源,造成服务器巨大压力。 • 电子商务交易大量损耗服务器资源,服务器性能急剧下降。 • 服务器很大部分资源用来处理网络连接,响应时间变慢 。
WAN是覆盖地理范围相对较为广阔的数据通信网络,它一般是利用公共载 体(比如电信公司)提供的设备进行传输.WAN技术运行在OSI的最下3层
1.5 IP Routing 的含义
• 路由协议(routing protocol):用于routers动态寻找 网络最佳路径,保证所有routers拥有相同的路由表. 一般,路由协议决定数据包在网络上的行走的路径. 这类协议的例子有OSPF,RIP,IGRP,EIGRP等 • 可路由协议(routed protocol):当所有的routers知 道了整个网络的拓扑结构以后,可路由协议就可以 用来发送数据.一般的,可路由协议分配给接口,用 来决定数据包的投递方式.这类例子有IP和IPX
F5的源地址转换(SNAT)配置方法

F5的源地址转换(SNAT)配置方法初步接触F5的网络管理员可能会被F5的源地址转换搞迷糊,因为F5有多种情况下需要使用源地址转换,而且源地址转换的方法也有几种,本文就简单叙述一下F5源地址转换。
需要做源地址转换的情况:,,内部网络主动发起请求,要求访问外部网络的服务时;,,单臂部署F5,外部网络主动发起请求,要求访问内部网络的服务时; 两种情况下,源地址转换的配置方法都是一样的。
配置源地址转换方法一:转换为出口所属VLAN的 IP 或者出口所属 VLAN 的浮动 IP。
配置:定义一个SNAT转换项,在转换地址部分选择Automap 。
转换规则:单机部署,数据包到达F5后,F5将其源IP转换为出口所属VLAN的IP。
双机部署,数据包到达F5后,F5将其源IP转换为出口所属VLAN的浮动IP。
适用情况:内部电脑不多(外出会话数不会超过65535),而且外出数据包源地址转换没有特殊要求的情况。
方法二:转换为特定的IP地址或者IP地址池。
配置:定义一个SNAT pool,然后定义一个SNAT转换项,在转换地址部分选择定义的SNAT pool 。
转换规则:数据包到达F5后,F5会从SNAT pool里面依次取出一个IP,然后将数据包的源IP转换为该IP。
适用情况:内部电脑很多(外出会话数会超过65535),而且外出数据包源地址转换没有特殊要求的情况。
方法三:根据特定的源IP或者目标IP转换为相应的IP。
配置:定义一个iRule 实现地址判断和源IP转换,定义一个匹配所有目标的VS,然后引用定义的iRule。
转换规则:数据包到达F5后,F5 会检查其源IP或/和目标IP,然后根据iRule的逻辑决定将数据包的源IP转换为哪个IP。
适用情况:需要根据数据包的来源或/和目标IP转换数据包的源IP,比如多链路时。
rule irule_outbound {when LB_SELECTED {if {[IP::remote_addr equals 192.168.1.1] } { snatpool snat_192.168.1.1}elseif {[IP::remote_addr equals 192.168.10.1] } { snatpool snat_192.168.10.1}else {snat automap}}}。
F5配置管理守则(内部)
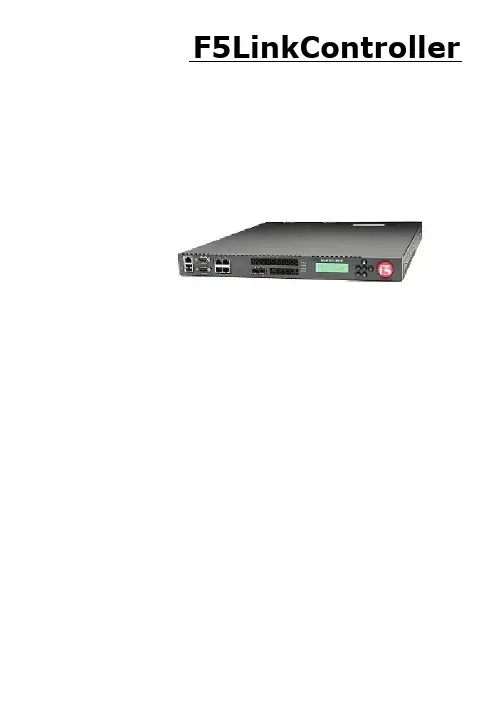
F5LinkController关于LinkController的说明(简称LC)F5的负载均衡有三大产品LTM(LocalTrafficManagement):服务器负载均衡GTM(GlobalTrafficManagement):全局多站点负载均衡LC(LinkController):链路负载均衡LTM通常部署在serverfarm前面,实现对web或者应用服务器的负载均衡GTM的功能可以总结为一个智能的DNS服务器,其内核用的就是LinuxBund9,通过GTM做域名解析来将用户的访问数据流导向不同的站点或者数据中心,同时GTM还可以作为DNS服务器来使用LinkController:LC是LTM和GTM的结合体,LC可以实现简单的4层服务器负载均衡的功能和简单的GTM的功能;因此,LC对内可以实现服务器的负载均衡,对外可以实现多ISP链路接入的负载均衡,通过LC的职能DNS解析功能返回给不同的客户不同的DNS解析结果,这样就可以实现根据一定的策略使不同的用户从不同的ISP线路访问站点2配置过程确定网络结构图,确定应用的访问流程,确定详细地址和路由规划设备初始化LTM部分设置:主要是设置VirtualServer和Outbound流量的负载均衡LinkController部分设置:主要是通过域名解析的方式实现Inbound流量的负载均衡双机设置如何进行测试如何进行故障排查3第一部分设备初始化配置4,设备初始化内容安装BIG-IPVersion 的版本,最好是通过Vmware 全新安装的方式,不要通过IM 升级的方式 打最新的Hotfix ,目前版本最新的Hotfix 版本为可以通过 进行下载配置管理地址和管理路由 如果使用默认地址,管理口为如果需要使用其它地址,可以在console 下通过config 命令进 行修改,也可以通过液晶面板按键操作进行修改激活设备,申请license设置正确的时区,一般为asia/shanghai ,以及确认或者修改 系统时间(在命令行下通过date 命令进行修改)设定管理员admin (Forweb ,默认为admin ),root (For CLI ,默认为default )的密码5安装操作系统确认设备软件版本,要求为BIG-IPVersion,在CLI下用命令bversion查看如果不是,请安装BIG-IPVersion的版本,最好是通过Vmware全新安装的方式,不要通过IM升级的方式安装方法请参考相关《BIGIP设备操作系统安装手册》文档注意,在安装之前请备份/config/文件通常,该文件内容如下:[root@f5:Active]config#moreRegistrationKey:KQYHC-UMEAR-FHHUK-FJDPU-YFYHAKJ 设备重装后,该文件会丢失,而设备的license激活需要该文件,如果不慎丢失,需要开一个case要求F5T ac帮忙查找,会比较麻烦6, 安装补丁要求安装最新的Hotfix ,目前版本最新的Hotfix 版本为 可以通过 进行下载,下载的时候需要申请一个F5网站的帐号,登陆后即可下载 有了Hotfix 文件后,需要将文件上传到F5设备上,通常上传到/tmp 目录下F5设备不支持telnet 和ftpserver ,但是默认是一个SFTPserver , 可以通过SecureFTP 客户端直接连接到F5设备上,通过root 帐号登 陆,进行文件的上传和下载;如果没有SecureFTP 客户端,也可以 在笔记本上起一个FTP 服务器,再通过CLI 从F5设备连接到笔记本上 来拉Hotfix 文件上传Hotfix 后,安装Hotfix 前,请通过console 连接到设备上,进入 /tmp 目录下,通过执行命令im (hotfix 文件名),安装将会自动完 成安装完成后,设备会提示你对设备进行fullboxreboot ,即输入命令 /usr/bin/full_box_reboot ,等待设备重启完成,也可以将设备关电 重启,完成后可以用命令bversion 进行验证7激活设备license设备激活后license如右图所示,请确认license的正确性8初始化基本设置设置管理口地址和管理路由,默认为设置HostName,注意要求为一个FQDN设置HighAvailability模式,此处为单机模式,选择SingleDevice,如果做双机,则要选择RedundantPair设置TimeZone,通常为Asia/shanghai设置Root和Admin密码,默认为root/default,admin/admin9第二部分LCOutbound流量均衡部分配置10LinkController实施前的准备确定网络结构图!确定网络结构图!确定网络结构图!确定应用的访问流程!确定应用的访问流程!确定应用的访问流程!确定合理正确的地址路由规划!确定合理正确的地址路由规划!确定合理正确的地址路由规划!11地址规划ISPCT ISPCNCVlanCT:F5LinkControllerVlanINTERNAL:Firewall WEB1WEB2办公网用户12VlanCNC:LCV9配置逻辑结果图-Outbound流量Link1Link2Default_Gateway_Pool VSiRulesLink1Link2InternalClientsLinkController13配置VLAN添加3个VLAN:CNCCTINTERNAL,并对每个VLAN划分端口14配置SELFIP按照地址规划配置每个VLAN的IP地址15配置一个Default_Gateway_Pool16配置默认路由配置默认路由,指向Default_Gateway_Pool17配置其它静态路由18配置OutboundVirtualServer(简称VS)19LCOutbound流量均衡部分配置说明这样,基本的Outbound负载均衡的配置就结束了,内部的用户,可以通过两条线路访问外面了下面我们要继续进一步讨论如何优化Outbound负载均衡的策略和满足一些特殊的需求,主要是通过iRules来实现的20Outbound的高级配置-根据运营商选择线路典型需求如下:对于去往中国电信的访问,走电信的线路CT_Pool,当电信的线路故障时,走网通的线路,对于去往中国网通的访问,走网通的线路CNC_Pool,当网通的线路故障时,走电信的线路,其他的访问在中国电信和中国网通之间负载均衡Default_Gateway_Pool配置过程:建立Pool建立电信/网通地址库的class建立Rules将Rules和VirtualServer进行绑定21由于当电信的线路故障时候需要用网通的线路做备份,所以在CT_Pool里面启用了”PriorityGroupActivation”,把电信线路的Priority设置高一些,而网通线路的Priority设置低一些。
F5BIGIP配置文档

F5BIGIP配置⽂档BIGIP标准配置⽂档⽬录1. 连接BIGIP (4)1.1 Console⽅式 (4)1.2 ⽹络连接⽅式 (4)1.2.1 基于WEB⽅式 (4)1.2.2 基于SSH⽅式 (7)2.⽹络配置 (9)2.1 ⽹络配置步骤及流程 (9)2.1.1 L2 Vlan 配置 (10)2.1.2 L3 self ip 配置 (11)2.2 服务器直连模式⽹络配置 (12)2.2.1 ⽹络连接拓扑图 (12)2.2.2 VLAN划分 (12)2.2.3 IP地址划分 (13)2.3 服务器⾮直连模式⽹络配置 (14)2.3.1 ⽹络拓扑结构 (14)2.3.2 VLAN划分 (14)2.3.3 IP地址划分 (15)2.4 透明模式⽹络配置 (16)2.4.1 ⽹络拓扑结构 (16)2.4.2 VLAN划分 (16)2.4.3 IP地址划分 (16)2.5 静态路由的添加 (17)3.负载均衡配置 (17)3.2 Pool配置 (19)3.3 Virtual Server配置 (22)3.4 会话保持配置 (24)3.4.1 会话保持的概念 (24)3.4.2 Simple会话保持 (25)3.4.3 Cookie 会话保持 (26)3.5 iRules配置 (27)3.6 Monitor配置 (30)3.6.1 Monitor的添加 (30)3.6.2 Node Address Monitor配置 (33) 3.6.3 Node Association Monitor配置 (35)3.6.4 Monitor 的验证 (36)4. SNAT配置 (37)4.1 SNAT的概念 (37)4.2 NAT配置 (38)4.3 SNAT配置 (39)4.3.1 SNAT IP配置 (39)4.3.2 SNAT AutoMap配置 (41)5. Redundent配置 (42)6. 系统维护部分配置 (46)6.1 SNMP配置 (46)6.2 Syslog配置 (47)6.3 NTP配置 (47)6.4 ⽤户管理 (50)7. BIGIP命令⾏常⽤命令解释 (57)7.1 系统配置相关命令 (57)7.2 系统维护相关命令 (57)1.连接BIGIP1.1Console⽅式基于Console终端配置BIG-IP 的准备安装Windows操作系统的PC⼀台(装有超级终端)BIGIP设备⾃带的Console电缆⼀条使⽤超级终端建⽴⼀个连接,通过Console电缆⼀端连接BIGIP,⼀端连接COM,COM的参数设置如图:1.2⽹络连接⽅式1.2.1基于WEB⽅式在浏览器地址栏键⼊https://(BIGIP 设备IP地址),如下图:回车后,出现以下界⾯:此对话框为浏览器与BIGIP通讯交换的证书提⽰,点击“是”继续输⼊⽤户名和密码点击确定继续点击Configure your BIGIP Using Configration Utility进⼊BIGIP配置主界⾯。
f5的配置过程
1 f5的工作原理Creating the pool:beahttpserver 192.168.100.65,60,51,52BIG-IP pool is a set of devices grouped together to receive traffic accordingto a load balancing method. This pool uses the monitor you just created.Creating the virtual server:a virtual server 172.16.3.250 thatreferences the pool and the HTTP and cookie persistence profiles youcreated in the preceding procedures.BIG/IP利用虚拟IP地址(VIP由IP地址和TCP/UDP应用的端口组成,它是一个地址)来为用户的一个或多个目标服务器(称为节点:目标服务器的IP地址和TCP/UDP应用的端口组成,它可以是internet的私网地址)提供服务。
2 实现方案分析神州数码朱林咨询2.1、实现方式1(建议采用该方式)如果不配置链路的负载均衡f5可以只配置1个vlan(配置internal vlan ,self ip, gateway)物理的连接方式,f5只要有1条物理线路连接到ciso6509即可对应核心交换机上的cisco6509的所划分的vlan由于f5只是对服务器做负载均衡只配置1个vip ip_addr_1 ,对应地址池中的4台主机(192.168.100.51,192.168.100.52,192.168.100.60,192.168.100.65) 该vip可以和4台bea 服务器不在同一网段中该vip和f5的internal vlan的self ip同一网段建议采用实现方式1f5的网卡不和服务器在同一网段,不需要192.168.100.*该段的地址2.2、实现方式2也可以将f5通过3条网线连接到cisco6509上f5分别配置3个vlan ( tele,cnc,internal)f5配置1个self ip 用于和其它vlan (包括4台bea 服务器) 通讯f5配置3个vip 分别用于电信用户,网通用户,内网用户的访问f5配置1个bea-http-pool 服务器地址池每个vip 分别对应相同的bea-http-pool 地址池这样只是逻辑上清晰一些电信用户只需访问 vip-tele 该地址指向bea-http-pool网通用户只需访问 vip-cnc 该地址指向bea-http-pool内网用户只需访问 vip-internal 该地址指向bea-http-pool3具体业务访问实现(实现方式1):1 电信用户访问通过tele 线路,cisco pix 配置了nat ,将nat 后的地址修改为ip_addr_1(vip),此时f5会通过selfip 和网关通讯, 分别从地址池中查找较空闲的bea server 地址并向该地址发起访问2 网通用户访问通过cnc 线路,cisco pix 配置了nat ,将nat 后的地址修改为ip_addr_1(vip),此时f5会通过selfip 和网关通讯, 分别从地址池中查找较空闲的bea server 地址并向该地址发起访问3 内部用户访问现在内部用户直接访问的地址要修改为现在的 ip_addr_1(vip)电信Pix网通Pix Vlan_I: 4台bea server 地址Vlan_m : 包含self ip; ip_addr_1此时f5会通过selfip和网关通讯,分别从地址池中查找较空闲的bea server 地址并向该地址发起访问而不是以前的bea server的直接物理地址4需要网络的配合工作4.1、cisco pix修改cisco pix防火墙的nat配置需要将原来的的nat后的地址修改为现在的vip地址ip_addr_14.2、规划出f5接入的vlan在cisco 6509上规划出f5连接的vlan分配相应的地址:vlan 网关地址f5 internal vlan 地址f5 vip地址4.3、内网用户访问地址的修改内网用户直接访问bea server的地址要修改为vip地址4.4、192.168.100.60路由表改动只需添加一条缺省的路由表项不添加其它的静态路由如果没有配置f5还是要保留原来的配置5配置手册参考《bea_lb_dgv9.pdf》。
F5命令行配置配置手册
F5命令行配置配置手册bigstart Restarts the SNMP agent bigsnmpd. bigtop Displays real-time statistics.Config Configures the IP address, network mask, and gateway on the management (MGMT) port.Use this command at the BIG-IP system prompt prior to licensing the the BIG-IP system, and do not confuse it with the bigpipe config command or the BIG-IP Configuration utility.halt Shuts down the BIG-IP software application.hostname Displays the name you have given to the BIG-IP system.printdb Prints the values of one or more entries in the bigdbTM database. reboot Reboots the BIG-IP system.ssh and scp Access command line interfaces on other SSH-enabled devices, and copy files to or from a BIG-IP system.自定义Bigpipe shell名称bp> shell promptbp> shell prompt BIG-IP>系统Shell名称将变成:BIG-IP>此特性避开此限制,在Linux命令前加”!”.BIG-IP>!ls //查看目录BIG-IP>!ifconfig //查看接口配置RoutesSelf IP addressesPacket FiltersTrunks (802.3ad Link Aggregation)Spanning Tree Protocol (STP)VLANs and VLAN groupsARP配置Packet Filtering命令: bigpipe packet filter你可以定义一个包过滤规则来提供访问控制,速率shaping,审计. 配置路由命令:route ( | all | inet | inet6)F5的Show Tech[root@XXXX:Standby] config # qkviewGetting systemwide backup configuration files.Getting AOM information.Getting last 175 lines of log files.Getting last 175 lines of gzipped log files.Getting md5 sum information.Getting core file list.Getting Public Certificate information.Getting tmctl information.completed... 6 of 161 checks produced no dataDiagnostic information has been saved in file /var/tmp//doc/e50f6ebe960590c69ec376 23.html -tech.out Please send this file to support@/doc/e50f6ebe960590c69ec376 23.html .bigtop - display real-time statistics-bytes display counts in bytes (vs bits)-pkts display counts in packets (vs bits)-reqs display counts in requests (vs connections)-vips number of virtual servers to print-nodes number of nodes to print-once print once and exit-delay number of seconds between samples (default 4)-scroll disable full-screen mode-nosort disable sorting-conn sort by connection count (vs byte count)-delta sort by count since last sample (vs total)-n print IP address and services in numeric format-vname display virtual servers by name (vs IP address)-help, -h print this message日志文件系统1. Access the BIG-IP system prompt.2. Stop the BIG-IP system or put the system into a safe condition such as standby mode using the bigstart stop command.3. Type the following command:resize-logFSThis command prompts you for the desired file size in gigabytes.4. At the prompt, type an integer.The minimum allowed value is 1, and the maximum allowed value is 10.A prompt appears that allows you to confirm the specified file size.5. Type Y.A message appears, notifying you of the need for the BIG-IP system to perform a reboot, followed by a prompt, which allows you to permit the reboot operation. Note: Prior to rebooting, the BIG-IP system verifies that the integer you typed in step 3 is within the allowed range, and checks to ensure that enough disk space exists for the specified size.6. Type Y.A confirmation prompt appears.7. Type Y.The system displays messages indicating that the reboot operation is about to occur.8. Wait for the reboot operation to finish.When the system becomes available again, the newly-specified disk space for the log file will be in effect.WARNINGDo not delete the files: /shared/.LoopbackLogFS and /shared/LogFS_README, because this action deletes all of your log files.启用/禁用虚拟服务或虚拟地To enable or disable a virtual server, use the appropriate command syntax:bp> virtual : enable | disableTo enable or disable a virtual address, use the appropriate command syntax:bp> virtual address enable | disable从服务中移出单个的NodeYou can remove an individual node from service, or return an individual node to service from the bigpipe shell command line.To remove an individual node from service, use the following command:bp> node : downTo return an individual node to service, use this command: bp> node : up查看修改F5系统配置文件器来编辑或者查看这些文件,当你没有条件使用浏览器时,有时候修改配置文件很有必要.这就需要F5的无浏览器配置模式和命令行配置模式Important:在你编辑完bigip.conf or bigip_base.conf 重启MCPD service 之前, 你必须运行bigpipe load 确保MCPD service 使用的是当前的配置数据alert.conf Stores definitions of SNMP traps (system default alerts).user_alert.conf Stores definitions of SNMP traps (user-defined alerts)./config/bigip.conf Stores all configuration objects for managing local application traffic, such as virtual servers, load balancing pools, profiles, and SNATs.Note that after you edit bigip.conf, and before you restart the MCPD service, you must run the bigpipe load command./config/bigip_base.conf Stores BIG-IP self IP addresses and VLAN and interface configurations. Note that after you edit bigip_base.conf, and before you restart the MCPD service, you must run the bigpipe load command./config/bigip.license Stores authorization information for the BIG-IP system./etc/bigconf.conf Stores the user preferences for the Configuration utility./config/bigconfig/openssl.conf Holds the configuration information for how the SSL library interacts with browsers, and how key information is generated./config/user.db Holds various configuration information. This file is known as the bigdb database. /config/bigconfig/httpd.conf Holds configuration information for the web server./config/bigconfig/users The web server password file. Contains the user names and passwords of the people permitted to access whatever is provided by the webserver./etc/hosts Stores the hosts table for the BIG-IP system./etc/hosts.allow Stores the IP addresses of workstations that are allowed to make administrative shell connections to the BIG-IP system./etc/hosts.deny Stores the IP addresses of workstations that are not allowed to make administrative shell connections to the BIG-IP system./etc/rateclass.conf Stores rate class definitions./etc/ipfwrate.conf Stores IP filter settings for filters that also use rate classes. /etc/snmpd.conf Stores SNMP configuration settings./etc/snmptrap.conf Stores SNMP trap configuration settings./config/ssh Contains the SSH configuration and key files./etc/sshd_config This is the configuration file for the secure shell server (SSH). It contains all the access information for people trying to get into the system by using SSH./config/routes Contains static route information.[root@ISAG-2:Standby] config # find_keysISAG-2 koradsatn. omtitra eodISAG-2 junl trig Cmi nevl5scnsdt md.6koradsatn. omtitra eod Found license key JTPBO-CHRSX-DGBIO-HOAHJ-MOZJEVA License file location is: /sda.1/config/bigip.licenseFound license key JTPBO-CHRSX-DGBIO-HOAHJ-MOZJEVA Unmounting unneeded partitions... ISAG-2 junl trig Cmi nevl5scnsn Cmi nevl5scnsree aamd.<>junl trig Cmi nevl5scns<6>EXT3-fs: mounted filesystem with ordered data mode.ISAG-2 junl trig Cmi nevl5scns<6>kjournald starting. Commit interval 5 secondscompleteAbove information can be found in /tmp/keys.outManaging Local Application TrafficSetting up load balancingControlling HTTP trafficImplementing HTTP and TCP optimization profilesAuthenticating application trafficImplementing persistenceEnhancing the performance of the BIG-IP systemManaging health and performance monitorsImplementing iRules设置VirtualServer负载均衡1. Decide what types of traffic you want the BIG-IP system to manage, as well as whether you want to implement session persistence, connection persistence, and remote authentication.2. For each decision in step 1, decide whether you want to use the corresponding default profile that the BIG-IP system provides, or whether you want to create a custom profile.3. Access the bigpipe shell.4. If you want to create custom profiles, use the profile command, specifying the appropriate type of profile as an argument. If you do not want to create custom profiles, skip this step.5. Create one or more load balancing pools, using the pool command.6. Create a virtual server, using the virtual command, and assign to it any profiles and pools that you created. If you are using default profiles, some of those profiles might already be assigned to the virtual server by default.配置克隆Pool克隆Pool设计是用于入侵检测,你可以针对一个VS设置一个克隆Pool,这个克隆的VS接收世的流量和普通Pool一样,你就可以复制流量到入侵检测系统中.1. Access the bigpipe shell.2. Use the virtual command, to create or modify a virtual server, specifying a value for the clone pool argument.配置最后一跳Pool默认,BIG-IP系统自动启用最后一跳特性是,如果你想禁用这个特性.然后自己手工定义一个最后一跳路由器,你可以建立一个最后一跳pool 并且指定其属于某个VS当中.1. Access the bigpipe shell.2. Use the pool command to create a last hop pool that contains the router inside addresses.3. Use the lasthop pool argument with the virtual command to assign the last hop pool to a virtual server.If you have not assigned an SSL profile to the virtual server, use the profile argument with the virtual command to assign the profile to the virtual server.配置SNATs这里有两种基础方法来建议一个SNAT,你可以直接将一个转换地址委派给一个或多个源IP地址,或者你可以配置一个SNAT pool,然后委派这个SNAT pool到某个源IP地址,在较新的版本中,BIG-IP自动从SNAT Pool中选择一个转换地址Note that you can assign these types of mappings from within an iRule.To map a single translation address to an original address1. Access the bigpipe shell.2. Designate an IP address as a translation address, using the snat translation command.3. Map the translation address to one or more original IP addresses, using the snat command or the rule command.To map a SNAT pool to an original address1. Access the bigpipe shell.2. Create a pool of translation addresses (that is, SNAT pool), using the snatpool command.3. Map the SNAT pool to one or more original IP addresses, using either the snat command or the rule command.配置HTTP traffic你可以配置BIG-IP来控制HTTP流量:配置HTTP压缩,HTTP请求重定向,HTTP请求重写,插入和插除HTTP头,启用或者禁用cookie加密和SYN cookie支持,配置HTTP 类Profile, HTTP响应数据组块控制.Configuring HTTP compression配置BIG-IP系统压缩HTTP 服务响应1. Access the bigpipe shell.2. Configure the compression-related settings of an HTTP profile,using the profile http command.3. Assign the HTTP profile to a virtual server, using the virtual command.Redirecting HTTP requests你可以配置HTTP Profile来重定向HTTP请求,并且在这个Profile 中定义一个Fallback主机1. Access the bigpipe shell.2. Using the profile http command, create or modify an HTTP profile, specifying a value for the fallback argument. You can specify either a URI or the default fallback host, or you can specify that you want no HTTP redirection.3. Verify that the HTTP profile you created or modified is assigned to a virtual server.Rewriting HTTP redirections你可以配置HTTP Profile来重写HTTP的重定向规则1. Access the bigpipe shell.2. Using the profile http command, create or modify an HTTP profile, specifying a value for the redirect rewrite argument.For example, to create a profile that only rewrites URIs matching the originally requested URI (minus an optional training slash), use the following syntax:profile http myHTTPprofile { redirect rewrite matching }3. Verify that the HTTP profile you created or modified is assigned to a virtual server.Inserting and erasing HTTP headers你可以配置HTTP Profile来插入一个头文件到HTTP请求,或者从HTTP请求中移出一个头文件1. Access the bigpipe shell.2. Using the profile http command, create or modify an HTTP profile, specifying a value for either the header insert, header erase, or insert xforwarded for options.3. Verify that the HTTP or Fast HTTP profile you created or modified is assigned to a virtual server.Enabling or disabling cookie encryption你可以使用Profile http中的两个选项来启用或者禁用cookie加密1. Access the bigpipe shell.2. Using the profile http command, create or modify an HTTP profile, specifying a value for the encrypt cookie and cookie secret options.3. Verify that the HTTP profile you created or modified is assigned to a virtual server.Enabling or disabling SYN cookie support为了管理DOS攻击,你可以在一个Fast L4 Profile中配置SYN Cookie选项启用或者禁用SYN Cookie支持功能◆如果BIG-IP系统包含了Packet Velocity ASIC (PVA)技术,使用profile fastl4命令,定义一个hardware syncookie(enable | disable | default)选项,同样,你可以根据需求设置以下的变量通过db命令.pva.SynCookies.Full.ConnectionThreshold (default: 500000) pva.SynCookies.Assist.ConnectionThreshold (default: 500000)pva.SynCookies.ClientWindow (default: 0)值得注意的是这个hardware syncookie 特性目前只可用于D84和D88平台.在其实平台设备这个特性无效.所以如果你在D84和D88上设置software syncookie 特性,SYN Cookie只通过软件处理◆如果BIG-IP系统不包含Packet Velocity ASIC(PVA)技术,使用profile fastl4 命令,指定为software syncookie (enable | disable | default) option.Configuring the HTTP Class profileBIG-IP系统包含一种Profile叫做HTTP Class Profile,你可以使用你定义的标准来用分类HTTP流量,当你分类流量的时候,你转地流量的原则是根据审查目标流量的头文件或者内容来定.如果BIG-IP系统包含Application Security Manager (ASM)或者WebAcclerator模块,你可以配置系统来先发送HTTP流量到那个模块,然后再发送到最终目标,例如,你可以使用HTTP Class Profile来对Virtual Server下命令,要求它发送流量先经过ASM然后再转发到负载均衡Pool.Unchunking and rechunking HTTP response data如果你想要监控内容你可以取消或者重新对HTTP响应进行组块操作,只需要配置HTTP Profile来启用unchunking功能.1. Access the bigpipe shell.2. Using the profile http command, create or modify an HTTP profile and specify the response argument.3. Make sure that you have assigned the HTTP profile to a virtual server, using the virtual command.你能够设备的保持有以下几种:实施Session保持CookieDestination Address AffinityMicrosoft Remote Desktop Protocol (MSRDP)HashSession Initiation Protocol (SIP)Source Address AffinitySSLUniversal具体操作:1. Access the bigpipe shell.2. Create a persistence profile, using the profile command, that corresponds to the type of persistence you want to implement.3. Assign the persistence profile to a virtual server, using the persist and fallback persist arguments with the virtual command.实施连接保持为了实施连接保持,你可以添加一个Keep-Alive头文件到HTTP /1.0头文件里(如果不存在).(默认HTTP/1.1连接包含Keep-Alive支持),你同样可以启用connection pooling特性,它可以保持服务器端的连接打开,重新用来供其它客户端请求所使用.你可以通过修改HTTP或者Fast HTTP Profile文件来启用keep-alive支持和Connection pools.同样可以修改OncConnect Profile来实现.To add Keep-Alive headers into HTTP requests1. Access the bigpipe shell.2. To ensure that HTTP connections stay open, use the profile http command and specify the oneconnect transformations argument. This ensures that the BIG-IP system inserts a Connection:Keep-Alive header into any HTTP /1.0 request that does not already contain one.3. Make sure that you have assigned the HTTP or Fast HTTP profile to a virtual server, using the virtual command.To enable connection pooling1. Access the bigpipe shell.2. Using the profile oneconnect command, configure a profile for connection pooling.3. Assign the profile to a virtual server, using the profile argument with the virtual command.小提示:你同样可以通过配置Fast HTTP Profile来配置连接保持,在BIGPIPE SHEEL中使用fasthttp命令.加强BIG-IP性能BIG-IP系统.设置连接Qos和数据包TOS等级你可以使用bigpipe工具来设置QoS和TOS等级,你不仅可以对所有具有目标负载均衡Pool的流量做,同时你也可以对自定义的流量做,例如:Layer 4 ,TCP 和UDP流量.1. Decide whether you want to set QoS and T oS levels for traffic targeted for an entire pool or for specific types of traffic, or both.If you want to set the QoS and ToS levels for an entire pool, access the bigpipe shell and use the pool command with one or more of the following arguments: link qos to client, link qos to server, ip tos to client, and ip tos to server.If you want to set the QoS and ToS levels for certain types of traffic, access the bigpipe shell and use the profile command to create or modify a Fast L4, TCP, or UDP profile.2. Verify that the pool or the profile that you created or modified is assigned to a virtual server. To do this, use the following syntax:bp> virtual list设置空闲超时时间(Idle timeout time)或者修改一个Fast L4,Fast HTTP,TCP,或者UDP Profile.1. Create or modify a Fast L4, Fast HTTP, TCP, or UDP profile, by accessing the bigpipe shell and using the profile command.2. Specify the idle timeout argument to set a timeout value.3. Verify that the profile you created or modified is assigned to a virtual server.实施速率整形Virtual Server或者Packet Filter规则中.1. Access the bigpipe shell.2. Create one or more rate classes, using the rate class command.3. Assign the rate classes to a virtual server or a packet filter rule, using either the virtual command or the packet filter command.Implementing iRulesiRule特性强大而灵活,值得注意的是它可以增强BIG-IP系统能力.一个iRule可以引用任意object,它不管这个被引用的object处理哪个分区里.例如;一个iRule属于分区A,但包含指定一个Pool属于分区B 的语句.1. Access the bigpipe shell.2. Create an iRule using the rule command. You must include the name of the T cl script and the script itself as arguments for the command.3. Assign the iRule to a virtual server, using the virtual command in one of the following ways:To associate multiple iRules with a virtual server, use this syntax:bp> virtual rule \ ...To remove the assignment of an iRule from a virtual server, use this syntax:bp> virtual rule noneTo remove the iRule assignments from multiple virtual servers, use the following syntax. Note that you can remove the iRule assignments only from virtual servers that reside in the current Write partition or in partition Common.bp> virtual all rule noneTo associate an existing iRule with multiple virtual servers, use the following syntax. Note that you can associate an iRule only with virtual servers that reside in the current Write partition or in partition Common. bp> virtual all ruleImportant: In this case, the iRule becomes the only iRule that is associated with each virtual server in the current Write partition. Because this command overwrites all previous iRuleassignments, we do not recommend use of this command.。
F5配置手册(简要流程)
F5配置手册(简要流程)F5配置手册(简要流程)负载均衡器通常称为四层交换机或七层交换机。
四层交换机主要分析IP层及TCP/UDP层,实现四层流量负载均衡。
七层交换机除了支持四层负载均衡以外,还有分析应用层的信息,如HTTP协议URI 或Cookie 信息。
一、F5配置步骤:1、F5组网规划(1)组网拓朴图(具体到网络设备物理端口的分配和连接,服务器网卡的分配与连接)(2)IP地址的分配(具体到网络设备和服务器网卡的IP地址的分配)(3)F5上业务的VIP、成员池、节点、负载均衡算法、策略保持方法的确定2、F5配置前的准备工作(1)版本检查f5-portal-1:~# b versionKernel:BIG-IP Kernel 4.5PTF-07 Build18(2)时间检查--如不正确,请到单用户模式下进行修改f5-portal-1:~# dateThu May 20 15:05:10 CST 2004(3)申请license--现场用的F5都需要自己到F5网站上申请license3、F5的通用配置(1)在安全要求允许的情况下,在setup菜单中可以打开telnet及ftp功能,便于以后方便维护(2)配置vlan unique_mac选项,此选项是保证F5上不同的vlan 的MAC地址不一样。
在缺省情况下,F5的各个vlan的MAC地址是一样的,建议在配置时,把此项统一选择上。
可用命令ifconfig –a来较验具体是system/Advanced Properties/vlan unique_mac(3)配置snat any_ip选项选项,此选项为了保证内网的机器做了snat后,可以对ping的数据流作转换。
Ping是第三层的数据包,缺省情况下F5是不对ping的数据包作转换,也就是internal vlan的主机无法ping external vlan的机器。
(注意:还可以采用telnet来验证。
F5 LTM配置手册
5. 双机配置 1) 确认主、备 F5 运行在双机模式,点击 System->Platform 进行查看修改。 主 F5:
备 F5:
2) High Availability 配置 冗余模式:点击 System->High Availability,如下图:
第 11 页
Network Mirroring 配置, 主 F5:
的配置文件,根据需要选择),选择 Restore,即可进行恢复。
3) 配置文件上传、下载 同样在 System->Archives 中,选择 Upload 即可上传配置文件,上传配置文
件可用于后续的恢复。 若要下载配置文件,点击相应的配置文件,即可进行 Download 操作。
第 17 页
技术交流 仅供参考
二、 网络拓扑
典型的 LTM 部署架构如下: 1. 串行部署:
如下图所示,负载均衡串联在应用服务器网段和核心交换机所在网段之间, 两个网段被 F5 分割为两个互不相连的子网。
防火墙
F5 负载均衡器冗余系统
核心交换机
Ethernet
应用服务器
第1页
2. 旁路部署: 如下图所示,负载均衡旁路接入网络,不需要对现有网络架构进行调整。物
3) 可以Copy Dossier文本或下载文件,登录到F5的激活页面: https:///license/dossier.jsp 将复制的Dossier文本粘贴进去,或上传文本文件,选择Next,获取到License 激活文件,将激活代码复制到F5的界面,从而激活设备。
第4页ห้องสมุดไป่ตู้
3. 系统基础配置 点击 System->Platform,配置管理地址、主机名、时区等;