[中文翻译]SAI教程3(小佳译)
sai工具使用介绍
画笔工具盘:能够新建用户自定义的画笔将对象拖动到面板外(Ctrl+左右键拖动)可实现删除Ctrl+左键拖动对象的移动右键单击显示菜单(再单击右键一次关闭)右键拖动对象的移动/复制双击打开设置窗口菜单上未显示的快捷键:特殊操作:方向键移动视图空格+拖动移动视图Ctrl+拖动移动图层/选区Ctrl+Shift+拖动选择图层并移动Ctrl+空格+拖动矩形缩放视图Ctrl+空格+左键单击缩小视图Ctrl+空格+左键单击还原视图[ 将画笔直径调小一些] 将画笔直径调大一些0~9 切换画笔浓度- 切换前景色与透明X 调换前景色与背景色画笔类操作:Shift+左键拖动在最后绘制的位置与拖动开始点之间连结直线Ctrl+Alt+左键拖动调整画笔大小Alt+左键单击吸管工具矩形选区工具的操作:Shift+左键拖动添加到选区Alt+左键拖动从选区减去Alt+左键拖动除去选区Enter 确认图像变形Esc 停止图像变形各工具的通用操作:按下某个选择按钮暂时切换为当前工具Ctrl+方向键图层or选区以1像素为单位移动Ctrl+Shift+方向键图层or选区以8像素为单位移动补充:以下方图层进行裁切(启用【剪切图层蒙版】)选项:勾选【剪切图层蒙版】后的图层将会以其下的图层(无勾选【剪切图层蒙版】)的透明度进行裁切(蒙版操作)假设有以下情况:图层1 【剪切图层蒙版】关闭图层2 【剪切图层蒙版】开启图层3 【剪切图层蒙版】开启图层4 【剪切图层蒙版】关闭此时,图层1 和4将进行普通合成。
而图层2和3将以图层1的透明度进行蒙版合成图层操作:图层面板左方的一系列按钮有:【新建图层】【新建钢笔图层】【新建图层组】【向下转写】【向下合并】【清除图层】【删除图层】【向下转写】与【向下合并】的区别如下所述:【向下转写】:被选择的图层与其下的图层合并,原图层被清除【向下合并】:被选择的图层与其下的图层合并,原图层被删除文件浏览:在以下文件夹内生成缩览图文件:X:\Documents and Settings\All Users\Application Data\SYSTEMAX SoftwareDevelopment\SAI\thumbnail还原/重做:还原/重做所保存的数据存放于临时文件夹,程序将生成多个16MB的文件,由于目前版本不会检查磁盘剩余空间大小,因此,出于安全考虑,请在有充裕空间的磁盘内运行软件线稿转化为图层(线的抽取):从扫描仪得到的线稿,可以执行菜单的图层|线稿转化为图层(亮度转化为透明度)选项,以抽取线稿,生成单一的线的图层。
sai绘画的整个步骤

第一步新建图像推荐分辨率300,这样能够达到精稿的效果……当然如果纯粹只是涂鸦为主的话可以选择用默认的72分辨率什么的…有关分辨率的详细问题这里就不多说了,我说不清的,一定要去看高人的教程解说才行…(望天✲✲✲第二步绘制草稿把自己大致的设想画出来,不需要画的很精细,自己看得懂就好↑(真的是自己才看得懂)另外也要在这一步调整好构图什么的,这样到后期就不用在构图方面纠结问题了在这里我是把画布给裁*小了一点…*在SAI中的裁剪方法和PS不一样在SAI中的裁剪步骤如下:1 点击选择工具2 以本图为例,框选要留下的部分(没有被框选中的区域则是要裁剪掉的)3 图像→以选区的尺寸裁剪(T)4 结束。
很简单吧XD✲✲✲第三步进一步绘制草稿在原先的草稿(构图)的基础上进行更进一步的绘制这时应该大致能看出画的内容了人物上不断调整结构让它看的更顺眼点↑之所以这样说是因为我是个结构废…不管怎么调整结构都是有问题的(你)✲✲✲第四步描线把草稿所在的图层的不透明度调整到50%左右,当然数值根据自己的喜好来更改就可以了,没有定值然后新建一个图层在草稿图层的上方,进行描线这里我描线用的笔是SAI里默认的【笔】,同时运用了材质使线条显得更自然一些大家可以根据自己的习惯选择描线用的笔刷在这里要注意的是,如果想快速作画的话,可以选择把脸部的五官单独分出来在一个新的图层画这样为之后的铺色步骤可以多出很多时间大致完成后就是上图的场景随后去掉或者隐藏草稿图层后只留下线稿图层就是下图的场景✲✲✲第五步铺色块把线稿的图层置于最上边,然后在这之下新建图层进行铺色块的环节这一步主要是用来确定整体色调和各个部位的颜色说白了就是选色环节如果为了修改方便可以像我这样把每个部位的色块都分在不同的图层里如下图如果嫌麻烦的话用一个图层解决当然也可以然后这里是写给像我这样的选色废看的如果在自己铺完色块后怎么看那颜色都不顺眼,就可以利用调整色相/饱和度来修改颜色下图就是在修改完后的最终定色…✲✲✲第六步上阴影根据个人习惯来决定顺序我一般都是从皮肤开始入手的在画阴影的时候也有两种方式可以选择①新建一个图层置于皮肤色块图层的上方鼠标选中该新建的图层,然后勾选←这里的第二项剪贴图层蒙版然后就会有这样的效果↓②不新建图层直接选中皮肤色块图层然后勾选←这里的第一项保护不透明度然后在这个图层上直接上阴影用任何两个方法中的一种都可以这样再新建的图层上面无论怎么画都不会有画出去的问题了可以放心大胆的画作者在这里用的是第一种方法,为了方便修改用上述方法进行阴影上色,最后可以达到下图的效果*这里还是写给同为选色废的同胞们的话(´∀`*)关于阴影选不来色的问题在一个个部分分开画阴影之后时常会碰到画面色调不统一或者看不顺眼的问题那么这里有个技巧①首先如果是按照我那样把所有色块都分在不同的图层的孩子们先请新建一个图层组然后把所有的色块图层都移到这个图层组里如果是所有色块都在一个图层上的孩子就不用这个繁杂的步骤了②新建图层,勾选剪贴图层蒙版,置于色块图层(组)的上方,混合模式改为正片叠底③选一个灰色,根据自己的喜好习惯来选如果是暖色调的图可以用偏暖的灰色,如果是冷色调的则相反在新建的图层上画阴影,这样所有的部分都能上到就不用担心画面不整体的问题了当然,这个方法挺偷懒的但很实用✲✲✲第七步休息一会上上P站聊聊天打打游戏喝喝茶上上厕所吃吃点心看看小说随便你爱干嘛干嘛✲✲✲第八步眼睛上色这里推荐放大画…这样能更加精细一点①上眼白②涂上眼睛内部(你跳的是不是太快点了)高光可以新开一个图层建在线稿上面画这样就可以覆盖住眼睛上的线条了③加工新建一个图层,勾选剪贴图层模板图层的混合模式改为滤色或者是发光,然后涂上亮色,觉得边缘太实可以用模糊笔刷模糊一下边缘这样眼睛就看起来有神了很多了XD✲✲✲第九步整体加工这一步我也不一定能讲清楚……大家能看懂就看懂吧……①首先先对皮肤进行加工在皮肤原有的图层上再次新建图层,勾选剪贴XXXX(懒得说全名了大家都懂的……混合模式改为正片叠底然后用水彩笔或者喷枪笔刷轻轻地在两颊上刷上红色,如果刷的太深也没关系,只要用模糊笔刷慢慢磨几下让它显得自然点就可以了另外想要让皮肤显得饱和一点,可以用滴管选曲皮肤本身的颜色,在刚才抹红晕的图层(或者再新开一个正片叠底的图层)用同样的方法进行渲染这里就是不断的润色不断地用模糊工具磨达到自然过渡的效果…②头发加工在原本的头发图层上面新建图层,勾选剪XXXXX…混合模式正片叠底然后用偏红或者偏蓝的颜色刷上去,可以把头发看做一个球体那样做出过渡的效果这样头就圆起来了(?)之后如果觉得太过死板的话可以像我这样做出反光的效果步骤如下在线稿上面新建一个图层,混合模式滤色然后用皮肤的颜色去轻轻地刷在发梢的位置就会做出上图的效果了如果觉得太亮可以调整滤色图层的不透明度最后加上高光,头发部分就完成了③衣服加工步骤雷同于上面给皮肤和头发加工的步骤还是在所有衣服的图层上面新建图层勾选XXXXXX混合正片叠底然后抹上颜色就好了…= =(喂✲✲✲第十步最后调整①制作背景因为主色调已经定下来是暖色了所以背景选择用粉红色首先先拖入素材,进行大小调整让它和背景一样大,顺手调整一下色调然后混合模式改成正片叠底让它和原来的背景颜色合在一起背景就很简单的完成了o(* ̄▽ ̄*)ゞ②调整色调看着上图就会有种人物和背景不合的感觉为了去掉这种不和谐感,就在人物所有图层之上新建一个图层,勾选XXXXXX,混合模式滤色然后刷上和背景邻近的颜色,调整图层的不透明度,用模糊笔刷磨一磨就是下图这个效果了←去掉背景的话就是这个感觉*这张是后来最后检查的时候存的所以脸上的字已经写上去了噗别在意别在意③忘说了一步,这里补上……就是如果觉得黑色的线条很死板的话,可以修改线条的颜色,让它偏红或者偏蓝这样就会显得自然一些,具体方法就不再这里说了,大家应该都会吧?④PS加工存成PSD格式的文件后*打开PS开始进行最后的加工修改*大家一定要注意在画的过程中就要随时保存啊…不随时保存的后果你们都懂的。
sai绘画教程
Sai的基本功能介绍1Hello 大家好呐~我是绘伴大陆老师今天我们午间分享的主题是sai的基本功能介绍。
在大家刚开始接触板绘的时候,我们需要一个绘画软件作为使用的载体,充当我们的笔和纸,而我们今天要学习的软件就是sai了。
Sai的操作简单,学习成本低,对于刚接触板绘的新手来说比较友好,我们将会从以下两点开始学习。
①sai的常用功能(第一部分)②线稿上色的基本操作Sai可以说是ps对绘画功能的提取,但即使如此我们还是要先将最常用的功能认清,熟悉最基本的操作,然后才来慢慢展开探索。
首先大家看这张图,会不会有同学好奇,这种工整的颜色是怎样实现的呢,是用画笔像手绘一样直接涂的吗?那我们今天就来初步学习这种上色的铺色方法常用功能:①新建文件:我们的文件就是我们将要绘制的图片,在点击新建文件后,我们可以选择画布的尺寸等信息。
②图层:图层对于习惯传统绘画的同学来说是一个比较新的概念。
每一个图层上的内容都是独立开来不相影响的,我们可以增加和删除图层。
这种分层绘画的方式将大幅增加我们绘画的效率。
③选区工具:选区工具的作用是,当我们选定了一个选区后(即蚂蚁线的框选范围),我们在绘制的时候内容是不会超过这个选区范围的,这样我们在填充基本颜色的时候就会比较工整,不会把颜色涂出边界。
同时我们可以反推一下,有些同学有时在画布上画不出东西,是不是忘记把选区取消了?④画笔工具:陈列在这里的就是我们的画笔了,不同笔刷的设置不同,画出来的效果也不一样。
我们常用的橡皮擦也在这里。
线稿上色的基本操作:当我们熟悉基本操作后,可以对sai最简单的上色方法做一个了解,就是我们上色的第一步,填底色。
这里我们拿一个正方体做示范(这种画法对线稿质量有一定的要求,首要的一点就是线条要密闭,建议大家先把描线学好)第一步。
选区:我们使用魔棒工具,点选我们的上色范围,选择后选区会呈现蓝色,但这不代表这里被填充了颜色,只是代表选区的范围。
第二部。
铺色:我们可以用油漆桶工具或者各种笔刷在上面上色,同时我们的颜色是不会超过正方体选区的。
SAI日系插画零基础入门教程

作者简介
作者简介
这是《SAI日系插画零基础入门教程》的读书笔记,暂无该书作者的介绍。
谢谢观看
阅读感受
再者,书中的教学方法特别注重实践和互动。通过临摹和原创的练习,我开 始尝试用自己的方式去表达想法和感受。这种互动的学习方式让我感受到了创作 的乐趣,同时也提升了我的技巧和认知。
阅读感受
然而,《S日系插画零基础入门教程》并不仅仅限于技术的教授。书中强调了 艺术和生活的,鼓励我们将观察生活、体验生活融入到创作中。这让我意识到, 插画不仅是个人情感的表达,也是对世界的理解和解读。
精彩摘录
可以根据发际线和头发轮廓,再次细化头发的各个部分。注意保持细节和整 体的比例一致。
阅读感受
阅读感受
在我踏入插画世界的道路上,我遇到了《S日系插画零基础入门教程》这本书。 它不仅为我提供了一扇通向日系插画的大门,而且激发了我内心深处的创作欲望。
阅读感受
这本书的基础知识部分非常详尽,从线条的绘制到颜色的选择,从基本的图 形到复杂的构图,都做了清晰明了的解释。对于零基础的读者,比如我,每一个 章节都让我有了新的认识和领悟。我逐渐了解到,插画并非单纯的艺术表现,而 是一种可以用作传达信息、表达情感的工具。
目录分析
该章节主要介绍了本书的主要内容和学习目标。其中重点强调了对于零基础 学习者而言,学习SAI软件的使用和掌握日系插画的基本概念是极其重要的。还 介绍了SAI软件的基本界面和一些常用工具,为后续的学习提供了基础。
目录分析
该章节主要讲解了线稿的绘制技巧。从线条的分类、绘制方法到线条的运用 等多个方面进行了详细的介绍。特别是对于初学者而言,能够迅速掌握不同种类 的线条的绘制方法,从而为后续的上色和细节刻画打下良好的基础。
sai
谢谢观看
水彩境界
对不透明度激烈变化的部分产生水彩效果 推荐用法: 1.首先如下所述建立图层组: 【图层组】使用了用纸质感 (水彩,绘图纸等) 【图层1】乘算,水彩境界 【图层2】 2.用笔或水彩笔对图层1进行绘制 画笔边缘在右方选择 画笔浓度设置在100左右 底色混合,不透明度混合设置在50以上 然后,进行适当的绘制
sai
绘图软件--Easy Paint Tool SAI
01 最低配置
03 相关工具 05 图层蒙版
目录
02 详细设置 04 对象抽取 06 水彩境界
SAI(日语:サイ)是由日本SYSTEMAX公司销售、SYSTEMAX Software Development开发的一款绘图软件。 日文全称为ペイントツールSAI(英语:Easy PaintTool SAI)。Easy Paint Tool SAI这套软件相当小巧,约 3M大,免费安装。
图层蒙版
与Photoshop的兼容性 Photoshop的图层蒙版拥有以下的特征: 1.图层外的所有区域全部不显示 2.图层外的所有区域全部显示 SAI只支持1中所述的内容 在SAI中,一旦图层组的混合模式被设置成【通过】,就无法再使用图层蒙 版 在Photoshop中,即使设置成【通过】,也可以使用图层蒙版 新建图层蒙版: 在图层面板上按下【新建蒙版】即可。 此时选区将自动转化为图层蒙版。
SAI是专门做来绘图的,许多功能较Photoshop更人性化。像是可以任意旋转、翻转画布,缩放时反锯齿。
最低配置
·Windows Me 首先软件是能运行。但WinMe本身是不稳定的系统,出现问题的时候难以分清原因(出在SAI上还是系统), sai故未作正式支持。 使用Windows Me的请自负责任。 ·Windows Vista 收到能运行的回馈。一般认为能在XP兼容模式下运作,因为进行过详细的运行测试。 故现状未做出正式支持。 强大的墨线功能 1.手抖修正功能。有效的修正了用手绘板画图时最大的问题。 2.矢量化的钢笔图层,能画出流畅的曲线并像PS的钢笔工具那样任意调整。 绘图软件Easy Paint Tool SAI画面(12张)笔刷的设置也是相当详细。工具变换这功能也很贴心,例如长按 着E
教程|SAI软件应用超详细教学part04

教程|SAI软件应用超详细教学part04今天为大家带来的是由漫联教育整理的SAI软件教程分享一篇SAI软件应用的超详细教程由于内容太详细了,所以小编会分成几篇来讲解适合各位初学板绘的小白喲~赶紧收藏起来拿回去练习吧~~~~今后我也将为大家带来更多、更好的原创/转载教程。
想了解更多课程及学习方法可以百度搜索:漫联教育这是关于SAI软件应用教学的第四期了,关注公众号可以查找到往期教程本教程使用人群:手绘小白,刚接触板绘和屏会的小伙伴注:由于内容较多教程会分几期分享,方面同学消化和更牢固记住SAI的功能使用好了,往期对SAI的讲解也已经差不多了,最后一期我们来说说SAI顶上的这些。
首先是文件,这个是不管谁在打开sai都会第一个点的东西,像是打开啊保存啊另存为啊那些我想我不用说了吧……这里主要说说新建文件。
选择新建文件就会出现这么一个东西,那两个方框里面是你即将创建的画布的长和宽,也就是大小。
但是SAI非常人性化的准备了许多预设大小,像是A4纸啊,几种比较常见的屏幕分辨率之类的大小都会有,需要特定的大小的时候可以直接在里面选择。
在右边有四个单位,由上至下的分别是【像素】【英寸】【厘米】【毫米】,对于楼主来说最容易最常用的就是【像素】,这个最容易把握大小。
不过注意,SAI的画布创建时有限制的,假如太大是无法创建的,而且小编提醒一下(注意这很重要)配置一般或者是比较低的电脑不要选择太大了,要不然后来图层一多工程文件为很大,而且有很高的几率会卡死或者是再也无法打开这个文件然后是打开文件,这里其实不用太多讲。
这些是SAI能打开的文件的格式,除了SAI和PSD以外其他都是一些图像文件。
而这个另存为也是这些是可以另存为的格式,SAI和PSD都可以保存图层结构,但是不能被类似于美图看看之类的东西打开。
(至少SAI不行)接下来就是保存这些东西【图层】而这个PSD可以被PS读取【就是PS的保存格式】所以说有了这个可以实现PS和sai的结合,就可以使用PS做sai的后期啦!(或者是一起用)然后就是第二个选项编辑了,这个没用,全部都可以用键盘实现,所以说无视它也可以的。
easypainttoolsai教程(一个绘图软件教程)

easy paint tool sai教程(一个绘图软件教程)Engage in art or painting enthusiasts today for you to recommend a RAR1 can easily draw lines software, use it is very simple, easy to use, the software named "Easy Paint Tool SAI any software" this software line drawing ratio has been used more and more cheating guards, the gospel line moron! The corresponding software introduced in the famous painting of the "digital" grammar, a popular sound fanart hand also used it. Whether the game Lu Lu CG SAI wind wind or watercolor has very good performance, guards with two lines can also replace the ComicStudio value of the pen drawing cartoon lines. The volume is compact and powerful, is home to travel a (?) Essential good products.Can rotate, flip canvas, zoom anti aliasing.Powerful Moxian function1. people moved to tears the camera shake correction function! Effectively improved the biggest problem with drawing with a tablet. (finally I can draw the perfect straight line...)2., vectorization of the pen layer, can draw a smooth curve, and like PS pen tool which has any adjustment.The settings for the brush are also very detailed. Tool conversion, this function is also very intimate, such as long press E will temporarily become an eraser, loosen and change back to brush, fast key switch tool"Easy, Paint, Tool, SAI, Ver.1.0.0."-------------------------------------------------------------------------------------------- configuration-------------------------------------------------------------------------------------------[minimum configuration]Operating system Windows 98/2000/XPCPU supports the Pentium 400MH level of MMXMemory Win98/2000... 256MB, WinXP... 512MBDisplay 1024x768 16 million 770 thousand colorInput device, pen, pressure perception, digital boardWindows MeFirst of all, the software is able to run. But WinMe itself is an unstable system, and when it comes to the problem, it's hard to tell the reason (on the SAI or on the system),There is no formal support.Please be responsible for using Windows Me.Windows VistaReceive feedback that can be run. It is generally believed to work in XP compatible mode because of the detailed running tests.There is no formal support for the status quo.At present, Windows Vista is also responsible for its own use.-------------------------------------------------------------------------------------------In the conditions of use-------------------------------------------------------------------------------------------Please read, do not, assess period of use conditions in the Easy SAI page "Paint Tool" (software operating conditions).-------------------------------------------------------------------------------------------- assist in the development of-------------------------------------------------------------------------------------------If there is an internal error with SAI, the error record window will appear in the lower right corner of the interface.At the same time, the same directory as sai.exe generates the errlog.txt file. Please send the file to ****************using the mailbox.It can help if you can add errors. If it's not too much trouble, please cooperate.-------------------------------------------------------------------------------------------- Installation-------------------------------------------------------------------------------------------For the first time, please download the full version.There is no need to install.After decompression, please execute the sai.exe in the folder directly.For the first time, in order to install processing, the situation will take more than ten seconds to several minutes.If you upgrade from the previous version, copy sai.exe and sfl.dll to the SAI folder.Sai.exe... Easy, Paint, Tool, SAI, main programSfl.dll... SYSTEMAX Framework LibraryBrushform.conf... Brush shape related settings file Brushtex.conf... Brush material related settings file Papertex.conf paper texture related settings file...Presetcvsize.conf... Canvas dimensions related to default files<blotmap>... Store a folder with permeable shapes<brushtex> storage folder paper texture...<elemap>... Store the brush shape folder<toolink> folder for storing pen tool information<toolnrm> folder where information about ordinary brush tools is stored-------------------------------------------------------------------------------------------- uninstall-------------------------------------------------------------------------------------------First delete all files under the folder. Next, delete thefollowing registry key.HKEY_CURRENT_USER\Software\SYSTEMAX Software Development\SaiHKEY_LOCAL_MACHINE\Software\SYSTEMAX SoftwareDevelopment\Sai-------------------------------------------------------------------------------------------- brush tool-------------------------------------------------------------------------------------------The features of each tool are as follows.[pencil]A tool for scheduling thin lines.[spray gun]The gun style coloring tool[pen]Can carry on the thick coating and painting watercolor style tool. Able to blend background and opacity rendering.[watercolor]In a transparent watercolor style painting tool. Able to blend background and opacity rendering.Painted below the pen pressure set in the fuzzy pen pressure, it will be painted out of color into a blur tool.Large pen pressure coloring, smaller pressure pen pen, please use.Note that if you do not set the minimum diameter a little larger, the blur will become worse.If the opacity is set to 0, the opacity is blurred.[Mark pen]A tool that draws the wet drawing mode close to the old watercolor pen to OFF.Able to paint colors, as if seeping into a paper.With the pen pressure can make the opacity rise, but to achieve a certain opacity, once again can not be less than the opacity.However, when you lock the layer's opacity, it becomes the same effect as the pen tool.[eraser]Eraser tool.Usually painted in clear colors, painted white (255255255) when the layer is locked.[choice pen]A tool that describes the details of a selection with a brush.[constituencies]A tool that removes the correct details of the selection by brush.-------------------------------------------------------------------------------------------Set the brush parameters - tools-------------------------------------------------------------------------------------------[brush diameter unit]Specifies the brush diameter slider. Please choose the size of the corresponding brush.[maximum diameter]Sets the maximum diameter of the brush.[drawing mode]ZhengchangNormal drawing mode.Film overlayA percentage of the colors of a painting color; a painting of the bottom of the background.Once each stroke is added, the color will be deeper.Bright colouredIn contrast to the hue of the foreground color, the brightness is reduced to suppress the darkening of the color to be plotted.Especially with pen and watercolor pen tool, the effect is stronger.DepthA drawing pattern in the middle of a negative and normal drawing pattern. Only pens and watercolor pens are available.[edge profile]Sets the sharpness of the edges.[brush concentration]Set the concentration of various brushes.[minimum diameter]Set brush diameter at minimum pen pressure.[brush shapes]Choose the shape of the brush. The slider on the right controls the strength of the shape.Can set the penetration shape penetration strength, the thickness of wool pen shape.[brush material]Selection of paper material. The slider bar on the right controls the strength of the material.[color mixing] pen (ink pen, watercolor pen, Mark pen)Sets the blend of foreground color and background color at the painting.[water component] (pen, watercolor pen)Sets an opacity increment. Effect of water proportion on pigment.When you use a watercolor pen, the opacity of this parameter is 0.[color extensions] (pens, watercolour pens, Mark pens)Sets the extent of color extension.[degree of opacity] (pen, watercolor pen)Keep the original opacity from the part that contains the pixels to the transparent part[fuzzy pen press] (watercolor pen)Sets fuzzy tools that do not draw color; pen pressure.< detailed Settings >[painting quality]Set priority painting speed or prioritize painting quality?.[contour hardness]Sets the hardness of the brush outline. Brushes with an edge stand apply.[minimum concentration]Sets the brush's minimum concentration of brush.[maximum concentration pen pressure]Set the brush to the maximum concentration when the pen pressure.[pen pressure sensitivity]Set pen, press, hard and soft sensing of digital board.[pen press]Sets the parameters for pen control to control the brush.-------------------------------------------------------------------------------------------- the pen tool-------------------------------------------------------------------------------------------After you create the new pen layer, you can draw the stroke that you can edit.Anchor point toolsTool for editing anchor points. Select the type of operation within the radio box,Or press the shortcut button, click or drag anchor and curve for editing.[selection / dissolution]If you choose anchor or curve, you can select multiple anchor points or curves.Right-click or deselect through the menu [Select] [deselect all anchor points].After you select anchor, you can do the following:Mobile anchor pointStroke macro deformationDelete anchor pointSetting / removing macro deformation anchor pointsSet / remove sharp pointsAdjust pen pressureMove stroke (exception when Shift is pressed)Copy and move strokes (exceptions when Shift is pressed)Delete strokeImage morphingAfter you select the curve, you can do the following:Delete curvesMobile strokesCopy move strokesDelete strokeModify strokes, lines, and thicknessChanging stroke colorsImage morphing[mobile anchor]Drag and drop moving anchor points.Drag and drop on the curve will add anchor points and move.[strokes, macros, deformation]Drag, anchor, and curves can be within the range of macro deformation anchors (yellow anchor points)Make a rough transition.[delete anchor points / curves]Click the anchor or curve to delete the operation.[macro deformation anchor ON/OFF]Click the anchor to change the anchor point to the general anchor or macro deformation anchor point.[moving strokes]Drag the strokes to move.[copy move strokes]After dragging the stroke, copy the stroke and move it.[connection strokes]Drag and drag, so that the different strokes of the anchor overlap, you can connect the strokes.[delete strokes]Click on the stroke to delete.[set / remove sharp angle]Click the anchor point to convert to an anchor that can bend at an acute angle.Pen toolsA stroke that can be edited by hand drawing. (free pen)Curve toolsDraws curves that can be edited repeatedly by clicking the anchor anchor.Line toolDraws a polyline that can be edited repeatedly by clicking the anchor anchor.Correction fluid toolsErase part strokes.Modify the line toolClick the brush type to modify the stroke. (diameter, concentration, etc)Pen press toolStroke control.Change color toolsClick the color of the change stroke.-------------------------------------------------------------------------------------------- the magic wand-------------------------------------------------------------------------------------------Constituency selection modelThe method of detecting range of selected range is selected.In addition, the existing range of selection will become the object of boundary detection.The detection of the selection boundary is default to [the transparent part of the coil].[the transparent part of a coil]Select the range within the coil. But the choice must be transparent.Edge detection is performed accurately.[determine the range of transparency] sets the + (plus) of the pixel transparency of the click position[decision transparent range] is the default selection.[the transparent part of a coil]Select the range within the coil. But the choice must be transparent.Blur edge detection. For example, in messy paintings.But an overly cluttered line will have no effect.[determine the range of transparency] sets the + (plus) of the pixel transparency of the click position[decision transparent range] is the default selection. [part of the chromatic aberration]The area within the specified range is selected by chromatic aberration of pixels. It is a universal tool for selection.Area selection source[edit layer]Extracts a selection from the current layer or layer group. [specify layer]Select the layer or group of groups in the layer option set to the specified selection source.Only when the current selection area is extracted is not set to the specified constituency source layer.[image]Extract the selection from the image that is now displayed.-------------------------------------------------------------------------------------------- image deformation tools-------------------------------------------------------------------------------------------Deform the image by following.1. select the layer that you want to change or adjust the floating layer (cut by the size of the selection).2. from the image deformation tool (seltool) select [zoom [] [] free transform free rotation of a shape. ".Or press the shortcut key Ctrl+T (default selection [free transform])3., the deformed shape of the navigation zone is deformed in any form.4. press [determine] to complete the operation (or press [stop] to give up the deformation)Navigation area operationsDrag and drop movement within navigation area[free transform]Click drag to change dimensionsShift + drag and drop box, lock, aspect ratio, size changeCtrl + drag and drop frame free deformationDrag and drop rotation outside navigation area[zoom]Drag and drop the frame sizeShift + drag and drop box, lock, aspect ratio, size change[free form]Drag and drop the shape of the frame[spin]Drag and drop rotation outside navigation areaThe alpha 8 (b) [the free deformation] [free] modified into shapeParameter please see your hobby adjustment.-------------------------------------------------------------------------------------------- palette-------------------------------------------------------------------------------------------The following actions can be performed on the palette.Can drag the color sample (CTRL+ left or right click drag to drag the color plate color sample delete).CTRL + left drag, move, color, sample / addRight click the display menu (right-click again to close the menu)Right click to move / remove color samples-------------------------------------------------------------------------------------------- brush tool tray-------------------------------------------------------------------------------------------A tray that accommodates new user-defined brushesDrag and drop the project (CTRL+ left drag, or right drag) to delete outside the tray.Drag CTRL + left to move the projectRight click the display menu (right-click again to close the menu)Right click to move / copy itemsLeft click on the display settings window-------------------------------------------------------------------------------------------Shortcut menu - unspecified-------------------------------------------------------------------------------------------Special key operationsScroll view of arrow keysSpace + left drag scroll viewCTRL+ drag and drop the moving layer and move the selection partCTRL+SHIFT+ drag and choose the layer left and moveCTRL+ space + left to drag and drop the view zoom boxCTRL+ space + left click to enlarge viewCTRL+ space + right click to reset the view zoom inCTRL+ALT+ space + left to drag and drop the view zoom boxCTRL+ALT+ space + left click to reduce the viewCTRL+ALT+ space + right click to reset the view's narrowingALT+ space + left to drag and rotate the viewALT+ space + right click to reset the rotation of view[choose the smaller brushChoose the brush size one0~9 select brush concentrationToggle transparent color and foreground colorX toggle foreground color and background colorKey operations for brush toolsSHIFT+ left drag to start and connect the last painted position to the start point of the dragCTRL+ALT+ drag left to change brush sizeALT+ left click to pick up colorSelect the key operation of the toolSHIFT+ left drag to increase selectionALT+ left drag to exclude selectionENTER determines the free transformESC terminates the free transformTool general operationPress the shortcut key of various tools without the corresponding tool to switch temporarily (loosen back to original tool)CTRL+ arrow key layer / selection range navigation (moves in 1 pixels)CTRL+SHIFT+ arrow key layer / selection range navigation (moves in 8 pixels)Basic operation of sliderSHIFT+ drag and drop the exact operation sliderRight click to drag and drop the exact action slider-------------------------------------------------------------------------------------------- digital pen side switch function-------------------------------------------------------------------------------------------如果没在数位板驱动程序方面进行了侧边开关的设置。
SAI新人详细的SAI基础进阶上色教程
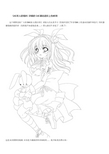
SAI新人的福利详细的SAI基础进阶上色教程这个教程送给广大的SAI新人爱好者们请新人们认真学习里面涉及到了许多SAI上色基本的操作和技巧同时感谢线稿的提供者(虽然我不知道他是谁。
)那么废话不多说了上图了!这是本次教程的线稿应该是丰满版的铃音妹纸吧。
我开始真没看出来~皮肤的阴影也是大致涂下就行啦记得根据衣服的起伏阴影是不同的哦到时候你的动作只会影响到人物以外的颜色清理涂出去的部分就亨氏方便啦这样装饰物的底色就很快上完啦很是轻松吧?现在开始上衣服的底色了我是将衣服分成了两个图层来上色这样就不怕上不同颜色时会影响到其他地方~底色基本上铺完啦底色的颜色选择可以随意点到时候可以换的所以新淫们千万别把时间浪费在选底色上而使自己的灵感跑掉了。
这时人物基本的明暗与色调就出来啦那么接着继续努力吧~一般像这种质感嘛需要新淫们多多去尝试说不定可以得到意外的收获哦!铃妹纸正在成形中(丰满版的白兔铃妹纸哦)继续加油~说实在的画到这我才发现她是铃妹纸。
眼睛是心灵的窗户所以在画的时候一定不要偷懒哦~嘛~怎么说呢我就是喜欢闪闪发亮的头发呵呵(这货没救了- -!)接下来是背景啦许多新淫都说背景无力谁一开始就会画背景呢?多多尝试必有收获的下面是简单的背景制作对于新淫来讲还是要认真看哦~不然不一定看得懂~许多赛璐璐的插画里都有着外面这一圈白线呢~ 感觉就是卡哇伊嘛~ 虽然我背景也很渣但还是动两笔安慰安慰自己吧~记得合并图层哦不然看起来都觉得麻烦。
好啦差不多画完啦接下来只要再整体的调一下人物与背景的饱和度那啥的就行啦~下面是完成图。
忘了说啦因为是图片教程看不清的可以点击图片放大哦(废话~谁不知道啊~)接下来放上图层的图片许多新人对图层的安放不是很清楚图层乱糟糟的画到后面就有点分不清啦(我以前就是这样的- -!)所以把图层的图片也放出来供新人参考。
今天就到这里啦为了不想**楼我苦苦的熬了一夜(插了楼怕新淫更不好理解图中意思了。
这什么逻辑。
- 1、下载文档前请自行甄别文档内容的完整性,平台不提供额外的编辑、内容补充、找答案等附加服务。
- 2、"仅部分预览"的文档,不可在线预览部分如存在完整性等问题,可反馈申请退款(可完整预览的文档不适用该条件!)。
- 3、如文档侵犯您的权益,请联系客服反馈,我们会尽快为您处理(人工客服工作时间:9:00-18:30)。
本来是好几个月前就翻译的,可脑残的摆渡老是说文档质量低于是一拖再拖到现在再试试看看能不能上传本教程由阿命收集翻译:小佳原址:CG・イラストの描き方講座-お絵描きIRADUKAI/感谢翻译的牧葉的好友小佳,及牧葉[No.544]大嘘様◆SAI講座◆はじめまして、大嘘と申します。
SAIのCG講座をさせていただく事になりました。
ほとんど独学ですが、最後までお付き合いください。
大家好,我叫“大嘘”,这次很荣幸能担讲SAI的CG讲座,大部分为自学内容,请大家陪我到最后。
使用ソフト:SAIペンタブ:Intuos4 PTK-840使用的软体:SAI 手绘板:Intuos4PTK-840①作業環境◆◆作業画面◆◆作業画面はこのようになっています。
这是打开后的操作画面。
ツールやレイヤーの配置設定などは、[ウィンドウ]にあるそれぞれの項目にチェックを付けはずしする事で調整できます。
工具和图层的配置设定放在window中了。
各个项目都可以通过选择来进行调节设置。
◆◆ショートカットキー◆◆ショートカットの設定は[その他]→[ショートカットキー設定]またはショートカットに設定したいツールをダブルクリックする事で設定できます。
快捷键的设置快捷键的设置可以通过“其他”中的“设定快捷键”或者双击想设定的快捷键来完成。
↓は自分が設定しているショートカットキーの配置になります。
色のついている部分が最も多用するショートカットキーです。
(これは左利きの人用前提の配置なので、参考程度にご覧ください)↓是自己设定的快捷键的配置。
有颜色的部分是用得最多的快捷键。
(这是以左撇子的使用者为前提的设置,请看一下参考程度。
)※訂正:F…消しゴム×→E…消しゴム○订正:F…橡皮改为E…橡皮。
◆◆解像度◆◆イラストは大きく描いて最後に40~60%程縮小すれば綺麗な仕上がりに見えますので、あらかじめ画像サイズは大きめに設定します。
解像度因为开始把草图画大一些最后缩小40%到60%就可以看到漂亮的成图了,所以画前先把图的整体尺寸定大一些。
②下書き/線画打草稿、线描---下書き---打草稿ある程度描きたいものをイメージして、それを形にしていきます。
背景は人物を完成させてから細かく描いていきます。
把自己想画的东西先想象一下,以此为模型去画。
背景等人物画完后再仔细去画。
---線画---线描線画は「鉛筆ツール」で描きます。
线描请用“铅笔”工具。
ブラシサイズは原稿サイズにもよりますが、基本1~2で。
線画の太さを一定にしてしまうと安っぽく見えてしまいますので、線に強弱をつけます。
刷子的号也得根据本稿的尺寸,一般为1~2号。
如果把线条的粗细设为固定则有些地方会看着很不合适,因此要注意线的粗细。
線画が出来ました。
线描好了,如下图。
次に、線画を柔らかく見せるために線画の色を変えます。
ここで「クリッピング」を使用します。
接着,为了让线描画看着比较柔和,请改变线描的颜色。
在这儿,我用了“剪裁”クリッピングとは、下にあるレイヤーの描画された部分にのみ、上から塗り足す事が出来る機能です。
これは着色の際にも重宝しますので、この機能を覚えて損はないと思います。
クリップするとレイヤーの左横に赤い線が表示されます。
剪裁能把下面的图层中只选择的部分涂到上面。
这在上色时是很重要的功能,我认为记住比较好。
剪裁后在图层的左侧会用红色的线标示出来。
【修正前】修改前【修正後】修改后③塗り上色③塗り-その2-上色2肌や目の塗り方と同じ要領で肌→目→髪→服→その他小物等の順にレイヤー別で塗っていきます。
跟给皮肤、眼睛的上色要领一样,按照皮肤—眼睛—头发—衣服—其他的小配饰这样的顺序分图层上色。
まぶた眼睑女の子らしさを出す為にまぶたを少しいじります。
为表现出女子的样貌,要稍注意一样眼睑。
①「線画レイヤー」の上に新規レイヤー作成し[加算モード]にしてからクリッピング。
白く塗り潰します。
1,在“线描图层”上新建一个图层,设为“正片叠底”模式进行剪裁,涂为白色。
②消しゴムを使って形を整えて2,用橡皮修整一下整体形状。
③レイヤーの不透明度を40~50%まで下げ、3,把图层的不透明度设为40%到50%。
④さらに上に新規レイヤーを作成し、[加算モード]にしてからクリッピング。
赤く塗り潰します。
4,接着再新建一个图层,设为“正片叠底”模式后剪裁,涂为红色。
⑤不透明度を10~15%まで下げ、消しゴムで調整。
5,把不透明度调低至10%到15%左右,用橡皮修整。
これで完成です。
这样就完成了。
仕上げ(人物)完成(人物)人物の仕上げとして、ちょっと手を加えます。
完成人物图,稍微修改一下。
①人物のレイヤーを全て結合②その上に新規レイヤー作成&クリッピング③「加算モード」にして、適当な色で人物を塗り潰す。
1,把所有的人物图给合并。
2,再新建一个图层,并进行剪裁。
3,设定为“正片叠底”模式,选用适当的颜给人物上色。
④不透明度を10~15%にして完成です。
↓4,把不透明度设为10%到15%左右就完成了。
ちなみに「加算モード」にしてない状態だとこんな感じです。
顺便说一下,如果不设为“正片叠底”模式就是这种感觉了。
④背景/仕上げ4,背景、完成背景の作業です。
背景的绘制。
描きたい背景(この場合はアイス)をイメージし、徐々に形にしていきます。
先想象出想画的背景(这里为冰),然后慢慢使其成形。
アイスの塗りの手順はこのような感じになってます。
冰的上色顺序如下。
同じ要領で他のアイスも描き塗っていきます。
「そもそもアイスが描けない」という方は、(アイスに限った話ではありませんが)実際のアイスを買って観察しながら描いていきましょう。
如上也给其他的冰上色。
原本就不会画冰的人(也不仅是冰),建议买实际中的冰一边观察一边画。
④背景/仕上げ-その2-背景、完成,2.仕上げの作業です。
最后的绘制。
①一番下に「新規レイヤー」を作成。
薄めのピンクで塗りつぶします。
1,在最下面做一个“新建图层”,涂成浅粉色。
②背景の隙間が勿体ないので☆を付け加え2,背景的空隙也别浪费,加上☆。
③女の子を目立たせるために、背景レイヤーを全て「結合」し、不透明度を60~70%程に下げます。
(ぱっと見、分かるか分からないか程度の色の変化でしかないですが、そこは個々のこだわりで調整します。
)3,为了让女孩更显目,把所有的背景图层合并,并把非透明度调低到60%到70%。
(粗看上去,只能看到很难辨认的颜色的变化,要根据每个细节部分进行调整。
)簡単な人物影の作り方制作人影的简单绘法。
①結合した人物をコピーします1,把合并后的人物复制。
②コピーした「人物レイヤー」の上に新規レイヤーを作成し、クリッピング2,在复制的“人物图层”上新建一个图层。
剪裁。
③黒く塗りつぶし3,涂成黑色。
④レイヤーを結合させれば4,让图层合并。
影(シルエット)の出来上がりです。
人影(剪影)就做好了。
最後に「人物レイヤー」と「背景レイヤー」の間に作った影を入れて不透明度等を調節し、完成です。
最后在“人物图层”和“背景图层”中间放入绘好的人影,调节一下非透明度就完成了。
・下書き~線画に約3時間・塗り~仕上げに約5時間作業時間だけならば合計8時間ほどかかりました。
草图到线描,大概三小时上色到完成大概五小时。
如果只是绘制的话时间大概要八小时左右。
もちろん作業時間を気にするよりも、どれだけ真剣にかつ楽しくその絵の作業に取り組んだかが大切です。
当然,比起绘制时间,更重要的是你在绘制过程中有多认真,体会了多少乐趣。
,自分の塗り方をつかめていない方は、はじめに誰かの塗り方を真似ながら練習するという手もあります。
そうしていくうちに自分に合った塗り方がわかってくるはずです。
イラストに関しては、継続させない事には上達する事もありませんので皆さんも頑張って心のこもったイラストを描き続けていきましょう。
最後までお付き合いくださってありがとうございました。
还没找到属于自己的上色方法的人,有种方法就是边模仿他人的方法边练习。
在这样的一个过程中慢慢就会找到适合自己的上色方法了。
关于插画,如果不坚持就不会有进步,所以请大家一定要努力、用心把插画坚持下去。
谢谢大家陪我到最后。