
Android图片处理工具类(圆角,压缩)
Android图片处理工具类(圆角,压缩)工作中用到的图片处理工具类,简单写下来,以便备用!public class BitmapUtils {/*** 图像背景圆角处理* bitmap要处理的图片 roundPx 图片弯角的圆度一般是5到10之间*/public static Bitmap getRoundedCornerBitmap(Bitmap bitmap, float roundPx) {// 创建与原图大小一样的bitmap文件,Config.ARGB_8888根据情况可以改用其它的Bitmap output = Bitmap.createBitmap(bitmap.getWidth(), bitmap.getHeight(), Config.ARGB_8888);// 实例画布,绘制的bitmap将保存至output中Canvas canvas = new Canvas(output);final int color = 0xff424242;//写自己需要的颜色值final Paint paint = new Paint();final Rect rect = new Rect(0, 0, bitmap.getWidth(), bitmap.getHeight());final RectF rectF = new RectF(rect);paint.setAntiAlias(true);canvas.drawARGB(0, 0, 0, 0);paint.setColor(color);canvas.drawRoundRect(rectF, roundPx, roundPx, paint);paint.setXfermode(newPorterDuffXfermode(android.graphics.PorterDuff.Mode.SRC_IN)); canvas.drawBitmap(bitmap, rect, rect, paint);bitmap.recycle();bitmap = null;return output;}/*** bitmap缩放* width要缩放的宽度 height要缩放的高度*/public static Bitmap getBitmapDeflation(Bitmap bitmap, int width, int height, boolean recycle) {if (null == bitmap) {return null;}float scaleWidth = 0f;float scaleHeight = 0f;// 获取bitmap宽高int bitmapWidth = bitmap.getWidth();int bitmapHeight = bitmap.getHeight();// 计算缩放比,图片的宽高小于指定的宽高则不缩放if (width < bitmapWidth) {scaleWidth = ((float) width) / bitmapWidth;} else {scaleWidth = 1.00f;}if (height < bitmapHeight) {scaleHeight = ((float) height) / bitmapHeight; } else {scaleHeight = 1.00f;}Matrix matrix = new Matrix();matrix.postScale(scaleWidth, scaleHeight);Bitmap newBitmap = Bitmap.createBitmap(bitmap, 0, 0, bitmapWidth, bitmapHeight, matrix, true);if (recycle && !bitmap.isRecycled()) {bitmap.recycle();}bitmap = null;return newBitmap;}/**** 方法概述:进入图片的大小与质量压缩,用于区分大小图片*/public static Bitmap getCompressedImage(String srcPath) {BitmapFactory.Options newOpts = new BitmapFactory.Options();// 开始读入图片,此时把options.inJustDecodeBounds 设回true了 newOpts.inPreferredConfig = Bitmap.Config.RGB_565;newOpts.inPurgeable = true;newOpts.inJustDecodeBounds = true;FileInputStream is = null;try {is = new FileInputStream(srcPath);} catch (FileNotFoundException e) {e.printStackTrace();}Bitmap bitmap = BitmapFactory.decodeStream(is, null, newOpts);// 此时返回bm为空newOpts.inJustDecodeBounds = false;int w = newOpts.outWidth;int h = newOpts.outHeight;// 现在主流手机比较多是800*480分辨率,所以高和宽我们设置为float hh = 130f;// 这里设置高度为800ffloat ww = 130f;// 这里设置宽度为480f// 缩放比。
由于是固定比例缩放,只用高或者宽其中一个数据进行计算即可int be = 1;// be=1表示不缩放if (w > h && w > ww) {// 如果宽度大的话根据宽度固定大小缩放be = (int) (newOpts.outWidth / ww);} else if (w < h && h > hh) {// 如果高度高的话根据宽度固定大小缩放be = (int) (newOpts.outHeight / hh);}if (be <= 0) {be = 1;}newOpts.inSampleSize = be;// 设置缩放比例// 重新读入图片,注意此时已经把options.inJustDecodeBounds 设回false了bitmap = BitmapFactory.decodeFile(srcPath, newOpts);if (bitmap != null) { return compressImageSize(bitmap, 8);// 压缩好比例大小后再进行质量压缩}return null;}/**** 方法概述:图片质量压缩*/protected static Bitmap compressImageSize(Bitmap image, int size) {if (image == null)return image;ByteArrayOutputStream baos = new ByteArrayOutputStream();press(pressFormat.JPEG, 100, baos);// 质量压缩方法,这里10表示不压缩,把压缩后的数据存放到baos中int options = 100;while(baos.toByteArray().length / 1000> size && options / 3> 0) { // 循环判断如果压缩后图片是否大于10kb,大于继续压缩baos.reset();// 重置baos即清空baospress(pressFormat.JPEG, options, baos);// 这里压缩options%,把压缩后的数据存放到baos中options -= options / 3;// 每次都减少30%}ByteArrayInputStream isBm = newByteArrayInputStream(baos.toByteArray());// 把压缩后的数据baos存放到ByteArrayInputStream中Bitmap bitmap = BitmapFactory.decodeStream(isBm, null, null);// 把ByteArrayInputStream数据生成图片return bitmap;}/**** 方法概述:保存图片*/public static String saveBitmapWithName(String path, String bitName, Bitmap mBitmap) {File f = new File(path + bitName + ".png");String url = path + bitName + ".png";try {f.createNewFile();} catch (IOException e) {System.out.println("文件创建出错");}FileOutputStream fOut = null;try {fOut = new FileOutputStream(f);} catch (FileNotFoundException e) {System.out.println(" 创建文件流失败");e.printStackTrace();}press(pressFormat.PNG, 100, fOut);try {fOut.flush();} catch (IOException e) {e.printStackTrace();}try {fOut.close();} catch (IOException e) {e.printStackTrace();}return url;}/**** 方法概述:根据传入参数保存图片*/public static boolean saveImageTo(Bitmap photo, String spath) { try {BufferedOutputStream bos = new BufferedOutputStream(new FileOutputStream(spath, false));press(pressFormat.PNG, 100, bos);bos.flush();bos.close();} catch (Exception e) {e.printStackTrace();return false;}return true;}}</pre>。
Android中图片处理(放大缩小,去色,转换格式,增加水印等)
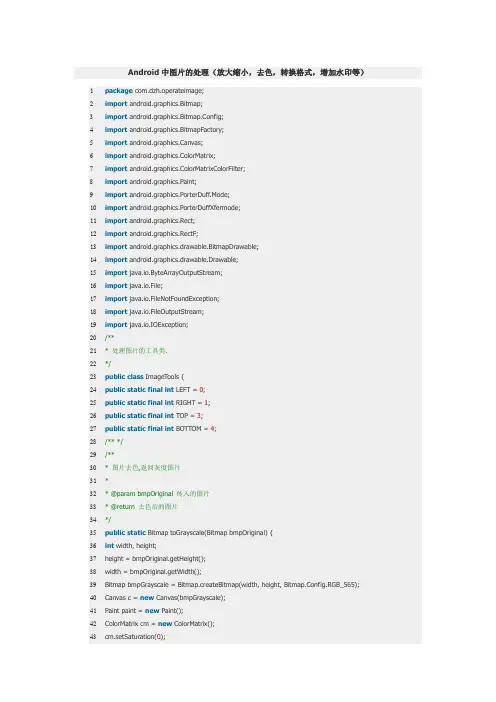
Android中图片的处理(放大缩小,去色,转换格式,增加水印等)1package com.dzh.operateimage;2import android.graphics.Bitmap;3import android.graphics.Bitmap.Config;4import android.graphics.BitmapFactory;5import android.graphics.Canvas;6import android.graphics.ColorMatrix;7import android.graphics.ColorMatrixColorFilter;8import android.graphics.Paint;9import android.graphics.PorterDuff.Mode;10import android.graphics.PorterDuffXfermode;11import android.graphics.Rect;12import android.graphics.RectF;13import android.graphics.drawable.BitmapDrawable;14import android.graphics.drawable.Drawable;15import java.io.ByteArrayOutputStream;16import java.io.File;17import java.io.FileNotFoundException;18import java.io.FileOutputStream;19import java.io.IOException;20/**21* 处理图片的工具类.22*/23public class ImageTools {24public static final int LEFT = 0;25public static final int RIGHT = 1;26public static final int TOP = 3;27public static final int BOTTOM = 4;28/** */29/**30* 图片去色,返回灰度图片31*32* @param bmpOriginal 传入的图片33* @return 去色后的图片34*/35public static Bitmap toGrayscale(Bitmap bmpOriginal) {36int width, height;37height = bmpOriginal.getHeight();38width = bmpOriginal.getWidth();39Bitmap bmpGrayscale = Bitmap.createBitmap(width, height, Bitmap.Config.RGB_565); 40Canvas c = new Canvas(bmpGrayscale);41Paint paint = new Paint();42ColorMatrix cm = new ColorMatrix();43cm.setSaturation(0);44ColorMatrixColorFilter f = new ColorMatrixColorFilter(cm);45paint.setColorFilter(f);46 c.drawBitmap(bmpOriginal, 0, 0, paint);47return bmpGrayscale;48}49/** */50/**51* 去色同时加圆角52*53* @param bmpOriginal 原图54* @param pixels 圆角弧度55* @return 修改后的图片56*/57public static Bitmap toGrayscale(Bitmap bmpOriginal, int pixels) {58return toRoundCorner(toGrayscale(bmpOriginal), pixels);59}60/** */61/**62* 把图片变成圆角63*64* @param bitmap 需要修改的图片65* @param pixels 圆角的弧度66* @return 圆角图片67*/68public static Bitmap toRoundCorner(Bitmap bitmap, int pixels) {69Bitmap output = Bitmap70.createBitmap(bitmap.getWidth(), bitmap.getHeight(), Config.ARGB_8888); 71Canvas canvas = new Canvas(output);72final int color = 0xff424242;73final Paint paint = new Paint();74final Rect rect = new Rect(0, 0, bitmap.getWidth(), bitmap.getHeight()); 75final RectF rectF = new RectF(rect);76final float roundPx = pixels;77paint.setAntiAlias(true);78canvas.drawARGB(0, 0, 0, 0);79paint.setColor(color);80canvas.drawRoundRect(rectF, roundPx, roundPx, paint);81paint.setXfermode(new PorterDuffXfermode(Mode.SRC_IN));82canvas.drawBitmap(bitmap, rect, rect, paint);83return output;84}85/** */86/**87* 使圆角功能支持BitampDrawable88*89* @param bitmapDrawable90* @param pixels91* @return92*/93public static BitmapDrawable toRoundCorner(BitmapDrawable bitmapDrawable, int pixels) { 94Bitmap bitmap = bitmapDrawable.getBitmap();95bitmapDrawable = new BitmapDrawable(toRoundCorner(bitmap, pixels));96return bitmapDrawable;97}98/**99* 读取路径中的图片,然后将其转化为缩放后的bitmap100*101* @param path102*/103public static void saveBefore(String path) {104BitmapFactory.Options options = new BitmapFactory.Options();105options.inJustDecodeBounds = true;106// 获取这个图片的宽和高107Bitmap bitmap = BitmapFactory.decodeFile(path, options); // 此时返回bm为空108options.inJustDecodeBounds = false;109// 计算缩放比110int be = (int)(options.outHeight / (float)200);111if (be <= 0)112be = 1;113options.inSampleSize = 2; // 图片长宽各缩小二分之一114// 重新读入图片,注意这次要把options.inJustDecodeBounds 设为false哦115bitmap = BitmapFactory.decodeFile(path, options);116int w = bitmap.getWidth();117int h = bitmap.getHeight();118System.out.println(w + " " + h);119// savePNG_After(bitmap,path);120saveJPGE_After(bitmap, path);121}122/**123* 保存图片为PNG124*125* @param bitmap126* @param name127*/128public static void savePNG_After(Bitmap bitmap, String name) {129File file = new File(name);130try {131FileOutputStream out = new FileOutputStream(file);132if (press(pressFormat.PNG, 100, out)) {133out.flush();134out.close();135}136} catch (FileNotFoundException e) {137 e.printStackTrace();138} catch (IOException e) {139 e.printStackTrace();140}141}142/**143* 保存图片为JPEG144*145* @param bitmap146* @param path147*/148public static void saveJPGE_After(Bitmap bitmap, String path) {149File file = new File(path);150try {151FileOutputStream out = new FileOutputStream(file);152if (press(pressFormat.JPEG, 100, out)) {153out.flush();154out.close();155}156} catch (FileNotFoundException e) {157 e.printStackTrace();158} catch (IOException e) {159 e.printStackTrace();160}161}162/**163* 水印164*165* @param bitmap166* @return167*/168public static Bitmap createBitmapForWatermark(Bitmap src, Bitmap watermark) { 169if (src == null) {170return null;171}172int w = src.getWidth();173int h = src.getHeight();174int ww = watermark.getWidth();175int wh = watermark.getHeight();176// create the new blank bitmap177Bitmap newb = Bitmap.createBitmap(w, h, Config.ARGB_8888);// 创建一个新的和SRC长度宽度一样的位图178Canvas cv = new Canvas(newb);179// draw src into180cv.drawBitmap(src, 0, 0, null);// 在0,0坐标开始画入src181// draw watermark into182cv.drawBitmap(watermark, w - ww + 5, h - wh + 5, null);// 在src的右下角画入水印183// save all clip184cv.save(Canvas.ALL_SAVE_FLAG);// 保存185// store186cv.restore();// 存储187return newb;188}189/**190* 图片合成191*192* @return193*/194public static Bitmap potoMix(int direction, Bitmap... bitmaps) {195if (bitmaps.length <= 0) {196return null;197}198if (bitmaps.length == 1) {199return bitmaps[0];200}201Bitmap newBitmap = bitmaps[0];202// newBitmap = createBitmapForFotoMix(bitmaps[0],bitmaps[1],direction);203for (int i = 1; i < bitmaps.length; i++) {204newBitmap = createBitmapForFotoMix(newBitmap, bitmaps[i], direction);205}206return newBitmap;207}208209private static Bitmap createBitmapForFotoMix(Bitmap first, Bitmap second, int direction) {210if (first == null) {211return null;212}213if (second == null) {214return first;215}216int fw = first.getWidth();217int fh = first.getHeight();218int sw = second.getWidth();219int sh = second.getHeight();220Bitmap newBitmap = null;221if (direction == LEFT) {222newBitmap = Bitmap.createBitmap(fw + sw, fh > sh ? fh : sh, Config.ARGB_8888); 223Canvas canvas = new Canvas(newBitmap);224canvas.drawBitmap(first, sw, 0, null);225canvas.drawBitmap(second, 0, 0, null);226} else if (direction == RIGHT) {227newBitmap = Bitmap.createBitmap(fw + sw, fh > sh ? fh : sh, Config.ARGB_8888); 228Canvas canvas = new Canvas(newBitmap);229canvas.drawBitmap(first, 0, 0, null);230canvas.drawBitmap(second, fw, 0, null);231} else if (direction == TOP) {232newBitmap = Bitmap.createBitmap(sw > fw ? sw : fw, fh + sh, Config.ARGB_8888); 233Canvas canvas = new Canvas(newBitmap);234canvas.drawBitmap(first, 0, sh, null);235canvas.drawBitmap(second, 0, 0, null);236} else if (direction == BOTTOM) {237newBitmap = Bitmap.createBitmap(sw > fw ? sw : fw, fh + sh, Config.ARGB_8888); 238Canvas canvas = new Canvas(newBitmap);239canvas.drawBitmap(first, 0, 0, null);240canvas.drawBitmap(second, 0, fh, null);241}242return newBitmap;243}244/**245* 将Bitmap转换成指定大小246* @param bitmap247* @param width248* @param height249* @return250*/251public static Bitmap createBitmapBySize(Bitmap bitmap,int width,int height)252{253return Bitmap.createScaledBitmap(bitmap, width, height, true);254}255/**256* Drawable 转Bitmap257*258* @param drawable259* @return260*/261public static Bitmap drawableToBitmapByBD(Drawable drawable) {262BitmapDrawable bitmapDrawable = (BitmapDrawable)drawable;263return bitmapDrawable.getBitmap();264}265/**266* Bitmap 转Drawable267*268* @param bitmap269* @return270*/271public static Drawable bitmapToDrawableByBD(Bitmap bitmap) { 272Drawable drawable = new BitmapDrawable(bitmap);273return drawable;274}275/**276* byte[] 转bitmap277*278* @param b279* @return280*/281public static Bitmap bytesToBimap(byte[] b) {282if (b.length != 0) {283return BitmapFactory.decodeByteArray(b, 0, b.length);284} else {285return null;286}287}288/**289* bitmap 转byte[]290*291* @param bm292* @return293*/294public static byte[] bitmapToBytes(Bitmap bm) {295ByteArrayOutputStream baos = new ByteArrayOutputStream(); press(pressFormat.PNG, 100, baos);297return baos.toByteArray();298}299}。
AndroidLuBan与Compressor图片压缩方式

AndroidLuBan与Compressor图⽚压缩⽅式之前选择压缩图⽚库,在github上找的这个star最多的,使⽤⽅法是传⼊图⽚数组,在异步线程中回调返回的结果。
接下来就出现问题了,压缩的图⽚质量模糊,虽然可以设置多少KB⼀下不压缩,在正常⼿机屏幕压缩没太⼤问题。
但是在平板,同⼀张图⽚,压缩就会模糊。
Luban.with(this).load(photos) // 传⼈要压缩的图⽚列表.ignoreBy(100) // 忽略不压缩图⽚的⼤⼩.setTargetDir(getPath()) // 设置压缩后⽂件存储位置.setCompressListener(new OnCompressListener() { //设置回调@Overridepublic void onStart() {// TODO 压缩开始前调⽤,可以在⽅法内启动 loading UI}@Overridepublic void onSuccess(File file) {// TODO 压缩成功后调⽤,返回压缩后的图⽚⽂件***在此判断是否压缩完毕,根据返回的图⽚++与原数组size⽐较***}@Overridepublic void onError(Throwable e) {// TODO 当压缩过程出现问题时调⽤}}).launch(); //启动压缩这个压缩是在主线程中的耗时操作,需要⾃⼰去写⼀个异步线程,并通过handler传递消息到主线程。
.setMaxWidth(640).setMaxHeight(480)这两个数值越⾼,压缩⼒度越⼩,图⽚也不清晰,.setQuality(75)这个⽅法只是设置图⽚质量,并不影响压缩图⽚的⼤⼩KB.setCompressFormat(pressFormat.WEBP) WEBP图⽚格式是Google推出的压缩强,质量⾼,但是IOS不识别,需要把图⽚转为字节流然后转PNG格式.setCompressFormat(pressFormat.PNG)PNG格式的压缩,会导致图⽚变⼤,并耗过⼤的内存,⼿机反应缓慢.setCompressFormat(pressFormat.JPEG)JPEG压缩;压缩速度⽐PNG快,质量⼀般,基本上属于1/10的压缩⽐例try {File file = new Compressor(activity).setMaxWidth(640).setMaxHeight(480).setQuality(100).setCompressFormat(pressFormat.JPEG).setDestinationDirectoryPath(Environment.getExternalStoragePublicDirectory(Environment.DIRECTORY_PICTURES).getAbsolutePath()).compressToFile(new File(filePath));String imageString=file.getPath();paths.add(imageString);} catch (IOException e) {e.printStackTrace();}在此判断paths的⼤⼩是否等于图⽚数组⼤⼩,判断是否调⽤handler传递消息到主线程去坐其他操作以上就是本⽂的全部内容,希望对⼤家的学习有所帮助,也希望⼤家多多⽀持。
Android图片处理-压缩转格式

移动开发中,内存资源很宝贵,而且对加载图片内存空间也有限制;所以我们会在加载图片对图片进行相应的处理,有时为了提高响应速度,增强用户体验,我们在加载大图片时会先加载图片的缩略图、如后加载原图,所以我们要将图片按照固定大小取缩略图,一般取缩略图的方法是使用BitmapFactory的decodeFile方法,然后通过传递进去BitmapFactory.Option类型的参数进行取缩略图,在Option中,属性值inSampleSize表示缩略图大小为原始图片大小的几分之一,即如果这个值为2,则取出的缩略图的宽和高都是原始图片的1/2,图片大小就为原始大小的1/4。
然而,如果我们想取固定大小的缩略图就比较困难了,比如,我们想将不同大小的图片去出来的缩略图高度都为200px,而且要保证图片不失真,那怎么办?我们总不能将原始图片加载到内存中再进行缩放处理吧,要知道在移动开发中,内存是相当宝贵的,而且一张100K的图片,加载完所占用的内存何止 100K?经过研究,发现,Options中有个属性inJustDecodeBounds,研究了一下,终于明白是什么意思了,SDK中的E文是这么说的If set to true, the decoder will return null (no bitmap), but the out... fields will still be set, allowing the caller to query the bitmap without having to allocate the memory for its pixels.意思就是说如果该值设为true那么将不返回实际的bitmap不给其分配内存空间而里面只包括一些解码边界信息即图片大小信息,那么相应的方法也就出来了,通过设置inJustDecodeBounds为true,获取到outHeight(图片原始高度)和 outWidth(图片的原始宽度),然后计算一个inSampleSize(缩放值),然后就可以取图片了,这里要注意的是,inSampleSize 可能小于0,必须做判断。
Android实例] 圆角图片加阴影
![Android实例] 圆角图片加阴影](https://360docs-1393072327.cos.ap-beijing.myqcloud.com/439a0d1f76c66137ee06197f.webp)
Android 实现圆角图片并添加阴影此方法可实现圆角图片加阴影背景,先上图看下效果:主要的代码在MyCoverImageView类里面,具体实现是对bitmap的转换合成过程!废话少说,下面直接贴代码1、工具类public class MyCoverImageView extends ImageView {private Bitmap src =null;public Paint paint = new Paint(Paint.ANTI_ALIAS_FLAG);private void init(Context context){src = BitmapFactory.decodeResource(getResources(), R.drawable.src); // src = zoomImg(src,300,300);// src = toRoundCorner(src,30);}public MyCoverImageView(Context context) {super(context);init(context);}public MyCoverImageView(Context context, AttributeSet attrs) { super(context, attrs);init(context);}public MyCoverImageView(Context context, AttributeSet attrs, int defStyle) { super(context, attrs, defStyle);init(context);}@Overrideprotected void onSizeChanged(int w, int h, int oldw, int oldh) { super.onSizeChanged(w, h, oldw, oldh);}@Overrideprotected void onDraw(Canvas canvas) {super.onDraw(canvas);}public void setImageBitmapWithCoverIn(Bitmap bm) {Bitmap out = toRoundCorner(bm,20);// int w = bm.getWidth();// int h = bm.getHeight();//cover// Bitmap dd =BitmapFactory.decodeResource(getResources(),R.drawable.goods_img_bg);// Bitmap cover = Bitmap.createBitmap(w, h, Bitmap.Config.ARGB_8888);// Canvas canvas_cover = new Canvas(cover);// NinePatch np = new NinePatch(dd, dd.getNinePatchChunk(), null);// Rect r = new Rect(0,0,w,h);// np.draw(canvas_cover, r);// Bitmap out = Bitmap.createBitmap(w, h, Bitmap.Config.ARGB_8888);// Canvas canvas_out = new Canvas(out);// paint.setAntiAlias(false);// canvas_out.drawBitmap(cover,0, 0, paint); //dst// paint.setXfermode(new PorterDuffXfermode(Mode.SRC_IN));// canvas_out.drawBitmap(bm, 0, 0, paint); //src// try {// File myCaptureFile = new File("/sdcard/test.png");// myCaptureFile.deleteOnExit();// myCaptureFile.createNewFile();// BufferedOutputStream bos = new BufferedOutputStream(new FileOutputStream(myCaptureFile));// press(pressFormat.PNG,100, bos);// bos.flush();// bos.close();// } catch (FileNotFoundException e) {// e.printStackTrace();// } catch (IOException e) {// e.printStackTrace();// }super.setImageBitmap(out);}static void setCornerRadii(GradientDrawable drawable, float r0, float r1, float r2, float r3) {drawable.setCornerRadii(new float[] { r0, r0, r1, r1, r2, r2, r3, r3 });}/*** @param bitmap* @param pixels* @return*/public static Bitmap toRoundCorner(Bitmap bitmap, int pixels) {Paint paint = new Paint(Paint.ANTI_ALIAS_FLAG);Bitmap output_shadow = Bitmap.createBitmap(bitmap.getWidth(),bitmap.getHeight(), Config.ARGB_8888);Bitmap output = Bitmap.createBitmap(bitmap.getWidth(), bitmap.getHeight(), Config.ARGB_8888);Rect rect = new Rect(0,0,bitmap.getWidth(),bitmap.getHeight());RectF rectF= new RectF(rect);Canvas canvas = new Canvas(output);// Canvas canvas_shadow = new Canvas(output_shadow);//这里画一个渐变的图形canvas.drawColor(0x00000000);GradientDrawable mDrawable = newGradientDrawable(GradientDrawable.Orientation.TL_BR, new int[] { 0xFFFF0000,0xFF00FF00, 0xFF0000FF });mDrawable.setBounds(rect);mDrawable.setShape(GradientDrawable.RECTANGLE);mDrawable.setGradientRadius((float)(Math.sqrt(2) * 60));mDrawable.setGradientType(GradientDrawable.LINEAR_GRADIENT);//这里设置圆角。
Android中图片压缩方案详解

Android中图片压缩方案详解1、质量压缩法设置bitmap options属性,降低图片的质量,像素不会减少第一个参数为需要压缩的bitmap图片对象,第二个参数为压缩后图片保存的位置设置options 属性0-100,来实现压缩。
private Bitmap compressImage(Bitmap image) {ByteArrayOutputStream baos = new ByteArrayOutputStream();press(pressFormat.JPEG, 100, baos);//质量压缩方法,这里100表示不压缩,把压缩后的数据存放到baos中int options = 100;while ( baos.toByteArray().length / 1024>100) { //循环判断如果压缩后图片是否大于100kb,大于继续压缩baos.reset();//重置baos即清空baospress(pressFormat.JPEG, options, baos);//这里压缩options%,把压缩后的数据存放到baos中options -= 10;//每次都减少10}ByteArrayInputStream isBm = new ByteArrayInputStream(baos.toByteArray());//把压缩后的数据baos存放到ByteArrayInputStream中Bitmap bitmap = BitmapFactory.decodeStream(isBm, null, null);//把ByteArrayInputStream数据生成图片return bitmap;}质量压缩不会减少图片的像素。
它是在保持像素不变的前提下改变图片的位深及透明度等,来达到压缩图片的目的。
进过它压缩的图片文件大小会有改变,但是导入成bitmap后占得内存是不变的。
android图片处理之让图片变成圆形
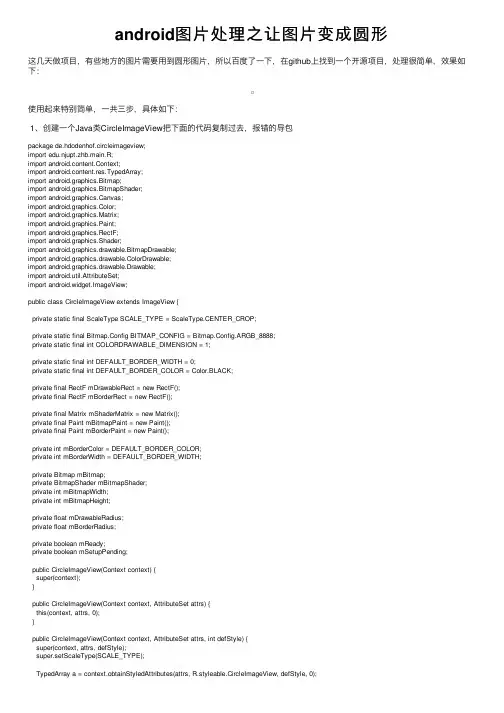
android图⽚处理之让图⽚变成圆形这⼏天做项⽬,有些地⽅的图⽚需要⽤到圆形图⽚,所以百度了⼀下,在github上找到⼀个开源项⽬,处理很简单,效果如下:使⽤起来特别简单,⼀共三步,具体如下:1、创建⼀个Java类CircleImageView把下⾯的代码复制过去,报错的导包package de.hdodenhof.circleimageview;import edu.njupt.zhb.main.R;import android.content.Context;import android.content.res.TypedArray;import android.graphics.Bitmap;import android.graphics.BitmapShader;import android.graphics.Canvas;import android.graphics.Color;import android.graphics.Matrix;import android.graphics.Paint;import android.graphics.RectF;import android.graphics.Shader;import android.graphics.drawable.BitmapDrawable;import android.graphics.drawable.ColorDrawable;import android.graphics.drawable.Drawable;import android.util.AttributeSet;import android.widget.ImageView;public class CircleImageView extends ImageView {private static final ScaleType SCALE_TYPE = ScaleType.CENTER_CROP;private static final Bitmap.Config BITMAP_CONFIG = Bitmap.Config.ARGB_8888;private static final int COLORDRAWABLE_DIMENSION = 1;private static final int DEFAULT_BORDER_WIDTH = 0;private static final int DEFAULT_BORDER_COLOR = Color.BLACK;private final RectF mDrawableRect = new RectF();private final RectF mBorderRect = new RectF();private final Matrix mShaderMatrix = new Matrix();private final Paint mBitmapPaint = new Paint();private final Paint mBorderPaint = new Paint();private int mBorderColor = DEFAULT_BORDER_COLOR;private int mBorderWidth = DEFAULT_BORDER_WIDTH;private Bitmap mBitmap;private BitmapShader mBitmapShader;private int mBitmapWidth;private int mBitmapHeight;private float mDrawableRadius;private float mBorderRadius;private boolean mReady;private boolean mSetupPending;public CircleImageView(Context context) {super(context);}public CircleImageView(Context context, AttributeSet attrs) {this(context, attrs, 0);}public CircleImageView(Context context, AttributeSet attrs, int defStyle) {super(context, attrs, defStyle);super.setScaleType(SCALE_TYPE);mBorderWidth = a.getDimensionPixelSize(R.styleable.CircleImageView_border_width, DEFAULT_BORDER_WIDTH); mBorderColor = a.getColor(R.styleable.CircleImageView_border_color, DEFAULT_BORDER_COLOR);a.recycle();mReady = true;if (mSetupPending) {setup();mSetupPending = false;}}@Overridepublic ScaleType getScaleType() {return SCALE_TYPE;}@Overridepublic void setScaleType(ScaleType scaleType) {if (scaleType != SCALE_TYPE) {throw new IllegalArgumentException(String.format("ScaleType %s not supported.", scaleType));}}@Overrideprotected void onDraw(Canvas canvas) {if (getDrawable() == null) {return;}canvas.drawCircle(getWidth() / 2, getHeight() / 2, mDrawableRadius, mBitmapPaint);canvas.drawCircle(getWidth() / 2, getHeight() / 2, mBorderRadius, mBorderPaint);}@Overrideprotected void onSizeChanged(int w, int h, int oldw, int oldh) {super.onSizeChanged(w, h, oldw, oldh);setup();}public int getBorderColor() {return mBorderColor;}public void setBorderColor(int borderColor) {if (borderColor == mBorderColor) {return;}mBorderColor = borderColor;mBorderPaint.setColor(mBorderColor);invalidate();}public int getBorderWidth() {return mBorderWidth;}public void setBorderWidth(int borderWidth) {if (borderWidth == mBorderWidth) {return;}mBorderWidth = borderWidth;setup();}@Overridepublic void setImageBitmap(Bitmap bm) {super.setImageBitmap(bm);mBitmap = bm;setup();}public void setImageDrawable(Drawable drawable) {super.setImageDrawable(drawable);mBitmap = getBitmapFromDrawable(drawable);setup();}@Overridepublic void setImageResource(int resId) {super.setImageResource(resId);mBitmap = getBitmapFromDrawable(getDrawable());setup();}private Bitmap getBitmapFromDrawable(Drawable drawable) {if (drawable == null) {return null;}if (drawable instanceof BitmapDrawable) {return ((BitmapDrawable) drawable).getBitmap();}try {Bitmap bitmap;if (drawable instanceof ColorDrawable) {bitmap = Bitmap.createBitmap(COLORDRAWABLE_DIMENSION, COLORDRAWABLE_DIMENSION, BITMAP_CONFIG); } else {bitmap = Bitmap.createBitmap(drawable.getIntrinsicWidth(), drawable.getIntrinsicHeight(), BITMAP_CONFIG);}Canvas canvas = new Canvas(bitmap);drawable.setBounds(0, 0, canvas.getWidth(), canvas.getHeight());drawable.draw(canvas);return bitmap;} catch (OutOfMemoryError e) {return null;}}private void setup() {if (!mReady) {mSetupPending = true;return;}if (mBitmap == null) {return;}mBitmapShader = new BitmapShader(mBitmap, Shader.TileMode.CLAMP, Shader.TileMode.CLAMP);mBitmapPaint.setAntiAlias(true);mBitmapPaint.setShader(mBitmapShader);mBorderPaint.setStyle(Paint.Style.STROKE);mBorderPaint.setAntiAlias(true);mBorderPaint.setColor(mBorderColor);mBorderPaint.setStrokeWidth(mBorderWidth);mBitmapHeight = mBitmap.getHeight();mBitmapWidth = mBitmap.getWidth();mBorderRect.set(0, 0, getWidth(), getHeight());mBorderRadius = Math.min((mBorderRect.height() - mBorderWidth) / 2, (mBorderRect.width() - mBorderWidth) / 2);mDrawableRect.set(mBorderWidth, mBorderWidth, mBorderRect.width() - mBorderWidth, mBorderRect.height() - mBorderWidth); mDrawableRadius = Math.min(mDrawableRect.height() / 2, mDrawableRect.width() / 2);updateShaderMatrix();invalidate();}private void updateShaderMatrix() {float scale;float dy = 0;mShaderMatrix.set(null);if (mBitmapWidth * mDrawableRect.height() > mDrawableRect.width() * mBitmapHeight) {scale = mDrawableRect.height() / (float) mBitmapHeight;dx = (mDrawableRect.width() - mBitmapWidth * scale) * 0.5f;} else {scale = mDrawableRect.width() / (float) mBitmapWidth;dy = (mDrawableRect.height() - mBitmapHeight * scale) * 0.5f;}mShaderMatrix.setScale(scale, scale);mShaderMatrix.postTranslate((int) (dx + 0.5f) + mBorderWidth, (int) (dy + 0.5f) + mBorderWidth); mBitmapShader.setLocalMatrix(mShaderMatrix);}}2、在values⽂件夹下⾯创建⼀个xlm⽂件attrs.xml把下⾯的代码复制进去<?xml version="1.0" encoding="utf-8"?><resources><declare-styleable name="CircleImageView"><attr name="border_width" format="dimension" /><attr name="border_color" format="color" /></declare-styleable></resources>3、接下来就是使⽤了,直接在布局⽂件中使⽤,具体使⽤如下:直接创建⼀个⾃定义的CircleImageView src属性设置你要改变成圆形的图⽚<RelativeLayout xmlns:android="/apk/res/android"xmlns:tools="/tools"android:layout_width="match_parent"android:layout_height="match_parent"android:background="#ff00ff"><com.example.circleimageview.CircleImageViewandroid:id="@+id/imageview"android:layout_width="100dp"android:layout_height="100dp"android:layout_centerInParent="true"android:src="@drawable/control_image"/></RelativeLayout>以上就是本⽂的全部内容,希望对⼤家的学习有所帮助,也希望⼤家多多⽀持。
android中background圆角实现原理
android中background圆角实现原理在Android开发中,背景圆角是一种常见的视觉效果,它可以使背景看起来更加圆滑和自然。
在Android中,背景圆角可以通过多种方式实现,其中最常见的是使用背景图片和圆角属性。
本文将介绍Android中Background圆角实现的基本原理,并分析其优缺点。
一、背景圆角的实现方式1.使用背景图片和圆角属性在Android中,可以使用背景图片和圆角属性来实现背景圆角。
通过设置ImageView的背景图片,并使用圆角属性设置背景图片的圆角大小,可以实现背景圆角效果。
这种方法适用于背景图片已经存在的场景,可以通过调整圆角大小来改变背景圆滑程度。
2.使用自定义View自定义View是一种更高级的实现方式,可以通过在自定义View中绘制圆角形状来实现背景圆角。
这种方法需要开发者手动绘制圆角形状,并对绘制的形状进行适配,适用于需要自定义背景圆滑程度的场景。
3.使用BitmapShaderBitmapShader是一种可以使用OpenGL实现的实现背景圆角的算法。
通过在Paint对象中使用BitmapShader,可以在渲染时对位图进行圆角处理,从而实现背景圆角效果。
这种方法适用于需要高性能渲染的场景,可以通过调整圆角大小和位图质量来改变背景圆滑程度。
二、实现原理分析背景圆角的实现原理主要基于图像处理和渲染技术。
在Android中,背景图片通常使用Bitmap对象来表示,而圆角效果则通过设置Bitmap对象的Shader属性来实现。
对于使用背景图片和圆角属性的方法,可以通过设置ImageView的背景图片和圆角属性来改变背景图片的圆滑程度。
在渲染时,ImageView会根据背景图片和圆角属性绘制出具有圆角的背景效果。
对于使用自定义View的方法,可以通过在自定义View中绘制具有圆角的形状来实现背景圆角。
在绘制时,可以根据需要调整绘制路径和绘制颜色等参数来改变背景圆滑程度。
Android如何设置圆角图片
Android如何设置圆⾓图⽚在开发过程中有时需要将图⽚显⽰成圆⾓图⽚,⼀般我们可以通过在xml中设置drawable shape即可,但今天我给出另⼀种⽅法,⽤java代码动态去设置圆⾓,顺便做个简单的笔记。
主要原理是使⽤系统⾃带api:RoundedBitmapDrawableFactory先上效果图:由于⽐较简单,直接给出实现⽅式:public class MainActivity extends AppCompatActivity {private ImageView mImgRectRound;private ImageView mImgRound;@Overrideprotected void onCreate(Bundle savedInstanceState) {super.onCreate(savedInstanceState);setContentView(yout.activity_main);mImgRectRound = (ImageView) findViewById(R.id.img_rect_rounded);mImgRound = (ImageView) findViewById(R.id.img_rounded);rectRoundBitmap();roundBitmap();}private void rectRoundBitmap(){//得到资源⽂件的BitMapBitmap image= BitmapFactory.decodeResource(getResources(),R.drawable.dog);//创建RoundedBitmapDrawable对象RoundedBitmapDrawable roundImg =RoundedBitmapDrawableFactory.create(getResources(),image);//抗锯齿roundImg.setAntiAlias(true);//设置圆⾓半径roundImg.setCornerRadius(30);//设置显⽰图⽚mImgRectRound.setImageDrawable(roundImg);}private void roundBitmap(){//如果是圆的时候,我们应该把bitmap图⽚进⾏剪切成正⽅形,然后再设置圆⾓半径为正⽅形边长的⼀半即可Bitmap image = BitmapFactory.decodeResource(getResources(), R.drawable.dog);Bitmap bitmap = null;//将长⽅形图⽚裁剪成正⽅形图⽚if (image.getWidth() == image.getHeight()) {bitmap = Bitmap.createBitmap(image, image.getWidth() / 2 - image.getHeight() / 2, 0, image.getHeight(), image.getHeight()); } else {bitmap = Bitmap.createBitmap(image, 0, image.getHeight() / 2 - image.getWidth() / 2, image.getWidth(), image.getWidth()); }RoundedBitmapDrawable roundedBitmapDrawable = RoundedBitmapDrawableFactory.create(getResources(), bitmap);//圆⾓半径为正⽅形边长的⼀半roundedBitmapDrawable.setCornerRadius(bitmap.getWidth() / 2);//抗锯齿roundedBitmapDrawable.setAntiAlias(true);mImgRound.setImageDrawable(roundedBitmapDrawable);}}布局⽂件:<?xml version="1.0" encoding="utf-8"?><LinearLayout xmlns:android="/apk/res/android"xmlns:tools="/tools"android:id="@+id/activity_main"android:layout_width="match_parent"android:layout_height="match_parent"android:orientation="vertical"tools:context="com.cjl.roundedbitmap.MainActivity"><ImageViewandroid:id="@+id/img_rect_rounded"android:layout_width="200dp"android:layout_height="300dp"android:layout_marginTop="20dp"android:layout_gravity="center_horizontal"/><ImageViewandroid:id="@+id/img_rounded"android:layout_marginTop="20dp"android:layout_width="200dp"android:layout_height="200dp"android:layout_gravity="center_horizontal"/></LinearLayout>如有问题,欢迎指正,谢谢。
Android获取照片、裁剪图片、压缩图片
Android获取照⽚、裁剪图⽚、压缩图⽚前⾔在做上⼀个项⽬时深深受到了图⽚上传的苦恼。
图⽚上传主要分为两个部分,⾸先要获取图⽚,⽽获取图⽚可以分为从⽂件获取或者拍照获取。
第⼆个部分才是上传图⽚,两个部分都是⾛了不少弯路。
由于Android系统的碎⽚化⽐较严重,我们可能出现在第⼀台机⼦上能获取图⽚,但是换⼀个机⼦就不能获取图⽚的问题,并且在Android6.0,7.0之后也要做⼀定的适配,这样对于开发者来说,⽆疑很蛋疼。
由于也是初学者,很多东西没有考虑到,适配起来也是有点难度的。
这⼏天也是从github上找到了⼀个库(地址在这),经过简单的学习之后,发现⽤起来还是蛮简单的,并且在不同机型之间都能达到同样的效果。
更重要的是可以根据不同配置达到不同的效果接下来看下⽤法获取图⽚1)获取TakePhoto对象⼀)通过继承的⽅式继承TakePhotoActivity、TakePhotoFragmentActivity、TakePhotoFragment三者之⼀。
通过getTakePhoto()获取TakePhoto实例进⾏相关操作。
重写以下⽅法获取结果void takeSuccess(TResult result);void takeFail(TResult result,String msg);void takeCancel();这种⽅法使⽤起来虽然简单,但是感觉定制性不⾼,必须继承指定的Activity,⽽有时我们已经封装好了BaseActivity,不想再改了。
有时候通过继承⽆法满⾜实际项⽬的需求。
⼆)通过组装的⽅式去使⽤实现TakePhoto.TakeResultListener,InvokeListener接⼝。
在 onCreate,onActivityResult,onSaveInstanceState⽅法中调⽤TakePhoto对⽤的⽅法。
重写onRequestPermissionsResult(int requestCode, String[] permissions, int[] grantResults),添加如下代码。
Android实现圆形图片或者圆角图片
Android实现圆形图⽚或者圆⾓图⽚Android圆形图⽚或者圆⾓图⽚的快速实现,具体内容如下话不多说直接上codexml⽂件布局<LinearLayoutandroid:id="@+id/ll_headpict"android:layout_width="match_parent"android:layout_height="97dp"android:layout_margin="13dp"android:background="@drawable/shape_white_radius10_solid"android:gravity="center_vertical"android:orientation="horizontal"android:paddingLeft="25dp"><TextViewandroid:layout_width="0dp"android:layout_height="wrap_content"android:layout_weight="1"android:text="头像"android:textColor="@color/color4A4A4A"android:textSize="14sp"android:textStyle="bold" /><ImageViewandroid:id="@+id/iv_headpict"android:layout_width="60dp"android:layout_height="60dp"android:layout_marginRight="37dp"android:scaleType="fitXY"android:src="@mipmap/ic_headview_demo" /></LinearLayout>初始化控件之后⽤⼯具类加载//第⼀个参数上下⽂,第⼆个控件名称,第三个图⽚url地址,第四个参数圆⾓⼤⼩ViewUtils.loadImageRadius(this, mIvpict, stringUrl, 15);//头像ViewUtils.java⼯具类/*** Created by wjw on 2016/11/28* 倒圆⾓⼯具类*/public class ViewUtils {/*** 图⽚加载* @param context* @param iv* @param url*/public static void loadImage(Context context, ImageView iv, String url) {if(null ==context || null==iv){return;}if(Utils.isTxtEmpty(url)){try {Glide.with(context).load(R.mipmap.placeholder_icon) .dontAnimate().diskCacheStrategy(DiskCacheStrategy.ALL).into(iv);}catch (Exception e){}}else {try {Glide.with(context).load(url) .dontAnimate().diskCacheStrategy(DiskCacheStrategy.ALL).placeholder(R.mipmap.placeholder_icon).into(iv); } catch (Exception e) {}}}public static void loadImage(Context context, ImageView iv, int id) {if(null ==context || null==iv){return;}try {Glide.with(context).load(id) .dontAnimate().diskCacheStrategy(DiskCacheStrategy.ALL).placeholder(R.mipmap.placeholder_icon).into(iv); }catch (Exception e){}}/*** 本地图⽚* @param context* @param iv* @param id* @param radius*/public static void loadImage(Context context, ImageView iv, int id,int radius) {if(null ==context || null==iv){return;}try {Glide.with(context).load(id) .dontAnimate().diskCacheStrategy(DiskCacheStrategy.ALL).transform(new GlideRoundTransform(context, radius)).into(iv);}catch (Exception e){}}public static void setImageResource(ImageView iv, int id) {if(null!=iv){iv.setImageResource(id);}}/*** 加载⽹络图⽚(带圆⾓)* @param context* @param iv* @param url* @param radius*/public static void loadImageRadius(Context context, ImageView iv, String url, int radius) {if(null ==context || null==iv){return;}if(Utils.isTxtEmpty(url)){try {Glide.with(context).load(R.mipmap.placeholder_icon) .dontAnimate().diskCacheStrategy(DiskCacheStrategy.ALL).transform(new GlideRoundTransform(context, radius)).into(iv);}catch (Exception e){}}else{try {Glide.with(context).load(url) .dontAnimate().diskCacheStrategy(DiskCacheStrategy.ALL).transform(new GlideRoundTransform(context, radius)).placeholder(R.mipmap.placeholder_icon).into(iv);}catch (Exception e){}}}/*** 加载⽹络图⽚(圆形)* @param context* @param iv* @param url*/public static void loadImageCircle(Context context, ImageView iv, String url) {if(null ==context || null==iv){return;}if (Utils.isTxtEmpty(url)) {try {Glide.with(context).load(R.mipmap.placeholder_icon) .dontAnimate().diskCacheStrategy(DiskCacheStrategy.ALL).transform(new GlideCircleTransform(context)).into(iv);}catch (Exception e){}} else {try {Glide.with(context).load(url) .dontAnimate().diskCacheStrategy(DiskCacheStrategy.ALL).transform(new GlideCircleTransform(context)). placeholder(R.mipmap.placeholder_icon).into(iv);}catch (Exception e){}}}}效果如图圆⾓图⽚以上就是本⽂的全部内容,希望对⼤家的学习有所帮助,也希望⼤家多多⽀持。