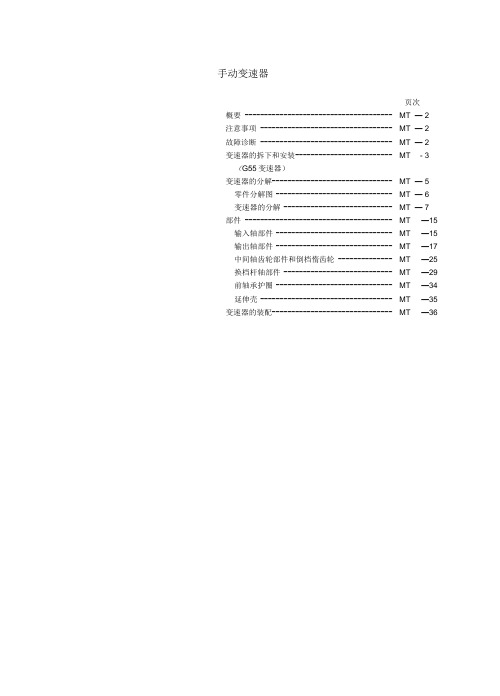
伊顿中型变速器拆装手册
简述拆卸变速器的步骤及注意事项
拆卸变速器的步骤及注意事项拆卸变速器是车辆维护保养中的一个重要步骤,其操作繁琐且需要一定的专业知识和技能。
本文将从简述拆卸变速器的步骤及注意事项出发,为您详细介绍这一过程。
一、准备工作1. 为了安全起见,首先确保车辆停稳在平整的地面上,并且将驻车制动器牢固地固定住。
2. 另外,要记得提前切断电池的正极,以免触电事故发生。
3. 准备好相应的工具,如扳手、起重机等。
二、拆卸步骤1. 拆下车身下的护板,以便于接下来的工作顺利展开。
2. 打开变速器油排放螺丝,将变速器油排放至容器中,避免污染环境。
3. 用扳手拆下变速器液压油管、传感器、电子线束等相关零部件。
4. 使用适当的工具,拆下变速器与发动机之间的螺栓。
5. 使用专业的起重机,小心地将变速器从发动机上卸下。
三、注意事项1. 操作过程中要保持工作环境干净整洁,避免异物进入变速器内部造成损坏。
2. 拆卸变速器时,需时刻保持注意力集中,防止因疏忽大意而造成意外伤害。
3. 拆卸后的变速器需妥善保管,避免受潮或遭受外部损坏。
总结回顾拆卸变速器是一项复杂且需要细心操作的工作,需要严格按照步骤进行,避免疏漏。
在操作过程中,注意事项更是至关重要,确保操作的安全性和有效性。
个人观点和理解作为一项维修保养工作,拆卸变速器需要严格遵循相关步骤和注意事项,以免造成不可挽回的损坏。
这也需要操作人员具备一定的专业知识和技能,因此建议在没有足够经验和技术的情况下,尽量寻求专业人士的帮助。
通过本文的介绍,相信您对拆卸变速器的步骤及注意事项有了更深入的了解。
在日常维护中,务必谨慎对待这一环节,以保障车辆的正常运行和安全。
拆卸变速器是一项需要专业技能和经验的工作,其复杂性和繁琐程度需要操作人员具备一定的专业知识和技能。
在进行拆卸变速器时,有一些特殊情况需要注意,接下来我将详细介绍这些情况以及应对方法。
当拆卸变速器时,操作人员需要特别注意变速器内部的液压系统,因为液压系统是变速器正常运行的关键。
简述变速器拆装的步骤
简述变速器拆装的步骤
变速器拆装的步骤通常包括以下几个步骤:
1. 准备工作:首先要确保车辆处于安全的工作状态,如将车辆停放在平坦的地面上,并拉起手刹。
然后,打开车辆的引擎盖,并用千斤顶将车辆抬起,以便能够更方便地接触到变速器。
2. 排除液压压力:在开始拆装变速器之前,需要排除液压压力,以免发生意外。
这通常可以通过拆下变速器油箱上的液压软管或者拆下变速器油底壳的油塞来实现。
3. 拆卸传动轴及连接件:在拆卸变速器之前,需要先拆卸传动轴和与之连接的部件。
这包括拆下传动轴的万向节和支撑架,拆掉传动轴和变速器的连接螺栓,以及拆下其他与变速器连接的零件。
4. 拆卸变速器支架:变速器通常是由支架支撑在车辆底盘上的,因此在拆卸变速器之前,需要先拆卸变速器支架。
这通常需要拆掉支架上的螺栓和螺母,然后将支架与变速器分离。
5. 拆卸变速器本体:最后,可以开始拆卸变速器本体。
这通常需要拆下变速器的油底壳、离合器套筒、换挡杆及其相关连接杆,以及变速器的其他零件。
拆卸过程中需要小心操作,以避免损坏变速器或其他零件。
完成以上步骤后,就可以将拆下的变速器进行维修、更换零件或安装新的变速器。
拆卸变速器后,也需要进行仔细清洁,以
防止污染变速器内部。
最后,根据逆序的顺序重新安装变速器和与之相关的零件,并确保每个零件正确定位、固定和连接好。
伊顿离合器安装手册(中英版)
7
7
器总成安装指导 - 带非快速拆卸式轴承
• 1.7. Install lockwashers and mounting bolts finger tight. Replace studs with lockwashers and bolts. Progressively tighten mounting bolts in a crisscross pattern starting with a lower bolt. Torque to 37-44 ft.lbs.(50-60N.m). • 1.7. 安装紧固螺栓和防松垫圈,用手拧紧。并将两个导向螺柱换成
2
2
1、I-Instruction of “Clutch Assembly” 离合器总成安装指导 - 带非快速拆卸式轴承
• 1.2. Install a new pilot bearing. The bearing must have a press fit. • Note1: Tap on the outer race only.Tapping on the inner race could cause damage to the pilot bearing. • Note2: Eaton strongly recommends the use of premium grade pilot bearing.The operating temperatures of the pilot bearing has increased the last several years.This creates operating conditions that are no longer acceptable to the standard pilot bearing and grease.Failure of the pilot bearing usually results in a warranty claim for drag and clutch noise. • 1.2. 在飞轮上正确安装新的导向轴承。轴承必须正确压装。 • 注意1:仅敲击外滚道。如敲击内滚道会导致对导向轴承的损伤。 • 注意2:伊顿强烈推荐使用高等级的导向轴承。导向轴承承受的温 度最近几年一直上升,这使标准的导向轴承和润滑脂不能满足工作 温度的要求。导向轴承工作性能出现问题会导致离合器拖扭或噪音。
变速器总成的拆装1

排气歧管与前排气管的固定螺母拧紧力矩为30N•M
排气管接头上的螺母拧紧力矩:35N•M
起动机的固定螺栓拧紧力矩为20N•M
传动轴防热罩、排气管固定支架固定螺母,拧紧力矩为20N•M
[文档可能无法思考全面,请浏览后下载,另外祝您生活愉快,工作顺利,万事如意!]
使用13mm梅花扳手和13mm套筒拧下排挡支撑杆上的固定螺母
取下螺栓,将支撑杆与变速器壳体分离
使用10mm套筒拧下离合块固定螺栓
取下离合块
(旁白)
用10mm梅花扳手拧下离合器防护板上的一个固定螺栓和螺母
取下离合器防护板
(旁白)
将变速器托架放置与变速器正下方,支撑变速器
用13mm梅花扳手拧下发动机前支撑的两个固定螺栓
用13mm套筒扳手拧紧起动机的1个固定螺栓,拧紧力矩为20N·m
用17mm套筒扳手拧紧排气歧管和前排气管的2个固定螺栓,拧紧力矩为30N•M
插好前氧传感器线束插头(发动机内容剪切过来)
(旁白)
安装蓄电池负极固定夹
用10mm开口扳手拧紧蓄电池正、负极固定夹上的固定螺母
关闭引擎盖
主目录标题4:(字幕/旁白) 四、技术要点
使用可调扭力扳手按照规定的力矩拧紧螺栓排气管接头上的两个螺母,拧紧力矩:35N•M
(旁白)
调整起动机,使起动机上的三个螺栓孔对准发动机上的三个固定孔
拧上起动机最下侧的固定螺栓
将传动轴防热罩上的螺栓孔对准起动机最外侧的固定螺栓孔
拧上起动机最外侧的固定螺栓
用13mm套筒扳手拧紧起动机的2个固定螺栓,拧紧力矩为20N•M
在拆卸前整理好需要用到的工具、器材及物品
清洁工作现场
变速箱拆装工艺流程

变速箱拆装工艺流程一 概述变速箱安装在液力变矩器的后面,来自变矩器的动力通过变速箱的输入轴传递到变速箱,再有驱动轴传递到前后驱动轴。
二 变速箱常见故障故障现象 检查结果 故障分析 故障排除 在某一档位行车无力或者无法行驶变速箱油底壳油发黑并有异味1.变速箱长期处于超载工作2.变速箱没有按运行时间进行换油3.频繁的突然变速操纵对离合片进行更换变速箱壳体上有渗油迹象变速箱前后盖有裂纹 深沟轴承磨损,变速箱在运行时,轴体发生圆跳动,频繁冲击壳体换新的深沟轴承三 需修装载机验收经过技术员对故障机器进行故障检查并确诊验收。
四 装载机大修前期处理将机器停在坚硬平整的地面上,将工作装置降至地面,并且堵塞住轮子,防止车辆移动,之左边:主动摩擦片右边;从动摩擦片均已经受到严重划伤和磨损后拆除司机室下面的外围挡板,再用高压水枪认真清洗机器表面和内部的泥土和油污,尤其是变速箱外围件。
六变速箱外围件拆除1.拆除并移走司机室。
2.解除变速箱上面的相关联的管路和电线。
3.取下发动机与变速箱的联结螺栓,两人配合用吊具吊出变速箱。
注意:a)在吊取变速箱时一定要确保变速箱平衡并且晃动小。
b)拆除的管道口要用布头堵住。
c)用遮布盖住发动机飞轮。
七变速箱安置将变速箱平稳安置在修理车间的特定位置,确保空旷平整清洁。
八变速箱总成分解1.拆解变速箱外围件。
2.解体变速箱的前后壳体。
3.两人配合取出变速箱三根主轴,之后拆除变矩器和停车制动离合器。
4.两人配合拆解各档位离合器和变矩器和壳体上各轴承。
注意:a)在拆解时一定要把零件进行分类分开摆放防止错乱。
b)在拆解停车制动中的保持器是一定要与壳体之间做好记号。
九零件清洗和除油将拆解的各个零件用超声波清洗机清洗(没有条件可用清洁柴油清洗),之后用压缩空气吹干净。
十技术员对零件鉴定并分类,同时记录需更换的零件号和数量1.技术员对清洁后的所有零件进行鉴定并分类为报废零件,可用零件,需修零件。
2.对需修零件进行修理,对报废零件进行记录,申报新的零件。
变速箱拆装全解(绝对好东西)
(b)拆下1档和2档换档叉。
使用尖头冲子和锤子从1档和2档换档头上敲出带 槽弹簧销。
(d)从轴上拆下1档和2档换档头。
(c)
16.
(5速)
测量5档中间轴齿轮的轴向间隙。
使用测隙规测量5档中间轴齿轮的轴向间隙。
标准间隙:0.10— 0.30毫米
最大间隙:0.30毫米
(5速)
拆下隔套的钢球
(a)拆下隔套。
(b)使用磁棒取出钢球。
19.拆下倒档换档臂托架
拆下2个螺栓和倒档换档臂托架。
拆下倒档惰齿轮和轴
(a)拧下倒档惰齿轮轴挡块固定螺栓并拆下挡块。
拆下后轴承护圈
使用扭力套筒扳手拆下4个螺栓。
(扭力套筒扳手T40 09042 — 00020)
拆下中间轴齿轮
(a)使用弹簧卡环钳拆下中间轴齿轮后轴承的弹簧卡环。
输入轴部件
零件分解图
(b)使用SST和12毫米套筒扳手拆下中间轴齿轮后轴承。
SST 09602 — 35011
(c)拆下中间轴齿轮。
拆下输入轴
从输出轴拆下带滚针轴承的输入轴和同步环。
拆下输出轴
(a)使用弹簧卡环钳拆下输出轴中间轴承的弹簧卡环。
(b)采用拉输出轴并同时用塑料锤子敲出中间板的方法, 从中间板拆下输出轴。
部件
使用弹簧卡环钳拆下2个弹簧卡环。
8.将中间板从变速器外壳分开
(a)如图所示固定住变速器。
(b)使用塑料锤子小心地敲出变速器外壳。
(c)如图所示从中间板上拆下变速器。
9.将中间板固定在台虎钳上
(a)如图所示使用2个离合器壳体螺栓、平板垫圈和适 当的螺母进行固定。
注意:要讲平板垫圈装在正常位置的相反一侧。采用增 加或减少平板垫圈的方法,使螺栓端部和螺母的前端面 相平齐。
变速器的拆装与调整

变速器的拆装与调整一、实践内容1)变速器传动机构的拆装。
2)变速器操纵机构的拆装与调整。
二、实践的目的与要求通用实际操作,熟悉三轴式变速器与二轴式变速器的分解与装合,掌握其操纵机构的拆装与调整。
三、教具和工具常用工具一套、铜棒一根、变速器拆装车一辆、二轴式变速器和三轴式变速器各一台、配套的挂图一套。
四、操作技能训练1.三轴式变速器的拆装与调整(以EQ1091为例进行分析)(1)自车上拆下变速器总成1)首先拆下与传动轴相连的万向节(注意:拆卸前应在传动轴凸缘叉和变速器二轴凸缘上作上装配标记)。
2)拆下倒车警报开关导线、速度表传动软轴。
3)拆下离合器分离拉杆锁紧件,使离合器踏板机构与离合器叉拉臂分离,拆下手制动器软轴接头等操纵机构连接件,拆下驾驶室内变速器盖板。
4)拆下固定在变速器壳体上的离合器助力分泵。
5)用变速器拆装车托住变速器总成,拆下飞轮壳与离合器壳之间的固定螺栓,拆下变速器与发动机后悬架及车架的固定螺栓。
6)拆下变速器总成。
(注意:应先将变速器第一轴沿轴向平稳退出后才可放下变速器总成)(2)三轴式变速器的分解(见图1)图1 变速器分解图1-第一轴后轴承内圈卡环 2-滚柱轴承及卡环 3-第一轴 4-隔环 5、20、32、40-滚针轴承 6-滚针轴承卡环 7-第一轴齿轮接合齿圈 8-第五、六挡同步器锁环 9、15、18、22-卡环 10-花键毂 12-定位块 13-推块 14-第五、六挡结合套 16-第二轴五档齿轮 17-第五档齿轮滚针轴承 19-四档齿轮衬套 21-第二轴四档齿轮 23-第三、四挡齿轮接合齿圈24-第三、四挡同步器锁环 25-花键毂 26-第三、四档结合套 27-第二轴三挡齿轮 28、33-隔套 29防转销 30-第二轴 31-第二轴二档齿轮 34-第二档同步器总成 35-第一档接合齿圈 36-第二轴一挡齿轮 37-一挡齿轮衬套 38-倒挡齿轮接合齿圈 39-倒挡齿轮接合套41-倒挡齿轮衬套 42-第二轴倒挡齿轮 43-倒挡齿轮止推垫 44-后盖油封总成 45-挡尘罩总成 46-第二轴凸缘 47、62-O形环 48-锁紧螺母 49-第一轴轴承盖螺栓 50-第一轴轴承盖 51-密封垫 52-第一轴油封总成 53-外壳 54、67-衬垫 55-取力孔盖板 56-取力孔盖板螺栓 57-速度表齿轮标牌 58-变速器标牌 59-加油螺塞 60-放油螺塞 61-垫圈 63-偏心套 64-速度表传动齿轮 65-偏心固定螺栓 66-蜗杆 68-后盖 69-后盖螺栓1)拆下放油螺塞,放尽齿轮油。
伊顿9速同步变速器说明书
Eaton 9-Speed Synchronized Transmissions Double “H” Shift Control ConfigurationTRDR0070February 2008FS(O) 6109FS(O) 6209FS(O) 6309FS(O) 8209FS(O) 8309FS(O) 10209FS(O) 10309Warnings and CautionsRead the entire driver instruction before operating this transmission.Set the park brakes before starting the vehicle, always be seated in the driver's seat, move the shift lever to neutral, and depress the master clutch.If engine cranks in any gear other than neutral or without the master clutch depressed, service your vehicle neutral safety start circuit immediately (where a safety start circuit is fitted).Before working on a vehicle, parking the vehicle, or leaving the cab with the engine running, place the transmission in neutral, set the parking brakes, and block the wheels.Do not release the parking brake or attempt to select a gear until the air pres-sure is at the correct level.TOWING: To avoid damage to the transmission during towing, place the trans-mission in neutral and lift the drive wheels off the ground or disconnect the driveline.iWarnings & Cautions (i)Introduction (1)Tag Information (1)Operation (2)Nomenclature (2)Shift Pattern (2)General Information (3)High to Low Range Shifting (3)Driving Tips (4)Initial Start-Up (5)Upshift (5)Downshift (6)Service & Maintenance (7)Proper Lubrication (7)Mixing Oil Types (7)Proper Transmission Lubrication Levels (8)Lubricant Change Intervals (9)Operating Temperatures (10)Lubricant Change (11)Maintenance Checks (12)Tag InformationTransmission model designation and other transmission identification information are stamped on the transmission tag. To identify the transmission model designation and serial number, locate the tag on the transmission and then locate the numbers as shown.IMPORTANT: DO NOT REMOVE OR DESTROY THE TRANSMISSION IDENTIFICATION TAG.Transmission TagRecord the Transmission Model and Serial Number below. Have these reference numbers handy when ordering replacement parts or requesting service information:Transmission Model:Transmission Serial Number:Every effort has been made to ensure the accuracy of all information in this manual. However, Eaton Truck Components Operations makes no expressed or implied warranty or representation based on the enclosed information. Any errors or omissions may be reported to Eaton Corporation, Truck Components, Global Marketing Services, P.O.Box 4013, Kalamazoo, Michigan, 49003.1NomenclatureShift PatternCNote: The shift lever is cross gate biased and will rest naturally in 3rd / 4th gate position when in LOW and in 5th / 6th gate position when in HIGH.The cross gate bias could vary or may be omitted depending on thevehicle manufacturer. Ensure you are familiar with this before driving the vehicle2General Information9-Speed Double “H”Models in this series provide nine forward speeds and one reverse speed, consisting of a five-speed front section and a two-speed auxiliary range section.Crawler gear (C) in the front section is used only as a starting gear. The other four ratios are used once in LOW range and once again in HIGH range.After shifting out of Crawler gear, shift the remaining gears in LOW range and HIGH range as you would shift any synchronized transmission.Shift range from LOW to HIGH and HIGH to LOW by moving the shift lever fully to the right or fully to the left as described in the Operation section. The transmission will automatically make the synchronized range shift as the shift lever is moved fully left or right.High to Low Range ShiftingNever attempt to shift down at too high a vehicle speed as this will result in major damage to the driveline.Note: Some vehicles are fitted with a range shift over-speed protection device in conjunction with the vehicle manufacturer. Never assume a rangeover-speed device is fitted.As a guide never shift from HIGH range to LOW range above 30 kph - not even if the vehicle is in neutral and the clutch pedal is depressed.Note: This speed will vary based on the overall driveline configuration.3Shift Pattern DiagramsA shift pattern diagram / etched shift knob should be in your vehicle (depending on vehicle manufacture).Driving Tips•Always use the clutch when making up shifts or down shifts.Premature synchronizer failure can result from not using the clutch.•Always select an initial starting gear that provides sufficient reduction for load and terrain.•Never slam or jerk the shift lever to complete gear engagement.•Never coast with the shift lever in the neutral position.•Never downshift at too high of a road speed.•Never shift to crawler gear (C) while the vehicle is moving.•Never select reverse gear while the vehicle is moving.4Initial Start-UpBefore starting the vehicle, always be seated in the drivers seat, move the shift lever to neutral, and depress the master clutch fully.Before moving a vehicle, make sure you understand your shift pattern configuration.1.Make sure the shift lever is in neutral, the range section is in LOW,and the parking brakes are set.2.Turn on the key switch. Start the engine.3.Build up the air pressure to cut off.4.Apply the service brakes.5.Depress the clutch pedal to the floor.6.Move the shift lever to the desired initial gear.7.Release the parking brakes.8.Slowly release the clutch pedal and apply accelerator.In the following instructions it is assumed that the driver is familiar with operating a commercial vehicle and can coordinate the shift lever movement and clutch pedal to make a smooth gear engagement while upshifting and downshifting.Upshift1.Fully depress the clutch pedal. Move the shift lever to the nextdesired speed.2.Release the clutch pedal.3.Accelerate the vehicle.4.Continue upshifting to 4th speed.5Range Shift Low to High (4th to 5th)1.When in the last LOW range gear position (4th) and ready for thenext upshift, with the engine / vehicle speed at a point that will allowthe vehicle to accelerate.2.Release the accelerator.3.Fully depress the clutch pedal. Move the shift lever to neutral.4.Move the shift lever fully RIGHT for a short period - doing this willtrigger the range valve to automatically shift the transmission toHIGH range.5.Allow the shift lever to return to its natural cross gate position.6.With the clutch still depressed shift to 5th speed.7.Release the clutch and apply the accelerator.8.Continue upshifting to 8th speed.Downshift1.Fully depress the clutch pedal, move the shift lever to the nextdesired speed.2.Release the clutch pedal.3.Continue downshifting to 5th speed.Range Shift High to Low (5th to 4th)1.When in the last HIGH range gear position (5th) release theaccelerator.2.Fully depress the clutch pedal. Move the shift lever to neutral.3.Move the shift lever fully LEFT for a short period - doing this willtrigger the range valve to automatically shift the transmission toLOW range.4.Allow the shift lever to return to its natural cross gate position.5.With the clutch still depressed shift to 4th speed.6.Release the clutch.7.Slow the vehicle and continue downshifting.Note: Never shift to crawler gear (C) while the vehicle is moving.6Proper LubricationProper lubrication procedures are key to a good all-around maintenance program. If the lubricant level is ignored, all the maintenance procedures in the world are not going to keep the transmission running or assure long transmission life.Eaton transmissions are designed so that the internal parts operate in an oil circulating bath created by the motion of the gears and shafts.All parts will be lubricated if these procedures are closely followed:•Maintain oil level and inspect regularly.•Follow maintenance plan.•Use correct grade and type of oil. Prolonged oil change will cause internal damage.•Do not overfill as this causes overheating and effects fuel economy.•Buy from a reputable dealer.Mixing Oil TypesNever mix engine oils and gear oils in the same transmission.Note: Additives and friction modifiers must not be introduced. Engine oils and gear oils may not be compatible; mixing can cause breakdown of thelubricant and affect component performance. When switching between types of lubricants, all areas of each affected component must bethoroughly flushed.7Proper Transmission Lubrication Levels•Make sure the transmission lubricant is level with the bottom of the fill opening.Always check the oil on level ground•8Lubricant Change Intervals•Lubricant change intervals will be included in the vehicle operating handbook and will be defined based on the type of oil used and theoperating conditions.•As a base rule the following should be followed:Mineral Oils* On Highway UseInitial oil change -At the operator’s discretion.Every 20,000 km -Inspect oil level and check for leaks.-Change oil (see Note below) Every 100,000 km (orannually)Note: Whichever comes first.* Off Highway UseInitial oil change -At the operator’s discretion.Every 40 hours -Inspect oil level and check for leaks.Every 500 hours -Change oil (see Note 1 below)Every 1000 hours -Change oil (see Note 2 below)Note 1: Oil change - where severe dirt conditions exist.Note 2: Oil change - where normal conditions exist.910Operating TemperaturesTransmissions must not be allowed to operate at temperatures above 120o C (250o F). Operating above this temperature causes loaded gear toothtemperatures to exceed 177o C (350o F), which will ultimately destroy the heat treatment of the gears. If the elevated temperature is associated with an unusual operating condition that will recur seek advice from your vehicle manufacturer.Synthetic / Semi-Synthetic Oils* On Highway UseEvery 20,000 km-Inspect oil level and check for leaks.Every 300,000 km to500,000 km- OR -Every 3 years - -Change oil (see Note below)Change oil.Note: Mileage will depend on type of oil used.* Off Highway UseEvery 40 hours-Inspect oil level and check for leaks.Every 500 hours-Change oil (see Note below)Every 1000 hours -Change oil (Normal operation)Note: Change oil where severe dirt conditions exist.Lubricant ChangeDraining OilHot oil may be present during this activity.•Drain the transmission when the oil is warm.•Remove the two drain plugs from the transmission.•Clean the oil strainer before replacing it.•Replace copper washer / o-ring as required.Re-filling•Fill transmission to the level of the filler opening.•Do not inter mix different types of brands of oil.•Do not use additives i.e. friction modifiers.•Do not overfill the transmission, as this will cause overheating and may cause oil leaks through the input and output shaft oil seals. 11Maintenance ChecksConduct regular maintenance checks where possible regarding:-Clutch mechanism -General operation-Lubricant-Correct level-Filler and drain plug -Correct tightness / damage towashers-Cap screws and gaskets -Loose / oil leaks-LRC / Shift tower -Secure / free play / wear12Copyright Eaton Corporation, 2012.Eaton hereby grant their customers,vendors, or distributors permission to freely copy, reproduce and/or distribute this document in printed format. It may be copied only in its entirety without any changes or modifications. THIS INFORMATION IS NOT INTENDED FOR SALE OR RESALE, AND THIS NOTICE MUST REMAIN ON ALL COPIES.Note: Features and specifications listed in this document are subject to change without notice and represent the maximum capabilities of the software and products with all options installed. Although every attempt has been made to ensure the accuracy of information contained within, Eaton makes no representation about the completeness, correctness or accuracy and assumes no responsibility for any errors or omissions. Features and functionality may vary depending on selected options.For spec’ing or service assistance, call 1-800-826-HELP (4357) or visit /roadranger.In Mexico, call 001-800-826-4357.Eaton Corporation Vehicle Group P .O. Box 4013Kalamazoo, MI 49003 USA 800-826-HELP (4357)/roadrangerPrinted in USA Roadranger: Eaton and trusted partners providing the best products and services in the industry, ensuring more time on the road.。
- 1、下载文档前请自行甄别文档内容的完整性,平台不提供额外的编辑、内容补充、找答案等附加服务。
- 2、"仅部分预览"的文档,不可在线预览部分如存在完整性等问题,可反馈申请退款(可完整预览的文档不适用该条件!)。
- 3、如文档侵犯您的权益,请联系客服反馈,我们会尽快为您处理(人工客服工作时间:9:00-18:30)。
Pacific Rim
•FAW •YTB
伊顿卡车客车零部件(上海)有限公司
2. 型号的定义:
FSO–6406A
富勒同步器式 Fuller Synchronized
速比组
带超速档 Overdrive
前进档数 设计级别 X 136=额定的扭矩
变速器的型号和编号都被印 刻在变速器的铭牌上,在寻 求服务时,请记下变速器的 型号和编号。它将有助于您 尽快的得到技术支持。
检查离合器壳法兰上的螺栓是否有松动的现象。 离合器分离轴承
拆下维修孔盖,检查分离轴承的径向和轴向间隙。 检查分离轴承止推面和推式离合器止推套的相对位置 离合器踏板的轴和孔(3) 将轴向上撬起检查其磨损情况,若发现存在过大间隙,应拆下 离合器的分离机构检查轴孔的衬套及轴的磨损 加油螺塞和放油螺塞(5) 拆下加油螺塞,按规定的时间间隔检查润滑油油面,应拧紧加 油螺塞和放油螺塞。 螺栓和垫片(6) 检查所有的螺栓和垫片,看是否存在螺栓松动或垫片缺损现象 而造成的润滑油的泄露,特别是取力器孔盖和后轴承盖。 变速操纵杆(7) 检查变速操纵杆在杆座中的松动量和自由行程,如果过于松动 ,检查变速操纵杆及杆座总成。
NAFTA
•Navistar •GMC •Ford •Freightliner •Sterling •RVI/Mack •Mercede-Benz •Kenmex •Dina •Bering/Hyundai
South America
•GMC •Ford •VW •Navistar/Agrale •Iveco •Isuzu •Mercedes
• 采用细齿啮合套,换档平稳; • 由于增加杠杆比、减小换档行程和采用新的摩擦材料,使得换档非常
轻便 • 自1998年开始在1、2档采用获得专利的低换档力同步器技术,使得1
、2档换档轻便灵活; • 主轴和中间轴采用滚锥轴承,从而获得更高的承载能力和更长的使用
寿命; • 由于增加了齿宽和采用高摩擦系数的EFM II Pyrolitic Carbon同步器
8406A的维护和保养
伊顿卡车客车零部件(上海)有限公司
1.伊顿®富勒®中型变速器简介
许用最大输入扭矩569-1166N.m; 全同步器式。 有5档和6档两大类。 目前在国内应用的以FS-6406A、FSO-6406A和FSO8406A 6档变速器为主。
伊顿卡车客车零部件(上海)有限公司
主要用户
伊顿变速器品牌: Fuller®(富勒) Roadranger ®
伊顿中型变速器
伊顿卡车客车零部件(上海)有限公司
2002年3月
目录
1.伊顿®富勒®中型变速器简介 2. 型号的定义: 3.FS-6406A / FSO-6406A /FSO-
8406A特点 4.FS-6406A / FSO6406A/FSO-
58
2.52
FSO-8406A 1166 9.04
1.00 .78 .78
36 28 28
1.36 1.00 1.00
50 59 59
2.04 1.59 1.59
64 64 64
5.27 4.13 4.13
71 71 71
9.01 7.05 7.05
8.63 6.75 6.75
58
2.52
伊顿卡车客车零部件(上海)有限公司
Europe +
•Volvo •RVI •Iveco •Foden •ERF •Leyland-DAF •Seddon-Atkinson •JBC •Marsall •Dennis •Toyota S. Africa •Chrylser Turkey •Otosan Turkey •BMC Turkey •UralAZ Russia •Roman Romania •SNVI Algeria •Telco India •Paco Pakistan
伊顿卡车客车零部件(上海)有限公司
3.FS-6406A /FSO-6406A/FSO-8406A 特点 ---优良的性能,出色的可靠性,换档快速、轻便、平稳、舒适
型号
最大扭矩 速比 倒 N.m 范围 档
1
%
2
%
3
%4%5% 6
58
3.22
FS-6406A FSO-6406A
9.01 895
9.04
伊顿卡车客车零部件(上海)有限公司
伊顿卡车客车零部件(上海)有限公司
伊顿卡车客车零部件(上ห้องสมุดไป่ตู้)有限公司
伊顿卡车客车零部件(上海)有限公司
4 FS/FSO-6406,8406A变速器的维护和保养 4.1保持正确的润滑油量 确保润滑油的油面与加油孔平齐。用你的手指能碰到油
面并不意味着润滑油的油量合适。
伊顿卡车客车零部件(上海)有限公司
润滑油量(推荐值)
型号
FSO-42/5205 FS-62/6305 FS-53/6305 FS-5406 FS/FSO-6406 FSO-8406
最大值(升)
5.43 8.99 8.51 8.51 9.22 9.22
伊顿卡车客车零部件(上海)有限公司
4。2拆卸变速器前进行检查 离合器壳的安装(1)
材料,是变速器的使用寿命更长; • 由于采用计算机设计的常啮合斜齿轮,从而提高齿轮强度降低噪声; • 采用本体总称可派生出Autoshift • 较高许用输入扭矩 • 较高的速比覆盖范围 • 可选装左、有侧置和后置的取力器; • 有直接、距离操纵、杆式或软轴操纵供选择;
伊顿卡车客车零部件(上海)有限公司
伊顿卡车客车零部件(上海)有限公司
变速操纵杆及杆座总成(8) 把变速操纵杆及杆座总成从变速器上拆下。 检查压簧和垫片的定位和磨损情况。 检查变速操纵杆下端的磨损情况,并检查上盖中拨叉和滑块槽 与变速杆相接触位置的磨损情况。
伊顿卡车客车零部件(上海)有限公司
4.3传动系脱开时的检查 万向节配对法兰或节叉螺母
检查其紧固程度,将其紧固到推荐值 输出突缘(锁紧螺母已紧固)
向上撬起输出突缘以检查主轴后轴承的径向间隙 4.4拆下万向节配对法兰或节叉检查
输出轴花键(11) 通过万向节配对法兰或节叉的运动和骤停来检查其磨 损情况。 主轴后轴承盖(12) 检查油封的磨损情况
伊顿卡车客车零部件(上海)有限公司
4.5 拆卸和安装变速器操纵杆 从变速器操纵杆座上拆下4个紧固螺栓。 轻击壳体以破坏密封垫片。 拆下变速器操纵杆杆座和垫片并清理表面