硬件KCB用户手册
GW200KB产品手册

无线选择,就在华荣汇! 产品手册 版本号:V1.0.0GW200KB RF Modem Array产品特征:z支持RS485/RS232/TTL接口z 64个频道z可以软件修改频道z可以硬件修改频道z可以软件修改波特率z可以软件修改发射功率装配结构图Un i t:mm引脚说明(8PIN_2.0mm插座)PIN# I/O 引脚说明DIN I 串口输入到GW200KB, 可选择RS232或3.3V/5V兼容 TTL 逻辑电平。
DOUT O 串口数据从GW200KB输出, 可选择RS232或3.3V/5V兼容 TTL 逻辑电平。
A I/O RS485接口A线(485+),使用RS485接口时COM焊盘必须开路。
B I/O RS485接口B线(485-),使用RS485接口时COM焊盘必须开路。
GND I/O 公共地。
VCC I GW200KB电源输入,GW200KB内部集成有LDO。
/SET I 配置或者正常工作模式选择信号输入,低电平将使GW200KB进入配置模式,此时串口的数据将被视为配置指令而不会被传送出去。
/RST I 复位信号输入,低电平将使GW200KB复位,复位脉冲低电平宽度至少需要10uS。
ANTENNA I/O 天线接口,50欧姆阻抗。
PCB焊盘跳线(选择TTL、RS232或RS485接口)GW200KB串口电平COM 焊盘状态 DIN和DOUT A和B 断 开 RS232接口电平。
RS485接口电平短 路 3.3V/5V兼容TTL接口电平。
―― JP1-JP5跳线,用来选择上电后默认的工作频道,跳线表如下。
设置的频道=跳线的16进制值×2JP5 JP4 JP3 JP2 JP1 CH# JP5 JP4 JP3 JP2 JP1 CH# ON ON ON ON ON 0 OFF ON ON ON ON 20 ON ON ON ON OFF 2 OFF ON ON ON OFF 22 ON ON ON OFF ON 4 OFF ON ON OFF ON 24 ON ON ON OFF OFF 6 OFF ON ON OFF OFF 26 ON ON OFF ON ON 8 OFF ON OFF ON ON 28 ON ON OFF ON OFF A OFF ON OFF ON OFF 2A ON ON OFF OFF ON C OFF ON OFF OFF ON 2C ON ON OFF OFF OFF E OFF ON OFF OFF OFF 2E ON OFF ON ON ON 10 OFF OFF ON ON ON 30 ON OFF ON ON OFF 12 OFF OFF ON ON OFF 32 ON OFF ON OFF ON 14 OFF OFF ON OFF ON 34 ON OFF ON OFF OFF 16 OFF OFF ON OFF OFF 36 ON OFF OFF ON ON 18 OFF OFF OFF ON ON 38 ON OFF OFF ON OFF 1A OFF OFF OFF ON OFF 3A ON OFF OFF OFF ON 1C OFF OFF OFF OFF ON 3C ON OFF OFF OFF OFF 1E OFF OFF OFF OFF OFF 0技术参数参 数 测试环境 最小值 典型值 最大值 单位供电电源 使用RS232和TTL接口 3.0 5.0 8 V 使用RS485接口 4.9 5.0 8 V电流消耗 待机模式(1.5秒后会被WDT复位退出待机模式)1 mA 接收模式 32 mA 发射模式(19dBm输出功率,+5V) 110 mA工作频率范围 404.420 435.920 MHz 调制方式 FSK调制频偏 43.2 KHz 发射功率范围 VCC=+5V -10 20 dBm最大发射功率 VCC=+3.3V 16 17 dBm VCC=+5V 18.5 20接收灵敏度 2400bps -115 -118 -120 dBm 天线阻抗 50 ohm 接口速率 1200 115200 bps 传输延迟 9600bps 5 mS 上电初始化延迟 VCC=3.3V 250 mS /RST引脚复位初始化延迟 1 mS 工作温度范围 -20 25 65 ℃ 存储温度范围 -55 25 125 ℃ 湿度范围 10 20 90 % 外型尺寸 52.1(L)×34.3(W)×7(H) mm出厂默认设置频道跳线设置波特率9600bps校验None数据位8停止位 1参数配置(参数配置期间/SET信号必须置低)帧结构用户下发:0xAA+Command+Data0+Data1+0xBBGW200KB应答:0xAA+0x4F+PA_Now+CH_Now+RSSI_Now+0xBB指令集Command R/W Data0 Data1 说明0x40 W 任意值 任意值 握手指令0x46 W 任意值 任意值 获取上一次收到数据的信号强度0x49 W PA_SET CH_SET设置上电后的发射功率,掉电后参数保存,设置工作频道,但工作频道在重新上电后,以硬件调频为准。
keb变频器操作手册

keb变频器操作手册可按照如下步骤进行调试1 调试准备2 同步机曳引机自学习3 速度选择说明4 抱闸配合调节5 速度曲线调节1 调试准备调试前请确认如下事宜:1)变频器安装正确,输入L1,L2,L3接线正确,输出U,V,W与电机连接电缆相序是否正确,制动电阻接线。
2)变频器,曳引机,编码器接地良好,零地分开,编码器线缆双端都接地良好。
2 同步曳引机自学习曳引机自学习是一个很重要的步骤,检测编码器相对电机转子的机械位置。
是驱动曳引机正常运作的前提。
各电梯生产厂家通常在厂内完成曳引机自学习,并有曳引机零位(CP.24)给出。
如果厂家没有完成自学习,可按以下步骤进行。
自学习条件:曳引机空载,吊起轿箱,钢丝绳与挂起,电梯转换到检修,用检修运行,来给变频器使能和松开抱闸。
1 设置电机参数,CP.1-CP.7CP.1 PM Rated Current(电机额定电流)CP.2 PM Rated Speed(电机额定转速)CP.3 PM Rated Frequency(电机额定频率)CP.4 PM EMK Voltage Constant(千转反电势)CP.5 PM Rated Torque(曳引机额定转矩)CP.6 PM Winding Resistance(线圈电阻)CP.7 PM Winding Inductance(线圈电抗)2 并且用CP8设置成1,做电机自适应。
CP.8 Motor Adaption(电机自适应)3 确认编码器类型和线数正确,将CP24设置为2206,检修运行,确认抱闸打开,无摩擦,电机无负载,即开始自学习。
CP.22 Encoder Pulse Number(编码器线数)CP.24 System Position(编码器位置)4 自学习时电机的电流会逐步升高至额定电流,同时CP.24值也在不停地跳变直至停止,一般持续2~3分钟。
当CP.24所显示值保持一段时间(30秒)无变化时,说明自学习完成。
NB核心板K1使用说明书.V10

NB核心板K1使用说明书.V10前言NB核心板K1由深圳市容辉信息科技有限公司研发和设计,开发板专业实用,小巧精致,有助于用户快速了解和开发NB通信产品。
核心板配套测试例程基于主流的STM32CUBEMX软件和KEIL MDK5软件开发。
测试例程注释详细,逻辑清晰,让懂得单片机C语言的用户能快速理解。
本文档免费开源,提供给读者参考;如有疏漏,请读者批评指正。
一、NB核心板1.STM32底板1)STM32底板支持7V-15V输入,带TVS防护和ESD防护,带工业级有源硅晶振(超强稳定性、无温飘),带EEPROM。
2)STM32底板的单片机为STM32F103RET6,带512KB的FLASH和64KB的RAM,外设资源丰富。
3)STM32底板预留了1.25间距的5P端口,SW模式,方便下载程序。
4)STM32底板预留两路串口、两路ADC、一路SPI,方便用户使用杜邦线连接其它设备。
5)STM32底板的串口连接如下:USART1连接NB核心板USART2连接RS232母口USART3连接RD模块UART4连接定位模块UART5连接BLE模块HC08,方便一些用户使用手机APP来控制开发板。
(购买完整开发板的用户,将赠送一块HC-08 BLE蓝牙模块)2.NB核心板K1核心板K1小巧精致,2层板,带阻抗匹配,带SIMCOM公司主流的SIM7020C模块,带TVS/ESD防护,性能高度稳定,用户可以将它直接扣在产品使用。
二、核心板使用方法1.接入NB天线(请不要上电,严禁带电插拔天线)2.插上NB卡(请不要上电,严禁带电插拔SIM卡)3.把核心板和SIM32底板对扣在一起。
用户也可以把核心板和自己的底板对扣,或者用杜邦线连接。
请注意VIN的电压范围是2.1V-3.6V。
4.插上电池(环境温度:-20℃~55℃)也可以用电源适配器7V-15V,电流输出能力大于1A。
5.用RS232转USB线连接开发板的串口母座和电脑6.打开串口调试助手波特率115200,选择好端口号如果用户有可以测试的服务器IP地址(域名)和端口号,就可以在服务器端打开TCP/UDP 测试软件,进行上传和下发测试。
Bosch-CAN用户手册中文版

1. C_CAN用户手册1术语和缩写Terms and AbbreviationsThis document uses the following terms and abbreviations.这个文档使用到以下的术语和缩写。
Term MeaningCAN Controller Area Network控制器局域网BSP Bit Stream Processor位流处理器BTL Bit Timing Logic位时间机制CRC Cyclic Redundancy Check Register循环冗余码校验冗余DLC Data Length Code数据长度编码EML Error Management Logic错误管理机制FSM Finite State Machine有限动作状态TTCAN Time Triggered CAN 时间触发通讯的控制器局域网2. C_CAN用户手册2Functional Description功能简介C_CAN是可以作为单独或集成ASIC一部分的CAN总线模块。
用硬件描述语言描述C_CAN综合到逻辑器件。
它包含CAN内核、消息RAM、消息处理状态机、控制寄存器和模块接口。
CAN 内核通信符合CAN协议规范2.0A和2.0B。
在使用中位速率可以编程达到1M/S。
硬件连接物理层需在接收发射器。
在CAN网络中通信,每个消息目标需要设定,接收的消息目标和识别符掩码存储到消息RAM中。
所有关于消息处理是在消息处理状态器中完成。
这些功能包括消息过滤、CAN 内核与消息RAM之间的通信和消息发送中断请求并产生中断模块。
C_CAN中的寄存器组可以通过接口模块被外器CPU访问。
这些寄存器用于控制或配置CAN内核和消息处理状态机,并存储到消息RAM。
在C_CAN模块中的接口模块可以定制成适合于用户使用的模块接口。
C_CAN具有以下的功能特性:支持CAN协议怎版本2.0A和版本2.0B位速度达到1M/S32 个消息目标(在消息RAM 中有32个可以自定义接收或发送的消息目标)每个消息目标有自己的识别符掩码可编程的FIFO模式(消息目标在FIFO中连续存放)可屏蔽中断对于时间触发的CAN应用可以取消自动重传模式在自己测试操作可以设计成循环模式(重复发关这一个消息)兼容摩托罗拉公司HC08 的8位单处理模块接口对ARM内核有2个16 位的接口模式给AMBA ABB 总路线3. C_CAN用户手册3模式结构Block DiagramCAN CoreCAN 内核CAN 协议控制器和接收与发送移位寄存器完成消息的并行或串行转换Message RAM消息RAN存储消息目标和识别符掩码Registers寄存器所有寄存器用于控制和配置C_CAN模块Message Handler消息状态处理机控制数据在CAN内核接收与发送移位寄存器与消息RAM 之间的传送,也在控制和配置寄存器中产生中断Module Interface模块接口到目前为止,C_CAN模块被分成3种不同的接口。
德国KUKA(库卡)机器人操作手册
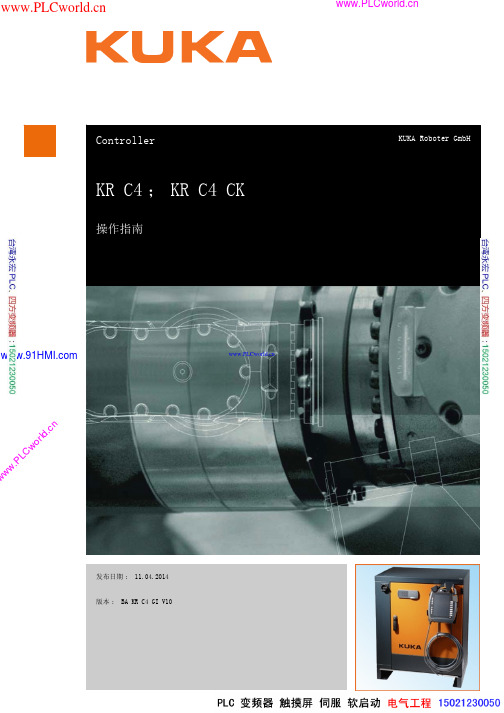
发布日期: 11.04.2014版本: BA KR C4 GI V10www.P LCwo r l d.c n© 版权 2014KUKA Roboter GmbH Zugspitzstraße 140D-86165 Augsburg 德国此文献或节选只有在征得库卡机器人集团公司明确同意的情况下才允许复制或对第三方开放。
除了本文献中说明的功能外,控制系统还可能具有其他功能。
但是在新供货或进行维修时,无权要求库卡公司提供这些功能。
我们已就印刷品的内容与描述的硬件和软件内容是否一致进行了校对。
但是不排除有不一致的情况,我们对此不承担责任。
但是我们定期校对印刷品的内容,并在之后的版本中作必要的更改。
我们保留在不影响功能的情况下进行技术更改的权利。
本文件为原版文件的翻译。
KIM-PS5-DOC出版物:Pub BA KR C4 GI (PDF) zh 书页构造:BA KR C4 GI V11.2版本:BA KR C4 GI V10www.PLC wo r l d.c n1引言 .............................................................91.1工业机器人文献 .........................................................91.2提示的图示 .............................................................91.3商标 ...................................................................91.4所用概念 ...............................................................102对象和用途 .......................................................132.1目标群体 ...............................................................132.2按规定使用 .............................................................133产品说明 .........................................................153.1工业机器人概览 .........................................................153.2机器人控制系统概览 .....................................................153.3库卡 Power Pack ........................................................173.4库卡 Servo-Pack ........................................................173.5控制系统 PC ...........................................................173.6控制柜 .................................................................183.7安全接口板 .............................................................193.8旋转变压器数字转换器 ...................................................193.9控制器系统面板 .........................................................193.10低压电源件 .............................................................203.11外部24 V 供电电源 ......................................................203.12蓄电池 .................................................................203.13电源滤波器 .............................................................213.14总线用户 ...............................................................213.14.1KCB 用户 .............................................................213.14.2KSB 用户和配置类型 ...................................................223.14.3KEB 用户和配置类型 ...................................................223.15接线面板接口 ...........................................................243.16电机插头 Xxx、附加轴 X7.1 和 X7.2 ......................................253.16.1电机插头 X20 的插头配置 ..............................................263.16.2重载荷件 X20.1 和 X20.4 插头配置 .....................................273.16.3附加轴 1 插头配置 X7.1 ...............................................283.16.4附加轴 1 和 2 插头配置 X7.1 和 X7.2 .................................283.16.5 4 轴重载型卸码垛机器人插头配置 X8 ....................................293.16.6 4 轴卸码垛机器人插头配置 X20 .........................................303.16.7 5 轴重载型卸码垛机器人插头配置 X20.1 和 X20.4 ........................313.16.8 5 轴卸码垛机器人插头配置 X20 .........................................323.16.9X81(4 轴)插头配置 .................................................333.16.10X82(8 根轴)插头配置 ...............................................343.16.11卸码垛机器人附加轴 1 插头配置 X7.1 ...................................343.16.12卸码垛机器人附加轴 1 和 2 插头配置 X7.1 和 X7.2 ......................353.17多功能接线板 X81,单个插头 X7.1...X7.4 .................................353.17.1X81(3 轴)插头配置 .................................................363.17.2X81(4 轴)插头配置 .................................................373.17.3X81、X7.1(5 轴)插头配置 ...........................................383.17.4X81、X7.1 和 X7.2(6 轴)插头配置 ...................................39目录www.P LC wo r l d.c n3.17.5X81、X7.1...X7.3(7 轴)插头配置 .....................................403.17.6X81、X7.1...X7.4(8 轴)插头配置 .....................................413.18单个插头 X7.1...X7.8 ....................................................433.18.1X7.1...X7.3(3 轴)插头配置 ..........................................443.18.2X7.1...X7.4(4 轴)插头配置 ..........................................453.18.3X7.1...X7.5(5 轴)插头配置 ..........................................463.18.4X7.1...X7.6(6 轴)插头配置 ..........................................473.18.5X7.1...X7.7 插头配置(7 轴) .........................................493.18.6X7.1...X7.8(8 轴)插头配置 ..........................................513.19控制系统 PC 机接口 ......................................................523.19.1主板 D2608-K 接口 ....................................................533.19.2主板 D3076-K 接口 ....................................................543.19.3主板 D3236-K 接口 ....................................................553.20库卡 smartPAD 支架(选项) ..............................................563.21柜冷却装置 ..............................................................573.22客户安装空间说明 ........................................................574技术数据 .........................................................594.124 V 外来供电 ...........................................................604.2安全接口板 .. (61)4.3机器人控制器尺寸 ........................................................624.4机器人控制器的最小间距 ..................................................624.5柜门的摆动范围 ..........................................................634.6smartPAD 支架尺寸(选项) ...............................................644.7用于地面固定的钻孔尺寸 ..................................................644.8技术柜的钻孔尺寸 ........................................................644.9标牌 ....................................................................655安全 .............................................................695.1一般 ....................................................................695.1.1责任说明 .............................................................695.1.2按规定使用工业机器人 .................................................695.1.3欧盟一致性声明及安装说明 .............................................705.1.4使用的概念 ...........................................................705.2相关人员 ................................................................715.3工作区域、防护区域及危险区域 ............................................725.4停机反应的触发器 ........................................................725.5安全功能 ................................................................735.5.1安全功能概览 .........................................................735.5.2安全控制系统 .........................................................745.5.3运行方式选择 .........................................................745.5.4“操作人员防护装置” 信号 ...........................................745.5.5紧急停止装置 .........................................................755.5.6从上一级安全控制系统中退出登录 .......................................755.5.7外部紧急停止装置 .....................................................765.5.8确认装置 .............................................................765.5.9外部确认装置 .........................................................765.5.10外部安全运行停止 .....................................................765.5.11外部安全停止 1 和外部安全停止 2 ......................................77 www.P LC wo r l d.c n5.5.12T1 的速度监控 ........................................................775.6附加防护装备 ...........................................................775.6.1点动运行 .............................................................775.6.2软件极限开关 .........................................................775.6.3机械终端止挡 .........................................................775.6.4机械式轴范围限制装置(选项) .........................................775.6.5轴运动范围监控装置(选项) ...........................................785.6.6不用驱动能量移动机械手的方法 .........................................785.6.7工业机器人上的标识 ...................................................785.6.8外部防护装置 .........................................................795.7运行方式和防护功能概览 .................................................795.8安全措施 ...............................................................805.8.1通用安全措施 .........................................................805.8.2运输 .................................................................805.8.3投入运行和重新投入运行 ...............................................815.8.3.1检查机器数据和安全配置 ............................................825.8.3.2调试模式 ..........................................................835.8.4手动运行 .............................................................835.8.5模拟 .................................................................845.8.6自动运行 .............................................................845.8.7保养和维修 ...........................................................845.8.8停止运转,仓储和废料处理 .............................................865.8.9单点控制(Single Point of Control)的安全措施 .......................865.9所用的标准和规定 .......................................................876规划 .............................................................896.1电磁兼容性(EMC) ......................................................896.2置放条件 ...............................................................896.3连接条件 ...............................................................926.4固定库卡 smartPAD 支架(选项) .........................................936.5使用 Harting 插头 X1 的电源接口 ........................................936.6安全接口 X11 的说明 ....................................................946.6.1安全接口 X11 .........................................................956.6.2外部确认开关接口 X11 .................................................986.6.3插头 X11 的插孔图 ....................................................996.6.4紧急停止回路及防护装置的布线示例 .....................................996.6.5安全输入端和输出端布线示例 ...........................................1006.7通过以太网安全接口的安全功能 ...........................................1026.7.1确认开关基本电路 .....................................................1066.7.2通过以太网安全接口的 SafeOperation (选项) ...........................1066.7.3以太网接口 (1xRJ45) X66 ..............................................1096.8CIB 上的 EtherCAT 接口 .................................................1096.9接地电位均衡导线 .......................................................1106.10更改系统结构,更换设备 .................................................1116.11确认操作人员防护装置 ...................................................1116.12性能级 .. (111)6.12.1安全功能的 PFH 值(PFH = Probability of Failure per Hour,即每小时故障概率)1127运输 .............................................................115 www.P L C w o rl d .c n7.1用运输托盘挽具运输 ......................................................1157.2使用叉车进行运输 .. (116)7.3用电动叉车进行运输 ......................................................1187.4用滚轮附件组运输(选项) ................................................1188投入运行和重新投入运行 ...........................................1198.1概览投入运行 (119)8.2置放机器人控制系统 ......................................................1208.3接上连接电缆 ............................................................1208.3.1X21 数据线路 .........................................................1218.4固定库卡 smartPAD 支架(选项) ..........................................1218.5插入库卡 smartPAD .......................................................1228.6连接接地电位均衡导线 ....................................................1228.7将机器人控制系统连接到电源上 ............................................1228.8取消蓄电池放电保护 ......................................................1238.9将安全接口 X11 接好线并插入 .............................................1248.10更改系统结构,更换设备 ..................................................1248.11投入运行模式 ............................................................1248.12接通机器人控制器 ........................................................1259操作 .............................................................1279.1库卡 smartPAD 手持编程器 ................................................1279.1.1前部 .................................................................1279.1.2背面 .................................................................12810保养 .............................................................13110.1保养图标 ................................................................13110.2检查 SIB 继电器输出端 ...................................................13310.3检查 SIB 扩展型继电器输出端 .............................................13310.4清洁机器人控制系统 ......................................................13311维修 (135)11.1修理及备件购置 ..........................................................13511.2布线示例 X11 ............................................................13611.3更换外部风扇 ............................................................13711.4更换控制系统 PC 机组件 ..................................................13811.4.1更换控制系统 PC 机 ...................................................13811.4.2更换控制系统 PC 机风扇 ...............................................13911.4.3更换主板 .............................................................14111.4.4更换主板电池 .........................................................14111.4.5更换 LAN 双网卡 DualNIC ..............................................14111.4.6更换硬盘 .............................................................14111.5更改系统结构,更换设备 ..................................................14211.5.1更换库卡 Power Pack ..................................................14311.5.2更换库卡伺服包 (KSP) ...............................................14511.5.3更换控制柜 ...........................................................14811.5.4更换安全接口板 .......................................................15111.5.5更换旋转变压器数字转换器 .............................................15311.6更换蓄电池 ..............................................................15511.7更换低压电源 ............................................................157 www.P LC wo rl d.c n11.8更换平衡压力分隔器 .....................................................15811.9安装库卡系统软件 (KSS) .................................................15912故障排除 (161)12.1控制柜 LED 显示 ........................................................16112.2保险装置控制柜 .........................................................16412.3分解器数字转换器 LED 显示 ..............................................16512.4控制器系统面板 LED 显示 ................................................16612.4.1控制器系统面板 LED 故障显示 ..........................................16812.5安全接口板 LED 显示 ....................................................16912.6控制系统 PC 机接口 .....................................................17112.6.1主板 D2608-K 板载 LAN 网卡 LED 显示 .................................17212.6.2主板 D3076-K 板载 LAN 网卡 LED 显示 .................................17212.6.3主板 D3236-K 板载 LAN 网卡 LED 显示 .................................17312.7安全接口板保险装置 .....................................................17312.8检查库卡 Servo Pack ....................................................17512.9检查库卡 Power Pack ....................................................17612.10KPP 和 KSP 的故障信息 ..................................................17712.11KPP 和 KSP 的警告提示 ..................................................18013停止运转,仓储和废料处理 (185)13.1停止运转 ...............................................................18513.2仓储 ...................................................................18513.3废物处理 ...............................................................18514库卡服务 (187)14.1技术支持咨询 ...........................................................18714.2库卡客户支持系统 .......................................................187索引 (195) www.PLC wo r l d.c nwww.P LC wo r l d.c n9 / 201: BA KR C4 GI V101引言1.1工业机器人文献工业机器人文献由以下部分组成:⏹机器人机械装置文献⏹机器人控制系统文献⏹系统软件操作及编程指南⏹选项及附件指南⏹保存在数据载体上的部件目录每份指南均独立成篇。
硬件KCB用户手册

B.Term_P
8
B.Term_N
9
免责声明
冗余保护支持
整机功耗
小于60W
整机重量
小于10Kg
防护等级
IP 30
符合标准
EN50155, EN50121, IEC61373-1999
工作环境
工作温度
-25℃~55℃
存储温度
-40℃~70℃
工作湿度
0-95% RH,无冷凝;
接口规格
电源接口
M12-A型,4针,公头,额定电压DC110V,数量1
以太网接口
MVB
表示运行电源
RESET
/
系统重新启动
CPUSupport
Socket Type
FCBGA-1170
CPU Type
Intel
供电模式
单相供电
Memory
Type
板贴内存颗粒
Memory Speed
DDR31333MT/s
Maximum
4GB
中央处理器
Socket type
FCBGA1170
CPU Support
EH2
TX+
1
100M以太网接口
RX+
2
TX-
3
RX-
4
GND_EARTH
S1,S2
GND_EARTH
S3,S4
6
Console
外端机
U_TXD0
2
DB9调试口
U_RXD0
3
GND
5
NC
1;4
NC
6;7
NC
8;9
7
X21
USB
MCTC KCB B 接口板介绍 V

适用场合
抱闸作UCMP制停部件时
附加制动器作为UCMP制作部件 时
Never Stop Improving
新增功能--UCMP
3、增加轿门副门锁触点接入端子; 异步机UCMP方案必须使用轿门副门锁触点,轿门必须增加一副触点; 对应随行电缆中必须增加两根随行电缆(SGC1\SGC2); KCB-B2板中增加接入插件:AB-8\AC-3;
MCTC-KCB-B1
Never Stop Improving
MCTC-KCB-B2
优化部分
1、去掉KCB-B1接口板中SL\SS1\SS2\S1这四个短接安全门锁回路的插件(下图):
××× ×
2、修改检修回路(右图) 去掉原来接口板上面的检修继电器,紧急电动
短接和上下行信号;使用机房紧急电动运行开关 触点实现;
Never Stop Improving
Never Stop Improving
新增功能—门锁旁路装置
增加门锁旁路装置: 锁旁路装置包含两个插件:S1/S2,以及一个4孔插头。 其中:S1为系统正常状态插件;S2为旁路状态插件;两者共用4孔插头: 1)系统在正常状态时,插头插在S1上; 2)系统在旁路状态时插在S2上;其中旁路厅门时插在左侧四PIN上,旁路轿门
Never Stop Improving
电气原理图
除前面提到的“优化部分”和“新增功能”外,有些端子的针脚定义也有了 变动,在此不作全述,具体请参下面的电气原理图(此图中暂不包含门锁短接检 测部分)。
特别提醒:B2接口板不能完全兼容B1老接口板.
Never Stop Improving
汇川 与您携手 共创美好未来
原来紧急电动电动运行开关只有1常开触点; 更改后的紧急电动运行开关为2常开1常闭触点的 按钮;
RATOC RAL-KEB02iP USB_DAC模式使用指南(版本1.0)说明书

RAL-KEB02iP USB_DAC Mode Setup GuideRev. 1.0 01/July/2014RATOC Systems, Inc.Osaka,JapanIndex1. Introduction (3)1-1.Features (3)2. System requirements (4)2-1. PC running on Windows 8,7,Vista,XP(SP2 or newer) 32/64bits (4)2-2. MacOS X 10.7 or newer (4)2-3. Stereo Headphone (4)3. Package contents (5)4.Front Panel, Rear Panel Layout (5)5. Setting up Mac/MacOS X (11)5-1. Connecting RAL-KEB02iP to Mac USB port (11)5-2. Setting 'Sound Effects' output to Internal Speakers (12)5-3. Setting RAL-KEB02iP as an Audio Output (13)5-4. Setting up 'Audio MIDI Setup' Application (14)5-5. Launch and play iTunes or other Music Player application (15)6. Setting up Windows PC ( Windows 7 ) (16)6-1. Installation of USB Audio 2.0 Class Driver (16)7. Grade up setting for Windows (22)8. Specifications (26)iPod.iPad,iPhone, MacOS X are registered trade mark of Apple Inc.1. IntroductionThank you for purchasing RAL-KEB02iP portable USB_DAC. We are confident that you will enjoy listening Hi-Reso music at anywhere, outdoors and in hime with your PC audio system, Mac Book, iPhone, iPad, iPod and WALKMAN. RAL-KEB02iP receives High-Resolution LPCM format up to 24bit/384kHz from 16bit/44.1kHz and DoP format compatible DSD digital music stream. KEB02iP passes it to DSD Direct enabled DAC (ESS ES9018K2M) and creates clear and natural sound without any conversion, and also, RAL-KEB02iP is fully compatible with DoP(DSD over PCM) Standard 1.1 and works with popular Music Players, such as Audirvana Plus on MacOS X, foobar2000 with foo_asio_dsd, HQPlayer and JPLAY on Windows PC.*1) USB Audio Class 2 Driver for Windows must be downloaded from our site below and installed prior to use RAL-KEB02ip with Windows PC.download from /download/driver.htm*2)RAL-KEB02iP has two operation mode, iPod Compatible mode and USB_DAC Compatible mode. These two modes are switchable with slide switch at the front panel before turning on Power Switch. Refer iPod Compatible Mode User's Guide to useKEB03iP with iPod/iPhone/iPad.1-1.FeaturesUSB_DAC mode●Fully compatible with USB 2.0 (HS 480Mbps) Specifications.●Fully compatible with USB Audio Class 2.0 Driver.●Accepts DoP Standard 1.1 compliant DSD 5.6448/2.8224MHz data andL-PCM 24bit/16bit384kHz/352.8kHz/192kHz/176.4kHz/96kHz/88.2kHz/48kHz/44.1kHz (2ch).●Includes ESS SABRE32™ ES9018K2M Audio file class DAC.●Fully balanced circuit and balanced earphone output.●Earphone level switch (High <-> Low).●Digital Filter Curve selection switch ( Slow <-> Fast)●Includes reliable 3.7V/1200mAh Li-Polymer Battery(made in Japan).●Quick Charging time (2hr) and 5.5hr operating time.2. System requirements2-1. PC running on Windows 8,7,Vista,XP(SP2 or newer) 32/64bits●One USB 2.0 HS(480Mbps) enabled Host port.●Internet access to download USB Audio 2.0 Driver for Windows.●RAL-KEB02iP USB Audio Class 2.0 Driver installation required.●User's Guide, Setup Guide and Grade up Guide are able to download fromRAL_Audio site.Note) The knowledge and experience regarding 'Control Panel' for 'Sound AudioDevice', 'Device Manager', Audio Music Player application such as foobar, MediaPlayer, iTunes and CD Ripping applications are required to use RAL-KEB02iP. Refer to the User Guide, Instruction Guide or Online Helpof these Applications.2-2. MacOS X 10.7 or newer●One USB 2.0 HS(480Mbps) enabled Host port.●MacOS X 10.7 or newer already includes USB Audio Class 2 Driver.** You don't need to download and install the driver.2-3. Stereo Earphone●Stereo earphone equipped with Standard 3.5mm mini Stereo Phone Plug.●Stereo earphone equipped with balanced cable and Standard 2.5mm mini-miniphone plug.●Impedance 8-Ohm to 110-Ohm3. Package contentsRAL-KEB02iP package includes:●RAL-KEB02iP●USB 2.0 Cable ( USB-A to mini-B ) for USB_DAC mode x1.●USB-A to micro-B Cable for charging x1.●USB-A to iPod 30P Dock cable (0.1m) for iPod Compatible mode x1.●USB-A to Lightning cable (0.1m) for iPod Compatible mode x1.●Silicon Band to bundle iPod/iPhone with KEB02iP.** AC adapter (DC +5V/1A) is not included in the package.4. Front Panel, Rear Panel Layout4-1. Front Panel(1). Power & Volume LevelPower off : Turn Counter Clock wise to 7 O'clock position and check Click sound andlighting off PW/LB LED.Power on: Turn Clock wise from 7 O'clock position and check Click sound and lighting on PW/LB LED.Volume level control: adjust Headphone output level to your favorite level.(2). PW/LB LED.Light on to indicate the operating state. Green light indicates Battery level is over 3.4V and Red light indicates Low Battery state below 3.4V. In this case, charging is required.(3). HP level Slide SwitchSelect Headphone output level.Right position shown in above brings High-Level for high impedance headphones.Left position shown in above brings Low-Level for Low impedance headphones. (4). Analog Filter selection Switch.You can select Analog Filter Curve inside ES9018K2M DAC with this switch.Right position brings Sharp Roll-Off Curve and Left position brings Slow Roll-off Curve.(5). 3.5mm mini Jack.Stereo analog audio output for earphones. Supports 8 Ohm to 110 Ohm impedance. (6). 2.5mm micro jack ( L –BAL – R )Analog Audio Balanced amp output to drive 4-wire ( 2 wire for L, 2wire for R) type4-2. Rear panel(1). Digital Audio Stream Input for iPod/iPhone/iPadUSB-A Connector : Compliant with USB 2.0 Full Speed(12Mbps) Spec.*KEB02ip works as USB-Host but does not provide charging current from this connector.It can provide USB Bus_Power to USB device up to 100mA.*Don’t use this connector at USB_DAC mode. Never connect iPod/iPhone/iPad to thisconnector when Mode select Switch is set for USB_DAC mode.(2). Digital Audio Stream Input for PC/Mac.USB mini-B Connector : Compliant with USB 2.0 High-Speed(480Mbps) Spec. andKEB02iP works as the USB Audio Class 2 Audio Device.*This connector is used in USB_DAC mode. Don't connect any device when iPodLegacy Support Compatible mode is selected.(3). DC+5V power input for charging.USB micro-B Connector :Must connect DC+5V( +0.25V, -0.25V, 0.5A minimum )Power supply unit to charge internal battery with USB-A to micro USB-B cable.*AC adapter is not included inbox. Soled separately.* Use DC+5V(+0.25V -0.25V)/1 to 2A Switching type AC adaptor or USB port of PC/Mac.(4). Mode Select Slide SwitchUse this slide switch to change KEB02iP operation mode. This switch must be set in Power_OFF state, Volume Knob at the front panel must be set at 7'Oclock position. And the Volume Knob must be turned clockwise to enable operation mode being selected by current setting of this switch for iPod Legacy Support mode or USB_DAC mode.- iPod position(Left) : iPod Legacy Support mode.KEB02iP works as an USB Host and iPod/ iPhone/iPad works as an USB Device. Must be set this position before turning Power_ON KEB02iP to use this mode.- USB position(Middle or Right) : USB_DAC mode.KEB02iP works as an USB Audio Class 2 Device and High-Speed(480Mbps) Device. Must be set this position before turning Power_ON KEB02iP to connect PC or Mac to USB mini-B port. KEB02iP works with internal battery and does not require USB BUS Power at BT position. Must select BT position to connect Apple Camera Connect Kit, Lightning to USB Camera Adapter or SONY WALKMAN USB Connection canle.KEB02ip works requires USB Bus_Power at BP position. In this case you can connect to USB high-speed enabled HOST port of PC or Mac.(5). LEDs(5-1) USB(Green)/ iPod(Red)Lights on Red when succeeded to detect iPod and starts brink to indicate beingcommunicating successfully with iPod.(5-2) PCM(Green)/DSD(Red)Disabled in iPod Legacy support compatible mode. Enabled only in USB_DAC mode.(5-3) EXTP(Green)Indicates External DC+5V Power source or USB Bus_Power(BP mode) is beingsupplied and KEB02iP is working and charging internal battery with the external power source or USB Bus_power(BP mode).(5-4) Charge.Indicates internal battery is being charged with the external power or USBBus_Power(BP mode).5. Setting up Mac/MacOS X5-1. Connecting RAL-KEB02iP to Mac USB portGetting started with setting up your Mac/MacOS X 10.7 or newer.(1)Turn off Power of KEB02iP and select USB_DAC mode. And then turn on power ofKEB02iP.(2)Connect RAL-KEB02iP mini-B port to Mac USB port with USB-A to mini-B cable.The cable should be compliant with USB High-Speed(480Mbps) certification.(3)MacOS X will detect and recognize RAL-KEB02iP.(4)Click on the "System Preferences" app on Dock.(5)Click on the "Sound" icon at the Hardware row.5-2. Setting 'Sound Effects' output to Internal SpeakersClick on the "Sound Effects" tab to prevent alerts and effect sounds such as "e-mail received notification sound" from being routed to Audio System.Set Play sound effects through 'Internal Speakers'”.5-3. Setting RAL-KEB02iP as an Audio OutputClick on the "Output" tab and select "RATOC RAL_KEB02iP Audio Out".This selection will route the sound from iTunes or other Audio Applications to your Audio system.5-4. Setting up 'Audio MIDI Setup' Application(1)If "Audio Midi Setup" application is not found on Dock, open the Hard Disk icon andopen the "Applications" folder.You can find the "Audio Midi Setup" application at the "Utilities" folder.(2)Open the "Audio Midi Setup" application and select "Audio Devices".(3)Click on "Output" tab. Select "RATOC RAL_KEB02iP Audio Out" for the "DefaultOutput" to send the sounds from iTunes or other applications to Audio system.(4)Select "Built-in Output" for the "System Output" to route system alert sound such as "new mail received" sound to built-in speaker.(5)Select "RATOC RAL_KEB02iP Audio Out" and then select your desired sample ratesuch as 192000 Hz. at "Format".If sample rate which is not identical to the sample rate of original music file itself is selected, MacOS X Audio driver will execute sample rate conversion. As this conversion will affect audio quality, we recommend to select adequate sample rate which is identical to one of music file at this field.5-5. Launch and play iTunes or other Music Player applicationLaunch iTunes or other Music Player application. Start it and select Music file. You will listen and enjoy fine and clear sound from your Audio system. To learn more about Music Player application, refer to User Guide or Online Help of the application.6. Setting up Windows PC ( Windows 8, 7 )This chapter describes the driver installation and setting on Windows 7 as an example, these process is almost the same as one on Windows 8, Vista, XP.Getting started with setting up Windows 7 ( 32bit or 64bit ) PC.6-1. Installation of USB Audio 2.0 Class DriverRAL-KEB02iP requires USB Audio Class 2.0 Driver. You need to install it before using it. If you forgot it or failed to install the driver, RAL-KEB02iP would not be configured as a USB Audio Device.(1)Turn off Power of KEB02iP and select USB_DAC mode. And then turn on power ofKEB02iP.(2)Connect RAL-KEB02iP to USB 2.0 HS(480Mbps) enabled port on PC.(3)Log in as an Administrator. You must log in as an Administrator to install USB Audio Class 2.0Driver.(4)Download RAL-KEB02iP Driver from/english/download/driver/keb02ip.htmland follow the instructions at the site and install the driver.(5)Click and run KEB02iP_driver.exe. User Account Control window will appear and show RATOCSystems, Inc. as the Verified publisher name. Click 'Yes' to go to next step.(6)"RAL-KEB02iP installer" will start automatically. Click 'Next' to start installation.(7)InstallShield will start and show status.(8)Click 'Install' button at 'Windows Security' dialog box below and continue driverinstallation.(9)When this message shows up, remove USB Audio Device except RAL-KEB02iP.Only one KEB02iP should be connected at this time.Click "OK","Next","Install","Install" to finish the installation.(10)W indows Security dialog box may be shown up again, if so, click 'Install' to continue theinstallation.(11)C onnect RAL-KEB02iP to your PC when the dialog box below is shown up.Click 'OK' after the connection is completed.(12)I nstallShield Wizard will check system, prepare and start the installation.(13)InstallShield Wizard will complete. Click "Finish".(11) Open Device Manager Window and check "RATOC Systems, Inc. Check 'USB 2.0Audio Devices RAL-KEB02iP' is shown up.-2. Uninstall RAL-KEB02iP Device DriverIf you failed in RAL-KEB02iP Driver installation or desire to remove it from your Windows PC, uninstall it and re-install again.Follow the instructions below.(1) Open 'Control Panel' and select 'Programs and Features' icon.(2) Select and click 'REX-KEB02iP Driver'.(3) InstallShield will start and show dialog box below. Just in case, make sure you willstart to uninstall. And then click 'Yes.'(4) Click "Finish" at InstallShield Window below.7. Grade up setting for WindowsThis chapter describes how to improve sound quality and tune up your PC to listen high fidelity and pure sound.Before installation of Music Player application or additional drivers:- Check Compatibility and Combination of Sound Drivers and Applications. And select most suitable one for your PC/Mac Audio system. You also need some setting atDevice Manager Window to use the application or add-on drivers.- Set disable to route "System Sound" to your Audio system. Follow steps below:(1) Launch "Control Panel" and click on "Sound".(2) Select "Built-in Sound card" at the "Playback" tab. Click "Set Default" button toroute system sound such as "new mail received" to built-in speaker.(3) Select "RAL-KEB02iP" at the "Playback" tab and click "Properties" button.(4) Click "Advanced" tab. And set check mark at both "Allow applications to takeexclusive control of this device" and "Give exclusive mode applications priority".These two setting must be set to use our driver, Kernel Streaming orWASAPI mode with Music Player applications. If you would like to use MediaPlayer or iTunes, these applications use Direct Sound or QuickTime Player.7-1.Listen HD Music with Direct Sound and Kernel Mixer (1) Double click "RAL-KEB02iP Audio" at "Playback" tab. Click "Properties" button.You can change icon and device name as you like.(2) Click "Advanced" tab and select Sampling Rate/bit rate corresponding to propertyof music files you like at "Default Format" box.Note) 24bit/88.2kHz, 24bit/176.4kHz, 24bit/352.8kHz and 24bit/384kHz are not shown up at the list box.This is the known issue of Windows 7/Vista Direct Sound Driver.ing WASAPI mode, skip Kernel MixerWindows 8, 7 and Vista(SP1 or newer) includes this function. Once enabled, Windows Kernel Mixer is bypassed and Audio application can pass music data to Audio drivers directly.** iTunes does not work with WASAPI setting on 64bit Windows 8, 7, Vista.(1) Click "Start" and launch "Control Panel".(2) Double click "Sound".(3) Double click "RAL-KEB02iP Audio" at "Playback" tab. And click "Properties" button.(4) Click "Advanced" tab and mark Checkbox of both "Allow applications to takeexclusive control of this device" and "Give exclusive mode applications priority" at "Exclusive Mode" box.(5) Download components suitable for your application such as foobar2000 from theapplication web site. Install it and follow instructions described at the web page.Inputs Outputs 8. SpecificationsName DSD and High-Reso PCM ready portable USB DACModel Number RAL-KEB02iPTerminals USB mini-B for USB_DAC mode.USB-A for iPod Compatible mode.Supported PC Windows 8, 7, Vista, XP ,Mac OS X 10.7 or later.*Windows 64 bit versions are supported.Supported AudioUSB_DAC mode USB Audio Class 2.0 ( 480Mbps required )Input Format (Hi-Speed mode is required)DSD 5.6448/2.8224MHz ( DoP standard-compliant).L-PCM24bit/16bit,384kHz/354.8kHz/192kHz/176.4kHz/96kHz/88.2kHz/48kHz/44.1kHz (2ch)iPod Compatible modeUSB Full speed (12Mbps ).L-PCM 16bit, 32kHz/44.1kHz/48kHzTerminals Analog Stereo 3.5 mini Jack.Analog balanced output, 2.5mm mini-mini jacks.Compatibleearphones. Impedance 8Ω to 110ΩFrequency DC ~90 kHz (24bit/192 kHz ), Characteristics 10 Hz to 40 kHz (24bit/96 kHz),20 Hz to 20 kHz (16bit/44.1 kHz)rated output Balanced output (2.5 mini-mini):131mW/ch. @22 ohm load.Stereo output (3.5mm mini)38mW/ch. @68 ohm load.Internal Battery Li-Polymer 3.7V 1200mAh. USB charger required. Unit Dimensions/Weight 70 (W) x 103 (D) x 24 (H) mm.230g.。
- 1、下载文档前请自行甄别文档内容的完整性,平台不提供额外的编辑、内容补充、找答案等附加服务。
- 2、"仅部分预览"的文档,不可在线预览部分如存在完整性等问题,可反馈申请退款(可完整预览的文档不适用该条件!)。
- 3、如文档侵犯您的权益,请联系客服反馈,我们会尽快为您处理(人工客服工作时间:9:00-18:30)。
设备内部配置MVB卡
选择配置4G/WIFI/GPS
双主板分别配置256G SSD带减震机构工业级硬盘
电源冗余设计
2.2机械结构
2.3整机特性
Item
Description
整机特性
机械尺寸
安装方式
2U,机架式安装
散热方式
无风扇,自然冷却
整机供电
额定DC110V,宽压输入DC77-148.5V(0.7%-1.35%)
6
8
X22
EH0
TX+
1
100M以太网接口
RX+
2
TX-
3
RX-
4
GND_EARTH
S1,S2
GND_EARTH
S3,S4
9
X23
EH1
TX+
1
100M以太网接口
RX+
2
TX-
3
RX-
4
GND_EARTH
S1,S2
GND_EARTH
S3,S4
10
X24
EH2
TX+
1
100M以太网接口
RX+
2
TX-
3
PWR 2
透明LED,点亮时为绿色;电源输入2时常亮
Running
透明LED,系统运行时绿色闪烁
Alarm
透明LED,告警指示灯,点亮时是红色
PWR Fault
透明LED,点亮时为红色;电源1或2缺失时亮
HD
透明LED,点亮时为绿色;硬盘有数据读写时点亮
USB
从上到下分别:红、绿、黄
M12-以太网
两个绿灯
D-
2
D+
3
GND
4
GND_EARTH
5
GND_EARTH
6
3
X12
EH0
TX+
1
100M以太网接口
RX+
2
TX-
3
RX-
4
GND_EARTH
S1,S2
GND_EARTH
S3,S4
4
X13
EH1
TX+
1
100M以太网接口
RX+
2
TX-
3
RX-
4
GND_EARTH
S1,S2
GND_EARTH
S3,S4
整机用户手册规格参数
版 本 V1.0
2019-04-02
版本审批及更新记录
文件类型
文件编号
生效日期
起草人
审核人
批准人
版本号
更新日期
起草人
更新简述
V1.0
新起草
文档目录
一、 引言
1.1文档目的
对项目提供硬件参数和接口定义,供用户和开发人员参考。
二、
2.1主要功能
整机按“2+1”方式设计,双主板+隔离板架构
RX-
4
GND_EARTH
S1,S2
GND_EARTH
S3,S4
11
Console
内端机
U_TXD0
2
DB9调试口
U_RXD0
3
GND
5
NC
1;4
NC
6;7
NC
8;9
12
MVB
Db9
A.Data_P
1
DB9MVB
A.Data_N
2
NC
3
B.Data_P
4
B.Data_N
5
A.Term_P
6
A.Term_N
过载保护 支持
冗余保护 支持
整机功耗
小于60W
整机重量
小于10 Kg
防护等级
IP 30
符合标准
EN50155, EN50121, IEC61373-1999
工作环境
工作温度
-25℃~55℃
存储温度
-40℃~70℃
工作湿度
0-95% RH,无冷凝;
接口规格
电接口
M12-A型,4针,公头,额定电压DC110V,数量1
5
X14
EH2
TX+
1
100M以太网接口
RX+
2
TX-
3
RX-
4
GND_EARTH
S1,S2
GND_EARTH
S3,S4
6
Console
外端机
U_TXD0
2
DB9调试口
U_RXD0
3
GND
5
NC
1;4
NC
6;7
NC
8;9
7
X21
USB
Vbus
1
USB
D-
2
D+
3
GND
4
GND_EARTH
5
GND_EARTH
MVB
表示运行电源
RESET
/
系统重新启动
CPU
Support
Socket Type
FCBGA-1170
CPU Type
Intel
供电模式
单相供电
Memory
Type
板贴内存颗粒
Memory Speed
DDR3 1333MT/s
Maximum
4GB
中央处理器
Socket type
FCBGA1170
CPU Support
以太网接口
M12-D型,4孔,母头,百兆,数量6
MVB接口
标准DB9接口
部件规格
机箱
2U,乳白色,
电源转换模块
DC-DC 110-12V
硬盘
256G固态硬盘 宽温,数量2
MVB卡
可插拔
4G模块
带天线及其馈线
板卡
主板
3个M12-D型接头,数量2
隔离卡
数量1
LED
PWR 1
透明LED,点亮时为绿色;电源输入1时常亮
7
B.Term_P
8
B.Term_N
9
免责声明
IntelCeleronAtom E3845
CPU功率
TDP 3.5/10W
CPU散 热
散热片散热设计
2.4接口定义
Item
Connector
Pin Signal
Pin
No.
Description
Name
Type
1
X00
M12-A
110V+
1
电源
110V+
3
GND
2
GND
4
2
X11
USB
Vbus
1
Usb