openGL画直线、圆、椭圆
OpenGL 3基本图形绘制

模型-视图变换过程就是一个将顶点坐标从世界坐标变换到 视觉坐标的过程。这里很重要的是对两个坐标系的认识。 世界坐标系也称为全局坐标系。它是一个右手坐标系,可 以认为该坐标系是固定不变的,在初始态下,其x轴为沿屏
幕水平向右,y轴为沿屏幕垂直向上,z轴则为垂直屏幕面
向外指向用户。
视觉坐标系(即观察坐标系)也称为局部坐标系。它是一个
(1)确定当前矩阵栈 void glMatrixMode(Glenum mode); 参数取值:
GL_MODELVIEW:模型视图矩阵
GL_PROJECTION:投影矩阵 GL_TEXTURE:纹理矩阵 默认的选定矩阵为模型-视图变换。
矩阵栈及其操作(2/8)
清矩阵栈栈顶
void glLoadIdentity(void); •将栈顶矩阵替换为单位矩阵 •取消之前变换的作用 M … I
对于二维图形向二维屏幕的投影,则应使用实 用库中的如下函数:
void gluOrtho2D(Gldouble left, Gldouble right,
Gldouble bottom, Gldouble top);
前面提到过,用二维顶点命令绘制的二维物体 的z坐标均为零,而gluOrtho2D()命令假定场景 中的 z 坐标介于-1.0和 1.0 之间。
左手坐标系,该坐标系是可以活动的。在初始态下,其原
点及x、y轴分别与世界坐标系的原点及x、y轴重合,而z轴 则正好相反,即为垂直屏幕面向内。
默认:视点在原点,视线沿Z轴负方向。
坐标系
右手坐标系
y
窗口 x
o z
缺省的观察坐标系
视点变换
View变换可以改变视点的位置和方向,要在 Model变换之前调用。设置任意观察坐标点。
OpenGL入门学习之二——绘制几何图形

假设现在我已经指定了若干顶点,那么 OpenGL 是如何知道我想拿这些顶点来干什么呢?是 一个一个的画出来,还是连成线?或者构成一个ቤተ መጻሕፍቲ ባይዱ边形?或者做其它什么事情?
为了解决这一问题,OpenGL 要求:指定顶点的命令必须包含在 glBegin 函数之后,glEnd 函 数之前(否则指定的顶点将被忽略)。并由 glBegin 来指明如何使用这些点。 例如我写: glBegin(GL_POINTS);
OpenGL 入门学习之二——绘制几何图形 2009-01-07 11:25 一、点、直线和多边形 我们知道数学(具体的说,是几何学)中有点、直线和多边形的概念,但这些概念在计算机 中会有所不同。 数学上的点,只有位置,没有大小。但在计算机中,无论计算精度如何提高,始终不能表示 一个无穷小的点。另一方面,无论图形输出设备(例如,显示器)如何精确,始终不能输出 一个无穷小的点。一般情况下,OpenGL 中的点将被画成单个的像素(像素的概念,请自己 搜索之~),虽然它可能足够小,但并不会是无穷小。同一像素上,OpenGL 可以绘制许多 坐标只有稍微不同的点,但该像素的具体颜色将取决于 OpenGL 的实现。当然,过度的注意 细节就是钻牛角尖,我们大可不必花费过多的精力去研究“多个点如何画到同一像素上”。 同样的,数学上的直线没有宽度,但 OpenGL 的直线则是有宽度的。同时,OpenGL 的直线 必须是有限长度,而不是像数学概念那样是无限的。可以认为,OpenGL 的“直线”概念与 数学上的“线段”接近,它可以由两个端点来确定。 多边形是由多条线段首尾相连而形成的闭合区域。OpenGL 规定,一个多边形必须是一个 “凸多边形”(其定义为:多边形内任意两点所确定的线段都在多边形内,由此也可以推导 出,凸多边形不能是空心的)。多边形可以由其边的端点(这里可称为顶点)来确定。(注 意:如果使用的多边形不是凸多边形,则最后输出的效果是未定义的——OpenGL 为了效率, 放宽了检查,这可能导致显示错误。要避免这个错误,尽量使用三角形,因为三角形都是凸 多边形)
OpenGL入门教程(精)
OpenGL 入门教程1.第一课:说起编程作图,大概还有很多人想起TC 的#include < graphics.h>吧?但是各位是否想过,那些画面绚丽的PC 游戏是如何编写出来的?就靠TC 那可怜的640*480 分辨率、16 色来做吗?显然是不行的。
本帖的目的是让大家放弃TC 的老旧图形接口,让大家接触一些新事物。
OpenGL 作为当前主流的图形API 之一,它在一些场合具有比DirectX 更优越的特性。
1、与C 语言紧密结合。
OpenGL 命令最初就是用C 语言函数来进行描述的,对于学习过C 语言的人来讲,OpenGL 是容易理解和学习的。
如果你曾经接触过TC 的graphics.h,你会发现,使用OpenGL 作图甚至比TC 更加简单。
2、强大的可移植性。
微软的Direct3D 虽然也是十分优秀的图形API,但它只用于Windows 系统(现在还要加上一个XBOX 游戏机)。
而OpenGL 不仅用于Windows,还可以用于Unix/Linux 等其它系统,它甚至在大型计算机、各种专业计算机(如:医疗用显示设备)上都有应用。
并且,OpenGL 的基本命令都做到了硬件无关,甚至是平台无关。
3、高性能的图形渲染。
OpenGL 是一个工业标准,它的技术紧跟时代,现今各个显卡厂家无一不对OpenGL 提供强力支持,激烈的竞争中使得OpenGL 性能一直领先。
总之,OpenGL 是一个很NB 的图形软件接口。
至于究竟有多NB,去看看DOOM 3 和QUAKE4 等专业游戏就知道了。
OpenGL 官方网站(英文)下面我将对Windows 下的OpenGL 编程进行简单介绍。
学习OpenGL 前的准备工作第一步,选择一个编译环境现在Windows 系统的主流编译环境有V isual Studio,Broland C++ Builder,Dev-C++等,它们都是支持OpenGL 的。
但这里我们选择V isual Studio 2005 作为学习OpenGL 的环境。
OpenGL中点Bresenham绘制直线算法

OpenGL中点Bresenham绘制直线算法本⽂实例为⼤家分享了OpenGL中点Bresenham绘制直线算法,供⼤家参考,具体内容如下环境macos xcode编译器代码#include <GLUT/GLUT.h>#include <iostream>#include<iostream>#include<cstdlib>#include<ctime>using namespace std;float wid = 400; //设置窗⼝的⼤⼩,约定窗⼝必须为正⽅形float height = wid; //设置窗⼝的⼤⼩int numbers = 20; //设置划分的⽹格的个数float t = wid/numbers; //模拟像素下的单位1/*参数设置说明:输⼊直线的两点A(x1,y1);B(x2,y2)您应当确保参数范围在-400~400.且为整数。
*⽀持不同斜率*⽀持两点位置颠倒*/int x1 = -300,y1=-400,x2 =400,y2 = 100;void draw_point(float x, float y,int k_kind,int d_kind);float translater(int x);void swap(int &a, int &b){ int tmp = 0;tmp = b;b = a;a = tmp; }void bresenham(int x1, int y1,int x2, int y2){/*函数说明:bresenham算法部分参数说明:与openGL已有的划线函数⼀样,要求⽤户提供的是点的起点(x1,y1)和终点(x2,y2)为了便于观察,我们会绘制原像素下的直线。
这⾥的坐标要求是-1 ~ 1*/int k_kind = 0; //k_kind⽤来表⽰斜率的类型。
0是0~1;1是1~⽆穷;2是0~-1;3是负⽆穷~-1int d_kind =0; //d_kind⽤来表⽰dy正负的类型。
使用opengl程序绘制实线、虚线和点划线
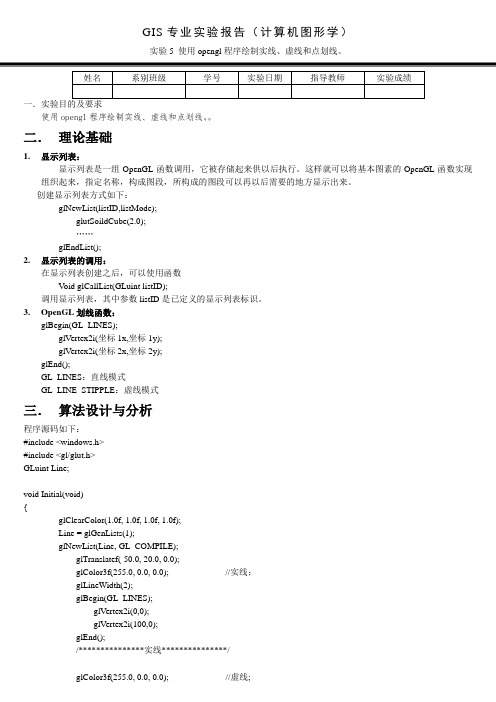
GIS专业实验报告(计算机图形学)实验5 使用opengl程序绘制实线、虚线和点划线。
使用opengl程序绘制实线、虚线和点划线。
二.理论基础1.显示列表:显示列表是一组OpenGL函数调用,它被存储起来供以后执行。
这样就可以将基本图素的OpenGL函数实现组织起来,指定名称,构成图段,所构成的图段可以再以后需要的地方显示出来。
创建显示列表方式如下:glNewList(listID,listMode);glutSoildCube(2.0);……glEndList();2.显示列表的调用:在显示列表创建之后,可以使用函数Void glCallList(GLuint listID);调用显示列表,其中参数listID是已定义的显示列表标识。
3.OpenGL划线函数:glBegin(GL_LINES);glVertex2i(坐标1x,坐标1y);glVertex2i(坐标2x,坐标2y);glEnd();GL_LINES:直线模式GL_LINE_STIPPLE:虚线模式三.算法设计与分析程序源码如下:#include <windows.h>#include <gl/glut.h>GLuint Line;void Initial(void){glClearColor(1.0f, 1.0f, 1.0f, 1.0f);Line = glGenLists(1);glNewList(Line, GL_COMPILE);glTranslatef(-50.0, 20.0, 0.0);glColor3f(255.0, 0.0, 0.0); //实线;glLineWidth(2);glBegin(GL_LINES);glVertex2i(0,0);glVertex2i(100,0);glEnd();/***************实线***************/glColor3f(255.0, 0.0, 0.0); //虚线;glEnable(GL_LINE_STIPPLE);glLineStipple (2, 0x4444);glLineWidth(2);glBegin(GL_LINES);glVertex2i(0,-20);glVertex2i(100,-20);glEnd();/***************虚线***************/glColor3f(255.0, 0.0, 0.0); //点划线;glEnable(GL_LINE_STIPPLE);glLineStipple (2, 0xffcc);glLineWidth(2);glBegin(GL_LINES);glVertex2i(0,-40);glVertex2i(100,-40);glEnd();/***************点划线***************/ glEndList();}void ChangeSize(int w, int h){glViewport(0, 0, w, h);glMatrixMode(GL_PROJECTION);glLoadIdentity();gluOrtho2D (-70.0f, 70.0f, -70.0f, 70.0f);}void Display(void){glClear(GL_COLOR_BUFFER_BIT);glMatrixMode(GL_MODELVIEW);glLoadIdentity();glTranslatef(0.0, 0.0, 0.0);glCallList(Line);glFlush();}int main(int argc, char* argv[]){glutInit(&argc, argv);glutInitDisplayMode(GLUT_SINGLE | GLUT_RGB);glutInitWindowSize(600,450);glutInitWindowPosition(100,100);glutCreateWindow("OpenGL直线、虚线、点划线");glutDisplayFunc(Display);glutReshapeFunc(ChangeSize);Initial();glutMainLoop();return 0;}四.程序调试及运行结果的自我分析与自我评价代码中调用了画线函数的两个不同模式,绘制实线模式(GL_LINES)和绘制虚线模式(GL_LINE_STIPPLE)。
opengl绘图

窗口是继承JFrame类而来,其中的show()函数使整 个窗口可见。
3.1.2 用Java应用程序绘图
例: 画一条起点为(50,50),终点为(150,150)的直线。
先用下面的SetPixel类将生成一个面板,并在上面画一条起点为 (50,50),终点为(150,150)的直线,直线的颜色为蓝色。 import javax.swing.*; //引入swing包 import java.awt.*; //引入图形软件包awt class SetPixel extends JPanel { Color color; int startX,startY,endX,endY; public SetPixel() //构造函数(初始化) { color=Color.blue; //蓝色 startX=50; // 设置直线的起点和终点位置 startY=50;
3.1.1 用Java小程序绘图
简单的绘图操作
Graphics.drawLine(int startX,int startY,int endX,int endY):
画一条起点为(startX,startY),终点为(endX,endY)的直线段。
Graphics.clearRect(int x,int y,int width,int height): 将左上角为(x,y),宽为width,高为height的区域用背景色填充。
Pe
Ps
图中实心圆点表示用 DDA方法生成的直线
3.2.1 基本增量算法
void dda(int x1, int x2, int y1, int y2) { int k; float x, y, dx, dy; k =abs(x2-x1); if (abs(y2-y1)>k) k = abs(y2-y1); dx = (float)(x2-x1)/k; dy = (float)(y2-y1)/k; x = (float)x1; y = (float)y1; for (int i = 0; i <k ; i++ ) { putPixel((int)(x+.5f), (int)(y+.5f)); x = x+dx; y = y+dy; } }
OpenGL基本图形的绘制
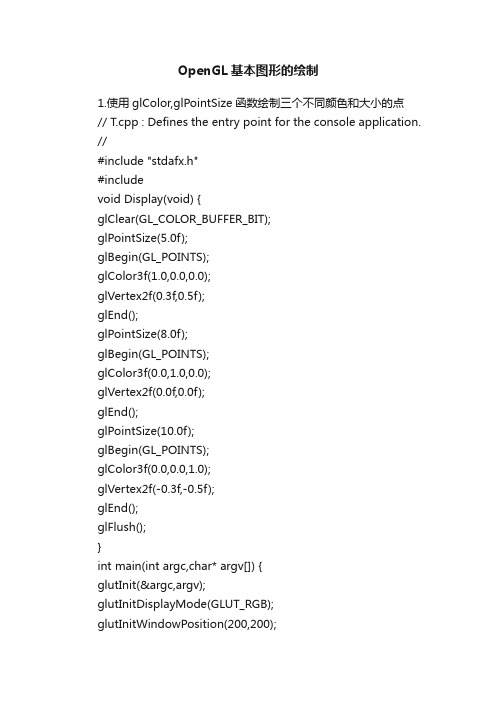
OpenGL基本图形的绘制1.使用glColor,glPointSize函数绘制三个不同颜色和大小的点// T.cpp : Defines the entry point for the console application. //#include "stdafx.h"#includevoid Display(void) {glClear(GL_COLOR_BUFFER_BIT);glPointSize(5.0f);glBegin(GL_POINTS);glColor3f(1.0,0.0,0.0);glVertex2f(0.3f,0.5f);glEnd();glPointSize(8.0f);glBegin(GL_POINTS);glColor3f(0.0,1.0,0.0);glVertex2f(0.0f,0.0f);glEnd();glPointSize(10.0f);glBegin(GL_POINTS);glColor3f(0.0,0.0,1.0);glVertex2f(-0.3f,-0.5f);glEnd();glFlush();}int main(int argc,char* argv[]) {glutInit(&argc,argv);glutInitDisplayMode(GLUT_RGB); glutInitWindowPosition(200,200);glutInitWindowSize(400,400);glutCreateWindow("Three Point");glutDisplayFunc(&Display);glutMainLoop();return 0;}2.使用glColor,glLineWidth,glLineStripple函数绘制实心、虚线及渐变色线(1)实心线// T.cpp : Defines the entry point for the console application.//#include "stdafx.h"#includevoid Display(void) {glClear(GL_COLOR_BUFFER_BIT);glColor3f(1.0,0.0,0.0);glEnable(GL_LINE_STIPPLE);glShadeModel(GL_SMOOTH);glLineStipple(2,0xFFFF);glLineWidth(2);glBegin(GL_LINES);glVertex2i(-100,0);glVertex2i(100,0);glEnd();glFlush();}int main(int argc,char* argv[]) {glutInit(&argc,argv);glutInitDisplayMode(GLUT_RGB);glutInitWindowPosition(200,200);glutInitWindowSize(400,400);glutCreateWindow("Solid Line");glutDisplayFunc(&Display);glutMainLoop();return 0;}(2)虚线// T.cpp : Defines the entry point for the console application. //#include "stdafx.h"#includevoid Display(void) {glClear(GL_COLOR_BUFFER_BIT);glColor3f(1.0,0.0,0.0);glEnable(GL_LINE_STIPPLE);glShadeModel(GL_SMOOTH);glLineStipple(4,0xAAAA);glLineWidth(2);glBegin(GL_LINES);glVertex2i(-100,0);glVertex2i(100,0);glEnd();glFlush();}int main(int argc,char* argv[]) {glutInit(&argc,argv);glutInitDisplayMode(GLUT_RGB);glutInitWindowPosition(200,200);glutInitWindowSize(400,400);glutCreateWindow("Dotted Line");glutDisplayFunc(&Display);glutMainLoop();return 0;}(3)渐变线// T.cpp : Defines the entry point for the console application. //#include "stdafx.h"#includeGLuint Line;void Initial(void) {glClearColor(0.0f, 0.0f, 0.0f, 0.0f);Line = glGenLists(1);glNewList(Line, GL_COMPILE);glTranslatef(-50.0, 20.0, 0.0);glColor3f(255.0, 0.0, 0.0);glLineWidth(2);glBegin(GL_LINES);glColor3f(255.0, 0.0, 0.0);glVertex2i(0,-20);glColor3f(0.0, 0.0, 255.0);glVertex2i(100,-20);glEnd();glEndList();void ChangeSize(int w, int h) {glViewport(0, 0, w, h);glMatrixMode(GL_PROJECTION);glLoadIdentity();gluOrtho2D (-70.0f, 70.0f, -70.0f, 70.0f);}void Display(void) {glClear(GL_COLOR_BUFFER_BIT);glMatrixMode(GL_MODELVIEW);glLoadIdentity();glTranslatef(0.0, 0.0, 0.0);glCallList(Line);glFlush();}int main(int argc, char* argv[]) {glutInit(&argc, argv);glutInitDisplayMode(GLUT_SINGLE | GLUT_RGB);glutInitWindowSize(600,450);glutInitWindowPosition(100,100);glutCreateWindow("渐变色线");glutDisplayFunc(Display);glutReshapeFunc(ChangeSize);Initial();glutMainLoop();return 0;}3.使用glColor,glPolygonMode函数绘制纯色、渐变色、轮廓多边形(1)纯色六边形// a.cpp : Defines the entry point for the console application.//#include "stdafx.h"#includevoid init(){glClearColor (1.0, 1.0, 1.0, 0.0);glMatrixMode (GL_PROJECTION);gluOrtho2D (0.0, 200.0, 0.0, 150.0);}void polygon(void){glClear(GL_COLOR_BUFFER_BIT);int p1 [] = {20, 75};int p2 [] = {60, 5};int p3 [] = {140, 5};int p4 [] = {180, 75};int p5 [] = {140, 145};int p6 [] = {60, 145};glColor3f(0.0, 0.5, 1.0);glBegin(GL_POLYGON);glVertex2iv(p1);glVertex2iv(p2);glVertex2iv(p3);glVertex2iv(p4);glVertex2iv(p5);glVertex2iv(p6);glEnd();glFlush();}void main(int argc, char *argv[]){glutInit(&argc, argv);glutInitDisplayMode(GLUT_SINGLE | GLUT_RGB); glutInitWindowSize(400, 300);glutCreateWindow("纯色六边形");init();glutDisplayFunc(polygon);glutMainLoop();}(2)渐变色六边形// a.cpp : Defines the entry point for the console application. //#include "stdafx.h"#includevoid init(){glClearColor (1.0, 1.0, 1.0, 0.0);glMatrixMode (GL_PROJECTION);gluOrtho2D (0.0, 200.0, 0.0, 150.0);}void polygon(void){glClear(GL_COLOR_BUFFER_BIT);int p1 [] = {20, 75};int p2 [] = {60, 5};int p3 [] = {140, 5};int p4 [] = {180, 75};int p5 [] = {140, 145};int p6 [] = {60, 145};glColor3f(0.0, 0.5, 1.0);glBegin(GL_POLYGON);glColor3f(0.0,0.0,1.0);glVertex2iv(p1);glColor3f(0.0,1.0,0.0);glVertex2iv(p2);glColor3f(1.0,0.0,0.0);glVertex2iv(p3);glColor3f(0.0,0.0,1.0);glVertex2iv(p4);glColor3f(0.0,1.0,0.0);glVertex2iv(p5);glColor3f(1.0,0.0,0.0);glVertex2iv(p6);glEnd();glFlush();}void main(int argc, char *argv[]){glutInit(&argc, argv);glutInitDisplayMode(GLUT_SINGLE | GLUT_RGB); glutInitWindowSize(400, 300);glutCreateWindow("渐变色六边形");init();glutDisplayFunc(polygon);glutMainLoop();}(3)轮廓渐变色六边形// a.cpp : Defines the entry point for the console application. //#include "stdafx.h"#includevoid init(){glClearColor (1.0, 1.0, 1.0, 0.0); glPolygonMode (GL_FRONT_AND_BACK,GL_LINE); gluOrtho2D (0.0, 200.0, 0.0, 150.0);}void polygon(void){glClear(GL_COLOR_BUFFER_BIT);int p1 [] = {20, 75};int p2 [] = {60, 5};int p3 [] = {140, 5};int p4 [] = {180, 75};int p5 [] = {140, 145};int p6 [] = {60, 145};glColor3f(0.0, 0.5, 1.0);glBegin(GL_POLYGON);glColor3f(0.0,0.0,1.0);glVertex2iv(p1);glColor3f(0.0,1.0,0.0);glVertex2iv(p2);glColor3f(1.0,0.0,0.0);glVertex2iv(p3);glColor3f(0.0,0.0,1.0);glVertex2iv(p4);glColor3f(0.0,1.0,0.0);glVertex2iv(p5);glColor3f(1.0,0.0,0.0);glVertex2iv(p6);glEnd();glFlush();}void main(int argc, char *argv[]){glutInit(&argc, argv);glutInitDisplayMode(GLUT_SINGLE | GLUT_RGB); glutInitWindowSize(400, 300); glutCreateWindow("轮廓渐变色六边形");init();glutDisplayFunc(polygon);glutMainLoop(); }。
OpenGL编程基础(二)
OpenGL编程基础
显示点、直线和多边形: 三、多边形的细节 2. 设置点画多边形的函数: glPolygonStipple() 句法:void glPolygonStipple(const GLubyte *mask); 描述:定义填充多边形的当前点画模式。Mask参数是一 个指向32x32位图的指针,后者被解释为0和1的掩码。如果 模式中出现的是1,则多边形对应的像素就被绘制,如果模
OpenGL编程基础
显示点、直线和多边形: 二、直线的细节 直线的细节包括直线的宽度和不同点画模式的直线。 1. 设置直线的宽度函数: glLineWidth() 句法:void glLineWidth(GL float Width); 描述:设置被渲染直线的粗细,以像素为单位。Width必 须大于0.0,默认值为1.0 。在未使用反走样功能时,直线的
OpenGL编程基础
OpenGL基础函数
OpenGL图元绘制
OpenGL编程基础
显示点、直线和多边形: 一、点的细节 点的基本大小对应屏幕上的1个像素。使用glPointSize()函 数可设置被渲染点的大小。 句法:void glPointSize(GL float size); 描述:设置被渲染点的大小,以像素为单位。Size必须 大于0.0,默认值为1.0 。被渲染的点呈正方形方块。如果 启用了反走样或多重采样,被渲染的点呈圆形。调用函数 glEnable(),并将参数设置为GL_POINT_SMOOTH,启 用反走样。例:point
x[i ] xc r (cos(t ) t sin( t )) y[i ] yc r (sin( t ) t cos(t ))
绘制渐开线,如图所示。
- 1、下载文档前请自行甄别文档内容的完整性,平台不提供额外的编辑、内容补充、找答案等附加服务。
- 2、"仅部分预览"的文档,不可在线预览部分如存在完整性等问题,可反馈申请退款(可完整预览的文档不适用该条件!)。
- 3、如文档侵犯您的权益,请联系客服反馈,我们会尽快为您处理(人工客服工作时间:9:00-18:30)。
glViewport(0, 0, 500, 500);
/* NB: default viewport has same coords as in myinit, */
/* so this could be omitted: */
{
if(d2<=0)
{
d2+=b*b*(2*x+2)+a*a*(-2*y+3);
x++;
y--;
}
else
{
d2+=a*a*(-2*y+3);
y--;
}
putpixel(xc,yc,x,y);
putpixel(xc,yc,-x,-y);
putpixel(xc,yc,-x,y);
putpixel(xc,yc,x,-y);
{
x+=delta_x;
y+=delta_y;
glBegin(GL_POINTS);
glVertex3f(x,y,0);
glEnd();
}
}
/* the display callback: */
void display1() //画圆
{
glClear(GL_COLOR_BUFFER_BIT); /*clear the window */
cout<<"**** 3.用Bresenham算法画椭圆*****"<<endl;
cout<<"************************************************"<<endl;
cout<<"请选择如下操作:";
int choice;
cin>>choice;
switch(choice)
x++;
y--;
}
putpixel(xc,yc,x,y);
putpixel(xc,yc,-x,-y);
putpixel(xc,yc,-x,y);
putpixel(xc,yc,x,-y);
}
d2=b*b*(x+0.5)*(x+0.5)+a*a*(y-1)*(y-1)-a*a*b*b;
while(y>0)
putpixel(xc,yc,-x,-y);
putpixel(xc,yc,-x,y);
putpixel(xc,yc,x,-y);
while(b*b*(x+1)<a*a*(y-0.5))
{
if(d1<0)
{
d1+=b*b*(2*x+3);
x++;
}
else
{
d1+=b*b*(2*x+3)+a*a*(-2*y+2);
glVertex3f(xc+y,yc-x,0);
glVertex3f(xc-y,yc-x,0);
glEnd();
}
void drawcircle(int xc,int yc,int radius)
{
int x,y,p;
x=0;
y=radius;
p=3-2*radius;
glClear(GL_COLOR_BUFFER_BIT);
{
case 1:
glutCreateWindow("Bresenham circile"); /* window title */
glutDisplayFunc(display1); /* display callback invoked when window opened */
myinit(); /* set attributes */
{
glBegin(GL_POINTS);
glVertex3f(xc+x,yc+y,0);
glVertex3f(xc-x,yc+y,0);
glVertex3f(x(xc-x,yc-y,0);
glVertex3f(xc+y,yc+x,0);
glVertex3f(xc-y,yc+x,0);
glClearColor(1.0, 1.0, 1.0, 0.0); /* white background */
glColor3f(1.0, 0.0, 0.0); /* draw in red */
/* set up viewing: */
/* 500 x 500 window with origin lower left */
myinit(); /* set attributes */
glutMainLoop(); /* enter event loop */
break;
case 3:
glutCreateWindow("MidBresenhamEllipse"); /* window title */
glutDisplayFunc(display3); /* display callback invoked when window opened */
/* so this could be omitted: */
drawEllipse(250,250,60,40);
/* and flush that buffer to the screen */
glFlush();
}
int main(int argc, char** argv)
{
/* Standard GLUT initialization */
glFlush();
}
void display3() //画圆
{
glClear(GL_COLOR_BUFFER_BIT); /*clear the window */
/*----------------------------------------*/
/* viewport stuff */
/*----------------------------------------*/
glutInit(&argc,argv);
glutInitDisplayMode (GLUT_SINGLE | GLUT_RGB); /* default, not needed */
glutInitWindowSize(500,500); /* 500 x 500 pixel window */
glutInitWindowPosition(0,0); /* place window top left on display */
myinit(); /* set attributes */
glutMainLoop(); /* enter event loop */
default: return 0;
}
return 0;
}
glViewport(0, 0, 500, 500);
/* NB: default viewport has same coords as in myinit, */
/* so this could be omitted: */
drawcircle(250,250,100);
/* and flush that buffer to the screen */
glMatrixMode(GL_PROJECTION);
glLoadIdentity();
gluOrtho2D(0.0, 500.0, 0.0, 500.0);
glMatrixMode(GL_MODELVIEW);
}
void plot_circle_points(int xc,int yc,int x,int y)//画圆
cout<<"************************************************"<<endl;
cout<<"****请选择如下操作: *****"<<endl;
cout<<"**** 1.用DDA画线*****"<<endl;
cout<<"**** 2.用Bresenham算法画圆*****"<<endl;
glutMainLoop(); /* enter event loop */
break;
case 2:
glutCreateWindow("Digital Differential Analyser Line"); /* window title */
glutDisplayFunc(display2); /* display callback invoked when window opened */
/*----------------------------------------*/
/* viewport stuff */
/*----------------------------------------*/
/* set up a viewport in the screen window */
dda_line(20,20,420,350);
/* and flush that buffer to the screen */
glFlush();
}
void display2() //画圆
{
glClear(GL_COLOR_BUFFER_BIT); /*clear the window */