标致207cc使用手册handbook
2011标致307说明书
2011标致307说明书尊敬的车主:感谢您购买我们的2011标致307。
本说明书将为您提供全面而详细的车辆信息和使用指南,以帮助您更好地了解和使用您的车辆。
请在使用前仔细阅读本手册,并按照指南进行操作。
本说明书包含以下内容:第一部分:车辆概述1. 车型介绍本节将为您介绍2011标致307系列车型的特点、配置和外观设计,以及不同车型之间的区别。
第二部分:车辆操作2. 车辆启动与熄火本节将详细介绍如何正确启动和熄火您的2011标致307,包括车钥匙的使用、点火开关以及注意事项。
3. 前进与倒退在本节中,您将了解如何使您的车辆前进和倒退,包括换挡杆的使用以及倒车和前进时的注意事项。
4. 方向盘与转向了解正确使用方向盘和转向器的方法对您驾驶过程的安全至关重要。
本节将为您提供相关指南和技巧。
5. 加油与加注液体了解正确的加油和加注液体的方法,不仅可以确保您的2011标致307的正常运转,还能延长其使用寿命。
第三部分:车辆保养6. 汽车保养计划本节将向您介绍2011标致307的常规保养计划,包括更换机油、刹车片、轮胎等部件以保持车辆性能的最佳状态。
7. 车辆清洁与维护了解正确的车辆清洁和维护方法可以确保您的2011标致307保持良好的外观和性能。
本节将为您提供相关建议和技巧。
第四部分:车辆故障排除8. 常见故障排除车辆故障是司机不可避免的问题之一。
本节将为您提供常见故障的识别和排除方法,帮助您在紧急情况下快速解决问题。
第五部分:车辆安全9. 驾驶安全驾驶安全是我们始终关注的重点。
本节将为您提供驾驶安全的指南,包括安全驾驶技巧、安全带的使用和遇到紧急情况时的应对措施。
10. 车辆安全系统2011标致307配备了多种车辆安全系统,如防抱死刹车系统(ABS)和电子稳定控制系统(ESC)。
本节将为您介绍这些系统的功能和使用方法。
第六部分:其他信息11. 车辆规格与参数本节将提供2011标致307的详细规格与参数信息,包括车身尺寸、发动机参数、燃油消耗等,以供您参考。
HP iLO MP 207用户手册说明书
iLO MPThe Integrated Lights-Out Management Processor (iLO MP) offers remote server management through an independent management processor (MP). It provides a way for you to connect to a server and perform administration or monitoring tasks for the server hardware. iLO MP is available whenever the server is connected to a power source, even if the server main power switch is in the off position.iLO controls power, reset, and Transfer of Control (TOC) capabilities; provides console access; displays and records system events; and can display detailed information about the various internal subsystems. iLO also provides a virtual front panel that you can use to monitor server status and see the state of front panel LEDs. All iLO functions are available through the server LAN and the local RS-232 and remote RS-232 ports. Access to local and remote ports, telnet, and secure shell (SSH) is through the iLO text interface, while Web access is through a graphical user interface (GUI).iLO was introduced into most Integrity Entry Class servers in late 2004. Prior to that, embedded remote server management was referred to as management processor functionality. All legacy MP functionality has been carried forward and combined with new features, all under the heading of “iLO MP”. Therefore, “iLO” and “MP” mean the same thing for Entry Class servers.Firmware version E.03.13 (or later) supports the following iLO MP features:•Always-on capability: iLO is active as long as the power cord is plugged in•Multiple access methods: Local, remote, telnet, SSH use the iLO text interface. Web access uses a GUI.—Local Serial Port: Use a terminal or laptop computer for direct connection.—Remote/Modem Serial Port: Use a dedicated modem RS-232 port and external modem.—LAN: Use telnet, Web, or SSH to access iLO LAN.•Remote power cycle; power on or power off; reset•Mirrored console: The system console output stream is reflected to all connected console users, and any user can provide input.•Independent, non mirrored sessions (from local and modem ports)—Direct session with OS using the iLO MP command SE—Connection to another iLO using the iLO MP command CSP•Display of information about various internal subsystems—Field replaceable unit (FRU) information—System power state, temperature information, and fan status—Status of processors•Logging, display, and keyword search of:—System console history—System events•User access control•DHCP and DNS support•IPMI over LAN•Licensing•iLO Advanced Pack features, such as SSH access, group actions capability, and LDAPNOTE A complete description of the iLO MP is provided in the HP Integrity and HP 9000 Integrated Lights-Out Management Processor Operations Guide.Configuring the iLO MP LAN Port IP AddressBy connecting the iLO MP LAN port to an active network, you have two options for configuring an IP address. The first option is to use a DHCP server, which automatically assigns an IP address, and the other is to use the ping command from another host on the same subnet to set a static IP address for the iLO MP. After the IP address has been set, you can establish a telnet session to configure additional parameters.If you are using a DHCP server, and it provides the Domain Name, and if the primary DNS server accepts dynamic DNS (DDNS) updates or has been configured through the DHCP server, then you can use a default host name to connect to the iLO MP through telnet. The default host name is 14 characters long, consisting of the letters “mp” followed by the 12 characters of the Media Access Protocol (MAC). See “Configure an IP Address” on page209 to determine the MAC address. If no DNS access is available, the telnet session can use the assigned IP address.If you are using DHCP, proceed to “Accessing the iLO MP” on page209. For more information on configuring DHCP, see “Configuring the iLO MP LAN Information” on page211. For a non-DHCP implementation, perform the following steps to configure a static IP address.Configuring a Static IP Address (Non-DHCP)To configure a static IP address for the iLO MP LAN port, follow these steps:1.Set up local terminal access.2.Configure the IP address.Set Up Local Terminal Access After powering on the terminal, ensure the communications settings are as follows:•8/none (parity)•9600 baud•None (receive)•None (transmit)If the terminal is a PC using Reflection 1, check or change these communications settings by performing the following steps:Step 1.From the Reflection 1 Main screen, pull down the Connection menu and choose Connection Setup.Step 2.Choose Serial Port.Step 3.Choose Com1.Step 4.Check the settings and change, if required.Go to More Settings to set Xon/Xoff. Click OK to close the More Settings window.Step 5.Click OK to close the Connection Setup window.Step 6.Pull down the Setup menu and choose Terminal (under the Emulation tab).Step 7.Choose a supported terminal type.The preferred type is VT100.Step 8.Click Apply.This option is not highlighted if the terminal type you want is already selected.Step 9.Click OK.Configure an IP Address To configure the iLO MP LAN static IP address, perform the following steps: Step 1.Determine the Media Access Control (MAC) address of the iLO MP LAN interface by viewing the label located at the rear of the server.Step 2.Connect a LAN cable on your local subnet to the core I/O LAN port.Step 3.Add an Address Resolution Protocol (ARP) table entry to another host located on your local subnet.This ARP table entry maps the MAC address of the core I/O LAN interface to the IP address chosen for that interface.NOTE Adding an entry to the ARP table is typically done using the ARP command with the appropriate option. For example, arp -s is used with Windows. Consult youroperating system documentation for more information.Step e the ping command from the host that has the new ARP table entry. The destination address is the IP address that is mapped to the MAC address of the iLO MP. The iLO MP LAN port should now be configured with the appropriate IP address.Step e the telnet command to connect to the iLO MP from a host on the local subnet.Accessing the iLO MPYou can connect to the iLO MP using the following methods:•The local serial port using a local terminal•The remote Customer Service Modem (CSM) port using external modem (dial-up) access, if remote modem access is configured•The iLO MP LAN port using the Web interface, telnet, or SSH, if login access through the iLO MP LAN is enabledLocal Terminal Access to the iLO MPEstablish communication with the iLO MP by connecting a terminal to the local CSM I/O serial port. Establish a terminal session using a standalone terminal or using terminal emulation software, such as HyperTerm, Putty, or Reflection 1 running on a PC.During installation, communicating with the iLO MP enables such tasks as:•Verifying that the components are present and installed correctly•Configuring the LAN portInteracting with the iLO MPTo interact with the iLO MP command line interface, perform the following steps:NOTE On initial server installation, the iLO MP has two default user accounts:•All Rights (Administrator) level user; login = Admin, password = Admin (both are case sensitive).•Console Rights (Operator) level user; login = Oper, password = Oper (both are case sensitive).For security reasons, HP recommends that you use the UC command during the initial logonsession to modify default passwords (enter CM at the MP> prompt, and enter UC at the MP:CM>prompt).IMPORTANT If default users such as Admin are modified, configuration parameters in HP Systems Insight Manager (HP SIM) need to be changed for the group actions feature to work properly. For moreinformation regarding HP SIM, refer to the HP Systems Insight Manager User andInstallation Guide at the following web site: /go/hpsim.Step 1.Log in using your iLO MP user account name and password.NOTE If you are logged in, the iLO MP Main Menu displays. To follow this procedure, make sure you are at the iLO MP Main Menu. Use Ctrl+B to return to the iLO MP Main Menu. Step e the iLO MP menus and commands as needed. Main Menu commands are shown in “iLO MP Main Menu”. You can access commands not displayed in the iLO MP Main Menu in command mode by first using the CM command at the MP prompt. You can display a list of available commands using the iLO MP help function. Initiate the help function from either the iLO MP Main Menu or theCommand Menu prompts by entering HE followed by LI. You can return to the iLO MP Main Menu by pressing Ctrl+B.Step 3.Log out using the X command (enter X at the MP> prompt) after returning to the iLO MP Main Menu.iLO MP Main MenuFollowing are the iLO MP Main Menu commands:MP MAIN MENU:CO:ConsoleVFP:Virtual Front PanelCM:Command MenuCL:Console LogsSL:Show Event LogsCSP:Connect to Service ProcessorSE:Create OS SessionHE:Main Menu HelpX:Exit ConnectionNOTE The previous example shows the Main Menu screen accessed through the local serial or remote modem ports. The list of commands displayed might be different and depends on your methodof access to the iLO MP.Configuring the iLO MP LAN InformationLAN information includes the iLO MP network name, IP address information, and configuring DHCP and DNS service information.To configure the iLO MP LAN IP address:Step 1.At the iLO MP Main Menu prompt (MP>), enter CM to choose command mode.Step 2.At the command mode prompt (MP:CM>), enter LC (for LAN configuration).The screen displays the default values and asks if you want to modify them. It is good practice towrite down the information, because you might need it for future troubleshooting. See “The LCCommand Screen” on page212.NOTE The default value in the “IP address” field is set at the factory. You must configure the actual iLO MP LAN IP address.Step 3.The screen displays the current LC data. When prompted to enter a parameter name, A to modify All, or Q to Quit, enter A to choose all parameters.Step 4.The screen displays the current DHCP status. If DHCP is used to acquire IP address information, enter E to enable, D to disable, or Q unless you are using the local serial port.Step 5.Enter the LC command to disable DHCP.CAUTION Modifying the DHCP status, IP address, gateway IP address, or subnet maskparameters drops all present LAN and Web connections.NOTE Changing DHCP status to Enabled or Disabled resets IP address, gateway IPaddress, and subnet mask parameters to factory default values. If DHCP status waschanged to disabled, you can change the values.If the IP address, gateway IP address, and subnet mask are obtained through DHCP,you cannot change them without first disabling DHCP.Step 6.The screen displays the current IP address. When prompted to enter a new value or Q, enter the new IP address.Step 7.The screen displays the current host name. When prompted to enter a new value or Q, enter the new iLO MP network name.This is the host name for the iLO MP LAN displayed at the command prompt. It is also used toidentify the iLO MP LAN interface in a DNS database. The name can be up to 64 characters inlength, and must start with a letter, end with a letter or number, and contain only letters, numbers, or dashes.NOTE The host name is not case sensitive.Step 8.The screen displays the current subnet mask name. When prompted to enter a new value or Q, enter the new subnet mask name.Step 9.The screen displays the current gateway address. When prompted to enter a new value or Q, enter the new gateway address.Step 10.The screen displays the current link state information. When prompted to enter a new value or Q, press enter. The message -> Current Link State has been retained displays.Step 11.The screen displays the current Web console port number. When prompted to enter a new value or Q, press enter. The message -> Current Web Console Port Number has been retaineddisplays.Step 12.The screen displays the current SSH console port number. When prompted to enter a new value or Q, press enter. The message -> Current SSH Console Port Number has been retaineddisplays.NOTE SSH settings will not display if you do not have Integrated Lights-Out AdvancedPack licensing.Step 13.The screen displays a new LC listing, including the values entered in the preceding steps. Verify that the desired values have been accepted. When prompted to enter a parameter for revision, Y to confirm, or Q to Quit, enter Y to confirm all parameters.-> Check all LAN parameters to ensure they are correct before commit.-> “SP_NAME_STR” will be reset if you confirm the changes.MP Host Name: mpserverStep 14.Enter XD -reset to reset the iLO MP (only necessary if you are connected through a serial port). Step 15.After the iLO MP resets, log in to the iLO MP again. Enter the iLO MP command mode (enter CM at the MP: prompt).Step 16.At the MP:CM> prompt, enter LS to confirm the new LAN settings.Step 17.Enter SA to enable or disable the Web console and telnet access after the iLO MP has been reset.NOTE HP recommends disabling access methods that you do not intend to use. For example IPMI over LAN. IPMI over LAN allows access to the iLO MP through the LAN andhas no password by default. HP recommends disabling this port if IPMI managementconsole software is not being used in your data center (use the SA command). Ifconsole management tools are being used, HP recommends using the tools to set apassword on the IPMI over LAN port.The LC Command ScreenThe following screen shows LC command output:MP:CM> LC -ncCurrent LAN Configuration:MAC Address : 0x0060b0f54c51DHCP Status : EnabledIP Address : 127.1.1.1。
欧宝自动轿车之手册说明书
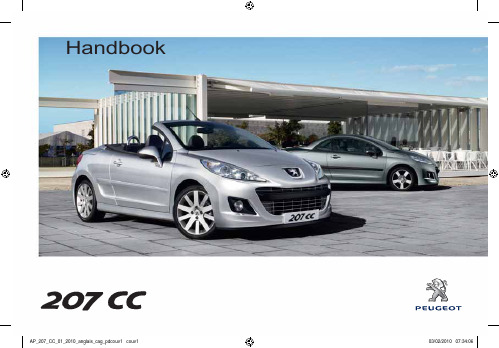
H andbookFAMILIARISATIONE XTERIORR etractable roofT his system enables you to change the vehicle from "coupé" to "cabriolet" con-¿guration and vice versa with a single action.6S tatic directional lightingT his additional lighting automatically provides extended visibility when turning.80V isual and audible rear parkingsensorsT his system provides a warning whenreversing by detecting obstacles locat-ed behind the vehicle.111U nder-inflation detectionT his system monitors the pressure ineach tyre and warns you of a punc-ture or drop in pressure.92T urbulence prevention net(Windstop)I n "cabriolet" con¿ guration, thissystem reduces the wind turbu-lence in the front seats.60T emporary tyre repair kitT his kit is a complete system, con-sisting of a compressor and an inte-gral sealant, for the temporary repairof a tyre.1204ii5FAMILIARISATIONO PENINGR emote control keyA lso... D . Normal lockingo r D eadlocking of the vehicle.F uel tank Opening and hooking the fuel ¿ llerapacity of the tank : approximately 50 litres (petrol) or 48 litres (Diesel).B oot 1. Unlocking the complete vehicle or1. Key in the ignition switch.O n Diesel vehicles, the fuel tank opening incorporates a misfuel prevention device which prevents ¿ lling with petrol. 76!!i6FAMILIARISATIONO PENINGR etractable roof When washing your vehicle:- lock the vehicle, - avoid spraying the upper partof the windows,- keep the end of the high-pres-sure nozzle at least 1 metrefrom the windows and door seals.After washing the vehicle or fol-lowing rain, wait until the roof has dried before opening it.The roof is operated under the sole responsibility of the driver.D uring operation of the roof, to avoid the risk of injury, ensure that no one is in the vicinity of the mov-ing parts.Y ou are strongly advised not to op-erate the roof in strong winds.It is preferable to operate the roof with the engine running.T he roof can be operated at speeds below 6 mph (10 km/h).I t is only possible to carry out the operation twice with the engine off, to avoid discharging the battery.P recautions to be taken before operating the roof) Park the vehicle on level ground. ) Check that no object could hinderthe operation of the roof: - nothing should be placed on the moving rear shelf - if luggage is being carried in the boot, it must not raise the net, ) Ensure that the net ) Close the boot correctly.M aintenanceC arry out a complete opening and closing operation of the roof at least once a month to keep it in good working order.!i!7FAMILIARISATIONO PENINGR etractable roof operation Do not release the roof control during operation of the roof.H owever, in the event of danger, release the control, the roof stops; then, when the danger is no lon-ger present, complete the required operation.I f the operation has not completely ¿ nished, you will be warned by an audible signal and a message on the multifunction screen. These will be repeated as the vehicle passes a number of speed thresh-olds.C hanging to "cabriolet" If you continue to pull or press this control after the end of the opera-tion, the four windows rise.T he electric window controls and the control for the four windows are deactivated during operation of the roof.T he roof electronic control unit may interrupt the operation in progress as a precaution (for example: door movement and roof operation in quick succession). In this case, release the control then operate it again to complete the required operation.O perating faultI f a malfunction of the roof occurs, apply the parking brake, switch off the ignition, restart the engine, then start the required operation again.I f the problem persists, contact a PEUGEOT dealer.guration: the roof opens out and locks auto- T he end of the operation is con8FAMILIARISATIONI NTERIORD ual-zone digital air conditioningThis system allows different levels of comfort to be set for the driver and the front passenger. It then automatically controls these levels according to the ambient conditions.A utomatic gearbox This system provides perfect driving pleasure by combining a fully automatic mode, associated with two special pro-grammes, and a manual mode. 104A udio and communication systemsT hese systems bene ¿ t from the latesttechnology: MP3 compatible Peugeot Connect Sound, Peugeot Connect USB, Bluetooth hands-free system, Peugeot Connect Navigation with 16/9 colour screen, JBL audio system, auxiliary sockets.P eugeot Connect Navigation 149P eugeot Connect Sound 179P eugeot Connect USB 186E lectric windows On the driver's side, control of the electric window is automatic when opening and when closing. 69FAMILIARISATIONI NSTRUMENTS AND CONTROLS1.Cruise control/speed limiter switches.Steering wheel adjustment control.Lighting and direction indicator control9FAMILIARISATIONI NSTRUMENTS AND CONTROLS1.Steering lock and ignition. 10i!11FAMILIARISATIONS ITTING COMFORTABLYA lso... 5. Access to the rear seats. 6. Heated seat.F ront seat adjustmentS teering wheel adjustment Adjustment for height and reach. As a safety precaution, these op-erations must only be carried out while stationary.52i12FAMILIARISATIONS ITTING COMFORTABLYD oor mirror adjustmentA . Selecting the mirror.B . Adjusting the position of the mirror.C . De-selecting the mirror. 53A lso... D . Folding/Unfolding.R ear view mirror adjustment 1. Selecting the "day" position of theF ront seat beltsi13S EEING CLEARLY L ightingW ipers creenwash: pull the stalk towards Automatic wiping is not currently available on the 207 CC.V ENTILATIONA dvice on interior settingsDDD igital air conditioning14M ONITORINGI nstrument panel S witch panelW arning lampsighting of the indicator lamp indicatesthe status of the corresponding function.Deactivation of the ESP/ASR system.Deactivation of the interior volumetric15!16P ASSENGER SAFETYF ront passenger's airbagI gnition switch1. Open the glove box.2. Insert the key.3. Select "ON" or "forwards facing" child seat,"OFF"ing" child seat.4. Remove the key keeping the switch in the new position. 99F ront seat beltsS TARTA heavy object (key fob...), attached to the key and weighing down on its shaft in the ignition switch, could cause a malfunction.D RIVING SAFELYS peed limiter "LIMIT" I nstrument panel displayC ruise control "CRUISE"he cruise control or speed limiter modeappears on the instrument panel when17。
标志206使用手册PDF

概览 - 9
前雾灯/后雾灯(旋钮B) 前雾灯(将旋钮向前转动一 次) 前雾灯和后雾灯(将 旋钮向前转动二次)
雨刮器开关(*)
前雨刮
2 快速刮水 1 正常刮水 I 间歇刮水 或者 AUTO 自动刮水 0 停止 点动刮水 风窗玻璃清洗:雨刮器开关向驾驶员 方向抬起。
83 - 87
发动机........................ 83 油耗.......................... 84 质量.......................... 85 尺寸.......................... 86 识别特征...................... 87
54
47
57
16 - 概览
RD8 汽车音响
24
按键 A (按键/旋钮)
B
C
D E F G
H
I J K L J至O P
功能
开机/关机 - 音量调节 CD碟片仓口
自动/手动搜索前面的电台(收音机)/选择上一曲目-(CD)快倒
收音机/CD模式选择 静音(声音关闭)/(CD)暂停 电台自动搜索/电台自动搜索并保存(收音机) 音效调节(低音、高音、音量分配……)
功能
1
风量调节
2
空气流向分配
3
空气内外循环控制
4
空调开关
5
后风窗玻璃除霜
6
空调系统关闭
7
温度调节
8
舒适度自动调节
9
前风窗自动除霜除雾
概览 - 15
方向盘高度调节
2010 Volkswagen CC Sport 用户手册说明书

2010 Volkswagen CCSport includes: 200HP 2.0 TSI engine, 6-speed manual transmission, ESP, ABS, ASR, ABS w/ brake assistant, EDTC, speed sensitive steering, leather multi-function steering wheel, matte chrome inserts for center console, driver & passenger power comfort seats, heated front seats, auto dimming interior mirror, leather gear shift knob, power exterior mirrors, cruise control, Premium 8 radio w/ Aux-in, satellite radio prep, Bluetooth connectivity, 8 speakers, daytime running lights, rain sensing intermittent wipers, Climatic climate control, leatherette seating surfaces, electric parking brake, 17" Phoenix alloy wheels w/ 235/45 R17 all-weather tires, fog lamps, LATCH, airbags, front & rear passenger curtain airbags, front side airbags, TPMS6-Speed Manual, Model Codes: 3572L2/3572F2/3572Y2 MSRP $28,5106-Speed DSG Auto w/ Tiptronic, Model Codes: 3572LD/3572FD/3572YD MSRP $29,610Luxury includes Sport features, plus: 6-speed DSG automatic transmission w/ tiptronic, brushed aluminum inserts for center console & dashboard, panorama electric tilting sunroof, power adjustable front seats w/ memory, sport front seats, power exterior mirrors w/ memory, Park Distance Control, Climatronic climate control, Nappa leather seating surfaces, chrome-plated interior trim, Home Link, 17" Spa alloy wheels w/ 235/45 R17 all-weather tires, heated washer nozzles6-Speed DSG Auto/ w Tiptronic Model Codes: 3574LD/3574FD/3574YD MSRP $33,830VR6 Sport includes Luxury & Sport features, plus: 280HP 3.6L VR6 engine, 6-speed automatic transmission w/ tiptronic, 3-spoke leather wrapped multi-function steering wheel w/ control for gear shift, power rear sunshade, Vavona wood inserts for dashboard & door, Dynaudio Sound, 10 channel amp, 600watt, 10 speaker system, 18? Interlagos alloy wheels w/ 235/40 R18 all-weather tires, Bi-Xenon headlights w/ AFS, headlight washer system6-Speed Tiptronic, Model Code: 3572U6 MSRP $40,060VR6 4Motion includes VR6 Sport, Luxury, & Sport features, plus: 4Motion AWD system, 6-speed automatic transmission for four-wheel drive, 18" Daytona alloy wheels w/ 235/40 R18 all-weather tires6-Speed Tiptronic, Model Code: 3572UQ MSRP $41,170Optional Equipment:Available on all: 4X4 Rear Side Airbags $350, UF8 Media Device Interface for iPod Integration $199 (not available w/ PTM)Available on Sport only: W72 CC R-Line Package $1,830Available on Luxury only; 9VE Dynaudio Premium Sound System $1,000, CCC Climatronic/Heated Washer Nozzle Credit $ -500 (affects production wks 22/09-36/09 only), W73 CC Lux Appearance Package $1,200Available on Luxury & VR6: PTM Technology Package w/ MDI $2,640 (not available w/ UF8)Colors:Candy White/Cornsilk Beige-Black V-Tex/Black V-Tex/Cornsilk Beige-Black Leather/Black Leather Deep Black Metallic/Cornsilk Beige-Black V-Tex/Black V-Tex/Cornsilk Beige-Black Leather/Black LeatherIron Gray Metallic/Cornsilk Beige-Black V-Tex/Black V-Tex/Cornsilk Beige-Black Leather/Black LeatherIsland Gray Metallic (not available w/ R-Line)/Cornsilk Beige-Black V-Tex/Black V-Tex/Cornsilk Beige-Black Leather/Black LeatherLight Brown Metallic/Cornsilk Beige-Black V-Tex/Black V-Tex/Cornsilk Beige-Black Leather/Black LeatherMocha Anthracite Metallic (not available w/ R-Line)/Cornsilk Beige-Black V-Tex/Black V-Tex/Cornsilk Beige-Black Leather/Black LeatherReflex Silver Metallic/Cornsilk Beige-Black V-Tex/Black V-Tex/Cornsilk Beige-Black Leather/Black LeatherShadow Blue Metallic (not available w/ R-Line) /Cornsilk Beige-Black V-Tex/Black V-Tex/Cornsilk Beige-Black Leather/Black LeatherWhite Gold Metallic (not available w/ R-Line)/Cornsilk Beige-Black V-Tex/Black V-Tex/Cornsilk Beige-Black Leather/Black Leather。
T31车型介绍(090212)

207两厢电气主要装备-雨刷
• 后雨刷器自动工作 前雨刷器工作时,如果您挂入倒档,后雨 刷器将自动开启,间歇刮水。
后喷水孔
207两厢后雨刷
由BSI进 行管理后 雨刷电机
207两厢电气主要装备-倒车雷达
• 3级车装备倒车雷达 • 2级车可选装。
挂入倒档后,驻车辅助系统开 始工作,同时出现声音提示信 号。
1.4 MT
1.6 MT/AT ● ● ● ○ ○ - ● ● ● ○ ○ - ● ● ● ● ● -
1.6 AT ● ● ● ● ● -
带MP3的CD+收音机
多碟虚拟CD+蓝牙+USB 倒车雷达+多碟虚拟CD+蓝牙 +USB 扬声器数量 “
●
- - 4
●
- - 4
●
- ○ 6
●
- ○ 6
●
○ - 6
207两厢外部造型-侧面
207两厢 的侧面线条流 畅、简洁有力, 镀铬防擦条凸 显高档、美观。
207两厢外部造型-尾部
207两厢 尾部设计 借鉴了标致607的尾灯 设计理念,尾灯外型与 207三厢相同,(但不能 互换).线条流畅,配备 了后雨刷.尾部牵引钩 在后保险杠右侧,尾部 整体搭配协调,很好的 利用了空气动力学原理, 使车辆高速行驶稳定性 更好。
对比207三厢增加了后雨刷器,207两厢的BSI 40V GR 插接重新使用。
该插接器只有 一根导线
207两厢车身主要装备-外装
T31 主要装备 Niv 1 浅内饰 深内饰 浅内饰 Niv2 深内饰 浅内饰 Niv3 深内饰
1.4 MT
1.6 MT 15寸铝合金车轮 着色玻璃 后雨刮器 电动天窗 倒车雷达 电动包(后门电动窗+电动 外后视镜+倒车雷达) ○ ● ● - - ○ ○ ● ● - - ○
207详细说明书

【系统名】详细设计说明书浙江浙大中控信息技术有限公司创建/修改页1.引言 (4)1.1编写目的 (4)1.2项目背景 (4)1.3定义 (4)1.4参考资料 (4)2.总体设计 (4)2.1需求概述 (4)2.2软件结构 (4)3.程序描述 (5)3.1功能 (5)3.2性能 (5)3.3输入项目 (5)3.4输出项目 (5)3.5算法 (5)3.6程序逻辑 (5)3.7接口 (5)3.8存储分配 (5)3.9限制条件 (5)3.10测试要点 (5)1.引言1.1编写目的【阐明编写详细设计说明书的目的,指明读者对象。
】1.2项目背景【应包括项目的来源和主管部门等。
】1.3定义【列出文档中所用到的专门术语的定义和缩写词的原文。
】1.4参考资料【列出有关资料的作者、标题、编号、发表日期、出版单位或资料来源,可包括:a.项目的计划任务书、合同或批文;b.项目开发计划;c.需求规格说明书;d.概要设计说明书;e.测试计划(初稿);f.用户操作手册(初稿);g.文档中所引用的其他资料、软件开发标准或规范。
】2.总体设计2.1需求概述2.2软件结构【如给出软件系统的结构图。
】3.程序描述【逐个模块给出以下的说明:】3.1功能3.2性能3.3输入项目3.4输出项目3.5算法【模块所选用的算法。
】3.6程序逻辑【详细描述模块实现的算法,可采用:a.标准流程图;b.PDL语言;c.N-S图;d.PAD;e.判定表等描述算法的图表。
】3.7接口3.8存储分配3.9限制条件3.10测试要点【给出测试模块的主要测试要求。
】。
标致408handbook n2使用手册(下)

展开三角警告牌 在发生事故或故障等紧急停车情况下, 为了及时提示后面的车辆,必须点亮危 险警告灯并将三角警告牌放在车辆后面。 根据路面类型和能见度的不同,应 将三角警告牌放置在适当的距离处。
与事故车辆的摆放距离(单位:米) 普通公路
>=50m 将三角警告牌底部四个支架 1 展开 放稳。 张开两个警告牌边框 2 和 3,扣好卡 扣 4。 将三角警告牌反光的一面朝向其他 车辆驶来的方向。 使用完成后,按相反的顺序收折。
拉出安全带,然后将锁扣插入锁孔 中。 拉一下安全带,检查安全带是否锁 止。 根据撞击的方式和程度,预张紧装置 可以在气囊打开之前触发或独立触发。 预张紧装置在启动的时候会释放出气体 并伴有声响,这是由系统内置的爆燃式 点火装置产生的。 在以上情况下,气囊警告灯会点亮。 撞击发生后,请到东风标致特约商处检 查是否有必要更换安全带系统。
A. B.
侧气帘(*)
侧气帘安装在座舱内侧上部,位于车身 与内饰之间。 侧气帘在乘员与侧车窗之间打开,以保 护乘员头部。 在 B 区发生由外向内垂直于侧面的剧烈 碰撞时,侧气囊在前座乘员和车门之间 打开,可以减少乘员胸部受伤害的程度。
如果该警告灯点亮,并伴随有蜂 鸣声和在多功能显示屏上显示的 信息,请与东风标致特约商联系, 以便对系统进行检查。在这种情 况下,碰撞时气囊可能不会打开。
97
8
气囊(*)
作为安全带保护功能的辅助和补充,汽 车遇到强烈碰撞时,可以降低坐姿正确 且正确系有安全带的乘员受伤害的程度。 如果发生碰撞,电子检测系统记录并分 析撞击监测区域内受到的正面和侧面 (如果配置了侧气囊和侧气帘)的冲击 (见示意图) ,分别控制气囊是否起爆。 气囊起爆之后,气囊会立即迅速排气, 不会妨碍乘客从车内出来。 在发生非强烈碰撞的情况下,安全带提 供的保护更安全,气囊不充气打开;碰 撞的强烈程度取决于障碍物的类型和撞 击的相对速度和角度。 A. B.