JBLBTX_250低音炮服务手册ServiceManual
JBL 250P 260P 有电子子频器说明书
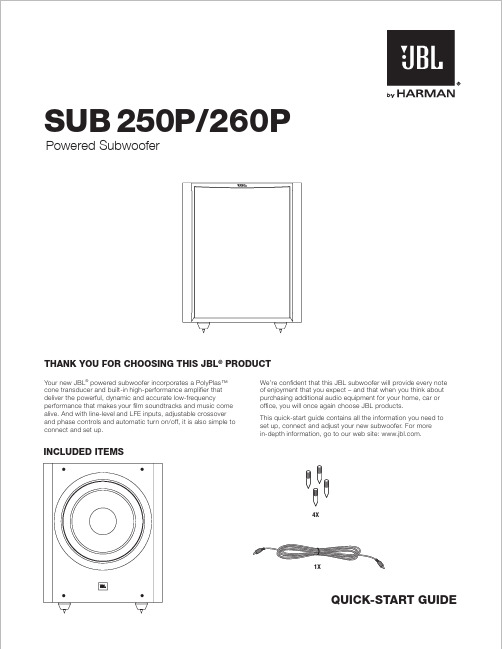
INCLUDED ITEMSYour new JBL ® powered subwoofer incorporates a PolyPlas™ cone transducer and built-in high-performance ampli fie r that deliver the powerful, dynamic and accurate low-frequencyperformance that makes your fil m soundtracks and music come alive. And with line-level and LFE inputs, adjustable crossover and phase controls and automatic turn on/off, it is also simple to connect and set up.We’re confident that this JBL subwoofer will provide every note of enjoyment that you expect – and that when you think about purchasing additional audio equipment for your home, car or of fice , you will once again choose JBL products.This quick-start guide contains all the information you need to set up, connect and adjust your new subwoofer. For more in-depth information, go to our web site: .Powered SubwooferTHANK YOU FOR CHOOSING THIS JBL ® PRODUCTSUB 250P/260PQUICK-START GUIDE1X4XSUBWOOFER REAR-PANEL CONTROLS AND CONNECTIONS1) Crossover Control: This control determines the highest frequency at which the subwoofer reproduces sounds. The higher you set the Crossover control, the higher in frequency the subwoofer will operate and the more its bass will “overlap” that of the speakers. This adjustment helps achieve a smooth transition of bass frequencies between the subwoofer and the speakers for a variety of different rooms and subwoofer locations.2) Phase Switch: This switch determines whether the subwoofer transducer's piston-like action moves in and out in phase with the main speakers. If the subwoofer were to play out of phase with the main speakers, the sound waves from the main speakers could partially cancel out the sound waves from the subwoofer, reducing bass performance and sonic impact. This phenomenon depends in part on the placement of all the speakers relative to the listening position and to each other in the room. 3) Bass Boost: When switched to 'On,' this boosts bass level for added low-end power.4) Power On Mode: When switched to 'Auto' position, the subwoofer will then be in Standby mode. It will automatically turn 'On' when an audio signal is detected at its inputs, and will return to the Standby mode when no audio signal is detected by its inputs after approximately 10 minutes. Otherwise, subwoofer will always remain powered until Power Switch is turned 'Off.' 5) Subwoofer Level: Use this control to adjust the subwoofer’s volume. Turn the knob clockwise to increase the volume; turn the knob counterclock-wise to decrease the volume.6) On/Standby LED: When the Power switch is in the ‘On’ position, this LED indicates whether the subwoofer is in the On or Standby state.• When the LED glows green, the subwoofer is turned on.• When the LED glows red, the subwoofer is in the Standby mode.7) Line In/LFE Input Connectors:• When you’re connecting the subwoofer to the dedicated subwoofer output of a receiver/processor that has its own low-pass crossovernetwork, use the LFE Input connector.• When you're connecting the subwoofer to the preamp or subwoofer outputs of a receiver/processor that does not have its own low-passcrossover network, use both Line In connectors and set the InputMode switch in the ‘Normal’ position. If your receiver/processor onlyhas one subwoofer output you can use either Line In connector.8) Power Switch: Set this switch in the ‘On’ position to turn the subwoofer on.If you will be away from home, or will not be using the subwoofer for an extended period, set this switch in the ‘Off’ position to conserve energy. 9) Power Cord:After you have made and verified the subwoofer’s input connections, plug the power cord into an active, unswitched electrical outlet for proper operation of the subwoofer.DO NOT plug the power cord into the accessory outlets found on some audio components.23PLACING THE SUBWOOFERCONNECTING THE SUBWOOFERThe performance of a subwoofer is directly related to its placement in the listening room and its physical position relative to the other speakers in the system.While it is true that in general our ears do not hear directional sounds at the lowfrequencies where subwoofers operate, when installing a subwoofer within the limited confines of a room, the r eflections, standing waves and absorptions generated within the room will str ongly influence the performance of any subwoofer system. As a result, the specific location of the subwoofer in the room does become important to the amount and quality of bass that is produced.For example, placing the subwoofer next to a wall generally will increase the amount of bass in the room; placing it in a corner (1) generally will maximize amount of bass in the room. However, corner placement can also increase the destructive effect of standing waves on bass performance. This effect can vary depending on the listening position – some listening positions may yield very good results while others may have far too much (or too little) bass at certain frequencies.We strongly recommend that you experiment with placement befor e choosing a final location for your subwoofer. One way you can determine the best location for the sub-woofer is by temporarily placing it in the listening position and playing music with strong bass content. Move around to various locations in the room while the system is playing (putting your ears wher e the subwoofer would be placed), and listen until you find thelocation where the bass performance is best. Place the subwoofer in that location.TO A RECEIVER OR PREAMP/PROCESSOR WITH A LOW-PASS FILTERED DEDICATED SUBWOOFER OUTPUTTO A RECEIVER OR PREAMP/PROCESSOR WITH PREAMP OUTPUTSIn many rooms, placing the subwoofer along the same plane as the left and right speakers (2) can produce the best integration between the sound of the subwoofer and that of the left and right speakers. In some rooms, the best performance could even result from placing the subwoofer behind the listening position (3).HARMAN International Industries, Inc.8500 Balboa Boulevard, Northridge, CA 91329 USATURNING THE SUBWOOFER ON AND OFFSet the subwoofer’s Power switch to the ‘On’ position. Now set the subwoofer’s Power On Mode to the ‘Auto’ position. The subwoofer will automatically turn itself on when it receives an audio signal, and it will go into Standby mode after it has received no audio signal for approximately 10 minutes. The subwoofer’s LED will glow green when the subwoofer is on and will glow red when the subwoofer is in Standby.If you will not be using the subwoofer for an extended period – for instance, if you’re going on vacation – set the Power Switch to the ‘Off’ position.SUBWOOFER ADJUSTMENTS: CROSSOVER CONTROLThe Crossover control adjusts the subwoofer’s built-in low-pass filter crossover between 50Hz and 150Hz. The higher you set the Crossover control, the higher in frequency the subwoofer will operate and the more its bass will ‘overlap’ that of the speakers. This adjustment helps achieve a smooth transition of bass frequencies between the subwoofer and the speakers for a variety of different rooms and subwoofer locations.To set the Crossover control, listen for the smoothness of the bass. If the bass seems too strong at certain frequencies, try a lower Crossover control setting. If the bass seems too weak at certain frequencies, try a higher Crossover control setting.SUBWOOFER ADJUSTMENTS: VOLUMEUse the Level control to set the subwoofer’s volume. Turn the knob clockwise to increase the subwoofer’s volume; turn the knobcounterclock-wise to decrease the volume. Once you have balanced the subwoofer’s volume with that of the other speakers in your system, you shouldn’t have to change the Level control setting.Notes on Setting Subwoofer Volume:• Sometimes the ideal subwoofer volume setting for music is too loud for films, while the ideal setting for films is too quiet for music. When setting the subwoofer volume, listen to both music and films with str ong bass content and find a ‘middle g round’ volume level that works for both.• If your subwoofer always seems too loud or too quiet, you may want to place it in a different location. Placing the subwoofer in a corner will tend to increase its bass output, while placing it away from any walls or corners will tend to lessen its bass output.SUBWOOFER ADJUSTMENTS: PHASEThe Phase switch determines whether the subwoofer driver’s piston-like action moves in and out in phase with the speakers. If the subwoofer were to play out of phase with the speakers, the sound waves from the speakers could partially cancel out the waves from the subwoofer, reducing bass performance and sonic impact. This phenomenon depends in part on the placement of all the speakers relative to each other in the room.Although in most cases you should leave the Phase switch in the ‘Normal’ position, there is no absolutely correct setting for the Phase switch. When the subwoofer is properly in phase with the speakers, the sound will be clearer and have maximum impact, and percussive sounds like drums, piano and plucked strings will sound more life-like. The best way to set the Phase switch is to listen to music that you know well and to set the switch in the position that gives drums and other percussive sounds maximum impact.USING THE SUPPLIED CARPET SPIKESFour metal spikes are supplied for use when you place the subwoofer on a carpeted surface. Do not use these spikes when placing subwoofer on non-carpeted surfaces.To insert the spikes:1. Gently lay the subwoofer on its side (not its front or back) on a soft, nonabrasive surface.2. Screw each spike into the threaded insert in each foot. Make sure all four spikes are screwed in completely for stability.Note : NEVER drag the subwoofer to move it. Always carefully lift the subwoofer and carry it to its new location.© 2014 HARMAN International Industries, Inc. All rights reserved.JBL is a trademark of HARMAN International Industries, Incorporated, registered in the United States and/or other countries. PolyPlas is a trademark of HARMAN International Industries, Incorporated.Features, speci fic ations and appearance are subject to change without notice.Part No. OPERATING THE SUBWOOFER。
JBL CS Series 汽车音响多元元件说明书

INSTALLATION WARNINGS AND TIPSABOUT THESE INSTRUCTIONS Installation of automotive stereo com-ponents can require extensive experi-ence with a variety of mechanical and electrical procedures. Although these instructions explain how to install CS Series multielement speakers in a general sense, they do not show the exact installation methods for your particular vehicle. If you do not feel you have the experience, do not attempt the installation yourself, but instead ask your authorized JBL car audio dealer about professional installation options.LOUD MUSIC ANDHEARINGPlaying loud music in an automobilecan hinder your ability to hear trafficas well as permanently damage yourhearing. The maximum volume levelsachievable with JBL speakers, com-bined with high power amplification,may exceed safe levels for extendedlistening. We recommend using lowvolume levels when driving. JBLaccepts no liability for hearing loss,bodily injury, or property damageas a result of use or misuse of thisproduct.REAR DECKPRECAUTIONIn some cars, fuel tanks may belocated directly beneath the reardeck. Before installation, make surethere is adequate speaker basketclearance before considering thislocation!INSTALLATION TIPS•Always wear protective eyewearwhen using any tools.•Turn off all audio components andother electrical devices before youstart. Disconnect the (–) negativelead from your vehicle’s battery.•Keep speakers in their packageuntil final installation. When movinga speaker, always rest it with thecone or dome facing up. Never useforce to install any speaker.•Check clearances on both sides ofa planned mounting surface beforedrilling any holes or installing anyscrews. Remember that the screwscan extend behind the surface.•At the installation sites, locateand make a note of all fuel lines,hydraulic brake lines, vacuum linesand electrical wiring. Use extremecaution when cutting or drilling inand around these areas.•Before drilling or cutting holes, usea utility knife to remove unwantedfabric or vinyl, to keep materialfrom snagging in a drill bit or saw.•For door installations, check theclearance with the windowsthroughout the range of the win-dow’s travel, and verify that amounted speaker will not interferewith the window crank or powerwindow mechanism.•If mounting speakers elsewhere,check for clearance around reardeck torsion bars, glove box orother structural elements.•Do not mount speakers where theywill get wet.INSTALLATIONFigure 3.Mounting the CS206 usingthe supplied grille.Figure 2.Mounting the CS264.NOTE: T he CS264 is designed tobe installed under a factory grille.Consequently, no grilles are pack-aged with this model.NOTE:The CS206 uses an adapterto fit a variety of different 6"openings. Select an appropriateadapter ring and secure it to thevehicle using the sheet-metalscrews provided, then attach thespeaker to the ring with themachine screws.Figure 1.Mounting the speaker(except CS264) using the suppliedgrilles.SPECIFICATIONSJBL Consumer Products250 Crossways Park Drive, Woodbury, NY 11797 USA 1.800.336.4JBL (4525) • FAX 1.516.682.3523 • © 2003 Harman International Industries, Incorporated JBL is a registered trademark ofHarman International Industries, Incorporated.Part No. CSMEOM2/03CS205CS206CS264CS265CS308CS310CS396 CS496Type:5-1/4" two-way 6-1/2" two-way 4" x 6" two-way 165mm two-way 8" three-way 10" three-way 6" x 9" three-way 6" x 9" four-way Speaker 4 ohms 4 ohms 4 ohms 4 ohms 4 ohms 4 ohms 4 ohms 4 ohms Impedance:Power 90W Peak,120W Peak,90W Peak,120W Peak,210W Peak,270W Peak,210W Peak,210W Peak,Handling 30W RMS 40W RMS 30W RMS 40W RMS 70W RMS 90W RMS 70W RMS 70W RMS Sensitivity (2.83V, 1m):91dB 91dB 90dB 91dB 91dB 92dB 91dB 91dB Frequency Response:70Hz – 20kHz 55Hz – 20kHz 75Hz – 20kHz 55Hz – 20kHz 50Hz – 20kHz 45Hz – 20kHz 50Hz – 20kHz 50Hz – 21kHz Mounting Depth:2-1/4" (58mm) 2" (51mm)1-11/16" (43mm)2-3/8" (61mm)3" (77mm)4-3/16" (107mm)3" (77mm)3" (77mm)Cut-Out Diameter:4-11/16" (120mm)5-1/8" (131mm)5-3/4" x 3-5/16"5-11/16" (145mm)7-3/16" (183mm)9-3/16" (234mm)8-13/16" x 6" 8-13/16" x 6" (147mm x 85mm)(224mm x 153mm)(224mm x 153mm)GENERAL CAREThe loudspeaker grilles may be cleaned with a damp cloth. Do not use any cleaners or solvents on the grilles or the speaker cones.A valid serial number is required for warranty coverage.Features, specifications and appearance are subject to change without notice.。
JBL Cinema SB250 平面电视搭配子音箱说明书

Aporta un sonido cinematográfico a cualquier televisor de perfil delgado. JBL Cinema SB250 está diseñado para complementar cualquier televisor de panel plano y proyectar un sonido envolvente virtual impactante con un conjunto elegante y sencillo. Se conecta sin hilos a su subwoofer compacto y potente, y al televisor con un solo cable. También mejora la experiencia de visualización con funciones de transmisión inalámbrica avanzadas mediante Bluetooth como JBL SoundShift™, que funciona con el televisor y un dispositivo móvil inalámbrico a la vez para que pueda cambiar automáticamente entre el sonido del televisor y el de su teléfono o tableta. JBL Cinema SB250 puede aprender cualquier control de volumen de control remoto de televisor, con lo cual usted disfruta de un control más sencillo de toda su experiencia de cine en casa. Un conmutador EQ mural o de sobremesa calibra el SB250 para cualquier tipo de instalación y el control independiente del volumen del subwoofer permite ajustar la respuesta de bajos a su gusto personal.CaracterísticasAporta un sonido cinematográfico a cualquier televisor de perfil delgado Solución inalámbrica todo en uno Conexión con un solo cable Aprendizaje del control remoto del televisorJBL SoundShift™Dolby® Digital y Harman Surround Harman Volume (Volumen Harman)Características y ventajasAporta un sonido cinematográfico a cualquier televisor de perfil delgadoJBL Cinema SB250 se ajusta a cualquier televisor moderno de panel plano y aporta un sonido cinemático impactante.Solución inalámbrica todo en unoSolución completa todo en uno con un subwoofer inalámbrico compacto de 6,5" (165 mm).Conexión con un solo cableConexión sencilla con un solo cable analógico u óptico con su televisor.Aprendizaje del control remoto del televisorSimplifique su experiencia utilizando el control remoto de su televisor, ya existente, para hacer funcionar la barra de sonido.JBL SoundShift ™Funciona con el televisor y un dispositivo móvil inalámbrico a la vez para que pueda cambiar automáticamente entre el sonido del televisor y el de su teléfono o tableta.Dolby ® Digital y Harman SurroundSonido cinematográfico con sonido Dolby ® Digital y Harman Display Surround.Harman Volume (Volumen Harman)Basta de anuncios a todo volumen; Harman Volume mantiene el nivel de sonido coherente.Contenido de la caja1 Barra de sonido Cinema SB2501 Subwoofer inalámbrico JBL 1 Control remoto1 Cable analógico de 3,5 mm 1 Cable óptico1 Guía de inicio rápido 1 Tarjeta de garantía 1 Hoja de seguridadEspecificaciones técnicasIntervalo de frecuencias: 45 Hz – 20 kHz SPL máximo: 100 dBPotencia total del amplificador de Cinema SB250: 200 W máx.Dimensiones: Barra de sonido (Ancho x Alto x Profundidad): 831 x 65 x 78 mm Peso: 2,8 kgSubwoofer (Ancho x Alto x Profundidad): 242 x 242 x 320 mm Peso: 4,8 kgDimensiones (Ancho x Alto x Profundidad): 935 x 310 x 375 mm Peso bruto: 10,5 kgJBL Cinema SB250 incluye módulos de altavoces izquierdo y derecho con unidades duales de dos vías cada uno con unidades de gama completa de 55 mm (2,25") y un altavoz de agudos con cúpula de 32 mm (1,25"). Subwoofer inalámbrico alimentado con una unidad de 165 mm (6,5") en una carcasa con puertosDescodificación Dolby ® Digital Conectividad Bluetooth ®Una entrada de audio analógica estéreo Una entrada óptica digitalUn puerto USB para actualizaciones de software© 2015 HARMAN International Ind ustries, Incorporated. Tod os los d erechos reservad os. JBL es una marca comercial d e HARMAN International Ind ustries, Incorporated , registrad a en Estad os Unid os y en otros países. Las funciones, las especificaciones y el diseño del producto están sujetos a cambios sin previo aviso. La marca de la palabra Bluetooth ® y los logotipos son marcas registradas propiedad de Bluetooth SIG, Inc.y cualquier uso de dichas marcas por parte de HARMAN International Industries, Incorporated se realiza bajo licencia. Otras marcas registradas y nombres comerciales son propiedad de sus respectivos propietarios. Fabricado con licencia de Dolby Laboratories. Dolby y el símbolo de la doble D son marcas registradas de Dolby Laboratories.HARMAN International Industries, Incorporated8500 Balboa Boulevard, Northridge, CA 91329 USA 。
JBL 影院音频系统所有者手册说明书

2READ FIRST! Important Safety Precautions!1.Read these instructions.2.Keep these instructions.3.Heed all warnings.4.Follow all instructions.5.Do not use this apparatus near water.6.Clean only with a dry cloth.7.Do not block any ventilation openings. Install in accordance with the manufacturer’s instructions.8.Do not install near any heat sources such as radiators, heat registers, stoves or other apparatus (including amplifiers) that produce heat.9.Do not defeat the safety purpose of the polarized or grounding-type plug.A polarized plug has two blades with one wider than the other.A grounding-type plug has two blades and a third grounding prong. The wide blade or the third prong are provided for your safety. If the provided plug does not fit into your outlet, consult an electrician for replacement of the obsolete outlet.10.Protect the power cord from being walked on or pinched, particularly at plugs, convenience receptacles and the point where they exit from the apparatus.11.Only use attachments/accessories specified by the e only with the cart, stand,tripod, bracket or table specified by the manufacturer or sold with thecaution when moving the cart/ apparatus combination to avoid injury from tip-over.13.Unplug this apparatus during lightning storms or when unused for long periods of time.14.Refer all servicing to qualified service personnel. Servicing is required when the apparatus has been damaged in any way, such as power-supply cord or plug isdamaged, liquid has been spilled or objects have fallen into theapparatus, the apparatus has been exposed to rain or moisture, does not operate normally, or has been dropped.15.Do not use attachments not recommended by the product manufacturer, as they may cause hazards.16.This product should be operated only from the type of power source indicated on the marking label. If you are not sure of the type of power supply to your home, consult your product dealer or local power company. For products intended to operate from battery power or other sources, refer to the operating instructions.17.If an outside antenna or cable system is connected to the product, be sure the antenna or cable system is grounded so as to provide some protection against voltage surges and built-up static charges. Article 810 of the National Electrical Code,ANSI/NFPA 70, provides information with regard to proper grounding of the mast and supporting structure,grounding of the lead-in wire to an antenna discharge unit, size of grounding conductors, location of antennadischarge unit, connection to grounding electrodes, and requirements for the grounding electrode. See Figure A.18.An outside antenna system should not be located in the vicinity of overhead power lines or other electric light or power circuits, or where it can fall into such power lines or circuits. When installing an outside antenna system, extreme care should be taken to keep from touching such power lines or circuits,as contact with them might be fatal.19.Do not overload wall outlets,extension cords, or integralconvenience receptacles, as this can result in a risk of fire or electric shock.20.Never push objects of any kind into this product through openings, as they may touch dangerous voltage points or short-out parts, which could result in a fire or electric shock.Never spill liquid of any kind on the product.21.The apparatus shall not be exposed to dripping or splashing, and no objects filled with liquids,such as vases, shall be placed on the apparatus.22.Do not attempt to service this product yourself, as opening or removing covers may expose you to dangerous voltage or other hazards.Refer all servicing to qualified service personnel.23.When replacement parts are required, be sure the service technician has used replacement parts specified by the manufacturer or that have the same characteristics as the original part. Unauthorized substitutions may result in fire,electric shock or other hazards.24.Upon completion of any service or repairs to this product, ask the service technician to perform safety checks to determine that the product is in proper operating condition.25.The product should be mounted to a wall or ceiling only asrecommended by the manufacturer.THANK YOU FOR CHOOSING JBLFor more than 60years, JBL has been involved in every aspect of music and film recording and reproduction, from live performances to the provide every note ofenjoyment that you expect –and that when you think aboutpurchasing additional audioequipment for your home, carWeb site at .It enables us to keep youposted on our latest advance-ments, and helps us to betterunderstand our customers4SPEAKER PLACEMENTSUBWOOFERSURROUND SPEAKERSFRONTSPEAKERSThe front speakers should be placed the same distance from each other as they are from the listening position.The CSB5 speakers should be placed at about the same height from the floor as the listeners’ ears will be, or they may be angled toward the listeners.The center channel speaker should be placed slightly behind the front left and right speakers, and no more than 2 feet (0.6m) above or below the tweeters of the left and right speakers. It is often convenient to set the center speaker on top of thetelevision set, as shown in the drawing.The JBL Cinema Soundspeaker system may be used in 5.1-, 6.1- or 7.1-channel applications. In 5.1-channel applications, two of thesurround speakers should be placed slightly behind the listening position and, ideally,should face each other and be at a level higher than the listeners’ ears. If that is not possible, they may be placed against a wall behind the listening position, facingforward. In 6.1-channel appli-cations, two of the surround speakers should be placed in the side positions, and asingle surround back speaker should be placed against the wall behind the listening position. In 7.1-channelapplications, place two of the surround speakers in the side positions, and place the two surround back speakers against the rear wall.In Dolby ®Digital and DTS ®systems, it is best to aim all of the speakers (except the subwoofer) toward thelistening position at or slightly above about ear-level height.In systems where only analog surround processing (such as Dolby Pro Logic ®II) isavailable, it may be preferable to aim the speakers straight out from the wall to obtain a more diffuse sound.The low-frequency material reproduced by the subwoofer is mostly omnidirectional, and this speaker may be placed in a convenient location in the room. However, bass reproduction will be maximized when the subwoofer is placed in acorner along the same wall as the front speakers.Experiment with subwoofer placement by temporarily placing the subwoofer in the listening position and moving around the room until the bass reproduction is best. Place the subwoofer in that location.CENTER CHANNEL SPEAKER† Single surround back speaker may be used with 6.1 receivers and processors.Alternate placement for surround speakers when only 5.1 channels are used; required placement for surround back speakers in 7.1-channel systems.5The CSC55 center channel and the CSB5 are designed to be mounted on the wall. There are two (2) fixed-mount wall brackets provided for the CSC55, and one for the CSB5.Each speaker bracket will require up to three 1-1/2" #10wood screws; each screw should be fastened to a wall stud.If a wall stud is unavailable,install an anchor appropriate for a 1-1/2" #10 screw.NOTE: The customer is responsible for the correct selection and use of mounting hardware (available through hardware stores) to ensure the proper and safe wall-mounting of the speakers.Step ing the included mounting template (CSC55only) or the bracket back plate (CSB5 only), mark thepositions on the wall where you would like to place the mounting screws.Step 2.Attach the back plate(s) of the bracket to the wall using three screws (not included).Step 3.Attach the frontplate(s) (with the two holes) of the bracket(s) to the CSC55 or CSB5, using the provided screws.Step 4.Slide the CSC55 or CSB5 speaker with attached bracket front plate(s) onto the back plate(s) of the bracket(s).Once positioned properly, the speaker should slide down slightly and become secure.To remove the speaker from the wall, simply slide the speaker up.WALL-MOUNTING THE CSC55AND CSB56CONNECTION TIPSSPEAKER CONNECTIONSSeparate and strip the ends of the speaker wire as shown.Speakers and electronics terminals have corresponding (+) and (–) terminals. Most manufacturers of speakers and electronics, including JBL, use red to denote the (+)terminal and black to denote the (–) terminal.The (+) lead of the speaker wire is noted with a stripe. It is important to connect both speakers identically:(+) on the speaker to (+) on the amplifier and (–) on the speaker to (–) on the amplifier.Wiring “out of phase” results in thin sound, weak bass and a poor stereo image.With the advent of multichan-nel surround sound systems,connecting all of the speakers in your system with the correct polarity remains equally important in order to preserve the proper ambience and directionality of theprogram material.insert each wire into its corresponding hole in the base. Then tighten down the terminals.CSB5,CSC55To use the binding-post speaker terminals, unscrew the colored collar until the pass-through hole in the center post is visible under the collar. Insert the bare end of the wire through this hole;then screw the collar down until the connection is tight.The hole in the center of each collar is intended for use with banana-type connectors. To comply with European CE certification,these holes are blocked with plastic inserts at the point of manufacture.To use banana-type connectors requires the removal of the inserts.The hole in the center of each collar is intended for use with banana-type connectors. To comply with European CE certification,these holes are blocked with plastic inserts at the point of manufacture.To use banana-type connectors requires the removal of the inserts.DOLBY PRO LOGIC®(NON-DIGITAL) – LINE LEVELUse this installation method for Dolby Pro Logic applications (not Dolby Digital, DTS or other digital processing), where the receiver/processor is equipped with a subwoofer output, or a volumecontrolled preamp (line-) level output:Use RCA-type interconnectsto connect the line-levelsubwoofer outputs on yourreceiver or amplifier to theline-level inputs on thesubwoofer. IMPORTANT: Donot use the LFE input on thesubwoofer with DolbyPro Logic processors.NOTE: If your receiver oramplifier has only onesubwoofer output jack, thenyou will need to use aY-connector (not included).Plug the male end of theY-connector into your receiveror amplifier’s subwooferoutput jack, and connect eachof the two female ends toseparate RCA-typeinterconnects. Finally, plug theRCA-type interconnects intothe line-level inputs on thesubwoofer.Connect each speaker tothe corresponding speakerterminals on your receiveror amplifier.Make sure your receiver orprocessor is correctlyconfigured to indicate that thesubwoofer is “On.”Use this installation method for Dolby Digital, DTS or other digital surround processors: Use the line-level input jack marked “LFE” for the Low-Frequency Effects channel.Connect this jack to the LFEoutput or subwoofer outputon your receiver or amplifier.Connect each speaker tothe corresponding speakerterminals on your receiveror amplifier.Make sure that you haveconfigured your surroundsound processor for “Sub-woofer On.” Also configureyour receiver for 5.1-, 6.1-or 7.1-channel operation asappropriate. The front left,front right, center and rearspeakers should all be setto “Small.” If your receiverallows you to set the cross-over frequency between thesubwoofer and the mainspeakers, select 100Hz orthe setting that is the closestfrequency below it.DOLBY®DIGITAL OR DTS®(OR OTHER DIGITAL SURROUND MODE) CONNECTION7SUBWOOFER OPERATIONPress the Master Power switch (marked “Power” a) to the On position to use the subwoofer. The CSS10 subwoofer will automatically turn on or go into standby (sleep) mode as described below. When your receiver or amplifier is off, or is not sending program materialto the subwoofer, the subwoofer will be in standby mode (the LED on the front of the CSS10 will be red). When the subwoofer senses an audio signal, it will automatically turn on (the LED will be green). If the subwoofer does not sense a signal after approximately 20 minutes, it will automatically go into standby mode.If you will be away from home for an extended period of time,or if the subwoofer will not beused, switch the MasterPower switch a to the Offposition by pressing it until itpops out.VOLUMEVolume may be adjusted using the Subwoofer Level control b, as shown.The Phase control determineswhether the subwoofer’spistonlike action moves in andout in phase with the mainspeakers or opposite the mainspeakers. There is no corrector incorrect setting. Properphase adjustment depends onseveral variables, such assubwoofer placement andlistener position. Adjust thePhase switch c to maximizebass output at the listeningposition.Remember, every system,room and listener is different.There are no right or wrongsettings; this switch offers theadded flexibility to adjust yoursubwoofer for optimumperformance for your specificlistening conditions withouthaving to move your speakers.If at some time in the futureyou happen to rearrange yourlistening room and move yourspeakers, you shouldexperiment with the phaseswitch in both positions, andleave it in the position thatmaximizes bass performance.8If there is no sound from any of the speakers:• Check that receiver/amplifier is on and a source is playing.• Check that the powered subwoofer is plugged in and is turned on (Power switch a pushed in).• Check all wires and connections between receiver/ amplifier and speakers. Make sure all wires are connected. Make sure none of the speaker wires are frayed, cut or punctured, or touching each other.• Review proper operation of your receiver/amplifier.If there is no sound coming from one speaker:• Check the “Balance” control on your receiver/amplifier.• Check all wires and connections between receiver/ amplifier and speakers. Make sure all wires are connected. Make sure none of the speaker wires are frayed, cut or punctured, or touching each other.• In Dolby Digital or DTS modes, make sure that the receiver/ amplifier is configured so that the speaker in question is enabled.• Turn off all electronics and switch the speaker in question with one of the other speakers that is working correctly. Turn everything back on, and determine whether the problem has followed the speaker or has remained in the same channel. If the problem is in the same channel, the source of the problem is most likely with your receiver or amplifier, and you should consult the owner’s manual for that product for further information. If the problem has followed the speaker, consult your dealer for further assistance or, if that is not possible, visit .If there is no sound from thecenter speaker:• Check all wires andconnections between receiver/amplifier and speaker. Makesure all wires are connected.Make sure none of the speakerwires are frayed, cut orpunctured, or touching eachother.• If your receiver/processor isset in Dolby Pro Logic mode,make sure the center speaker isnot in phantom mode.• If your receiver/processor isset in one of the Dolby Digital orDTS modes, make sure thereceiver/processor isconfigured so that the centerspeaker is enabled.If the system plays at lowvolumes but shuts off asvolume is increased:• Check all wires andconnections between receiver/processor and speakers. Makesure all wires are connected.Make sure none of the speakerwires are frayed, cut orpunctured, or touching eachother.• If more than one pair of mainspeakers is being used, checkthe minimum impedancerequirements of your receiver/amplifier.If there is low (or no) bassoutput:• Make sure the connections tothe left and right “SpeakerInputs” have the correctpolarity (+ and –).• Make sure the subwoofer isplugged into an active electricaloutlet and is turned on (Powerswitch a pushed in).• In Dolby Digital or DTS modes,make sure your receiver/processor is configured so thatthe subwoofer and LFE outputare enabled.• Switch the Phase switch c tothe opposite position, and selectthe position that results in themost pleasing bass response.If there is no sound fromthe surround speakers:• Check all wires andconnections between receiver/processor and speakers. Makesure all wires are connected.Make sure none of the speakerwires are frayed, cut orpunctured, or touching eachother.• Review proper operation ofyour receiver/amplifier and itssurround sound features.• Make sure the movie orTV show you are watchingis recorded in a surround soundmode. If it is not, check to seewhether your receiver/processor has other surroundmodes you may use.• In Dolby Digital or DTS modes,make sure your receiver/processor is configured so thatthe surround speakers areenabled. When five satellitesare in use, remember toconfigure your receiver orprocessor for 6.1-channeloperation, and when sixsatellites are in use, configureyour receiver or processor for7.1 channels.• Review the operation of yourDVD player and the jacket ofyour DVD to make sure that theDVD features the desired DolbyDigital or DTS mode, and thatyou have properly selected thatmode using both the DVDplayer’s menu and the DVDdisc‘s menu.TROUBLESHOOTING9SYSTEMFrequency Response 27Hz – 30kHz (–6dB)CST55Maximum Recommended Amplifier Power150 Watts*Power Handling50W Continuous/300W Peak Frequency Response55Hz – 30kHz (–6dB) Nominal Impedance8 OhmsSensitivity90dB @ 1 Watt/1 meterTweeter One 3/4" (19mm) titanium-laminate dome, video-shieldedWoofers Dual 130mm (5")transducers with PolyPlas™ cones, neodymium magnets and HeatScape™ motor structure, video-shielded Dimensions (H x W x D)(including wall-mount bracket and grille)1168 x 286 x 286mm (46" x 11-1/4" x 11-1/4") Weight7.7kg (17 lb)CSB5Maximum Recommended Amplifier Power125 Watts*Power Handling40W continuous/300W peak Frequency Response60Hz – 30kHz (–6dB) Nominal Impedance8 OhmsSensitivity88dB @ 1 watt/1 meterTweeter 3/4" (19mm) Titanium-laminate dome, video-shieldedWoofer5" (130mm)Transducer with PolyPlas™cone, neodymium magnet and HeatScape™ motor structure, video-shieldedDimensions (H x W x D) (including base and grille) 363 x 155 x 116mm (14-5/16" x 6-1/8" x 4-9/16") Weight2.3kg (5 lb)Dimensions (H x W x D)(without base and with wall-mount bracket and grille)338 x 155 x 130mm (13-5/16" x 6-1/8" x 5-1/8") Weight2kg (4.5 lb) CSC55Maximum Recommended Amplifier Power150 Watts*Power Handling50W Continuous/300W Peak Frequency Response55Hz – 30kHz (–6dB) Nominal Impedance8 OhmsSensitivity90dB @ 1 watt/1 meterTweeter One 19mm (3/4")titanium-laminate dome, video-shieldedWoofers Dual 130mm (5")transducers with PolyPlas™ cones, neodymium magnets and HeatScape™ motor structure, video-shielded Dimensions (H x W x D)(including wall-mount bracket and grille)159 x 667 x 108mm (6-1/4" x 26-1/4" x 4-1/4") Weight4.5kg (10 lb)CSS10Amplifier Power150 Watts RMSFrequency Response27Hz – Low-pass crossover setting at signal sourceLow-Frequency Driver250mm (10")cone and HeatScape™motor structure, video-shieldedInput LFE preamp levelDimensions (H x W x D)(including feet)464 x 337 x 406mm (18-1/4" x 13-1/4" x 16") Weight19.5kg (43 lb)SPECIFICATIONSAll features and specifications are subject to changewithout notice.Dolby and Pro Logic are registered trademarks of DolbyLaboratories.DTS is a registered trademark of DTS, Inc.*The maximum recommended amplifier power ratingwill ensure proper system headroom to allow foroccasional peaks.We do not recommend sustained operation at thesemaximum power levels.CSB5, CSC55 and CST55CSS10 (230V only)。
JBL BassPro 汽车音响子woofer说明书

THANK YOUfor choosing the JBL BassPro. BassPro has been designed to deliver great bass performance from a compact, easily installed powered subwoofer enclosure.To get the best performance from your BassPro, we strongly recommend that installation be entrusted to a qualified professional. Although these instruc-tions explain how to install BassPro in a general sense, they do not show spe-cific installation methods that may be required for your particular vehicle.If you do not have the necessary tools or experience, do not attempt the installation yourself. Instead,please ask your authorizedJBL car audio dealer about professional installation.In order that we may better serve you should you require warranty service, please retain your original sales receipt and register your BassPro online at .3.Turn the head unit ON and play a selection of your favorite music track that has substantial bass.4.Adjust the CROSSOVER control counterclockwise, until you hear only low-frequency information. Example – you should not hear vocals coming from BassPro when seated in the normal listening position.5.Adjust the BASS CONTROL either clockwise or counterclockwise to suit your taste, and to avoid audible distortion.6.If you elect to not install the Remote Bass Control, adjust the GAIN control to the maximum level that provides undistorted output from the BassPro, with the head unit’s volume control at its 3 o’clock setting.Note: In most cases the above steps will provide you with satisfactory results. However, the actual process may require several readjustments of each control, since the settings will interact with one another. If necessary, consult your authorized JBL car audio dealer for help in tun-ing your system.For speaker-Use this RJ-11 jack control is set to minimum.to its maximum .TROUBLESHOOTING7SPECIFICATIONSAmplifier power:100 WattsFrequency response:20Hz – 120HzFuse rating:20AMax current draw:12AIdle current draw:<800mAInput sensitivity:50mV to 4V Line-level input;1V to 16V universal interfaceCrossover frequency:70Hz – 120HzCrossover slope:12dBDimensions (L x W x H):16-1/8" x 9-1/2" x 12-1/4"(includes mounting feet)(410mm x 242mmx 312mm)JBL Consumer Products250 Crossways Park Drive, Woodbury, NY 11797 USA1.800.336.4JBL(4525) • FAX 1.516.682.3523 • © 2003 Harman International Industries, IncorporatedJBL is a registered trademark ofHarman International Industries, Incorporated.Part No. BASSPROOM3/03。
JBL产品使用说明书

HARMAN International Industries, Incorporated8500 Balboa BoulevardNorthridge, CA 91329Dear Customer,Congratulations and thank you for choosing the JBL brand. Please take a moment to complete the enclosed profile card. The information we gather will enable us to keep you informed of our latest advancements and will help us to better understand your needs and fulfill your expectations.For more than 60 years, the JBL brand has been the professional’s top choice in music and film recording and reproduction. From the stage to the recording studio to the liv-ing rooms and automobiles of critical audiophiles, the JBL brand sets the standard for accuracy and dynamic musical performance.We’ve maintained this enviable position through rigorous research into analog and digital technologies and psychoacoustics. The results of this research drive the devel-opment of new designs and materials, extracting even greater levels of performance. We’re confident that the JBL products you have chosen will surpass your expectations, and that the next time you consider the purchase of an audio product, you will again think of JBL products.Once again, thank you for selecting JBL equipment.HARMAN International Industries, IncorporatedA Message from the JBL manufacturerand the Consumer Electronics Association:Selecting fine audio equipment, such as the unit you have just purchased, is only the start of your musical enjoyment. Now it is time to consider how you can maximizethe fun and excitement your equipment offers. JBL and the Consumer Electronics Association want you to get the most out of your equipment by playing it at a safe level, one that lets the sound come through loud and clear without annoying blaring or distortion – and, most important, without affecting your sensitive hearing.Sound can be deceiving. Over time your hearing “comfort level” adapts to higher volumes of sound. What sounds “normal” can actually be loud and harmful to your hearing. Guard against this by choosing a safe level BEFORE your hearing adapts.TO ESTABLISH A SAFE LEVEL:• Start your volume control at a low setting.• Slowly increase the sound until you can hear it comfortably, clearly, and without distortion. ONCE YOU HAVE ESTABLISHED A COMFORTABLE SOUND LEVEL:• Do not exceed that level.Taking a moment to do this now will help to prevent hearing damage or lossin the future. After all, we want you listening for a lifetime.JBL Northridge Series Passive All Weather Speaker Systems5-Year Limited WarrantyThis is an important document. Attach your bill of sale to this card and keep it ina safe place. Your bill of sale is your warranty.The JBL warranty remains in effect for five years from the date of the first consumer purchase.WHO IS PROTECTED BY THIS WARRANTYProvided that the JBL product was purchased from an authorized dealer in theUnited States or purchased by military personnel from an authorized militaryoutlet, the JBL warranty protects the original owner, which warranty is not transferable. Any attempt to transfer this warranty shall immediately void it. A copy of the original dated bill of sale must be presented whenever warranty service is required.WHAT IS COVERED BY THIS WARRANTYExcept as specified below, the JBL warranty covers all defects in material and workmanship. The following are not covered: damage caused by accident, misuse, abuse, product modification or neglect; damage occurring during shipment; damagefrom failure to follow instructions contained in the instruction manual; damageresulting from the performance of repairs by someone not authorized by the JBL manufacturer; damage caused by installation of parts that do not conform to JBL specifica-tions; units used for commercial or business use; any claims based on misrepresentations by the seller; products sold on an “as is” or final sale basis; or the cost of installing, removing, or reinstalling the unit. JBL liability is limited to the repair or replacement,at our option, of any defective product and shall not include incidental orconsequential damages. The JBL manufacturer reserves the right to replace a discontinued model with a comparable model. Any replacement units or parts may be new or rebuilt. NOTE: Repair of our product must be done by an authorized dealer or service center. Unauthorized repair will void the warranty and is done at the risk of the consumer.TO OBTAIN WARRANTY SERVICEIf you require warranty service, please contact your dealer for assistance. If this is not possible and you live in the United States, please visit our Web site at or call 800-336-4525 for information on how to obtain service or replacement.If purchased outside the United States, contact your local dealer or distributor for repair or replacement.DO NOT RETURN PRODUCTS TO THE JBL FACTORY WITHOUT AUTHORIZATION; THEY WILL BE RETURNED UNOPENEDYou are responsible for transporting your product for repair or replacement. The JBL manufacturer will pay reasonable return charges for delivery to any location in the con- tinental United States, Alaska or Hawaii if the repair or replacement is covered underthe warranty. Please save the original shipping carton(s), as a charge will be made for additional cartons.Correspondence with JBL Customer Service should be addressed to: JBL Customer Service, 8500 Balboa Boulevard, Northridge, CA 91329. Outside the United States, please contact your local distributor.This warranty gives you specific legal rights. You may also have other rights, which vary from state to state. Some states do not allow the exclusion or limitation of incidentalor consequential damages or limitations on how long an implied warranty lasts, so the above may not apply to you.HARMAN International Industries, Incorporated8500 Balboa Boulevard, Northridge, CA 91329© 2012 HARMAN International Industries, Incorporated. All rights reserved.JBL is a trademark of HARMAN International Industries, Incorporated, registered in the United States and/or other countries. CEA (Consumer Electronics Association) is a registered trademark of the Consumer Electronics Association.Part No. 5YEARWARJBL。
JBL IRX108BT服务手册说明书
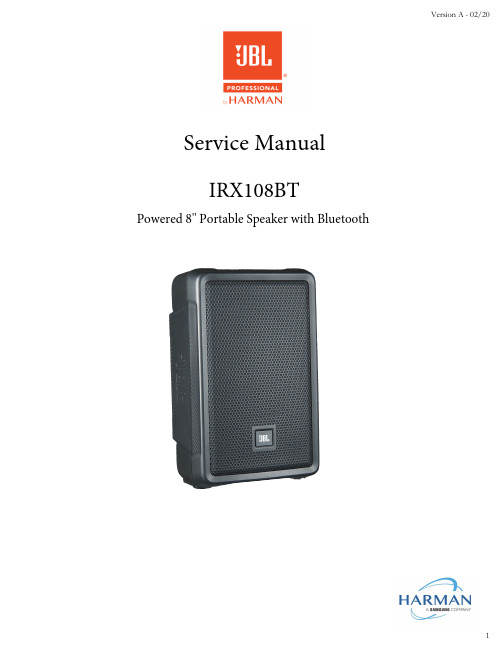
Service ManualIRX108BTPowered 8'' Portable Speaker with BluetoothVersion A - 02/20Table of ContentsDatasheets and Specifications Exploded View DiagramsSchematicsBill of Materials IRX108BT Service ManualVersion A - 02/20HIGHLIGHTS ■Bi g Sound, Small BoxClass-leading output and frequency response in a compact designBluetooth 5.0 Audio Streamin g Easily stream audio with greater wireless range, speed and accuracy using Bluetooth 5.0Feedback Su pp ressiondbx® Automatic Feedback Suppression for trouble-free operationEQ PresetsFour selectable EQ presets to easily tune the speaker for a range of applicationsMusic Duckin gSoundcraft®-designed ducking automatically attenuates music when speech is detectedThe JBL IRX108BT portable powered speaker delivers class-leading output and clarity, total ease of use and an unrivaled feature set at our most affordable price point. Sound amazing with a custom, pro-grade PA engineered to outperform larger competing systems. EQ presets let you dial in optimal tone in an instant-no experience necessary-and built-in dbx feedback suppression lets you crank it up with confidence. Play music, soundtracks and backing tracks with Bluetooth 5.0 audio streaming, and ensure your voice carries over background music with one-touch ducking. Two mic/line combo inputs and an XLR pass-thru output round out this lightweight, durable PA.Performers, content producers, fitness instructors and presenters on the go can count on the versatile, full-featured IRX108BT to serve up stunning, pro-quality sound, every time.KEY MESSAGES ■CLASS-LEADING OUTPUT AND CLARITY The IRX108BT draws from seven decades of legendary JBL engineering to deliver the highest measured output and the widest frequency response in its class, with SPL, wattage and performance ratings equivalent to larger competitive loudspeakers.BLUETOOTH AND AUDIO 1/0Bluetooth 5.0 audio streaming lets you play backing tracks,video soundtracks or recorded music between sets with greater wireless range, speed and accuracy-even link two speakers to create a true stereo image. Two XLR/TRS combo inputs and an XLR pass-thru output to connect additional speakers round out 1/0 options.RUGGED AND ROAD-TESTEDLike every JBL speaker, the IRX108BT undergoes 100 hours of stress testing to ensure it'll perform flawlessly in real-world conditions.IN THE BOX ■IRX108BTIEC Power Cable Quick Start GuideTAKE THE GUESSWORK OUT OF GREAT SOUNDSound your best in seconds with four EQ presets modeled after a range of common performance scenarios. Built-in dbx feedback suppression protects speakers-and your ears-by automatically stopping feedback before it starts. One-touch,Soundcraft-designed ducking automatically lowers music volume when speech input is detected, ensuring every word is heard loud and clear.POWERFUL GETS MORE PORTABLEThe IRX108BT is engineered to deliver big-system sound in a compact footprint. Its ultra-lightweight, durable polypropylene cabinet will have you loading in and out in minutes, and ergonomic handles make transport a breeze. In short, you'll enjoy big, crystal-clear sound without the hassle of hauling a huge system.BluetoothDatasheets and SpecificationsIRX108BT Service ManualVersion A - 02/20APPLICATIONS ■MUSICIANS/PERFORMERSMusicians and performers looking for a great-sounding, easy-to-use sound reinforcement speaker in a portable, affordable package.FEATURES ■PRESENTERS/INSTRUCTORSMobile presenters and fitness instructors looking for an easy-to-use, compact PA solution with Bluetooth audio and built-in music ducking.HOSPITALITY /GOVERNMENT INSTALLATIONS Hospitality/government installationsrequiring professional sound quality with ease of use and minimal setup time.•Four EQ presets take the guesswork out of optimizing sound •2 XLR{TRS combo input jacks and 1 XLR output offer a range•dbx AFS stops feedback before it startsof connectivity choices•Bluetooth integration allows stereo streaming of music,soundtracks and backing tracks•Input accepts mic or line source to enhance versatility •Ergonomic handles make transport quick and easy •One-touch ducking automatically lowers music volume when speech input is detected•Durable honeycomb steel grille is road-tested for reliability •Wide frequency response: 54 Hz -20 kHz •Lightweight designTECHNICAL SPECIFICATIONS ■SYSTEM TYPE: CABINET: MAXSPL:FREQUENCY RESPONSE {:t3 dB): POWER RATING: INPUT IMPEDANCE: Powered 8" two-wayPolypropylene with full grille 124 dB peak 54 Hz-20 kHz 1300 watts peak 10k ohm balanced•Built-in pole mount expands system setup optionsCOVERAGE PATTERN: BLUETOOTH: 90° (horizontal) x 60° (vertical) nominal Audio streaming, Bluetooth version 5.0 DSP: 1/0:MOUNTING: NET WEIGHT:DIMENSIONS (D x W x H):4 presets, feedback suppression, ducking2 XLR{TRS combo mic/line inputs, 1 XLR pass-thru output 35 mm pole socket 17.4 lb (7.9 kg)10.15 X 12.32 X 19.15 in (258 x 313 x 486 mm)ORDER SPECIFICATIONS ■SHIPPING CARTON (L x W x H): SHIPPING WEIGHT: UPC CODE:10.87 X 13.35 X 20.35 in (276 x 339 x 517 mm) 20.5 lb (9.3 kg)691991033506IRX108BT Service ManualVersion A - 02/201415161725262728Exploded View DiagramsIRX108BT Service ManualVersion A - 02/20IRX108BT_REAR PLATE ASSY_EXPLODED VIEWIRX108BT Service ManualVersion A - 02/20Schematics IRX108BT Service ManualVersion A - 02/20。
JBL 音箱产品说明书

* Dolby and Pro Logic are trademarks of Dolby Laboratories.
DTS is a registered trademark of Digital Theater Systems, Inc.
Declaration of Conformity
We, Harman Consumer International 2, route de Tours 72500 Chateau-du-Loir FRANCE
† The maximum recommended amplifier power rating will ensure proper system headroom to allow for occasional peaks. We do not recommend sustained operation at these maximum power levels.
Template/paint shield (punch out at perforation).
SPEAKER PLACEMENT
Front Speakers
WALL 400- 600
Models SP5, SP6 as Rear Speakers
- 1、下载文档前请自行甄别文档内容的完整性,平台不提供额外的编辑、内容补充、找答案等附加服务。
- 2、"仅部分预览"的文档,不可在线预览部分如存在完整性等问题,可反馈申请退款(可完整预览的文档不适用该条件!)。
- 3、如文档侵犯您的权益,请联系客服反馈,我们会尽快为您处理(人工客服工作时间:9:00-18:30)。
Q1,Q3,Q4,Q6,Q7,Q8,Q103,Q104 Q2,Q5,Q101,Q102,Q112 Q13,QM1 Q11,Q12 Q106 Q107 Q105 Q110 Q111 Q109 Q108 D2,D3,D4,D5,D8,D9 ZD1,ZD2 D1 D7 D6 U1 L1 T1 R33 R30 R10 R5,R25,R26,R104,R105,R111,R112 R12,R19,R20,R21,R22,R113,R122 R1,R8,R9,R28,R102,R124,RM1 R125 R18
August 02
BTX-250 SPARE PARTS POWER AMP POS ITEM NO. ASYJBL50 027112092 PCB 122SA1015 TRANSISTOR 122SC1815 TRANSISTOR 123T0K30A TRANSISTOR 123TRFZ44 TRANSISTOR 124T0SA06 TRANSISTOR 124T0SA13 TRANSISTOR 124T0SA56 TRANSISTOR 128TTI35C TRANSISTOR 128TTI36C TRANSISTOR 129TB647A TRANSISTOR 129TD667A TRANSISTOR 131TN4148 DIODE 133T0015B ZENER DIODE 134TN5402 RECTIFYING DIODE 136T1220A FAST RECOVER RECTIFIER 136T1220C FAST RECOVER RECTIFIER 158TTL494 IC DIP16 174114005 INDUCTANCE 181T02804 POWER TRANSFORMER 220440101 RESISTOR 220440242 RESISTOR 220880100 RESISTOR 220880101 RESISTOR 220880102 RESISTOR 220880103 RESISTOR 220880133 RESISTOR 220880153 RESISTOR DESCRIPTION PCB ASSY AMP JBL50 CSA50 POWER 112X92MM PCB Blank TOSHIBA 2SA1015 250MA 60V 0.4W TOSHIBA 2SC1815 250MA 60V 0.4W MOS K30A (T0-92) IR IRFZ44V 60V 55A 115W TR MOTOROLA MPSA06 N 0.5A 80V TR MOTOROLA MPSA13 N 0.5A 30V TR MOTOROLA MPSA56 P 0.5A 80V TR SGS OR TI TIP35C N 25A TR SGS OR TI TIP36C P 25A 100V TR HITACHI 2SB647AC 100V 1A TR HITACHI 2SD667AC 100V 1A NS 1N4148 HSS 150MA 100V 52MM NEC RD15EB3 ZNR 0.5W 15V 52MM 1N5402 RET 3.0A 100V F12C20A 12A 200V (TO220) F12C20C 12A 200V (TO220) NEC UPC494 OR TI TL494 DIOX30 D=2.1 5.0UH(VERTICAL TYPE) JBL-50 28∮ 6:16 VARNISH T2804 CARBON CR 1/4W 100Ω J CARBON CR 1/4W 2.4KΩ J CARBON CR 1/6W 10Ω J CARBON CR 1/6W 100Ω J CARBON CR 1/6W 1KΩ J CARBON CR 1/6W 10KΩ J CARBON CR 1/6W 13KΩ J CARBON CR 1/6W 15KΩ J QTY 1 1 8 5 2 2 1 1 1 1 1 1 1 6 2 1 1 1 1 1 1 1 1 1 7 7 7 1 1
POWER AMP POS ITEM NO. 830062181 MICA SEGMENT 862T00100 FIBER TUBE 865T00080 CABLE TIE 178311908 HIGH FREQUENCY CORE PRE AMP ITEM NO. ASYJBL50P 027152065 PCB 137T03G00 LED 151T04558 IC SIP8 197T04212 SLIDE SWITCH 202T15203 VR 203T15203 VR 22022047A RESISTOR 220880102 RESISTOR 220880103 RESISTOR 220880104 RESISTOR 220880124 RESISTOR 220880153 RESISTOR 220880202 RESISTOR 220880222 RESISTOR 220880223 RESISTOR 220880224 RESISTOR 220880273 RESISTOR 220880472 RESISTOR 220880473 RESISTOR 231100101 RESISTOR 31JT10105 C/C 31KT10205 C/C 340T10725 E/C DESCRIPTION 3*Φ4.5 (HOLE) 62*18mm T=0.1mm (1000MM) 1φ 100MM YJ-100 31*19*8MM DESCRIPTION JBL50 PRE CAR SUBWOOFER AMP JBL50 PRE 152X64MM PCB 94-V0 LED 3MM GREEN ROHM BA4558N 4P2T SS001-P242P PA12 16T1-2D8 (SINGLE)B20K L=15MM 16T1-2D8-B20K L=15MM CARBON CR 1/2W 4.7Ω J CARBON CR 1/6W 1KΩ J CARBON CR 1/6W 10KΩ J CARBON CR 1/6W 100KΩ J CARBON CR 1/6W 120KΩ J CARBON CR 1/6W 15KΩ J CARBON CR 1/6W 2KΩ J CARBON CR 1/6W 2.2KΩ J CARBON CR 1/6W 22KΩ J CARBON CR 1/6W 220K J CARBON CR 1/6W 27K OHM J CARBON CR 1/6W 4.7KΩ J CARBON CR 1/6W 47KΩ J METAL MO 1W 100 OHM J C/C NPO 100PF/50V J C/C Y5P 1000PF/50V K 100UF/25V 6*11 +20-10% QTY 1 0,04 1 1 QTY 1 1 1 4 1 2 1 4 3 10 2 1 2 1 1 3 1 3 2 1 2 8 2 2
Specifications
Dynamic Range: CD: RMS Power Handling: Max Power Handling: Frequency Response: Active Crossover: Impedance: Phase control: Dimensions (H x W x D): 100W 300W 20Hz - 160Hz 40 - 120Hz 4 Ohms 0 - 180° 0 to +6dB @ 40Hz 625 x 320 x 315 mm
POWER AMP POS R11 R118 R16,R101,R121,R123 R107,R110 R15 R114 R14,R17 R115 R116,R117 R2,R3,R4,R6,R7,R13 R108,R109 R103,R106 R27 R29 R31,R32 R119,R120 RT C102,C107,C109 C13 C1,C4,C8,C105,C110 C108 C10 C5,C9,C12,C18,C19,C22 C7,C11,C21,C106 C14,C15 C103,C104 C101 C6 C3 J1,J2,J3,J4,J5,J6,J7,J8,J9,J10,J11,J12,C20,JP14 ITEM NO. 220880201 RESISTOR 220880221 RESISTOR 220880222 RESISTOR 220880272 RESISTOR 220880273 RESISTOR 220880302 RESISTOR 220880333 RESISTOR 220880432 RESISTOR 220880470 RESISTOR 220880472 RESISTOR 220880512 RESISTOR 220880681 RESISTOR 220880683 RESISTOR 231100220 RESISTOR 231100681 RESISTOR 23251001A CEMENT TYPE RESISTOR 261T05103 THERMISTOR 31JT10105 C/C 31JT68125 C/C 31ZT10410 C/C 32JT10410 M/C 32JT68210 M/C 340T10625 E/C 340T10725 E/C 340T22851 E/C 340T33725 E/C 340T47550 E/C 340T47625 E/C 341T22835 E/C 400T06520 JUMP WIRE DESCRIPTION CARBON CR 1/6W 200Ω J CARBON CR 1/6W 220Ω J CARBON CR 1/6W 2.2KΩ J CARBON CR 1/6W 2.7KΩ J CARBON CR 1/6W 27K OHM J CARBON CR 1/6W 3KΩ OHM J CARBON CR 1/6W 33KΩ J CARBON CR 1/6W 4.3KΩ J CARBON CR 1/6W 47Ω J CARBON CR 1/6W 4.7KΩ J CARBON CR 1/6W 5.1KΩ J CARBON CR 1/6W 680Ω J CARBON CR 1/6W 68KΩ J METAL MO 1W 22Ω J METAL MO 1W 680Ω J SQM 5W 0.1Ω (VERTICAL TYPE) NTC THERMISTOR D103J 10K C/C NPO 100PF/50V J C/C Y5E 680PF/250V K C/C 0.1U/100V Z M/C 0.1UF/100V J (MINISIZE) M/C 0.0068UF/100V J 10UF/25V 5*11 +20-10% 100UF/25V 6*11 +20-10% 2200UF/50V 16*32 +20-10% 330UF/25V 8*14 +20-10% 4.7UF/50V 5*11 +20-10% 47UF/25V 5*11 +20-10% 2200UF/35V 18*27 105℃ JUMP 0.6*52MM QTY 1 1 4 2 1 1 2 1 2 6 2 2 1 1 2 2 1 3 1 5 1 1 6 4 2 2 1 1 1 14