广东省有线U互动快速使用手册精编版
uvd1p说明书
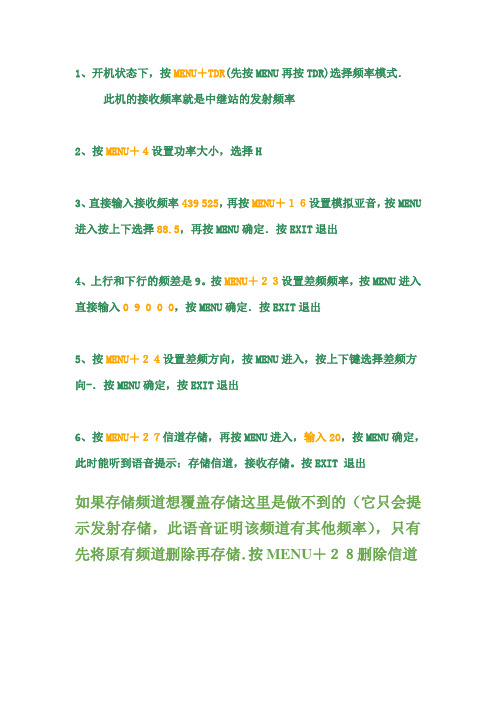
1、开机状态下,按MENU+TDR(先按MENU再按TDR)选择频率模式.此机的接收频率就是中继站的发射频率2、按MENU+4设置功率大小,选择H3、直接输入接收频率439 525,再按MENU+16设置模拟亚音,按MENU 进入按上下选择88.5,再按MENU确定.按EXIT退出4、上行和下行的频差是9。
按MENU+23设置差频频率,按MENU进入直接输入0 9 0 0 0,按MENU确定.按EXIT退出5、按MENU+24设置差频方向,按MENU进入,按上下键选择差频方向-.按MENU确定,按EXIT退出6、按MENU+27信道存储,再按MENU进入,输入20,按MENU确定,此时能听到语音提示:存储信道,接收存储。
按EXIT 退出如果存储频道想覆盖存储这里是做不到的(它只会提示发射存储,此语音证明该频道有其他频率),只有先将原有频道删除再存储.按MENU+28删除信道KG-UVD1P说明书菜单设置基本步骤:1. 按【MENU】键进入菜单。
2. 按上下方向键选择所要设置的菜单。
3. 按【MENU】键进入所选择的菜单。
4. 按键或键选择该菜单下的参数。
5. 按【MENU】键确认所选择的参数。
6. 按【EXIT】键退出菜单设置。
常用设置:工作模式的转换:1. 按【MENU】键进入菜单。
2. 按键或键选择功能菜单项21:【CH-MDF】。
3. 按【MENU】进入【CH-MDF】菜单。
4. 按键或键选择:① FREQ(频率模式)②CH(信道号) ③CHFREQ(信道号+频率)④NAME(信道号+信道名称)5. 按【MENU】键确认。
6. 按【EXIT】键退出菜单设置。
也可通过快捷键在待机状态下按【MENU】键 + 【TDR】键在频率模式和信道模式之间进行快速转换。
同频收发存储设置:例如:接收、发射频率都为144.580MHZ,存入第33信道1. 按数字键选择接收所需的频点。
依次按下1 4 4 5 8 0即可。
广东省有线U互动快速使用手册
U互动快速使用手册1.遥控器介绍1.1遥控器具体使用2.U互动使用2.1主页界面认识2.2主页界面菜单使用2.3看电视2.4时移、回看功能2.5互动点播2.6机顶盒设置与帮助3.移动U宽频使用及管理3.1移动U宽频(家庭宽带上网)使用步骤3.2移动U宽频CMCC上网3.3Wi-Fi名称修改和密码管理4.多屏互动使用4.1支持系统4.2安装方法4.3多屏软件使用5.简单故障与处理5.1新装U宽频48小时后任未收到中国移动发送的认证短信5.2上网登陆过程中出现“页面信息不存在或已丢失”等提示,不能正常上网5.3上网登陆过程中提示“登陆账号不符”,不能正常上网5.4电视显示蓝屏、雪花、保护画面、只能看到模拟频道等5.5上网不正常5.6体验专区个别节目有图像没声音5.7电视显示蓝屏、雪花、保护画面、只能看到模拟频道等5.8直播电视频道列表中没有频道、频道表错误、没有电视节目单信息5.9遥控器不能控制机顶盒5.10全部或部分直播节目出现黑屏、提示“信号中断,请检查网络信号”、全部或部分直播节目出现马赛克5.11电视画面只有声音没有图像5.12电视画面只有图像没声音1.1遥控器具体使用回到目录○红色键:查看当前所观看的频道信息;设置喜爱频道时使用。
○绿色键:设置喜爱频道时使用,喜爱频道编辑。
○黄色键:进入所观看电视节目的时移功能;设置喜爱频道时使用。
○蓝色键:设置喜爱频道时使用,频道隐藏。
点播时用于搜索功能启动。
#号键:16︰9与4︰3图像显示切换。
输入法下起中/英切换使用。
*号键:声道切换,立体声/混合声/左声道/右声道电视机控制区:供将电视机遥控器对应按键功能复制过来,实现机顶盒遥控器与电视机遥控器的二合一功能。
遥控器复制(学习)步骤:1、按本机“设置”键3秒后松开,红灯长亮。
2、10秒内按下本机电视机“电源”键,红灯闪烁一下。
2.1主页界面认识回到目录正常开机需要约45-60秒时间。
开机默认进入主页界面,见图2.2主页界面菜单使用回到目录使用遥控的方向键可选择不同的主菜单及下拉菜单,按确认键进入。
U卡使用手册

一、打开软件,点击硬件配置,输入密码168,如图1所示。
图1 硬件配置登陆界面二、输入密码168,点击确定,进入硬件配置页面,选择单元板类型(P10单元板选择最后一个12接口4扫P10),以及屏高度和宽度,然后点击保存屏参。
如图2所示。
图2 硬件配置页面三、编辑内容。
在软件左边有一个节目管理的属性窗口,可以进行节目的添加和删除,分区的添加和删除。
在软件的下方的黑色窗体里面可以输入文字,选择字体和大小。
如图3所示。
图3 内容编辑界面四、保存到U盘。
编辑好节目内容后,把U盘插入电脑,然后点击菜单栏的保存到U盘,选择U盘所在的设备。
如需校时可把校时的勾打上,然后保存,保存成功然后关闭。
图4图4 保存到U盘五、保存内容到U盘成功后,把U盘从电脑上拔下,然后插到控制卡或者U盘延长线上,显示屏上会提示读取数据,当显示保存完毕后可把U盘拔掉。
屏就会正常走字。
注意事项:1、带U卡的电源至多可带8块P10单元板,不宜超出。
2、U盘应该选择普通的U盘,不可用SD卡之类的存储器。
3、控制卡与单元板之间的16P排线应注意方向,一般可排线的红边对着OE,控制卡上插排线的地方有个小三角形标志的一方为OE。
P10的单元板插在控制卡上的12接口上面。
常见问题:1、U盘插在控制卡上,显示屏上出现没有文件。
检查一下是否内容没有保存成功,把U盘再插入电脑,重新保存一遍内容。
2、显示屏显示不正常。
检查一下硬件配置,看单元板接口选择是否正确。
或者检查排线是否插对方向。
3、每次重启电源时显示屏显示花屏。
这种情况是由于控制卡供电不足,导致启动失败造成。
可以把带控制卡的电源少带两块单元板测试一下。
UU融合通讯软件使用手册

UU融合通讯软件使用手册目录1. 安装软件 (2)2.软件注册 (2)3. 通讯录管理 (3)3.1 通讯录编辑 (3)3.2 通讯录导入导出 (4)3.3 搜索 (10)3.4 分组设置 (11)3.5 浏览模式 (13)3.6 数据备份、恢复与合并 (14)3.6.1 数据备份 (15)3.6.2 数据恢复 (16)3.6.3 数据合并 (16)3.7 网络备份 (17)3.8 发送邮件 (20)4. 通讯服务 (20)4.1 注册登录 (21)4.2 充值方法 (23)4.3 多方电话会议 (25)4.4 短信群发 (26)4.5 邮件群发 (28)4.6 传真群发 (29)4.7 Skype通话 (30)5. 日程管理 (33)6. 帮助和关于 (34)1. 安装软件安装过程:双击“setup.exe”进行安装,并根据安装向导的提示完成安装软件。
注意事项:在安装软件的同时请阅读许可证协议,并且同意接受许可证中的条款方可对软件进行安装。
安装机系统需求:--系统需求--“UU融合通讯软件”有以下系统需求:Windows 98 / ME /2000 /XP /2003 /Vista/windows 7PC 166MHz 以上128MB 内存128MB硬盘空间2.软件注册安装完成后,在桌面上会生成UU图标,免费试用期为十天。
试用期过后,此时分两种情况连接网络和未连接网络。
未连接网络:双击图标,会先弹出提示:请连接网络注册该软件,谢谢!连接网络:双击图标,会先弹出提示:请输入CD Key注册该软件(CD Key 在Memory 盘中)如下图:此时单击【确定】,弹出如下注册界面,此时需要输入有效的序列号方式完成注册方可使用,共五段,每段五个字符。
卸载软件重新安装时,需要重新输入有效的序列号来完成注册。
3. 通讯录管理融合本地通讯录和手机通讯录于一体进行统一管理。
3.1 通讯录编辑通讯录的编辑包括:通讯录的新增、修改、删除操作等操作。
还不会用广电“黑科技”?这份U点家庭服务器使用手册你一定要收藏
点击一级菜单“影视”进入后,可以选择到新片大片、电影、电视剧、卡通、综艺娱乐、探索 纪实等海量的影视内容。
点击一级菜单“应用”进入后,可以选择到音乐、游戏、教育、生活等丰富的应用类业务。
点击一级菜单“少儿”进入后,可以选择到谷豆少儿专区、米卡乐园、U点科普专区,内容涵 盖动漫空间、明星卡通、快乐律动、亲子乐园、棒棒堂等热播少儿点播类业务,满足0-12岁小 朋友看动画、唱儿歌、学知识的收视需求。
方法一:全屏播放时,点击遥控器“确认”键,弹出频道分类列表后,点击遥控器“右键”,弹 出列表后,选择“回看”进入。
方法二:在一级菜单“直播”下,在“4+5入口栏”,选择点击“回看”进入。
(四)新闻”“影视”“应用”“少儿”和“专区”介绍 点击一级菜单“新闻”进入后,可以选择到央视热门新闻栏目、大湾区新闻、广东省级知名新
可进行搜索。例如,搜索“三生三世”,在搜索框中输入“SSSS”,即可搜索到相应节目。
历史:移动光标至“历史”时点击确定即可进入播放历史页面。播放历史页面会显示最近已播 放的节目。
收藏:移动光标至“收藏”时点击确定即可进入收藏页面。收藏页面查看用户最近已收藏的点 播节目。
四、如何使用语音遥控器
(一)外观说明
2、时移功能介绍 时移指用户可直接对当前播放的直播电视频道内容和节目进行快退、暂停操作,快退或暂停后 可进行快进直至追上当前播放进度(直播节目不能快进)。目前为用户提供4小时即时时移功 能。全屏播放直播电视节目时,如果当前节目支持时移功能,按“左”键,进入时移播放,可对当 前直播节目进行倒退收看。
3、回看功能介绍 回看指用户可以通过菜单选择7*24小时内播放的节目。直播频道全屏播放时,需要进行回看时 有两个方法可进行回看。
数字有线电视网络手动搜台指南说明书
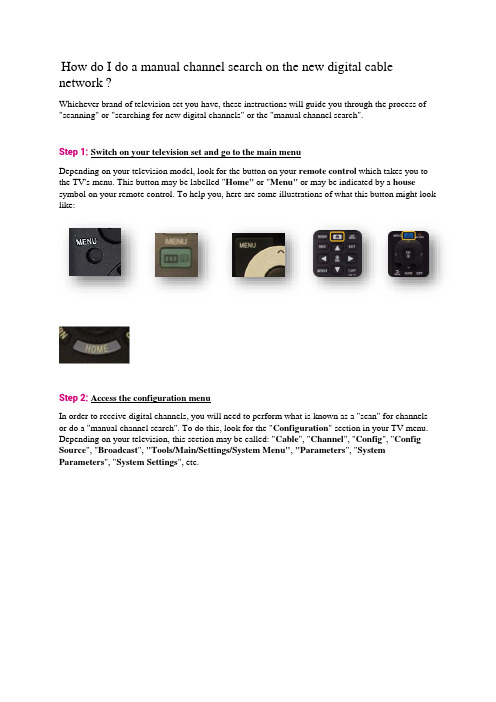
How do I do a manual channel search on the new digital cable network ?Whichever brand of television set you have, these instructions will guide you through the process of "scanning" or "searching for new digital channels" or the "manual channel search".Step 1:Switch on your television set and go to the main menuDepending on your television model, look for the button on your remote control which takes you to the TV's menu. This button may be labelled "Home" or"Menu" or may be indicated by a house symbol on your remote control. To help you, here are some illustrations of what this button might look like:Step 2:Access the configuration menuIn order to receive digital channels, you will need to perform what is known as a "scan" for channels or do a "manual channel search". To do this, look for the "Configuration" section in your TV menu. Depending on your television, this section may be called: "Cable", "Channel", "Config", "Config Source", "Broadcast", "Tools/Main/Settings/System Menu", "Parameters", "System Parameters", "System Settings", etc.Here are some illustrations to help you (the following illustrations have been taken from a "Samsung" television". However, the steps remain the same for all brands of television):Step 3:Select the installation optionThen select"Channels","Index", "Installation", "Installation Programme", "Install channels", "Parameters", "System Parameters", "Channel Search", "Digital Settings", "Rescan" "Scan", etc.Step 4:Select the option to search for digital channelsTo carry out a "scan" or perform a "manual channel search", you need to look for the manual channel search option amongst the available settings. If this option is not available, carry out an automatic channel searchThe channel search function may have different names, such as: "Search Assistant", "Auto Installation", "Automatic/Operator Scan", "Auto System Configuration", "Clear Channels", "Aerial/Cable/Service Installation", "Auto Digital Store", "Channel Settings", "Reinstall/Search All Channels", "Automatic Digital Channel Search", "Automatic Digital Cable Network Search", "Manual DVB-C Search", "Factory/Manual Digital Settings", "Reinitialise Channels/TV", "Reinstall everything", "Reset to startup settings", "Cable synchronisation", etc.Please note! Do not choose updateSome television models will ask you if you want to perform a scan for digital or analogue channels. Here you want to search for digital channels.The television might ask you if you want to search for channels via the aerial or via the cable network. In all cases, you want to search via the cable network.Step 5:Enter your password if the television requests itIt's possible that the television will ask you to enter a password during this process. If you know your password, enter it now. If you don't know the password, try: "0000", "1111", "1234", "8888", "9999".If your equipment warns you that all your previous channels will be deleted, this is normal.Step 6:Set the channel search settingsWhen you have found the right section, you should be on a configuration page with some settings which can be modified. Here are some general indications of what you might be asked:Reference table:Step 7:Start a channel searchOnce you have entered these settings, you can start a search by pressing "Start Scan", "Start ATP", "Start", or "Search",Wait until the process is complete. This can take several minutes.Step 8:Exit the installation menuPress "Back", "Confirm", "Exit", "Menu" or "Complete" to exit the installation menu.Step 9:Check that the scan has returned the correct channelsYou will now be asked to go to Channel 99. You should see the following screen:If you see this screen, you have completed the scan and now have access to cable television.。
HomeLink 通用传输器 uuHomeLink 用户指南说明书

uu HomeLink® Universal Transceiver*u Training HomeLinkFeatures ■Programming a Button1Training HomeLinkReprogramming a ButtonIf you want to retrain a programmed button for anew device, you do not have to erase all buttonmemory. You can replace the existing memory codeusing this procedure:Erasing Button MemoryTo erase programming from the buttons, press and holdthe two outside HomeLink buttons until the HomeLinkindicator changes from orange to rapidly flashing green.This should take about 10 seconds. You should erase allprogramming before selling the vehicle.OperatingTo operate, simply press and release the programmedHomeLink button. Activation will now occur for thetrained device.QuestionsFor questions or comments, visit, /HomeLinkGentex, or by calling the HomeLink Hotline(North America only) at (800) 355-3515.HomeLink® is a registered trademark of Gentex2.1.Press and hold the desired HomeLink button untilthe HomeLink indicator begins to slowly flashorange. This should take about 20 seconds.Release the HomeLink button and position theremote transmitter you wish to link 1 - 3 inches(3 - 8 cm) from the HomeLink button you want toprogram, then follow steps 3 - 6 under“programming a button.”TrainingComplete1.Position the remote transmitter you wish to link 1 to 3 inches (3 - 8 cm) from theHomeLink® button you want to program.3b.Canadian Garage Door OpenerA. Press and release the HomeLinkbutton. Press, hold, and release thebutton on the remote every 2 secs.Does the HomeLink indicator (LED)change from slowly flashing orange torapidly flashing or continuously ongreen? The process should take lessthan 60 seconds.2.Press and release the desired HomeLink button. Is the HomeLink indicator (LED) slowlyflashing orange?3a.Hold the button on the remotetransmitter. Does HomeLink indicator(LED) change from slowly flashingorange to rapidly flashing green orcontinuously on green? The processshould take less than 60 seconds.5.Press and hold the HomeLink button again.5a.The remote has a rolling code. Press the“learn” button on the remote-controlleddevice (e.g., garage door opener).6.Press and hold the HomeLink buttonagain.The remote-controlled device shouldoperate.Training Complete5b.Within 30 seconds, press and hold theprogrammed HomeLink button for 2 4.Press and hold the programmed HomeLinkbutton for about a second. Does the device(garage door opener) work?FeaturesBluetooth ® HandsFreeLink ® (HFL) allows you to place and receive phone calls using your vehicle’s audio system, without handling your cell phone.Using HFL■HFL Buttons1Bluetooth ® HandsFreeLink ®Place your phone where you can get good reception.To use HFL, you need a Bluetooth -compatible cell phone. For a list of compatible phones, pairing procedures, and special feature capabilities:•U.S.: Visit /handsfreelink/, or call 1-888-528-7876.•Canada: For more information on smartphone compatibility, call 1-855-490-7351.Voice control tips•Aim the vents away from the ceiling and close the windows, as noise coming from them may interfere with the microphone.•If the microphone picks up voices other than yours, the command may be misinterpreted.State or local laws may prohibit the operation of handheld electronic devices while operating a vehicle.Up to 20 favorite contacts can be stored. If there is no entry in the system, the pop-up notification appears on the screen.2Favorite Contacts P.472Up to 20 call histories can be stored. If there is no call history, Call History is disabled.Left Selector WheelPHONE Buttonuu Bluetooth® HandsFreeLink®u Using HFLFeatures Left Selector Wheel: While receiving a call, the incoming call screen is displayed onthe driver information interface. You can pick up the call using the left selectorwheel.2Receiving a Call P.477PHONE button: Press to go directly to the Phone screen.Selector knob: Rotate to select an item on the screen, then press .1Bluetooth® HandsFreeLink®Bluetooth® Wireless TechnologyThe Bluetooth® word mark and logos are registered trademarks owned by Bluetooth SIG, Inc., and any use of such marks by Honda Motor Co., Ltd., is under license. Other trademarks and trade names are those of their respective owners.HFL LimitationsAn incoming call on HFL will interrupt the audio system when it is playing. It will resume when the call is ended.uu Bluetooth ® HandsFreeLink ®u Using HFLFeaturesThe audio/information screen notifies you when there is an incoming call.Certain manual functions are disabled or inoperable while the vehicle is in motion. You cannot select a grayed-out option until the vehicle is stopped.■HFL Status Display1HFL Status DisplayThe information that appears on the audio/information screen varies between phone models.■Limitations for Manual Operationuu Bluetooth® HandsFreeLink®u HFL MenusFeatures HFL MenusThe power mode must be in ACCESSORY or ON to use the system.1HFL MenusTo use HFL, you must first pair your Bluetooth-compatible cell phone to the system while the vehicleis parked.Some functions are limited while driving. A messageappears on the screen when the vehicle is movingand the operation is canceled.PHONE buttonRecent Calls*1AllPair a phone to the system.Connect New DeviceChange Device Connect a paired phone.Priority Device Set a device as the priority device.Bluetooth SettingsKeypad*1SettingsFavoriteContacts*1(Existing entry list)Contacts*1DialedMissedReceivedDisplay the last outgoing, incoming, and missed calls.Display the last outgoing calls.Display the last missed calls.Display the last incoming calls.Dial the selected number in the favorite contacts list.Display the phonebook of the paired phone.Enter a phone number to dial.Disconnect All Device Disconnect a paired phone from the system.Delete Device Delete a previously paired phone.uu Bluetooth ® HandsFreeLink ®u HFL MenusFeaturesRingtone Select the ringtone stored in the connected cell phone.PhoneVehicleSelect the ringtone stored in HFL.Auto Phone Call Transfer Hands-Free System ClearSet calls to automatically transfer from your phone to HFL when you enter the vehicle.Clear the phone settings, paired phones, all favorite contacts entries, all call history data, and all imported phonebook data.uu Bluetooth® HandsFreeLink®u HFL MenusFeatures■To pair a cell phone (No phone hasbeen paired to the system)1.Press the PHONE button.2.Make sure your phone is in search ordiscoverable mode.3.Select Yes.u The audio system will enter a waitingmode for pairing.4.Select Honda Pilot from your phone.u If you want to pair a phone from thisaudio system, select Search from carand follow the prompts.When your phone appears on the list,select it.5.The system gives you a pairing code on theaudio/information screen.u Confirm if the pairing code on the screenand your phone matches.This may vary by phone.6.A notification appears on the screen ifpairing is successful.■Phone Setup1Phone SetupYour Bluetooth-compatible phone must be paired toHFL before you can make and receive hands-freecalls.Phone Pairing Tips:•You cannot pair your phone while the vehicle ismoving.•Up to six phones can be paired.•Your phone’s battery may drain faster when it isconnected to HFL.•If your phone is not ready for pairing or not foundby the system within three minutes, the system willtime out and return to the Bluetooth Settingsscreen.Once you have paired a phone, you can see itdisplayed on the screen with one or two icons on theright side.: The phone is compatible with Bluetooth® Audio.: The phone can be used with HFL.When pairing a phone from this audio system:If your phone doesn’t appear on the audio/information screen, select Search from phone andsearch for Bluetooth® devices using your phone.From your phone, select Honda Pilot.uu Bluetooth ® HandsFreeLink ®u HFL MenusFeatures■To pair a cell phone (when a phone hasalready been paired to the system)1.Press the PHONE button.u If a prompt appears asking to connect to a phone, select No and proceed with step 2.2.Select Settings .3.Select Bluetooth Settings .4.Select Connect New Device .u The audio system will enter a waitingmode for pairing.uu Bluetooth® HandsFreeLink®u HFL MenusFeatures 5.Make sure your phone is in search ordiscoverable mode.6.Select Honda Pilot from your phone.u If you want to pair a phone from this audio system, select Search from carand follow the prompts.When your phone appears on the list,select it.7.The system gives you a pairing code on theaudio/information screen.u Confirm if the pairing code on the screen and your phone matches.This may vary by phone.8.A notification appears on the screen ifpairing is successful.u You can prioritize a Bluetooth® device at the same time. Select Yes if you want toprioritize the device.uu Bluetooth ® HandsFreeLink ®u HFL MenusFeatures■To change the currently paired phone1.Press the PHONE button.2.Select Settings .3.Select Bluetooth Settings .4.Select Change Device .u The screen changes to a device list.5.Select a desired device name.6.Select Both , Audio , or Phone .u When another device is connected to Android Auto and you select Both or Phone , a confirmation message appears. Select Continue .u HFL disconnects the connected phone and starts searching for another pairedphone.Features ■To delete a paired phone1.Press the PHONE button.2.Select Settings.3.Select Bluetooth Settings.4.Select Delete Device.u The screen changes to a device list.5.Select a phone you want to delete.6.A confirmation message appears on thescreen. Select Yes.u When the device is connected to Android Auto, a confirmation message appears.Select Yes.FeaturesIf paring between your phone and the system is executed while you are on the phone, the call can be automatically transferred to HFL.1.Press the PHONE button.2.Select Settings .3.Select Auto Phone Call Transfer .4.Select ON or OFF .You can change the ringtone setting.1.Press the PHONE button.2.Select Settings .3.Select Ringtone .4.Select Phone or Vehicle .■Automatic Transferring■Ringtone1RingtonePhone: Depending on the make and model of the cell phone, the ringtone stored in the phone will sound if the phone is connected.Vehicle: The fixed ringtone sounds from thespeakers.Features Phone settings, paired phones, all favorite contacts entries, all call history data, and all imported phonebook data are erased.1.Press the PHONE button.2.Select Settings.3.Select Hands-Free System Clear.4.Select Yes.5.A confirmation message appears on thescreen. Select Yes.6.A notification appears on the screen. SelectOK.■To Clear the SystemFeaturesWhen your phone is paired, the contents of its phonebook and call history are automatically imported to HFL.■Automatic Import of Cellular Phonebook and Call History1Automatic Import of Cellular Phonebook and Call History When you select a person from the list in the cellular phonebook, you can see up to five category icons. The icons indicate what types of numbers are stored for that name.On some phones, it may not be possible to import the category icons to HFL.The phonebook is updated after every connection. Call history is updated after every connection or call.Pref Home Mobile PagerWork Fax Car OtherVoiceFeatures ■To add a favorite contacts1.Press the PHONE button.2.Select Recent Calls, Contacts, or Keypad.3.Select the star icon.3.Select Add to Favorite.u A notification appears on the screen ifthe favorite contact is successfully stored.u To remove the favorite contact, selectthe star icon again.■Favorite ContactsRecent Calls ScreenStar IconContacts ScreenStar IconKeypad ScreenAdd to FavoriteOn the Recent Calls or Contacts screenOn the Keypad screenFeatures■To delete a favorite contact1.Press the PHONE button.2.Select Favorite Contacts .3.Select the star icon.4.A confirmation message appears on the screen. Select Yes .Star IconFeatures You can make calls by inputting any phone number, or by using the importedRecent Calls, Favorite Contacts, and Contacts entries.■To make a call using the importedphonebookWhen your phone is paired, the contents of itsphonebook are automatically imported toHFL.1.Press the PHONE button.2.Select Contacts.3.The phonebook is stored alphabetically.Select a name.4.Select a number.u Dialing starts automatically.■Making a Call1Making a CallOnce a call is connected, you can hear the voice ofthe person you are calling through the audiospeakers.Features■To make a call using a phone number1.Press the PHONE button.2.Select Keypad .3.Select a number.4.Select Call .u Dialing starts automatically.■To make a call using the call historyCall history is stored by All , Dialed , Missed ,or Received .1.Press the PHONE button.2.Select Recent Calls .u You can sort by All , Dialed , Missed , or Received . Select the icon on the upper right of the screen.3.Select a number.uDialing starts automatically.1To make a call using the call historyThe call history appears only when a phone is connected to HFL, and displays the last 20 dialed,received, or missed calls.Features ■To make a call using a favorite contact1.Press the PHONE button.2.Select Favorite Contacts.3.Select a number.uDialing starts automatically.FeaturesWhen there is an incoming call, an audible notification sounds and the Incoming Call... screen appears.You can answer the call using the left selector wheel.To pick up the call, roll up or down to select Answer on the driver information interface and then press the left selector wheel.u If you want to decline or end the call,select Ignore on the driver information interface using the left selector wheel.■Receiving a Call1Receiving a CallCall WaitingSelect Answer using the left selector wheel to put the current call on hold to answer the incoming call.Select Swap Calls using the left selector wheel to return to the current call.Select Ignore using the left selector wheel to ignore the incoming call if you do not want to answer it.Select Hang Up using the left selector wheel if you want to hang up the current call.You can select the icons on the audio/information screen instead of the icons on the driver information interface.HFL ModeCaller’s Nameuu Bluetooth® HandsFreeLink®u HFL MenusFeatures The following options are available during a call.Swap Calls: Put the current call on hold to answer the incoming call.Mute: Mute your voice.Use Handheld: Transfer a call from HFL to your phone.Keypad: Send numbers during a call. This is useful when you call a menu-drivenphone system.The available options are shown on the lowerhalf of the screen.Select the option.u The mute icon appears when Mute isselected. Select Mute again to turn it off.■Options During a Call1Options During a CallKeypad: Available on some phones.Mute Icon。
多方音视频互动系统 快速使用手册说明书

右上角 图标设置设备名称,以更好的标识设备。
授权码是主机与终端间互相发现的一个校验码,你可以点击右上角 启或主机与终端重新连接的时候进行校验。
1硬盘槽(定制) 指示灯2模拟音频输入和输出接口,另一端连接到网络交换机,连接到SDI 输入和输出双向音视频互动基础设置05按照以上3、4步骤分别安装好两台设备,将设备连接至交换机,并配置相同网段的IP 保证设备能够正常通讯。
电脑也接入同一交换机,配置同网段的IP 地址,登录设备的管理页面,首先在“媒体”--“视频源”查看已连接的本地视频源(左上角显示为LOCAL)输入图像是否正常,有视频正常输入的接口会显示视频画面,5s 更新一次;无视频输入的接口显示为蓝屏,请检查视频源和连接线是否正常。
1.查看本地视频源点击“发现”查看是否能够自动发现其他翼多设备,如果能够发现设备,将显示在左侧列表,设备图标显示为绿色(设备掉线后就无法显示)。
点击设备,选中其“所有视频源”,将其添加到本机作为视频源。
2.自动发现设备和添加视频源3.解码对端视频源并输出至显示设备在“媒体”界面,将已添加的REMOTE 设备的视频源拖动至输出窗口作为解码输出RTSP/RTMP 流输出,媒体源包括视频源列表的所有源和2个输出“添加发布点”-“发布点名称”,添加一个发布点。
“源选择”:点击“源选择”,根据需要,可选择需要输出的视频源,每个源均可以选择“流服务”:点击“流服务-添加流服务”,选择需要添加的服务类型并设置相应参数,支持RTSP 和RTMP 。
RTMP 配置方式如下:“状态”:配置完成“源选择”和“流服务”之后,可点击“状态”查看发布点的相关统计信息。
磁盘盒上有磁盘指示灯:磁盘挂载成功后会显示为绿灯常亮;初始化时磁盘绿灯不亮,初始化成功后绿灯常亮;正在录像时为绿灯闪烁;点击“录像设置”可以设置录像相关参数:文件限制可选根据大小或时长进行切割,也可不切割;录满之后自动切换到磁盘2,当2个磁盘都录满之后则停止录像。
- 1、下载文档前请自行甄别文档内容的完整性,平台不提供额外的编辑、内容补充、找答案等附加服务。
- 2、"仅部分预览"的文档,不可在线预览部分如存在完整性等问题,可反馈申请退款(可完整预览的文档不适用该条件!)。
- 3、如文档侵犯您的权益,请联系客服反馈,我们会尽快为您处理(人工客服工作时间:9:00-18:30)。
U互动快速使用手册1.遥控器介绍1.1 遥控器具体使用2.U互动使用2.1 主页界面认识2.2 主页界面菜单使用2.3 看电视2.4 时移、回看功能2.5 互动点播2.6 机顶盒设置与帮助3.移动U宽频使用及管理3.1 移动U宽频(家庭宽带上网)使用步骤3.2 移动U宽频CMCC上网3.3 Wi-Fi名称修改和密码管理4.多屏互动使用4.1 支持系统4.2 安装方法4.3 多屏软件使用5.简单故障与处理5.1 新装U宽频48小时后任未收到中国移动发送的认证短信5.2 上网登陆过程中出现“页面信息不存在或已丢失”等提示,不能正常上网5.3 上网登陆过程中提示“登陆账号不符”,不能正常上网5.4 电视显示蓝屏、雪花、保护画面、只能看到模拟频道等5.5 上网不正常5.6 体验专区个别节目有图像没声音5.7 电视显示蓝屏、雪花、保护画面、只能看到模拟频道等5.8 直播电视频道列表中没有频道、频道表错误、没有电视节目单信息5.9 遥控器不能控制机顶盒5.10 全部或部分直播节目出现黑屏、提示“信号中断,请检查网络信号”、全部或部分直播节目出现马赛克5.11 电视画面只有声音没有图像5.12 电视画面只有图像没声音1.1 遥控器具体使用回到目录○红色键:查看当前所观看的频道信息;设置喜爱频道时使用。
○绿色键:设置喜爱频道时使用,喜爱频道编辑。
○黄色键:进入所观看电视节目的时移功能;设置喜爱频道时使用。
○蓝色键:设置喜爱频道时使用,频道隐藏。
点播时用于搜索功能启动。
#号键:16︰9与4︰3图像显示切换。
输入法下起中/英切换使用。
*号键:声道切换,立体声/混合声/左声道/右声道电视机控制区:供将电视机遥控器对应按键功能复制过来,实现机顶盒遥控器与电视机遥控器的二合一功能。
遥控器复制(学习)步骤:1、按本机“设置”键3秒后松开,红灯长亮。
2、10秒内按下本机电视机“电源”键,红灯闪烁一下。
2.1 主页界面认识回到目录正常开机需要约45-60秒时间。
开机默认进入主页界面,见图2.2 主页界面菜单使用回到目录使用遥控的方向键可选择不同的主菜单及下拉菜单,按确认键进入。
按数字1-4键,快速进入推荐专栏(影片)。
2.3 看电视回到目录【广播电视】是看数字电视的基本板块,包括原来标清机顶盒的大部分内容。
包含电视频道、频道回看、音频广播、准视频点播、喜爱频道和节目指南。
选【电视频道】可进入电视分类收视,见下图。
2.4 时移、回看功能回到目录电视时移回看功能就是将最近4小时,最远7天的电视直播节目像看DVD一样,由您快进、快退、暂停,任意看。
按黄色键可直接进入时移功能,请使用方向键选择收视,当电视屏右上角出现回旋箭头符号时说明已进入时移收视。
超出4小时节目可使用【广播电视】→【频道回看】进入,按提示选频道和时间。
(见图)2.5 互动点播回到目录选【高清互动】即可欣赏高清视频精华,超过6000小时的高清影视节目精彩纷呈。
除【体验专区】外,其它收费专区只需订购即可正常点播。
具体资费请向96956咨询或登陆了解。
(见图)2.6 机顶盒设置与帮助回到目录机顶盒相关设置操作集合在主页主菜单【自助服务】,【频道编辑】按照个人爱好排列或设定频道顺序。
【系统设置】与本机的应用特性相关,非必要不建议随便修改。
系统参数、软件更新、恢复出厂默认值及无线Wi-Fi设置均置于此菜单。
(无线网络详细操作详见移动U宽频使用)【了解U互动】手把手教您如何使用本机,建议第一时间进入了解。
(见图)3.1 移动U宽频(家庭宽带上网)使用步骤回到目录3.1.1. 打开无线网络,搜索Wi-Fi信号(见图5),选择搜索列表中名为USER_xxxxxx的Wi-Fi信号(如为有线连接,此步可略过)3.1.2. 连接上后,在浏览器输入一网址,如(如为有线连接,此步可略过)3.1.3. 在弹出登录页面中填入用户名和密码。
(用户名格式为xxxxxxxxxxx@139.gd,11位为您登记过的广州移动手机号)3.1.4. 登录成功后请在新浏览页面中输入您需要的网站即可自由上网。
其它网络应用亦请在登录成功后再使用,如QQ程序等。
3.2 打开“无线局域网”/“Wi-Fi”——选取“CMCC”网络——浏览器打开任意网页——在推送登录认证界面输入手机号与密码——登录成功。
对于CMCC上网请参考3.3 Wi-Fi名称修改和密码管理3.3.1 遥控器修改:按遥控器“主页”键,选主菜单及下拉菜单【自助服务】→【系统设置】→【Wi-Fi设备】进入Wi-Fi管理主界面。
(见图8)在Wi-Fi管理主界面选【无线参数】→【SSID】或【密码】,按遥控器“确认”键进入修改;最后按【确定】按钮保存。
3.3.2 用电脑修改: 在浏览器的地址栏中输入 http://192.168.88.254,按回车键进入登录界面。
输入用户名(默认“admin”)和密码(默认为“96956”),单击“确定”按钮进入,然后按菜单提示操作。
4.1 支持系统回到目录屏互动终端支持系统有:Android安卓2.2以上版本,或苹果IOS5.0以上版本。
注:IOS 4.x版本系统部分功能会受影响,如时移功能4.2 安装方法回到目录1)使用移动设备(Android或IOS设备)连接机顶盒的Wi-Fi信号,默认 USER_xxxxxxxx。
注:多屏功能必须将终端连接机顶盒的Wi-Fi,使用其他运营商的网络(如家庭宽带/3G网络)均无法使用。
2)安装操作苹果IOS系统:打开移动设备浏览器,IOS设备使用Safari浏览,点击菜单中的“客户端下载”,选择您所在的城市,然后选择“点击下载”会弹出提示框进行终端程序的安装,见图10。
Android安卓系统:设备使用系统自带浏览器浏览"",点击菜单中的“客户端下载”,选择自己的城市,并选择自己设备的品牌和型号,然后选择“点击下载”会弹出提示框进行终端程序的安装,见图11。
选择下载,在下载完成后选择“安装”就可以完成U互动软件的安装,见图12。
3)下载完成后,IOS系统将会自动完成安装,在程序列表中可以找到U互动的软件。
Android安卓系统安装完成后也可以在所有程序列表里找到U互动软件。
4.3 多屏软件使用回到目录U互动软件具有以下功能:1.节目推荐推荐页面是“U互动”软件启动后的默认页面,根据用户点击率展示热门节目(见图13),您通过上下划动触屏就可翻看节目列表,点击便可以进入选择的节目。
1.直播(多码率支持)软件页面下方的“直播”按钮,就能进入直播频道页面(见图14)。
通过点击频道列表,就可即时播放所选频道。
1.点播(多码率支持)点击“U互动”软件页面下方的“点播”按钮,就可进入点播节目列表页面(其中点播节目分类包括电影、电视剧等。
点击相应的分类按钮,就能进入分类节目列表。
1.按节目单回看点击直播节目列表后面的“i”图标(见图14),可以进入对应频道的节目预告页面(见图16)。
该界面可分别查看此频道前后七天的节目信息,如果该频道支持回看,则节目信息栏会显示对应的绿色三角图标,点击后该节目可进行回看。
1.点播节目搜索点击“U互动”下方的“搜索”按钮,您就可以进入搜索页面。
在该页面中输入所要搜索的节目名称,则可获得相关节目列表。
另外,为了方便用户饱览最热门节目,搜索页面会显示最热门搜索。
——————————————————————————————1.点播节目收藏“空间”提供软件进行一些和用户本身相关的功能操作,比播放记录、节目收藏等,可让您体验更加丰富的U互动功能(见图17)。
1.点播播放记录点播历史记录中包含了您最近观看的点播记录,点击相应条目,即可进行跳转继续欣赏。
1.手机遥控器打开U互动界面右上角的手机遥控器图标,进进入遥控器页面。
图18为图标模式,展现当前终端支持播放频道的相应图标。
点击底部的“向下箭头”可显示电视台图标列表(见图19),点击图标按钮后可进行切台操作。
——————————————————————————————1.离线收视(仅限安卓平台)点击“离线收视”进入离线收视页面,点击“下载中”和“已完成”选项卡可以查看下载中的任务和已完成的任务。
您可以查看正在下载任务的进度、状态等,也可以通过点击右边的状态按钮进行“开始下载”或者“暂停下载”操作。
点击已下载完的任务,可以播放视频。
长按列表可以进行删除操作。
——————————————————————————————1.切屏收视将手机或pad等支持该类业务的终端设备上正在播放的节目,切换到电视屏幕中进行播放。
——————————————————————————————1.拉屏收视将电视屏幕中正在播放的节目,切换到手机或pad等其他支持该类业务的设备中进行播放。
——————————————————————————————1.用户信息管理(登录注册)2.软件更新(自动和手动)5.1 新装U宽频48小时后任未收到中国移动发送的认证短信回到目录请您确认绑定的手机可以正常接收短信,没有屏蔽或拒收某些短信的设置,尝试检查手机中被拦截的短信内容。
如超过48小时仍未收到认证短信,请致电96956协助。
5.2 上网登陆过程中出现“页面信息不存在或已丢失”等提示,不能正常上网回到目录关闭所有浏览器,并把默认主页修改成其他页面后,再次尝试登陆网页。
5.3 上网登陆过程中提示“登陆账号不符”,不能正常上网回到目录检查输入的帐号及密码是否正确,请按中国移动手机短信提示的帐号及密码重新输入,并注意检查帐号格式为“绑定手机号码@139.gd”。
5.4 上网时无法弹出认证界面或输入帐号密码登陆时出现“会话信息不存在或已丢失”等回到目录1) 机顶盒断电关机15分钟后再重启开机,连接网络后在浏览器地址栏输入登陆尝试; 2) 如依然无法登陆,请致电96956协助。
5.5 新装U宽频48小时后任未收到中国移动发送的认证短信回到目录1)确认机顶盒前面板信号灯全亮,否则重启机顶盒; 2)确认无线 Wi-Fi 网络正确连接致 User_xxxxxx或CMCC,否则刷新无线Wi-Fi网络连接或改网线连接尝试; 3)重启机顶盒及电脑再次尝试上网登陆,再有故障请致电96956协助。
5.6 体验专区个别节目有图像没声音回到目录需使用机顶盒的数字音频输出接口,通过外部解码功放进行音频解码。
如用户已外接解码功放并在机顶盒选择了“解码信号”(进入“自助服务”→“系统设置”→“本机设置”→“音视频设置”→“数字音频”,选择“解码信号”选项),仍无法解决的请致电96956协助。
5.7 电视显示蓝屏、雪花、保护画面、只能看到模拟频道等回到目录1)检查机顶盒是否处于正常开机状态; 2)检查信号线、HDMI线是否松脱; 3)用电视机遥控器进行AV、视频或信源切换到连接机顶盒的视频上收看。