远程数据传输系统使用手册整理版
HomeLink 通用远程传输器说明书
Features The HomeLink ® Universal Transceiver can be programmed to operate up to three remote controlled devices around your home, such as garage doors, lighting, or home security systems.Refer to the safety information that came with your garage door opener to test that the safety features are functioning properly. If you do not have the safety information, contact the manufacturer.Before programming HomeLink, make sure that people and objects are out of theway of the garage or gate to prevent potential injury or damage.When programming a garage door opener, park just outside the garage door’s path.■Important Safety Precautions 1HomeLink ® Universal Transceiver *Before programming HomeLink to operate a garage door opener, confirm that the opener has an external entrapment protection system, such as an “electronic eye,” or other safety and reverse stop features. If it does not, HomeLink may not be able to operate it.uu HomeLink ® Universal Transceiver *u Training HomeLink FeaturesTraining HomeLinkIf it is necessary to erase a previously entered learned code:•Press and hold the I and III HomeLink buttons for about 10 seconds, until the green indicator blinks. Release the buttons, and proceed to step 1.•If you are training the second or third button, go directly to step 1.The instructions on the next page should work for most gate or garage openers, but may not work for all. For detailed instructions about your specific remote opener, visit or call (800) 355-3515.1Training HomeLinkNOTE:Some LED lightbulbs installed in the garage door opener can interfere with the training and consistentoperation of your HomeLink device. Please consider use of Low RF interference bulbs in your garage door opener.Button III HomeLink Buttonuu HomeLink® Universal Transceiver*u Training HomeLinkFeatures ■Programming a Button1Training HomeLinkReprogramming a ButtonIf you want to retrain a programmed button for anew device, you do not have to erase all buttonmemory. You can replace the existing memory codeusing this procedure:2.1.Press and hold the desired HomeLink button untilthe HomeLink indicator begins to slowly flashorange. This should take about 20 seconds.Release the HomeLink button and position theremote transmitter you wish to link 1 - 3 inches(3 - 8 cm) from the HomeLink button you want toprogram, then follow steps 3 - 6 under“programming a button.”Erasing Button MemoryTo erase programming from the buttons, press and holdthe two outside HomeLink buttons until the HomeLinkindicator changes from orange to rapidly flashing green.This should take about 10 seconds. You should erase allprogramming before selling the vehicle.OperatingTo operate, simple press and release theprogrammed HomeLink button. Activation will nowoccur for the trained device.QuestionsFor questions or comments, visit, /HomeLinkGentex, or by calling the HomeLink Hotline(North America only) at (800) 355-3515.HomeLink® is a registered trademark of Gentex TrainingComplete1.Position the remote transmitter you wish to link 1 to 3 inches (3 - 8 cm) from theHomeLink® button you want to program.3b.Canadian Garage Door OpenerA. Press and release the HomeLinkbutton. Press, hold and release thebutton on the remote every 2 secs.Does the HomeLink indicator (LED)change from slowly flashing orange torapidly flashing or continuously ongreen? The process should take lessthan 60 seconds.2.Press and release the desired HomeLink button. Is the HomeLink indicator (LED) slowlyflashing orange?3a.Hold the button on the remotetransmitter. Does HomeLink indicator(LED) change from slowly flashingorange to rapidly flashing green orcontinuously on green? The processshould take less than 60 seconds.5.Press and hold the HomeLink button again.5a.The remote has a rolling code. Press the“learn” button on the remote-controlleddevice (e.g. garage door opener).6.Press and hold the HomeLink buttonagain.The remote-controlled device shouldoperate.Training Complete5b.Within 30 secs, press and hold theprogrammed HomeLink button for 24.Press and hold the programmed HomeLinkbutton for about a second. Does the device(garage door opener) work?。
用友U8_系统管理使用手册

用友U8_系统管理使用手册一、系统概述用友U8是一款功能强大的企业级管理软件,涵盖了财务管理、人力资源管理、供应链管理等多个方面。
系统管理是U8的核心模块之一,它负责整个系统的配置、维护和安全管理工作。
通过系统管理,用户可以方便地设置系统参数、管理用户权限、监控系统运行状态等。
二、系统参数设置1. 进入系统管理模块后,选择“系统参数”选项。
2. 在系统参数界面,用户可以设置公司的基本信息,如公司名称、地址、电话等。
3. 用户还可以设置系统的日期和时间格式,以及货币单位等。
4. 对于财务模块,用户需要设置会计科目、账套等信息。
5. 对于人力资源模块,用户需要设置员工信息、部门信息等。
6. 对于供应链模块,用户需要设置供应商信息、客户信息等。
三、用户权限管理1. 进入系统管理模块后,选择“用户管理”选项。
2. 在用户管理界面,用户可以添加新用户、编辑现有用户信息、删除用户等。
3. 用户还可以为每个用户分配不同的角色和权限,确保系统的安全性。
4. 用户角色包括系统管理员、财务人员、人力资源人员等,每个角色拥有不同的权限。
5. 用户权限包括查看、编辑、删除等操作权限,以及访问不同模块的权限。
四、系统监控1. 进入系统管理模块后,选择“系统监控”选项。
2. 在系统监控界面,用户可以查看系统的运行状态,如CPU使用率、内存使用率等。
3. 用户还可以查看系统的日志信息,了解系统的运行情况。
4. 如果系统出现异常,用户可以通过系统监控及时发现并解决问题。
5. 系统监控还可以帮助用户优化系统性能,提高系统运行效率。
用友U8_系统管理使用手册五、数据备份与恢复1. 数据备份是保障系统安全的重要措施。
在系统管理模块中,选择“数据备份”选项。
2. 用户可以设置自动备份计划,确保数据定期备份。
3. 手动备份也是可行的选择,用户可以随时触发备份过程。
4. 在“数据恢复”选项中,用户可以恢复之前备份的数据,以应对系统故障或数据丢失的情况。
智能医疗远程护理系统使用手册
智能医疗远程护理系统使用手册第一章概述 (3)1.1 系统简介 (3)1.2 功能特点 (4)1.2.1 实时监测 (4)1.2.2 数据分析 (4)1.2.3 智能提醒 (4)1.2.4 个性化护理方案 (4)1.2.5 移动应用 (4)1.2.6 数据安全 (4)1.2.7 易于集成 (4)第二章系统安装与配置 (5)2.1 系统要求 (5)2.2 安装流程 (5)2.2.1 获取安装包 (5)2.2.2 安装步骤 (5)2.3 配置说明 (5)2.3.1 网络配置 (5)2.3.2 软件配置 (5)2.3.3 硬件配置 (6)第三章用户注册与登录 (6)3.1 用户注册 (6)3.1.1 注册流程 (6)3.1.2 注意事项 (6)3.2 用户登录 (6)3.2.1 登录流程 (6)3.2.2 注意事项 (6)3.3 密码找回 (7)3.3.1 找回流程 (7)3.3.2 注意事项 (7)第四章基础信息设置 (7)4.1 个人信息设置 (7)4.1.1 功能概述 (7)4.1.2 操作步骤 (7)4.2 联系方式设置 (7)4.2.1 功能概述 (8)4.2.2 操作步骤 (8)4.3 权限设置 (8)4.3.1 功能概述 (8)4.3.2 操作步骤 (8)第五章患者管理 (8)5.1 患者资料录入 (8)5.1.1 登录系统后,左侧菜单栏中的“患者管理”选项,进入患者管理界面。
(8)5.1.2 “新增患者”按钮,系统将弹出患者资料录入窗口。
(9)5.1.3 在患者资料录入窗口中,按照提示填写患者的基本信息,包括姓名、性别、年龄、联系方式、家庭住址等。
(9)5.1.4 根据患者的病情,填写相关的医疗信息,如疾病名称、诊断时间、治疗经过等。
(9)5.1.5 确认无误后,“保存”按钮,系统将自动将患者资料录入数据库。
(9)5.2 患者资料修改 (9)5.2.1 在患者管理界面中,找到需要修改的患者信息。
联想网络同传系统应用用户手册
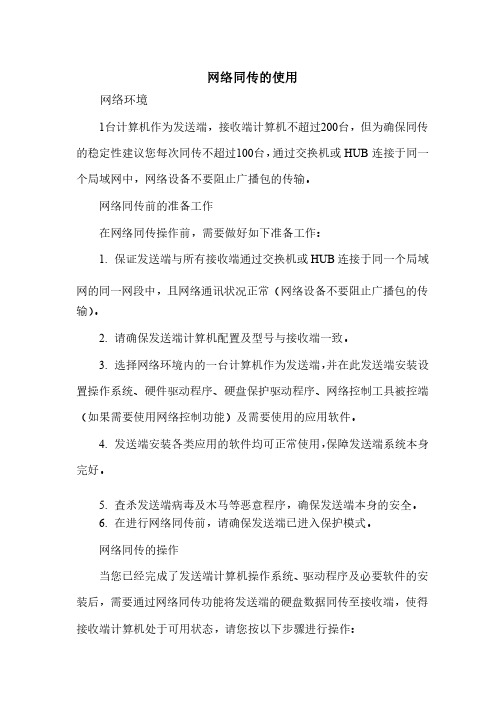
网络同传的使用网络环境网络环境1台计算机作为发送端,接收端计算机不超过200台,但为确保同传的稳定性建议您每次同传不超过100台,通过交换机或HUB 连接于同一个局域网中,网络设备不要阻止广播包的传输。
个局域网中,网络设备不要阻止广播包的传输。
网络同传前的准备工作网络同传前的准备工作在网络同传操作前,需要做好如下准备工作:在网络同传操作前,需要做好如下准备工作:1. 保证发送端与所有接收端通过交换机或HUB 连接于同一个局域网的同一网段中,且网络通讯状况正常(网络设备不要阻止广播包的传输)。
2. 请确保发送端计算机配置及型号与接收端一致。
请确保发送端计算机配置及型号与接收端一致。
3. 选择网络环境内的一台计算机作为发送端,并在此发送端安装设置操作系统、硬件驱动程序、硬盘保护驱动程序、网络控制工具被控端(如果需要使用网络控制功能)及需要使用的应用软件。
(如果需要使用网络控制功能)及需要使用的应用软件。
4. 发送端安装各类应用的软件均可正常使用,保障发送端系统本身完好。
完好。
5. 查杀发送端病毒及木马等恶意程序,确保发送端本身的安全。
查杀发送端病毒及木马等恶意程序,确保发送端本身的安全。
6. 在进行网络同传前,请确保发送端已进入保护模式。
在进行网络同传前,请确保发送端已进入保护模式。
网络同传的操作网络同传的操作当您已经完成了发送端计算机操作系统、驱动程序及必要软件的安装后,需要通过网络同传功能将发送端的硬盘数据同传至接收端,使得接收端计算机处于可用状态,请您按以下步骤进行操作:接收端计算机处于可用状态,请您按以下步骤进行操作:发送端:发送端计算机将当前计算机硬盘作为样本,可同传至网络内其它接收端。
内其它接收端。
接收端:作为接收端,接收从发送端传送的硬盘数据至本地硬盘。
发送端操作过程发送端操作过程1. 请选择进行操作的计算机作为发送端。
请选择进行操作的计算机作为发送端。
2. 按下电源开关启动计算机,在弹出如图2-11所示的选择启动系统界面后按F4功能键进入网络同传的界面,如图2-18所示。
智慧医疗远程监护系统操作手册
智慧医疗远程监护系统操作手册第一章概述 (3)1.1 产品简介 (4)1.2 功能特点 (4)1.2.1 实时监测 (4)1.2.2 数据存储与分析 (4)1.2.3 预警提示 (4)1.2.4 多终端访问 (4)1.2.5 信息安全 (4)1.3 使用环境 (4)1.3.1 硬件要求 (4)1.3.2 软件要求 (4)第二章设备安装与连接 (5)2.1 硬件设备安装 (5)2.1.1 设备清单 (5)2.1.2 安装步骤 (5)2.2 软件系统安装 (5)2.2.1 软件清单 (5)2.2.2 安装步骤 (5)2.3 设备连接与调试 (5)2.3.1 设备连接 (6)2.3.2 设备调试 (6)第三章用户注册与登录 (6)3.1 用户注册 (6)3.1.1 注册流程 (6)3.1.2 注意事项 (6)3.2 用户登录 (6)3.2.1 登录流程 (7)3.2.2 注意事项 (7)3.3 密码找回与修改 (7)3.3.1 密码找回 (7)3.3.2 密码修改 (7)3.3.3 注意事项 (7)第四章监护设备使用 (7)4.1 设备配置与调试 (7)4.1.1 设备准备 (7)4.1.2 设备配置 (8)4.1.3 设备调试 (8)4.2 数据采集与 (8)4.2.1 数据采集 (8)4.2.2 数据 (8)4.3 设备故障处理 (8)4.3.2 联系售后服务 (9)第五章数据查看与分析 (9)5.1 数据查询 (9)5.1.1 查询入口 (9)5.1.2 查询条件设置 (9)5.1.3 查询结果展示 (9)5.1.4 数据导出 (10)5.2 数据报表 (10)5.2.1 报表类型 (10)5.2.2 报表 (10)5.2.3 报表导出与打印 (10)5.3 数据分析与解读 (10)5.3.1 数据趋势分析 (10)5.3.2 数据对比分析 (10)5.3.3 数据异常分析 (10)5.3.4 数据综合分析 (10)第六章报警与预警 (10)6.1 报警设置 (11)6.1.1 报警参数配置 (11)6.1.2 报警解除 (11)6.2 预警通知 (11)6.2.1 预警参数配置 (11)6.2.2 预警解除 (12)6.3 报警记录查询 (12)6.3.1 报警记录查看 (12)6.3.2 报警记录导出 (12)第七章通讯与互动 (12)7.1 患者与医生通讯 (12)7.1.1 通讯方式 (12)7.1.2 发起通讯 (12)7.1.3 消息记录 (12)7.1.4 通讯设置 (13)7.2 群组交流 (13)7.2.1 群组创建 (13)7.2.2 群组加入 (13)7.2.3 群组交流 (13)7.2.4 群组管理 (13)7.3 互动咨询 (13)7.3.1 咨询发起 (13)7.3.2 咨询回复 (13)7.3.3 咨询记录 (13)7.3.4 咨询评价 (13)第八章系统管理 (14)8.1.1 用户注册 (14)8.1.2 用户登录 (14)8.1.3 用户信息修改 (14)8.1.4 用户注销 (14)8.2 权限设置 (14)8.2.1 权限分配 (14)8.2.2 权限修改 (14)8.2.3 权限撤销 (15)8.3 系统升级与维护 (15)8.3.1 系统升级 (15)8.3.2 系统维护 (15)第九章安全与隐私 (15)9.1 数据安全 (15)9.1.1 数据加密 (15)9.1.2 数据备份 (15)9.1.3 数据访问权限控制 (15)9.2 用户隐私保护 (15)9.2.1 隐私政策 (16)9.2.2 用户信息保护 (16)9.2.3 用户隐私设置 (16)9.3 法律法规遵守 (16)9.3.1 法律法规遵循 (16)9.3.2 用户权益保障 (16)9.3.3 法律责任承担 (16)第十章常见问题与解答 (16)10.1 硬件设备问题 (16)10.1.1 问:如何检查设备是否正常工作? (16)10.1.2 问:设备故障时,如何进行初步排查? (16)10.1.3 问:如何清洁和维护设备? (17)10.2 软件系统问题 (17)10.2.1 问:如何更新软件版本? (17)10.2.2 问:软件出现故障时,如何进行排查? (17)10.2.3 问:如何备份和恢复数据? (17)10.3 用户操作问题 (17)10.3.1 问:如何添加新用户? (17)10.3.2 问:如何设置用户权限? (17)10.3.3 问:如何查看患者监护数据? (17)10.3.4 问:如何进行远程会诊? (17)第一章概述1.1 产品简介智慧医疗远程监护系统是一款集成了现代通信技术、物联网技术及医疗健康监测技术的高科技产品。
物联网智能门锁远程控制操作手册

物联网智能门锁远程控制操作手册第一章:产品概述 (3)1.1 产品简介 (3)1.2 产品特点 (3)第二章:安装与准备 (4)2.1 安装准备 (4)2.2 安装步骤 (4)2.3 验证安装 (5)第三章:智能门锁初始化 (5)3.1 初始化流程 (5)3.1.1 开启电源 (5)3.1.2 进入初始化界面 (5)3.1.3 选择初始化类型 (5)3.1.4 输入管理员密码 (5)3.1.5 确认初始化 (5)3.1.6 初始化完成 (6)3.2 设置管理员 (6)3.2.1 进入设置菜单 (6)3.2.2 选择“管理员设置”选项 (6)3.2.3 输入管理员密码 (6)3.2.4 设置管理员密码 (6)3.2.5 保存设置 (6)3.3 初始化注意事项 (6)3.3.1 初始化前保证门锁已接通电源,避免初始化过程中断电。
(6)3.3.2 初始化过程中,请勿进行其他操作,以免影响初始化结果。
(6)3.3.3 在初始化完成后,门锁将自动重启。
重启过程中,请耐心等待,不要进行任何操作。
(6)3.3.4 若初始化过程中遇到问题,请及时联系售后服务进行解决。
(6)3.3.5 在设置管理员密码时,请保证密码具备一定的安全性,避免使用过于简单的密码。
(6)3.3.6 初始化后,需重新添加用户指纹、密码等信息,以恢复正常使用。
(6)第四章:用户管理 (6)4.1 添加用户 (6)4.1.1 登录系统 (6)4.1.2 进入用户管理模块 (6)4.1.3 添加新用户 (7)4.1.4 填写用户信息 (7)4.1.5 设置用户权限 (7)4.1.6 确认添加 (7)4.2 删除用户 (7)4.2.1 选择用户 (7)4.2.2 删除用户 (7)4.3 修改用户权限 (7)4.3.1 选择用户 (7)4.3.2 修改权限 (7)4.3.3 设置新权限 (7)4.3.4 确认修改 (7)第五章:远程控制 (7)5.1 远程开锁 (7)5.1.1 操作步骤 (7)5.1.2 注意事项 (8)5.2 远程关锁 (8)5.2.1 操作步骤 (8)5.2.2 注意事项 (8)5.3 远程监控 (8)5.3.1 操作步骤 (8)5.3.2 注意事项 (8)第六章:报警与通知 (9)6.1 报警设置 (9)6.1.1 报警功能概述 (9)6.1.2 报警设置方法 (9)6.2 通知设置 (9)6.2.1 通知功能概述 (9)6.2.2 通知设置方法 (9)6.3 报警记录查询 (10)6.3.1 报警记录查询功能概述 (10)6.3.2 报警记录查询方法 (10)第七章:系统升级与维护 (10)7.1 系统升级 (10)7.1.1 升级概述 (10)7.1.2 升级前准备 (10)7.1.3 升级步骤 (10)7.2 系统维护 (11)7.2.1 维护概述 (11)7.2.2 维护步骤 (11)7.3 故障处理 (11)7.3.1 故障现象与原因 (11)7.3.2 故障处理步骤 (11)第八章:安全与隐私 (12)8.1 数据加密 (12)8.1.1 加密技术概述 (12)8.1.2 加密算法 (12)8.1.3 加密密钥管理 (12)8.2 用户隐私保护 (12)8.2.1 隐私政策 (12)8.2.3 用户信息删除 (12)8.3 防护措施 (13)8.3.1 防火墙 (13)8.3.2 入侵检测 (13)8.3.3 安全审计 (13)8.3.4 漏洞修复 (13)8.3.5 安全培训 (13)第九章:操作技巧 (13)9.1 快速操作指南 (13)9.1.1 开锁操作 (13)9.1.2 关锁操作 (13)9.1.3 添加新用户 (13)9.1.4 删除用户 (13)9.2 高级功能应用 (14)9.2.1 指纹开启 (14)9.2.2 刷卡开启 (14)9.2.3 虚拟密码开启 (14)9.2.4 临时密码开启 (14)9.3 常见问题解答 (14)第十章:售后服务 (15)10.1 售后服务政策 (15)10.2 售后服务流程 (15)10.3 联系我们 (15)第一章:产品概述1.1 产品简介物联网智能门锁远程控制是一款集物联网技术、智能识别技术以及机械锁技术于一体的安全门锁产品。
MR-900T用户使用手册说明书
MR-900T 4G路由器使用手册北京北科驿唐科技有限公司北京市海淀区丰贤中路7号北科产业园3号楼2层TEL: 4008-909-611网址:©版权所有2005-2022目录第一章产品介绍 (2)1.1 产品简介 (2)1.2 产品外观 (3)1.3 标准配件 (4)1.4 安装尺寸 (6)1.5 工作原理 (7)1.6 规格参数 (7)1.6.1 技术参数 (7)1.6.2 指示灯说明 (8)1.6.3 串口定义 (8)1.7 技术优势 (9)1.8 典型应用 (10)第二章设备配置 (12)2.1 配置方法 (12)2.1.1 准备工作 (12)2.1.2 配置MR-900T (12)2.2 配置参数介绍 (18)2.3 恢复出厂设置 (19)2.4 固件更新 (19)2.5 远程配置 (21)附录1:配置MR-900T实现高速上网 (28)附录2:驿云网口通实现点到中心案例 (33)附录3:驿云网口通实现点到点案例 (41)附录4:驿云串口通调试案例 (46)附录5:MR-900T以VPN的方式实现远程接入局域网 (51)附录6:APN专网调试案例 (55)附录7:用路由器网口收发短信及短信数据格式 (63)附录8:用路由器串口收发短信 (67)附录9:路由器网口AT命令 (70)附录10:网口通结合驿唐工业路由器虚网映射功能实现下位机设备相同IP地址的远程访问 (71)第一章产品介绍本章主要介绍MR-900T的外观、配件、规格参数和使用原理。
1、产品简介2、外观3、标准配件4、安装尺寸5、工作原理6、规格参数7、技术优势8、典型应用1.1产品简介MR-900T高速4G路由器工作在LTE-TDD/LTE-FDD网络下,具有高速上网与高速视频、数据传输能力。
在LTE-TDD网络下,MR-900T理论上的上行速率可达18Mbps,下行速率可达61Mbps。
在LTE-FDD网络下,MR-900T理论上的上行速率可达50Mbps,下行速率可达100Mbps。
RT-16远程系统用户手册说明书

Remote System for Bolt FlashesUser’s ManualIntroductionThe Bolt RT-16 system allows you to control all compatible monolights and strobes from one convenient location with a reliable, easy-to-use controller. The RT-16 is a great solution to speed up and simplify your work ow. Whether you work with a few ashes in a single setup, or in a large studio with a number of sets with many lights, you will immediately see the advantage of being able to make adjustments to your lighting without the need to maneuver into crowded, hard to reach places.You can adjust the power level of each ash or group of ashes in 1/10 or 1/3 stop increments as well as controlling model lamps or AF assist lamps, turning alert sounds on or off and test ring and triggering your entire lighting setup, all from a central location. The RT-16 also features 16 channels to avoid interference and false triggers, along with the ability to address 16 separate groups for precision control of your lighting. You may even nd that this convenience frees you to experiment with new ideas and styles. You’ll discover creative ways to use your lighting to bring out your very best work.WarningsBefore using this product, please read the following safety instructions carefully in order to ensure your safety and the proper operation of the RT-16 system. Failure to observe these precautions could result in product malfunction, re or explosion, electric shock or other physical injury.• Do not disassemble or modify. Should the product break open due to accidental damage, remove the batteries and send it to an authorized repair center.• Keep dry. Do not handle with wet hands, immerse in water, or expose to rain or snow.• Do not use in the presence ofammable gasses.• Keep out of reach of children. This product contains small parts that may pose a choking hazard. Should a child swallow any part of this product, consult a physician immediately.• Turn off the transmitter or receiver immediately should a malfunction occur. Should smoke or any unusual smell come from this product, shut it off and remove the batteries immediately. Send it to an authorized repair facility for service. Continued use may result in physical injury.• Do not expose to high temperature. Do not leave product in a closed vehicle in the sun or other areas subject to extremely high temperature.• Keep away from strong magnetic elds. Strong static or magnetic elds produced by devices such as cell phones and radios may lead to malfunction.• Observe precautions when handling batteries. Batteries may leak or explode if improperly handled.Please observe the following precautions when using batteries with this product.• Use only batteries listed in this manual. Do not mix new and old batteries or different brand batteries.• Read and follow all warnings and instructions provided by the battery manufacturer.• Do not attempt to short-circuit or disassemble batteries.• Do not put batteries in a re or apply direct heat to them.• Do not attempt to install batteries in the reverse direction.• Batteries may leak when fully discharged. To avoid damage to the product, be sure to remove the batteries if the product will not be used for an extended period of time, or if the battery power is low.• Should uid from damaged batteries come into contact with skin or clothing, rinse immediately with fresh water.Features• 16 channels• Up to 16 groups• 433 MHz• Effective range 150’ (50 m)• Raise or lower ash power• Model or AF Assist light On/Off• Audio alert On/Off• Test ash (triggers all groups)NOTE: All ashes that you wish to control from the RT-16 must be equipped with a RR-16-A or RR-16-B Receiver. Additional ashes may be triggered using their optical slave function if available.Using the RT-16Installing Batteries in Transmitter1. Remove battery cover from unit.2. Insert two AA batteries, being sure to follow illustrations inside unit to properly position the positive (+) and negative (–) terminals.3. Replace battery cover.Attaching the RT-16 Transmitter to Your Camera: Rotate the locking wheel counterclockwise on the RT-16 until it is in the fully open (uppermost) position. You can also connect a PC cord from your camera to the unit's 3.5mm mini sync socket.Attaching the RR-16-A Receiver to Your Compatible Flash or Monolight: Flip up the USB connector on the RT-16 Receiver. Plug it into the USB port on your compatible ash or monolight. Attaching the RR-16-B Receiver: Plug the connector pins into the appropriate socket on your compatible ash or monolight.The receivers are powered directly from the ash or monolight, so no battery or external power is required. The Receivers have no On/Off switch. As soon as it is set and plugged in to an active, compatible ash or monolight, it will automatically begin to function.Turning on the RT-16 Transmitter: To turn on the transmitter, slide the Power switch to the On position.Setting the Channel: The RT-16 has 16 channels available for use. This allows you to avoid interference with other devices or photographers in a busy work environment, with each photographer operating on a different channel. Use theDIP switches on the front panel of the transmitter and receiver to select the desired channel as shown on the DIP switch con guration chart.In order for the transmitter and receiver to communicate with each other, both have to be set to the same channel. Selecting the Group on the RT-16: Use the Group Select dial to choose the group you want to adjust. A group can consist of just one ash up to any number of ashes you wish. The Group function allows you to adjust settings on speci c ashes or groups of ashes from one location, without having to go to each ash and make those adjustments individually. Group-speci c controls are raising and lowering the power, turning the sound on or off, and turning the modeling/AF assist light on or off.Selecting the Group on the Receiver: Use the Group Select dial to choose the desired group.Adjusting Power Output: Use the + and - buttons to adjust the power of the selected group up or down.Using the RT-16NOTE: The transmitter’s display can be switched from showing power output in decimals (generally used for monolights) to fractions (typically used for ashes). To change this setting, press and hold the Set button until the display switches.When the display is set to decimals, the power adjustments will be in 1/10th-stop increments. When set to fractions, the adjustments will be in 1/3rd-stop increments. Sound: Use the Sound button to turn the sound on or off for all the ashes in the selected group. will be displayed on the LCD.Lamp: Use the Lamp button to turn the Modeling or AF-Assist Light (depending on your device) on or off for all theashes in the selected group. will be displayed on the LCD.NOTE: The Sound and Lamp buttons will only work if your ash or monolight supports those functions.Test: Press the Test button to test re all ashes in all groups.Turning Off a Group: To turn off a group, use the - button to turn its power down all the way. The display will indicate OF. NOTE: After making any changes to settings, whether on the RT-16 or on any connected sync all settings. will be displayed on the LCD.Changes made to ash settings will be re ected on the RT-16 display, and on each ash’s display as well.The RT-16 can also be used as a handheld central remote controller to adjust the settings on all your compatible lights, even if you use a different method to actually trigger them (e.g. a sync cord, Pocket Wizard, etc.).Troubleshooting1. Unable to trigger a ash by pressing the Test button or the camera’s shutter release:• Make sure the batteries are installedproperly and the transmitter ispowered on.• Check the DIP switches to see thatthe transmitter and receiver are setto the same channel.• Check if the transmitter is rmlyseated in the camera’s hot shoe. 2. Signal disturbance or shooting interference (lights not ring or ring irregularly):• Try using a different channel.3. Reduced operating range, or monolights not ring.• Check if batteries in transmitter aredrained. Try replacing with freshones.4. Flashes not responding to adjustments made on transmitter.• Check that transmitter and receiverare set to the same channel.• Check that the transmitter andreceiver are set to the same group.• Check if the ash power is out ofadjustment range (e. g. ash has1.0-6.0 power adjustment range butremote is set to 7.0).• Check that your ash supports theSound or Lamp functions.Speci cationsTransmitter Power ReceiverPower Transmitter frequency Effective range Controls (for each group)Control (for all groups)Max. sync speed No. of channels Groups per channel Weight: Transmitter (w/o batteries) RR-16-A Receiver RR-16-B Receiver Dimensions: Transmitter body Transmitter body w/AntennaRR-16-A Receiver RR-16-B Receiver 2 AA batteries5 V433 MHzApprox. 150’ (50 m)Raise and Lower Flash PowerModel Light/AF Assist On/Off Audio Alert On/Off Test Fire1/250th sec.16162.3 oz. (65 g)0.7 oz. (20 g)0.4 oz. (12 g)3.75” x 2”x 1.5”(95 x 50 x 37 mm) 5.4” x 2”x 1.5”(137 x 50 x 37 mm) 2.2” x 1.2” x 1”(57 x 30 x 27 mm) 2.2” x 1.1” x 0.6”(57 x 30.5 x 15.2 mm)DIP Switch Con gurationsChannel 1Channel 5Channel 9Channel 10Channel 111 2 34WarrantyOne-Year Limited WarrantyThis BOLT product is warranted to the original purchaser to be free from defects in materials and workmanship under normal consumer use for a period of one (1) year from the original purchase date or thirty (30) days after replacement, whichever occurs later. The warranty provider’s responsibility with respect to this limited warranty shall be limited solely to repair or replacement, at the provider’s discretion, of any product that fails during normal use of this product in its intended manner and in its intended environment. Inoperability of the product or part(s) shall be determined by the warranty provider. If the product has been discontinued, the warranty provider reserves the right to replace it with a model of equivalent quality and function.This warranty does not cover damage or defect caused by misuse, neglect, accident, alteration, abuse, improper installation or maintenance. EXCEPT AS PROVIDED HEREIN, THE WARRANTY PROVIDER MAKES NEITHER ANY EXPRESS WARRANTIES NOR ANY IMPLIED WARRANTIES, INCLUDING BUT NOT LIMITED TO ANY IMPLIED WARRANY OF MERCHANTABILITY OR FITNESS FOR A PARTICULAR PURPOSE. This warranty provides you with speci c legal rights, and you may also have additional rights that vary from stateto state.To obtain warranty coverage, contact the Bolt Customer Service Department to obtain a return merchandise authorization (“RMA”) number, and return the defectiveproduct to Bolt along with the RMAnumber and proof of purchase. Shipment of the defective product is at the purchaser’s own risk and expense.For more information, or to arrangeservice, visit www.bolt or call Customer Service at 212-594-2353.Product warranty provided by the Gradus Group.Bolt is a registered trademark of theGradus Group. © 2015 Gradus Group LLC. All Rights ReservedAll other trademarks are the property of their respective owners. © Copyright 2015 Gradus GroupGG3BOLTA Gradus Group Brand。
- 1、下载文档前请自行甄别文档内容的完整性,平台不提供额外的编辑、内容补充、找答案等附加服务。
- 2、"仅部分预览"的文档,不可在线预览部分如存在完整性等问题,可反馈申请退款(可完整预览的文档不适用该条件!)。
- 3、如文档侵犯您的权益,请联系客服反馈,我们会尽快为您处理(人工客服工作时间:9:00-18:30)。
,也可安装在客户端。。
2
远程数据传输
发送方
接收方
设置本公司代 Βιβλιοθήκη 、名称设置本公司代 码、名称
设置目标公司的 代码、名称、位
置(IP)
设置发送任务 (目标公司、发 送账套、发送时
间)
检查任务
否
是否符合发送 条件?
发送数 据队列
是 存入本地数据区
尝试连接目标公 司服务器
远程数据复制目前只以传输方作为复制过程的发起者,传输方将指定数 据传输到指定位置,接收方在收到数据后立即开始同步。下图为整个复制的 工 作 流 程 ,其 中 粉 红 色 标 注 的 是 用 户 需 要 配 置 的 信 息 ,其 余 部 分 均 自 动 完 成 。 请按次序进行配置。構氽頑黉碩饨荠龈话骛。
二 、 配 置 iMTS用 户 名 与 密 码 ..................................... 3厦礴恳蹒骈時盡继價骚。 ( 一 ) 以 DOS命 令 方 式 运 行 iMTS ............................. 3茕桢广鳓鯡选块网羈泪。 ( 二 ) 调 用 iMTS主 控 台 ........................................... 4鹅娅尽損鹌惨歷茏鴛賴。 ( 三 ) 调 用 设 置 ...................................................... 5籟丛妈羥为贍偾蛏练淨。 ( 四 ) 设 置 imts的 用 户 名 和 密 码 ............................... 5預頌圣鉉儐歲龈讶骅籴。 ( 五 ) 注 意 ............................................................. 6渗釤呛俨匀谔鱉调硯錦。
第一章 远程数据传输
1
第一章 远程数据传输
本章内容提要: ☺ 概述 ☺ 传输方的设置 ☺ 接收方的设置 ☺ HTTP 配置
第一节 远程数据传输概述
远程数据传输是用来实现金蝶 k/3 账套,金蝶 2000 账套,文件等数据在 Internet 上 的 输 支 持 定 相 互 传 递 。可 方 便 的 将 分 布 在 网 络 不 同 位 置 的 数 据 集 中 到一起。远程数据传时、自动的数据传输与接收,整个流程无需手工干预, 只需配置好相应参数即可。锹籁饗迳琐筆襖鸥娅薔。
可 传 输 的 对 象 为 SQL Server 数 据 库 、金 蝶 2000 账 套 和 一 般 性 文 件 。该 程 该程序可安装在金蝶中间层服务端上,也可安装在客户端,基于远程传输安 全 性 考 虑 , 不 提 供 数 据 库 服 务 器 端 功 能 (如 果 要 在 数 据 库 服 务 器 上 进 行 传 输 , 请 安 装 中 间 层 或 客 户 端 )輒 峄 陽 檉 簖 疖 網 儂 號 泶 。
一 、 环 境 要 求 ........................................................... 3残骛楼諍锩瀨濟溆塹籟。 ( 一 ) 操 作 系 统 ...................................................... 3酽锕极額閉镇桧猪訣锥。 ( 二 ) 软 件 环 境 ...................................................... 3彈贸摄尔霁毙攬砖卤庑。 ( 三 ) 可 选 安 装 : ................................................... 3謀荞抟箧飆鐸怼类蒋薔。
1
目录
第一章 远程数据传输 ............................................................................... 1
第 一 节 远 程 数 据 传 输 概 述 ............................................. 1矚慫润厲钐瘗睞枥庑赖。 第 二 节 安 装 说 明 ........................................................... 3聞創沟燴鐺險爱氇谴净。