SmartView软件操作手册
ADISRA SmartView 远程查看器指南说明书

Remote Viewer GuideNote: this document is only for Microsoft Windows Operating System1.ScopeThe ADISRA SmartView Remote Viewer Guide explains how remote access worksinternally and the steps to follow in order to deploy the remote access feature within ADISRA SmartView.2. SummaryRemote Viewer is a tool which allows the user to connect the Viewer to ADISRASmartView runtime on a local or remote computer. In order to execute the Remote Viewer, the user needs to run the full installation of ADISRA SmartView and thenexecute the Viewer.exeWhen the Remote Viewer connects to the remote runtime application, it requeststhe Graphics which will be opened. It is not necessary to manually copy theapplication to the machine where the Remote Viewer will be executed. This is animportant feature since the application will be only placed in the machine where the runtime is running. There will be no need to keep applications in different machines.Additionally, whenever a change is made on a Graphics layout (i.e. added an extralabel on engineering), this change will already be available to the Remote Viewer,the user needs to re-open the updated Graphics. When logic has been updated in a Service, Trigger, Driver or any module that is part of the runtime, the user mustrestart the runtime process and the Remote Viewer will be automaticallydisconnected/closed.3. Configuring the RuntimeEvery Remote Viewer needs to connect to a ADISRA SmartView runtime process. We will look at the runtime configuration first.To configure the project that is going to be executed, follow the steps below:On the Settings Ribbon, go to Viewer and select “SelfHosting”. Enter a port number, the default port is “9000” but it can be changed if it is already in use.3.1 Check the Ports Being UsedThis step is only needed if it is uncertain if the port is already in use. Stop the application if it is running.•Press “Windows+R” and type "cmd" and click OK to open the Command Prompt:•In the Command Prompt type ”netstat -an” and see the ports that are being used. Make sure the port to be configured is not listed. If it is, select adifferent port number that is not being used.3.2 Check the IP Address of the Executing MachineThe IP Address and the port number configured in the project will be used to create the connection between the Remote Viewer and the Runtime. Please follow the instructions below to obtain the correct IP Address for the machine where the runtime is being executed.•Press “Windows+R” and type "cmd" and click OK to open the Command Prompt:•In the Command Prompt type ”ipconfig” and check the IPv4 Address, this will be used later. In this example, it is “192.168.1.145”.4.Configure the Remote ViewerTo configure the Remote Viewer to connect to the executing Runtime from another machine, follow the steps below:•Open the Viewer. To open the Viewer, the user must navigate to the ADISRA SmartView installation bin folder and double click Viewer.exe.•Note: the red circle indicates the viewer is not connected to an executing Runtime;set the IP address and designate the port to be configured (as shown in the lastchapter), then test the connection.•If everything is configured correctly, this message will be displayed.Remember that the ADISRA SmartView Runtime must be running.•Then click the “Connect” button, the default graphic of the executing project will open; note, now the viewer has a green circle indicating it’s connected to the Runtime:5. Custom ResolutionIn this section, understand how to configure the custom resolution of the Remote Viewer.If the machine selected for the Remote Viewer has a different resolution than theinitial machine intended for the project, then the viewer’s resolution can bechanged. Click the “Custom Resolution” check box. Two options are offered:•First option, click the down arrow on the far right of the first resolution box and the box will descend displaying available resolutions. Select the desiredresolution.•Or, click the second box and type in the desired resolution:6. Possible Errors6.1 Connection FailedWhen testing the connection in the Remote Viewer and a connection failedmessage appears:•To resolve this problem, first make sure the runtime is running on the remote machine. Also, make sure the runtime IP Address and the port number arecorrect.•Next, check if the network is operating properly. Open the CMD (Command prompt) and ping the runtime IP Address.ADISRA SmartView Remote Viewer GuideADISRA · 3432 Greystone Drive, Suite 125 · Austin, TX 78731Phone: 1-833-5ADISRA (1-833-523-4772)-11-“ping 192.168.1.145“.• If the ping fails, there is a problem with the network.6.2 Application Does Not OpenThis might not be an error. To confirm the project has a Startup Graphicconfigured. Select “Settings” to display the Startup Graphic box. Page “Home” is the “Startup Graphic”. When the user runs the Remote Viewer, it will connect to Runtime and the Home page will be displayed for the user. If there is not a “Startup Graphic” configured, nothing will be displayed.Alternatively, a Graphic maybe opened from the windows notification area located on the screen’s bottom right near the system clock. Right click on the highlighted icon, click on the “Graphics” option and then click on the Graphics to be opened..。
Samsung Smart View

Samsung Smart View通过“Samsung Smart View”应用程序,您可以在三星智能电视上播放移动设备和电脑中存储的多媒体内容。
通过Samsung Smart View,您可以在三星智能电视上享受存储在您手机和PC 上的内容,而且您还可以通过手机控制电视。
手机版本下载※ 请直接在三星应用商店搜索Samsung Smart View。
Windows 电脑版本下载“Samsung Smart View”的特色功能电视机遥控功能即使没有遥控器,您也可以使用Smart View 来操控你的三星智能电视。
播放移动设备的内容连接您的手机与电视,然后选择视频,图片,或者甚至音乐。
您的内容将在电视上即时播放。
创建播放列表创建个性化的播放列表,您就可以在一个地方访问所有您喜欢的视频,照片和音乐。
播放电脑中的内容您可将电脑中的文件或者是整个文件夹添加到Smart View 里,然后就可以一起播放这个列表上的所有内容。
※ 如果您同时添加了视频和字幕,您就可以使用字幕功能了。
观看三星智能电视上的内容您可以享受所有连接到电视上的设备里的内容,这些都可以作为源文件播放。
※ 2013和2014的三星智能电视, 您可以从“多媒体”访问所连接设备里面的内容,2015的三星智能电视, 从“我的内容”访问※ 应用程序可用性可能因地区而异。
※ Netflix 需具备会员资格。
Smart View操作说明在同一网络下连接移动设备/电脑和电视从应用商店或三星盖乐世社区应用商店下载“Samsung Smart View”应用程序。
启动“Samsung Smart View”应用程序,并根据向导完成安装。
※ 2011~2013三星智能电视, 在弹出窗口选择“允许”,以显示出附近的设备进行连接。
2014年~2015年三星智能电视,需要输入电视屏幕上显示的4位数字。
支持的设备智能电视2011LED D7000及以上,PDP D8000及以上。
SVC3000用户手册
SmartView Clinet 3000用户手册目录1运行环境 (1)1.1硬件设备 (1)1.2支持软件 (1)2 软件安装 (2)3 登录 (4)4 设备管理 (5)4.1 新增设备 (6)4.2 搜索设备 (6)4.3 删除设备 (8)4.4 设备信息变更 (8)5 用户管理 (9)5.1 认证文件管理 (9)5.2 用户组管理 (10)5.3 用户管理 (13)6 会话管理 (14)6.1 启动会话 (14)6.2 终止会话 (15)6.3 会话设置 (16)6.4 鼠标 (17)6.5 键盘 (17)6.6 选项设置 (18)6.7 全屏 (19)6.7 虚拟媒体 (19)6.8 智能电源管理器(PDU)管理 (20)6.8.1 PDU 信息变更 (20)6.8.2 PDU控制 (21)1运行环境1.1硬件设备中央处理器:主频1GHz以上,推荐使用英特尔“奔腾4”以上处理器内存:256MB以上内存硬盘:200M以上可用硬盘空间显示:标准 VGA,16位真彩色以上驱动器:CD-ROM驱动器(可选)1.2支持软件操作系统:Windows XP或更高版本2 软件安装【第一步】启动计算机,并将《SmartView Client 3000》安装盘放入光驱。
单机版文件名:SVC3000(STAND)_Setup,网络版分为32位、64位,请按需求安装。
【第二步】点击“下一步”继续安装,读取用户许可协议【第三步】同意后点击“下一步”继续安装,安装程序出现“选择目的地位置”框,默认安装目录为C:\Program Files\COMPANY\SmartView,点击“更改”可更改安装目录,如图2.1:图2.1【第四步】点击“下一步”进入软件安装过程,如图2.2:图2.2出现如图2.3所示,表示安装成功图2.33 登录双击桌面上的图标,进入SVC3000系统,也可以从【开始】→【程序】→【SVC3000】进入。
SmartView软件操作手册
SmartView软件操作手册欢迎使用 SmartView(TM)SmartView(TM) 是您的系统随附的光盘所提供的一款功能强大、使用方便的分析软件。
SmartView 与摄像机配合使用,就能:, 将热像图像传送到电脑并有效管理它们, 优化和分析红外线和可见光对照图像, 创建和打印包含重要图像数据的详细专业报告,理解系统要求在安装和操作 SmartView(TM) 之前,确保您的计算机满足下列系统要求:软件要求, Microsoft(TM) Windows(TM) 98SE/ME/2000/XP。
, 用于产品注册和查看“常见问答”的 Web 浏览器: Microsoft(TM) InternetExplorer 5.0 或更新版本或者 Netscape Browser(TM) 5.0 或更新版本。
硬件要求, CompactFlash(TM) 存储卡阅读器。
, 20 MB 可用磁盘空间,不包括 Web 浏览器和 Microsoft(TM) Word 所需的空间。
, 16-位色,800 x 600 或更高分辨率视频。
, 彩色打印机(用于打印图像)。
, 光驱(用于安装 SmartView 软件)安装 SmartView要安装 SmartView 软件:1. 关闭所有程序。
2. 将 SmartView 光盘插入系统的光驱中。
如果您的系统启用了“自动运行”功能,则安装会自动开始;请转至步骤 5。
3. 如果“自动运行”未启用,则从“开始”菜单中,选择运行。
4. 键入 <D:\setup>(如果您的光驱使用不同的盘符,请以您的光驱盘符来替换“D”)。
5. 遵照屏幕上的指示完成安装。
卸载 SmartView 软件要从您的计算机上卸载 SmartView 软件:1. 打开 Windows 控制面板。
2. 在 Windows 控制面板中,选择“添加或删除程序”。
3. 选中 SmartView,然后单击相应的按钮删除/卸载 SmartView 软件。
SmartView软件使用讲解
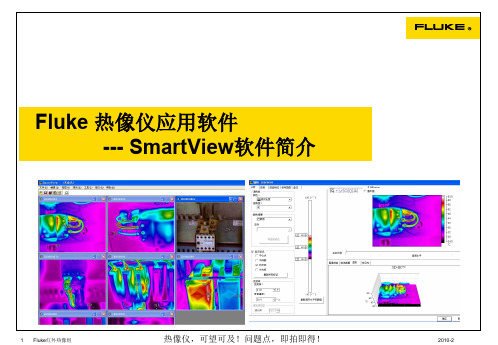
Fluke 热像仪应用软件--- SmartView软件简介Smartview软件说明保存格式为IS2的红外热图可使用SmartView软件实现图像处理、标注、导出、生成报告等功能,软件适合所有Fluke红外热像仪型号。
SmartView软件可任意安装在有Windows2000、XP、Vista等操作系统的计算机内,安装次数没有限制。
硬件要求:•SD/CF存储卡阅读器。
•200 MB 可用磁盘空间,不包括 Web 浏览器和Microsoft(TM) Word 所需的空间。
•16位色,800 x 600 或更高分辨率视频。
•光驱(用于安装 SmartView 软件)软件设置–温度单位设置注意:当SmartView软件安装完成后,华氏温标为其默认温度单位,请尽快设置为摄氏温标。
操作步骤:编辑–首选项–应用–温度单位软件设置–报告输出格式设置操作步骤:编辑–首选项–报告可选择PDF、Word等。
注意:Smartview软件报告若以Word格式输出,计算机需要能打开Word2007版本,否则需要对Office系统进行升级。
软件操作–打开热图文件操作步骤:文件–打开–找寻热图或直接用快捷方式打开热图。
软件支持同时打开多幅热图,并以层叠或平铺形式展开热图分析–进入热图分析页面双击在浏览页面下的热图,即可进入分析页面。
热图分析–标注区域标注点标注软件可在红外图范围内标注任意点、线、区域的温度状态,按鼠标右键可进行标注的编辑和删除。
热图分析–标注(线)在进行线标注时,可使用图形工具显示所标注的线条(可多条)的温度分布曲线。
热图分析–红外、可见光融合拖动滑块,调整可见光在红外图像中的显示比例,以便清晰标明问题点的位置。
热图设置为画中画模式该功能同样适用。
热图导出–图像在浏览页面中选取需要导出的热图,按鼠标右键后选取“导出”,再选取“图像”,即可导出各种格式图片及增加日期和调色板。
注意:一旦热图导出,导出的图片不再具有分析功能,若需要重新分析,必须打开原始热图(IS2格式)进行分析。
SmartView软件操作手册
欢迎使用SmartView(TM)SmartView(TM) 是您的系统随附的光盘所提供的一款功能强大、使用方便的分析软件.SmartView 与摄像机配合使用,就能:将热像图像传送到电脑并有效管理它们优化和分析红外线和可见光对照图像创建和打印包含重要图像数据的详细专业报告理解系统要求在安装和操作SmartView(TM)之前,确保您的计算机满足下列系统要求:软件要求•Microsoft(TM) Windows(TM) 98SE/ME/2000/XP.•用于产品注册和查看“常见问答”的Web 浏览器:Microsoft(TM)Internet Explorer 5。
0 或更新版本或者Netscape Browser(TM) 5.0 或更新版本.硬件要求•CompactFlash(TM)存储卡阅读器.•20 MB 可用磁盘空间,不包括Web 浏览器和Microsoft(TM) Word 所需的空间。
•16-位色,800 x 600 或更高分辨率视频。
•彩色打印机(用于打印图像)。
•光驱(用于安装SmartView 软件)安装SmartView要安装SmartView 软件:1. 关闭所有程序。
2. 将SmartView 光盘插入系统的光驱中。
如果您的系统启用了“自动运行”功能,则安装会自动开始;请转至步骤5。
3. 如果“自动运行”未启用,则从“开始"菜单中,选择运行.4. 键入<D:\setup>(如果您的光驱使用不同的盘符,请以您的光驱盘符来替换“D”).5. 遵照屏幕上的指示完成安装。
卸载SmartView 软件要从您的计算机上卸载SmartView 软件:1. 打开Windows 控制面板.2. 在Windows 控制面板中,选择“添加或删除程序”。
3. 选中SmartView,然后单击相应的按钮删除/卸载SmartView 软件。
注意: 按钮名称取决于您运行的Windows(TM) 版本而有所不同。
Oracle Smart View for Office 发布说明书
Release 11.1.2.5.500C ONTENTS I N B RIEFFeatures Introduced in Release 11.1.2.5.500 (2)Features Introduced in Release 11.1.2.5.410 (3)New Features Introduced in Earlier Releases (4)Features Introduced in Release 11.1.2.5.500Subtopicsl New Smart Forms for Saving Client-side Calculationsl New Oracle Journals Extension for Financial ManagementNew Smart Forms for Saving Client-side CalculationsThe Excel formulas and functions that you add to ad hoc grids in Oracle Smart View for Office can now be saved to Oracle Planning and Budgeting Cloud Service in Smart Forms.Note:Smart Form functionality is available for ad hoc grids created from Oracle Planning and Budgeting Cloud Service. Check with your service administrator about the availability of Smart Forms in your service.In Smart View, an Oracle Planning and Budgeting Cloud Service user can create an ad hoc grid, add Excel formulas or functions to the grid, and then save the grid, including the formulas and functions, to Oracle Planning and Budgeting Cloud Service as a Smart Form.The formulas and functions, or business calculations, can be executed at runtime in either Smart View or the Oracle Planning and Budgeting Cloud Service web interface, without adding members to Oracle Planning and Budgeting Cloud Service metadata. When the Smart Form is opened from Smart View, the business calculations are executed completely in the Smart View client, leveraging the native Excel calculation engine, without a round trip to the Oracle Planning and Budgeting Cloud Service. Business calculations are supported in both Smart View and the Oracle Smart View for Office User's Guide web interface.The Smart Form, with its calculations and grid labels, must be created in Smart View. Grid labels provide placeholders in a grid for entering the business calculations for corresponding data cell intersections. Smart Forms support formulas and functions for rows and columns at the cell level.For more information, see the “Smart Forms” chapter in the Oracle Smart View for Office User's Guide.New Oracle Journals Extension for Financial Management Oracle Journals is a new Smart View extension that supports a subset of the Journals functionality found in the Oracle Hyperion Financial Management web interface.Note:The Oracle Journals extension works with Smart View version 11.1.2.5.500 and later, and with Oracle Hyperion Financial Management 11.1.2.4.100 and later.2With the Oracle Journals for Financial Management extension in Smart View, you can performthese journal tasks:l Open a journal and view its properties, such as Status, Type, Balance Type, Group, and Classl Create a new blank journal or create a journal using a standard or recurring templatel Create a journal from data grids or data forms opened in Excel using the right-click option in the grid or form, or the Create Journal command in the ribbonl Create an ad hoc query from within a journal.l Edit and save journalsl Submit, Unsubmit, Approve, Reject, Post, Unpost, and Delete journalsl Open an Entity Detail Report from data grids or data forms, and from an Entity Detail report, click on a journal to drill down for further detailsFor more information, see the “Oracle Journals” chapter in the Oracle Smart View for OfficeUser's Guide.Features Introduced in Release 11.1.2.5.410New Extension for Oracle Enterprise Performance Reporting Cloud ServiceThis release introduces the Oracle Enterprise Performance Reporting Cloud Service extensionfor Smart View. With the Oracle Enterprise Performance Reporting Cloud Service extension,you use familiar Microsoft Office tools to access and work with data in Oracle EnterprisePerformance Reporting Cloud Service.Oracle Enterprise Performance Reporting Cloud Service in Smart View enables you and your colleagues work in a collaborative environment with Word documents containing refreshabledata copied from Smart View. With its clearly defined assignments and tasks, the OracleEnterprise Performance Reporting Cloud Service workflow organizes input from manycontributors in one document. Some tasks are performed in the Oracle Enterprise Performance Reporting Cloud Service web interface, and others are completed in Smart View.With Oracle Enterprise Performance Reporting Cloud Service:l Use the web interface to assemble a set of documents, called doclets, into a structure calleda report package.l Assign user access and responsibilities, as well as timelines and due dates, in the web interface for the authoring, review, and approval of each doclet in the report package.l Use Smart View to author doclet contents directly in Microsoft Word.You can work with doclets in Smart View while connected to Oracle Enterprise PerformanceReporting Cloud Service, or you can download doclets and work with them locally.3l Leverage Smart View's ability to access various data sources and include individual data points or formatted reports within the doclet.You can retrieve data from Oracle Enterprise Performance Reporting Cloud Service data sources and other Oracle Enterprise Performance Management System on-premises and cloud data sources.l Collaboratively review and comment on assigned review instances either on the web interface or in Smart View.l Sign off on the entire report package either on the web interface or in Smart View.l Finalize the report package in the web interface.When you work with the doclets in an Oracle Enterprise Performance Reporting Cloud Service report package, you can use Oracle Smart View for Office to copy and paste data from Oracle Enterprise Performance Reporting Cloud Service data sources, other Oracle Enterprise Performance Management System data sources, including on-premises and cloud data sources, and Oracle Business Intelligence Enterprise Edition data sources. For example, you can incorporate data from Oracle Essbase and Oracle Planning and Budgeting Cloud Service in the same doclet. A doclet in a report package in Word may contain a profit and loss statement that was created from an Oracle Essbase source along with an income statement report created from an Oracle Hyperion Planning source. The data points for the areas that you copy are retained in Word, so you can refresh the doclet to keep the data up to date.See the Oracle Enterprise Performance Reporting Cloud Service documentation on the Oracle Help Center for complete descriptions of Oracle Enterprise Performance Reporting Cloud Service, including overviews, and installation and procedural information.New Features Introduced in Earlier ReleasesUse the Cumulative Feature Overview tool to create reports of new features added in prior releases. This tool enables you to identify your current products, your current release version, and your target implementation release version. With a single click, the tool quickly produces a customized set of high-level descriptions of the product features developed between your current and target releases. This tool is available here:https:///oip/faces/secure/km/DocumentDisplay.jspx?id=1092114.145COPYRIGHT NOTICESmart View New Features, 11.1.2.5.500Copyright © 2004, 2015, Oracle and/or its affiliates. All rights reserved.Updated: October 2015Authors: EPM Information Development TeamThis software and related documentation are provided under a license agreement containing restrictions on use and disclosure and are protected by intellectual property laws. Except as expressly permitted in your license agreement or allowed by law, you may not use, copy, reproduce, translate, broadcast, modify, license, transmit, distribute, exhibit, perform, publish, or display any part, in any form, or by any means. Reverse engineering, disassembly, or decompilation of this software, unless required by law for interoperability, is prohibited.The information contained herein is subject to change without notice and is not warranted to be error-free. If you find any errors, please report them to us in writing.If this is software or related documentation that is delivered to the U.S. Government or anyone licensing it on behalf of the U.S. Government, then the following notice is applicable:U.S. GOVERNMENT END USERS:Oracle programs, including any operating system, integrated software, any programs installed on the hardware, and/or documentation, delivered to U.S. Government end users are "commercial computer software" pursuant to the applicable Federal Acquisition Regulation and agency-specific supplemental regulations. As such, use, duplication, disclosure, modification, and adaptation of the programs, including any operating system, integrated software, any programs installed on the hardware, and/ or documentation, shall be subject to license terms and license restrictions applicable to the programs. No other rights are granted to the U.S. Government.This software or hardware is developed for general use in a variety of information management applications. It is not developed or intended for use in any inherently dangerous applications, including applications that may create a risk of personal injury. If you use this software or hardware in dangerous applications, then you shall be responsible to take all appropriate fail-safe, backup, redundancy, and other measures to ensure its safe use. Oracle Corporation and its affiliates disclaim any liability for any damages caused by use of this software or hardware in dangerous applications.Oracle and Java are registered trademarks of Oracle and/or its affiliates. Other names may be trademarks of their respective owners.Intel and Intel Xeon are trademarks or registered trademarks of Intel Corporation. All SPARC trademarks are used under license and are trademarks or registered trademarks of SPARC International, Inc. AMD, Opteron, the AMD logo, and the AMD Opteron logo are trademarks or registered trademarks of Advanced Micro Devices. UNIX is a registered trademark of The Open Group. This software or hardware and documentation may provide access to or information about content, products, and services from third parties. Oracle Corporation and its affiliates are not responsible for and expressly disclaim all warranties of any kind with respect to third-party content, products, and services unless otherwise set forth in an applicable agreement between you and Oracle. Oracle Corporation and its affiliates will not be responsible for any loss, costs, or damages incurred due to your access to or use of third-party content, products, or services, except as set forth in an applicable agreement between you and Oracle.。
SmartView深入讲解
目录
Contents
• Smartview简介 • Smartview的架构与原理 • Smartview的使用与操作 • Smartview的优化与定制 • Smartview的案例与实践 • Smartview的未来发展与趋势
01 Smartview简介
什么是Smartview
Smartview可以应用于医疗健康 领域,帮助医生进行病例分析、 诊断和治疗方案制定。
02 Smartview的架构与原理
架构概述
分布式架构
Smartview采用分布式架构,由多个节点组成,每个节点负责处理 一部分数据和任务,提高了系统的可扩展性和容错性。
数据存储
数据在Smartview中以分布式存储的形式存在,采用分片技术将数 据分散到多个节点上,保证了数据的安全性和可靠性。
通过Smartview技术,实现对各类数据的实时采集和监控,有
效提高了监控效率。
优化决策支持
02
Smartview提供直观、全面的数据可视化界面,帮助决策者快
速做出准确判断。
降低运营成本
03
通过数据分析和预警功能,及时发现潜在问题,减少故障发生
率,降低运营成本。
客户反馈与评价
客户一
该解决方案非常实用,大大提高了我们的生产 效率和管理水平。
缓存策略
合理使用缓存技术,如Redis或 Memcached,缓存常用数据,减少 对数据库的访问。
代码优化
优化代码逻辑,减少不必要的计算和 数据库查询,提高程序执行效率。
负载均衡
使用负载均衡技术,将请求分发到多 个服务器,提高系统的并发处理能力。
定制化开发指南
设计阶段
Smartview-11版本操作使用说明-V2011.1
Smartview-11版本操作说明大唐联通项目组2010年10月一、海波龙Smartview介绍Smartview是海波龙公司开发的合并报表系统与OFFICE连接的软件。
安装Smartview后,可通过Smartview程序直接连接合并报表系统的数据库,根据使用者的用户权限将系统数据传出至EXCEL。
Smart View 面板通过 Smart View 面板,您可以管理数据源连接、访问数据和任务列表以及创建报表。
Smart View 面板从 Smart View 功能区打开,默认情况下显示在 Microsoft Office 应用程序的右侧。
您可以通过标题栏上的向下箭头对 Smart View 面板的位置和大小进行调整,或者关闭面板。
Smart View 面板包含下列窗格:•主页:包含一个面板,其中显示指向“共享连接”和“专用连接”的链接,以及最近使用项目的列表(如即席网格、数据表单和任务)。
您可以单击它们建立连接。
•共享连接:包含一个显示Oracle Hyperion® Shared Services 提供的可用连接的下拉菜单和一个显示当前选定连接的内容的树形视图。
•专用连接:包含一个显示本地计算机上保存的可用连接的下拉菜单和一个显示当前选定连接的内容的树形视图。
您还可以在此处输入 URL 直接连接到数据源。
•任务列表:任务的树列表,您可通过该列表管理任务。
只有当您从“共享连接”或“专用连接”中选择某个任务列表时,此窗格才会打开。
二、下载安装说明2.1、在IE浏览器中输入:http:// 10.192.137.19:19000/workspace/index.jsp打开登录页面。
2.2、输入用户名、密码。
登录进入以下页面。
2.3、点击“工具”按钮出现下拉框,找到“安装”再点击,出现下拉框,选择Smart view(s)点击。
2.4、点击Smart view(s)后,出现下载保存页面。
SmartView2000说明书
储并能在切换回来时自动恢复。 ◆ 内建记忆体,可储存系统设定。 ◆ 多个本地控制台端口,具有软件更新功能。 ◆ 设备与服务器相距不到 50 米时,分辨率可达 1600x1200@60,相距 50 米到
热键序列将不会生效。
OSD 主菜单图
5
注意:一个用户可以抢断另一个用户的通道,抢断以后,被抢断用户者显示“No Sel Pc”。为防止抢断发生,用户在选择通道时需看清 OSD 菜单中的“X”符 号,表示另一个用户正在访问此通道。
OSD 设置菜单
通过 “设置菜单”可以选择下列选项。
表 1.2:设置菜单功能(按 F1 进入)
声明
本手册适用于 SV2000 系列 KVM 交换机。 本手册可能包含技术上不准确的地方或编排出错,本手册的内容将做不定期的更新, 恕不另行通知;更新的内容将会在本手册的心版本中加入。我们随时会改进或更新本手册中 描述的产品或程序。如存在手册中队产品的描述与实物不符,一律以实物为准。
SmartView 2000 系列 KVM 交换机
KVM 当前软件版本 KVM 当前硬件版本 编辑(主要对 KVM 名称进行编辑) 更改设置参数
7
通道名称编辑
在 OSD 主菜单里,通过用上下键选中接有主机的通道,按 F2 进入通道名称 编辑。
表 1.3:编辑通道名称功能
名称
描述
Name
通道名称(用 Insert 键编辑)
ID 6000000001
2、打开升级工具 KVM Upgrade,选择对应的串口,波特率设置为 38400。
3、单击“选择文件”按钮,加载升级文件。 4、单击“启动服务”,将会出现“等待接受命令……”。
- 1、下载文档前请自行甄别文档内容的完整性,平台不提供额外的编辑、内容补充、找答案等附加服务。
- 2、"仅部分预览"的文档,不可在线预览部分如存在完整性等问题,可反馈申请退款(可完整预览的文档不适用该条件!)。
- 3、如文档侵犯您的权益,请联系客服反馈,我们会尽快为您处理(人工客服工作时间:9:00-18:30)。
欢迎使用SmartView(TM)SmartView(TM) 是您的系统随附的光盘所提供的一款功能强大、使用方便的分析软件。
SmartView 与摄像机配合使用,就能:.将热像图像传送到电脑并有效管理它们.优化和分析红外线和可见光对照图像.创建和打印包含重要图像数据的详细专业报告.理解系统要求在安装和操作SmartView(TM) 之前,确保您的计算机满足下列系统要求:软件要求∙Microsoft(TM) Windows(TM) 98SE/ME/2000/XP。
∙用于产品注册和查看“常见问答”的Web 浏览器:Microsoft(TM) Internet Explorer 5.0 或更新版本或者Netscape Browser(TM) 5.0 或更新版本。
硬件要求∙CompactFlash(TM) 存储卡阅读器。
∙20 MB 可用磁盘空间,不包括Web 浏览器和Microsoft(TM) Word 所需的空间。
∙16-位色,800 x 600 或更高分辨率视频。
∙彩色打印机(用于打印图像)。
∙光驱(用于安装SmartView 软件)安装SmartView要安装SmartView 软件:1. 关闭所有程序。
2. 将SmartView 光盘插入系统的光驱中。
如果您的系统启用了“自动运行”功能,则安装会自动开始;请转至步骤5。
3. 如果“自动运行”未启用,则从“开始”菜单中,选择运行。
4. 键入<D:\setup>(如果您的光驱使用不同的盘符,请以您的光驱盘符来替换“D”)。
5. 遵照屏幕上的指示完成安装。
卸载SmartView 软件要从您的计算机上卸载SmartView 软件:1. 打开Windows 控制面板。
2. 在Windows 控制面板中,选择“添加或删除程序”。
3. 选中SmartView,然后单击相应的按钮删除/卸载SmartView 软件。
注意: 按钮名称取决于您运行的Windows(TM) 版本而有所不同。
例如,在Windows(TM) XP 里,选择“更改/删除”。
4. 遵照屏幕上显示的任何指示完成操作。
您的CompactFlash(TM) 闪存卡读卡器要将图像从摄像机传送到您的计算机,使用系统附带的CompactFlash 闪存卡读卡器。
该设备可连接到计算机上的USB 端口或PC 卡插槽。
要安装和使用CompactFlash 闪存卡读卡器,遵照设备所附带的说明书进行。
报告问题如果您在安装或使用SmartView 时遇到问题,或者如果您希望报告软件程序错误,请联系“技术支持”部门。
当报告软件程序错误时,请提供下列信息:1. 您运行的操作系统。
2. 您使用的计算机制造商和型号。
3. 您运行的SmartView 版本。
4. 有关问题以及问题如何产生的详细描述。
务必要正确地拼写您收到的所有错误讯息。
保存和传送图像要保存您用摄像机捕获的图像,可使用系统附带的可插拔CompactFlash(TM) 闪存卡。
要将保存在存储卡上的图像传送到您的计算机,可使用系统附带的CompactFlash 闪存卡读卡器。
启动SmartView当您在计算机上安装SmartView(TM) 软件后,SmartView 启动图标放置在您的Windows(TM) 桌面上及Windows“开始”菜单内。
要在安装软件后启动SmartView,双击桌面上的SmartView 图标。
或者,单击Windows“开始”菜单中的SmartView 图标。
使用SmartView 主窗口使用SmartView 主窗口访问SmartView 功能。
SmartView 窗口组成要素包括:∙标题栏:横列于SmartView 窗口顶部。
包含最小化、最大化和关闭SmartView 窗口的控件。
∙菜单栏:位于“标题栏”下方。
包含用于激活各种SmartView 功能的许多下拉菜单。
∙工具栏:位于“菜单栏”下方。
包含几个控件,从左到右分别是:∙打开图像文件按钮:单击此按钮打开图像。
∙保存活动图像按钮:单击此按钮保存活动的图像。
∙保存所有图像按钮:单击此按钮保存所有打开的图像。
∙编辑活动图像按钮:单击此按钮打开图像编辑窗口以编辑活动的图像。
(注意:您还可双击活动的图像打开图像编辑窗口。
)∙有关所有图像的简易报告按钮:单击此按钮打开报告模板并为活动的图像产生报告。
使用工作区域整理图像您从摄像机转移的图像可以保存在计算机的硬驱或者公司网络上几个不同的文件夹里。
使用SmartView 工作区域和下列的建议帮助整理您的图像:∙把单一检视路径上的图像放在一起。
∙把相同目标物体的所有图像集合在一起。
然后,∙通过比较设备的当前情况与以前的情况,判断其相对健康状况。
∙确认维护已经解决了高温问题。
∙确认状况发生之前和之后的补救工作。
打开图像以供查看要打开图像以供查看:1. 单击“SmartView 工具栏”上的“打开图像文件”按钮。
2. 使用“搜索”菜单选择包含所需图像的文件夹。
3. 单击和选择您要打开的图像;按住Shift 键选择和打开多个图像。
使用样本图像SmartView 附带有样本图像,安装在SmartView 安装文件夹内名为“Sample Images”(样本图像)的一个文件夹中。
有了这些图像,您可以练习使用SmartView 的查看、分析和报告功能。
理解图像窗口当您用SmartView 打开红外线图像时,图像显示在图像窗口中。
您可以一次打开和显示任意数量的图像窗口;不过,在任一时间内仅能有一个活动图像窗口。
在图像窗口中:∙双击图像打开图像编辑窗口,您可以用此窗口修改或编辑活动图像属性。
注意: 当您修改图像的属性时,窗口的标题栏可能会出现星号(*)。
它表示您必须重新保存图像以便保存您所作的任何属性修改。
当您尝试关闭显示星号的图像窗口时,将会提示您如果想要的话,可在关闭之前保存图像。
∙右击活动图像打开图像弹出式菜单。
此菜单提供编辑图像和查看选项的捷径。
∙您可以使用剪贴板来复制和粘贴图像。
∙将鼠标指针移到图像上查看像素温度。
查看像素温度要查看图像中单独的像素温度:1. 将图像发射率和背景温度调整为适当的数值。
2. 双击活动图像打开图像编辑器。
3. 在图像编辑器窗口所显示的图像里,将鼠标指针移到目标图像或像素区域。
注意: 像素温度值会随着您将指针移到图像的不同区域/像素而改变。
使用图像弹出式菜单图像弹出式菜单提供编辑图像和查看选项的捷径。
要打开活动图像的弹出式菜单,右击活动图像的窗口。
使用“图像弹出式菜单”,您能够:∙单击“复制”将图像复制到剪贴板上。
∙单击“编辑”打开图像编辑窗口。
∙单击“查看图像信息”打开图像信息窗口。
∙单击“查看直方图”打开直方图窗口。
∙单击“查看数据”打开标记数据窗口。
∙单击“查看标记”查看或隐藏数据标记。
∙单击“缩放”调整缩放等级(放大或缩小)。
查看像素温度要查看图像中的单个像素温度:1. 双击活动图像打开图像编辑器。
2. 将图像发射率和背景温度调整为适当的数值。
3. 在图像编辑器窗口所显示的图像里,将鼠标指标移到目标图像或像素区域。
注意: 像素温度值会随着您将指标移过图像的不同区域/像素而改变。
使用图像信息窗口图像信息窗口显示有关活动图像的详细信息,如图像的保存位置、捕获图像的时间和日期以及发射率和背景温度值之类的图像属性。
要打开图像信息窗口:1. 右击活动图像的窗口打开图像弹出式菜单。
2. 选择菜单上的“查看图像信息”。
图像信息窗口出现在图像的下方。
要从图像编辑窗口查看图像信息:1. 双击活动图像打开图像编辑窗口。
2. 单击图像下方的“图像信息”选项卡。
使用直方图直方图是一种条形图,可以代表统计频率或发生率的分布情况。
在SmartView 中,您可以打开直方图窗口,按温度来查看图像像素的直方图。
图像的温度范围被分成相等大小的槽,显示为多个垂直条的集合。
每个条的高度表示有多少个素的温度位于该槽的范围之内。
要打开直方图窗口:1. 右击活动图像窗口打开图像弹出式菜单。
2. 选择菜单上的“查看直方图”。
直方图窗口出现在图像的下方。
要从图像编辑窗口查看直方图:1. 双击活动图像打开图像编辑窗口。
2. 单击图像下方的“直方图”选项卡。
注意: 使用剪贴板来将直方图复制和粘贴到另一个应用程序中。
右击直方图图像,然后从弹出式菜单选择“复制”使用标记数据窗口标记数据窗口显示与您放置到图像中的标记有关的数值和统计数据。
要查看标记数据:1. 右击活动的图像窗口打开图像弹出式菜单。
2. 选择菜单上的“查看数据”。
标记数据出现在图像的下方。
要从图像编辑窗口查看标记数据:1. 双击活动的图像打开图像编辑窗口。
2. 单击图像下方的“标记数据”选项卡。
∙在图像编辑窗口的“标记”选项卡中,您还可单击绘制模式菜单内的“选择标记”图标,然后双击图像上的一个标记打开标记属性窗口。
∙单击“显示”选项卡给标记创建一个名称及/或在图像中显示标记名和标记内区域的最小、平均和最大温度。
给每个标记显示的数值为:∙标签:用于识别标记∙发射率:与标记相关联的发射率。
它会影响标记的温度统计数据。
∙背景温度:与标记相关联的背景温度。
它会影响标记的温度统计数据。
∙最小值:最低温度∙平均值:平均温度∙最大值:最高温度∙标准差:标准差∙单位:温度单位注意: 单击标记数据表格内的列表头,按照该列表头来排序表格项。
使用调色板尽管所有的SmartView 调色板均可用于任何图像,您会发现根据情况的不同,有些调色板分析图像的效果可能优于其他调色板。
要更改调色板(温度范围条):1. 双击活动图像打开图像编辑器。
2. 单击“调色板”选项卡。
3. 单击“调色板颜色”下箭头键打开调色板选项菜单。
4. 单击您所需的调色板选项;调色板便会随之改变。
5. 在图像编辑器里,单击“确定”保存所作的更改。
要更改调色板温度(温度范围)值:1. 双击活动图像打开图像编辑器。
2. 单击“调色板”选项卡,表示像素温度最小值(底部)、平均值(中间)和最大值(顶部)的一组滑动框出现在温度范围条的左侧。
3. 顺着温度条向上或向下滑动方框以较大的增量移动;使用方框旁的上/下箭头键组以较小的增量移动。
注意: 当您更改最小或最大值或跨度时,平均值或水平也会随之改变。
而且,如果您移动平均值,则最小值和最大值也会随之改变。
使用等温线以一般科学术语来说,等温线是温度记录图(用您的摄像机捕获的一个图像)上的一组曲线,这些曲线标示了温度相同的不同点。
SmartView 中的等温线是一个图像,它高亮显示在指定的温度范围内的所有图像像素。
这些“在范围内”的像素以单色显示,以便将它们与图像的其余部分区别开来。
要启用等温线并定义等温线温度范围:1. 双击活动图像打开图像编辑器,然后单击“调色板”选项卡。