箭牌油烟机t881说明书
格兰仕油烟机使用说明书

请在使用本机之前,仔细阅读并妥善保管适用产品型号:WHI94ORAB WHI94ORAW安装使用说明书吸油烟机戈兰尼电器(上海)有限公司Gorenje gospodinjski aparati , d .o .o .戈兰尼电器上海有限公司()地址:上海市长宁区天山西路1068号联强国际广场A 栋2楼B 网址:委托生产商:海信(广东)厨卫系统有限公司10949775-A温馨提示由衷地感谢您选用g orenje厨房电器产品,安装使用之前,请详细阅读本说明书。
如有任何技术或疑难问题需要咨询,请与本公司联系,本公司将竭诚为您服务。
目录注意事项 (1)产品简介 (3)产品安装 (5)使用说明 (7)清洁、保养和维护 (10)电气原理图 (12)常见故障及处理方法 (12)客户服务 (13)环保清单 (14)保修卡 (15)产品发票粘贴栏 (16)本产品符合下列国家标准:GB4706.1-2005 《家用和类似用途电器的安全 第一部分:通用要求》GB4706.28-2008 《家用和类似用途电器的安全 吸油烟机的特殊要求》GB29539-2013 《吸油烟机能效限定值及能效等级》GB/T17713-2011《吸油烟机》发票粘贴栏发票粘贴处请在此处粘贴发票并盖销售单位章(粘贴发票后请妥善保管,否则保修期将按自出厂日期算起)16注意事项为保证使用安全,避免造成人身伤害和财产损失,请务必遵守以下安全注意事项。
表示必须禁止的内容表示强制施行的内容表示必须注意的内容1215保修卡客户联产品型号购机日期购机商店发票号码用户签名用户地址日 期检 修 记 录维 修 员电话反馈联产品型号购机日期购机商店发票号码用户签名电话销售人员签字:销售单位章产品信息编码(粘贴处)用户地址地址:上海市长宁区天山西路1068号联强国际广场A 栋2楼B 网址 :售后服务热线:(021)60290890环保清单本表格根据SJ/T11364的规定编制::表示该有害物质在该部件所有均质材料中的含量均在GB/T26572规定的限量要求以下。
cxw-200烟机说明书

CXW-200系列油烟机产品说明卡CXW-200系列产品特点:1.本机进风口采用防漏油专用结构,内腔采用外翻式专利结构,整体拉伸成形。
2.风机系统的叶轮采用特殊涂层处理,易擦洗。
3.该吸油烟机采用不锈钢网孔专利结构,有效过滤分离油烟,进风更顺畅。
4.整体静音优化系统,配置优质轴承,静音电机,确保整机运行平稳宁静。
5.照明采用高效节能LED灯。
装箱清单请您打箱后逐一检查以下产品和附件是否齐全,如有缺少或损坏请与CXW-200系列产品的安装注意事项:1.安装墙壁应能承受油烟机重量,否则禁止安装;2.墙壁打孔时应避开埋设的电线,以免发生触电危险;3.友情提示您,尽量选择专业人员安装,由于自行安装不当导致的适用问题及事故责任保险公司不负赔偿责任。
安装尺寸如图所示:日常维护及注意事项1.如不按说明书规定的方法清洗,吸油烟机有起火的危险;2.如电源线损坏,须由公司指定专用软线更换;3.吸油烟机在炉火消耗煤气或其它燃料时使用,房间必须通风良好;4.禁止炉火直接烘烤吸油烟机5.本机系家用电器,避免在特殊环境中使用;6.要经常清除吸油烟机上的油污。
擦拭吸油烟机时,务必拔掉电源插头,并带上橡胶手套,以防止钢板棱边划伤手指;7.面板清洗建议每日使用结束后用洗洁精水轻擦油污,防止积重难于打理;8.油网清洗建议每半个月用软布蘸洗洁精轻擦干净,清洗周期视使用情况可适当延长或缩短;9.清洗前,需等待油杯冷却,方可清洗,防止烫伤;10.清洗时应选用中性洗涤剂,禁用含研磨剂的洗涤液及易燃清洁剂,去污后用清水洗掉洗涤剂并擦干;11.严禁用水冲洗,防止电器部件进水;12.清洗时,禁用锋利、硬物和钢丝球等伤害表面的器具;13.特别注意,使用动物油脂易导致油孔堵塞,应经常疏通;14.本类产品连续使用不应超过3小时,否则会影响使用寿命。
环境与保护1.外包装材料是可回收材料,内包装泡沫塑料为不可降解材料,请分类处理,或者与您附近的回收中心联系。
箭牌卫浴akb1188说明书

箭牌卫浴akb1188说明书
1、自动运行功能,在有人体入座的情况下,按下遥控器上“自动运行”按键,座便器先执行臀部洗净1分钟,再执行暖风烘干3分钟后自动停止。
在无人体入座的情况下,按下遥控器上“自动运行”按键,座便器不执行任何功能。
2、冲洗马桶功能,马桶按下遥控器上的“冲洗”按键,座便器启动座便器冲洗功能。
若是按下“自动冲洗”功能,执行时人体必须在6秒以上入座,即让人体感应传感器感应6秒以上才可以使用,而取消人体感应后即退出自动冲洗功能。
3、烘干功能使用,洗净停止后,按遥控器上的“烘干”键。
座便器将进行暖风烘干,大约3分钟后暖风烘干将自动停止。
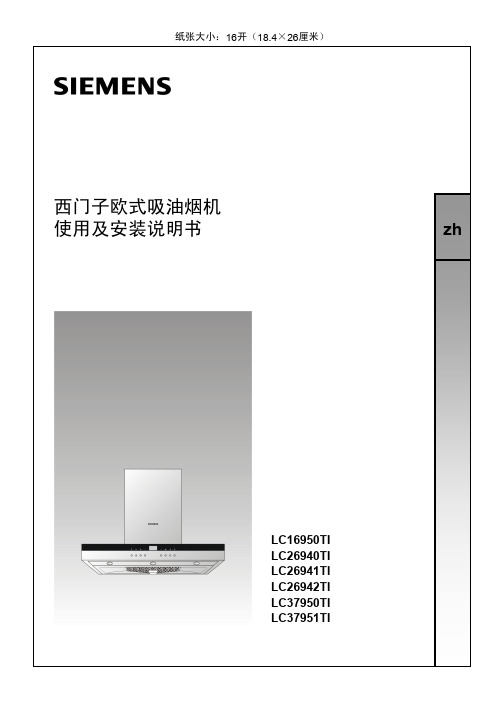
西门子油烟机说明书

示例:当前时间为20:25,设置闹钟时间为5分钟后 1. 按下“闹钟 ”按键,显示屏中显示“ min ”符号,分钟数开
始闪烁。 如果在松开“闹钟 ”按键的1分钟内没有任何调节,那么 将自动返回至时钟显示界面。 2. 按下“调节+” 或“调节-”按键,直至显示” 00:05 ”。 如果在1分钟内没有任何调节,那么将自动返回至时钟显 示界面。
额定工作电压
输入功率 电机
照明
风量 m³/min
静压 Pa
噪声 dB(A)
净重 kg
24
外形尺寸 宽度
900
mm
厚度
530
高度
615
220V~ 50Hz
200W
2 X 20W
14.5 ± 1
≤300 (最大时)
≤69(声功率级)
26.5
26.5
23.5
920
920
900
509
509
509
550
550
If you need an English user manual, please download it from Siemens website. Or you can send the E-mail to service department, or you can call up service hot line for free supply. Thanks!
由于不遵守该使用及安装说明书中规定的注意事项,所引起的任何故障和损失均不在厂家的保修 范围内,厂家亦不承担任何相关责任。请妥善保管好所有文件。如有疑问,请与当地的西门子家 电客户服务中心或经销商联系。
箭牌智能马桶AD802AM说明书

箭牌智能马桶AD802AM说明书箭牌智能马桶使用说明包括自动运行功能、冲洗马桶功能以及烘千功能使用这三部分:1、自动运行功能在有人体入座的情况下,按下遥控器上“自动运行”按键,座便器先执行臀部洗净1分钟,再执行暖风烘干3分钟后自动停止。
在无人体入座的情况下,按下遥控器上“自动运行”按键,座便器不执行任何功能。
2、冲洗马桶功能马桶按下遥控器上的“冲洗”按键,座便器启动座便器冲洗功能。
若是按下“自动冲洗”功能,执行时人体必须在6秒以上入座,即让人体感应传感器感应6秒以上才可以使用,而取消人体感应后即退出自动冲洗功能。
3、烘干功能使用洗净停止后,按遥控器上的“烘干”键。
座便器将进行暖风烘干,大约3分钟后暖风烘干将自动停止。
箭牌智能马桶使用步骤1、按下“臀部洗净”或遥控器“臀部洗净”按键,臀部洗净喷嘴将在固定位置喷射一分钟后自动停止喷射。
2、臀部洗净功能启动后,再按一次“臀部洗净”或按遥控器“臀部洗净”按键,喷嘴将前后往返移动,以增强洗净效果,若再按一次喷嘴将停止前后往返移动,停留在移动前的工作状态。
3、按下“按摩”或遥控器“按摩”按键,冲洗水压有节奏、反复的强弱交替变化,起到按摩的效果,若需要停止按摩功能,请再按一次该按键,若再按一次将重新回到按摩状态。
4、洗净一分钟后,按座便器上的“暖风烘干”或遥控器上“烘干”按键,座便器将进行暖风烘干,3分钟后暖风烘干将自动停止,暖风烘干功能启动后,暖风出风口前后有节奏往复移动,以增强烘干效果。
5、在洗净功能过程中按遥控器上位置调节“前”或“后”按键在没有使用移动往返洗净功能时可向前或向后调节臀部洗净喷嘴的位置。
6、洗净功能启动后按本“停止”或遥控器“停止”按键,座便器将停止所有正在执行的功能。
7、如果在开启移动功能状态下按遥控器上“按摩”按键,可以同时使用移动冲洗功能和按摩功能。
家电罩式抽油烟机安装与使用说明书

Dear Customer,We thank you for choosing this quality appliance and hope you enjoy many years of reliable service.Please ensure this manual is read carefully before installation and use. Keep this manual in a safe and accessible location should future reference be required.RegardsHome AppliancesCONTENT2 …………………………………………………. Notice3 …………………………………………………. Caution4 …………………………………………………. Feature5-8 ……………………………………………….. Installation9 ………………………………………………….. Notice of installation10 ……………………………………………..….. Safety Warning11-16 …………………………………………..… Use17 ………………………………………………… Maintenance18 ………………………………………………… Light Replacing19 ………………………………………………… Abnormity and SolutionNOTICE1.Thank you for choosing our canopy rangehood. Please read the instructionmanual carefully before use.2.The installation work must be undertaken by a qualified and competent fitter.3.The manufacturer disclaims all liability for any damage or injury caused as aresult of not following instructions for installation contained in the followingtext.The cooker hood is used on 220/240v, 50Hz.Home Appliances – Oct 2013 1SAFETY WARNINGS•Installation of this Integrated Canopy Rangehood must be carried by a qualified and competent installer.•The manufacturer disclaims and liability for any damage or injury caused as a result of not following instruction of installation contained in this instructionmanual.•This Integrated Canopy Rangehood is not intended for use by young children or infirm persons without supervison.•Young children should be supervised to ensure they do not play with this Integrated Canopy Rangehood.•To avoid possible electric shock this Integrated Canopy Rangehood should be unplugged before any maintenance or cleaning is carried out.•This Integrated Canopy Rangehood cannot be installed in an external environment.•The Grease Filters should be cleaned at least once a month to avoid the risk of fire.•Flambe cooking cannot be carried out under the Integrated Canopy Rangehood and is not recommended for use over Barbeques.•Ducting must be independent from any other form of ducting of other household heating sources.•Ducting into wall cavities is prohibited unless the cavity has been designed for this purpose•Lit gas burner should never remain uncovered or on when there is no pan present due to the risk of fire.•Adequate ventilation of the room is required when the cooker hood is used at the same time as appliances burning gas or other fuels.- CAUTION: Accessible parts may become hot when used with cooking appliances.Home Appliances – Oct 2013 2(2)FEATURE1. The cooker hood uses high quality materials, and is made with a streamlined design.2. Equipped with a large power low noise electric motor and centrifugal leaf, it produces strong suction, low noise, non stick grease filter and easy to clean.3. With the isolated low voltage circuit board control, 12vAC input, the lights are therefore safer.4. Special wind tunnel construction and oil collector design, free dirt will be absorbed in a second.Home Appliances – Oct 2013 3Home Appliances – Oct 20134(3). Installation If the model without Glass: 3.1 The cooker hood shall be placed at a distance of 65-75cm (26-30inch) from the cooking surface. See Pic 1. 3.2 Install the hook on a suitable place once the installation height is fixed, and keep it in line. The fixed position of the inside chimney bracket is the place of chimney. See Pic 2. 3.3 Fix one-way valve on the hood and connect the extensible pipe to the one-way valve. See Pic 3. 3.4 Put the cooker hood on the hook. See Pic 4. 3.5 Use clamp to fix the T-piece valve on the extensible pipe. See Pic 5. 3.6 Fix plate on the outer chimney, and be sure that the inside chimney can be adjusted the height in it freely, See Pic 6. 3.7 Install the chimney and screw the T-piece metal outlet to the inside chimney, See Pic 7 and 8. 3.8 Adjust the height of the inside chimney to the position of the inside chimney bracket and fix on it by screw, after adjusting the position, fix the body with safety screw. See Pic 9. Note: The two safety vents are positioned on the back casing, with diameter of 6mm.Warning: Failure to install the screws or fixing device in accordance with theseinstructions may result in electrical hazardsHome Appliances – Oct 2013 5Home Appliances – Oct 20136If the model with Glass: 3.1 The cooker hood shall be placed at a distance of 65-75cm (26-30inch) from the cooking surface. See Pic 1. 3.2 Install the hook on a suitable place once the installation height is fixed, and keep it in line. The fixed position of the inside chimney bracket is the place of chimney. See Pic 2. 3.3 Fix one-way valve on the hood and connect the extensible pipe to the one-way valve. See Pic 3. 3.4 Put the cooker hood on the hook. See Pic 4. 3.5 Put the glass according to the lead direction and way on the cooker hood, and then use the screws to fix the glass. See Pic 5. 3.6 Use clamp to fix the T-piece valve on the extensible pipe. See Pic 5. 3.7 Fix plate on the outer chimney, and be sure that the inside chimney can be adjusted the height in it freely, See Pic 6. 3.8 Install the chimney and screw the T-piece metal outlet to the inside chimney, See Pic 7 and 8. 3.9 Adjust the height of the inside chimney to the position of the inside chimney bracket and fix on it by screw, after adjusting the position, fix the body with safety screw. See Pic 9. Note: The two safety vents are positioned on the back casing, with diameter of 6mm.Warning: Failure to install the screws or fixing device in accordance with theseinstructions may result in electrical hazardsHome Appliances – Oct 2013 7(4) NOTICE OF INSTALLATION1.Before installation, please ensure the area is clean to avoid suction of theremaining bits of broken wood and dust.2.It cannot share the same air ventilation tube with other appliance such as gastube, warmer tube, and hot wind tube.3.The bending of ventilation tube should be≥120°, parallel or above the startpoint and should be connected to the external wall.4.After installation, make sure that the extractor is level to avoid greasecollection at one end.Home Appliances – Oct 2013 8(5) SAFETY WARNING✧Keep your children from using the cooker hood.✧Your cooker hood is for domestic use only, not suitable for barbecue, roast shopand other commercial use.✧Any installation work must be carried out by a qualified electrician or competentperson.✧The cooker hood and its filter mesh should be cleaned regularly in order to keepin good working order.✧Before cleaning, always ensure that you have switched your cooker hood off.✧Clean the cooker hood according to the instruction manual and keep thecooker hood from the danger of burning.✧No fire for drying your cooker hood.✧If there is any fault with your cooker hood, please call the service departmentappointed by agent for servicing.✧Please keep the room draughty when your cooker hood and gas hob areworking.✧Do not exhaust the gas from cooker hood through the same heated flue which isfor the gas from gas hob and other kitchen appliances.✧Before installation and usage, read all the instructions and make sure that thevoltage (V) and the frequency (Hz) indicated on your cooker hood are exactly the same as the voltage (V) and the frequency (Hz) in your home.✧In order to get the most out of your cooker hood, please read the instructionmanual before installing & using, and keep it in a safe place.✧Ensure that you could get our guarantee for your cooker hood, please providethe warranty card and purchase receipt, or the guarantee will not be offered.(6) USEElectronic Button1.Turn on the power; the buzzer will buzz five times. The sound shows that theappliance is powered.2.Push the low button, the indicating light 1 on, the buzzer will buzz once, andthe motor runs at low speed. Push it again and the motor will stop.3.Push the middle button, the indicating light 2 on, the buzzer will buzz once,and the motor runs at mid speed. Push it again and the motor will stop4.Push the high button, the indicating light 3 on, the buzzer will buzz once, andmotor runs on high speed. Push it again and the motor will stop5.Push the light button; the indicating light 4 on, and the two lighting lamps willcome on. Push it again and the lamps will turn off, with every push the buzzer will buzz one time.Push button1. Push stop button, and the motor will stop.2. Push the Low button, the buzzer will buzz once, and the motor runs at low speed.3. Push the Mid button, the buzzer will buzz once, and the motor runs at mid speed.4. Push the High button, the buzzer will buzz once, and the motor runs at high speed.5. Push the light button and the two lights will come on. Push it again and the lightwill turn off.pic6CLowMidHighLightStopTouch controlPic 71.Power on: Connect the power, and then the machine enters standby status.2.Press “light” key. The lights are on. And press it again. The lights are off.3.Press “Add” key. The motor runs at the low speed. Press it the second time. Themotor runs at the mid speed. Press it the third time. The motor runs at the high speed.4.Press “Dec” key. The running motor slows down to the mid speed. Press it thesecond time. The motor runs at the low speed. Press it the third time. The motor stops.5.When the motor or light is still on, press “Timer” key, and then the machine willstop and enter standby status in 10 minutes.LCD Touch controlPic 81. Power on: Switch on the power supply, and the backlight is lit, displaying “24-hour system”. The output is then blocked up,and the soot machine entersstandby status. The backlight disappear automatically 30 seconds later under the condition of none operation.2. Press “Indicator” key: Press the indicator key once, the indicator is lit, and onthe LCD screen is lit. Press it for a second time, of the indicator and the LCD screen will distinguish and it will be repeated again and again.3. Power on position and increase key , the motor is provided with three positions,i.e. low, medium and high.1. Press key once, the is displayed on the display screen, and the motorstarts operation. The is the low position (power on position.)2. Press key once more at the low position, the is displayed on thedisplay screen, and the is the medium position.3. Press key once more at the medium position, the is displayed onthe display screen, and the is the high position.4. Go on pressing key at the high position, the is still displayed onthe display screen, and the motor works normally. It is still at high position atthis time.4. Power on position and decrease key “”1. Press “” key once, the motor is adjusted to a lower position, and the LCDscreen displays that position in the meantime; If it is decreased continuouslyto none position, then, it is the power off position (namely, the motor stopsoperation.)5. Timer key “”:1. The timer key is the timer setting key if the timer key doesn’t work at both theposition and indicator.①Long press timer key for 2-3 seconds, time segment , and thefirst two hour bit segment flash, use key for the digit increase, and use key for the digit decrease. Namely: The variable is 01 each time it ispressed; the hour segment is with the largest digit of 23. If it exceeds 23,key is null and void. If it is equal to 00, then, the key is null andvoid.②Press the timer key for the 2nd time , time segment , and the lasttwo minute bit segment flash, use key for the digit increase, and use key for the digit decrease. Namely: The variable is 01 each time it is pressed; the minute segment is with the largest digit of 59. If it exceeds59, key is null and void. If it is equal to 00, then, the key is null andvoid.③Press the timer key for the 3rd time, and it is the time setting exit andconfirm key.④Long press timer key for 2-3 seconds under this operation mode, and itis for the hour setting; Press it for the 2nd time: Setting for the minute;Press it for the 3rd time: For the time setting exit and confirm, and it willbe repeated again and again (if the 1st time pressing doesn't exceed 2seconds, then it can't run this operating procedure.)2. The timer key is the timer if the timer key works at either the position or theindicator.①It is provided with three kinds of time segment, and they are5min/15min/30min/timer cancel in sequence, and the 1st time is 5min,the 2nd time is 15min, the 3rd time is 30min, the 4th time is timer cancel,the 5th time is 5min, and the 6th time is 15min …., and it will be repeatedagain and again.②Example: Let the setting time be 15min, the display is 00:15, 00:14, …00:1,with 0:00 displays per minute, and once “00: 00” appears, the motorposition and the indicator power supply will be cut off automatically,(the display screen displays “24-hour system”, the output is blocked up,and the soot machine enters standby status, and the backlight will beput out automatically 30 seconds later.)③Time segment change over, 5 seconds later, it starts to decreasegradually (example: 15min is changed over to 30min, with a delay of 5seconds, and 00: 30 on the display screen starts to decrease gradually).(7) MAINTENANCE7.1 The cleaning of the carbon grease filter meshThe filter mesh is made of high-density stainless steel. Please do not use the corrosive detergent on it. Keeping this filter clean will keep the appliance running correctly. Please strictly follow the guidelines below.Method 1: Put the mesh into 40-50 c clean water, pour on detergent, and soak for 2-3 mins. Wear gloves and clean with a soft brush. Please do not apply too much pressure, as the mesh is delicate and will damage easy.Method 2: If instructed to do so, it can be put into a dishwasher, set the temperature at around 60 degrees.7.2 Notice of cleaning cooker hoodA.To protect the main body from corrosion over a long period of time, thecooker hood should be cleaned with hot water plus non corrosive detergent every one month.B.Please do not use abrasive detergent for it will damage the body.C.Keep the motor and other spare parts free from water, as this will causedamage to the appliance.D.Before cleaning the appliance please remember to turn off powerE.The carbon filter shouldn’t be exposed to heat.F.Please don’t tear open the fixed bar around the carbon filterG.If the supply cord is damaged, it must be replaced by the manufacturer, itsservice agent or similarly qualified persons in order to avoid a hazard.(8) LIGHT REPLACING8.1 Halogen light:Use a small flat blade screwdriver to remove the inner stainless steel ring (when removing the inner ring, do so carefully so not to damage the range hood, as the glass lens could easily fall out of the inner ring) ; and remove carefully the halogen globe with a new one.8.2 LED light:Remove the filters, and push the light downwards, and unplug the wiring connector.(9) Abnormity and SolutionFault Cause SolutionLight on, but motor does not work The leaf blocked Get rid of the blocking The capacitor damaged Replace capacitor The motor jammed bearingdamagedReplace motorThe internal with of motor off ora bad smell from the motorReplace motorLight does not work, motor does not work Beside the above mentioned, check the following: Light damaged Replace lightsPower cord looses Connect the wires as perthe electric diagramOil leakage One way valve and the airventilation entrance are nottightly sealedTake down the one wayvalve and seal with glueLeakage from the connectionof U-shaped section andcoverTake U-shaped sectiondown and seal with soapor paintShake of the body The leaf damaged and causesshakingReplace the leafThe motor is not tightlyhangedLock the motor tightlyThe body is not tightlyhangedFixed the body tightlyInsufficient suction The distance between thebody and the gas top too longReadjust the distanceToo much ventilation from open doors or windows Choose a new place and resemble the machineThe machine inclines The fixing screw not tightenough Tighten the hanging screw and make it horizontalThe hanging screw not tight enough Tighten the hanging screw and make it horizontal。
金牌厨卫油烟机cxw-230使用说明书

金牌厨卫油烟机cxw-230使用说明书金牌厨卫油烟机CXW-230使用说明书金牌厨卫油烟机CXW-230是一款高品质的厨房电器,旨在为用户提供清洁、健康的烹饪环境。
本使用说明书将为您详细介绍如何正确使用和维护这款油烟机,以确保其长期有效运行。
1. 安装\n在安装之前,请确保您已经阅读并理解了本使用说明书中的所有内容。
首先,确定安装位置,确保其与灶台之间有足够的距离。
然后,使用提供的螺丝将油烟机固定在墙壁上,并确保其稳固。
最后,将电源线连接到电源插座上。
2. 使用\n在开始烹饪之前,请确保油烟机已经打开,并选择适当的风速档位。
根据您所需的排风量和食物的烹饪方式,选择合适的档位。
一般来说,高温和大量油烟产生时应选择高档位,而低温和少量油烟产生时应选择低档位。
3. 维护\n为了保持油烟机的良好工作状态,请定期清洁和维护它。
首先,关闭电源并拔掉电源插头。
然后,使用湿布和中性清洁剂擦拭外壳和控制面板。
请勿使用酸性或碱性清洁剂,以免损坏油烟机的表面。
另外,定期清洗和更换油烟机的过滤网,以确保其正常运行。
4. 注意事项\n在使用油烟机时,请注意以下事项:\n- 请勿将湿手插入电源插座或触摸控制面板。
\n- 请勿将易燃物品放置在油烟机附近。
\n- 请勿将油烟机用于其他用途,以免损坏设备。
\n- 在长时间使用后,请确保油烟机冷却后再进行清洁和维护。
总结:\n金牌厨卫油烟机CXW-230是一款高品质的厨房电器,它能够有效地排除厨房中产生的油烟和异味,为用户提供一个清洁、健康的烹饪环境。
通过正确安装、使用和维护这款油烟机,您可以确保其长期有效运行,并为您的家庭带来更好的烹饪体验。
希望本使用说明书能够帮助您更好地使用金牌厨卫油烟机CXW-230。
卡萨帝家用吸油烟机 CXW-258-C2T90AGUD说明书

智能家电操控智慧场景定制智家商城购物家电报装报修使用说明书使用前请仔细阅读本说明书本公司保留说明书解释权产品外观请以实物为准阅后请与发票一并妥善保存如遇产品技术或软件升级,恕不另行通知本产品只适合在中国大陆销售和使用CXW-258-C2T90AGUD CXW-200-CT16EG CXW-200-CT16DW12主要零部件名称15-171314售后服务技术数据装箱单待机与延时 调速手势功能WiFi功能6.7. 联动功能智能稳吸功能尊敬的卡萨帝用户:您好!感谢您使用卡萨帝产品,为了您能更好的阅读本说明书和使用本产品,防止人身伤害及物品损坏事故,请务必仔细阅读并遵守本说明书中有以下标志符号的内容。
必须禁止的行为或操作必须遵守的行为或操作电气方面使用电源专用插座(3孔10A插座),确保地线不悬空,必须可靠的接地。
的3如果油烟机安装在燃气灶上方,灶台上烹饪容器的支承面与吸油烟机最底部的最小距离应至少为650mm。
如果燃气灶台安装说明规定了更大的安装距离,则对此应予以考虑。
当本产品的安装高度(即炉灶上烹饪器具的支承面与吸油烟机最低部位的距离)低于650mm时,低于650mm部分的所有部件均为吸油烟机的不易燃部件或工作在安全特低电压下的部件,且这些部件变形时,不会影响对触及带电部件的防护。
4电源盒主箱蜗壳电机叶轮外装饰罩电源板后背板集烟腔油网油杯LED灯控制板玻璃面板56安装前请务必将支脚固定顶后板上。
1.吸油烟机使用的房间应通风良好。
无易燃易爆或腐蚀性材料物品。
2.安装吸油烟机的墙体应有足够的强度,且表面平直。
3.在墙面钻孔时应避开墙体内埋设的水、电、气管线。
以免引起触电、气体泄漏等危险。
1.估算吸油烟机通到室外的出风管的位置,参见安装示意图。
2.一个直线的、较短的出风管将使得吸油烟机的吸烟效果更佳。
3.尽量避免使用过长以及有较多弯道的出风管,否则将影响吸油烟机的排烟效果。
4.出风管与墙孔的连接处使用管道胶带严格进行密封,必须连接牢固。
- 1、下载文档前请自行甄别文档内容的完整性,平台不提供额外的编辑、内容补充、找答案等附加服务。
- 2、"仅部分预览"的文档,不可在线预览部分如存在完整性等问题,可反馈申请退款(可完整预览的文档不适用该条件!)。
- 3、如文档侵犯您的权益,请联系客服反馈,我们会尽快为您处理(人工客服工作时间:9:00-18:30)。
箭牌油烟机t881说明书
摘要:
1.产品简介与特点
2.安装与拆卸步骤
3.功能与操作说明
4.维护与清洁方法
5.安全注意事项
正文:
箭牌油烟机T881是一款高性能、美观实用的厨房电器,为广大消费者带来舒适、便捷的烹饪体验。
以下为产品说明书,为您提供详细的安装、使用及维护方法。
一、产品简介与特点
箭牌油烟机T881采用简约时尚的设计,精湛的工艺,呈现出高品质的家电美学。
其主要特点如下:
1.强劲排烟能力:高效马达,迅速排出厨房油烟,保证厨房空气清新。
2.低噪音:运行过程中噪音低,让您享受宁静的烹饪时光。
3.易拆洗:可拆卸式滤网,方便清洗,确保排烟效果。
4.安全防护:多重安全保护设计,使用更放心。
二、安装与拆卸步骤
1.安装前,请确保油烟机与烟道连接处无缝隙,保证排烟顺畅。
2.按照说明书中的示意图,将油烟机挂架安装在墙上,确保稳固。
3.将油烟机本体与挂架对准,插入挂架上的螺丝孔,紧固螺丝。
4.连接电源线,打开油烟机,检查是否能正常工作。
拆卸步骤与安装相反,注意在拆卸时要小心,避免损坏零部件。
三、功能与操作说明
1.开机:按下油烟机面板上的开关,即可启动油烟机。
2.调速:根据需要,可调整油烟机的风速。
3.照明:按下照明开关,提供充足的光线环境。
4.定时功能:设置合适的时间,油烟机将在设定的时间后自动关机。
四、维护与清洁方法
1.定期清理滤网:拆下滤网,用清水冲洗,必要时可使用清洁剂。
2.清理油杯:取出油杯,倒掉油污,用湿布擦拭干净。
3.机身清洁:用湿布轻轻擦拭机身,避免使用强烈腐蚀性的清洁剂。
五、安全注意事项
1.安装时,请确保电源线布线合理,避免安全隐患。
2.使用过程中,请勿让儿童接近油烟机,防止意外伤害。
3.切勿将液体物品倒入油烟机内部,以免损坏零部件。
4.遇到故障时,请立即切断电源,联系专业人员进行维修。
通过以上说明,相信您已经对箭牌油烟机T881有了更深入的了解。
