ENVI安装详细步骤
实验二 ENVI软件安装及ENVI图像处理基础 肖可蒙

4.End member Collection ——端元波谱分类
5.Create Class Image from ROI s——根据感兴趣区生成分类图像
6.Post Classification——分类后处理
实验心得与体会:此次实验有助于我以后用这款软件,同时也扩充了我的英语词汇量。
1file1openimagefile打开图像文件2openvectorfile打开矢量文件3openremotefile打开远程文件4openexternalfile打开外部文件5openpreviousfile打开以前的文件6launchenvizoom启动envi缩放7editenviheader编辑头文件8generatetestdate生成测试数据9dateviewer数据浏览器10savefile文件的存储11importfromidlvariable输入idl变量12exportidlvariable输出为idl变量13compileidlmodule编辑idl代码14idlcpuparametersidlcpu参数设置15tapeutilities磁带工具16scandirectorylist扫描目录列表17changeoutputdirectory更改输出目录18savesessionscript将session存为脚本文件19executestartupscript执行启动脚本文件20restoredisplaygroup恢复显示组21enviqueuemanagerenvi队列管理22envilogmanager生成处理信息日志23closeallfiles关闭所有文件24preferences设置envi参数25exit退出精品文档就在这里各类专业好文档值得你下载教育管理论文制度方案手册应有尽有精品文档2basictools1resizedatespatialspectral数据调整空间波谱2subsetdataviarot通过感兴趣区构建数据子集3rotateflipdate图像旋转4layerstacking层的叠加5convertdatebsqbilbip数据格式转换6stretchdate数据拉伸7statistics统计8spatialstatistics统计工具9changedetection变化探测分析10measurementtool测量工具11bandmath波段运算12spectralmath波谱运算13segmentationimage图像分割14regioninterest感兴趣区15mosaicking图像镶嵌16masking17preprocessing预处理三
envi安装指南

May 2009 EditionCopyright © ITT Visual Information Solutions All Rights ReservedInstallation and Licensing Guide0509IDL71InstRestricted Rights NoticeThe IDL®, IDL Advanced Math and Stats™, ENVI®, and ENVI Zoom™ software programs and the accompanying procedures, functions, and documentation described herein are sold under license agreement. Their use, duplication, and disclosure are subject to the restrictions stated in the license agreement. ITT Visual Information Solutions reserves the right to make changes to this document at any time and without notice.Limitation of WarrantyITT Visual Information Solutions makes no warranties, either express or implied, as to any matter not expressly set forth in the license agreement, including without limitation the condition of the software, merchantability, or fitness for any particular purpose. ITT Visual Information Solutions shall not be liable for any direct, consequential, or other damages suffered by the Licensee or any others resulting from use of the software packages or their documentation.Permission to Reproduce this ManualIf you are a licensed user of these products, ITT Visual Information Solutions grants you a limited, nontransferable license to reproduce this particular document provided such copies are for your use only and are not sold or distributed to third parties. All such copies must contain the title page and this notice page in their entirety.Export Control InformationThe software and associated documentation are subject to U.S. export controls including the United States Export Administration Regulations. The recipient is responsible for ensuring compliance with all applicable U.S. export control laws and regulations. These laws include restrictions on destinations, end users, and end use.AcknowledgmentsENVI® and IDL® are registered trademarks of ITT Corporation, registered in the United States Patent and Trademark Office. ION™, ION Script™, ION Java™, and ENVI Zoom™ are trademarks of ITT Visual Information Solutions.ESRI®, ArcGIS®, ArcView®, and ArcInfo® are registered trademarks of ESRI.Portions of this work are Copyright © 2008 ESRI. All rights reserved.Numerical Recipes™ is a trademark of Numerical Recipes Software. Numerical Recipes routines are used by permission.GRG2™ is a trademark of Windward Technologies, Inc. The GRG2 software for nonlinear optimization is used by permission.NCSA Hierarchical Data Format (HDF) Software Library and Utilities. Copyright © 1988-2001, The Board of Trustees of the University of Illinois. All rights reserved.NCSA HDF5 (Hierarchical Data Format 5) Software Library and Utilities. Copyright © 1998-2002, by the Board of Trustees of the University of Illinois. All rights reserved.CDF Library. Copyright © 2002, National Space Science Data Center, NASA/Goddard Space Flight Center.NetCDF Library. Copyright © 1993-1999, University Corporation for Atmospheric Research/Unidata.HDF EOS Library. Copyright © 1996, Hughes and Applied Research Corporation.SMACC. Copyright © 2000-2004, Spectral Sciences, Inc. and ITT Visual Information Solutions. All rights reserved.This software is based in part on the work of the Independent JPEG Group.Portions of this software are copyrighted by DataDirect Technologies, © 1991-2003.BandMax®. Copyright © 2003, The Galileo Group Inc.Portions of this computer program are copyright © 1995-1999, LizardTech, Inc. All rights reserved. MrSID is protected by U.S. Patent No. 5,710,835. Foreign Patents Pending.Portions of this software were developed using Unisearch’s Kakadu software, for which ITT has a commercial license. Kakadu Software. Copyright © 2001. The University of New South Wales, UNSW, Sydney NSW 2052, Australia, and Unisearch Ltd, Australia.This product includes software developed by the Apache Software Foundation (/).MODTRAN is licensed from the United States of America under U.S. Patent No. 5,315,513 and U.S. Patent No. 5,884,226.QUAC and FLAASH are licensed from Spectral Sciences, Inc. under U.S. Patent No. 6,909,815 and U.S. Patent No. 7,046,859 B2.Portions of this software are copyrighted by Merge Technologies Incorporated.Support Vector Machine (SVM) is based on the LIBSVM library written by Chih-Chung Chang and Chih-Jen Lin (.tw/~cjlin/libsvm), adapted by ITT Visual Information Solutions for remote sensing image supervised classification purposes.IDL Wavelet Toolkit Copyright © 2002, Christopher Torrence.IMSL is a trademark of Visual Numerics, Inc. Copyright © 1970-2006 by Visual Numerics, Inc. All Rights Reserved.Other trademarks and registered trademarks are the property of the respective trademark holders.ContentsChapter 1System Requirements (7)IDL (8)Feature Support by Operating System (10)Chapter 2Installing IDL or ENVI for Windows (11)Introduction (12)Installing IDL or ENVI for Windows (13)Installing IDL or ENVI Silently and Unattended (15)Running IDL or ENVI on Windows (16)Running ENVI Zoom on Windows (16)Running the IDL Virtual Machine on Windows (16)Running IDL Save Files on Windows (17)Installation and Licensing Guide34Chapter 3Installing IDL or ENVI for UNIX (19)Introduction (20)Installing IDL or ENVI for UNIX (21)Mounting the DVD on Your System (21)Installing IDL (22)Unmounting the DVD from Your System (24)Setting Up the Environment (25)Defining Environment Variables and Aliases (25)Running IDL or ENVI on UNIX (27)Running the IDL Virtual Machine on UNIX (28)Running IDL Runtime Applications on UNIX (28)Chapter 4Installing IDL or ENVI for Macintosh (29)Installing IDL or ENVI for Macintosh (30)Setting Up Your Environment (32)Running IDL or ENVI under Macintosh (33)Running IDL or ENVI from Applescript (33)Running IDL or ENVI from the Command Line (34)Running the IDL Virtual Machine under Macintosh (35)Running IDL Runtime Applications under Macintosh (36)Chapter 5Licensing IDL and ENVI (37)Licensing Methods (38)IDL Virtual Machine (38)Demonstration Mode (IDL) (38)Evaluation License (38)Flexible Single-User License (39)Node-Locked License (40)Floating License (41)Using the License Wizard (44)Running the License Wizard after Installation (44)Using the License Manager (45)Installing the License Manager (45)Configuring Client Access to the License Manager (46)Contents Installation and Licensing Guide5Working with the License Manager (49)Using the Same License Manager for Different Applications (55)Upgrading a Network License Manager (63)Using License Files (65)Viewing License Files (65)Modifying License Files (65)Customizing Floating Licenses (67)Appendix 6Troubleshooting Licensing (73)General Information (74)Other Resources (74)For Further Help (74)Evaluation Licenses (75)License Information Does Not Pass the Checksum Test (75)File Already Exists (75)File Cannot Be Written (75)Permissions Error Message (Linux) (75)Flexible Single-User and Windows Node-Locked Licenses (77)Check the License Format (77)Host ID of This System Does Not Match the Host ID (78)Files Needed for Initialization of the Licensing Program Could Not Be Found (79)License File Does Not Support This Version (79)Cannot Find License (80)Licenses Requiring a License Server (82)All Platforms (82)UNIX and Macintosh (86)License Manager Startup (88)Installation and Licensing Guide Contents6Contents Installation and Licensing GuideChapter 1System RequirementsThis section describes supported platforms and software requirements.IDL . . . . . . . . . . . . . . . . . . . . . . . . . . . . . . . . 8Feature Support by Operating System . . . . . 10Installation and Licensing Guide78Chapter 1: System RequirementsIDL Installation and Licensing GuideIDLA network interface card (NIC or Ethernet) is required for software-based node-locked and floating licenses. The following table describes the supported platforms and operating systems for IDL.aFor UNIX and Mac OS X, the supported versions indicate that IDL was either built on (the lowest version listed) or tested on that version. You can install and run IDL on other versions that are binary compatible with those listed.b The LINUX version of IDL is built on RedHat 4. If your version of Linux iscompatible with the listed kernel and glibc versions, you should be able to install and run IDL.c The IDL Workbench requires the GTK+ library version 2.4 or later. Printingfunctionality in the Workbench requires GTK+ library version 2.10 or later. If GTK+ version 2.4 or later is not available, IDL will only run in console mode.d On 64-bit Linux systems, the IDL Workbench requires that your platform’s 32-bitcompatibility libraries be installed.eThe IDL Workbench and Online Help are not supported on Solaris x86 64-bit machines. Documentation is available on the DVD for Solaris x86 platforms.PlatformVendorHardwareOperating SystemSupported VersionsWindowsMicrosoftIntel/AMD x86 32-bit Windows XP SP2, Vista Intel/AMD x86_64 64-bitWindows XP SP2, Vista Macintosh aApple PowerPC 32-bit OS X 10.5.1Apple Intel 32-bit OS X 10.5.1AppleIntel 64-bit OS X 10.5.1UNIX aSUN SPARC 32-bit Solaris c 10SUN SPARC 64-bitSolaris c 10SUN Intel/AMD x86_64 64-bit Solaris e 10various Intel/AMD x86 32-bit Linux b, c Kernel version 2.6.9 glibc version 2.3.4 gtk2 version 2.4.13variousIntel/AMD x86_64 64-bitLinux b, c, dTable 1-1: Hardware Requirements for IDLChapter 1: System Requirements9 32-bit and 64-bit VersionsOn UNIX and Macintosh Intel platforms that provide 64-bit support, you can run IDLas either a 32-bit or a 64-bit application. When both versions are installed, the 64-bitversion is the default. You can run the 32-bit version by specifying the -32 switch atthe command line, as follows:% idl -32or% idlde -32Under Microsoft Windows, the 32-bit and 64-bit versions are started via separateStart menu entries.On Macintosh Intel 64-bit machines, you can double-click on the 32-bit Macintoshapplescript (.app) files.Graphics HardwareSome IDL features take advantage of graphics hardware that supports the OpenGL2.0 interface to improve rendering performance, if such hardware is present. Yourvideo card should support OpenGL 2.0 or higher to take advantage of these features.Be sure to update your video card drivers with the most recent version.Platform Support Questions and AnswersThis topic describes the platform support requirements for IDL 7.1. Platform supportrequirements change over time; for the most current information, visit the ITT VisualInformation Solutions web site:/ProductServices/IDL/PlatformSupport.aspx.Software RequirementsThe following table describes the software requirements for IDL:Platform Software RequirementsWindows Internet Explorer 5.0 or higherMacintosh Apple X11 X-Windows managerTable 1-2: Software Requirements for IDLInstallation and Licensing Guide IDL10Chapter 1: System RequirementsFeature Support by Operating SystemInstallation and Licensing GuideF e a t u r e S u p p o r t b y O p e r a t i n g S y s t e mT h e f o l l o w i n g t a b l e s h o w s m a r k s i n d i c a t i n g w h i c h p l a t f o r m s s u p p o r t t h e c o r r e s p o n d i n g f e a t u r e . I D L t e c h n o l o g i e s n o t l i s t e d i n t h i s t a b l e a r e a s s u m e d t o w o r k o n a l l s u p p o r t e d p l a t f o r m s .F e a t u r eW i n d o w sO S XL i n u x S o l a r i sI n t e l 32-b i tI n t e l 64-b i tP P C 32-b i t I n t e l 32-b i t I n t e l 64-b i t I n t e l 32-b i t I n t e l 64-b i tS P A R C32-b i t S P A R C64-b i tI n t e l 64-b i tA c t i v e X : W I D G E T _A C T I V E X (I D L c o m A c t i v e X o b j e c t )•C O M O b j e c t –E x p o r t (v i a E x p o r t B r i d g e A s s i s t a n t )••C O M O b j e c t –I m p o r t (ID L c o m I D i s p a t c h o b j e c t )•D a t a M i n e r••••••D I C O M N e t w o r k S e r v i c e s•••••D I C O M R e a d /W r i t e (I D L f f D i c o m E x o b j e c t )•••••D I C O M R e a d (I D L f f D i c o m o b j e c t )•••••••D X F f i l e f o r m a t (I D L f f D X F o b j e c t )•••I D L A d v a n c e d M a t h a n d S t a t s (I M S L N u m e r i c a l L i b r a r y )•••••••M r S I D (I D L f f M r S I D )•R e m o t e P r o c e d u r e C a l l s (R P C s )•••••••I D L W o r k b e n c h a n d O n l i n e H e l p•••••••••T a b l e 1-3: F e a t u r e S u p p o r t : I D L 7.1Chapter 2Installing IDL or ENVI for WindowsThis chapter covers the following topics:Introduction . . . . . . . . . . . . . . . . . . . . . . . . . 12Running IDL or ENVI on Windows . . . . . 16 Installing IDL or ENVI for Windows . . . . . 13Installation and Licensing Guide1112Chapter 2: Installing IDL or ENVI for Windows IntroductionYou must have Administrator privileges or be a member of the Administrator groupto install IDL or ENVI. If you do not have such privileges, the installation processcannot modify the system configuration of the machine, so it will fail. After you haveinstalled IDL or ENVI, you do not need Administrator privileges to run it.After you have installed IDL or ENVI (see “Installing IDL or ENVI for Windows” onpage 13), use the License Wizard to retrieve and install a license. You can run theLicense Wizard at any time by selecting Start→All Programs → IDLx.x→ License Wizard orStart→All Programs → ENVI x.x→ License Wizard.WarningYou must have Administrator privileges to install licenses or to install, start, or stopthe License Manager.Introduction Installation and Licensing GuideChapter 2: Installing IDL or ENVI for Windows13 Installing IDL or ENVI for WindowsThis section describes how to install IDL or ENVI on Windows platforms.You may be required to restart your computer during the installation process. Toavoid losing unsaved information, save all open files and close any open applicationsbefore installing IDL or ENVI.The installation process installs the software first and then runs the License Wizard.You can run the License Wizard later if you cannot obtain your license number at thetime of install.To install IDL or ENVI:1.Insert the installation disk in the appropriate drive. After a short delay, theautorun program starts. If the autorun program does not start automatically,select Start→Run. In the Run dialog, click Browse to locate the drive, selectautorun_win.exe and click OK.2.Click Install 32-bit software or Install 64-bit software (where software refersto IDL or ENVI) from the autorun program. The InstallShield Wizard dialogappears.3.Click Next. The License Agreement dialog appears.4.Read the license agreement, then click Yes to continue. The ChooseDestination Location dialog appears.The default installation folder displays, which is \Program Files\ITT onthe local hard drive. Click Next to install in the default folder.To install in a different location, click Browse. In the Choose Folder dialog,select an alternate location and click OK.If you are installing 64-bit IDL or ENVI, the installer installs all of the files for32-bit and 64-bit versions. For information on running IDL or ENVI in eithermode, see “Running IDL or ENVI on Windows” on page 16.If you are installing ENVI, and the IDL version on which ENVI is based isalready installed on your system, ENVI is automatically installed below thatIDL distribution in the \products folder. The Destination Folder dialog willnot appear, and you will not be able to choose a path for your ENVIinstallation. If you do not want ENVI installed in this path, you must uninstallthat IDL version. You can then install ENVI.Click Next to accept the directory that is displayed. The Select Featuresdialog appears.Installation and Licensing Guide Installing IDL or ENVI for Windows14Chapter 2: Installing IDL or ENVI for Windows5.The typical installation features are indicated by check marks. Clicking afeature displays information about that option. Select the features you want toinstall by checking the boxes for those features.Click Next to continue. The File Type Associations dialog appears.6.You can choose which file type extensions to register with IDL or ENVI. Thefile types are IDL Binary File (.sav), IDL Program File (.pro), IDL iTools(.isv), and Workbench Visualization Export File (.vexp). All of the types areselected by default. If you are installing ENVI, you can also register the JPIPURL file type with ENVI Zoom on 32-bit platforms only. Change theseselections as needed, and click Next.7.If you chose to install the DICOM Network Services module, you will beasked if you want to configure the network services to start automatically atboot time. Click Yes or No to continue.8.The Start Copying Files dialog appears. Click Next. The Setup Status dialogappears and shows the installation progress.9.When installation is complete, the License Wizard starts. See “Using theLicense Wizard” on page 44.NoteIf you choose not to run the License Wizard as part of the installationprocess, you can click No. You can run IDL or ENVI in timed demonstrationmode and run the License Wizard later by selectingStart→All Programs → IDL x.x→ License Wizard orStart→All Programs → ENVI x.x→ License Wizard.10.A dialog notifies you that the installation was successful. You can choose todisplay the release notes. Click Finish.Your installation is now complete.If you are prompted to reboot after installation, you may need to run the LicenseWizard by selecting one of the following:•Start → All Programs → IDL x.x→ License Wizard•Start → All Programs → ENVI x.x→ License WizardTo modify or repair your installation, open the Control Panel in Windows andcontinue with one of the following options:•Windows XP: Double-click Add or Remove Programs. The Add or Remove Programs dialog appears. Click IDL x.x or ENVI x.x, and click Change. The Installing IDL or ENVI for Windows Installation and Licensing GuideChapter 2: Installing IDL or ENVI for Windows15 Setup Maintenance dialog appears, where you can modify the installedcomponents or repair your installation.•Windows Vista: From the Control Panel, selectPrograms → Programs and Features. Click IDL x.x or ENVI x.x, and clickUninstall/Change. The Setup Maintenance dialog appears, where you canmodify the installed components or repair your installation.Installing IDL or ENVI Silently and UnattendedYou can install IDL or ENVI unattended by creating an install script. Run thisfunction using the /s and /f1 parameters on the setup32.exe file (setup64.exefor 64-bit software) for the installation. Choose a syntax below to run the installscript, depending on your platform (32-bit or 64-bit). The command is one line: <DVD>:\windows\setup32.exe /s /f1"<DVD>:\windows\unattend32.iss"Or,<DVD>:\windows\setup64.exe /s /f1"<DVD>:\windows\unattend64.iss"The setup xx.exe files and sample unattend xx.iss response files are located onthe installation DVD under the windows directory. The sample unattend.iss isset up to install the default features. Use this file as an example to create your own.iss file.To record your own unattend xx.iss response file, run the installer with thefollowing command:<DVD>:\windows\setup32.exe /r /f1"C:\unattend.iss"OR,<DVD>:\windows\setup64.exe /r /f1"C:\unattend.iss"NoteIf you are running the silent installer on Windows Vista, you must have elevatedprivileges to run the above commands.Select the desired features and responses during this installation. The resultingresponse file can be used with future silent installations.PrerequisitesFor the silent installer to be successful, the target system must have the MSI InstallerEngine version 3.1, which is available directly from Microsoft.Installation and Licensing Guide Installing IDL or ENVI for Windows16Chapter 2: Installing IDL or ENVI for Windows Running IDL or ENVI on WindowsTo run IDL under Windows, select Start→All Programs→IDL x.x→IDL.To run ENVI under Windows, select Start→All Programs→ENVI x.x →ENVI.NoteIf you have 64-bit IDL or ENVI installed, you can select either 32-bit or 64-bit IDLor ENVI from the Windows Start menu. The commands above start 64-bit IDL orENVI if you are on a 64-bit platform. You can start 32-bit IDL or ENVI by selectingStart→All Programs→IDL x.x→ IDL (32-bit) → IDL orStart→All Programs→ENVI x.x→ ENVI (32-bit) → ENVI.To run ENVI + IDL under Windows, select Start→All Programs→ENVIx.x→ENVI + IDL.Running ENVI Zoom on WindowsSelect one of the following options. The ENVI Zoom interface appears when theprogram is loaded and started.•Select Start→All Programs→ENVI x.x→ENVI Zoom.•If you have 64-bit ENVI installed, you can select either 32-bit or 64-bit ENVI Zoom from the Windows Start menu. The command above starts 64-bit ENVIZoom if you are on a 64-bit platform. You can start 32-bit ENVI Zoom byselecting Start→All Programs→ENVI x.x→ ENVI (32-bit) → ENVIZoom.•From the ENVI main menu bar, select File→Launch ENVI Zoom. You can open both ENVI and ENVI Zoom from the same IDL session.•If you are running IDL or ENVI + IDL, type envizoom at the IDL command line.Running the IDL Virtual Machine on WindowsTo run a *.sav file in the IDL Virtual Machine, you can launch the IDL VirtualMachine and open the *.sav file, or launch the*.sav file in the IDL VirtualMachine from the command line.Running IDL or ENVI on Windows Installation and Licensing GuideChapter 2: Installing IDL or ENVI for Windows17To open a *.sav file from the IDL Virtual Machine:1.Select Start→All Programs→IDL x.x→IDL Virtual Machine orStart→All Programs→ENVI x.x→IDL Virtual Machine to launch theIDL Virtual Machine and to display the IDL Virtual Machine window.2.Click anywhere in the window to dismiss the IDL Virtual Machine splashscreen and to display the file selection menu.3.Locate and select the *.sav file, and double-click or click Open to run it.NoteIf you select a data save file, the IDL Workbench will be launched and thedata restored.To run a *.sav file from the command-line prompt:1.Open a command-line prompt. Select Start→Run, and enter cmd.2.Change directory (cd) to the ITT_DIR\IDL xx\bin\bin.<platform>directory where <platform> is bin.x86 (32-bit machines) or bin.x86_64(64-bit machines).3.Enter the following at the command-line prompt:idlrt -vm=<path><filename>where <path> is the path to the *.sav file, and <filename> is the name ofthe *.sav file.NoteIf a license is available on the machine running the *.sav file, double-clicking the *.sav file will run it in the licensed runtime version of IDL. Toforce the *.sav file to run in the Virtual Machine, run it from the commandline with the -vm argument.Running IDL Save Files on WindowsTo run a *.sav file in the runtime version of IDL, do either of the following:•Double-click the *.sav file to launch the application. If an IDL license is not available, the application will run in the IDL Virtual Machine.Installation and Licensing Guide Running IDL or ENVI on Windows18Chapter 2: Installing IDL or ENVI for Windows NoteIf the file is an application save file, it will run in runtime. If the file is a datasave file, the IDL Workbench will be launched and the data restored.•Open a command-line prompt. Select Start→Run, and enter cmd. Change directory (cd) to the ITT_DIR\bin\bin.<platform> directory, where<platform> is bin.x86 (32-bit machines) or bin.x86_64 (64-bitmachines). Enter the following at the command line prompt:idlrt <path><filename>where <path> is the path to the *.sav file, and <filename> is the name ofthe *.sav file.Running IDL or ENVI on Windows Installation and Licensing GuideChapter 3Installing IDL or ENVI for UNIXThis chapter covers the following topics:Introduction . . . . . . . . . . . . . . . . . . . . . . . . . 20 Installing IDL or ENVI for UNIX . . . . . . . . 21Setting Up the Environment . . . . . . . . . . . . 25 Running IDL or ENVI on UNIX . . . . . . . . 27Installation and Licensing Guide1920Chapter 3: Installing IDL or ENVI for UNIX IntroductionCheck your OS version: make sure that you are running on one of the supportedUNIX versions listed in “System Requirements” on page 7, or a UNIX version that isbinary-compatible with one of these versions.You must be running X Windows: the IDL or ENVI installation program has aMotif graphical user interface and requires you to be running X Windows. (If youcannot install from a machine running X Windows, see the instructions in the/unix/install/no_gui directory on your IDL or ENVI installation disk.)After you have installed IDL or ENVI (see “Installing IDL” on page 22), use theLicense Wizard to retrieve and install a license. You can license IDL or ENVI later bytyping ittlicense at the UNIX prompt after you have set up your environment asdescribed in “Defining Environment Variables and Aliases” on page 25. Introduction Installation and Licensing GuideChapter 3: Installing IDL or ENVI for UNIX21 Installing IDL or ENVI for UNIXThis section describes how to install IDL or ENVI on UNIX platforms.Mounting the DVD on Your SystemIDL and ENVI for UNIX installation programs are distributed on a DVD. The DVDmounts as idl xx or envi xx). In some cases, you may need to create a /dvddirectory.The DVD mounts automatically. (On some systems, you must have root permissionsto mount a removable disk. Consult your operating system documentation forinstructions on mounting a DVD on your system.)NoteLinux systems: The automount sometimes runs with incorrect permissions. Usingthe following unmount and mount commands ensures a smooth installation onLinux:Insert the DVD into the DVD drive. The automount will run and display the DVDcontents.Open a terminal window and type the following commands.umount /dev/hdcmount -o ro -t udf /dev/hdc /mediaNow you can proceed to the installation instructions below.Remember how your DVD has been mounted, and use this path in place ofDVD-PATH in the installation instructions.Installation and Licensing Guide Installing IDL or ENVI for UNIX22Chapter 3: Installing IDL or ENVI for UNIX Installing IDLFollow the steps below to install IDL or ENVI. If you are installing in a publicdirectory, make sure you have root or similar permissions before running theinstallation script.NoteThese instructions apply to the installation DVD. If you have a CD-ROM, see thefile readme.txt on the installation CD for instructions.The installer process installs the software first and then runs the License Wizard.1.Enter the following command at your UNIX prompt:/bin/sh /DVD-PATH/install_unix.shwhere DVD-PATH is the path to your DVD drive.A warning message may appear that indicates you must be logged in as root ifyou plan to install IDL or ENVI in a public directory. Click Yes to continue.The License Agreement dialog appears.2.To continue the installation, click Yes to accept the terms of the licenseagreement. The IDL Installation dialog appears.3.Next to the Set Directory button is the directory under which the idl xx orenvi xx directory will be created (where xx is the software version). Thedefault installation directory is /usr/local/itt. The installation directorywill be referred to as ITT_DIR for the remainder of the installation andlicensing instructions. The dialog lists the required disk space to install and theavailable disk space in the selected directory. If you want to install in thedefault directory, proceed to Step 4.To change the default directory, click Set Directory. The Select InstallationDirectory dialog appears. If you do not have write permissions for a selecteddirectory, it appears as gray text. The selected directory will be created for youif it does not already exist.If you are installing ENVI, and the IDL version on which ENVI is based isalready installed on your system, you can install ENVI below that IDLdistribution. If you want to install ENVI in this location, click Set Directoryand choose the directory that contains the appropriate idl xx directory (thedefault location for IDL is /usr/local/itt). If you do not select the samepath, another IDL distribution is installed with ENVI.Installing IDL or ENVI for UNIX Installation and Licensing Guide。
ENVI基本影像处理流程操作

ENVI基本影像处理流程操作ENVI(Environment for Visualizing Images)是一款基于科研的遥感数据处理软件,该软件可以进行多光谱、高光谱和雷达影像的处理、分析以及可视化等操作。
本文将介绍ENVI基本影像处理流程的操作步骤,并提供一些实用技巧。
1. ENVI软件的安装ENVI软件的安装包可以通过官方网站下载,安装过程需要注意以下几点:•系统要求:ENVI软件需要安装在一台配备了Windows操作系统的计算机上。
安装前请确认您的计算机符合软件的系统要求。
•授权方式:ENVI采用了USB加密狗的授权方式,安装时需要连入加密狗。
•安装路径:ENVI软件的安装路径需要选择到英文全路径,建议安装在较大的磁盘上。
2. ENVI软件的启动ENVI软件具有图形界面和命令行两种启动方式,这里只介绍图形界面启动方式。
操作步骤如下:1.在Windows桌面上找到ENVI的快捷方式,鼠标双击打开ENVI软件;2.程序启动后,会出现ENVI Main窗口,该窗口分为菜单栏和工具栏两部分;3.在菜单栏中选择基本操作>打开文件,弹出Open File窗口;4.选择需要打开的影像文件,点击打开按钮,ENVI软件会自动加载文件。
3. ENVI基本影像处理流程ENVI软件提供了多种基本影像处理流程,这里将介绍最常用的三种:图像增强、变换和分类。
下面的操作步骤均在ENVI软件的主界面中完成。
3.1 图像增强图像增强是指通过某些方法,使影像的细节更明显、对比度更强、噪声更小,从而使影像更易于解译。
下面介绍ENVI中的直方图均衡化增强方式。
1.打开需要增强的影像文件;2.在ENVI菜单栏中选择基本操作>图像增强>直方图均衡化;3.弹出直方图均衡化窗口,选择需要增强的波段,点击确定按钮;4.ENVI软件会自动完成直方图均衡化操作,并在新窗口中显示增强后的影像。
3.2 变换变换是指将原始影像进行变换,获得不同的波段组合,以便更好地提取地物信息。
01.ENVI产品简介与入门
遥感事业部
ENVI 产品简介与入门
版权声明:本教程涉及到的数据仅供练习使用,禁止用于商业用途。
网址: 技术支持邮箱: ENVI-IDL@ 电话: 010-57632288 技术支持热线: 400-819-2881-7
遥感事业部
表中可以完成当前在 ENVI 中打开的或存储在内存中的文件的信息,还可以进行包括:打开新文 件、关闭文件,以及查看元数据等操作。
图1.1
ENVI5.1 软件界面
为了方便老用户的使用,ENVI 5.1 还保留了经典的菜单+三视窗的操作界面,也就是在安装 ENVI5.1 时候,自动会把 ENVI Classic 版本安装。其实 ENVI Classic 就是一个完整的 ENVI4.8 或更 早期的版本。习惯这种界面风格的用户,可以选择使用 ENVI Classic 界面操作。
目录
ENVI 产品简介与入门 ..................................................................................................................... 1 1. ENVI5.1 您首先需要知道 .................................................................................................. 2 2. ENVI 安装目录结构 ........................................................................................................... 3 3. ENVI 数据输入 ................................................................................................................... 3 3.1 常见数据的打开....................................................................................................... 3 3.2 特定数据的打开....................................................................................................... 4 4. ENVI 数据显示 ................................................................................................................... 5 4.1 数据管理................................................................................................................... 5 4.2 栅格数据显示........................................................................................................... 7 5. ENVI 栅格文件系统和储存 ............................................................................................... 8 5.1 栅格文件格式........................................................................................................... 8 5.2 编辑栅格头文件....................................................................................................... 9 5.3 栅格文件保存......................................................................................................... 10 6. ENVI 常用系统设置 ......................................................................................................... 11
envi5.6license用法

标题:探讨envi 5.6 license的使用方法近年来,随着环境监测技术的不断发展,envi 5.6软件作为一款功能强大的环境监测分析工具备受关注。
envi 5.6 license是其使用过程中不可或缺的一部分,其使用方法直接关系到用户能否充分发挥软件的功能。
本文将就envi 5.6 license的使用方法展开探讨,帮助用户更好地理解和使用这一关键部分。
一、envi 5.6 license的获取1. 购物license用户可以通过冠方渠道购物envi 5.6的license,冠方提供了不同类型的license,用户可以根据自己的需求选择相应的版本。
购物license 时,用户需要提供相关的个人或单位信息,并按照冠方规定的流程完成购物过程。
2. 获取试用license对于一些用户来说,他们可能首次接触envi 5.6,或者只是临时需要使用这款软件进行某项工作。
针对这类情况,冠方也提供了试用license的获取途径。
用户可以在全球信息站上申请试用license,并按照规定的步骤完成申请流程,获取临时的license使用权限。
二、envi 5.6 license的安装1. 下载安装包在获取到license之后,用户需要首先下载envi 5.6的安装包。
冠方全球信息站提供了软件的下载信息,用户可以根据自己的操作系统版本选择对应的安装包进行下载。
2. 安装license安装envi 5.6时,系统会提示用户输入license信息,用户需要根据所购物或获得的license进行相应输入。
在输入正确的license信息后,软件即可完成安装,并获得完整的使用权限。
三、envi 5.6 license的有效期限1. 了解license的有效期在购物或获得license时,用户需要注意license的有效期限。
不同类型的license有不同的有效期,用户需要及时了解自己license的有效期,并在到期之前进行续费或更新,以确保软件的正常使用。
ENVI操作步骤
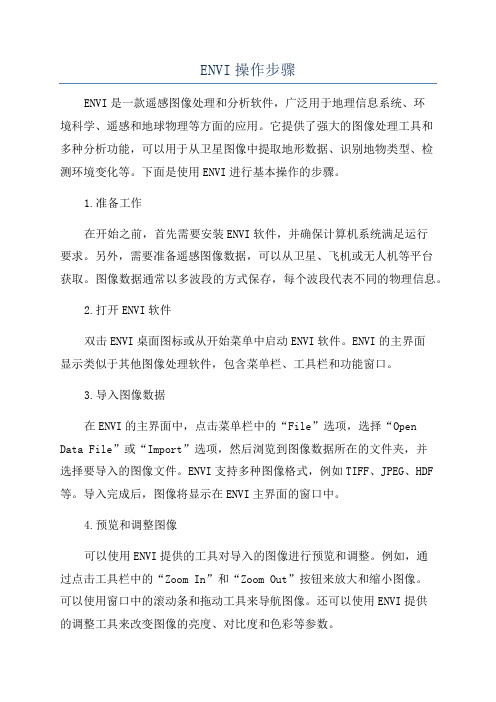
ENVI操作步骤ENVI是一款遥感图像处理和分析软件,广泛用于地理信息系统、环境科学、遥感和地球物理等方面的应用。
它提供了强大的图像处理工具和多种分析功能,可以用于从卫星图像中提取地形数据、识别地物类型、检测环境变化等。
下面是使用ENVI进行基本操作的步骤。
1.准备工作在开始之前,首先需要安装ENVI软件,并确保计算机系统满足运行要求。
另外,需要准备遥感图像数据,可以从卫星、飞机或无人机等平台获取。
图像数据通常以多波段的方式保存,每个波段代表不同的物理信息。
2.打开ENVI软件双击ENVI桌面图标或从开始菜单中启动ENVI软件。
ENVI的主界面显示类似于其他图像处理软件,包含菜单栏、工具栏和功能窗口。
3.导入图像数据在ENVI的主界面中,点击菜单栏中的“File”选项,选择“Open Data File”或“Import”选项,然后浏览到图像数据所在的文件夹,并选择要导入的图像文件。
ENVI支持多种图像格式,例如TIFF、JPEG、HDF 等。
导入完成后,图像将显示在ENVI主界面的窗口中。
4.预览和调整图像可以使用ENVI提供的工具对导入的图像进行预览和调整。
例如,通过点击工具栏中的“Zoom In”和“Zoom Out”按钮来放大和缩小图像。
可以使用窗口中的滚动条和拖动工具来导航图像。
还可以使用ENVI提供的调整工具来改变图像的亮度、对比度和色彩等参数。
5.进行遥感图像分析ENVI提供了多种图像处理和分析工具,可以用于从遥感图像中提取地物信息。
其中一种常用的分析方法是图像分类。
通过点击ENVI主界面中的“Classification”或“Classification Tools”选项,可以选择不同的分类算法,并应用于图像数据中。
分类结果将以颜色编码的形式显示在图像上,通过不同的颜色表示不同的地物类型。
6.提取地形信息ENVI可以根据遥感图像中的光谱信息提取地形数据。
其中一个常用的方法是“数字高程模型(Digital Elevation Model,DEM)”的创建。
envi镶嵌方法
envi镶嵌方法ENVI (Environment for Visualizing Images) 是一款专业的遥感图像处理软件,提供了一系列强大的图像处理和分析工具。
在ENVI中,你可以使用镶嵌(Mosaic)功能将多个图像拼接在一起,形成一个更大的图像。
以下是使用ENVI进行图像镶嵌的一般步骤:1. 打开ENVI:首先,启动ENVI软件。
2. 打开图像:在ENVI的菜单栏中,选择“File” -> “Open”,然后选择你想要镶嵌的图像文件。
你可以一次打开多个图像。
3. 创建Mosaic Dataset:在ENVI的菜单栏中,选择“Image” -> “Mosaic”,然后选择“Create Mosaic Dataset”。
4. 设置Mosaic Dataset参数:在弹出的对话框中,你可以设置各种参数,如投影、坐标系、分辨率等。
这些参数将决定最终镶嵌图像的属性和质量。
5. 添加图像到Mosaic Dataset:在“Add Images”部分,选择你想要添加到镶嵌中的其他图像。
你可以按顺序添加图像,以确保它们按照正确的顺序排列。
6. 调整图像顺序和大小:在“Mosaic”工具窗口中,你可以通过拖动和缩放图像来调整它们的顺序和大小。
这有助于确保所有图像都能正确地对齐和拼接。
7. 应用Mosaic:一旦你对所有设置和图像位置满意,就可以点击“OK”来应用镶嵌。
这将创建一个新的镶嵌图像,你可以在ENVI中进一步查看和分析。
8. 保存结果:如果你满意镶嵌的结果,可以选择“File” -> “Save As”,将结果保存为一个新的图像文件。
请注意,这只是ENVI中进行图像镶嵌的基本步骤。
具体操作可能会根据你的需求和所处理的图像有所不同。
在进行复杂的图像镶嵌时,你可能需要进一步了解ENVI的高级功能和选项。
如果你对ENVI的镶嵌功能有任何疑问或需要更详细的指导,建议查阅ENVI的官方文档或联系技术支持以获得帮助。
[课件]ENVI培训教程PPT
高光谱分析
• 像元纯净指数(PPI) 纯净像元指数是一种在多波谱和高光谱影像中寻找波 谱最纯净的像元的方法。通过,波谱最纯净的像元与 混合的端元相对应。像元纯净指数通过迭代将N维散点 图映射为一个随机单位向量来计算。每次映射的纯净 像元被记录下来,并且每个像元被标记为纯净像元的 总次数也将被记录下来。这将生成一幅像元纯净影像 PPI,在该影像上,每个像元的DN值与像元被标记为 纯净像元的次数相对应。
基于影像自带几何信息的地理坐标定位
• 构建GLT(几何查找表) 几何信息查找表文件包含了行和列的对应信息,这样就 将输出影像中的每一个像素同输入影像联系起来。如 果GLT值是正值,那么就会进行精确的像素匹配。如 果GLT值是负值,无法进行精确的像素匹配,只能使 用最临近的像素进行匹配。 • 通过GLT纠正影像 • 通过IGM(输入几何信息数据文件)纠正影像
监督分类 • 平行六面体法 平行六面体使用一条简单的判定规则对多光谱数据进行分类。判 定边界在影像数据空间中是否形成了一个N维的平行六面体。平 行六面体的尺度是由标准差阈值所确定的,而该标准差阈值则是 根据每种所选类的均值求出。 • 最小距离法 最小距离分类使用了每个感兴趣区的均值矢量,来计算每一个未 知像元到每一类均值矢量的欧氏距离。除非用户指定了标准差和 距离的阈值,否则所有像元都将分类到感兴趣区中最接近的那一 类。
• 二值编码法 二值编码分类技术将根据波段值落在波谱均值的下方或 者上方的情况,把数据波谱和端元波谱编码为0或者1。 “异或”逻辑函数被用来将每一种编码后的参考波谱同 编码后的数据波谱进行比较,生成一幅分类影像。 • 波谱角法 波谱角填图分类法(SAM)是一个基于物理的波谱分类 法,它是用N维角度将像元与参考波谱进行匹配。该算 法将波谱看作是空间的矢量,矢量的维数就等于波段的 个数,通过计算波谱间的角度,来判断两个波谱间的相 似度。
简述envi窗口连接操作流程
简述envi窗口连接操作流程The Envi window connection operation process is a crucial step in ensuring the efficiency and effectiveness of the Envi window system. Envi窗口连接操作流程是确保Envi窗口系统的效率和有效性的关键步骤。
It involves a series of steps that need to be followed meticulously to establish a seamless connection between Envi windows and other devices or systems. 它涉及一系列需要精心遵循的步骤,以建立Envi窗口与其他设备或系统之间无缝连接。
From checking the compatibility of the devices to configuring the settings, every aspect needs to be taken care of to ensure a smooth connection. 从检查设备的兼容性到配置设置,每个方面都需要被照顾,以确保连接的顺畅。
Here's a detailed look at the Envi窗口连接操作流程 from multiple perspectives.First and foremost, it is essential to ensure that the devices you are trying to connect with the Envi windows are compatible. 首先,必须确保您正在尝试连接到Envi窗口的设备是兼容的。
This may involve checking the technical specifications of both the Envi windows and the other devices, such as computers, smartphones, or other IoT devices. 这可能涉及检查Envi窗口和其他设备(如计算机、智能手机或其他物联网设备)的技术规格。
ENVI用户指南
ENVI用户指南第一节:概述欢迎使用ENVI!ENVI是一款强大的遥感图像处理和分析软件,具有许多功能和工具帮助用户处理和解释遥感图像数据。
本用户指南将详细介绍如何使用ENVI进行图像处理、增强、分类和解释。
第二节:安装和启动ENVI在本节中,将介绍如何安装和启动ENVI。
用户需要按照给定的步骤执行安装程序,然后启动ENVI软件。
还将介绍如何获取和安装ENVI的许可证。
第三节:ENVI界面介绍ENVI界面由多个面板和工具栏组成。
本节将详细介绍ENVI界面的各个部分,包括主菜单、工具栏、图像窗口、图像导航器等。
第四节:加载和显示图像在ENVI中,可以加载多种格式的遥感图像,并在图像窗口中显示。
本节将介绍如何加载不同格式的图像,并对图像进行显示和导航。
第五节:图像增强和预处理ENVI提供了多种图像增强和预处理工具,用于提高图像质量和准确度。
本节将详细介绍这些工具的使用方法,包括直方图均衡化、滤波、空间校正等。
第六节:图像分类图像分类是ENVI的一个重要功能,用于将图像像素划分为不同的类别。
本节将介绍如何使用ENVI进行图像分类,包括基于统计学的分类方法和基于机器学习的分类方法。
第七节:图像解释图像解释是遥感图像分析的关键步骤之一,用于从图像中提取有意义的信息。
本节将介绍如何使用ENVI进行图像解释,包括目标检测、变化检测和特征提取等。
第八节:输出和保存处理结果在ENVI中,可以将处理结果保存为图像文件或其他常见的文件格式。
本节将介绍如何输出和保存处理结果,以及如何生成图像报告和图像结果动画。
第九节:ENVI扩展功能ENVI还提供了许多扩展功能,用户可以根据需要安装和使用这些功能。
本节将介绍一些常见的ENVI扩展功能,如ENVI SARscape和ENVI LiDAR等。
第十节:常见问题解答本节将回答一些用户可能遇到的常见问题,包括安装问题、图像加载问题和处理问题等。
同时还会提供一些解决问题的方法和技巧。
- 1、下载文档前请自行甄别文档内容的完整性,平台不提供额外的编辑、内容补充、找答案等附加服务。
- 2、"仅部分预览"的文档,不可在线预览部分如存在完整性等问题,可反馈申请退款(可完整预览的文档不适用该条件!)。
- 3、如文档侵犯您的权益,请联系客服反馈,我们会尽快为您处理(人工客服工作时间:9:00-18:30)。
ENVI安装详细步骤
1、 如果已经安装过,但没有安装成功的同学,必须先将软
件卸载。具体可以使用控制面板->添加/删除程序->找到
ENVI,点击卸载。如图所示:
这里选择
remove。
卸载以后再按照以下步骤安装。
如果是没有安装过的同学,直接按照以下步骤安装。
2、 用记事本打开license.dat文件,如图所示:
将第一行的SERVER ****** ANY中的部分替换为自己的计
算机名。在我的电脑上点击右键,选择属性。点击计算机名
选项卡,可以查到计算机名。
3、 双击安装程序
会自动运行。
运行过程中会出现以下几个对话框。
点击next。
点击yes.
点击next。
点击next。
点击next。
点击next。
点击next。这时会开始安装,要花一些时间。如下图所示:
上步完成后,询问是否运行许可文件,选择YES.
需要选择许可文件的类型,这里选择permanent,长期的许
可文件。出现下面的对话框。
选择下方的“license”。
出现对话框,选择browse,选择刚才改过计算机名的许可文
件。
运行后出现下面的对话框。
点击finish。然后会跳出下面的对话框。
点击finish。同时envi的许可帮助文件也出现在屏幕上,关
掉即可。至此,安装过程全部结束。可以做作业咯!