Leica MS50_TS50_TM50用户手册_v1.1.1_zh
Leica ICC50 操作手册说明书

操作手册内容提要91215222426目录内容提要2目录3常规说明4安全概念5所使用的符号6安全性规定7安全性规定 (续) 8引言10拆箱11使用之前的准备工作13使用之前的准备工作 (续) 14使用 Windows 计算机进行连接和成像操作16不借助计算机,独立摄取图像17如何使用 SD 存储卡18不借助计算机,独立摄取图像 (续) 19不借助计算机,独立使用模拟量视频20为 ICC 50 设置新的白平衡21准备!设置!开始!23保养与清洁25Leica ICC 50 摄像头模块27 Leica ICC 50 摄像头模块 (续) 28摄像头之前,请该册子包含关于操作和保养的附加信息。
在干净的室内使用Leica ICC 50 摄像头在干净的室内使用时不会出现任何问题。
清洁Ϙ请勿使用不当的清洁剂、化学品或方法进行清洁。
Ϙ切勿使用化学品清洁有色表面或带有涂胶部件的附件。
否则会对表面造成损坏,或使部件被磨蚀。
Ϙ多数情况下,我们会按要求提供专门的解决方案。
有些产品可以进行修改,另外我们还可以提供在干净的室内使用的其它附件。
维修Ϙ修理工作只能由经徕卡显微系统有限公司培训的维修技师执行。
只能使用原装的徕卡显微系统零备件。
仪器负责人的责任Ϙ确保徕卡立体显微镜的操作、维护和修理均由经过授权和培训的人员执行。
Leica ICC 50 摄像头随附包含所有相关用户手册的交互式CD 光盘。
请将其放在安全且便于取用的地方。
也可以从我们的网站下载和打印用户手册及更新。
本操作手册描述了 Leica DM 立体显微镜系列中各个模块的特殊功能,并包含有关其操作安全、维护及附件的重要说明。
“安全概念”册子包含了有关立体显微镜、附件与电气附件的维修工作、要求与操作的附加安全信息,以及常规的安全说明。
可以将各个系统的部件与外部供应商提供的相关部件结合起来使用(例如冷光源等)。
请阅读本用户手册和供应商提供的安全要求。
在安装、操作或使用仪器之前,请先阅读上述用户手册。
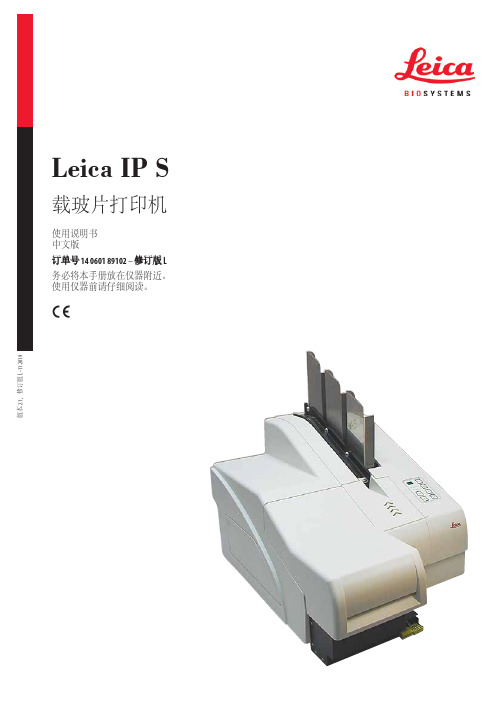
Leica IP S 产品说明书
我们没有义务根据最新技术发展定期和持续不断地更新当前使用说明书,或为客户提供本使用 说明书的更多副本、更新等。
在按照国家法律制度适用于每宗个案允许的范围内,我们对本使用说明书中所含的错误的陈述 图画、技术图示不承担法律责任。需要特别指出的是,对于因遵从本使用说明书的陈述或其他 信息所造成的任何直接或间接经济损失或损害,我们概不承担责任。
Leica IP S
3
目录
1. 重要信息 ............................................................................................................................................... 6
4. 仪器安装 .............................................................................................................................................24
2.1 安全说明 ...............................................................................................................................................................................11 2.2 警告 .........................................................................................................................................................................................12
徕卡测距仪使用说明书

徕卡测距仪使用说明书徕卡测距仪使用说明书:一、使用前的准备,一,电池的装入/更换打开仪器尾部的固定挡板。
向前推卡钮~向下将底座取下。
按住红色的卡钮推开电池盒盖。
安装或更换电池。
关闭电池盒盖~安装底座和卡扣。
当电池的电压过低时~显示屏上将持续闪烁显示电池的标志{B~21}。
此时应及时更换电池。
1、按照极性正确装入电池。
2、使用碱性电池,建议不要使用充电电池,。
3、当长时间不使用仪器时~请取出电池~以避免电池的腐蚀。
更换电池后~设置和储存的值都保持不变。
,二,多功能底底座固定挡板可以在下面的测量情况下使用:边缘测量~将固定挡板拉出~直到听到卡入的声音。
1、从2、从角落测量~将固定挡板拉出~直到听到卡入的声音~轻轻将固定挡板向右推~此时固定挡板完全展开。
仪器自带的传感器将辨认出固定挡板的位置~并将自动设置测量其准点。
,三,内置的望远镜瞄准器在仪器的右部有一个内置的望远镜瞄准器。
此望远镜瞄准器为远距离测量起到辅助的作用。
通过瞄准器上的十字丝可以精确地观察到测量目标。
在30米以上的测量距离~激光点会显示在十字线的正中。
而在30米以下的测量距离~激光点不在十字线中间。
,四,气泡一体化的水泡使仪器更容易调平。
,五,键盘1、开/测量键2、第二级菜单功能3、加+键4、计时,延迟测量,键5、等于[=]键6、面积/体积键7、储存键8、测量基准边键9、清除/关键10、菜单键11、照明键12、间接测量,勾股定律,键13、减-键14、BLUETOOTH ,六,显示屏1、关于错误测量的信息2、激光启动3、周长4、最大跟踪测量值5、最小跟踪测量值6、测量基准边7、调出储存值8、储存常数9、主显示10、单位~包括乘方立方,2/3,11、顶的面积12、墙面积13、3个额外显示,如:测量中间值,14、BLUETOOTH蓝牙开/关15、第二级菜单功能开16、硬件故障17、间接测量-利用勾股定律18、间接测量-利用勾股定律-部分高度19、面积/体积20、带常数的测量21、电池充电量显示二、菜单功能,一,设置在菜单中可以改变设置~并将其长久保存~并在关机和更换电池后不改变。
Leica Motor-Focus System 使用说明书
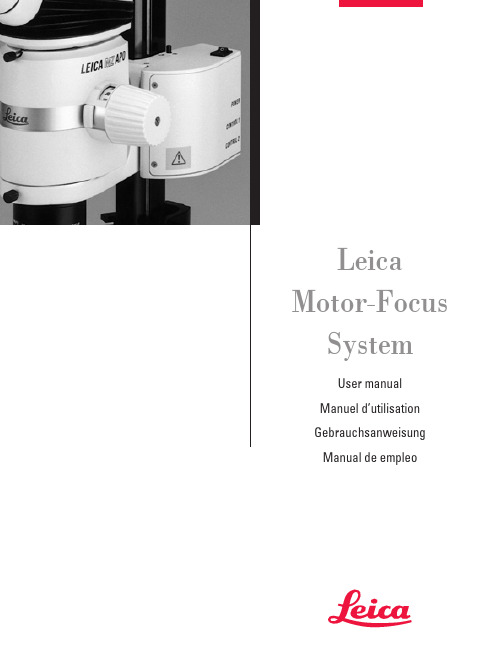
Leica Motor-Focus SystemUser manualManuel d’utilisationGebrauchsanweisungManual de empleoContentsDescription . . . . . . . . . . . . . . . . . . . . . . . . . . . . . . . . . . . . . . . . . . . . . . . . . . . . . . . . . . . . . .4Safety concept . . . . . . . . . . . . . . . . . . . . . . . . . . . . . . . . . . . . . . . . . . . . . . . . . . . . . . . . . .4Overview . . . . . . . . . . . . . . . . . . . . . . . . . . . . . . . . . . . . . . . . . . . . . . . . . . . . . . . . . . . . . . . .6AssemblyThe components . . . . . . . . . . . . . . . . . . . . . . . . . . . . . . . . . . . . . . . . . . . . . . . . . . . . . . . . .7Assembly . . . . . . . . . . . . . . . . . . . . . . . . . . . . . . . . . . . . . . . . . . . . . . . . . . . . . . . . . . . . . . .8UseSwitching on and off . . . . . . . . . . . . . . . . . . . . . . . . . . . . . . . . . . . . . . . . . . . . . . . . . . . . . .9Acoustic signal . . . . . . . . . . . . . . . . . . . . . . . . . . . . . . . . . . . . . . . . . . . . . . . . . . . . . . . . . .9Stops . . . . . . . . . . . . . . . . . . . . . . . . . . . . . . . . . . . . . . . . . . . . . . . . . . . . . . . . . . . . . . . . . . .9Footswitch . . . . . . . . . . . . . . . . . . . . . . . . . . . . . . . . . . . . . . . . . . . . . . . . . . . . . . . . . . . . . .9Handswitch . . . . . . . . . . . . . . . . . . . . . . . . . . . . . . . . . . . . . . . . . . . . . . . . . . . . . . . . . . . .10The focusing position: Storing, travelling, cancelling . . . . . . . . . . . . . . . . . . . . . . . . .10Focusing with the PC . . . . . . . . . . . . . . . . . . . . . . . . . . . . . . . . . . . . . . . . . . . . . . . . . . . .103DescriptionPurposeThe purpose of the motor-focus system is to provide motor-driven coarse and fine focusing by means of a manual control, a footswitch, or through a computer. Five exact focus settings can be stored so that the instrument can travel to them directly. The motor-focus system offers the following advantages over manual focusing:•Easy to use, even with heavy outfits•Ergonomically better•More flexibility for the user•Leaves the hands free•Saves time during repetitive tasks.For Leica stereomicroscopesThe modular design of the motor-focus system enables it to be fitted to the incident- and transmitted-light stands and large swinging-arm stand of the LEICA MS5, MZ6, MZ8, MZ12, MZAPO and MZ FLIII stereomicroscopes and of the LEICA M420 macroscope.User manualThe present user manual describes the design and use ofthe motor-focus system. There is a separate user manual for the stereomicroscope or macroscope.For safety directions, and for detailed information about the stereomicroscope or macroscope and how to clean it,and about its stands, illuminators and accessories, please refer to the user manual for that instrument.Safety conceptBefore you try to set up and use the motor-focus system, read: •this user manual, and in particular the safety notes•the user manual for your stereomicroscope or macroscope, including the notes about safety and care.Permitted usesThe motor-focus system is intended for the motor-driven raising and lowering of the LEICA MS5, MZ6, MZ8, MZ12, MZAPO and MZ FLIII stereomicroscopes and of the LEICA M420 macroscope on Leica incident- and transmitted-light stands, and on the large swinging-arm stand, and it replaces the mechanical drive housing. The motor-focus system consists of• a column with motor-focus mechanism• a transformer with a power cable• a manual control and/or a footswitch and/or a PC interface kit.Prohibited usesThe use of the motor-focus system in a different mannerfrom that described in this user manual can lead to injury, malfunction and damage.•Do not fit different plugs.•Do not attempt to modify the motor-focus system.•Do not dismantle any part of the motor-focus system unless instructions for doing so are given in the user manual.•Do not allow the motor-focus system to be opened by unauthorized personnel.Place of useThe motor-focus system is intended for use only in closed rooms.Responsibilities of person in charge of instrument•Ensure that the motor-focus system is operated, maintained and repaired only by authorized and trained personnel.•Ensure that personnel who use the motor-focussystem have read and understood this user manualand in particular all safety instructions.4Power cable Array•Inspect the power cable regularly for damage. If it isdefective, replace it immediately, because it can causethe instrument and ancillary equipment to becomeelectrically live, endangering personnel. Do not pull atthe power cable.•Position the power cable carefully and make sure that no-one can become entangled in it or fall over it.Cleaning•Disconnect the power cable before you attempt to clean the motor-focus system.•Respect the warning signs relating to the handling of liquids.EN •Read and follow the notes about cleaning which are given in the user manual for the instrument.LiquidsBe careful when handling liquids. If spilt on electricalappliances, they can:•cause the instruments and accessories to becomeelectrically live, endangering personnel•cause damage to the equipment.Legal requirementsAdhere to general and local regulations relating to accident prevention and environmental protection.Conformity with European Community directiveThe motor-focus system and its accessories are constructed in accordance with the latest technologies and are provided witha statement of conformity with EC requirements.5213 547 6EN7AssemblyIncident- or transmitted-light standColumn with motor-focus mechanism ➜base of stand̈Using three Allen screws, secure the column to the incident- or transmitted-light base (refer to user manualfor stereomicroscope or macroscope).̈Using the clamping screw, secure the lower stop to the column, taking the position of the object into account(see page 9).Large swinging-arm stand̈Fit the inclinable carrier rod to the horizontal arm in accordance with the user manual for the stereomicroscope or macroscope.̈Using the clamping screw, secure the lower stop to the carrier rod (see page 9).Microscope carrier ➜ column with motor-focus mechanism ̈Using an Allen screw, secure the microscopecarrier to the column of the stand (refer to user manual for stereomicroscope or macroscope).̈Fit the optics carrier, binocular tube and accessories to the stereomicroscope or macroscope in accordancewith the user manual.TransformerRespect the directions for safety on pages 4 and 5. Technical dataType MST31Input voltage85 to 264 VACInput frequency47 to 440 HzInput current max. 0.80 A at 115 VACmax. 0.50 A at 230 VAC Operating voltage 30VOperating temperature+10°C to +40°CStorage temperature–20°C to +55°CMaximum mechanical loading12 kg 1Connector for transformer2Connector for footswitch or for PC interface kit3Connector for manual control̈Connect the transformer to the motor-focus mechanism.̈Connect the power cable to the electricity supply.̈Connect the manual control and/or footswitch.̈If appropriate, connect the PC interface kit instead of the footswitch.Connecting the motor focus12389Safety measures for the stops Read the warnings on page 5. •The fixed stop (5) on the upper part of the column, and the adjustable stop (6) beneath the motor housing, limit the movement of the motor-focus system.•In addition, there is an end-switch (7) on top of the motor housing and another one beneath it. If, during focusing, an end-switch touches the stop, there is a series of beeps and the movement ceases.Set the lower stop •so that your hands have enough room betweenthe objective and the object, even when the motor-focus system has reached the stop•so that during focusing the objective cannot press against the object and damage either objective or object.̈Place the object beneath the objective.̈Look into the eyepiece and carefully bring the object intofocus using the manual control (see page 10), the footswitch or the PC (see page 10).̈Use the clamping screw (8) to secure the lower stop beneaththe motor housing.Footswitch•To focus using the footswitch: Left-hand switch (15) = up;right-hand switch (16) = down.•To change between fast- and fine focusing: Press left-hand and right-hand switches at the same time.•Focus positions cannot be stored by means of the footswitch.564781516ENHandswitch10Rotary knob for focusing11Red switch for alternating between coarse andfine focusing12Black switch for storing or cancelling up to five focus positions and for travelling to the stored positions Focusing with manual controlRespect the safety notes on pages 4 and 5.•Focus with the red rotary knob (10): Anticlockwise = down;clockwise = up.•Change between coarse (rapid) focusing and fine focusing by briefly pressing the red switch (11).•When the system is first switched on, the rapid focusing mode is active.Storing the focus position•Focus positions can be stored only by means of the manual control or the PC.• A maximum of five focus positions can be stored.•If a sixth focus position is stored, the one nearest to it will be cancelled.•Each focus position can be cancelled individually.•The system will travel to each of the individual focus positions in the sequence in which they were stored.•Switching off the system cancels all of the stored focus positions.̈Place the object beneath the objective.̈Set the lower stop (see page 9).̈Focus on the first point in the object.̈Press the black switch (12) for at least 1.5 seconds.The storage is confirmed by two short beeps.̈Focus on the second point in the object and store in the same way.̈Focus and store up to five points in the object.Travel to the stored focus positions̈Briefly press the black switch (12).To cancel the focus positions̈Keep the black switch (12) pressed until you hear two short beeps, a pause, and two long beeps.Focusing with the PC•In addition to a standard PC with RS232 interface, you need a PC interface kit from Leica.•The individual functions and commands are described in a separate user manual for the PC interface kit.10111210。
Leica Cerebro 样本跟踪系统用户手册说明书

Confi denceLeica Cerebro TM – Sample Tracking SystemPatient Safety. Laboratory Productivity. A Total Solution. Easy. Efficient. Accurate. Fully automated Leica HER2 FISH System for BOND TMContains PathVysion * FISH Probes supplied by Abbott Molecular Inc.Eliminate complexity and reduce human errors that may compromise patient care. The Leica HER2 FISH System uses familiar PathVysion LSI * HER2/CEP17 * FISH probes supplied by Abbott Molecular Inc, ready-to-use on the Leica BOND System. With fully automated staining plus a comprehensive training package, laboratories will find it easy to produce the consistent, high-quality stained slidesthat pathologists rely on.EasyReduced errors, lower repeat ratesStandardized, automated Leica BOND protocols for uniform staining consistency. Precise Leica BOND automation ensures reduced process variation todramatically reduce the number of repeats and save valuable hands-on time.Superior quality andstandardizationThe Leica HER2 FISH System is a complete, standardized diagnostic kit containing all the components required to run the entire test onthe Leica BOND System.Easy to useMany people are already familiar with the Leica BOND System and the PathVysion HER2 DNA Probe Kit by Abbott Molecular, the gold standard in HER2 FISH detection. The Leica HER2 FISH system contains FISH probes manufactured by Abbott Molecular, making adoption of automation straightforward.Leica HER2 FISH SystemWork smarter, increase efficiency and provide an improved service to your clinicians and customers. Leica BOND automation brings optimized workflow to HER2 FISH staining. With a complete system of automation, an optimized protocol and standardized ready-to-use reagents, the Leica HER2 FISH System provides the flexibility, reduced hands-on time and reduced turnaround time that today’s Lean workflow demands.EfficientManual HER2 FISHHands-on timeAutomation or reagent incubationTypical HER2 WorkflowDay 1Day 2The Leica HER2 FISH System can deliver next day HER2 results, up to 24 hours faster than current HER2 workflow.Patient cases can be continuously processed on the Leica BOND System without the delay required to batch cases as in manual HER2 FISH staining.Fully automated and fl exibleThree independent slide trays mean the Leica BOND System keeps your cases organized while providing the fl exibility for optimal workfl ow scheduling of your IHC and ISH tests.Maximize effi ciency, minimize costsFree your skilled staff for other high-value tasks by automating labor intensive FISHtechniques. The Leica HER2 FISH System brings time, workfl ow and ultimately cost effi ciencies to your laboratory.Lean Workfl owsGo ‘Lean’ without increasingresources. The Leica BOND System can improve the effi ciency of your laboratory with world-leading productivity and walk-away convenience. This allows you to deliver next day results for yourpathologists and clinicians.Leica HER2FISH SystemThe Leica HER2 FISH System provides a Total Solution. The system combines Abbott Molecular Inc's HER2 FISH probes with the industry-leading Leica BOND automated platform. The reduction in process variation delivers a high level of diagnostic confidence when combined with proprietary Leica HER2 FISH Control Slides.AccurateGold standard FISHtechnologyThe PathVysion LSI HER2/CEP17 FISH probes have a well established reputation, with an in-built CEP17 control for additional confidence in the quality of the result.Quickly deliver accurate resultsThe easy-to-read, single slide, dual probe fluorescent staining provides the highest quality result for the assessment of HER2 gene status.Diagnostic confidenceNow you can be confident you have done everything to deliver the accurate results needed foreffective patient care.Leica HER2 FISH SystemToTal IHC ReagenT SoluTIonS Leica Bond Oracle™ HER2 IHC SystemDeliver laboratory efficiency and diagnostic confidence with the Leica BOND Oracle HER2 IHC System, a complete solution for fully automated theranostic HER2 IHC staining.•efficient – eliminate waste, reduce errors and lower repeat rates • C onfident – accurate staining for the correct assessment and optimal treatment Novocastra Reference Range™The Reference Range is a group of superior products selected and organized to assist pathologists and scientists choose the idealantibodies for optimal tissue staining. Reference Range breast markers include:• Cytokeratin 20 (clone RW31)• estrogen Receptor (clone 6F11)• Ki67 antigen (clone MM1)• P53 Protein (Do-7) (clone Do-7)• P63 Protein (clone 7Jul)• Progesterone Receptor (clone 16)leICa bIoSySTeMSleica biosystems is a global leader in workflow solutions bringing histopathology laboratories and researchers the highest quality, most comprehensive product range in anatomical pathology. With complete histology systems featuring innovative automation, novocastra TMreagents and Surgipath ® consumables, leica biosystems offers the ideal product for each histology step and high-productivity workflow solutions for the entire laboratory.leica biosystems – an international company with a strong network of worldwide customer services:North America Sales and Customer Support North America800 248 0123Asia/Pacific Sales and Customer Support Australia 1800 625 286China +85 2 2564 6699Japan +81 3 5421 2804South Korea +82 2 514 65 43New Zealand 0800 400 589Singapore+65 6779 7823Europe Sales and Customer SupportFor detailed contact information about European sales offices or distributors pleasevisit our website.Leica Biosystems brings together products, qualityand support. Offering a complete solution that helps you advance workflows, enhancediagnostic clarity and deliver what really matters – better patient care.95.10245 Rev C ∙ 09/2012 ∙ Copyright © by leica biosystems newcastle ltd, newcastle, uK, 2012. Subject to modifications. leICa and the leica logo are registered trademarks of leica Microsystems IR gmbH.* PathVysion is a trademark of abbott Molecular Inc. all Rights Reserved. used under licenseThis product is not for sale in the uSa。
Leica MS50_TS50_TM50用户手册_v1.1.1_zh

LeicaMS50/TS50/TM50用户手册Version 1.1.1中文简介购买感谢您购买了MS50/TS50/TM50系列仪器。
本手册包括了重要的安全指南,可指导您安全地安装并使用仪器。
详情请参见"1 安全指南"。
请您在使用本产品之前仔细阅读用户手册。
仪器标识仪器的型号和序列号标注在仪器标签上。
请将仪器型号和序列号填写在下面。
当您需要与经销商或Leica Geosystems 授权的维修部门联系时,将会用到这些信息。
商标•Windows 是微软公司(Microsoft Corporation)在美国和其他国家的注册商标。
•蓝牙•SD 标志属于SD-3C,LLC 公司商标。
其他商标所有权归各自拥有者。
本手册的有效性本手册适用于 MS50/TS50/TM50仪器。
手册对于不同型号的区别会详加说明。
可用文档请参考以下MS50/TS50/TM50文档/软件的资源:•LeicaUSB 文档•https://myWorld@Leica Geosystems (https:// )提供许多服务,信息和培训材料。
通过直接访问 myWorld,您在任何时候(7天×24小时)都可以获取相关服务。
它能提高您的工作效率,保证您和您的仪器能及时从Leica Geosystems获取最新的信息。
类型:_______________序列号:_______________✓✓服务说明我的产品简单地将您和贵公司拥有的Leica Geosystems 产品添加进来。
查看您的产品的详细信息,购买附加选项或客户关怀包(CCPs),升级最新的软件并获取最新的文档。
我的维修查看您的产品在Leica Geosystems 维修中心的维修历史以及详细信息。
如果您的产品目前在Leica Geosystems 维修中心,那么可以查看它当前的维修状态以及预计维修截止日期。
服务说明我的支持提出关于您的产品的支持请求,它将会由您当地的Leica Geosystems支持团队来解决。
Leica激光扫描共聚焦显微镜快速操作手册

2
7
1 6
3 4
5
1 研究级显微镜 2 扫描头
8
10
9
11
3 防震台 4 EL6000荧光激发光源 5 显微镜控制器
6 遥控手轮
12 13
7 显示器 8 控制面板 9 键盘
10 电脑鼠标
14
11 电脑桌
12 CSU 13 电源控制 14 电脑主机
Leica TCS SP8正置,配备紧凑型光源组件(CSU)
物镜选择按钮 预览按钮 Live 拍摄按钮 叠加图像显示按钮,在使用两个或以上数量通道拍摄多色图像时,用于显示 所有通道叠加后的图像
7
2.3 在显微镜下观察样品
2.3.1 选择物镜:可通过显微镜主机右侧的物镜转换按钮,或软件中的“Objectives” 键进行选择。(如下图)(注意:有时,显微镜主机上的物镜转换按钮不能在干镜 和油镜或水镜之间切换,软件中都可以切换)
2
Leica TCS SP8基本系统组成
1 2
3 4
7 6
5
Leica TCS SP8倒置,配备灵活型光源组件(FSU)
8
9
10 11
13 12
14
1 研究级显微镜 2 扫描头 3 防震台 4 EL6000荧光激发光源 5 显微镜控制器 6 遥控手轮 7 显示器 8 控制面板 9 键盘 10 电脑鼠标 11 电脑桌 12 FSU 12.1 开机顺序 (硬件标号请参考前面的系统组成图)
(1)因为 FSU 和 CSU 硬件的电源控制 )不同,请分别按照如下步骤开机:
FSU 系统
CSU 系统
依次打开“PC Microscope”、“Scanner Power”、 先按电脑主机上的电源按钮启动电脑,再打
徕卡TM50和TS50比较表

比较内容
TCA2003/TCA1800
TS50超高精度全站仪
TM50精密监测机器人
徕卡自身对两种产品市场定位
新一代超高精度全站仪
新一代精密监测机器人
测角精度
1秒/0.5秒
0.5秒
1秒/0.5秒
角度测量方法
绝对编码,连续、对径测量
绝对编码,连续、四重角度探测,比对径测量精度提高30%
连续转动4000小时
可连续转动8000小时
可连续转动8000小时
旋转180°定位
用时5.4秒
仅用2.3秒
仅用2.3秒
图像测量系统
无
有,只适用于TS50I系列,500万像素
有,只适用于TM50I系列,500万像素,可以利用GEOMOS软件远程传输照片,远程执行拍照命令。
自动对焦
无
有,只适用于TS50I系列
基本精度1mm,1000米精度2mm
基本精度1mm,1公里精度2mm,2公里为4 mm
小视场技术
30', 1000米分辩距离为1.67米
1°30',100米分辩棱镜最小距离1.5米,1000米分辩距离为15米
28', 1000米分辩距离为1.5米;如果采用GEOMOS软件开启最小小视场技术,最小可以达到9.4′。
圆棱镜最大1000米,一般天气及环境达700米,恶劣天气及环境可测400米;360度棱镜最大可以达800米。
圆棱镜最大可达3000米,一般天气及环境2000米以上,恶劣天气及环境1200米以上;360度棱镜最大可以达1500米。
ATR测角精度
1秒
0.5秒
0.5秒
ATR精度
基本精度1mm,1000米精度2-3mm
- 1、下载文档前请自行甄别文档内容的完整性,平台不提供额外的编辑、内容补充、找答案等附加服务。
- 2、"仅部分预览"的文档,不可在线预览部分如存在完整性等问题,可反馈申请退款(可完整预览的文档不适用该条件!)。
- 3、如文档侵犯您的权益,请联系客服反馈,我们会尽快为您处理(人工客服工作时间:9:00-18:30)。
LeicaMS50/TS50/TM50用户手册Version 1.1.1中文简介购买感谢您购买了MS50/TS50/TM50系列仪器。
本手册包括了重要的安全指南,可指导您安全地安装并使用仪器。
详情请参见"1 安全指南"。
请您在使用本产品之前仔细阅读用户手册。
仪器标识仪器的型号和序列号标注在仪器标签上。
请将仪器型号和序列号填写在下面。
当您需要与经销商或Leica Geosystems 授权的维修部门联系时,将会用到这些信息。
商标•Windows 是微软公司(Microsoft Corporation)在美国和其他国家的注册商标。
•蓝牙•SD 标志属于SD-3C,LLC 公司商标。
其他商标所有权归各自拥有者。
本手册的有效性本手册适用于 MS50/TS50/TM50仪器。
手册对于不同型号的区别会详加说明。
可用文档请参考以下MS50/TS50/TM50文档/软件的资源:•LeicaUSB 文档•https://myWorld@Leica Geosystems (https:// )提供许多服务,信息和培训材料。
通过直接访问 myWorld,您在任何时候(7天×24小时)都可以获取相关服务。
它能提高您的工作效率,保证您和您的仪器能及时从Leica Geosystems获取最新的信息。
类型:_______________序列号:_______________✓✓服务说明我的产品简单地将您和贵公司拥有的Leica Geosystems 产品添加进来。
查看您的产品的详细信息,购买附加选项或客户关怀包(CCPs),升级最新的软件并获取最新的文档。
我的维修查看您的产品在Leica Geosystems 维修中心的维修历史以及详细信息。
如果您的产品目前在Leica Geosystems 维修中心,那么可以查看它当前的维修状态以及预计维修截止日期。
服务说明我的支持提出关于您的产品的支持请求,它将会由您当地的Leica Geosystems支持团队来解决。
查看您的支持历史,如果您需要参考以前的支持请求,可以查看其详细信息。
我的培训增强您对Leica Geosystems家族产品的了解—信息,知识,培训。
学习最新的在线培训材料或下载关于您的产品的培训材料。
获取关于您产品的最新信息并申请参加在您国家所开展的研讨班或培训课程。
目录在本手册中章节页码1安全指南61.1概述61.2使用范围61.3使用限制71.4职责71.5使用中存在的危险71.6激光类别91.6.1概述91.6.2测距部分,以及有棱镜测距部分91.6.3测距部分,以及有棱镜测距部分111.6.4望远镜相机自动对焦121.6.5自动目标照准ATR131.6.6超级搜索PS131.6.7电子导向光EGL141.6.8激光对中器141.7电磁兼容性 EMC161.8FCC声明,适用于美国172系统描述202.1系统组成202.2系统概念222.2.1软件概念222.2.2电源概念232.2.3数据存储概念232.3仪器构成243用户界面263.1键盘263.2操作273.3望远镜相机自动对焦274操作284.1为TS屏幕贴膜284.2连接到个人电脑294.3电源功能314.4电池324.4.1操作324.4.2TS仪器电池324.4.3SmartAntenna(智能天线)电池334.5使用存储设备344.6LED指示灯364.7正确观测注意事项395检查 & 校准405.1概述405.2准备工作415.3组合校正 (l, t, i, c, ATR和望远镜相机)415.4横轴倾斜误差校准(a)435.5校准仪器和基座的圆水准器445.6校准棱镜杆上的圆水准器445.7检查仪器激光对中器455.8三脚架维修45 6保养与运输466.1运输466.2存放466.3清洁与干燥476.4维护保养47 7技术参数487.1角度测量487.2距离测量(棱镜模式)487.3距离测量(无棱镜模式)507.4距离测量 - 长测程(LO模式)517.5自动目标照准ATR517.6扫描537.7超级搜索PS547.8广角相机547.9望远镜相机547.10SmartStation(超站仪)557.10.1SmartStation(超站仪)精度557.10.2SmartStation(超站仪)尺寸557.10.3SmartAntenna(智能天线)技术参数577.11遵循国家规定597.11.1MS50/TS50/TM50597.11.2RadioHandle(电台手柄)597.11.3GS08plus607.11.4GS12607.11.5GS14617.11.6GS15627.11.7SLR1,SLR2,SATEL SATELLINE-3AS627.11.8SLR5, SATEL SATELLINE M3-TR1637.11.9SLR3-1,SLR3-2,Pacific Crest ADL647.11.10SLG1,Telit UC864-G647.11.11SLG2,CINTERION MC75i657.11.12SLC1(美国),SLC2(美国)CDMA Telit CC864-DUAL667.12仪器常规技术参数667.13比例改正697.14归算公示71 8软件许可协议73索引741安全指南1.1概述说明下面的安全说明规定了产品责任人、使用者的责任,以及如何预防和避免危险操作。
产品责任人务必确保所有仪器使用者知道并遵守这些规定或说明。
关于警告信息警告信息是仪器安全的基本理念的必要部分。
当出现任何危害或危险的情况下时,仪器会提示。
警告信息...•使用户注意关于使用该产品有关的直接和间接的危害。
•包含一般的行为规则。
所有的安全说明和安全信息,都是为用户的安全着想,应严格遵守并遵循! 因此,手册对于任何执行任务的人都是必要的。
危险,警告,小心和注意是标准化的信号词关于人身伤害和财产损失的危害和风险识别水平。
为了您的安全,阅读并完全理解不同的关键词和它们的定义是必要的。
补充安全信息符号可以被放置在一个警告消息和补充文本之中。
1.2使用范围谨慎使用•测量水平角和垂直角。
•测量距离。
•记录观测值。
•拍摄和保存图像。
•自动目标搜索,识别及跟踪。
•可见的方向和竖轴照准。
•该产品可以进行远程控制。
•与外部设备之间的数据通讯。
•接收GNSS 卫星的载波相位和码信号,记录原始数据并计算坐标。
•利用多种GNSS 测量技术完成测量任务。
•记录GNSS 及与点位有关的数据。
•使用软件进行计算。
类型描述ƽ危险表示潜在的危险情况,如果不避免,将导致死亡或严重伤害。
ƽ警告表示潜在的危险情况或操作不当,如果不避免,可能会导致死亡或严重伤害。
ƽ小心表示潜在的危险情况,如果不避免,可能导致轻微或中等程度的伤害或操作不当。
注意表示潜在的危险情况中,如果不避免,可能会导致明显的材料,金钱和环境的破坏或错误操作。
为了正确并有效的使用产品,在操作过程中需要谨记并严格遵守操作规则。
使用禁忌•不按手册要求使用仪器。
•超出仪器的用途及范围•使仪器安全系统失效。
•无视危险警告。
•在特定的许可范围外,用工具如螺丝刀拆开仪器。
•修理或改装仪器。
•误操作以后继续使用仪器。
•仪器有明显的损坏和缺陷仍继续使用。
•未经Leica Geosystems事先明确的同意而使用其它厂商生产的附件。
•作业场地安全措施不够。
•望远镜直接对准太阳。
1.3使用限制环境条件仪器对环境条件的要求与人所能适应的环境条件相似:不适合在有腐蚀,易燃易爆的场合使用。
ƽ危险在危险地区、与电力装置接近的地区或类似地区工作时,产品负责人一定要预先与当地的安全主管机构和安全专家取得联系。
1.4职责产品制造商Leica Geosystems AG, CH-9435 Heerbrugg,在下文中称为Leica Geosystems,对所提供的产品,包括用户手册和原装附件,在安全的使用条件下承担责任。
负责仪器的人员负责仪器的人员有以下职责:•了解仪器的安全指南和用户手册指南。
•确保按照指南操作仪器。
•熟悉当地的安全条例和意外防护措施。
•当仪器和程序不安全时立即通知Leica Geosystems。
•确保遵循国家的法律,条例和使用条件,例如,电台传输,激光等等。
1.5使用中存在的危险ƽ小心仪器被碰撞、误操作、改装、长期保存、运输后,应检查是否会出现不正确的测量结果。
预防:定期检查仪器,或按照用户手册上的指示进行户外定期检校,尤其在不正常使用仪器或重要测量任务的前后更应如此。
ƽ危险由于存在触电的危险,使用棱镜杆或其他长杆在电气设备如通电电缆或电气化铁路附近工作是十分危险的。
预防:与电力设施保持一段安全距离。
如果一定要在此环境下工作,那么请与这些电气设备的安全负责部门联系,遵从他们的指导。
注意当使用远程控制模式时,可能会测量到无关的目标。
预防:当在遥控模式时,请经常检查测量结果。
ƽ小心如用仪器望远镜直接观测太阳,因为望远镜的放大系统的放大作用,会损伤眼睛和仪器。
预防:不要用望远镜直接对准太阳。
ƽ警告在动态测量应用中,若使用者没有注意周围的环境条件,就会存在发生事故的危险,如在放样过程中,周围有障碍物,土方开挖或交通车辆。
预防:产品负责人须确保所有用户都知道可能存在的危险。
ƽ警告测量场地如果没有足够的安全设施和标志,可能会引发危险的情况,如在公路上、建筑工地或工业安装现场等。
预防:始终确保作业场地的安全。
时刻遵守安全及事故预防管理章程和交通规则。
ƽ小心如果附件同仪器连接不牢固或设备遭受物理的冲击(如刮风,摔落),那么可能导致设备损坏或人员受伤。
预防:安装仪器时,确保附件正确、合适、安全的固定到位。
避免仪器受到机械性的损坏。
ƽ警告如果仪器与附件一起使用,例如对中杆等,会增加雷击的风险。
预防:雷雨天不要进行野外测量。
ƽ小心在电池的运输或处理过程中,不适当的机械影响可能会引发火灾。
预防:在运输或对电池作处理之前,将电池的电放掉。
在电池运输时,产品责任人必须遵守国内、国际规章及准则。
在运输前,请联系当地的承运人或运输公司。
ƽ警告强机械压力,高温或掉进液体里,可能导致电池泄漏、着火或爆炸。
预防:保护电池免受机械撞击和远离高温环境。
不要摔落电池或将电池浸入液体中。
ƽ警告如果电池短路,如接触到珠宝,钥匙,金属片或金属,电池可能过热损坏或起火,例如将电池装于口袋中时。
预防:确保电池末端不要和金属物接触。
ƽ警告如果仪器设备使用不当,会出现以下情况:•如果聚合材料的部件被燃烧,将产生有毒气体,可能有损健康。
•如果电池受损或过热,会引起燃烧,爆炸,腐蚀及污染环境。
•若不负责任地处理产品,在违反规章制度的情形下让未经授权的人使用仪器,从而使他们或第三方人员面临遭受严重伤害的风险并使环境容易遭受污染。