Microsoft Outlook 2010 培训 使用条件格式管理您的邮件及更多内容
Outlook 2010 的最佳做法
Outlook 2010 中的类别可让您以多种不同的方法管理邮件。有三种主要类别类型是我们建议您创建的: 项目(可以包含人员) 主题 位置或活动
3/19
类别不是该系统必需的方面,但如果您能专心使用它们,它们将使您更加得心应手。例如,他们可以帮助您更方便 地确定您现在可以做什么,并且能帮助您将类似的任务组合在一起,以便您一次性完成这些任务。
有关如何设置建议布局的详细信息,请参阅常见问题部分。
文件夹
最佳做法是: 有一个收件箱来容纳您需要加工(处理)的邮件。收件箱用来接收直接发送给您的邮件或需要您阅读的重要邮 件。
如果您收到往来于不同人员之间的许多邮件,请更改为“对话”视图。否则,请使用“日期”排列方式(默认排列方 式)ቤተ መጻሕፍቲ ባይዱ使用自动格式规则将所有仅发送给您的邮件标记为蓝色。
Outlook 2010 是一个能帮助您管理电子邮件、日历、联系人和任务的工具。因此,不论是在您的通信还是您的时 间管理中,它都占据着中心位置。为充分利用 Outlook 2010,我们提出了一些基本原则:
减少您阅读邮件的位置。通过使用一系列规则将您需要阅读的所有邮件筛选至一个位置 (收件箱)。 传递一些邮件。使用规则将您需要阅读的邮件发送到您的收件箱,然后让其余邮件原封不动的流入“联系人 组”(或通讯组列表)文件夹 (“联系人组”文件夹)。您不需要 (在大批量的情况下也不能)阅读每封发送给您 的邮件。只有重要的邮件才应进入您的收件箱。保留可能会是很有用的剩余邮件 (例如,当您遇到一个问题 时)。 减少您手动归档邮件的位置。通过依靠搜索查找邮件来减轻归档造成的脑力负担。 处理邮件时要注意四点。阅读您的邮件时,决定是否要:
默认标记
最佳做法是将“快速单击”标志设置为“今天”(这是默认做法)。
Outlook使用规则管理邮件
本文介绍什么是规则以及如何利用规则使“收件箱”中的活动保持有序状态和最新状态。
本文内容∙规则如何帮助您管理邮件∙从模板创建规则∙从头开始创建规则∙从邮件创建规则∙定期而不是始终运行规则∙服务器端的规则和客户端专用的规则∙“送达”回执、投票响应和外出通知∙会议要求、任务要求和文档∙通讯组列表∙将邮件转发到组织外规则如何帮助您管理邮件所谓规则,就是 Microsoft Outlook 对满足规则中指定的条件的正在接收或已发送的邮件自动执行的操作。
您可以通过使用“规则和通知向导”选择多个条件和操作。
规则仅对未读邮件起作用,对已读邮件就会失效。
规则分为两个常规类别:组织和通知。
“规则和通知向导”包含最常用的规则的模板。
∙保持有序状态这些规则帮助您对邮件归档和执行后续操作。
例如,您可以创建这样一个规则:对于特定发件人(如“谢晓兵”)发来的“主题”行中包含“销售”的邮件,将其标记为后续处理、归类为“销售”并移至名为“谢晓兵的销售邮件”的文件夹中。
∙保持最新状态这些规则在您收到特定邮件时以某种方式通知您。
例如,您可以创建这样一个规则:当您收到来自一个家庭成员的邮件时,自动向您的移动电话发送通知。
从空规则开始这些是从头开始创建的规则。
图 1“规则和通知向导”包含几个预定义的规则,称为模板。
例外您可以将特殊情况下的例外添加到规则中,例如当邮件标有后续操作或标记为高重要性时。
如果满足指定的任一例外,则不会对邮件应用规则。
从模板创建规则1.在“导航窗格”中,单击“邮件”。
2.在“工具”菜单上,单击“规则和通知”。
3.如果您有多个电子邮件帐户,请在“将更改应用于此文件夹”列表中,选择所需的“收件箱”。
4.单击“新建规则”。
5.在“步骤1: 选择模板”下,从“保持有序状态”或“保持最新状态”模板集合中选择所需的模板。
6.在“步骤2: 编辑规则说明”下,单击某个带下划线的值。
例如,单击“个人或通讯组列表”链接时,将打开通讯簿。
☆Microsoft Office Professional Outlook 2010教程
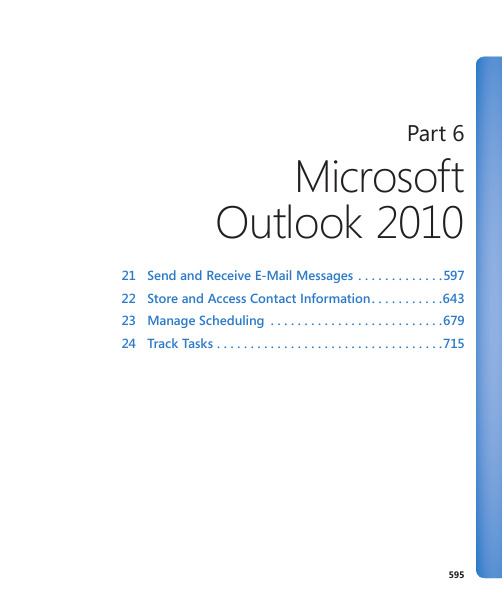
Part 6MicrosoftOutlook 201021 Send and Receive E-Mail Messages (597)22 Store and Access Contact Information (643)23 Manage Scheduling (679)24 Track Tasks (715)595Chapter at a GlanceCreate and sendmessages, page 598Attach files tomessages, page 615View messages andmessage attachments,page 618View message participantinformation, page 630597 21 Send and Receive E-Mail MessagesIn this chapter, you will learn how to✔ Create and send messages.✔ Attach files to messages.✔ View messages and message attachments.✔ Configure Reading Pane behavior.✔ View message participant information.✔ Respond to messages.Although Microsoft Outlook 2010 helps you manage your calendar, contacts, tasks, and notes, the primary reason most people use Outlook is to send and receive e-mail mes-sages. Over the past decade, e-mail (short for electronic mail ) has become an accepted and even required form of business communication. And of course, many people use e-mail to keep in touch with friends and family, either from work or from home. Outlook makes it easy to connect to multiple e-mail accounts, either on a business network or over the Internet, and provides all the tools you need to send, respond to, organize, filter, sort, find, and otherwise manage e-mail messages.Tip In this chapter and throughout this book, for expediency’s sake, we sometimes refer to e-mail messages simply as messages . When referring to other types of messages we use full descriptions such as instant messages or text messages .When sending messages from Outlook, you can format the text to suit your preferences, and include attachments such as documents, workbooks, and images. You can alsopersonalize your message in these ways:● Embed images, business graphics, and automatic signatures.● Set message options such as voting buttons, importance, sensitivity, and reminders.● Request electronic receipts when a message is delivered or opened.See Also For information about Outlook 2010 features not covered in this book, refer to Microsoft Outlook 2010 Step by Step by Joan Lambert and Joyce Cox (Microsoft Press, 2010).598 Chapter 21 Send and Receive E-Mail MessagesOutlook 2010 has several fancy new features that make it easy to display and trackinformation about the people you correspond with. These features include presenceicons that indicate whether a person is currently online, contact cards that appearwhen you point to a name in an e-mail message, and the People Pane at the bottomof the message window.In this chapter, you’ll create, send, and view messages, with and without attachments.You’ll view information about message participants. Then you’ll reply to and forwardmessages.Practice Files Before you can complete the exercises in this chapter, you need to copythe book’s practice files to your computer. The practice files you’ll use to complete theexercises in this chapter are in the Chapter21 practice file folder. A complete list ofpractice files is provided in “Using the Practice Files” at the beginning of this book.Important You’ll use the messages you create in this chapter as practice files for exercises inlater chapters of this book.Creating and Sending MessagesCreating an e-mail message is a relatively simple process. The only information that isabsolutely required is the recipient’s e-mail address; however, you will usually provideinformation in the following fields:●To Enter the e-mail address of the primary message recipient(s) in this field.This is the only field that is absolutely required to send a message.●Subject Enter a brief description of the message contents or purpose in this field.The subject is not required, but it is important to provide information in thisfield, both so that you and the recipient can identify the message and so thatthe message isn’t blocked as suspected junk mail by a recipient’s e-mail program.Outlook will warn you if you try to send a message with no subject.●Message body Enter your message to the recipient in this field, which is a largetext box.You can include many types of information including formatted text, hyperlinks,and graphics in the message body.Creating and Sending Messages 599 Addressing MessagesAddressing an e-mail message is as simple as inserting the intended recipient’s e-mail address into an address box in the message header of a message composition window. You can enter e-mail recipients into any of three address boxes:●To This address box is for primary message recipients. Usually, these are the peopleyou want to respond to the message. Each message must have at least one address in the To box.●Cc This address box is for “courtesy copy” recipients. These are usually people youwant to keep informed about the subject of the e-mail message but from whom you don’t require a response.●Bcc This address box is for “blind courtesy copy” recipients. These are people youwant to keep informed but whom you want to keep hidden from other message recipients. Bcc recipients are not visible to any other message recipients and there-fore aren’t included in message responses unless specifically added to one of the address boxes in the response message.Tip The Bcc address box is not displayed by default. You can display it in the message header by clicking the Bcc button, located in the Show Fields group on the Options tab of the message composition window.You can insert an e-mail address into an address box in the following ways:●Type the entire address.●Type part of a previously used address and then select the address from a list.●Click the address box label to display an address book from which you can selectone or more addresses.See Also For information about address books, see “Saving and Updating ContactInformation” in Chapter 22, “Store and Access Contact Information.”Tip Responding to a received message automatically fills in one or more of the address boxes in the new message window. For information, see “Responding to Messages” later in this chapter. If your e-mail account is part of an Exchange network, you can send messages to another person on the same network by typing only his or her e-mail alias—for example, joan; the at symbol (@) and domain name aren’t required. If you type only the name of a per-son whose e-mail address is in your address book, Outlook associates the name with the corresponding e-mail address, a process called validating, before sending the message. Keyboard Shortcut Press Ctrl+K to force Outlook to validate addresses.600 Chapter 21 Send and Receive E-Mail MessagesIf you type only a name and Outlook cannot find that person’s e-mail address in youraddress book, when you send the message, Outlook prompts you to select an addressbook entry or provide a full e-mail address.Depending on how you enter a message recipient’s name or e-mail address into anaddress box, Outlook either validates the name or address immediately (if you chose itfrom a list of known names) or validates it when you send the message. The validationprocess (also known as resolving) for each name or address has one of two results:●If Outlook successfully resolves the name or address, an underline appears belowit. If the name or address matches one stored in an address book, Outlook replacesyour original entry with the content of the Display As field in the contact record,and then underlines it.See Also For information about contact record fields, see “Saving and Updating ContactInformation” in Chapter 22, “Store and Access Contact Information.”●If Outlook is unable to resolve the name or address, the Check Names dialog boxopens, asking you to provide additional information.The Check Names dialog box might display No Suggestions, names that match the entry,or contact options saved in the contact record for the entered name.In the Check Names dialog box, you can do one of the following:❍Select from the suggested options.❍Click Properties to learn more about the selected option.❍Click Show More Names to display your address book.❍Click New Contact to create a new contact record in your default addressbook, directly from the dialog box.Creating and Sending Messages 601 Troubleshooting Message AddressingOutlook 2010 includes many features intended to simplify the process of addressing messages to recipients. As with any tool, these features can sometimes be more difficult to use than you’d like. In this section, we discuss troubleshooting tips for some common problems.Troubleshooting the AutoComplete Address ListAs you type a name or an e-mail address into the To, Cc, or Bcc box, Outlook displays matching addresses in a list below the box. You can insert a name or address from the list into the address box by clicking it or by pressing the arrow keys to select it and then pressing Tab or Enter.From time to time, you might find that the address list contains incorrect e-mail addresses—for example, if you have previously sent a message to an incorrect e-mail address, or if a person changes his or her e-mail address. If you don’t remove the incorrect address from the list, it can be easy to mistakenly accept Outlook’s suggestion and send your message to the wrong address.To clean up the AutoComplete Address list:1. In the list, point to the name or address you want to remove.2. Click the Delete button (the X) that appears to the right of the name or address.Troubleshooting Multiple RecipientsBy default, Outlook requires that you separate multiple e-mail addresses with semicolons. If you separate multiple addresses with another character such as a space or comma, or by pressing Enter, Outlook treats the addresses as one address and displays an error message when you attempt to send the message.You can instruct Outlook to accept commas as address separators, in addition to semicolons. To do this, follow these steps:1. In the Outlook program window or any item window, display the Backstage view,and then click Options.2. In the left pane of the Outlook Options dialog box, click Mail.3. On the Mail page, scroll to the Send Messages section.4. Select the Commas Can Be Used To Separate Multiple Message Recipients checkbox, and then click OK.602 Chapter 21 Send and Receive E-Mail MessagesTroubleshooting the Address BookBy default, Outlook first searches your Global Address List (the corporate directory pro-vided with an Exchange account, if you’re working with one), then searches the contactrecords stored in the Contacts module of your default account and then searches theSuggested Contacts list. If an e-mail address isn’t located in one of those locations,Outlook may search other address books such as those containing contact recordsstored with secondary e-mail accounts or custom address books that you create.If you have multiple address books, particularly multiple address books associated withmultiple accounts, Outlook does not, by default, search all of the address books andtherefore might not locate an e-mail address you have saved.To change the order in which Outlook searches the address books, or to add addressbooks to the search list, follow these steps:1. On the Home tab of the Outlook program window, in the Find group, click AddressBook.2. In the Address Book window, on the Tools menu, click Options.The Addressing dialog box opens.From the Addressing dialog box, you can designate the order in which Outlook searches forcontacts in existing address books.Creating and Sending Messages 6033. In the Addressing dialog box, click Custom. Then do any of the following:❍To search additional address books, click Add. Then in the Add Address List dialog box, click the address list you want to add, click Add, and click Close.❍To change the order in which Outlook searches the address books in the list, click an address book and then click the Move Up or Move Down button.❍If you’re uncertain which address book is represented by a list entry, click the address book and then click Properties to display the account name andfolder name of the address book.4. In the Addressing dialog box, click OK, and then close the Address Book window. Entering ContentAs long as you have an Internet connection, you can send e-mail messages to people within your organization and around the world by using Outlook, regardless of the type of e-mail account you have. Outlook can send and receive e-mail messages in three message formats:●Hypertext Markup Language (HTML) Supports paragraph styles (including num-bered and bulleted lists), character styles (such as fonts, sizes, colors, weight), and backgrounds (such as colors and pictures). Most (but not all) e-mail programs sup-port the HTML format—those that don’t display HTML messages as Plain Text.●Rich Text Format (RTF) Supports more paragraph formatting options than HTML,including borders and shading, but is compatible only with Outlook and Microsoft Exchange Server. Outlook converts RTF messages to HTML when sending themoutside of an Exchange network.●Plain Text Does not support the formatting features available in HTML and RTFmessages but is supported by all e-mail programs.E-mail message content isn’t limited to simple text. You can create almost any type of content in an e-mail message that you can in a Word document. Because Outlook 2010 and Word 2010 share similar commands, you might already be familiar with processes for creating content such as lists and tables.You can personalize your messages by using an individual font style or color and by inserting your contact information in the form of an e-mail signature or business card. (You can apply other formatting, such as themes and page backgrounds, but these won’t always appear to e-mail recipients as you intend them to, and they can make your com-munications appear less professional.)604 Chapter 21 Send and Receive E-Mail MessagesYou can format the text of your message to make it more readable by including headings,lists, or tables, and you can represent information graphically by including charts, pictures,clip art, and other types of graphics. You can attach files to your message and link to otherinformation, such as files or Web pages.For the purposes of this book, we assume that you know how to enter, edit, and formatcontent by using standard Microsoft Word techniques, so we don’t discuss all of them inthis book. We demonstrate many of these techniques within the step-by-step exercises,though, so keep an eye out for any new features that you aren’t yet familiar with.See Also For extensive information about entering and editing content and about formattingcontent by using character and paragraph styles, Quick Styles, and Themes, refer to MicrosoftWord 2010 Step by Step, by Joyce Cox and Joan Lambert (Microsoft Press, 2010).Tip You can also personalize a message by having Outlook add a predefined e-mail signature.You can specify different signatures for new messages and for replies and forwarded messages.For example, you might want to include your full name and contact information in the signaturethat appears in new messages, but only your first name in the signature that appears in repliesand forwarded messages.Saving and Sending MessagesAt regular intervals while you’re composing a message, Outlook saves a copy of themessage in the Drafts folder. This is intended to protect you from losing messagesthat are in progress.If you close a message composition window before sending the message, Outlook prompts youto save a draft or to save or discard the existing draft.You can save a message draft at any time by clicking the Save button on the QuickAccess Toolbar in the message window.。
Outlook邮件规则设置

Outlook邮件规则设置在日常工作和个人生活中,我们每天都会收到大量的电子邮件,这使得我们难以及时处理重要邮件和过滤垃圾邮件。
为了解决这个问题,我们可以使用Outlook的邮件规则设置功能。
本文将详细介绍如何设置Outlook邮件规则以提高我们的工作效率和邮件管理能力。
一、什么是Outlook邮件规则设置?Outlook邮件规则设置是一种自动化处理电子邮件的功能,它可以根据预设条件和规则,对邮件进行自动分类、标记、转发、删除等操作。
通过使用邮件规则设置,我们可以有效地管理和筛选电子邮件,节省大量的时间和精力。
二、如何设置Outlook邮件规则?1. 打开Outlook软件,点击菜单栏上的“文件”选项。
2. 在“文件”选项中,选择“新建规则”。
3. 在弹出的“规则向导”窗口中,可以选择“开始撰写规则”或“从规则模板开始”。
4. 如果选择“开始撰写规则”,我们可以根据自己的需求选择“从空白规则开始”或“在现有规则基础上构建”。
5. 如果选择“从规则模板开始”,我们可以根据不同的模板设置邮件规则,如自动分类、标记、转发等。
6. 根据选择的方式,按照规则向导的指示,完成相关设置,包括选择条件、执行操作、添加例外等。
7. 点击“下一步”并按需对规则进行自定义设置,并确定应用此规则的邮件夹和时间范围。
8. 最后,命名和保存设置好的邮件规则,并点击“完成”按钮。
三、常见的Outlook邮件规则设置方法1. 邮件分类规则通过设置邮件分类规则,我们可以将不同类型的邮件自动分类至特定文件夹中,例如将工作邮件分类至“工作”文件夹、将私人邮件分类至“私人”文件夹等。
2. 邮件标记规则邮件标记规则可根据特定条件为邮件添加标记,比如将高优先级的邮件标记为红色、将重要的邮件标记为黄色等,以便我们更快地辨认和处理重要邮件。
3. 邮件转发规则通过设置邮件转发规则,我们可以将特定类型的邮件自动转发至指定的人员或部门。
这在团队协作和工作流程中非常实用,可以保证邮件的及时处理和转达。
Outlook2010邮件客户端操作说明
Outlook 2010日常使用-共享日历
除了编制日历,管理自己的工作时间。还可以将自己的日历共享给自己的同事,让别 人了解你的忙闲状态或工作内容:
Outlook 2010日常使用-共享日历
设置好共享人后发送即可:
Outlook 2010日常使用-共享日历
收件人收件箱中会收到共享日历的邮件,点击【打开此日历】:
邮件管理-删除邮件
选中要删除的邮件,点击【删除】。
邮件删除后,会进入【已 删除邮件】文件夹中:
邮件管理-删除邮件
在【已删除邮件】中,再次删除该邮件时,该邮件会被彻底删除。
确定永久删除:
Outlook 2010日常使用-编制日历
选择【日历】,在指定日期双击鼠标创建约会。
Outlook 2010日常使用-编制日历
建立归档文件:
Outlook 2010配置项-本地归档历史邮件
配置自动存档:
Outlook 2010配置项-本地归档历史邮件
配置自动存档规则:
1.勾选此项,并设置存档执行周期 2.不用勾选此项 4.勾选此项 3.不能勾选此项 5.勾选此项 6.配置归档多久前的邮件
7. 归档邮件存放位置
8.不能勾选此项
Outlook 2010日常使用-密送及延时邮件
• 密件抄送及延时传递:邮件编辑窗口-【选项】
Outlook 2010日常使用-邮件签名 • 邮件签名
Outlook 2010日常使用-标记和分类邮件
在日常工作中,收到邮件时,可能会在将来某个时间再去处理,为了避免到时候 忘记或不方便查找,我们可以对邮件进行分类和标记,指定一项任务与该邮件进 行对应,来提醒自己。 右键点击邮件右侧的图标 ,来标记邮件,选择将来处理的日期或提醒。
outlook2010使用技巧

outlook2010使用技巧Outlook 2010 是一款非常实用的电子邮件客户端软件,提供了众多的使用技巧,帮助用户更高效地管理和处理邮件。
下面是一些常用的 Outlook 2010 使用技巧:1. 快速创建新邮件:按下Ctrl+Shift+M键可以快速创建新邮件,省去了鼠标操作的步骤。
2. 使用快速步骤:Outlook 2010 提供了“快速步骤”功能,可以将常用的邮件处理操作添加到快速访问工具栏中,方便快速处理邮件。
3. 自动回复:在长时间离开电脑时,可以设置自动回复功能,自动向发送邮件的人回复一条信息,告知自己的不在电脑旁边。
4. 搜索邮件:Outlook 2010 提供了强大的搜索功能,可以根据关键词快速找到相关的邮件。
在搜索框中输入关键词即可进行搜索。
5. 使用快捷键:学会使用一些常用的快捷键可以提高效率,比如Ctrl+R可以回复邮件,Ctrl+F可以转发邮件,Ctrl+N可以创建新邮件等。
6. 使用分类:可以给不同类型的邮件添加不同的分类,方便后续查找和处理。
可以通过右键单击邮件,在“标记”菜单中进行分类操作。
7. 创建规则:可以根据邮件的特定条件,自动进行标记、移动或者删除等操作。
在“文件”菜单中选择“管理规则和通知”就可以创建规则。
8. 转发邮件:可以转发邮件给其他人,以便其他人可以及时了解邮件内容。
可以选择邮件,在工具栏中点击“转发”按钮进行转发操作。
9. 添加邮件签名:添加个性化的邮件签名,可以在每封邮件的末尾展示你的个人信息或者公司信息。
可以在“文件”菜单中的“选项”中找到邮件签名选项。
10. 设置邮件提醒:可以设置邮件提醒功能,当有新的邮件到达时会弹出提醒框提醒你查看新邮件。
可以在“文件”菜单中的“选项”中找到邮件提醒选项。
Outlook 2010 还提供了很多其他实用的功能和技巧,帮助用户更加高效地处理邮件。
通过学习和掌握这些使用技巧,可以让我们更好地利用 Outlook 2010 来管理和处理邮件。
第23章--使用Outlook-2010收发邮件ppt课件(全)
使用OUTLOOK 2010收发邮件
第23章 使用Outlook 2010收发邮件ppt课件(全)
学习目标
OUTLOOK 2010是一个桌面信息管理系 统,通过该软件可以收发电子右键、管理 联系人信息、分配任务、记日记、安排日 程等。另外,还可能够利用它更好的管理 时间和信息,进行跨边界链接,跟踪活动、 打开和查看文档等。
第23章 使用Outlook 2010收发邮件ppt课件(全)
23.1.1 添加帐户
双击桌面上的Outlook 2010启动图标,如图23-1所示,启动Outlook 2010程序的过程中,将弹出“Outlook 2010”启动对话框。
单击“下一步”按钮,在弹出的界面中选择“是”单选项。 单击“下一步”按钮,在“添加新帐户”对话框中输入电子邮件帐户
第23章 使用Outlook 2010收发邮件ppt课件(全)
23.2 收发电子邮件
与普通邮件一样,电子邮件也需要有收、发信人的地址、信件等内容, 但是电子邮件的收发比普通邮件更简便和快捷。
第23章 使用Outlook 2010收发邮件ppt课件(全)
23.2.1 创建电子邮件
选择“开始”选项卡,单击“新建”选项组中的“新建电子邮件”按 钮,打开“未命名-邮件”窗口。然后,在该窗口中输入“收件人地 址”、“主题”及要发送的邮件内容,即可创建电子邮件。
在打开的“签名和信纸”对话框中单击“新建”按钮,打开“新签名” 对话框,然后输入新签名的名称并确定,在“签名和信纸”对话框中 的“编辑签名”文本框中输入签名的内容,然后进行确定即可。
第23章 使用Outlook 2010收发邮件ppt课件(全)
microsoftoutlook2010设置方法
microsoftoutlook2010设置方法第一篇:microsoft outlook2010 设置方法Microsoft Outlook2010 设置方法?1、打开Microsoft Outlook2010,点击“文件”-->“信息”-->“添加帐户”;2、弹出如下图的对话框,选择“电子邮件帐户”,点击“下一步”;3、选择“手动配置服务器设置或其他服务器类型”,点击“下一步”;4、选中“Internet 电子邮件”,点击“下一步”;5、按页面提示填写帐户信息:帐户类型选择:如果选择:POP3接收邮件服务器(I)的输入框中输入: 发送邮件服务器(SMTP)(O)后的输入框中输入6、点击“其他设置”后会弹出对话框(如下图),选择“发送服务器”,勾选“我的发送服务器(SMTP)要求验证”,并点击“确定”;7、回到刚才的对话框,点击“下一步”;8、在弹出的“测试帐户设置对话框”,如出现下图情况,说明您的设置成功了;9、在弹出的对话框中,点击“完成”。
第二篇:PPT 动画设置方法PPT 动画制作技巧1.设置进入动画设置进入动画2.设置动画播放方式设置动画播放方式3.设置退出动画设置退出动画4.自定义动画路径自定义动画路径5.调整动画顺序调整动画顺序6.设置背景音乐设置背景音乐7.设置动作按钮设置动作按钮8.设置强调动画设置强调动画9.设置字幕式动画设置字幕式动画 10.设置超级链接设置超级链接1.设置“进入”动画动画是演示文稿的精华,在画中尤其以“进入”动画最为常用。
动画是演示文稿的精华,在画中尤其以“进入”动画最为常用。
下面我们以设置“渐变式缩放”的进入动画为例,面我们以设置“渐变式缩放”的进入动画为例,看看具体的设置过程。
1)选中需要设置动画的对象,执行“幻灯片放映→自定义动画” 选中需要设置动画的对象,执行“幻灯片放映→自定义动画” 选中需要设置动画的对象命令,展开“自定义动画”任务窗格。
第六章 Outlook 2010应用软件
第六章 Outlook 2010应用软件
添加邮件账户: ➢ 选择“文件”选项卡,在左窗格中单击“ 信息”命令,在
中间窗格的“帐户信息”栏中单击“添加账户” 按钮。 ➢ 在“添加新账户”对话框中,选中 “电子邮件账户”单选
项,单击“下一步”按钮。 ➢ 在对话框中输入姓名、电子邮件地址、密码等信息,单击
第六章 Outlook 2010应用软件
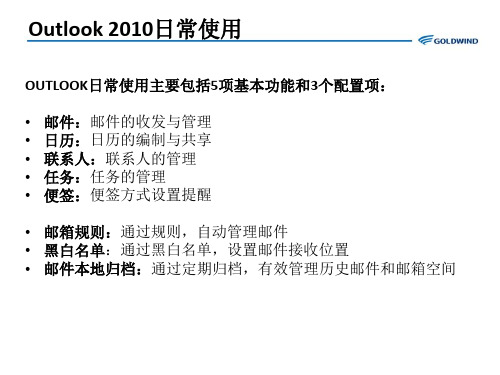
6.1 管理邮件账户 6.2 管理联系人 6.3 电子邮件的收发与管理 6.4 管理日常事务
第六章 Outlook 2010应用软件
6.1 管理邮件账户
➢ 使用Outlook发送和接收电子邮件之前,首先需要 向其中添加电子邮件帐户,这里的帐户就是指个 人申请的电子邮箱,申请好电子邮箱后还需要在 Outlook中进行配置,才能正常使用。
第六章 Outlook 2010应用软件
二、 接收和回复邮件
1.接收邮件: 这里所讲的接收邮件是将Internet电子邮箱中的邮件 接收到本地的Outlook中,接收邮件的方法通常包括 如下3种方法。 (1)接收指定的帐户邮件 (2)接收所有帐户邮件 (3)自动接收邮件
第六章 Outlook 2010应用软件
第六章 Outlook 2010应用软件
二、发布任务或任务要求
发布任务: ➢ 单击“任务”按钮展开“任务”界面,ቤተ መጻሕፍቲ ባይዱ“开始”选
项卡的“新建”组中单击“新建任务”按钮。 ➢ 在打开的“任务”窗口中设置任务主题、开始时间、
截止时间、状态、提醒时间和内容等信息,设置完成 后后单击“保存并关闭”按钮。
第六章 Outlook 2010应用软件
发布任务要求: ➢ 单击“任务”按钮展开“任务”界面,在“开始”
Outlook邮箱操作培训资料
贝业新兄弟物流
培训内容
Email基础知识 Outlook基本设置 Email基本操作 通讯簿的使用
2
Email基础知识
Email的概念 Email基本组成 Email工作原理 Email地址的组成 Email服务器的类型
3
Email的概念
Email即electrical mail的缩写 直接翻译过来就是电子邮件的意思 它的概念就来自于普通的邮件
Ctrl键或Shift键同时选择多个联系人) 然后按“收件人-〉”按钮即可 添加抄送人的方法一样 完成后按确定即可
36
新建邮件(续) ——添加收件人及抄送人3
37
新建邮件(续)
——添加附件、发送、保存
添加邮件附件
› 按工具栏中的按钮“ ”,在弹出的“插入文 件”对话框中选择需要作为邮件附件的文件。
43
添加联系人
新建联系人 保存联系人
44
添加联系人(续) ——新建联系人1
单击Outlook窗口左侧的导航栏中的“联 系人”一栏
按“Ctrl + N”,或使用工具栏按钮
“
”→“联系人”或使用菜单命
令“文件”→“新建”→“联系人”。
在弹出的对话框中填写联系人的个人信息 和邮件地址
完成后按“
关闭outlook,在“我的电脑”中找 到将该pst文件复制到非系统盘的文件 夹中
将原来的pst文件重新命名,如 “outlook1.pst”
22
邮件保存位置设置(续) ——步骤5
重新启动outlook,系统会提示你指 定pst文件,此时指向非系统盘文件夹 中的pst文件即可
在确认邮件没有问题之后,将原来目 录中改名后的“outlook1.pst”文件删 除
- 1、下载文档前请自行甄别文档内容的完整性,平台不提供额外的编辑、内容补充、找答案等附加服务。
- 2、"仅部分预览"的文档,不可在线预览部分如存在完整性等问题,可反馈申请退款(可完整预览的文档不适用该条件!)。
- 3、如文档侵犯您的权益,请联系客服反馈,我们会尽快为您处理(人工客服工作时间:9:00-18:30)。
使用条件格式管理您的邮件及更多内容
结合日历和任务的条件格式
如果创建了此规则,也可选择该规则 如果要停止使用规则但仍保留, 只需取消选中该规则旁 对于条件,转至“时间”列表, 选择“到期”和“下 本练习中,我添加了名为“优先级” 并单击“删除”, 可看到 ook 有一套预定义规则, 的规则,加粗、红 设为红色,因为允礼是我的上司, 我为此条件输入了他 转至“视图”选项卡,单击 “视图设置”,然后单击 若要为日历项目使用条件格式, 请确保在“日历”视图 但记住不可撤销删除。 规则运行,但不能删除规则。 的复选框。 周”。 色文本。 可能已包含您所需的一切。 可用规则的详细信息链接。 的名字。 “条件格式”。 Outlook 拥有一套预定义规则。 中, 提供关于条件格式和 本课程结尾的课程摘要卡 这就是使用条件格式的一些方法。 取消选中其复选框可停止 通过课程还可知道 Outlook 这样将提醒我任何下周前到期的任务。 当打开“条件格式”对话框时, 依照同样的流程,将条件格式用于任务。 关闭所有打开的对话框,完成更改。 单击“添加”,此规则称为“允礼的会议”。
使用条件格式管理您的邮件及更多内容
课程目标
• 向电子邮件、日历项目和任务应用条件格式规则。 • 编辑条件格式规则。 • 关闭并删除条件格式规则。
使用条件格式管理您的邮件及更多内容
利用条件格式保持有序
这样邮件是绿色的,直至打开邮件, 或在“阅读”窗格 然后选择“仅当项目是”, 确保“未读”出现在列表中。 规则立即开始运行。任何来自王炫皓、 带有指定术语的 然后在“发件人”字段中添加王炫皓 的姓名,即完成规 这样,如果邮件的主题字段中 没有该术语,规则将查找 现在,转至“位置”列表, 选择“主题字段及邮件正 如果不用逗号,规则将只查找 包含碳纤维和 以逗号分隔术语,因为我希望规则 查找碳纤维或 mukilteo。 在此示例中,输入“碳纤维”和 "Mukilteo",mukilteo 单击“字体”,现在微软雅黑很好, 但我在颜色列表单 若要创建新规则,单击“添加”,输入规则 名称,即 转至“视图”选项卡,单击“视图设置”, 然后单击 的 本课程为您演示如何对邮件、 日历项目和任务使用条件 例如,有关重要项目的邮件以绿色显示, 经理召开的会 虽然听起来像行家术语,但条件格式 只是简单的规则, 使用条件格式,快速便捷地管理 Outlook 2010 因为这是此 中查看邮件。 邮件都可轻松找到。 则。 文”。 邮件。 项目的代码名称, 击“绿色”,并加粗。 “发件人:王炫皓;主题:框架”, “条件格式”。 格式。 Outlook 已使用了几项条件格式规则, 议以红色显示。 当邮件满足指定的条件时, 收件箱、日历和其他项目。 请确保在“邮件”视图中。 和任务列表,并说明如何停止运行格式。 接下来,将说明如何将条件格式用于日历 选择规则,单击“条件”,单击“其他选择”, 更改规则。要求来自王炫皓的邮件在阅读后更改颜色。 单击“确定”,关闭打开的对话框, 本课程结尾的课程摘要卡将讨论 And 单击“确定”,然后单击“条件”并创建规则。 注意,需要时也可更改字体大小。 然后设置格式。 例如,未读邮件为粗体,过期邮件为红色。 可看到 然后单击需要使用新规则的文件夹。 和 Or 逻辑。 若要对邮件应用条件格式, 我们从邮件开始。 换言之,条件格式是追踪重要事件的方法。 可更改字体、字体大小或传入邮件的颜色。
Microsoft® Outlook® 2010 培训
使用条件格式管理您的邮件及更多 内容
课程内容
• 概述:定制规则 • 课程:包含2个讲解短片 • 课程摘要卡
使用条件格式管理您的邮件及更多内容
概述:定制规则
使用条件格式帮助管理您的收件箱、日 历和待办事项列表。
条件格式是当邮件或其他项目符合指定 的条件时更改字体、字体大小或字体颜 色的规则。 使用条件格式可快速、轻松 地管理重要信息、会议和任务。
指向视频底部可查看视频控件。 拖动或指向进度栏可向前或向后移动。
使用条件格式管理您的邮件及更多内容
课程摘要卡
有关此课程中涉及的任务摘要,请查看课程摘要卡。
使用条件格式管理您的邮件及更多内容