DataService-操作手册
网络设备用户操作手册说明书

How to assign an IP address and access your device User ManualTable of ContentsGet started (3)Browser support (3)About default IP addresses (3)AXIS IP Utility (4)Access your device on the network (4)Change the IP address of a device (4)AXIS Device Manager (5)Access your device on the network (5)Change the IP addresses of multiple devices (5)Change the IP address of a device (5)Alternative methods (7)Assign or discover IP addresses (7)Access the video stream (7)Improve your device's security (8)Secure passwords (8)Set a new password for the root account (8)About user accounts (8)Further information (9)Get startedGet startedTo find Axis devices on the network and assign them IP addresses in Windows®,use AXIS IP Utility or AXIS Device Manager.Both applications are free and can be downloaded from /supportWith AXIS IP Utility you can:•search the network for devices•change static IP addressesWith AXIS Device Manager you can:•search the network for devices•assign IP addresses•set passwords•see connection status•perform operations on multiple devices at once•manage firmware upgrades•configure device parametersDo you want information about other methods?See Alternative methods on page7.Browser supportYou can use the device with the following browsers:Chrome TM Firefox®Edge®Safari®Windows®recommended x xOS X®recommended xOther operating systems x xIf you need more information about recommended browsers,go to /browser-support.About default IP addressesAxis devices are designed to be used on an Ethernet network.To access the device’s webpage you need an IP address.Most networks have a DHCP server that automatically assigns IP addresses to connected devices.If your network does not have a DHCP server the default IP address is192.168.0.90.AXIS IP UtilityAXIS IP UtilityNoteThe computer running AXIS IP Utility must be on the same network segment(physical subnet)as the Axis device.Access your device on the network1.Connect power and network to the Axis device.2.Start AXIS IP Utility.All available devices on the network show up in the list automatically.3.To access the device from a browser,double-click the name in the list.Change the IP address of a device1.Start AXIS IP Utility.All available devices on the network show up in the list automatically.2.Right-click the device in the list and select Assign new IP address to selected device.3.Enter an available IP address and click Assign.4.To access the device from a browser,double-click the name in the list.AXIS Device ManagerAXIS Device ManagerAccess your device on the network1.Connect power and network to the Axis device.2.Start AXIS Device Manager.3.To connect to a server,go to Main menu>Servers>New connection:-If the server is on the network,select Remote server and select a server from the drop-down list or enter the IP address or DNS address in the Remote server field.-If the server is running locally on the computer,select This computer.4.To log in as the current Windows user,click Log in.If you clear Log on as current user you need to enter a username and password in the next step.5.Add devices:-AXIS Device Manager automatically searches for Axis devices on the network and adds them to the list of devices.-To manually add devices,go to Device management>Add devices.Select which devices you want to add from the list,click Next,and then click Finish.-To add devices from an IP range,go to Device management>Add devices from IP range.-To add a device from a specific IP address,go to Device management>Add device from address.6.To access the device from a browser,click the address link in the list.Change the IP addresses of multiple devicesTo speed up the process of assigning IP addresses,AXIS Device Manager suggests IP addresses from a specified range.1.In AXIS Device Manager,go to Device management.2.Select the devices you want to configure and then click Assign IP address to selected devices.3.In the Device maintenance dialog,click Yes.4.Select Assign the following IP address range.5.To change the suggested IP address range,enter the IP address range in the IP range text field.6.Click Next.7.To change any of the IP addresses,select a device and click Edit IP.8.Click Finish.Change the IP address of a device1.Select the device you want to configure and then click Assign IP address to selected devices.2.Select Assign the following IP address.3.Enter the IP address,subnet mask,and default router.AXIS Device Manager4.Click OK.Alternative methodsAlternative methodsAssign or discover IP addressesIn Windows®•UPnP™UPnP automatically detects Axis devices and adds them to Network or My Network Places.In Mac OS X®10.4or later•Bonjour(applicable to browsers with support for Bonjour)Navigate to the Bonjour bookmark in your browser,for example Safari,and click the link to access the webpage.All operating systems•DHCP serverTo view the admin pages for the network DHCP server,see the server’s user documentation.•Hosted video servicesTo connect to a hosted video service,see the service provider’s user documentation.To get more information and help withfinding a local service provider,go to /hostingAccess the video streamYou can access the video stream and still images from the Axis device in different ways.ImportantFor these commands to work,the device must have a root account.•Still JPEG images in a browser:enter the path http://<ip-address>/axis-cgi/jpg/image.cgi•RTSP streaming through most media players(for example VLC):enter the pathrtsp://<ip-address>/axis-media/media.amp•ONVIF streaming(for devices with an ONVIF user configured):enter the pathrtsp://<ip-address>/onvif-media/media.ampYou can find more ways to access the video stream in VAPIX®Library.Improve your device's securityImprove your device's securitySecure passwordsImportantAxis devices send the initially set password in clear text over the network.To protect your device after the first login,setup a secure and encrypted HTTPS connection and then change the password.The device password is the primary protection for your data and services.Axis devices do not impose a password policy as they may be used in various types of installations.To protect your data we strongly recommend that you:•Use a password with at least8characters,preferably created by a password generator.•Don’t expose the password.•Change the password at a recurring interval,at least once a year.Set a new password for the root accountImportantThe default administrator username is root.If the password for root is lost,reset the device to factory default settings.1.Type a password.Follow the instructions about secure passwords.See Secure passwords on page8.2.Retype the password to confirm the spelling.3.Click Create login.The password has now been configured.About user accountsThe default root account has full privileges and should be reserved for administrative tasks.Always create a user account with limited privileges for daily use.This reduces the exposure of the administrative account.Further informationFurther information•The user manual is available at •To check if there is updated firmware available for your device,see /support•For useful online trainings and webinars,see /academyUser Manual Ver.M4.5 How to assign an IP address and access your device Date:May2020©Axis Communications AB,2017-2020Part No.T10118032。
中国移动飞信平台软件手册-软件版本介绍
飞信软件版本介绍Microsoft Corporation2008年1月1.什么是飞信飞信是中国移动推出的一款跨越互联网和通信网络的即时通信产品,通过PC或手机终端,用户可随时随地实现文字、语音沟通,满足了手机用户之间对于深度沟通的需求,只要中国移动网络覆盖到的地方,您就不会失去与您好友的联系.飞信为用户提供了一个不受约束的、无限制的通讯沟通和交流平台。
飞信为中国移动的广大用户提供了一项即时通信基础服务,将成为中国移动重要的数据业务之一。
飞信的推出,对国内的即时通信市场产生了重要和深远的影响。
2.飞信应用平台介绍目前飞信平台支持的终端如下:➢短信终端:指飞信的短信终端,包括短信/STK客户端(以及SmartPhone的短信终端)。
也可以称作SMS终端➢智能手机终端:指智能手机上的飞信胖客户端,目前包括的平台有Windows Mobile、Symbian、Linux 、java等。
特别说明不支持MIDP2.0的Java手机客户端不算作智能手机客户端➢Java终端:指飞信的Java手机客户端,也可以称作J2ME终端➢WAP终端:指飞信的WAP手机客户端➢Web终端:指飞信的Web客户端(在PC上运行)➢PC终端:指飞信的PC胖客户端3.飞信功能介绍3.1.会话⏹功能说明两个人之间的文本通信,不限用户类型(飞信用户、手机好友)和客户端类型;特别的,根据上下文,在“即时消息”的章节范围内,“两人会话”可能指飞信用户之间的两人即时消息会话。
⏹涉及服务●SAP(SIP Access Proxy)●LCS (Live Communications Service)3.2.多人会话⏹功能说明多个人之间的文本通信。
飞信只支持飞信用户使用智能终端进行多人会话,而短信终端或手机好友均不能参与,因此“多人会话”一定指“多人即时消息会话”。
⏹涉及服务●SAP(SIP Access Proxy)●LCS (Live Communications Service)●TGS(Temp Group Service)3.3.短信功能3.3.1.发送短信⏹功能说明用户可以通过飞信终端向一个好友或者自己发送短信。
NMX6.4操作手册
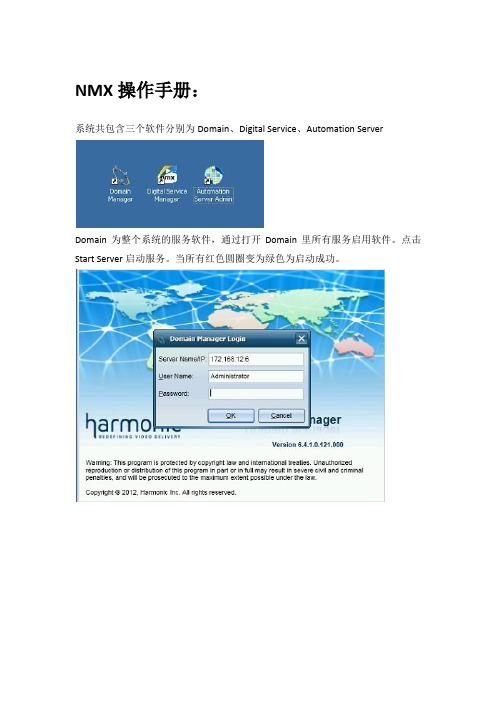
NMX操作手册:系统共包含三个软件分别为Domain、Digital Service、Automation ServerDomain为整个系统的服务软件,通过打开Domain里所有服务启用软件。
点击Start Server启动服务。
当所有红色圆圈变为绿色为启动成功。
当Domain启动成功后,打开Digital Service软件,配置复用部分打开后,显示为常用基础界面,在此界面可以查看报警和配置信息打开图标,可以显示出当前配置的逻辑连接图。
在此界面绿色线缆为主用信号,黄色为备用信号。
双击复用器图标(ProStream-1或ProStream-2),可以查看设备后面板状态在常用基础界面output service view里,打开linzhou-1,可以看到所有输出传输流,在每个传输流中可以看到包含的节目、PSI表格等信息。
并且,当传输流中出现报警,会在传输流前出现报警。
进行复用配置,在New Service Configuration右键选择Edit Service Configuration,进入配置页面复用配置界面左侧为复用器输入部分,A/V Streams为模拟输入,本系统不做使用Transports选项内包含IP输入和ASI输入的码流信息Inserted Data选项为PSI信息和加扰信息右侧为输出的传输流,每个流中包含所当前流规划的节目,加扰ECM、EMM信息,PSI表等信息当复用所有节目配置完成后,进入加扰配置阶段点击OK直接进入配置基础页面,在基础页面打开linzhou-1/New Service Configuration/MUXGROUP001,可显示出所有在复用阶段配置的传输流。
在New Service Configuration下点击Create New Batch进入配置页面进入后点击Next进入后可以看到三个选项InputsOutputs,CAS,SpreadSheet;其中加扰部分主要使用前两个选项首先,在InputsOutputs选项中,左侧Inputs选项卡内的ECM属性里配置AC信息配置完成后,进入CAS选项,配置每一个节目的加扰。
数据分析系统—用户操作手册范本
数据分析系统—用户操作手册范本数据分析系统操作手册一、前言1.1 编写目的本操作手册编写的目的是为了帮助用户更好地使用数据分析系统,提高工作效率。
1.2 读者对象本操作手册适用于所有使用数据分析系统的用户,包括但不限于数据分析师、市场营销人员等。
二、系统综述2.1 系统架构数据分析系统采用分布式架构,由前端界面、后端服务器、数据库等多个模块组成。
其中,前端界面采用响应式设计,兼容主流浏览器。
2.1.1 系统浏览器兼容数据分析系统支持主流浏览器,包括但不限于Chrome、Firefox、Safari等。
三、功能说明数据分析系统提供多项功能,包括数据导入、数据清洗、数据可视化等。
用户可以根据自己的需求选择相应的功能进行操作。
其中,数据可视化功能支持多种图表类型,如折线图、柱状图、饼图等,用户可以根据需要选择合适的图表类型进行展示。
另外,数据分析系统还支持数据导出功能,用户可以将分析结果导出为Excel或CSV格式的文件,方便后续处理和分享。
3、系统操作3.1、服务器监控服务器监控模块主要用于对服务器的性能进行监控。
用户可以通过该模块查看服务器的CPU、内存、磁盘等资源的使用情况,以及网络流量的情况。
同时,用户还可以设置自定义的监控项,以满足不同的监控需求。
3.2、日志源配置日志源配置模块主要用于对各类设备的日志进行采集。
用户可以通过该模块对设备进行配置,包括设备的IP地址、登录账号、密码等信息。
同时,用户还可以设置采集规则,以满足不同的采集需求。
3.3、日志查询与搜索日志查询与搜索模块主要用于对采集到的日志进行查询和搜索。
用户可以通过该模块对日志进行检索,以满足不同的查询需求。
同时,用户还可以设置查询条件,以进一步精确查询结果。
3.4、告警功能告警功能模块主要用于对采集到的日志进行告警。
用户可以通过该模块设置告警规则,以满足不同的告警需求。
同时,用户还可以设置告警方式,包括邮件、短信等方式。
3.5、系统管理系统管理模块主要用于对系统进行管理。
ZRM备份及还原MYSQL数据的操作手册
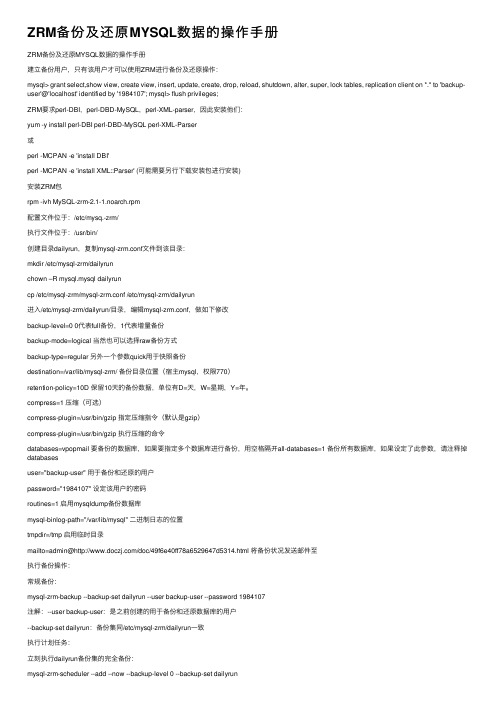
ZRM备份及还原MYSQL数据的操作⼿册ZRM备份及还原MYSQL数据的操作⼿册建⽴备份⽤户,只有该⽤户才可以使⽤ZRM进⾏备份及还原操作:mysql> grant select,show view, create view, insert, update, create, drop, reload, shutdown, alter, super, lock tables, replication client on *.* to 'backup-user'@'localhost' identified by '1984107'; mysql> flush privileges;ZRM要求perl-DBI,perl-DBD-MySQL,perl-XML-parser,因此安装他们:yum -y install perl-DBI perl-DBD-MySQL perl-XML-Parser或perl -MCPAN -e 'install DBI'perl -MCPAN -e 'install XML::Parser' (可能需要另⾏下载安装包进⾏安装)安装ZRM包rpm -ivh MySQL-zrm-2.1-1.noarch.rpm配置⽂件位于:/etc/mysq.-zrm/执⾏⽂件位于:/usr/bin/创建⽬录dailyrun,复制mysql-zrm.conf⽂件到该⽬录:mkdir /etc/mysql-zrm/dailyrunchown –R mysql.mysql dailyruncp /etc/mysql-zrm/mysql-zrm.conf /etc/mysql-zrm/dailyrun进⼊/etc/mysql-zrm/dailyrun/⽬录,编辑mysql-zrm.conf,做如下修改backup-level=0 0代表full备份,1代表增量备份backup-mode=logical 当然也可以选择raw备份⽅式backup-type=regular 另外⼀个参数quick⽤于快照备份destination=/var/lib/mysql-zrm/ 备份⽬录位置(宿主mysql,权限770)retention-policy=10D 保留10天的备份数据,单位有D=天,W=星期,Y=年。
DataService-操作手册
DataServices培训总结-操作手册目录一、DS简介 (3)二、DS数据加载方式 (4)三、DS进行数据抽取模型开发的基本过程 (5)四、DS创建数据源系统和目标系统的数据存储 (6)1、Oracle数据库作为数据源系统 (6)2、ECC作为数据源系统 (6)3、HANA数据库作为目标系统 (7)五、全量加载过程 (8)1、创建Project和Job (8)2、导入源表的元数据到资源库 (8)3、创建Data Flow (8)4、设置源表和目标表 (9)5、手工执行Job (10)六、基于表比较的增量加载 (11)1、在Job下定义工作流 (11)页脚内容12、在工作流中定义数据流 (11)3、加入Table_Comparison控件 (12)4、设置Table_Comparison控件 (13)七、基于时间戳的增量加载 (13)1、在Job下定义工作流 (13)2、定义Script控件 (14)3、定义处理新增数据的数据流和处理更新数据的数据流 (15)八、DS中常用控件介绍 (16)1、Key_Generation (16)2、Case (17)3、Merge (18)4、Validation (19)5、设置过滤器和断点 (20)九、定义Job定期执行 (21)1、登录Data Services Management Console (21)2、定义Batch Job Schedules (22)十、其他注意事项 (24)页脚内容2一、DS简介SAP BusinessObjects Data Services是通过SAP HANA认证的ETL工具。
采用数据批量处理的方式,定期执行后台作业,将数据从多个业务系统中抽取出来,并进行必要的处理(转换,合并,过滤,清洗),然后再加载到HANA数据库中。
DS的组件之间的关系:Management Consol:管理控制台是网页版DS管理工具,可以进行一些系统配置和定义Job执行页脚内容3Designer:Designer是一个具有易于使用的图形用户界面的开发工具。
Kyocera ecosys m2540dw 操作手册说明书

OAT变桨系统手动操作手册_存档版_

轴3:中控箱加热器不加热
ON
外部24V电源供电正常
广东明阳风电技术有限公司 广东省中山市火炬开发区建业路 528437
第5页共7页
资料提供部门:
技术中心
红色
OFF
X20:5
ON
红色
OFF
MY1.5Se OAT 变桨系统手动操作手册
外部24V电源供电中断 PMM24V电源输出正常 PMM24V电源输出中断
说明:由于变桨系统没有接入 24V 硬接信号线:EFC、watch dog,没有接 入外部 24V 电源,没有与风机主控进行通信,所以 PMM 和 PMC 上与之有关的 指示灯会指示失常,但不会影响手动操作的执行。
6.式选择开关处于 0 档位置,依次断
广东明阳风电技术有限公司 广东省中山市火炬开发区建业路 528437
第6页共7页
资料提供部门:
技术中心
MY1.5Se OAT 变桨系统手动操作手册
文件号:0MF.460.023 版 本:1.0 日 期:2009-9 级 别:
开中控箱内的电路保护开关、中控箱 400VAC 主电源开关和轴控箱上的电池供电 开关。确保所有轴控箱开关已断开,确保中控箱电源开关已断开。
松开驱动按钮,转动停止。
不执行手动操作时要将手动模式选择开关拨到 0 档: 统误动作。
4. PMM 状态指示说明
指示灯
状态
PMM状态指示灯指示说明 状态说明
广东明阳风电技术有限公司 广东省中山市火炬开发区建业路 528437
,防止变桨系
第4页共7页
资料提供部门:
技术中心
MY1.5Se OAT 变桨系统手动操作手册
与 PMM 的一致 与 PMM 的一致
- 1、下载文档前请自行甄别文档内容的完整性,平台不提供额外的编辑、内容补充、找答案等附加服务。
- 2、"仅部分预览"的文档,不可在线预览部分如存在完整性等问题,可反馈申请退款(可完整预览的文档不适用该条件!)。
- 3、如文档侵犯您的权益,请联系客服反馈,我们会尽快为您处理(人工客服工作时间:9:00-18:30)。
DataServices培训总结-操作手册目录一、DS简介 (2)二、DS数据加载方式 (2)三、DS进行数据抽取模型开发的基本过程 (3)四、DS创建数据源系统和目标系统的数据存储 (3)1、Oracle数据库作为数据源系统 (3)2、ECC作为数据源系统 (4)3、HANA数据库作为目标系统 (5)五、全量加载过程 (5)1、创建Project和Job (5)2、导入源表的元数据到资源库 (6)3、创建Data Flow (6)4、设置源表和目标表 (7)5、手工执行Job (7)六、基于表比较的增量加载 (8)1、在Job下定义工作流 (8)2、在工作流中定义数据流 (8)3、加入Table_Comparison控件 (9)4、设置Table_Comparison控件 (9)七、基于时间戳的增量加载 (10)1、在Job下定义工作流 (10)2、定义Script控件 (10)3、定义处理新增数据的数据流和处理更新数据的数据流 (11)八、DS中常用控件介绍 (13)1、Key_Generation (13)2、Case (13)3、Merge (14)4、Validation (15)5、设置过滤器和断点 (15)九、定义Job定期执行 (16)1、登录Data Services Management Console (16)2、定义Batch Job Schedules (17)十、其他注意事项 (18)一、DS简介SAP BusinessObjects Data Services是通过SAP HANA认证的ETL工具。
采用数据批量处理的方式,定期执行后台作业,将数据从多个业务系统中抽取出来,并进行必要的处理(转换,合并,过滤,清洗),然后再加载到HANA数据库中。
DS的组件之间的关系:◆Management Consol:管理控制台是网页版DS管理工具,可以进行一些系统配置和定义Job执行◆Designer:Designer是一个具有易于使用的图形用户界面的开发工具。
它允许开发人员定义包括数据映射,转换和控制逻辑的数据管理应用程序,创建包含工作流(作业执行定义)和数据流(数据转换定义)的应用程序◆Repository:应用程序设计器使用的本地资源库用来存储Data Services对象(如项目,作业,工作流,和数据流)的定义和源和目标的元数据◆Job server:作业服务器启动数据移动的从多个不同种类的源集成数据的引擎,执行复杂的数据转换,并管理从ERP系统和其他源的抽取和事务二、DS数据加载方式◆全量加载◆增量上载a)基于表比较作业在执行时读取数据源和目标中的全部数据,在服务器的内存中进行比较,计算数据差异b)时间戳增量需要在数据源中添加时间戳字段,一般为创建时间和最后修改时间,在抽取作业中定义对两个时间戳字段进行对比,符合条件的创建时间条目进行插入,符合条件的修改时间条目进行更新c)利用数据库CDC(changed data capture)首先需要开启数据库的CDC服务,为数据库实例启用CDC功能,为源表启用CDC功能。
在这种模式下,DS的增量更新不再直接访问源表,而是在与源表相关的变更记录表中读取增量三、DS进行数据抽取模型开发的基本过程◆为数据源创建数据存储◆导入源表的元数据到资源库◆为SAP HANA目标系统创建数据存储◆新建DS项目和批量作业◆新建DS数据流:定义源表和目标表,定义变量、编辑Query和Map_CDC_Operation ◆执行批量作业四、DS创建数据源系统和目标系统的数据存储1、Oracle数据库作为数据源系统登录Data Services Designer,在本地对象库的数据存储页签中单击鼠标右键,选择新建菜单创建数据存储“EAM_TEST”,在弹出的对话框中输入EAM数据库的连接信息2、ECC作为数据源系统同样在创建DataStore时,输入ECC的连接信息3、HANA数据库作为目标系统在创建DataStore时,输入HANA数据库的连接信息五、全量加载过程1、创建Project和Job在本地对象库的project页签中单击鼠标右键,选择新建菜单,创建项目“ERP_DS”。
双击该项目,在“Project Area”,可以在该项目下创建Job2、导入源表的元数据到资源库在本地对象库的数据存储页签中,选择源系统的数据存储,单击鼠标邮件,选择“Import By Name”,输入需要导入到资源库的表名称。
导入成功后,在数据存储的table目录下可以看到导入的表3、创建Data Flow单击“General”Job,在右边空白区域单击鼠标邮件,选择“Add New”-“Data Flow”4、设置源表和目标表单击创建的Data Flow,将需要导入到HANA数据库中的源表拖入到Data Flow区域中,将Data Flow区域右侧的工具条中的模版表拖入Data Flow区域创建模版表输入模版表名称、HANA目标系统的数据存储、HANA数据库存放DS抽取数据表的用户名。
连接源表和目标表双击模版表,设置“Options”中的“Use NVARCHAR for VARCHAR”5、手工执行Job选择Job,单击鼠标右键,选择“Execute”执行成功之后,在HANA数据库中的ERPDSUSER下可以看到“T161T”,可以查看数据表的内容。
执行过程信息和结果可以在监控器中查看。
六、基于表比较的增量加载1、在Job下定义工作流2、在工作流中定义数据流在数据流中定义源表和模版表,执行Job,执行成功之后,在目标系统数据存储的Template Table目录下可以看到创建的模版表3、加入Table_Comparison控件选择模版表,单击鼠标邮件,选择“Import Table”。
模版表会更新为Tables目录下的数据表。
通过将转换-数据集成中的“Table_Comparison”控件拖入到数据流中的方式添加“Table_Comparison”控件将源表连接“Table_Comparison”控件,“Table_Comparison”控件连接目标表。
4、设置Table_Comparison控件双击“Table_Comparison”控件,设置相关参数:比较的目标表、表的主键,需要比较的字段。
当需要比较的字段为空时,会比较所有字段。
建议按照需要填写需要比较的字段,可以加快处理速度。
保存后执行Job。
七、基于时间戳的增量加载1、在Job下定义工作流在工作流中定义Script控件,读取数据抽取后最新的创建时间和更改时间,定义一个处理新增数据的数据流和一个处理更新数据的数据流2、定义Script控件在Script控件中需要使用变量存放读取的最新的创建时间和最新的更改时间。
选择Job,在工具栏选择“Variables”按钮,创建全局变量双击“Script”控件,编写SQL语句,从HANA数据库表中读取最新的创建时间和更改时间3、定义处理新增数据的数据流和处理更新数据的数据流双击“EBAN_New”数据流,加载源表,Query,Map_CDC_Operation控件和目标表双击Query,在输出字段中增加“Sequence”和“Operation”两个字段。
“Sequence”字段使用函数gen_row_num()进行赋值,“Operation”赋值为‘I’在Quey中设置Where条件双击Map_CDC_Operation控件,设置CDC Columns同样的方式定义“EBAN_Upd”数据流,在Query的where条件中定义为在Query的数据结果中增加“Sequence”和“Operation”两个字段。
“Sequence”字段使用函数gen_row_num()进行赋值,“Operation”赋值为‘U’保存后,执行Job。
可以通过修改源系统数据测试基于时间戳的增量加载。
八、DS中常用控件介绍1、Key_Generation在源表基础上为目标表重新生成主键在Query中增加“ID”字段,赋值为0。
在Key_Generation控件中设置目标表、主键字段、主键值增加量2、Case将源表根据规则进行拆分双击Case控件,设置拆分条件当SOURCE = 1时,输出SPFLI_1,当SOURCE =2时,输出SPFLI_23、Merge将具有同样数据结构的源表进行合并在Query中增加输出字段Source,赋值为1。
在Query1中增加输出字段Source,赋值为2。
在Merge中将两个表的内容合并输出。
4、Validation提取数据源表中的正确数据,将错误数据单独存放在其他表中双击Validation控件,设置“Validation Rule”5、设置过滤器和断点过滤器和断点结合使用,用于设置Debug的条件选择源表到目标表的连接线,单击鼠标右键,选择Set Filter/Breakpoint,设置Debug条件(当满足某种条件时进入断点,或者在满足过滤条件的同时执行多少条数据后时进入断点)选择Job,单击鼠标右键,选择Start debug工具栏上的按钮可以控制执行下一条数据、继续执行、终止DebugDebug过程中进入断点后,可以一次查看数据加载结果九、定义Job定期执行1、登录Data Services Management Console 单击工具栏的“Data Services Management Console”按钮进入Data Services Management Console的登录界面单击进入Administrator界面2、定义Batch Job Schedules在Batch Job Configuration页签选择Add Schedules进入批量执行Job的设置界面可以设置每周的某一天执行(一周执行一次)或则每月的某一天执行(一个月执行一次),也可以设置为每天都执行。
都选“Recurring”则会定期循环执行,否则只执行一次。
可以设置一天执行一次,也可以一天执行多次,设置开始执行时间。
上图中如果设置为一天多次执行,开始时间为上午1点,持续时间为600分钟,间隔时间为360分钟,则Job会在一天的上午1点和上午6点各执行一次。
如果设置时间间隔为240分钟,则Job会在一天的上午1点、上午5点和上午9点各执行一次。
(总持续时间不超过10小时)。
十、其他注意事项1、客户端安装包需要注意和服务器DS版本一致2、在第一次登录CMS信息时,无法成功。
ping sapdstest也失败,需要在host文件中添加对应的地址和域名3、连接Oracle数据库作为数据源时,需要在客户端上安装Oracle客户端,设置tnsname.ora文件,设置环境变量ORACLE_HOME之后重启服务器;连接HANA数据库时,需要安装HANA客户端4、在连接ECC作为数据源时,需要开启系统跨客户端编辑权限5、在HANA中新建ERPDSUSER作为存放DS抽取表的Schema,将ERPDSUSER给SLTADM赋权限,包括查询和创建的权限6、全量抽取时,目标表不能使用导入表,需要使用模版表,模版表每次会删除重建,导入表会出现主键重复的错误提示7、基于时间戳的增量加载,源表中需要有创建时间和更改时间两个字段,分别处理新增和修改的数据8、如果只是设置过滤器而没有设置断点,在进行Debug时,Job会执行成功,过滤器有效。