华硕MX279H液晶显示器使用说明书
ASUS ROG SWIFT PG279Q 产品说明书

Display Video Feature Audio Features Convenient Hotkey I/O Ports Panel Size: Wide Screen 27.0"(68.6cm) 16:9Color Saturation : 100%(sRGB)Panel Backlight / Type : In-Plane SwitchingTrue Resolution : 2560x1440 *Display Surface Non-glarePixel Pitch : 0.233 mmBrightness(Max) : 350 cd/㎡Contrast Ratio (Max) : 1000:1Viewing Angle (CR ≧10) : 178°(H)/178°(V)Response Time : 4ms (Gray to Gray)Display Colors : 16.7M (real 8 bit)Flicker freeRefresh Rate(max) : 165Hz*Trace Free Technology : YesColor Temperature Selection : 4 ModesGamePlus(modes) : Yes (Crosshair/Timer/FPS Counter)Low Blue Light : YesHDCP support : YesGameVisual :6 Modes(Scenery/Racing/Cinema/RTS/RPG/FPS/sRGB Modes)G-SYNC™Stereo Speakers : 2W x 2 Stereo RMSGamePlus5-way OSD Navigation JoystickTurbo keySignal Input : HDMI, DisplayPortEarphone jack : 3.5mm Mini-JackUSB Port(s) : 3.0x21ROG SWIFT PG279QProducts What´s New Commercial SupportStoreSignal Frequency Power Consumption Mechanical Design Security Dimensions Weight Accessories Compliance and Standards Digital Signal Frequency : DisplayPort :34 ~209KHz (H) /30 ~165 Hz(V)HDMI : 30 ~140 KHz (H) /24 ~60 Hz(V)Power On: <90WPower Saving/Off:0.5WVoltage: 100-240V, 50/60HzChassis Colors : BlackTilt : +20°~-5°Swivel : +60°~-60°Pivot : 0°~+90°Height Adjustment : 0~120 mmVESA Wall Mounting : 100x100mmSuper Narrow Bezel Design : YesKensington lockPhys. Dimension with Stand(WxHxD): 619.77x552.53x237.9mmPhys. Dimension without Stand(WxHxD): 619.77x362.96x65.98 mm(For VESAWall Mount)Box Dimension (WxHxD): 756x456x300 mmNet Weight(Esti.): 7.0kgGross Weight(Esti.):10.6kgPower cordPower adapterDisplayPort cableUSB 3.0 cableQuick start guideHDMI cableSupport CDWarranty CardBSMI, CB, CCC, CE, CEL level 1, ErP, FCC,J-MOSS, KCC, PSE, RoHS, UL/cUL, VCCI, WEEE, WHQL (Windows 8.1, Windows8, Windows 7), RCM, TUV Flicker-free , eStandby, TUV Low Blue LightNote Privacy Policy Terms of Use Notice ©ASUSTeK Computer Inc. All rights reserved.*1) Refresh RateDisplayPort: 2560x1440(up to 165Hz)HDMI: 2560x1440(60Hz)All specifications are subject to change without notice. Please check with your supplier for exact offers. Products may not be available in all markets.PCB color and bundled software versions are subject to change without notice.Brand and product names mentioned are trademarks of their respective companies.United States / EnglishWant More?Who We AreNeed Help?Community。
ASUS MG279 Series LCD Monitor用户指南说明书
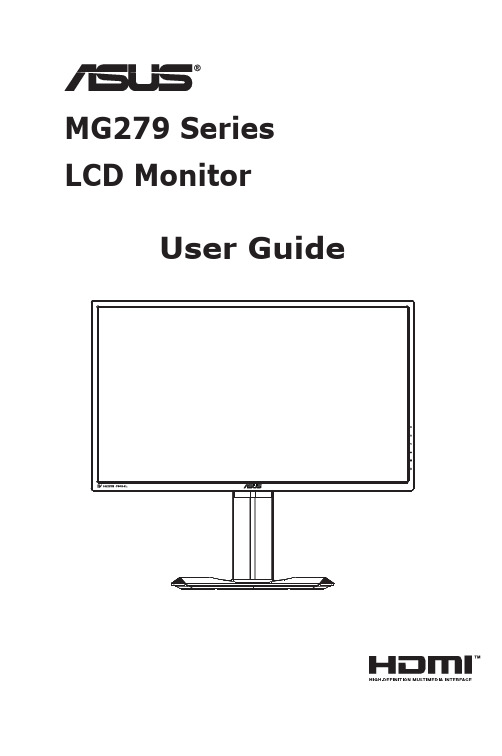
MG279 Series LCD MonitorUser GuideCopyright © 2015 ASUSTeK COMPUTER INC. All Rights Reserved.No part of this manual, including the products and software described in it, may be reproduced, transmitted, transcribed, stored in a retrieval system, or translated into any language in any form or by any means, except documentation kept by the purchaser for backup purposes, without the express written permission of ASUSTeK COMPUTER INC. (“ASUS”).Product warranty or service will not be extended if: (1) the product is repaired, modified or altered, unless such repair, modification of alteration is authorized in writing by ASUS; or (2) the serial number of the product is defaced or missing.ASUS PROVIDES THIS MANUAL “AS IS” WITHOUT WARRANTY OF ANY KIND, EITHER EXPRESS OR IMPLIED, INCLUDING BUT NOT LIMITED TO THE IMPLIED WARRANTIES OR CONDITIONS OF MERCHANTABILITY OR FITNESS FOR A PARTICULAR PURPOSE. IN NO EVENT SHALL ASUS, ITS DIRECTORS, OFFICERS, EMPLOYEES OR AGENTS BE LIABLE FOR ANY INDIRECT, SPECIAL, INCIDENTAL, OR CONSEQUENTIAL DAMAGES (INCLUDING DAMAGES FOR LOSS OF PROFITS, LOSS OF BUSINESS, LOSS OF USE OR DATA, INTERRUPTION OF BUSINESS AND THE LIKE), EVEN IF ASUS HAS BEEN ADVISED OF THE POSSIBILITY OF SUCH DAMAGES ARISING FROM ANY DEFECT OR ERROR IN THIS MANUAL OR PRODUCT.SPECIFICATIONS AND INFORMATION CONTAINED IN THIS MANUAL ARE FURNISHED FOR INFORMATIONAL USE ONLY, AND ARE SUBJECT TO CHANGE AT ANY TIME WITHOUT NOTICE, AND SHOULD NOT BE CONSTRUED AS A COMMITMENT BY ASUS. ASUS ASSUMES NO RESPONSIBILITY OR LIABILITY FOR ANY ERRORS OR INACCURACIES THAT MAY APPEAR IN THIS MANUAL, INCLUDING THE PRODUCTS AND SOFTWARE DESCRIBED IN IT.Products and corporate names appearing in this manual may or may not be registered trademarks or copyrights of their respective companies, and are used only for identification or explanation and to the owners’ benefit, without intent to infringe.Table of contentsNotices .........................................................................................................iii Safety information ......................................................................................iv Care & Cleaning (vi)1.1 Welcome! ......................................................................................1-11.2Package contents .........................................................................1-11.3Assembling the monitor ..............................................................1-21.4Connect cables .............................................................................1-31.4.1 Rear of the LCD monitor .................................................1-31.5Monitor introduction ....................................................................1-41.5.1 Using the Controls button ..............................................1-42.1Detaching the Quick Release stand (for VESA wall mount) .................................................................2-12.2Adjusting the monitor ..................................................................2-23.1 OSD (On-Screen Display) menu .................................................3-13.1.1 How to reconfigure ..........................................................3-13.1.2 OSD Function Introduction ..............................................3-23.2 Specifications ...............................................................................3-93.3 Troubleshooting (FAQ) ..............................................................3-103.4Supported Timing List ...............................................................3-11NoticesFederal Communications Commission StatementThis device complies with Part 15 of the FCC Rules. Operation is subject to the following two conditions:• This device may not cause harmful interference, and• This device must accept any interference received including interference that may cause undesired operation.This equipment has been tested and found to comply with the limits for a Class B digital device, pursuant to Part 15 of the FCC Rules. These limits are designed to provide reasonable protection against harmful interference in a residential installation. This equipment generates, uses and can radiate radio frequency energy and, if not installed and used in accordance with manufacturer’s instructions, may cause harmful interference to radio communications. However, there is no guarantee that interference willnot occur in a particular installation. If this equipment does cause harmful interference to radio or television reception, which can be determined by turning the equipment off and on, the user is encouraged to try to correct the interference by one or more of the following measures:• Reorient or relocate the receiving antenna.• Increase the separation between the equipment and receiver.• Connect the equipment to an outlet on a circuit different from that to which the receiver is connected.• Consult the dealer or an experienced radio/TV technician for help.As an Energy Star® Partner, our company has determinedthat this product meets the Energy Star® guidelines for energyefficiency.Canadian Department of Communications StatementThis digital apparatus does not exceed the Class B limits for radionoise emissions from digital apparatus set out in the Radio Interference Regulations of the Canadian Department of Communications.This class B digital apparatus complies with Canadian ICES-003.Made In ChinaSafety information• Before setting up the monitor, carefully read all the documentation that came with the package.• To prevent fire or shock hazard, never expose the monitor to rain or moisture.• Never try to open the monitor cabinet. The dangerous high voltages inside the monitor may result in serious physical injury.• If the power supply is broken, do not try to fix it by yourself. Contact a qualified service technician or your retailer.• Before using the product, make sure all cables are correctly connected and the power cables are not damaged. If you detect any damage,contact your dealer immediately.• Slots and openings on the back or top of the cabinet are provided for ventilation. Do not block these slots. Never place this product near or over a radiator or heat source unless proper ventilation is provided.• The monitor should be operated only from the type of power source indicated on the label. If you are not sure of the type of power supply to your home, consult your dealer or local power company.• Use the appropriate power plug which complies with your local power standard.• Do not overload power strips and extension cords. Overloading can result in fire or electric shock.• Avoid dust, humidity, and temperature extremes. Do not place the monitor in any area where it may become wet. Place the monitor on a stable surface.• Unplug the unit during a lightning storm or if it will not be used for a long period of time. This will protect the monitor from damage due to power surges.• Never push objects or spill liquid of any kind into the slots on the monitor cabinet.• To ensure satisfactory operation, use the monitor only with UL listed computers which have appropriate configured receptacles markedbetween 100 ~ 240V AC.• The socket-outlet shall be installed near the equipment and shall be easily accessible• If you encounter technical problems with the monitor, contact a qualified service technician or your retailer.• Provide an earthing connection before the mains plug is connected to the mains. And, when disconnecting the earthing connection, be sure to disconnect after pulling out the mains plug from the mains.WARNINGUsage of other than specified head- or earphones can result in hearing loss due to excessive sound pressures.Care & Cleaning• Before you lift or reposition your monitor, it is better to disconnect the cables and power cord. Follow the correct lifting techniques whenpositioning the monitor. When lifting or carrying the monitor, grasp the edges of the monitor. Do not lift the display by the stand or the cord.• Cleaning. Turn your monitor off and unplug the power cord. Clean the monitor surface with a lint-free, non-abrasive cloth. Stubborn stainsmay be removed with a cloth dampened with mild cleaner.• Avoid using a cleaner containing alcohol or acetone. Use a cleaner intended for use with the LCD. Never spray cleaner directly on thescreen, as it may drip inside the monitor and cause an electric shock. The following symptoms are normal with the monitor:• The screen may flicker during the initial use due to the nature of the fluorescent light. Turn off the Power Switch and turn it on again tomake sure that the flicker disappears.• You may find slightly uneven brightness on the screen depending on the desktop pattern you use.• When the same image is displayed for hours, an afterimage of the previous screen may remain after switching the image. The screen will recover slowly or you can turn off the Power Switch for hours.• When the screen becomes black or flashes, or cannot work anymore, contact your dealer or service center to fix it. Do not repair the screen by yourself!Conventions used in this guideWARNING: Information to prevent injury to yourself when trying tocomplete a task.CAUTION: Information to prevent damage to the componentswhen trying to complete a task.IMPORTANT: Information that you MUST follow to complete atask.NOTE: Tips and additional information to aid in completing a task.Where to find more informationRefer to the following sources for additional information and for product and software updates.1. ASUS websitesThe ASUS websites worldwide provide updated information on ASUS hardware and software products. Refer to 2. Optional documentationYour product package may include optional documentation that may have been added by your dealer. These documents are not part ofthe standard package.1.1 Welcome!Thank you for purchasing the ASUS® LCD monitor!The latest widescreen LCD monitor from ASUS provides a crisper, broader, and brighter display, plus a host of features that enhance your viewing experience.With these features, you can enjoy the convenience and delightful visual experience that the monitor brings you!1.2 Package contentsCheck your package for the following items:LCD MonitorMonitor BaseQuick Start GuideWarranty Card1x Power Cord1x DP to mini-DP CableCD1x MHL Cable (option)1x USB Cable (option)1x DisplayPort Cable (option)1x HDMI Cable (option)• If any of the above items is damaged or missing, contact your retailer immediately.1.3 Assembling the monitorTo assemble the monitor:1. Place the display flat on a cloth on the table, assemble the baseaccording to the drawing and use a coin to turn the screw tight. 2. Put the cable clip inset the hole of stand, and adjust the monitor tothe angle that is most comfortable for you.1.4 Connect cables1.4.1 Rear of the LCD monitor1. AC-IN Port2. USB upstream Port3. USB downstream Port4. HDMI-1/MHL5. HDMI-2/MHL6. DisplayPort7. Mini-DP8. Earphone Jack9. Kensington Lock1. Power Button/Power Indicator:• Press this button to turn the monitor on/off.•2. GameVisual:• Press this hotkey to switch from six video preset modes (Scenery Mode, Racing Mode, Cinema Mode, RTS/RPG Mode, FPS Mode, and sRGBMode) with GameVisual ™ Video Intelligence Technology.3. GamePlus:• Activate Crosshair or Timer functionconfirm the function needed.4. Input Select Button:• Use this hotkey to switch from HDMI-1 / MHL, HDMI-2/MHL, Mini-DP or DisplayPort input signal.5. Close Button• Exit the OSD menu.6.• Tums on the OSD menu. Enacts the selected OSD menu item.• Increases/Decreases values or moves your selection up/down/ left/right.2.1 Detaching the Quick Release stand (for VESAwall mount)The Quick Release Stand of this monitor is specially designed for VESA wall mount.To detach the Quick Release stand1. Disconnect power and signal cables. Carefully put the front of themonitor face down on a clean table.2. Use a screwdriver to remove the four screws on the arm (Figure 1),and then detach the arm/stand from the monitor (Figure 2).• We recommend that you cover the table surface with soft cloth to prevent damage to the monitor.• Hold the stand of the monitor while removing the screws.Figure 1Figure 2• The VESA wall mount kit ( 100 x 100 mm) is purchased separately.• Use only the UL Listed Wall Mount Bracket with minimum weight/load 28.8 kg (Screw size: M4 x 10 mm).Adjusting the monitorfor you.• Hold the stand to prevent the monitor from falling when you change its angle.• You can adjust the monitor’s angle from +20˚ to -5˚ and it allows 60˚ swivel adjustment from either left or right. You can also adjust themonitor’s height within +/- 15cm.Pivoting the monitor1. Lift the monitor to the highest position.2. Tilt the monitor to its maximum angle.3. Pivot the monitor clockwise to the angle you need.31It is normal that the monitor slightly shakes while you adjust the viewingangle.3.1 OSD (On-Screen Display) menu3.1.1 How to reconfigure1. Press the MENU button to activate the OSD menu.2. Press the ❑ and ☐ buttons to toggle between options in theMenu. As you move from one icon to another, the option name is highlighted.3. To select the highlighted item on the menu press the Center key.4. Press the ❑ and ☐ buttons to select the desired parameter.5. Press the Center key to enter the slide bar and then use the ❑ or☐ buttons, according to the indicators on the menu, to make your changes.6. Press the ❑ / ❑ to move left / right menu.3.1.2 OSD Function Introduction1. GameVisualThis function contains six sub-functions that you can select for your preference. Each mode has the Reset selection, allowing you to maintain your setting or return to the preset mode.• Scenery Mode : This is the best choice for scenery photo displaying with GameVisual™ Video Intelligence Technology.• Racing Mode : This is the best choice for racing game playing with GameVisual™ Video Intelligence Technology.• Cinema Mode : This is the best choice for movie watching with GameVisual™ Video Intelligence Technology.•RTS/RPG Mode: This is the best choice for Real-Time Strategy(RTS)/Role-Playing Game(RPG) playing with GameVisual™ Video Intelligence Technology.• FPS Mode: This is the best choice for First Person Shooter game playing with GameVisual™ Video Intelligence Technology.•sRGB Mode : This is the best choice for viewing photos and graphics from PCs.• In the Racing Mode, the Saturation, SkinTone, Sharpness, and ASCR functions are not user-configurable.•In the sRGB, the Saturation, Color Temp., SkinTone, Sharpness, Brightness, Contrast and ASCR functions are not user-configurable.2.Blue Light FilterAdjust the energy level of blue light emitted from LED backlight• Level 0: No change.•Level 1~4: The higher the level,the more blue light will be reduced.• When Blue Light Filter is activated,the default settings of Racing Mode will be automatically imported.• Between Level 1 to Level 3, the Brightness function is user-configurable.•Level 4 is optimized setting. It is compliance with TUV Low Blue Light Certification. The Brightness function is not user-configurable.3. ColorSelect the image color you like from this function.• Brightness : The adjusting range is from 0 to 100.• Contrast : The adjusting range is from 0 to 100. • Saturation : The adjusting range is from 0 to 100.• Color Temp.: Contains three preset color modes (Cool , Normal , Warm ) and User Mode.•Skin Tone : Contains three color modes including Reddish , Natural , and Yellowish .•In the User Mode, colors of R (Red), G (Green), and B (Blue) are user-configurable; the adjusting range is from 0 ~ 100.4. ImageYou can adjust the image Sharpness, Trace Free, Aspect Control, VividPixel, ASCR and FreeSync, from this main function.• Sharpness : Adjusts the picture sharpness. The adjusting range is from 0 to 100.• Trace Free: Speeds up the response time by Over Drive technology. The adjusting range is from lower 0 to faster 100.• Aspect Control : Adjusts the aspect ratio to “Full ”, “4:3”, “1:1”, “Overscan ”.•VividPixel: ASUS Exclusive Technology that brings lifelike visuals for crystal-clear and detail-oriented enjoyment. The adjusting range is from 0 to 100.• ASCR : Select ON or OFF to enable or disable dynamic contrast ratio function.•FreeSync (DP/Mini-DP only): It can allow a FreeSync supported* graphics source to dynamically adjust display refresh rate based on typical content frame rates for power efficient, virtually stutter free and low-latency display update.•4:3 is only available when input source is in 4:3 format 。
MX239H LCD 显示器用户指南 October 2012说明书

October 2012MX239HLCD MonitorUser GuideiiCopyright © 2012 ASUSTeK COMPUTER INC. All Rights Reserved.No part of this manual, including the products and software described in it, may be reproduced, transmitted, transcribed, stored in a retrieval system, or translated into any language in any form or by any means, except documentation kept by the purchaser for backup purposes, without the express written permission of ASUSTeK COMPUTER INC. (“ASUS”).Product warranty or service will not be extended if: (1) the product is repaired, modified or altered, unless such repair, modification of alteration is authorized in writing by ASUS; or (2) the serial number of the product is defaced or missing.ASUS PROVIDES THIS MANUAL “AS IS” WITHOUT WARRANTY OF ANY KIND, EITHER EXPRESS OR IMPLIED, INCLUDING BUT NOT LIMITED TO THE IMPLIED WARRANTIES OR CONDITIONS OF MERCHANTABILITY OR FITNESS FOR A PARTICULAR PURPOSE. IN NO EVENT SHALL ASUS, ITS DIRECTORS, OFFICERS, EMPLOYEES OR AGENTS BE LIABLE FOR ANY INDIRECT, SPECIAL, INCIDENTAL, OR CONSEQUENTIAL DAMAGES (INCLUDING DAMAGES FOR LOSS OF PROFITS, LOSS OF BUSINESS, LOSS OF USE OR DATA, INTERRUPTION OF BUSINESS AND THE LIKE), EVEN IF ASUS HAS BEEN ADVISED OF THE POSSIBILITY OF SUCH DAMAGES ARISING FROM ANY DEFECT OR ERROR IN THIS MANUAL OR PRODUCT.SPECIFICATIONS AND INFORMATION CONTAINED IN THIS MANUAL ARE FURNISHED FOR INFORMATIONAL USE ONLY, AND ARE SUBJECT TO CHANGE AT ANY TIME WITHOUT NOTICE, AND SHOULD NOT BE CONSTRUED AS A COMMITMENT BY ASUS. ASUS ASSUMES NO RESPONSIBILITY OR LIABILITY FOR ANY ERRORS OR INACCURACIES THAT MAY APPEAR IN THIS MANUAL, INCLUDING THE PRODUCTS AND SOFTWARE DESCRIBED IN IT.Products and corporate names appearing in this manual may or may not be registered trademarks or copyrights of their respective companies, and are used only for identification or explanation and to the owners’ benefit, without intent to infringe.Table of contentsNotices..........................................................................................................iii rmation.......................................................................................iv Care.&.Cleaning.. (v)1.1.Welcome!.......................................................................................1-11.2.Package.contents..........................................................................1-11.3.Monitor.introduction.....................................................................1-21.3.1 Front of the LCD monitor ................................................1-21.3.2 Rear of the LCD monitor .................................................1-41.3.3 QuickFit Function ............................................................1-52.1.Assembling.the.base....................................................................2-12.2.Connecting.cables........................................................................2-12.3.Detaching.the.base.......................................................................2-22.4.Adjusting.the.monitor...................................................................2-33.1.OSD.(On-Screen.Display).menu..................................................3-13.1.1 How to reconfigure ..........................................................3-13.1.2 OSD Function Introduction ..............................................3-13.2.Specifications................................................................................3-63.3.Troubleshooting.(FAQ).................................................................3-73.4.Supported.Timing.List..................................................................3-8Noticesmission.StatementThis device complies with Part 15 of the FCC Rules. Operation is subjectto the following two conditions:• This device may not cause harmful interference, and• This device must accept any interference received including interference that may cause undesired operation.This equipment has been tested and found to comply with the limits for a Class B digital device, pursuant to Part 15 of the FCC Rules. These limitsare designed to provide reasonable protection against harmful interferencein a residential installation. This equipment generates, uses and canradiate radio frequency energy and, if not installed and used in accordance with manufacturer’s instructions, may cause harmful interference to radio communications. However, there is no guarantee that interference willnot occur in a particular installation. If this equipment does cause harmful interference to radio or television reception, which can be determined by turning the equipment off and on, the user is encouraged to try to correctthe interference by one or more of the following measures:• Reorient or relocate the receiving antenna.• Increase the separation between the equipment and receiver.• Connect the equipment to an outlet on a circuit different from that to which the receiver is connected.• Consult the dealer or an experienced radio/TV technician for help. munications.StatementThis digital apparatus does not exceed the Class B limits for radionoise emissions from digital apparatus set out in the Radio Interference Regulations of the Canadian Department of Communications.This class B digital apparatus complies with Canadian ICES-003.iiiivSafety information• Before setting up the monitor, carefully read all the documentation that came with the package.• To prevent fire or shock hazard, never expose the monitor to rain or moisture.• Never try to open the monitor cabinet. The dangerous high voltages inside the monitor may result in serious physical injury.• If the power supply is broken, do not try to fix it by yourself. Contact a qualified service technician or your retailer.• Before using the product, make sure all cables are correctly connected and the power cables are not damaged. If you detect any damage, contact your dealer immediately.• Slots and openings on the back or top of the cabinet are provided for ventilation. Do not block these slots. Never place this product near or over a radiator or heat source unless proper ventilation is provided.• The monitor should be operated only from the type of power source indicated on the label. If you are not sure of the type of power supply to your home, consult your dealer or local power company.• Use the appropriate power plug which complies with your local power standard.• Do not overload power strips and extension cords. Overloading can result in fire or electric shock.• Avoid dust, humidity, and temperature extremes. Do not place the monitor in any area where it may become wet. Place the monitor on a stable surface.• Unplug the unit during a lightning storm or if it will not be used for a long period of time. This will protect the monitor from damage due to power surges.• Never push objects or spill liquid of any kind into the slots on the monitor cabinet.• To ensure satisfactory operation, use the monitor only with UL listed computers which have appropriate configured receptacles marked between 100 ~ 240V AC.• The socket-outlet shall be installed near the equipment and shall be easily accessible• If you encounter technical problems with the monitor, contact a qualified service technician or your retailer.Use only the AC/DC adapter model: AD 3 *' %&(;$ <+vCare & Cleaning• Before you lift or reposition your monitor, it is better to disconnect the cables and power cord. Follow the correct lifting techniques when positioning the monitor. When lifting or carrying the monitor, grasp the edges of the monitor. Do not lift the display by the stand or the cord.• Cleaning. Turn your monitor off and unplug the power cord. Clean the monitor surface with a lint-free, non-abrasive cloth. Stubborn stains may be removed with a cloth dampened with mild cleaner.• Avoid using a cleaner containing alcohol or acetone. Use a cleaner intended for use with the LCD. Never spray cleaner directly on the screen, as it may drip inside the monitor and cause an electric shock.The.following.symptoms.are.normal.with.the.monitor:• The screen may flicker during the initial use due to the nature of the fluorescent light. Turn off the Power Switch and turn it on again to make sure that the flicker disappears.• You may find slightly uneven brightness on the screen depending on the desktop pattern you use.• When the same image is displayed for hours, an afterimage of the previous screen may remain after switching the image. The screen will recover slowly or you can turn off the Power Switch for hours.• When the screen becomes black or flashes, or cannot work anymore, contact your dealer or service center to fix it. Do not repair the screen by yourself!ed.in.this.guideWARNING: Information to prevent injury to yourself when trying tocomplete a task.CAUTION: Information to prevent damage to the componentswhen trying to complete a task.IMPORTANT: Information that you MUST follow to complete atask.NOTE: Tips and additional information to aid in completing a task.rmationRefer to the following sources for additional information and for productand software updates.1..ASUS.websitesThe ASUS websites worldwide provide updated information on ASUShardware and software products. Refer to 2..Optional.documentationYour product package may include optional documentation that mayhave been added by your dealer. These documents are not part ofthe standard package.vi1-1ASUS LCD Monitor MX239H 1.1.Welcome!Thank you for purchasing the ASUS ® LCD monitor!The latest widescreen LCD monitor from ASUS provides a crisper, broader, and brighter display, plus a host of features that enhance your viewing experience.With these features, you can enjoy the convenience and delightful visual experience that the monitor brings you!1.2.Package.contentsCheck your package for the following items:LCD MonitorMonitor BaseQuick Start GuideWarranty Card1x Power Cord1x Power Adapter1x VGA Cable1x HDMI-DVI Cable1x Audio Cable• If any of the above items is damaged or missing, contact your retailerimmediately.1. QuickFit Button:• This is a hotkey to activate the QuickFit function designed for alignment.• The QuickFit function contains 7 pages of common grid patterns, paper sizes, and photo sizes. See page 1-5 for details.2. Button:• Automatically adjust the image to its optimized position, clock, and phase by long pressing this button for 2-4 seconds (for VGA mode only).• Use this hotkey to switch from six video preset modes (Scenery,Standard, Theater, Game, Night View, and sRGB Mode) withSPLENDID™ Video Intelligence Technology.• Exit the OSD menu or go back to the previous menu as the OSD menu is active.3. Button:• Press this button to decrease the value of the function selected or move to the next function.• This is also a hotkey for Volume adjustment.4. MENU Button:• Press this button to enter the OSD menu.• Press this button to enter/select the icon (function) highlighted while the OSD is activated.1-2Chapter 1: Product Introduction5. Button:• Press this button to increase the value of the function selected or move to the previous functions.• This is also a hotkey for Brightness adjustment.6.7.• Press this button to turn the monitor on/off.• The color definition of the power indicator is as the below table.ASUS LCD Monitor MX239H1-31.3.2.Rear.of.the.LCD.monitor1. DC-in Port2. HDMI Port3. VGA Port4. Audio-in Port5. Earphone-out Port6. Kensington Lock7. Control Buttons1-4Chapter 1: Product Introduction1-5ASUS LCD Monitor MX239H1.3.3.QuickFit.FunctionThe QuickFit function contains three patterns: (1) Grid (2) Paper size (3) Photo size.1.Grid pattern: Facilitates designers and users to organize content and layout on one page and achieve a consistent look and feel.2.Paper size: Provides users to view their documents in real size on the screen.3.Photo size: Provides photographers and other users to accurately view and edit their photos in real size on the screen.2.1.Assembling.the.baseTo assemble the base:1. Carefully put the front of the monitor face down on a clean table.2. Attach the base to the stand. Use your fingers to screw the base tothe stand tightly.3. The monitor is now ready for connection.• We recommend that you cover the table surface with soft cloth to preventdamage to the monitor.2.2.Connecting.cablesConnect the cables you need based on the introductions on chapter 1.3.2,page 1-4.2-1Chapter 2: Setup2-2ASUS LCD Monitor MX239H 2.3.Detaching.the.baseTo detach the base:1. Disconnect power and signal cables. Carefully put the front of the monitor face down on a clean table.2. Use your fingers to loosen the screw located at the bottom of the base, and remove the base from the stand.3.Or you may directly use a screwdriver to remove the screw thatsecure the base to the stand, and detach the base from the stand.• We recommend that you cover the table surface with soft cloth to prevent damage to the monitor.•Hold the base while removing the screw.2-3Chapter 2: Setup2.4.Adjusting.the.monitor• For optimal viewing, we recommend that you look at the full face of themonitor, then adjust the monitor to the angle that is most comfortable for you.• Hold the stand to prevent the monitor from falling while changing itsangle.•You can adjust the monitor’s angle from -5˚ to 20˚.-5 ~ 203.1.OSD.(On-Screen.Display).menu3.1.1.How.to.reconfigure1. Press the MENU button to activate the OSD menu.2. Press ❑ and ☐ to navigate through the functions. Highlight andactivate the desired function by pressing the MENU button. If thefunction selected has a sub-menu, press ❑ and ☐ again to navigatethrough the sub-menu functions. Highlight and activate the desiredsub-menu function by pressing the MENU button.3. Press ❑ and ☐ to change the settings of the selected function.4. To exit the OSD menu, press the button. Repeat step 2 andstep 3 to adjust any other function.3.1.2.OSD.Function.Introduction1..SplendidThis function contains six sub-functions that you can select for yourpreference. Each mode has the Reset selection, allowing you tomaintain your setting or return to the preset mode.•.Scenery.Mode: This is the best choice for scenery photo displaying with SPLENDID™ Video Intelligence Technology.ASUS LCD Monitor MX239H3-13-2Chapter 3: General Instruction•.Standard.Mode : This is the best choice for document editing with SPLENDID™ Video Intelligence Technology.•.Theater.Mode : This is the best choice for movie watching with SPLENDID™ Video Intelligence Technology.•.Game.Mode : This is the best choice for game playing with SPLENDID™ Video Intelligence Technology.•.Night.View.Mode : This is the best choice for playing dark-scene game or watching dark-scene movie with SPLENDID™ Video Intelligence Technology.•.sRGB.Mode : This is the best choice for viewing photos and graphicsfrom PCs.• In the Standard Mode, the Saturation, SkinTone, Sharpness, and ASCR functions are not user-configurable.•In the sRGB, the Saturation, Color Temp., SkinTone, Sharpness, Brightness, Contrast and ASCR functions are not user-configurable.2..ColorSelect the image color you like from this function.•.Brightness also a hotkey to activate this function.•.Contrast : The adjusting range is from 0 to 100.•.Saturation : The adjusting range is from 0 to 100.•.Color.Temp.: Contains three preset color modes (Cool , Normal , Warm ) and one User Mode.•.Skin.Tone : Contains three color modes including Reddish , Natural , and Yellowish .•.Smart.View : The versatile viewing positions with Smart View Technology.3-3ASUS LCD Monitor MX239H •In the User Mode, colors of R (Red), G (Green), and B (Blue) are user-configurable; the adjusting range is from 0 ~ 100..3..ImageYou can adjust the image Sharpness, Trace Free, Aspect Control, ASCR, Position (VGA only), and Focus (VGA only) from this main function.•.Sharpness : Adjusts the picture sharpness. The adjusting range is from 0 to 100.•.Trace.Free:.Speeds up the response time by Over Drive technology. The adjusting range is from lower 0 to faster 100.•.Aspect.Control : Adjusts the aspect ratio to “Full ”, “4:3”,“Overscan ”. •.ASCR : Select ON or OFF to enable or disable dynamic contrast ratio function.•.Position : Adjusts the horizontal position (H-Position ) and the vertical position (V-Position ) of the image. The adjusting range is from 0 to 100 (Only available for VGA input).•.Focus : Reduces Horizonal-line noise and Vertical-line noise of the image by adjusting (Phase ) and (Clock ) separately. The adjusting range is from 0 to 100 (Only available for VGA input).• •4..Input.SelectSelect the input source from VGA, HDMI1, or HDMI2.input signal.5..System.SetupAdjusts the system configuration.•.Splendid.Demo.Mode: Activate the demo mode for the Splendidfunction.•.Volume:.Adjust the earphone or speaker output volume level. The adjusting range is from 0 to 100.3-4Chapter 3: General Instruction•.ECO.Mode: Activate the ecology mode for power saving.•.OSD.Setup: Adjusts the horizontal postition (H-Position), verticalposition (V-Position), OSD.Timeout, DDC/CI, and Transparency of theOSD screen.•.Language: Select OSD language. The selections are: English, French, German, Spanish, Italian, Dutch, Russian, Traditional Chinese,Simplified Chinese, Japanese, Persian, Thai, Indonesian, Poland,Turkey, Portugal, Czech, Croatia, Hungary, Romania, and Korean.•.Information: Displays the monitor information.•.All.Reset: Selects “Yes” to revert all settings to the factory default mode.ASUS LCD Monitor MX239H3-53.2.Specifications3-6Chapter 3: General Instruction3.3.Troubleshooting.(FAQ)ASUS LCD Monitor MX239H3-73.4.Supported.Timing.ListVESA./.IBM.Modes.Support.Timing.(D-SUB,.HDMI.inputs)HDMI.1.3.CEA-861.Formats.Supported.Timing.(HDMI.input)*..T he.modes.not.listed.in.the.above.tables.may.not.be.supported..For.optimal.resolution,.we.recommend.that.you.choose.a.mode.listed.in.the.above.tables.3-8Chapter 3: General Instruction。
华硕MX279H液晶显示器使用说明书
中。将显示器放置在平稳的表面上。 • 遇有雷雨天气或长时间不使用时,应拔掉设备的电源线。这样做可以防
ASUS 全球网站提供关于 ASUS 硬件和软件产品的更新信息, 网址是 2. 可选文档 您的经销商可能在您的产品包装中添加了可选文档。这些文档不是标 准产品包装的组成部分。
回收服务
ASUS 的回收服务源自我们对于最高环保标准的承诺。我们相信,提供这些 解决方案能够让我们的客户负责地对于我们的产品、电池、其它组件以及包 装材料等进行回收利用。 请访问 /english/Takeback.htm 了解不同地区的回收信 息。
vii
1.1 欢迎使用!
感谢您购买 ASUS® 液晶显示器! 这是 ASUS 最新推出的宽屏液晶显示器,它不但提供更艳丽、更宽、更亮 的显示屏,而且通过一些有用的功能丰富您的观看体验。 通过这些功能,本显示器为您提供方便愉快的视觉体验!
1.2 物品清单
检查是否包括了以下物品:
液晶显示器 1 x 适配器 1 x 电源线 1 x VGA 线 1 x DVI-HDMI 线 1 x 音频线 1 x 快速入液晶显示器
用户指南
首版 2012年8月
版权所有 © 2012 ASUSTeK COMPUTER INC. 保留所有权利。 除了购买者出于备份目的而保留的文档外,未经 ASUSTeK COMPUTER INC.(以下称“ASUS”)明确书 面许可,不得以任何形式或通过任何方式复制、传播、转录本手册的任何部分,包括其中介绍的产品和软 件,也不得将其存储到检索系统中或翻译成任何语言。 在下列情况下,不能享受产品保修或维修服务:(1) 产品被修理、修改或改动,除非此类修理、修改或改动 得到 ASUS 的书面授权;(2) 产品序列号损毁或缺失。 ASUS“按原样”提供本手册,不提供任何明示或隐含的担保,包括但不限于对于适销性或针对特定目的的 适用性的隐含担保或条件。无论在任何情况下,ASUS 及其董事成员、高级职员、员工或代理不对由于本手 册或产品中存在任何缺陷或错误而导致的任何间接、特殊、偶然或必然损失(包括收益损失、业务损失、不 能使用或数据丢失、业务中断等)承担任何责任,即使 ASUS 已被告知此类损失的可能性。 本手册中包含的规格和信息仅供一般性参考,可能会随时变更而无需另行通知,因此不应构成 ASUS 的承 诺。ASUS 对本手册(包括其中介绍的产品和软件)中可能存在的任何错误不承担任何责任。 本手册中出现的产品名称和公司名称可能分别是或不是相应公司的注册商标或版权,仅用于标示或解释目 的,无意侵犯其所有者的权益。
ASUS PG279Q 液晶显示器 用户指南说明书
PG279Q 系列液晶显示器用户指南第一版 V12015 年 9 月版权所有 © 2015 ASUSTeK COMPUTER INC. 保留所有权利。
除了购买者出于备份目的而保留的文档外,未经 ASUST eK COMPUTER INC.(以下称“ASUS”)明确书面许可,不得以任何形式或通过任何方式复制、传播、转录本手册的任何部分,包括其中介绍的产品和软件,也不得将其存储到检索系统中或翻译成任何语言。
在下列情况下,不能享受产品保修或维修服务:(1) 产品被修理、修改或改动,除非此类修理、修改或改动得到 ASUS 的书面授权;(2) 产品序列号损毁或缺失。
ASUS“按原样”提供本手册,不提供任何明示或隐含的担保,包括但不限于对于适销性或针对特定目的的适用性的隐含担保或条件。
无论在任何情况下,ASUS 及其董事成员、高级职员、员工或代理不对由于本手册或产品中存在任何缺陷或错误而导致的任何间接、特殊、偶然或必然损失(包括收益损失、业务损失、不能使用或数据丢失、业务中断等)承担任何责任,即使 ASUS 已被告知此类损失的可能性。
本手册中包含的规格和信息仅供一般性参考,可能会随时变更而无需另行通知,因此不应构成ASUS 的承诺。
ASUS 对本手册(包括其中介绍的产品和软件)中可能存在的任何错误不承担任何责任。
本手册中出现的产品名称和公司名称可能分别是或不是相应公司的注册商标或版权,仅用于标示或解释目的,无意侵犯其所有者的权益。
ii声明 (iv)安全信息 (v)保养和清洁 (vi)Takeback Services (vii)第 1 章:产品介绍1.1 欢迎使用!...........................................................................1-11.2 物品清单 ..............................................................................1-11.3 显示器简介...........................................................................1-21.3.1 前部概览.................................................................1-21.3.2 后部概览.................................................................1-31.3.3 GamePlus 功能 ......................................................1-41.3.4 TURBO 功能(仅适用于 DisplayPort 输入) .........1-5第 2 章:设置2.1 调整显示器...........................................................................2-12.2 连接线缆 ..............................................................................2-22.3 打开显示器电源....................................................................2-2第 3 章:一般说明3.1 OSD(屏幕显示)菜单 ........................................................3-13.1.1 如何重新配置..........................................................3-13.1.2 OSD 功能介绍........................................................3-13.2 规格摘要 ..............................................................................3-63.3 故障排除(常见问题).........................................................3-73.4 支持的运行模式....................................................................3-7iii联邦通信委员会声明本设备符合 FCC 规则第 15 部分的要求其操作符合以下两项条件:•此设备不会产生有害干扰,并且•此设备必须可以承受任何接收到的干扰,包括可能导致不正常操作的干扰。
ASUS PG279Q系列LCD监视器用户指南第二版九月2015年版权所有说明书
PG279Q series LCD MonitorUser GuideFirst EditionSeptember 2015Copyright © 2015 ASUSTeK COMPUTER INC. All Rights Reserved.No part of this manual, including the products and software described in it, may be reproduced,transmitted, transcribed, stored in a retrieval system, or translated into any language in any form or by any means, except documentation kept by the purchaser for backup purposes, without the express writtenpermission of ASUSTeK COMPUTER INC. (“ASUS”).Product warranty or service will not be extended if: (1) the product is repaired, modified or altered, unless such repair, modification of alteration is authorized in writing byASUS; or (2) the serial number of theproduct is defaced or missing.ASUS PROVIDES THIS MANUAL “AS IS” WITHOUT WARRANTY OF ANY KIND, EITHER EXPRESS OR IMPLIED, INCLUDING BUT NOT LIMITED TO THE IMPLIED WARRANTIES OR CONDITIONS OF MERCHANTABILITY OR FITNESS FOR A PARTICULAR PURPOSE. IN NO EVENT SHALL ASUS, ITS DIRECTORS, OFFICERS, EMPLOYEES OR AGENTS BE LIABLE FOR ANY INDIRECT, SPECIAL,INCIDENTAL, OR CONSEQUENTIAL DAMAGES (INCLUDING DAMAGES FOR LOSS OF PROFITS, LOSS OF BUSINESS, LOSS OF USE OR DATA, INTERRUPTION OF BUSINESS AND THE LIKE),EVEN IF ASUS HAS BEEN ADVISED OF THE POSSIBILITY OF SUCH DAMAGES ARISING FROMANY DEFECT OR ERROR IN THIS MANUAL OR PRODUCT.SPECIFICATIONS AND INFORMATION CONTAINED IN THIS MANUAL ARE FURNISHED FORINFORMATIONAL USE ONLY, AND ARE SUBJECT TO CHANGE AT ANY TIME WITHOUT NOTICE, AND SHOULD NOT BE CONSTRUED AS A COMMITMENT BY ASUS. ASUS ASSUMES NORESPONSIBILITY OR LIABILITY FOR ANY ERRORS OR INACCURACIES THAT MAY APPEAR INTHIS MANUAL, INCLUDING THE PRODUCTS AND SOFTWARE DESCRIBED IN IT.Products and corporate names appearing in this manual may or may not be registered trademarks orcopyrights of their respective companies, and are used only for identification or explanation nd to theowners’ benefit, without intent to infringe.iiContents Notices (iv)rmation (v)Care.&.Cleaning (vi)Takeback.Services (vii)Chapter.1:.....Product.introduction1.1.Welcome!.......................................................................................1-11.2.Package.contents..........................................................................1-11.3.1 Front view .......................................................................1-21.3.2 Back view ........................................................................1-31.3.3 GamePlus Function ........................................................1-41.3.4 TURBO Function (only for DisplayPort input) .................1-5 Chapter.2:.....Setup2.1.Adjusting.the.monitor...................................................................2-12.2.Detaching.the.arm.(for.VESA.wall.mount)..................................2-22.3.Connecting.the.cables..................................................................2-22.4.Turning.on.the.monitor.................................................................2-3 Chapter.3:.....General.instructions3.1.OSD.(On-Screen.Display).menu..................................................3-13.1.1 How to reconfigure ..........................................................3-13.1.2 OSD function introduction ...............................................3-13.2.Specifications.summary...............................................................3-63.3.Supported.operating.mode..........................................................3-8iiiNoticesmission.StatementThis device complies with Part 15 of the FCC Rules. Operation is subject to the following two conditions:• This device may not cause harmful interference, and• This device must accept any interference received including interference that may cause undesired operation.This equipment has been tested and found to comply with the limits for aClass B digital device, pursuant to Part 15 of the FCC Rules. These limits are designed to provide reasonable protection against harmful interference in a residential installation. This equipment generates, uses and can radiate radio frequency energy and, if not installed and used in accordance with manufacturer’s instructions, may cause harmful interference to radio communications. However, there is no guarantee that interference will not occur in a particular installation. If this equipment does cause harmful interference to radio or television reception, which can be determined by turning the equipment off and on, the user is encouraged to try to correct the interference by one or more of the following measures:• Reorient or relocate the receiving antenna.• Increase the separation between the equipment and receiver.• Connect the equipment to an outlet on a circuit different from that to which the receiver is connected.• Consult the dealer or an experienced radio/TV technician for help.The use of shielded cables for connection of the monitor to the graphics card isrequired to assure compliance with FCC regulations. Changes or modificationsto this unit not expressly approved by the party responsible for compliancecould void the user’s authority to operate this equipment.As an Energy Star® Partner, our company has determined that thisproduct meets the Energy Star® guidelines for energy efficiency.munications.StatementThis digital apparatus does not exceed the Class B limits for radio noise emissions from digital apparatus set out in the Radio Interference Regulations of theCanadian Department of Communications.This class B digital apparatus complies with Canadian ICES-003.This Class B digital apparatus meets all requirements of the Canadian Interference - Causing Equipment Regulations.Cet appareil numérique de la classe B respecte toutes les exigences du Réglementsur le matériel brouiller du Canada.ivvSafety information•Before setting up the monitor, carefully read all the documentation that came with the package. •To prevent fire or shock hazard, never expose the monitor to rain or moisture. •Never try to open the monitor cabinet. The dangerous high voltages inside the monitor may result in serious physical injury. •If the power supply is broken, do not try to fix it by yourself. Contact a qualified service technician or your retailer. • Before using the product, make sure all cables are correctly connected and the power cables are not damaged. If you detect any damage, contact your dealer immediately.• Slots and openings on the back or top of the cabinet are provided for ventilation. Do not block these slots. Never place this product near or over a radiator or heat source unless proper ventilation is provided.• The monitor should be operated only from the type of power source indicated on the label. If you are not sure of the type of power supply to your home, consult your dealer or local power company.• Use the appropriate power plug which complies with your local power standard. • Do not overload power strips and extention cords. Overloading can result in fire or electric shock.• Avoid dust, humidity, and temperature extremes. Do not place the monitor in any area where it may become wet. Place the monitor on a stable surface. • Unplug the unit during a lightning storm or if it will not be used for a long period of time. This will protect the monitor from damage due to power surges.• Never push objects or spill liquid of any kind into the slots on the monitor cabinet.• To ensure satisfactory operation, use the monitor only with UL listed computers which have appropriate configured receptacles marked between 100-240V AC.• If you encounter technical problems with the monitor, contact a qualified service technician or your retailer.•The adapter is only used for this monitor, do not use it for other purpose. Your device uses one of the following power supplies: - Manufacturer: Delta Electronics Inc., Model: ADP-90YD B / ADP-120RH BThis symbol of the crossed out wheeled bin indicates that the product (electrical, electronic equipment, and mercury-containing button cell battery) should not be placed in municipal waste. Please check local regulations for disposal ofelectronic products.AEEE.yönetmeliğine.uygundurviCare & Cleaning• Before you lift or reposition your monitor, it is better to disconnect the cables and power cord. Follow the correct lifting techniques when positioning the monitor. When lifting or carrying the monitor, grasp the edges of the monitor. Do not lift the display by the stand or the cord.• Cleaning. Turn your monitor off and unplug the power cord. Clean the monitor surface with a lint-free, non-abrasive cloth. Stubborn stains may be removed with a cloth dampened with mild cleaner.•Avoid using a cleaner containing alcohol or acetone. Use a cleaner intended for use with the monitor. Never spray cleaner directly on the screen, as it may drip inside the monitor and cause an electric shock. The.following.symptoms.are.normal.with.the.monitor:• The screen may flicker during the initial use due to the nature of the fluorescent light. Turn off the Power Switch and turn it on again to make sure that the flicker disappears.• You may find slightly uneven brightness on the screen depending on the desktop pattern you use.• When the same image is displayed for hours, an afterimage of the previous screen may remain after switching the image. The screen will recover slowly or you can turn off the Power Switch for hours.•When the screen becomes black or flashes, or cannot work anymore, contact your dealer or service center to fix it. Do not repair the screen by yourself!ed.in.this.guideWARNING: Information to prevent injury to yourself when trying tocomplete a task.CAUTION: Information to prevent damage to the components when tryingto complete a task.IMPORTANT: Information that you MUST follow to complete a task.NOTE: Tips and additional information to aid in completing a task.rmationRefer to the following sources for additional information and for product and software updates.1..ASUS.websitesThe ASUS websites worldwide provide updated information on ASUShardware and software products. Refer to 2..Optional.documentationYour product package may include optional documentation that may havebeen added by your dealer. These documents are not part of the standardpackage.Takeback ServicesASUS recycling and takeback programs come from our commitment to the highest standards for protecting our environment. We believe in providing solutions forour customers to be able to responsibly recycle our products, batteries and other components as well as the packaging materials.Please go to /english/Takeback.htm for detail recycling information in different region.viiviii1.1 Welcome!Thank you for purchasing the ASUS® LCD monitor!The latest widescreen LCD monitor from ASUS provides a broader, brighter and crystal-clear display, plus a host of features that enhance your viewing experience. With these features, you can enjoy the convenience and delightful visual experience that the monitor brings to you!1.2 Package contentsCheck your package for the following items:LCD monitorDriver and Manual discQuick start guideWarranty cardPower adapterPower cordDP cableHDMI cableUSB cableIf any of the above items is damaged or missing, contact your retailerimmediately.Select “ON” when you see the message “LIGHT IN MOTION ON/OFF” appearsif you want to turn on the red light on the base. Select “OFF” if you want it toturn off. If you disable this function but later wish to reactivate it, please usethe OSD menu to turn it on. The monitor is Energy Star 6.0 compatible when“LIGHT IN MOTION” is “OFF”.If no signal is detected for 120 seconds, the monitor automatically enters savingmode.It is recommended that you set the DisplayPort Deep Sleep and HDMI DeepSleep functions to “OFF”.1-1 ASUS PG279Q Series LCD Monitor1-2Chapter 1: Product introduction 1.3 Monitor introduction1.3.1.Front.view1.2. • Exits the OSD menu item.• Turns on the OSD menu when the monitor enters standby mode or displays the “NO SIGNAL“ message.3. button:• GamePlus hotkey. Move the press • Turns on the OSD menu when the monitor enters standby mode or displays the “NO SIGNAL“ message.4. button• TURBO hotkey. Press the button to select among different refresh rates. (Only for DisplayPort input)• Turns on the OSD menu when the monitor enters standby mode or displays the “NO SIGNAL“ message.5.• Turns the monitor on/off.The color definition of the power indicator is as the below table.•1.3.2.Back.viewRear.connectors1..DC-IN.port. This port connects the power cord.2..Earphone.jack. This port is only available when an HDMI/DisplayPort cableis connected.3..DisplayPort. This port is for connection for a DisplayPort compatible device.4..HDMI.port. This port is for connection with an HDMI compatible device.B.3.0.upstream.port. This port is for connection with a USB upstreamcable. The connection enables the USB ports on the monitor.B.3.0.downstream.ports. These ports are for connection with USBdevices, such as USB keyboard/mouse, USB flash drive, etc.7. For service personnel only.8..Kensington.lock.slot.9..Control.buttons.ASUS PG279Q Series LCD Monitor1-31.3.3.GamePlus.FunctionThe GamePlus function provides a toolkit and creates a better gaming environment for users when playing different types of games. In addition, Crosshair function is specially designed for new gamers or beginners interested in First Person Shooter (FPS) games.To active GamePlus:1. Press the GamePlus hotkey.2. Move the3. Press the) button or move thefunction you choose, and move thethrough the settings. Move the4. Highlight the desired setting and press thePress the button to inactivate it.1-4Chapter 1: Product introduction1.3.4.TURBO.Function.(only.for.DisplayPort.input)The TURBO function helps you select among different refresh rates in a convenient way.To active TURBO:Press the TURBO hotkey repeatedly to select.ASUS PG279Q Series LCD Monitor1-51-6Chapter 1: Product introduction2-1ASUS PG279Q Series LCD Monitor 2.1Adjusting the monitor• For optimal viewing, we recommend that you look at the full face of the monitor, then adjust the monitor to the angle that is most comfortable for you.• Hold the stand to prevent the monitor from falling when you change its angle.•The recommended adjusting angle is +20˚ to -5˚ (for tilt)/+60˚ to -60˚ (for swiveling/ +120 mm (for height adjustment)/90˚ (for portrait view).-5° ~ +20°It is normal that the monitor slightly shakes while you adjust the viewing angle.Pivoting.the.monitor 1. Lift the monitor to the highest position.2 Tilt the monitor to its maximum angle.3.Pivot the monitor clockwise to the angle you need.-5° ~ +20°It is normal that the monitor slightly shakes while you adjust the viewing angle.Figure 1Figure 2Figure 32-2Chapter 2: Setup2.2Detaching the arm (for VESA wall mount)The detachable arm of this monitor is specially designed for VESA wall mount. To detach the arm:1. Have the front of the monitor face down on a table.2.Loosen the four screws on the back of the monitor and remove the arm/base.We recommend that you cover the table surface with soft cloth to preventdamage to the monitor.2.3 Connecting the cablesConnect the cables as the following instructions:•.To.connect.the.power.cord :a. Connect the power adapter securely to the monitor’s DC input.b. Connect one end of the power cord to the power adapter and the otherend to a power outlet.•.To.connect.the.DisplayPort/HDMI.cable:a. Plug one end of the DisplayPort cable to the monitor’s DisplayPort/HDMIport.b. Connect the other end of the DisplayPort/HDMI cable to your computer'sDisplayPort port.•e.the.earphone: connect the end with plug type to the monitor’s earphone jack when an HDMI or DisplayPort signal is fed.•B.3.0.ports: Take the supplied USB 3.0 cable, and plug the smaller end (type B) of the USB upstream cable to the monitor’s USBupstream port, and the larger end (type A) to your computer’s USB 3.0 port.Make sure your computer is installed with the lastest Windows 7/Windows 8operating system. That will enable the USB ports on the monitor to work.2.4 Turning on the monitorASUS PG279Q Series LCD Monitor2-32-4Chapter 2: Setup3-1ASUS PG279Q Series LCD Monitor 3.1OSD (On-Screen Display) menu3.1.1.How.to.reconfigure1. Press the2.Move the ) button up/down to navigate through the functions. Highlight the desired function and press the (the function selected has a sub-menu, move the again to navigate through the sub-menu functions. Highlight the desired sub-menu function and press the right to activate it. 3. Move the function.4.To exit and save the OSD menu, press the button or move the ) left repeatedly until the OSD menu disappears. To adjust other functions, repeat steps 1-3.3.1.2.OSD.function.introduction1..Over.ClockingThis function allows you to adjust the refresh rate.• Select “ON” if you want to enable this function.3-2Chapter 3: General Instructions•.Max.Refresh.Rate : After activating this function, you can select one refresh rate to be displayed along with 60 Hz and 120 Hz when pressing the TURBO hotkey (Only for DisplayPort input).After reboot, test the new Max Refresh Rate by enabling it in the NVIDIAControl Panel. If you don’t see an image, disconnect the DP cable and use themonitor OSD to try again with a safer Max Refresh Rate.2..GameVisualThis function contains 6 sub-functions you can select for your preference. Each mode has the Reset selection, allowing you to maintain your setting or return to the preset mode.•.Scenery.Mode : This is the best choice for scenery photo displaying with GameVisual TM Video intelligence Technology.•.Racing.Mode : This is the best choice for racing game playing with GameVisual TM Video intelligence Technology.•.Cinema.Mode : This is the best choice for movie watching with GameVisual TM Video intelligence Technology.•.RTS/RPG.Mode : This is the best choice for Real-Time Strategy (RTS)/Role-Playing Game (RPG) playing with GameVisual TM Video intelligence Technology.•.FPS.Mode : This is the best choice for First Person Shooter game playing with GameVisual TM Video intelligence Technology.•.sRGB.Mode : This is the best choice for viewing photos and graphics from PCs.• In the Racing mode, the following function(s) are not user-configurable: Saturation.• In the sRGB mode, the following function(s) are not user-configurable: Saturation, Color Temp., Brightness, Contrast.3..Blue.Light.FilterIn this function, you can adjust the blue light filter level.•.Level.0:.No change.•.Level.1~4: The higher the level, the less blue light is scattered.When Blue Light Filter is activated,the default settings of Racing Modewill be automatically imported. Between Level 1 to Level 3, the Brightnessfunction is user-configurable. Level 4 is optimized setting. It is compliancewith TUV Low Blue Light Certification. The Brightness function is not user-configurable.4..ColorYou can adjust Brightness, Contrast, Saturation and Color temperature from this menu.•.Brightness: the adjusting range is from 0 to 100.•.Contrast: the adjusting range is from 0 to 100.•.Saturation: The adjusting range is from 0 to 100.•.Color.Temp.: contains 4 modes including Cool, Normal, Warm, and User Mode.5..Image.You can adjust OD and ULMB from this menu.•.OD: Improves the gray level response time of the LCD panel.•.ULMB.(Ultra Low Motion Blur) (only for DisplayPort input): Adjusts the level of motion blur reduction. This function is available when the refreshrate is 85Hz, 100Hz or 120Hz.6..Input.Select.In this function, you can select your desired input source.7..System.Setup.Allows you to adjust the system.•.Language: There are 21 languages for your selection, including English, French, German, Italian, Spanish, Dutch, Portuguese, Russian, Czech,Croatian, Polish, Romanian, Hungarian, Turkish, Simplified Chinese,Traditional Chinese, Japanese, Korean, Thai, Indonesia, Persian.•.OSD.Position: Adjusts the horizontal position (H-Position)/the vertical position (V-Position) of the OSD.•.Transparency: Adjusts the OSD background from opaque to transparent.•.OSD.Timeout: Adjusts the OSD timeout from 10 to 120 seconds.•.Keylock: To disable all function keys. Press over 5 seconds to cancel the key lock function.•.Information: Shows the monitor information.•.LIGHT.IN.MOTION: Select“ON” if you want to turn on the red light on the base.•.Sound:*.Volume: the adjusting range is from 0 to 100.*.Mute: toggles the monitor sound between on and off.•.All.Reset: “Yes” allows you to restore the default settings.•.DisplayPort.Deep.Sleep: puts the DisplayPort port into deep sleep.•.HDMI.Deep.Sleep: puts the HDMI port into deep sleep.In order to be Energy Star compliant, the default setting for DisplayPort DeepSleep and HDMI Deep Sleep is “On”.If the monitor cannot wake up after going into deep sleep, do one of thefollowings:3.2 Specifications summary*Specifications are subject to change without notice.3.3 Troubleshooting (FAQ)3.4 Supported operating modeHDMI inputNote:Do not support interlace.DisplayPort inputNote:Do not support interlace.G-SYNC (only for DisplayPort input) supported NVIDIA GPUs: GeForce GTX TITAN X, GeForce GTX 980 Ti, GeForce GTX 980, GeForce GTX 970, GeForce GTX 960, GeForce GTX TITAN Z, GeForce GTX TITAN Black, GeForce GTX TITAN, GeForce GTX 780 Ti, GeForce GTX 780, GeForce GTX 770, GeForce GTX 760, GeForce GTX 750 Ti, GeForce GTX 750, GeForce GTX 745 (OEM), GeForce GTX 690, GeForce GTX 680, GeForce GTX 670, GeForce GTX 660 Ti, GeForce GTX 660, GeForce GTX 650 Ti BOOST. For other GPUs, please contact the manufactures to see if they are compatible.DisplayPort.input--Over.clockingNote:.Do.not.support.interlace.Over.Clocking.supported.GPUs:.NVIDIA.Maxwell.GPU.Graphics.Card.like.GTX745,.GTX750,.GTX750. Ti,.GTX.960,.GTX970,.GTX980,.GTX980.Ti.and.GTX.Titan.X..For.other.GPUs,.please.contact.the. patible.The.monitor.is.purposely.supporting.the.NVIDIA.G-SYNC.technology.and.targeting.NVIDIA.graphics. solutions..Please.note.that.Over.Clocking.function/performance.depends.on.the.GPUs.or.contents.displayed.. ASUS.only.provides.this.function..The.performance.or.any.side.effect.after.activation.is.not. guaranteed...。
ASUS MX239H LCD监视器用户指南2012年10月说明书

October 2012MX239HLCD MonitorUser GuideiiCopyright © 2012 ASUSTeK COMPUTER INC. All Rights Reserved.No part of this manual, including the products and software described in it, may be reproduced, transmitted, transcribed, stored in a retrieval system, or translated into any language in any form or by any means, except documentation kept by the purchaser for backup purposes, without the express written permission of ASUSTeK COMPUTER INC. (“ASUS”).Product warranty or service will not be extended if: (1) the product is repaired, modified or altered, unless such repair, modification of alteration is authorized in writing by ASUS; or (2) the serial number of the product is defaced or missing.ASUS PROVIDES THIS MANUAL “AS IS” WITHOUT WARRANTY OF ANY KIND, EITHER EXPRESS OR IMPLIED, INCLUDING BUT NOT LIMITED TO THE IMPLIED WARRANTIES OR CONDITIONS OF MERCHANTABILITY OR FITNESS FOR A PARTICULAR PURPOSE. IN NO EVENT SHALL ASUS, ITS DIRECTORS, OFFICERS, EMPLOYEES OR AGENTS BE LIABLE FOR ANY INDIRECT, SPECIAL, INCIDENTAL, OR CONSEQUENTIAL DAMAGES (INCLUDING DAMAGES FOR LOSS OF PROFITS, LOSS OF BUSINESS, LOSS OF USE OR DATA, INTERRUPTION OF BUSINESS AND THE LIKE), EVEN IF ASUS HAS BEEN ADVISED OF THE POSSIBILITY OF SUCH DAMAGES ARISING FROM ANY DEFECT OR ERROR IN THIS MANUAL OR PRODUCT.SPECIFICATIONS AND INFORMATION CONTAINED IN THIS MANUAL ARE FURNISHED FOR INFORMATIONAL USE ONLY, AND ARE SUBJECT TO CHANGE AT ANY TIME WITHOUT NOTICE, AND SHOULD NOT BE CONSTRUED AS A COMMITMENT BY ASUS. ASUS ASSUMES NO RESPONSIBILITY OR LIABILITY FOR ANY ERRORS OR INACCURACIES THAT MAY APPEAR IN THIS MANUAL, INCLUDING THE PRODUCTS AND SOFTWARE DESCRIBED IN IT.Products and corporate names appearing in this manual may or may not be registered trademarks or copyrights of their respective companies, and are used only for identification or explanation and to the owners’ benefit, without intent to infringe.Table of contentsNotices..........................................................................................................iii rmation.......................................................................................iv Care.&.Cleaning.. (v)1.1.Welcome!.......................................................................................1-11.2.Package.contents..........................................................................1-11.3.Monitor.introduction.....................................................................1-21.3.1 Front of the LCD monitor ................................................1-21.3.2 Rear of the LCD monitor .................................................1-41.3.3 QuickFit Function ............................................................1-52.1.Assembling.the.base....................................................................2-12.2.Connecting.cables........................................................................2-12.3.Detaching.the.base.......................................................................2-22.4.Adjusting.the.monitor...................................................................2-33.1.OSD.(On-Screen.Display).menu..................................................3-13.1.1 How to reconfigure ..........................................................3-13.1.2 OSD Function Introduction ..............................................3-13.2.Specifications................................................................................3-63.3.Troubleshooting.(FAQ).................................................................3-73.4.Supported.Timing.List..................................................................3-8Noticesmission.StatementThis device complies with Part 15 of the FCC Rules. Operation is subjectto the following two conditions:• This device may not cause harmful interference, and• This device must accept any interference received including interference that may cause undesired operation.This equipment has been tested and found to comply with the limits for a Class B digital device, pursuant to Part 15 of the FCC Rules. These limitsare designed to provide reasonable protection against harmful interferencein a residential installation. This equipment generates, uses and canradiate radio frequency energy and, if not installed and used in accordance with manufacturer’s instructions, may cause harmful interference to radio communications. However, there is no guarantee that interference willnot occur in a particular installation. If this equipment does cause harmful interference to radio or television reception, which can be determined by turning the equipment off and on, the user is encouraged to try to correctthe interference by one or more of the following measures:• Reorient or relocate the receiving antenna.• Increase the separation between the equipment and receiver.• Connect the equipment to an outlet on a circuit different from that to which the receiver is connected.• Consult the dealer or an experienced radio/TV technician for help.As an Energy Star® Partner, our company has determinedthat this product meets the Energy Star® guidelines for energyefficiency.munications.StatementThis digital apparatus does not exceed the Class B limits for radionoise emissions from digital apparatus set out in the Radio Interference Regulations of the Canadian Department of Communications.This class B digital apparatus complies with Canadian ICES-003.iiiivSafety information• Before setting up the monitor, carefully read all the documentation that came with the package.• To prevent fire or shock hazard, never expose the monitor to rain or moisture.• Never try to open the monitor cabinet. The dangerous high voltages inside the monitor may result in serious physical injury.• If the power supply is broken, do not try to fix it by yourself. Contact a qualified service technician or your retailer.• Before using the product, make sure all cables are correctly connected and the power cables are not damaged. If you detect any damage, contact your dealer immediately.• Slots and openings on the back or top of the cabinet are provided for ventilation. Do not block these slots. Never place this product near or over a radiator or heat source unless proper ventilation is provided.• The monitor should be operated only from the type of power source indicated on the label. If you are not sure of the type of power supply to your home, consult your dealer or local power company.• Use the appropriate power plug which complies with your local power standard.• Do not overload power strips and extension cords. Overloading can result in fire or electric shock.• Avoid dust, humidity, and temperature extremes. Do not place the monitor in any area where it may become wet. Place the monitor on a stable surface.• Unplug the unit during a lightning storm or if it will not be used for a long period of time. This will protect the monitor from damage due to power surges.• Never push objects or spill liquid of any kind into the slots on the monitor cabinet.• To ensure satisfactory operation, use the monitor only with UL listed computers which have appropriate configured receptacles marked between 100 ~ 240V AC.• The socket-outlet shall be installed near the equipment and shall be easily accessible• If you encounter technical problems with the monitor, contact a qualified service technician or your retailer.Use only the AC/DC adapter model: AD 3 *' %&(;$ <+vCare & Cleaning• Before you lift or reposition your monitor, it is better to disconnect the cables and power cord. Follow the correct lifting techniques when positioning the monitor. When lifting or carrying the monitor, grasp the edges of the monitor. Do not lift the display by the stand or the cord.• Cleaning. Turn your monitor off and unplug the power cord. Clean the monitor surface with a lint-free, non-abrasive cloth. Stubborn stains may be removed with a cloth dampened with mild cleaner.• Avoid using a cleaner containing alcohol or acetone. Use a cleaner intended for use with the LCD. Never spray cleaner directly on the screen, as it may drip inside the monitor and cause an electric shock.The.following.symptoms.are.normal.with.the.monitor:• The screen may flicker during the initial use due to the nature of the fluorescent light. Turn off the Power Switch and turn it on again to make sure that the flicker disappears.• You may find slightly uneven brightness on the screen depending on the desktop pattern you use.• When the same image is displayed for hours, an afterimage of the previous screen may remain after switching the image. The screen will recover slowly or you can turn off the Power Switch for hours.• When the screen becomes black or flashes, or cannot work anymore, contact your dealer or service center to fix it. Do not repair the screen by yourself!ed.in.this.guideWARNING: Information to prevent injury to yourself when trying tocomplete a task.CAUTION: Information to prevent damage to the componentswhen trying to complete a task.IMPORTANT: Information that you MUST follow to complete atask.NOTE: Tips and additional information to aid in completing a task.rmationRefer to the following sources for additional information and for productand software updates.1..ASUS.websitesThe ASUS websites worldwide provide updated information on ASUShardware and software products. Refer to 2..Optional.documentationYour product package may include optional documentation that mayhave been added by your dealer. These documents are not part ofthe standard package.vi1-1ASUS LCD Monitor MX239H 1.1.Welcome!Thank you for purchasing the ASUS ® LCD monitor!The latest widescreen LCD monitor from ASUS provides a crisper, broader, and brighter display, plus a host of features that enhance your viewing experience.With these features, you can enjoy the convenience and delightful visual experience that the monitor brings you!1.2.Package.contentsCheck your package for the following items:LCD MonitorMonitor BaseQuick Start GuideWarranty Card1x Power Cord1x Power Adapter1x VGA Cable1x HDMI-DVI Cable1x Audio Cable• If any of the above items is damaged or missing, contact your retailerimmediately.1. QuickFit Button:• This is a hotkey to activate the QuickFit function designed for alignment.• The QuickFit function contains 7 pages of common grid patterns, paper sizes, and photo sizes. See page 1-5 for details.2. Button:• Automatically adjust the image to its optimized position, clock, and phase by long pressing this button for 2-4 seconds (for VGA mode only).• Use this hotkey to switch from six video preset modes (Scenery,Standard, Theater, Game, Night View, and sRGB Mode) withSPLENDID™ Video Intelligence Technology.• Exit the OSD menu or go back to the previous menu as the OSD menu is active.3. Button:• Press this button to decrease the value of the function selected or move to the next function.• This is also a hotkey for Volume adjustment.4. MENU Button:• Press this button to enter the OSD menu.• Press this button to enter/select the icon (function) highlighted while the OSD is activated.1-2Chapter 1: Product Introduction5. Button:• Press this button to increase the value of the function selected or move to the previous functions.• This is also a hotkey for Brightness adjustment.6.7.• Press this button to turn the monitor on/off.• The color definition of the power indicator is as the below table.ASUS LCD Monitor MX239H1-31.3.2.Rear.of.the.LCD.monitor1. DC-in Port2. HDMI Port3. VGA Port4. Audio-in Port5. Earphone-out Port6. Kensington Lock7. Control Buttons1-4Chapter 1: Product Introduction1-5ASUS LCD Monitor MX239H1.3.3.QuickFit.FunctionThe QuickFit function contains three patterns: (1) Grid (2) Paper size (3) Photo size.1.Grid pattern: Facilitates designers and users to organize content and layout on one page and achieve a consistent look and feel.2.Paper size: Provides users to view their documents in real size on the screen.3.Photo size: Provides photographers and other users to accurately view and edit their photos in real size on the screen.2.1.Assembling.the.baseTo assemble the base:1. Carefully put the front of the monitor face down on a clean table.2. Attach the base to the stand. Use your fingers to screw the base tothe stand tightly.3. The monitor is now ready for connection.• We recommend that you cover the table surface with soft cloth to preventdamage to the monitor.2.2.Connecting.cablesConnect the cables you need based on the introductions on chapter 1.3.2,page 1-4.2-1Chapter 2: Setup2-2ASUS LCD Monitor MX239H 2.3.Detaching.the.baseTo detach the base:1. Disconnect power and signal cables. Carefully put the front of the monitor face down on a clean table.2. Use your fingers to loosen the screw located at the bottom of the base, and remove the base from the stand.3.Or you may directly use a screwdriver to remove the screw thatsecure the base to the stand, and detach the base from the stand.• We recommend that you cover the table surface with soft cloth to prevent damage to the monitor.•Hold the base while removing the screw.2-3Chapter 2: Setup2.4.Adjusting.the.monitor• For optimal viewing, we recommend that you look at the full face of themonitor, then adjust the monitor to the angle that is most comfortable for you.• Hold the stand to prevent the monitor from falling while changing itsangle.•You can adjust the monitor’s angle from -5˚ to 20˚.-5 ~ 203.1.OSD.(On-Screen.Display).menu3.1.1.How.to.reconfigure1. Press the MENU button to activate the OSD menu.2. Press ❑ and ☐ to navigate through the functions. Highlight andactivate the desired function by pressing the MENU button. If thefunction selected has a sub-menu, press ❑ and ☐ again to navigatethrough the sub-menu functions. Highlight and activate the desiredsub-menu function by pressing the MENU button.3. Press ❑ and ☐ to change the settings of the selected function.4. To exit the OSD menu, press the button. Repeat step 2 andstep 3 to adjust any other function.3.1.2.OSD.Function.Introduction1..SplendidThis function contains six sub-functions that you can select for yourpreference. Each mode has the Reset selection, allowing you tomaintain your setting or return to the preset mode.•.Scenery.Mode: This is the best choice for scenery photo displaying with SPLENDID™ Video Intelligence Technology.ASUS LCD Monitor MX239H3-13-2Chapter 3: General Instruction•.Standard.Mode : This is the best choice for document editing with SPLENDID™ Video Intelligence Technology.•.Theater.Mode : This is the best choice for movie watching with SPLENDID™ Video Intelligence Technology.•.Game.Mode : This is the best choice for game playing with SPLENDID™ Video Intelligence Technology.•.Night.View.Mode : This is the best choice for playing dark-scene game or watching dark-scene movie with SPLENDID™ Video Intelligence Technology.•.sRGB.Mode : This is the best choice for viewing photos and graphicsfrom PCs.• In the Standard Mode, the Saturation, SkinTone, Sharpness, and ASCR functions are not user-configurable.•In the sRGB, the Saturation, Color Temp., SkinTone, Sharpness, Brightness, Contrast and ASCR functions are not user-configurable.2..ColorSelect the image color you like from this function.•.Brightness also a hotkey to activate this function.•.Contrast : The adjusting range is from 0 to 100.•.Saturation : The adjusting range is from 0 to 100.•.Color.Temp.: Contains three preset color modes (Cool , Normal , Warm ) and one User Mode.•.Skin.Tone : Contains three color modes including Reddish , Natural , and Yellowish .•.Smart.View : The versatile viewing positions with Smart View Technology.3-3ASUS LCD Monitor MX239H •In the User Mode, colors of R (Red), G (Green), and B (Blue) are user-configurable; the adjusting range is from 0 ~ 100..3..ImageYou can adjust the image Sharpness, Trace Free, Aspect Control, ASCR, Position (VGA only), and Focus (VGA only) from this main function.•.Sharpness : Adjusts the picture sharpness. The adjusting range is from 0 to 100.•.Trace.Free:.Speeds up the response time by Over Drive technology. The adjusting range is from lower 0 to faster 100.•.Aspect.Control : Adjusts the aspect ratio to “Full ”, “4:3”,“Overscan ”. (Overscan is available only for HDMI source)•.ASCR : Select ON or OFF to enable or disable dynamic contrast ratio function.•.Position : Adjusts the horizontal position (H-Position ) and the vertical position (V-Position ) of the image. The adjusting range is from 0 to 100 (Only available for VGA input).•.Focus : Reduces Horizonal-line noise and Vertical-line noise of the image by adjusting (Phase ) and (Clock ) separately. The adjusting range is from 0 to 100 (Only available for VGA input).• Phase adjusts the phase of the pixel clock signal. With a wrong phase adjustment, the screen shows horizontal disturbances.•Clock (pixel frequency) controls the number of pixels scanned by one horizontal sweep. If the frequency is not correct, the screen shows vertical stripes and the image is not proportional.4..Input.SelectSelect the input source from VGA, HDMI1, or HDMI2.input signal.5..System.SetupAdjusts the system configuration.•.Splendid.Demo.Mode: Activate the demo mode for the Splendidfunction.•.Volume:.Adjust the earphone or speaker output volume level. The adjusting range is from 0 to 100.3-4Chapter 3: General Instruction•.ECO.Mode: Activate the ecology mode for power saving.•.OSD.Setup: Adjusts the horizontal postition (H-Position), verticalposition (V-Position), OSD.Timeout, DDC/CI, and Transparency of theOSD screen.•.Language: Select OSD language. The selections are: English, French, German, Spanish, Italian, Dutch, Russian, Traditional Chinese,Simplified Chinese, Japanese, Persian, Thai, Indonesian, Poland,Turkey, Portugal, Czech, Croatia, Hungary, Romania, and Korean.•.Information: Displays the monitor information.•.All.Reset: Selects “Yes” to revert all settings to the factory default mode.ASUS LCD Monitor MX239H3-53.2.Specifications3-6Chapter 3: General Instruction3.3.Troubleshooting.(FAQ)ASUS LCD Monitor MX239H3-73.4.Supported.Timing.ListVESA./.IBM.Modes.Support.Timing.(D-SUB,.HDMI.inputs)HDMI.1.3.CEA-861.Formats.Supported.Timing.(HDMI.input)*..T he.modes.not.listed.in.the.above.tables.may.not.be.supported..For.optimal.resolution,.we.recommend.that.you.choose.a.mode.listed.in.the.above.tables.3-8Chapter 3: General Instruction。
- 1、下载文档前请自行甄别文档内容的完整性,平台不提供额外的编辑、内容补充、找答案等附加服务。
- 2、"仅部分预览"的文档,不可在线预览部分如存在完整性等问题,可反馈申请退款(可完整预览的文档不适用该条件!)。
- 3、如文档侵犯您的权益,请联系客服反馈,我们会尽快为您处理(人工客服工作时间:9:00-18:30)。
警告:这些信息旨在防止您在试图完成一项任务时受伤。
小心:这些信息旨在防止当试图完成一项任务时损坏组件。
重要:您在完成一项任务时必须遵循这些信息。 注:这些提示和附加信息旨在帮助您完成一项任务。
vi
更多信息 如需更多信息或者产品和软件更新,请使用下列资源。 1. ASUS 网站
ii
目录
声明 ......................................................................................................... iv 安全信息......................................................................................................... v 保养和清洁..................................................................................................... vi 回收服务....................................................................................................... vii 1.1 欢迎使用! ..................................................................................... 1-1 1.2 物品清单......................................................................................... 1-1 1.3 显示器简介 ..................................................................................... 1-2
害。 • 电源发生故障时,不要尝试自行修复。请与专业技术服务人士或经销商
联系。 • 在使用本产品之前,确保所有线缆均连接正确并且电源线没有损坏。如
有任何损坏,请立即与经销商联系。 • 机壳后部和顶部的槽和开口用于通风目的。不要堵塞这些开口。除非通
风良好,否则不要将本产品放置在散热器或热源上部或附近。 • 本显示器只应使用标签上注明的电源类型。如果您不了解家中的电源类
止因电压突变而损坏显示器。 • 切勿将任何异物塞入或使任何液体溅入显示器机壳上的开口内。 • 为确保正常运行,本显示器只应与UL列出的计算机一起使用,这些计算
机的插座经过正确配置并且标记有100-240V AC。 • 如果在使用本显示器的过程中遇到任何技术问题,请与专业技术服务人
士或经销商联系。
v
保养和清洁
以下现象对于显示器来说是正常现象: • 由于荧光灯本身的特点,屏幕在初次使用时可能闪烁。关闭电源开关,
然后重新打开,确认闪烁已消失。 • 您可能会发现屏幕上的亮度略微不均匀,这与您使用的桌面图案有关。 • 同一图像显示数小时后,切换图像时可能残留前一个屏幕显示的图像。
屏幕会慢慢恢复,或者您可以关闭电源开关数小时。 • 当屏幕变黑或闪烁时或者无法继续工作时,请与经销商或服务中心联系
作为Energy Star® 的合作伙伴,本公司已经确定本产品符合 Energy Star® 在能源效率方面的要求。
加拿大通信部声明 此数字设备未超过加拿大通信部无线电干扰条例中规定的数字设备无线电噪 声发射 B 级限制。 此 B 级数字设备符合加拿大 ICES-003 的要求。
iv
安全信息
• 在设置本显示器之前,请仔细阅读产品包装中附带的所有文档。 • 为防止火灾或电击危险,切勿使本显示器遭受雨淋或受潮。 • 请勿打开显示器机壳。显示器内部有危险高压,可能导致严重人身伤

如果上述任何物品损坏或缺失,请立即与经销商联系。
ASUS 液晶显示器 MX279
1-1
1.3 显示器简介
1.3.1 前视图 ............................................................................. 1-2 1.3.2 后视图 ............................................................................. 1-4 1.3.3 QuickFit 功能................................................................... 1-5 2.1 组装显示器底座 .............................................................................. 2-1 2.1.1 安装底座.......................................................................... 2-1 2.1.2 拆卸底座.......................................................................... 2-2 2.2 调整显示器 ..................................................................................... 2-3 2.3 连接线缆......................................................................................... 2-3 2.4 打开显示器 ..................................................................................... 2-4 3.1 OSD(屏幕显示)菜单................................................................... 3-1 3.1.1 如何重新配置 .................................................................. 3-1 3.1.2 OSD 功能介绍................................................................. 3-1 3.2 规格摘要......................................................................................... 3-4 3.3 故障排除(常见问题) ................................................................... 3-6 3.4 支持的操作模式 .............................................................................. 3-7
型,请与经销商或当地电力公司联系。 • 使用符合您当地电力标准的合适电源插头。 • 不要使电源板或延长线过载。过载可能导致火灾或电击。 • 避免灰尘、潮湿和极端温度。不要将显示器放置在可能受潮的任何区域
中。将显示器放置在平稳的表面上。 • 遇有雷雨天气或长时间不使用时,应拔掉设备的电源线。这样做可以防
iii
声明
联邦通信委员会声明 本设备符合 FCC 规则第 15 部分的要求。其操作符合以下两项条件: • 此设备不会产生有害干扰,并且 • 此设备必须可以承受任何接收到的干扰,包括可能导致不正常操作的干
扰。 此设备经检测,符合 FCC 规则第 15 部分中关于 B 级数字设备的限制规定。 这些限制旨在为居民区安装提供防止有害干扰的合理保护。本设备会产生、 使用并且辐射无线电波,如果不按照制造商的说明进行安装和使用,可能会 对无线电通讯产生有害干扰。但是,不能保证在特定安装条件下不会出现干 扰。如果本设备对无线电或电视接收造成了有害干扰(可通过关闭和打开设 备电源来确定),建议用户采取以下一项或多项措施来消除干扰: • 调节接收天线的方向或位置。 • 增大设备与接收器之间的距离。 • 将此设备和接收设备连接到不同电路的电源插座上。 • 向代理商或有经验的无线电/电视技术人员咨询以获得帮助。 本产品采用电源管理功能。如果 10 秒后没有信号输入,产品会自动进入睡 眠/待机模式。
• 在提起或重新放置显示器之前,最好先拔掉线缆和电源线。采用正确的 提起方式放置显示器。提起或搬运显示器时,抓住显示器的边缘。不要 通过底座或线缆提起显示屏。
• 清洁。关闭显示器电源并拔掉电源线。使用不含麻且非研磨性的布清洁 显示器表面。将布在中性清洁剂中蘸湿后擦去顽固污渍。
• 不要使用包含酒精或丙酮的清洁剂。使用液晶专用清洁剂。切勿直接将 清洁剂喷洒在屏幕上,否则清洁剂可能渗入显示器内并导致电击。
ASUS 全球网站提供关于 ASUS 硬件和软件产品的更新信息, 网址是 2. 可选文档 您的经销商可能在您的产品包装中添加了可选文档。这些文档不是标 准产品包装的组成部分。
回收服务
ASUS 的回收服务源自我们对于最高环保标准的承诺。我们相信,提供这些 解决方案能够让我们的客户负责地对于我们的产品、电池、其它组件以及包 装材料等进行回收利用。 请访问 /english/Takeback.htm 了解不同地区的回收信 息。
MX279 系列
液晶显示器
用户指南
首版 2012年8月
版权所有 © 2012 ASUSTeK COMPUTER INC. 保留所有权利。 除了购买者出于备份目的而保留的文档外,未经 ASUSTeK COMPUTER INC.(以下称“ASUS”)明确书 面许可,不得以任何形式或通过任何方式复制、传播、转录本手册的任何部分,包括其中介绍的产品和软 件,也不得将其存储到检索系统中或翻译成任何语言。 在下列情况下,不能享受产品保修或维修服务:(1) 产品被修理、修改或改动,除非此类修理、修改或改动 得到 ASUS 的书面授权;(2) 产品序列号损毁或缺失。 ASUS“按原样”提供本手册,不提供任何明示或隐含的担保,包括但不限于对于适销性或针对特定目的的 适用性的隐含担保或条件。无论在任何情况下,ASUS 及其董事成员、高级职员、员工或代理不对由于本手 册或产品中存在任何缺陷或错误而导致的任何间接、特殊、偶然或必然损失(包括收益损失、业务损失、不 能使用或数据丢失、业务中断等)承担任何责任,即使 ASUS 已被告知此类损失的可能性。 本手册中包含的规格和信息仅供一般性参考,可能会随时变更而无需另行通知,因此不应构成 ASUS 的承 诺。ASUS 对本手册(包括其中介绍的产品和软件)中可能存在的任何错误不承担任何责任。 本手册中出现的产品名称和公司名称可能分别是或不是相应公司的注册商标或版权,仅用于标示或解释目 的,无意侵犯其所有者的权益。