VDI管理平台用户手册
vdi方案
VDI方案1. 简介虚拟桌面基础架构(Virtual Desktop Infrastructure,简称 VDI)是一种将用户桌面环境从物理设备中分离出来,并在远程服务器上进行虚拟化和集中化管理的解决方案。
在VDI方案中,用户可以通过任何设备(如PC、笔记本电脑、平板电脑或智能手机)远程访问虚拟桌面,这些虚拟桌面与物理设备相对独立,可以提供高度的灵活性和可扩展性。
本文将介绍VDI方案的基本原理、优势和实施步骤。
2. VDI方案的基本原理VDI方案的基本原理是将用户的桌面环境完全虚拟化并部署在服务器上,用户通过远程协议(如RDP、PCoIP、SPICE等)与服务器进行通信,将服务器上的虚拟桌面传输到用户设备上。
在这个过程中,用户设备上的操作将通过远程协议传递到服务器上进行处理,最终结果再传送回用户设备。
在虚拟化桌面环境的基础上,VDI方案还提供了一系列的管理功能,包括用户账号管理、桌面管理、资源分配、安全策略等。
管理员可以根据实际需要对用户账号进行设置,管理虚拟桌面的分配和回收,配置系统资源,同时通过安全策略保护整个VDI环境的安全性。
3. VDI方案的优势3.1 高度灵活的工作环境VDI方案可以将用户的桌面环境与物理设备完全分离,用户可以根据需要在任何设备上访问自己的虚拟桌面。
对于企业来说,员工可以使用自己的设备,无需为每个员工提供物理计算机,这大大降低了设备采购和维护的成本。
3.2 高度可扩展性和集中管理在VDI方案中,所有的桌面环境都集中在服务器上进行管理和维护。
管理员可以根据需要轻松地增加或减少桌面数量,实现弹性伸缩。
此外,通过集中管理,管理员可以对整个VDI环境进行集中管理,包括桌面分配、资源管理、补丁管理等,大大提高了运维效率。
3.3 安全性和数据保护VDI方案可以在服务器端进行数据存储和备份,用户的数据不会保存在本地设备上。
这样可以防止数据丢失和泄漏的风险,并且可以通过访问控制和安全策略来保护数据的安全。
VDI网站使用说明书

VDI网站使用说明书注:查询密码联系Qisda采购窗口或者ITS VDI 网站负责人1.在IE浏览器中输入Http://.com进入下面页面点击图中红色部分QCS-VEDI-佳世达苏州厂进入下面页面或者Http://.直接进入暂时变更为:Http://.:822.输入用户名密码后进入新的主画面也可以点击左边的OLD Main Face用原来的界面(1).查看新订单点击New PO Info出现下面画面点击View,跳出下面画面,查看新订单,点击上面的Download可以把订单下载到本地(2)Bonds CR按照下图红色部分选择查询要求点击左边的Detail查看Detail信息注:打印某个框架中页面按下面操作!第一步,在receving list 页面右击2,在跳出的预览页面选择仅打印选择定框架!3.您想要的页面VDI Shipment Maintain1点击左边的VDI Shipment Maintain2.进入以下页面选择一家佳世达公司,点击Entry进入3.进入下面页面,可以查询历史记录,也可以新增黄色框中为状态分为四种Save- 供应商刚刚保存没有发送给佳世达Send-已经发送给佳世达准备出货Return-该票货物信息有误被佳世达退回Close-佳世达已经收满改ShipmentID3.1点击New 新增一条ShipmentID,进入下面页面Upload的模板如下上传的过程会Check一些信息,错误代码如下Error instructionsA:VMI类型和Head不一致B:PO和料号不匹配C:PO收满或改PO不能使用D:超水位(不予卡关,SendOut会通知到Qisda采购)E:Invoice数量>Open PO-货物在途数量 F:送货单数量不是数值G:原产国代码不是数值H:价格不是数值I:币别不正确会反馈到预览Grid的Errors信息栏里面,如下图厂商可以对照错误修正直到全部正确方可保存,Error可以下载到Excel进一步参考如下图ByLine,和upload差不多适用于临时添加line和记录比较少的情况我们可以在Detail的部门对已经保存的进行修改和删除动作,操作如下点击编辑后Grid变成下面状态,可以修改一些数据下载报表,点击上方Print按钮跳出下面页面,右击可以打印改出货单打印效果如下:注意只有Save和return状态厂商才可以修改数据,否则为灰色。
H3C CAS VDI虚拟桌面功能操作指南
H3C CAS VDI虚拟桌面功能操作指导书Copyright © 2014 杭州华三通信技术有限公司版权所有,保留一切权利。
非经本公司书面许可,任何单位和个人不得擅自摘抄、复制本文档内容的部分或全部,并不得以任何形式传播。
本文档中的信息可能变动,恕不另行通知。
目录1 虚拟桌面技术介绍 (1)2 Windows XP虚拟机模板制作 (2)2.1 创建新的虚拟机 (2)2.2 增加Spice控制台 (7)2.3 增加ac97声卡 (10)2.4 启动虚拟机 (11)2.5 安装软件 (12)2.6 安装H3C Tools (12)2.7 安装CAS Tools (13)2.8 系统设置 (14)2.8.1 系统用户设置 (14)2.8.2 网卡设置 (15)2.8.3 开启远程访问功能 (15)2.9 将虚拟机转换成模板 (16)2.9.1 CAS Tools实现模板 (16)2.9.2 Sysprep实现模板 (17)3 Windows 7虚拟机模板制作 (19)3.1 创建新的虚拟机 (19)3.2 增加Spice控制台 (19)3.3 增加ich6声卡 (19)3.4 启动虚拟机 (22)3.5 安装软件 (22)3.6 安装H3C Tools (22)3.7 安装CAS Tools (22)3.8 系统设置 (25)3.8.1 系统用户设置 (25)3.8.2 设置网卡 (28)3.8.3 远程桌面 (28)3.8.4 关闭睡眠状态 (29)3.9 将虚拟机转换成模板 (29)3.9.1 CAS Tools实现模板 (29)3.9.2 sysprep实现模板 (31)4 Linux虚拟机模板制作 (32)4.1 创建新的虚拟机 (32)4.2 增加Spice控制台 (33)4.3 启动虚拟机 (33)4.4 安装软件 (33)4.5 安装CAS Tools (33)4.6 将虚拟机克隆为模板 (35)5 虚拟桌面部署 (36)5.1 创建组织 (36)5.2 创建虚拟桌面池 (41)5.2.1 固定桌面池 (41)5.2.2 浮动桌面池 (43)5.3 管理员部署虚拟桌面 (46)5.3.1 管理员手工创建虚拟桌面 (46)5.3.2 管理员手工批量创建虚拟桌面 (50)5.3.3 管理员部署浮动虚拟桌面 (54)5.3.4 批量创建用户 (55)5.4 终端用户申请虚拟桌面 (57)5.4.1 终端用户申请 (57)5.4.2 组织管理员审核 (60)5.5 启动虚拟桌面 (64)5.5.1 部署采用完全初始化 (64)5.5.2 部署采用快速初始化 (65)5.5.3 部署采用浮动桌面池 (66)6 使用IE浏览器自动弹出远程桌面的配置 (66)7 Spice控制台的使用 (72)7.1 启动虚拟机右键查看Spice控制台的端口 (72)7.2 使用Spice客户端连接已经处于启动状态的虚拟机 (72)8 注意事项 (73)1 虚拟桌面技术介绍VDI:Virtual Desktop Infrastructure,虚拟桌面基础架构。
VDI管理系统平台用户手册
闪龙VDI管理平台用户手册Version 1.5VDI管理平台用户手册VDI管理平台用户手册 (1)一、VDI管理平台简介 (3)1、背景 (3)2、简介 (4)二、VDI管理平台功能介绍 (4)1、系统管理 (4)1.1用户登录 (4)1.2 用户管理 (5)1.2.1 创建用户 (5)1.2.2 删除用户 (6)1.2.3 编辑用户 (6)1.2.4 密码初始化 (7)1.2.5 选择角色 (7)1.3 角色管理 (7)1.3.1 新增角色 (7)1.3.2删除角色 (8)1.3.3 为角色分配权限 (8)1.4 日志管理 (8)2、总览 (9)3、数据中心 (9)3.1 集群 (9)3.1.1新增集群 (9)3.1.2 编辑集群 (10)3.1.3 删除集群 (10)3.2 主机 (11)3.2.1 新增主机 (11)3.2.2 编辑主机 (11)3.23删除主机 (12)3.24 主机关机 (12)3.3虚拟机 (12)3.3.1 创建虚拟机 (12)3.3.1.1 新增虚拟机 (13)3.3.1.2 批量部署虚拟机 (13)3.3.1.3 删除虚拟机 (14)3.3.1.4 编辑虚拟机 (14)3.3.2 VDI管理平台用户对虚拟机可以进行的操作 (16)3.3.2.1 开启虚拟机 (16)3.3.2.2 重启虚拟机 (16)3.3.2.3 关闭虚拟机 (16)3.3.2.4 强行关闭虚拟机 (16)3.3.2.5 挂起虚拟机 (16)3.3.2.6 取消挂起虚拟机 (17)3.3.2.7 克隆虚拟机 (17)3.3.2.8 选择虚拟机所属用户 (17)3.3.2.9 虚拟机详情 (17)1)磁盘管理 (18)2)链接管理 (19)3)声卡管理 (19)4)显卡管理 (19)5)网卡管理 (20)6)光驱管理 (21)3.4 虚拟机用户 (21)3.4.1 新增虚拟机用户 (21)3.4.2 编辑虚拟机用户 (22)3.4.3 删除虚拟机用户 (22)3.4.4 批量导入虚拟机用户 (22)3.4.5 导出虚拟机用户的模板 (23)3.5 母盘和模板 (23)3.5.1 新增母盘 (23)3.5.2 编辑母盘 (24)3.5.3 删除母盘 (24)3.5.4 新增模板 (25)3.5.5 编辑模板 (25)3.5.6 删除母盘 (26)3.6 导入文件 (26)一、VDI管理平台简介1、背景桌面虚拟化作为虚拟化技术又一个快速兴起的潮流,越来越多的企业开始接受桌面虚拟化技术来实现企业的桌面基础架构。
NetApp VDI在云中使用Cloud Volumes ONTAP说明书
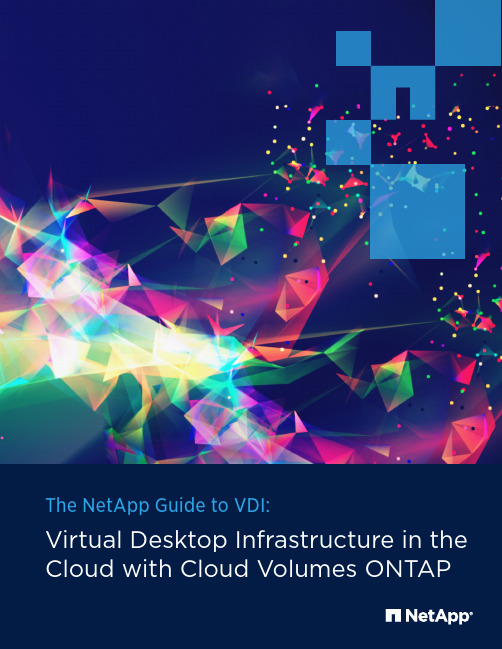
The NetApp Guide to VDI:Virtual Desktop Infrastructure in the Cloud with Cloud Volumes ONTAPVirtual Desktop Infrastructure (VDI) technology decouples the workplaceenvironment from the device used to access it. Rather than apps, data, userprofile, and operating system all being installed, secured, and maintained ona dedicated device such as a PC or laptop, at logon a VDI spins up a user-customized workplace instance hosted in a central data center or in a cloud andterminates the instance upon logoff.VDI technology addresses a number of compelling business trends such as thegrowing adoption of bring your own device (BYOD), the pressing need for morestreamlined and flexible business processes, and the spread of geographicallydistributed organizations. Although VDI does not have to be cloud-based, thealmost universal penetration of cloud technologies has also spurred its growth.Allied Market Research notes that the cloud-based VDI market, which includesprivate, public, and hybrid cloud deployments, was valued at ~$3.65 million in2016 and is expected to almost triple in value by 2023.This guidebook explores the pros and cons of self-hosted and cloud hostedVDI deployments and presents four hands-on customer success stories of VDIhosted on NetApp’s Cloud Volumes ONTAP data management solution.IntroductionT able of ContentsIntroduction (2)Table of Content (3)The Different Flavors of VDI Solutions (4)What is VDI? (4)The Opportunities and Challenges of Virtual Desktop Infrastructure in the Cloud (5)VDI Challenges (5)How Cloud Volumes ONTAP Supports VDI Shared Storage in the Cloud:Customer Case Studies (6)Global Architectural Firm Migrates VDI to the Cloud (7)Travel Industry Giant: Shared Storage Solution for VDI Users (8)CRM SaaS Provider: Migrate VDI Environment to AWS (8)Building Products Manufacturer: Disaster Recovery for VDI Environments (9)Cloud Volumes ONTAP Benefits for VDI (9)Conclusion (10)The Different Flavors of VDI SolutionsWith VDI, a connected end-userdevice securely connects to a backend infrastructure of file, app, and content servers, becoming a personalized virtual workstation that behaves as though the apps and data are installed and stored locally. When the session is terminated, files and other persistent data are stored so that, at the next logon, the workstation can be restored seamlessly. The infrastructure resources then return to the centralized pool to serve the needs of other users.Like cloud file sharing, VDI allows easy access to always-synced shared files from any connected device. Centralization of these shared files also makes it easier to protect data through backup and disaster recovery processes. However, VDI goes beyond cloud file sharing to alsoprovide a complete desktop userinterface environment.The connection can be through either apublic or private network. Similarly, thevirtual desktop infrastructure can beeither self-hosted in a on-premises datacenter or it can be hosted in the cloud.In the case of self-hosted VDI, thecompany must provide the physicalservers as well as install and maintainthe VDI hypervisor software. Thecompany must also provision andmaintain the network resources requiredto uphold performance SLAs as well asthe redundant resources required forhigh availability, backups, and disasterrecovery. In short, self-hosted VDIprovides a great deal of control but itsCAPEX and administrative costs can bevery high.One way of mitigating the complexitiesand costs of self-hosted VDI is toleverage a hyperconverged infrastructuresystem that tightly integrates allrequired compute and storageresources in commodity server nodes.Hyperconverged virtual desktopinfrastructures are easier to deploy,scale well, and are more cost effective tooperate and maintain.In the next section we look at theopportunities and challenges of cloud-hosted VDI.What is VDI?The Opportunities and Challenges of Virtual Desktop Infrastructure in the CloudCloud-hosted VDI takes advantage of public cloud economics, scalability, and security to lower the total cost of VDI ownership. However, VDI in the cloud is not without its challenges:Performance reliability can be impacted by the wide range of access devices, types of connectivity, and diverse VDI devices (gateways, brokers, etc.). Typical end-user problems that may be encountered due to these complexities include not being able to connect, poor latency, user interfaces not working properly after connection, and the inability to access certain applications.The company has less visibility into the underlying infrastructure resources, which can make monitoring and control a challenge.This challenge is further magnified in the multicloud and hybrid cloud environments that are the prevailing trend in organizations of all sizes today. Multicloud scenarios can also introduce interoperability issues.VDI solutions rely heavily on SMB file shares and this capability is not yet mature in all public cloud environments. AWS’ recently launched managed Windows file storage service (Amazon FSx) is certainly a step in the right direction but it is not a simple plug-and-play solution.Last but not least, without careful management and monitoring, VDI cloud costs can soar.Many of the public cloud providers offer Desktop as a Service (DaaS) solutions, such as Amazon WorkSpaces or WindowsVirtual Desktop from Microsoft Azure. DaaS is a secure cloud-based VDI solution that frees up administrators from infrastructure management issues. However, the other cloud VDI challenges noted above are relevant to DaaS solutions, which can also be expensive. It is estimated that an on-premises VDI solutions costs ~$300/user/year, while the cost for Amazon WorkSpace is$500/user/year.An alternative option to solve some of these challenges is for VDI users to turn to Cloud Volumes ONTAP.How Cloud Volumes ONTAP Supports VDI Shared Storage in the Cloud: Customer Case StudiesNetApp Cloud Volumes ONTAP , the leading enterprise-grade storage management solution in the cloud, delivers secure, proven storage management services on AWS, Azure and Google Cloud. Cloud Volumes ONTAP has compelling value propositions for cloud-hosted VDI, and supports a strong set of features including data protection, high availability, storage efficiencies, file share services, cloud automation, Kubernetes integration, and more.Let’s take a look at how this flexible platform has been put to use with VDI use case in these customer case studies.VDI Shared Storage with Cloud Volumes ONTAPEase of migration: Using Cloud Volumes ONTAP powerful point-in-time NetApp Snapshot technology™ and data replication features they were able to lift and shift their applications to the cloud, with minimal need for refactoring. Multi-protocol file sharing for SMB/CIFS as well as NFS and iSCSI protocol access.Reduced CAPEX by shifting their hosted VDI costs to OPEX.An enhanced disaster recovery solution as a cost-effective secondary data center.This US-based architectural firm operates fifteen officesworldwide. Its multidisciplinary, distributed teams ofarchitects, engineers, industry specialists and buildersexecute innovative large-scale projects such as commercialbuildings, education and sports facilities, multifamilyresidences and convention centers.Their self-hosted VDI infrastructure had already proven itselfas a productivity enabler that allows their employees towork seamlessly from anywhere at any time with any device.As part of their strategic decision to shift their business-and mission-critical applications to the cloud, they decidedto use Cloud Volumes ONTAP for Azure to host their fileshares and their entire VDI infrastructure.The benefits:Global Architectural Firm Migrates VDI to the Cloud 1234This US company owns and operates some of the world’s best knownonline travel brands. They operate several hundred travel booking websitesin ~75 countries, with listings for hundreds of thousands of hotels andhundreds of airlines.Seeking a highly available shared storage solution for their 1000+ VDIusers, they deployed Cloud Volumes ONTAP HA for AWS . Seeing thatthe solution was easy to deploy, with only minimal support required fromNetApp’s cloud experts, the company has decided to make Cloud VolumesONTAP the backbone for their VDI infrastructures worldwide. Using thisdual-node configuration, they are able to prevent data loss (RPO=0) andrecover in under sixty seconds (RTO<60).This US software company was a SaaS pioneer and its enterprise SaaSapplications continue to dominate the market. As part of a strategicdirection to migrate their own production workloads to the public cloud,they sought to migrate their on-premises VDI that was running on NetAppFAS systems. Looking for a cloud-based VDI solution that would providethe same enterprise-grade storage features as their current data centerdeployment, they decided to test Cloud Volumes ONTAP for AWS .After a successful proof of concept, the company is moving to productionwhile scaling requirements and tuning the solution accordingly. CloudVolumes ONTAP lets them change instance types, rightsize their VDIinstances, and cut down their storage costs using NetApp storageefficiencies . Ultimately their VDI migration will go global, serving 3,000internal users across the US, Europe, and Asia.Travel Industry Giant: Shared Storage Solution for VDI UsersCRM SaaS Provider:Migrate VDI Environment to AWSThis publicly traded enterprise is a leading manufacturer ofbuilding products and materials for the construction industry.Their head of Enterprise Infrastructure was an IT managerat JP Morgan during 9/11 and thus a firm believer in thebusiness-critical importance of a disaster recovery solution.With the company having only a single data center, he Building Products Manufacturer: Disaster Recovery for VDI Environmentsdecided to implement a cloud-based DR strategy for their file systems, databases and VDI environments. Deploying Cloud Volumes ONTAP on Azure they were able to quickly build out a reliable DR environment for their file systems, databases and VDI environments that leverages NetApp SnapMirror® data replication technology.ConclusionCloud VDI deployments provide the flexibility and agility that are key to business success in our fast-paced global economy. However VDI deployed across complex multicloud and hybrid cloud environments can be difficult to monitor, manage, and control. Rather than being empowered by VDI, end-users may experience operational and performance issues. And administrators may find that VDI cloud usage and costs soar out of control.NetApp Cloud Volumes ONTAP provides its customers with a seamless, secure, and cost-effective data storage and management solution for their multicloud VDI deployments. To see how Cloud Volumes ONTAP can accelerate your virtual desktop infrastructure in the cloud, start a 30-day free trial now.Refer to the Interoperability Matrix Tool (IMT) on the NetApp Support site to validate that the exact product and feature versions described in this document are supported for your specific environment. The NetApp IMT defines the product components and versions that can be used to construct configurations that are supported by NetApp. Specific results depend on each customer’s installation in accordance with published specifications.Copyright InformationCopyright © 1994–2019 NetApp, Inc. All rights reserved. Printed in the U.S. No part of this document covered by copyright may be reproduced in any form or by any means—graphic, electronic, or mechanical, including photocopying, recording, taping, or storage in an electronic retrieval system—without prior written permission of the copyright owner.Software derived from copyrighted NetApp material is subject to the following license and disclaimer:THIS SOFTWARE IS PROVIDED BY NETAPP “AS IS” AND WITHOUT ANY EXPRESS OR IMPLIED WARRANTIES, INCLUDING, BUT NOT LIMITED TO, THE IMPLIED WARRANTIES OF MERCHANTABILITY AND FITNESS FOR A PARTICULAR PURPOSE, WHICH ARE HEREBY DISCLAIMED. IN NO EVENT SHALL NETAPP BE LIABLE FOR ANY DIRECT, INDIRECT, INCIDENTAL, SPECIAL, EXEMPLARY, OR CONSEQUENTIAL DAMAGES (INCLUDING, BUT NOT LIMITED TO, PROCUREMENT OF SUBSTITUTE GOODS OR SERVICES; LOSS OF USE, DATA, OR PROFITS; OR BUSINESS INTERRUPTION) HOWEVER CAUSED AND ON ANY THEORY OF LIABILITY, WHETHER IN CONTRACT, STRICT LIABILITY, OR TORT (INCLUDING NEGLIGENCE OR OTHERWISE) ARISING IN ANY WAY OUT OF THE USE OF THIS SOFTWARE, EVEN IF ADVISED OF THE POSSIBILITY OF SUCH DAMAGE.NetApp reserves the right to change any products described herein at any time, and without notice. NetApp assumes no responsibility or liability arising from the use of products described herein, except as expressly agreed to in writing by NetApp. The use or purchase of this product does not convey a license under any patent rights, trademark rights, or any other intellectual property rights of NetApp.The product described in this manual may be protected by one or more U.S. patents, foreign patents, or pending applications.RESTRICTED RIGHTS LEGEND: Use, duplication, or disclosure by the government is subject to restrictions as set forth in subparagraph (c)(1)(ii) of the Rights in Technical Data and Computer Software clause at DFARS 252.277-7103 (October 1988) and FAR 52-227-19 (June 1987).Trademark InformationNETAPP, the NETAPP logo, and the marks listed at /TM are trademarks of NetApp, Inc. Other company and product names may be trademarks of their respective owners.NA-287-021811NetApp VDI in the Cloud with Cloud Volumes ONTAP。
EVDI产品部署及运维手册cn优选稿
E V D I产品部署及运维手册c n集团文件版本号:(M928-T898-M248-WU2669-I2896-DQ586-M1988)VDI产品部署及运维手册一、编写目的本手册是作为噢易公司VDI产品的部署及运维手册,详细介绍VDI产品的部署流程以及VDI服务器配置参数等,使相关工程师快速熟悉VDI产品。
二、适用范围本手册适用于噢易公司所有研发工程师、测试工程师、实施工程师、技术支持工程师等。
三、包括内容产品部署注意事项服务器端部署(含主控节点、计算节点)Web管理平台初始化安装Linux客户端安装Windows客户端产品架构图及组件介绍服务器端组件日志常用VDI产品命令附录一:常用Linux命令附录二:使用到的开源技术附录三:常见问题与解答四、产品部署注意事项确定主控节点IP;是否需要存储节点,如需要,请确保网络连接顺畅;部署顺序应为:先部署服务器端(含主控节点、计算节点),再进行Web管理平台的初始化,最后安装客户端(Windows、Linux)五、服务器端部署5.1 部署主控节点操作步骤:1、在物理服务器上安装虚拟化软件,安装前需手动设置从光驱启动,或者在启动时选择从光驱启动也可;2、插入光盘自动识别进入安装欢迎界面,如果物理服务器已经存在操作系统,安装会覆盖之前的操作系统;3、重新设置账户密码,并配置相关网络信息,具体操作请参见下方详解;.5.1.1光盘运行安装操作步骤:插入服务器主控节点console光盘,重启服务器,自动识别进入安装欢迎界面,选择安装方式,如图所示:注意:当前安装文件中英文版Console/Agent节点集一体,请自行选择对象执行,当前以中文版为例;图2.1.1.1选择安装节点Install OseasyChinese,Simplified):安装中文版主控节点。
Install Oseasy E-VDI 4. 0.1Agent(Chinese,Simplified):安装中文版计算节点Install Oseasy:安装英文版主控节点。
citrix vdi 方案

Citrix VDI 方案概述在现代工作环境中,虚拟桌面基础设施(Virtual Desktop Infrastructure,VDI)技术变得越来越重要。
在大规模开展远程工作、实现灵活办公的今天,Citrix VDI方案成为了一种理想的选择。
本文将详细介绍 Citrix VDI 方案的架构、特点以及在企业中的应用。
架构Citrix VDI 方案的架构主要由以下几个组件组成:1.Hypervisor(虚拟化平台):Citrix VDI 方案支持多种虚拟化平台,如 Citrix Hypervisor、VMware vSphere 和 Microsoft Hyper-V。
Hypervisor 负责在物理服务器上创建和管理虚拟机。
2.Delivery Controller(交付控制器):交付控制器是 Citrix VDI 方案的核心组件,它负责管理和分发虚拟桌面、应用和数据。
交付控制器提供基于用户和策略的身份验证和访问控制,确保用户可以安全、高效地访问所需的资源。
3.StoreFront(门户):StoreFront 提供统一的虚拟化应用和桌面访问门户,用户可以通过门户轻松访问其分配的虚拟桌面和应用。
4.Citrix Receiver(接收器):Citrix Receiver 是一款客户端软件,用户可以通过 Receiver 在其设备上访问 Citrix VDI 方案提供的虚拟桌面和应用。
Scaler(负载均衡器):NetScaler 负载均衡器用于优化和保护 Citrix VDI 方案的网络流量。
它可以确保用户的请求被高效地分发到最近的服务器,从而提供卓越的用户体验。
6.Profile Management(配置文件管理):Profile Management 组件负责管理用户配置文件,包括桌面设置、应用程序配置等。
它可以确保用户的配置文件在不同的虚拟桌面间保持一致。
特点Citrix VDI 方案具有以下几个显著的特点:•灵活性和可伸缩性:Citrix VDI 方案可以根据企业的需求进行灵活的配置和扩展。
VDI管理平台用户手册

VDI管理平台用户手册[键入文档标题] [键入文档副标题]VDI管理平台用户手册VDI管理平台用户手册 (2)一、VDI管理平台简介 (6)1、背景 (6)2、简介 (7)二、VDI管理平台功能介绍 (8)1、系统管理 (8)1.1用户登录 (8)1.2 用户管理 (9)1.2.1 创建用户 (9)1.2.2 删除用户 (10)1.2.3 编辑用户 (11)1.2.4 密码初始化 (11)1.2.5 选择角色 (11)1.3 角色管理 (12)1.3.1 新增角色 (12)1.3.2删除角色 (13)1.3.3 为角色分配权限 (13)1.4 日志管理 (14)2、总览 (14)3、数据中心 (15)3.1 集群 (15)3.1.1新增集群 (15)3.1.2 编辑集群 (16)3.1.3 删除集群 (16)3.2 主机 (17)3.2.1 新增主机 (17)3.2.2 编辑主机 (18)3.23删除主机 (18)3.24 主机关机 (18)3.3虚拟机 (19)3.3.1 创建虚拟机 (19)3.3.1.1 新增虚拟机 (20)3.3.1.2 批量部署虚拟机213.3.1.3 删除虚拟机 (22)3.3.1.4 编辑虚拟机 (22)3.3.2 VDI管理平台用户对虚拟机可以进行的操作 (24)3.3.2.1 开启虚拟机 (25)3.3.2.2 重启虚拟机 (25)3.3.2.3 关闭虚拟机 (25)3.3.2.4 强行关闭虚拟机253.3.2.5 挂起虚拟机 (25)3.3.2.6 取消挂起虚拟机263.3.2.7 克隆虚拟机 (26)3.3.2.8 选择虚拟机所属用户 (26)3.3.2.9 虚拟机详情 (26)1)磁盘管理 (27)2)链接管理 (29)3)声卡管理 (29)4)显卡管理 (30)5)网卡管理 (30)6)光驱管理 (31)3.4 虚拟机用户 (32)3.4.1 新增虚拟机用户.. 333.4.2 编辑虚拟机用户.. 333.4.3 删除虚拟机用户.. 343.4.4 批量导入虚拟机用户 (34)3.4.5 导出虚拟机用户的模板 (35)3.5 母盘和模板 (35)3.5.1 新增母盘 (36)3.5.2 编辑母盘 (37)3.5.3 删除母盘 (37)3.5.4 新增模板 (38)3.5.5 编辑模板 (38)3.5.6 删除母盘 (39)3.6 导入文件 (39)一、VDI管理平台简介1、背景桌面虚拟化作为虚拟化技术又一个快速兴起的潮流,越来越多的企业开始接受桌面虚拟化技术来实现企业的桌面基础架构。
- 1、下载文档前请自行甄别文档内容的完整性,平台不提供额外的编辑、内容补充、找答案等附加服务。
- 2、"仅部分预览"的文档,不可在线预览部分如存在完整性等问题,可反馈申请退款(可完整预览的文档不适用该条件!)。
- 3、如文档侵犯您的权益,请联系客服反馈,我们会尽快为您处理(人工客服工作时间:9:00-18:30)。
闪龙VDI管理平台用户手册Version 1.5VDI管理平台用户手册VDI管理平台用户手册 (2)一、VDI管理平台简介 (3)1、背景 (3)2、简介 (4)二、VDI管理平台功能介绍 (4)1、系统管理 (4)1.1用户登录 (4)1.2 用户管理 (5)1.2.1 创建用户 (5)1.2.2 删除用户 (6)1.2.3 编辑用户 (6)1.2.4 密码初始化 (7)1.2.5 选择角色 (7)1.3 角色管理 (7)1.3.1 新增角色 (7)1.3.2删除角色 (8)1.3.3 为角色分配权限 (8)1.4 日志管理 (8)2、总览 (9)3、数据中心 (9)3.1 集群 (9)3.1.1新增集群 (9)3.1.2 编辑集群 (10)3.1.3 删除集群 (10)3.2 主机 (11)3.2.1 新增主机 (11)3.2.2 编辑主机 (11)3.23删除主机 (12)3.24 主机关机 (12)3.3虚拟机 (12)3.3.1 创建虚拟机 (12)3.3.1.1 新增虚拟机 (13)3.3.1.2 批量部署虚拟机 (13)3.3.1.3 删除虚拟机 (14)3.3.1.4 编辑虚拟机 (14)3.3.1.5 为虚拟机安装驱动 (15)3.3.2 VDI管理平台用户对虚拟机可以进行的操作 (16)3.3.2.1 开启虚拟机 (16)3.3.2.2 重启虚拟机 (16)3.3.2.3 关闭虚拟机 (16)3.3.2.4 强行关闭虚拟机 (16)3.3.2.5 挂起虚拟机 (16)3.3.2.6 取消挂起虚拟机 (17)3.3.2.7 克隆虚拟机 (17)3.3.2.8 选择虚拟机所属用户 (17)3.3.2.9 虚拟机详情 (17)1)磁盘管理 (18)2)链接管理 (19)3)声卡管理 (19)4)显卡管理 (19)5)网卡管理 (20)6)光驱管理 (21)3.4 虚拟机用户 (21)3.4.1 新增虚拟机用户 (21)3.4.2 编辑虚拟机用户 (22)3.4.3 删除虚拟机用户 (22)3.4.4 批量导入虚拟机用户 (22)3.4.5 导出虚拟机用户的模板 (23)3.5 母盘和模板 (23)3.5.1 新增母盘 (23)3.5.2 编辑母盘 (24)3.5.3 删除母盘 (24)3.5.4 新增模板 (25)3.5.5 编辑模板 (25)3.5.6 删除模板 (26)3.6 导入文件 (26)一、VDI管理平台简介1、背景桌面虚拟化作为虚拟化技术又一个快速兴起的潮流,越来越多的企业开始接受桌面虚拟化技术来实现企业的桌面基础架构。
它通过桌面虚拟化技术在一台性能强大的服务器上虚拟出若干台虚拟机(VM ),用户或管理员可以在该虚拟机中安装操作系统、应用程序等,管理员可以根据需要将一台或多台虚拟机分配给一个或多个用户,而用户桌面上不再需要部署性能强大的PC,而只要部署一台安全、易管理的云计算终端就可以连接到数据中心的虚拟机并使用该虚拟机,通过网络把服务器端的虚拟主机传输到客户端并展现给最终用户。
而SanLogic云虚拟化桌面系统就是这样一个系统。
SanLogic云虚拟化桌面系统简称VDI,即Virtual Desktop Infrastructure 的缩写。
虚拟化桌面架构采用“集中计算,分布显示”的原则,通过虚拟化技术,将所有客户端的运算合为一体,在企业数据中心内进行集中处理,而桌面用户采用瘦客户端或专用小型终端机的方式,仅负责输入输出与界面显示,不参与任何计算和应用。
进一步概括的说,VDI 虚拟化桌面解决方案,即使用虚拟化技术,将所有用户的桌面电脑和工作环境放入企业的数据中心远程运行,而用户通过显示器、鼠标、键盘接入到远程系统中。
VDI(Virtual Desktop Infrastructure)管理平台是sanlogic云虚拟机化桌面系统中不可缺少的一部分,大大方了用户对服务器和虚拟机的管理和利用。
2、简介VDI管理平台采用了便于扩展的轻量级架构,既适合于构建简单的虚拟机系统(例如1台,或者3/5台物理服务器组建虚拟化),同时对于大型平台的管理,同样也保持了健壮性。
当然现阶段的VDI管理平台只能管理一台服务器。
V DI管理平台采用纯Web方式进行管理,将所有管理功能集中到一个统一的操作界面中,结构非常清晰,便于用户使用。
二、VDI管理平台功能介绍1、系统管理1.1用户登录用户在IE浏览器上输入http://192.168.200.1/vdi (IP地址根据实际需求修改)输入用户名和密码,用户名是admin 初始密码是1234561.2 用户管理用户管理主要对VDI管理平台进行权限的控制。
VDI管理平台采用基于角色的权限控制方式,每个用户都有分配会有一个角色,默认的admin帐号拥有系统管理员权限。
这些用户只针对使用VDI管理平台。
新建的用户默认是没有分配角色的,需要用户去给它分配角色1.2.1 创建用户选择系统管理,点击左侧,打开系统管理的下拉框,点击用户管理,进入用户管理界面图1.1点击“”,打开添加用户对话框,输入相应参数,点击“保存”,完成用户创建图1.21.2.2 删除用户选中一个用户,点击“”,就可以删除用户了。
图1.3选中一个用户1.2.3 编辑用户选中一个用户,点击“”,打开编辑用户的对话框,修改相关参数,完成后点击“保存”,完成编辑。
1.2.4 密码初始化选择一个用户,点击“”,将密码初始化。
初始化之后的密码为123456 1.2.5 选择角色选择一个用户,点击“”,打开选择角色对话框,选择某个角色,点击“确定”,为用户分配角色。
图1.51.3 角色管理角色管理就是为相应的角色分配相应的权限1.3.1 新增角色点击“”,输入相应参数,点击“保存”,新增一个角色。
新增角色过程中,点击“取消”,取消这次新增操作。
1.3.2删除角色选中一个角色,点击“”,删除角色。
图1.71.3.3 为角色分配权限选中一个角色,双击,显示权限的授权页面,为角色授权。
注意:1)新增的角色已经授予了某些权限;2)权限管理中的一下几个模块式开发用的,暂时没有关闭,用户无法使用:权限管理,数据字典,模块管理,图标管理,系统版本管理举例:为角色sanlogic分配权限点击“模块”中的的主机管理,在“权限”一栏中修改权限,在“成员配置”中,点击“新增”可以为角色添加用户图1.81.4 日志管理记录用户对VDI管理平台的操作点击“”根据日志类型查询操作记录点击“”根据操作时间查询操作记录2、总览总览界面可以显示相应集群的资源使用情况,方便用户及时的根据资源的使用情况,部署虚拟机进入总览页面,选择需要查看的集群,如下图所示图2.13、数据中心3.1 集群一个数据中心中可以建立多个集群,一个集群中可以加入多台服务器。
集群下面有主机,虚拟机,虚拟机用户,模板,母盘这5大模块。
3.1.1新增集群点击“”,新增一个集群,打开新增用户的对话框,输入相应参数,点击“保存”,完成新增集群。
图3.13.1.2 编辑集群选中一个集群,点击“”,打开编辑集群的对话框,输入相应参数,点击“保存”,完成编辑。
图3.23.1.3 删除集群选中一个集群,点击“”。
图3.33.2 主机用户可以通过VDI管理平台将服务器加入集群。
3.2.1 新增主机点击“”,新增一个主机,打开新增主机的对话框,输入相应参数,点击“保存”。
图3.43.2.2 编辑主机选中一个主机,点击“”,打开编辑主机的对话框,修改相应参数,点击“保存”,完成编辑。
图3.53.23删除主机选中一个主机,点击“”,删除主机。
注意:删除主机的时候需要删除在该主机上的所有虚拟机。
3.24 主机关机选中一个主机,点击“”,关闭主机。
3.3虚拟机用户可以再VDI管理平台上创建、删除虚拟机。
VDI管理平台可以兼容不同操作系统,除了支持传统的Windows XP,Windows 7,Windows server 2003, Windows Server 2008等Windows操作系统之外,还支持linux操作系统。
从而使得虚拟机能够适应绝大多数主流的操作系统,做到与PC一致的兼容性。
3.3.1 创建虚拟机创建虚拟机有三种模式:通过光驱创建,模板创建,母盘创建母盘创建是一种很好的模式。
通过同一母盘创建的虚拟机,他们之间相同的部分都来自母盘,这些虚拟机共享了同一个母虚拟硬盘。
这种方式有两个优点:1)节省虚拟机磁盘空间,可以在有限的存储空间中创建更多的虚拟机;2)可以快速的创建多个虚拟机,通过差分创建的虚拟机,不需要再安装操作系统,直接就可以用了。
VDI管理平台还有批量创建虚拟机的功能。
用户可以根据需求通过一次操作创建多台虚拟机,这个功能大大减少了用户的工作量。
3.3.1.1 新增虚拟机点击“”,新增一个虚拟机,打开新增虚拟机的对话框,输入相应参数,选择添加虚拟机的方式,选择母盘或者模板创建),点击“保存”,完成虚拟机创建。
虚拟机参数说明:添加虚拟机的方式:1)镜像文件(选择镜像文件创建需要上传安装镜像(见3.6))2)母盘(选择母盘创建需要先创建母盘(见3.5))3)模板(选择模板创建需要先创建模板(见3.5))系统盘驱动模式:1)ide2) virtio(virtio的读写性能比ide更好一些,但是在安装Windows 操作系统的时候,Windows安装文件时无法识别virtio驱动的,建议先用ide安装Windows 操作系统,安装完成后再操作系统内部安装驱动,安装完成后再将磁盘驱动修改为virtio模式)注意:1、一定要先选择主机,然后再选择创建方式2、使用光驱安装完虚拟机后,冲虚拟机内部重新启动时,会依旧重光驱启动,在进入启动页面前,可以按下F12,更改启动方式。
这种更改启动方式是临时的。
想要永久更改启动方式,需要编辑虚拟机,将“启动方式”,从光驱启动修改为硬盘启动。
图3.63.3.1.2 批量部署虚拟机点击“”,打开批量部署虚拟机的对话框。
填写相应参数,点击“保存”。
批量部署虚拟机时的命名规则:用户给虚拟机命名前缀,系统会自动在前缀后边添加编号的。
比如说Win701 Win702 Win703 蓝色部分是前缀需要用户填写,红色部分是编号,系统自动添加图3.73.3.1.3 删除虚拟机选中一个虚拟机,点击“”。
3.3.1.4 编辑虚拟机选中一个虚拟机,点击“”,打开编辑虚拟机的对话框,修改完相应参数,点击“保存”。
图3.83.3.1.5 为虚拟机安装驱动Windows操作系统:虚拟机没有光驱设备,就需要添加一个光驱设备,在光驱设备中添加镜像文件windows-guest-tools.iso(细节见3.3.2.9)。