puppet自定义facter说明
详解Puppeteer入门教程

详解Puppeteer⼊门教程1、Puppeteer 简介Puppeteer 是⼀个node库,他提供了⼀组⽤来操纵Chrome的API, 通俗来说就是⼀个 headless chrome浏览器 (当然你也可以配置成有UI的,默认是没有的)。
既然是浏览器,那么我们⼿⼯可以在浏览器上做的事情 Puppeteer 都能胜任, 另外,Puppeteer 翻译成中⽂是”⽊偶”意思,所以听名字就知道,操纵起来很⽅便,你可以很⽅便的操纵她去实现:1)⽣成⽹页截图或者 PDF2)⾼级爬⾍,可以爬取⼤量异步渲染内容的⽹页3)模拟键盘输⼊、表单⾃动提交、登录⽹页等,实现 UI ⾃动化测试4)捕获站点的时间线,以便追踪你的⽹站,帮助分析⽹站性能问题如果你⽤过 PhantomJS 的话,你会发现她们有点类似,但Puppeteer是Chrome官⽅团队进⾏维护的,⽤俗话说就是”有娘家的⼈“,前景更好。
2、运⾏环境查看 Puppeteer 的官⽅ API 你会发现满屏的 async, await 之类,这些都是 ES7 的规范,所以你需要:1. Nodejs 的版本不能低于 v7.6.0, 需要⽀持 async, await.2. 需要最新的 chrome driver, 这个你在通过 npm 安装 Puppeteer 的时候系统会⾃动下载的npm install puppeteer --save3、基本⽤法先开看看官⽅的⼊门的 DEMOconst puppeteer = require('puppeteer');(async () => {const browser = await unch();const page = await browser.newPage();await page.goto('https://');await page.screenshot({path: 'example.png'});await browser.close();})();上⾯这段代码就实现了⽹页截图,先⼤概解读⼀下上⾯⼏⾏代码:1. 先通过 unch() 创建⼀个浏览器实例 Browser 对象2. 然后通过 Browser 对象创建页⾯ Page 对象3. 然后 page.goto() 跳转到指定的页⾯4. 调⽤ page.screenshot() 对页⾯进⾏截图5. 关闭浏览器是不是觉得好简单?反正我是觉得⽐ PhantomJS 简单,⾄于跟 selenium-webdriver ⽐起来,那更不⽤说了。
开源自动化配置管理工具Puppet入门教程

开源自动化配置管理工具P u p p e t入门教程系统管理员经常陷入一系列的重复任务中:如升级软件包、管理配置文件、系统服务、cron任务以及添加新的配置、修复错误等。
这些任务通常是重复低效的,解决这类任务的第一反应是让他们自动化,于是出现了定制脚本。
由于环境复杂,定制脚本和应用程序一再被重复开发,并且很难适合多种平台,灵活性和功能也很难保证,于是像Puppet这样的自动化配置管理工具便出现了。
在开源世界里,有很多配置工具可供选择,这个领域一些关键的产品有:Puppet():Ruby写成的配置管理工具,使用C/S架构,使用declarative language配置客户端。
Cfengine():最先发布的开源配置工具之一,1993年发布,同样是C/S架构,通常应用于教育机构。
LCFG():C/S架构的配置管理工具,使用XML定义配置。
Bcfg2Python编写的C/S架构的配置管理工具,使用规格书和客户机响应配置目标主机。
本文档致力于描述使用Puppet管理你的主机、应用程序、后台程序和各种服务。
Puppet简介:1. Puppet的用途Puppet是开源的基于Ruby的系统配置管理工具,依赖于C/S的部署架构。
主要开发者是Luke Kanies,遵循GPLv2版权协议。
从1997年开始Kanies参与UNIX的系统管理工作,Puppet的开发源于这些经验。
因为对已有的配置工具不甚满意,从2001年到2005年间,Kanies开始在Reductive实验室从事工具的开发。
很快,Reductive实验室发布了他们的旗舰产品——Puppet。
2. Pupput的特性许多系统配置管理工具工作的方式非常类似,如cfengine。
是什么让Puppet与众不同Puppet的语法允许你创建一个单独脚本,用来在你所有的目标主机上建立一个用户。
所有的目标主机会依次使用适用于本地系统的语法解释和执行这个模块。
举例:如果这个配置是在Red Hat服务器上执行,建立用户使用useradd命令;如果这个配置是在FreeBSD主机上执行,使用的是adduser命令。
Puppet配置管理技术教程说明书
About the T utorialPuppet is a configuration management technology to manage the infrastructure on physical or virtual machines. It is an open-source software configuration management tool developed using Ruby which helps in managing complex infrastructure on the fly.This tutorial will help in understanding the building blocks of Puppet and how it works in an infrastructure environment. All the examples and code snippets used in this tutorial are tested. The working code snippets can be simply used in any Puppet setup by changing the current defined names and variables.AudienceThis tutorial has been prepared for those who want to understand the features and functionality of Puppet and how it can help in reducing the complexity of managing an infrastructure.After completing this tutorial one would gain moderate level understanding of Puppet and its workflow. It will also give you a fair idea on how to configure Puppet in a preconfigured infrastructure and use it for automation.PrerequisitesWe assume anyone who wants to understand and learn Puppet should have an understanding of the system administration, infrastructure, and network protocol communication. To automate the infrastructure provisioning, one should have a command over basic Ruby script writing and the underlying system where one wants to use Puppet. Copyright & DisclaimerCopyright 2018 by Tutorials Point (I) Pvt. Ltd.All the content and graphics published in this e-book are the property of Tutorials Point (I) Pvt. Ltd. The user of this e-book is prohibited to reuse, retain, copy, distribute or republish any contents or a part of contents of this e-book in any manner without written consent of the publisher.We strive to update the contents of our website and tutorials as timely and as precisely as possible, however, the contents may contain inaccuracies or errors. Tutorials Point (I) Pvt. Ltd. provides no guarantee regarding the accuracy, timeliness or completeness of our website or its contents including this tutorial. If you discover any errors on our website or in this tutorial, please notify us at **************************T able of ContentsAbout the Tutorial (i)Audience (i)Prerequisites (i)Copyright & Disclaimer (i)Table of Contents (ii)BASIC PUPPET (1)1.Puppet ─ Overview (2)Features of Puppet System (2)Pupp et ─ Workflow (3)Puppet ─ Key Components (4)2.Puppet ─ Architecture (6)3.Puppet ─ Installation (8)Prerequisites (8)Facter Installation (8)4.Puppet ─ Configuration (10)Open Firewall Ports on Machines (10)Configuration File (10)Key Components of Config File (12)5.Puppet ─ Environment Conf (14)Allowed Settings (15)6.Puppet ─ Master (17)Prerequisites (17)Creating Puppet Master Server (17)Installing NTP (17)Setup Puppet Server Software (19)Configure Memory Allocation on the Puppet Server (19)7.Puppet – Agent Setup (21)8.P uppet ─ SSL Sign Certificate Setup (22)9.Puppet – Installing & Configuring r10K (24)10.Puppet – Validating Puppet Setup (26)Setting Up the Virtual Machine (26)Validating Multiple Machine Configuration (28)11.Puppet – Coding Style (30)Fundamental Units (30)Metaparameters (31)Resource Collections (32)Run Stages (35)Advanced Supported Features (38)Capitalization (38)Arrays (39)Variables (39)Conditionals (41)If-Else Statement (42)Virtual Resource (43)Comments (43)Operator Precedence (44)Working with Templates (46)Defining and Triggering Services (46)12.Puppet – Manifest Files (47)Manifest File Workflow (47)Writing Manifests (48)13.Puppet ─ Module (50)Module Configuration (50)Modules Source (50)Module Naming (51)Module Internal Organization (51)Module Lookup (53)14.Puppet – File Server (54)File Format (54)Security (55)15.Puppet – Facter & Facts (57)Puppet Facts (58)Custom Facts (62)Using FACTERLIB (64)External Facts (65)ADVANCED PUPPET (67)16.Puppet – Resource (68)Resource Type (68)Resource Title (70)Attributes & Values (71)17.Puppet – Resource Abstraction Layer (77)18.Puppet ─ Template (85)Evaluating Templates (85)Using Templates (85)19.Puppet ─ Classes (90)Parameterized Class (92)20.Puppet ─ Function (94)File Function (94)Include Function (94)Defined Function (95)21.Puppet – Custom Functions (96)Writing Custom Functions (96)Location to Put Custom Function (96)Creating a New Function (97)22.Puppet ─ Environment (98)Using the Environment on Puppet Master (98)Setting the Clients Environment (99)Puppet Search Path (100)23.Puppet – Type & Provider (101)24.Puppet – RESTful API (105)REST API Security (105)Puppet Master API Reference (106)Puppet Agent API Reference (107)25.Puppet – Live Project (108)Creating a New Module (108)Installing a HTTP Server (108)Running the httpd Server (110)Configuring httpd Server (111)Configuring the Firewall (113)Configuring the SELinux (115)Copying HTML Files in the Web Host (116)Basic Puppet1Puppet 2Puppet is a configuration management tool developed by Puppet Labs in order to automate infrastructure management and configuration. Puppet is a very powerful tool which helps in the concept of Infrastructure as code. This tool is written in Ruby DSL language that helps in converting a complete infrastructure in code format, which can be easily managed and configured.Puppet follows client-server model, where one machine in any cluster acts as client known as puppet master and the other acts as server known as slave on nodes. Puppet has the capability to manage any system from scratch, starting from initial configuration till end-of-life of any particular machine.Features of Puppet SystemFollowing are the most important features of Puppet.IdempotencyPuppet supports Idempotency which makes it unique. Similar to Chef, in Puppet, one can safely run the same set of configuration multiple times on the same machine. In this flow, Puppet checks for the current status of the target machine and will only make changes when there is any specific change in the configuration.Idempotency helps in managing any particular machine throughout its lifecycle starting from the creation of machine, configurational changes in the machine, till the end-of-life. Puppet Idempotency feature is very helpful in keeping the machine updated for years rather than rebuilding the same machine multiple times, when there is any configurational change.Cross-platformIn Puppet, with the help of Resource Abstraction Layer (RAL) which uses Puppet resources, one can target the specified configuration of system without worrying about the implementation details and how the configuration command will work inside the system, which are defined in the underlying configuration file.1.Puppet ─ WorkflowPuppet uses the following workflow to apply configuration on the system.∙In Puppet, the first thing what the Puppet master does is to collect the details of the target machine. Using the factor which is present on all Puppet nodes (similar to Ohai in Chef) it gets all the machine level configuration details. These details are collected and sent back to the Puppet master.∙Then the puppet master compares the retrieved configuration with defined configuration details, and with the defined configuration it creates a catalog and sends it to the targeted Puppet agents.∙The Puppet agent then applies those configurations to get the system into a desired state.∙Finally, once one has the target node in a desired state, it sends a report back to the Puppet master, which helps the Puppet master in understanding where thecurrent state of the system is, as defined in the catalog.3Puppet ─ Key ComponentsFollowing are the key components of Puppet.Puppet ResourcesPuppet resources are the key components for modeling any particular machine. These resources have their own implementation model. Puppet uses the same model to get any particular resource in the desired state.ProvidersProviders are basically fulfillers of any particular resource used in Puppet. For example, the package type ‘apt-get’ and ‘yum’ both are valid for package management. Some times, more than one provider would be available on a particular platform. Though each platform always have a default provider.ManifestManifest is a collection of resources which are coupled inside the function or classes to configure any target system. They contain a set of Ruby code in order to configure a system.4ModulesModule is the key building block of Puppet, which can be defined as a collection of resources, files, templates, etc. They can be easily distributed among different kinds of OS being defined that they are of the same flavor. As they can be easily distributed, one module can be used multiple times with the same configuration.TemplatesTemplates use Ruby expressions to define the customized content and variable input. They are used to develop custom content. Templates are defined in manifests and are copied to a location on the system. For example, if one wants to define httpd with a customizable port, then it can be done using the following expression.The httpd_port variable in this case is defined in the manifest that references this template.Static FilesStatic files can be defined as a general file which are sometimes required to perform specific tasks. They can be simply copied from one location to another using Puppet. All static files are located inside the files directory of any module. Any manipulation of the file in a manifest is done using the file resource.5Puppet6Following is the diagrammatic representation of Puppet architecture.Puppet MasterPuppet Master is the key mechanism which handles all the configuration related stuff. It applies the configuration to nodes using the Puppet agent.Puppet AgentPuppet Agents are the actual working machines which are managed by the Puppet master. They have the Puppet agent daemon service running inside them.Config RepositoryThis is the repo where all nodes and server-related configurations are saved and pulled when required.2. Puppet ─ ArchitecturePuppetFactsFacts are the details related to the node or the master machine, which are basically used for analyzing the current status of any node. On the basis of facts, changes are done on any target machine. There are pre-defined and custom facts in Puppet.CatalogAll the manifest files or configuration which are written in Puppet are first converted to a compiled format called catalog and later those catalogs are applied on the target machine.7Puppet8Puppet works on the client server architecture, wherein we call the server as the Puppet master and the client as the Puppet node. This setup is achieved by installing Puppet on both the client and well as on all the server machines.For most of the platforms, Puppet can be installed via the package manager of choice. However, for few platforms it can be done by installing the tarball or RubyGems .PrerequisitesFactor is the only pre-requisite that does not come along with the standard package edition of Puppet. This is similar to Ohai which is present in Chef.Standard OS LibraryWe need to have standard set of library of any underlying OS. Remaining all the system comes along with Ruby 1.8.2 + versions. Following is the list of library items, which an OS should consist of.∙ base64 ∙ cgi∙ digest/md5 ∙ etc ∙ fileutils ∙ ipaddr ∙ openssl ∙ strscan ∙ syslog ∙ uri ∙ webrick ∙ webrick/https ∙xmlrpcFacter InstallationAs discussed, the facter does not come along with the standard edition of Ruby. So, in order to get the facter in the target system one needs to install it manually from the source as the facter library is a pre-requisite of Puppet.This package is available for multiple platforms however just to be on the safer side it can be installed using tarball , which helps in getting the latest version.3.Puppet First, download the tarball from the official site of Puppet using the wget utility.Next, un-tar the tar file. Get inside the untarred directory using the CD command. Finally, install the facter using install.rb file present inside the facter directory.Installing Puppet from the SourceFirst, install the Puppet tarball from the Puppet site using wget. Then, extract the tarball to a target location. Move inside the created directory using the CD command. Using install.rb file, install Puppet on the underlying server.Installing Puppet and Facter Using Ruby Gem9Puppet10Once we have Puppet installed on the system, the next step is to configure it to perform certain initial operations.Open Firewall Ports on MachinesTo make the Puppet server manage the clie nt’s server centrally, one needs to open a specified port on all the machines, i.e. 8140 can be used if it is not in use in any of the machines which we are trying to configure. We need to enable both TCP and UDP communication on all the machines.Configuration FileThe main configuration file for Puppet is etc/puppet/puppet.conf . All the configuration files get created in a package-based configuration of Puppet. Most of the configuration which is required to configure Puppet is kept in these files and once the Puppet run takes place, it picks up those configurations automatically. However, for some specific tasks such as configuring a web server or an external Certificate Authority (CA), Puppet has separate configuration for files and settings.Server configuration files are located in conf.d directory which is also known as the Puppet master. These files are by default located under /etc/puppetlabs/puppetserver/conf.d path. These config files are in HOCON format, which keeps the basic structure of JSON but it is more readable. When the Puppet startup takes place it picks up all .cong files from conf.d directory and uses them for making any configurational changes. Any changes in these files only takes place when the server is restarted.List File and Settings File∙ global.conf ∙ webserver.conf ∙ web-routes.conf ∙ puppetserver.conf ∙ auth.conf∙ master.conf (deprecated) ∙ca.conf (deprecated)There are different configuration files in Puppet which are specific to each component in Puppet.4.Puppet.confPuppet.conf file is P uppet’s main config uration file. Puppet uses the same configuration file to configure all the required Puppet command and services. All Puppet related settings such as the definition of Puppet master, Puppet agent, Puppet apply and certificates are defined in this file. Puppet can refer them as per requirement.The config file resembles a standard ini file wherein the settings can go into the specific application section of the main section.Main Config SectionPuppet Master Config FileDetail OverviewIn Puppet configuration, the file which is going to be used has multiple configuration sections wherein each section has different kinds of multiple number of settings.11Config SectionPuppet configuration file mainly consists of the following config sections.∙Main: This is known as the global section which is used by all the commands and services in Puppet. One defines the default values in the main section which canbe overridden by any section present in puppet.conf file.∙Master: This section is referred by Puppet master service and Puppet cert command.∙Agent: This section is referred by Puppet agent service.∙User: It is mostly used by Puppet apply command as well as many of the less common commands.Key Components of Config FileFollowing are the key components of Config file.Comment LinesIn Puppet, any comment line starts with (#) sign. This may intend with any amount of space. We can have a partial comment as well within the same line.Settings LinesSettings line must consist of -∙Any amount of leading space (optional)∙Name of the settings∙An equals = to sign, which may be surrounded by any number of space∙ A value for the settingSetting VariablesIn most of the cases, the value of settings will be a single word but in some special cases, there are few special values.1213PathsIn configuration file settings, take a list of directories. While defining these directories, one should keep in mind that they should be separated by the system path separator character, which is (:) in *nix platforms and semicolons (;) on Windows.In the definition, the file directory which is listed first is scanned and then later moves to the other directory in the list, if it doesn’t find one.Files and DirectoriesAll the settings that take a single file or directory can acceptan optional hash of permissions. When the server is starting up, Puppet will enforce those files or directories in the list.In the above code, the allowed hash are owner, group, and mode. There are only two valid values of the owner and group keys.End of ebook previewIf you liked what you saw…Buy it from our store @ https://14。
playwright codegen 自定义方法

playwright codegen 自定义方法要在Playwright Codegen中自定义方法,可以按照以下步骤操作:1. 打开Playwright Codegen的终端界面或命令行界面。
2. 使用以下命令启动Playwright Codegen:`npx playwright codegen`。
3. 导航到你想要自定义方法的页面。
4. 在页面上执行你想要自定义的操作。
例如,点击按钮、填写表单或获取元素属性等。
5. 执行操作时,在Playwright Codegen终端界面或命令行界面上,你会看到生成的代码。
这段代码是你自定义方法的基础。
6. 打开Playwright的文档(https://playwright.dev/docs/api/class-page)以获取页面类(`Page`)的更多方法和属性。
7. 在生成的代码中找到适当的位置,添加你自定义的方法。
8. 编辑自定义方法的逻辑和参数,使其符合你的需求。
9. 保存并退出编辑器。
10. 现在,你可以使用自定义的方法来产生你需要的行为。
例如,以下是一个在Playwright Codegen中自定义的方法的示例:```javascript// 原始生成的代码await page.click('input[type="submit"]');// 自定义方法async function clickSubmitButton() {await page.click('input[type="submit"]');}// 更新后的代码await clickSubmitButton();```通过这种方法,你可以自定义出许多在Playwright Codegen中没有直接生成的方法,以满足你的测试需求。
angular自定义指令详解

angular⾃定义指令详解指令(directive)是angular⾥⾯最核⼼也是最难懂的东西,在慕课⽹看了下⼤漠穷秋⽼湿的视频,⾃⼰百度半天做了⼀些⼩test,总算把⼀切都搞明⽩了。
先列出学习来源:指令中controller和link的区别:angular视频教程:指令中的隔离 Scope :angular学习笔记:⼀、指令的创建:⾸先你得先创建⼀个module:var module1 = angular.module('module1',[]);angular.bootstrap(document.body,['module1']);然后你还得有⼀个对应的controller:var module1 = angular.module('module1',[]);module1.controller('ctl1', function($scope) {$scope.content = 'i\'m, module 1';$ = 'module1';$scope.save = function() {console.log('is function save');};});angular.bootstrap(document.body,['module1']);然后你就可以安⼼的创建指令了:// 衔接上⾯的代码m1.directive('testDirective', function() {// 将对象return出去return{restrict: 'E',// 指令类型 E:element A:attribute M:comment C: classtemplate: '<div>我是指令⽣成的内容</div>';replace: true, //使⽤模板替换原始标记指令内原本的数据将被清空}});angular.bootstrap(document.body,['module1']);对应的html可以这样写:<body><div ng-controller="ctl1">{{content}}<test-directive>这是原本的内容</test-directive></div></body>以上代码需要注意⼀下⼏点:1.我们定义的指令名称是testDirective,但是在html中要写成test-directive。
Unity3d技术之2D骨骼动画插件Puppet2D的使用详解2

Introduction:Puppet2D 是一种工具允许您快速设置你的2D 角色动画的。
使用此工具可以创建2D 骨骼、皮肤你的人物的骨头,并创建真的很容易使用的控件,使动画角色一阵微风。
要打开Puppet2D 窗口,选择Puppet2D 菜单,转到Window>Puppet2DWindow。
在此窗口中包含所有创作工具。
若要开始创建你的被操纵东西,你要准备好你的角色被“rigged”。
在unity进入场景视图并单击2D 的按钮,在视图的顶部。
在你的2D 角色精灵中拖动并放入锁定的图层。
这是有用的所以你不要到头来不小心点击它当你试着画骨头或控制。
现在你准备好开始创建骨骼。
Bone& Control Layers and scale:你就能够更改控制和骨头顶部的Puppet2D 窗口的大小。
您还可以指定排序骨头将创建下一层。
一旦他们已经被创建,所以请确保你在你的骨骼和控制在创建之前开始处设置这,这不会改变他们的层。
Skeleton骨架:BoneCreation:骨骼是将控制你的小木偶是如何移动的支点。
若要开始创建一根骨头,请单击“Create Bone Tool”按钮。
这会设置你中骨创建模式。
你会留在这种模式下,直到您按输入或单击“Finish Bone”按钮。
2D 视图中开始使用鼠标左键,你会开始绘图的骨头。
每个骨骼会到父级无论您选择了。
Create Bone Tool按钮——开始创建骨骼鼠标左键单击——绘制的骨头退格键——删除选定的骨骼按住shift 键——移动选定的骨骼只按住ctrl 键——移动选定的骨骼和它的孩子Alt 单击鼠标左键——选定的骨骼和它的孩子之间插入骨单击鼠标右键——取消选择骨骼按enter 键/点击“Finish Bone”———–完成在中创建的骨头。
SplineCreation:这是一种特殊的表现为一条贝塞尔曲线的骨链。
当您绘制的控件而不是骨头,它是比正常骨骼以不同的方式创建。
activitimodeler任务节点自定义属性扩展
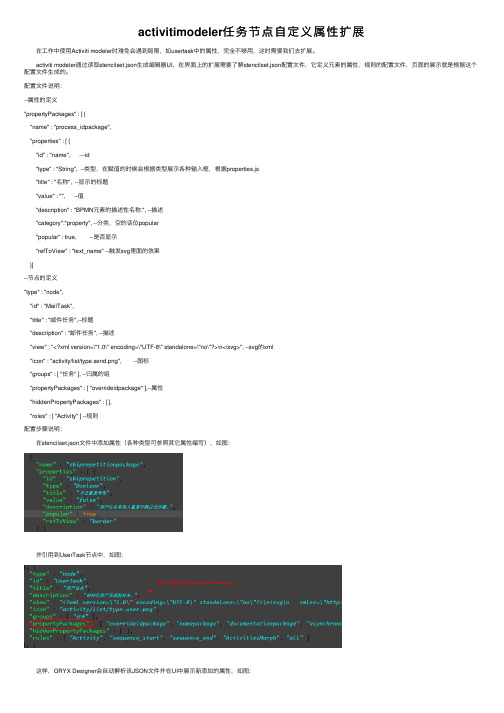
activitimodeler任务节点⾃定义属性扩展 在⼯作中使⽤Activiti modeler时难免会遇到局限,如usertask中的属性,完全不够⽤,这时需要我们去扩展。
activiti modeler通过读取stencilset.json⽣成编辑器UI,在界⾯上的扩展需要了解stencilset.json配置⽂件,它定义元素的属性,规则的配置⽂件,页⾯的展⽰就是根据这个配置⽂件⽣成的。
配置⽂件说明:--属性的定义"propertyPackages" : [ {"name" : "process_idpackage","properties" : [ {"id" : "name", ---id"type" : "String", --类型,在赋值的时候会根据类型展⽰各种输⼊框,根据properties.js"title" : "名称", --显⽰的标题"value" : "", --值"description" : "BPMN元素的描述性名称.", --描述"category":"property", --分类,空的话位popular"popular" : true, --是否显⽰"refToView" : "text_name" --触发svg⾥⾯的效果}]--节点的定义"type" : "node","id" : "MailTask","title" : "邮件任务",--标题"description" : "邮件任务", --描述"view" : "<?xml version=\"1.0\" encoding=\"UTF-8\" standalone=\"no\"?>\n</svg>", --svg的xml"icon" : "activity/list/type.send.png", --图标"groups" : [ "任务" ], --归属的组"propertyPackages" : [ "overrideidpackage" ],--属性"hiddenPropertyPackages" : [ ],"roles" : [ "Activity" ] --规则配置步骤说明: 在stencilset.json⽂件中添加属性(各种类型可参照其它属性编写),如图: 并引⽤到UserTask节点中,如图: 这样,ORYX Designer会⾃动解析该JSON⽂件并在UI中展⽰新添加的属性,如图: 接着,我们需要将UI上扩展的属性与activiti进⾏绑定。
Puppet自动化配置管理教程

Puppet自动化配置管理教程第一章:什么是PuppetPuppet是一种开源的自动化配置管理工具,用于统一管理和自动化配置大规模的IT基础架构。
Puppet通过对服务器和网络设备进行配置管理,实现了快速部署和变更管理的一体化解决方案。
它使用声明式语言和基于模块的方法来描述和管理设备配置,从而提高了系统管理效率和一致性。
第二章:Puppet架构Puppet的架构由三个组件组成:Puppet Master、Puppet Agent 和PuppetDB。
Puppet Master是Puppet的主控节点,负责管理配置和策略,并将它们传送给Puppet Agent。
Puppet Agent是在被管理的节点上运行的代理程序,它执行从Puppet Master下载的配置,并将节点信息反馈给Puppet Master。
PuppetDB是一个数据库,用于存储Puppet Master和Puppet Agent之间的通信数据。
第三章:安装和配置Puppet安装Puppet非常简单,只需下载并安装Puppet Master和Puppet Agent的软件包即可。
配置Puppet Master包括指定节点、制定配置策略、创建模块等。
配置Puppet Agent包括指定Puppet Master的地址、执行更新的时间间隔等。
通过正确的设置配置文件,Puppet Master和Puppet Agent之间就可以进行通信了。
第四章:使用Puppet编写配置策略Puppet使用自定义的声明式语言来描述配置策略。
通过编写Puppet配置文件,可以定义节点的配置要求、服务的安装和启动、文件的权限和内容等。
Puppet提供了丰富的资源类型和函数,可以满足各种配置需求。
编写配置策略时,需要考虑节点之间的依赖关系和执行顺序,确保配置的一致性和稳定性。
第五章:模块化管理和重用Puppet通过模块化管理的方式提高了配置管理的可重用性和扩展性。
- 1、下载文档前请自行甄别文档内容的完整性,平台不提供额外的编辑、内容补充、找答案等附加服务。
- 2、"仅部分预览"的文档,不可在线预览部分如存在完整性等问题,可反馈申请退款(可完整预览的文档不适用该条件!)。
- 3、如文档侵犯您的权益,请联系客服反馈,我们会尽快为您处理(人工客服工作时间:9:00-18:30)。
Puppet之ruby模块说明
1 说明
使用自定义facter分别获取客户端ip地址和网卡名称,不需要在客户端安装脚本
2 配置
管理服务器和被管理服务器都要配置
#vim /etc/puppet/puppet.conf
[main]
factpath=$vardir/lib/facter
pluginsync=true
新建目录
以nrpe模块为例
mkdir -p /etc/puppet/modules/nrpe/lib/facter
3 脚本
#cd /etc/puppet/modules/nrpe/lib/facter
获取外网网卡脚本
vim wannetcard.rb
Facter.add(:wanname) do
setcode do
%x{ /sbin/ifconfig|egrep -v "127\.0\.0\.1\|192\.168\.7\."|grep -B 1 "inet addr:"|grep "eth"|/usr/bin/awk '{print $1}'|grep -v ":" }.chomp
end
end
获取内网网卡脚本
vim lannetcard.rb
Facter.add(:lanname) do
setcode do
%x{/sbin/ifconfig|grep -B 1 "192\.168\.7\."|grep "eth"|awk '{print $1}'|grep -v ":"}.chomp
end
end
获取客户端外网IP
Facter.add(:getip) do
confine :kernel => :linux
setcode do
ip = nil
output = %x{/sbin/ifconfig|egrep -v 'eth0[::]|eth1[:space:]'|grep -A1 "eth"|grep "inet addr:"}
# a=output.split(/^\S/)
# a.each { |str| print str}
output.split(/^\S/).each { |str|
if str =~ /inet addr:([0-9]+\.[0-9]+\.[0-9]+\.[0-9]+)/
tmp = $1
unless tmp =~ /^192\.168\.7/
ip = tmp
break
end
end
}
ip
end
End
获取本地snmpd的pid值
Facter.add(:getkey) do
case RUBY_PLA TFORM
when /linux/i
os_family = "redhat"
when /solaris/i
os_family = "solaris"
when /ix/i, /gnu/i,/sysv/i,/sunos/i,/bsd/i
os_family = "unix"
when /win/i, /ming/i
os_family = "windows"
else
os_family = "other"
end
if os_family == "redhat" then
if File.exist?("/etc/rndc.key")
then
setcode do
%x{/bin/cat /var/run/snmpd.pid }.chomp
end
end
end
end
4 erb模版调用
# vim test.erb
外网IP::<%= getip %>
外网网卡:<%= wanname %>
内网网卡:<%= lanname %>。