Android详细的对话框AlertDialog.Builder使用方法
Android编程自定义AlertDialog样式的方法详解
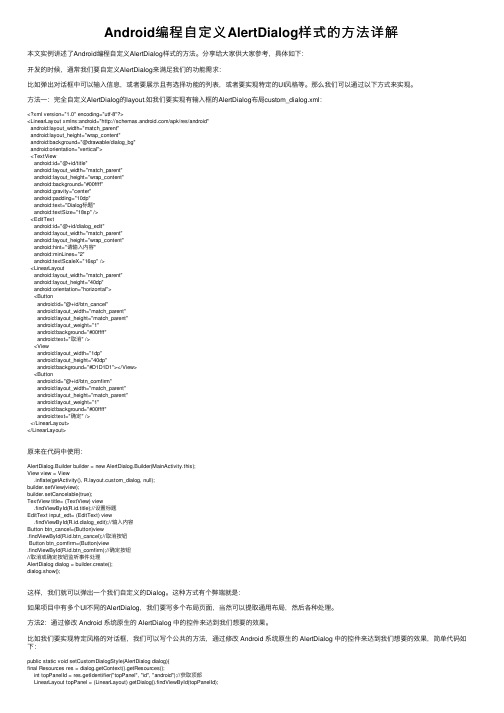
Android编程⾃定义AlertDialog样式的⽅法详解本⽂实例讲述了Android编程⾃定义AlertDialog样式的⽅法。
分享给⼤家供⼤家参考,具体如下:开发的时候,通常我们要⾃定义AlertDialog来满⾜我们的功能需求:⽐如弹出对话框中可以输⼊信息,或者要展⽰且有选择功能的列表,或者要实现特定的UI风格等。
那么我们可以通过以下⽅式来实现。
⽅法⼀:完全⾃定义AlertDialog的layout.如我们要实现有输⼊框的AlertDialog布局custom_dialog.xml:<?xml version="1.0" encoding="utf-8"?><LinearLayout xmlns:android="/apk/res/android"android:layout_width="match_parent"android:layout_height="wrap_content"android:background="@drawable/dialog_bg"android:orientation="vertical"><TextViewandroid:id="@+id/title"android:layout_width="match_parent"android:layout_height="wrap_content"android:background="#00ffff"android:gravity="center"android:padding="10dp"android:text="Dialog标题"android:textSize="18sp" /><EditTextandroid:id="@+id/dialog_edit"android:layout_width="match_parent"android:layout_height="wrap_content"android:hint="请输⼊内容"android:minLines="2"android:textScaleX="16sp" /><LinearLayoutandroid:layout_width="match_parent"android:layout_height="40dp"android:orientation="horizontal"><Buttonandroid:id="@+id/btn_cancel"android:layout_width="match_parent"android:layout_height="match_parent"android:layout_weight="1"android:background="#00ffff"android:text="取消" /><Viewandroid:layout_width="1dp"android:layout_height="40dp"android:background="#D1D1D1"></View><Buttonandroid:id="@+id/btn_comfirm"android:layout_width="match_parent"android:layout_height="match_parent"android:layout_weight="1"android:background="#00ffff"android:text="确定" /></LinearLayout></LinearLayout>原来在代码中使⽤:AlertDialog.Builder builder = new AlertDialog.Builder(MainActivity.this);View view = View.inflate(getActivity(), yout.custom_dialog, null);builder.setView(view);builder.setCancelable(true);TextView title= (TextView) view.findViewById(R.id.title);//设置标题EditText input_edt= (EditText) view.findViewById(R.id.dialog_edit);//输⼊内容Button btn_cancel=(Button)view.findViewById(R.id.btn_cancel);//取消按钮Button btn_comfirm=(Button)view.findViewById(R.id.btn_comfirm);//确定按钮//取消或确定按钮监听事件处理AlertDialog dialog = builder.create();dialog.show();这样,我们就可以弹出⼀个我们⾃定义的Dialog。
alertdialog.builder用法

Alertdialog.builder用法在Android开发中,AlertDialog是一个常用的弹窗控件,用于向用户显示一些重要信息或者获取用户的确认操作。
AlertDialog.Builder 则是用来构建AlertDialog的辅助类,它可以帮助我们创建自定义样式和功能的对话框,为用户提供更好的交互体验。
在本文中,我将介绍AlertDialog.Builder的基本用法,并深入探讨其灵活性和定制化的功能。
一、基本用法1. 创建AlertDialog.Builder对象我们需要创建一个AlertDialog.Builder对象来构建对话框。
通过以下代码可以实现:```AlertDialog.Builder builder = new AlertDialog.Builder(context); ```这里的context通常是指当前的Activity或者Fragment的上下文对象。
2. 设置对话框标题和消息可以使用setTitle()和setMessage()方法来设置对话框的标题和显示的信息:```builder.setTitle("提示");builder.setMessage("确定要删除这条记录吗?");```3. 添加按钮和点击事件通过调用setPositiveButton()、setNegativeButton()和setNeutralButton()方法来添加按钮,并设置按钮的点击事件:```builder.setPositiveButton("确定", new DialogInterface.OnClickListener() {@Overridepublic void onClick(DialogInterface dialog, int which) { // 用户点击确定按钮后的操作}});builder.setNegativeButton("取消", new DialogInterface.OnClickListener() {@Overridepublic void onClick(DialogInterface dialog, int which) { // 用户点击取消按钮后的操作}});```4. 创建和显示AlertDialog调用create()方法创建AlertDialog对象,并调用show()方法显示对话框:```AlertDialog dialog = builder.create();dialog.show();```通过以上基本用法,我们可以快速创建一个简单的AlertDialog对话框,并实现基本的交互功能。
安卓弹出对话框——Alertdialog
安卓弹出对话框——Alertdialog在Android开发当中,在界⾯上弹出⼀个Dialog对话框使我们经常需要做的,本篇随笔将详细的讲解Dialog对话框这个概念,包括定义不同样式的对话框。
⼀、Dialog我们⾸先来看看android官⽅⽂档对Dialog的介绍A dialog is a small window that prompts the user to make a decision or enter additional information. A dialog does not fill the screen and is normally used formodal events that require users to take an action before they can proceed.dialog就是⼀个在屏幕上弹出⼀个可以让⽤户做出⼀个选择,或者输⼊额外的信息的对话框,⼀个对话框并不会沾满我们整个的屏幕,并且通常⽤于模型事件当中需要⽤户做出⼀个决定后才会继续执⾏。
Dialog类是dialog对话框的基类,但是我们应该避免直接使⽤这个类来实例化⼀个dialog对话框,我们应当使⽤其⼦类来得到⼀个对话框:ng.Object↳ android.app.DialogKnown Direct SubclassesAlertDialog, CharacterPickerDialog, MediaRouteChooserDialog, MediaRouteControllerDialog, PresentationKnown Indirect SubclassesDatePickerDialog, ProgressDialog, TimePickerDialog我们看到,Dialog有很多的⼦类实现,所以我们要定义⼀个对话框,使⽤其⼦类来实例化⼀个即可,⽽不要直接使⽤Dialog这个⽗类来构造。
AlertDialog 使用 扩展

[功能]也是一种Dialog[原理]1. AlertDialog 本身并没有构造函数即不可以通过new AlertDialog(...) 来初始化而只能通过AlertDialog.Builder2. 而AlertDialog.Builder 比较像是AlertDialog的构造器用于接收各种和AlertDialog 有关的参数然后通过create() 来创建目标AlertDialog[代码步骤]1. 定义AlertDialog.Builder 实例并接受一些参数如:图片标题正文Java代码1ab = new AlertDialog.Builder(this);Java代码2ab.setTitle("HelloAlert").setMessage("Warning: its Alert Demo!").setIcon(R.drawable.robot);2. 根据AlertDialog.Builder 创建相应的AlertDialogJava代码3aDialog = ab.create();3. 弹出AlertDialogJava代码4findViewById(R.id.button).setOnClickListener(new OnClickListener(){5public void onClick(View v) {6// TODO Auto-generated method stub7aDialog.show();8}9});4. 取消AlertDialog写道因为该AlertDialog 所采用的布局是系统的其只接受Text 不接受Button 但是发现可以在AlertDialog 上面注册按键监听即AlertDialog.setOnKeyListener()不过因为该监听器只负责监听按键事件而鼠标点击是不管的所以请点击任意按键关闭之10aDialog.setOnKeyListener(new OnKeyListener(){1112@Override13public boolean onKey(DialogInterface arg0, int arg1, KeyEvent arg2) { 14// TODO Auto-generated method stub15aDialog.dismiss();1617return true;18}1920});* emulator 运行截图:5. 以上所采用的都是AlertDialog 系统默认的布局现在说自定义布局的情况并添加一个用于取消AlertDialog 的Button* 定义其布局hello.mainXml代码21<?xml version="1.0" encoding="utf-8"?>22<LinearLayout xmlns:android="/apk/res/android"23android:orientation="horizontal"24android:layout_width="fill_parent"25android:layout_height="fill_parent"26android:padding="10dp"27>28<ImageView29android:id="@+id/image"30android:layout_width="wrap_content"31android:layout_height="wrap_content"32android:src="@drawable/robot" />33<LinearLayout34android:orientation="vertical"35android:layout_width="wrap_content"36android:layout_height="wrap_content"37>38<TextView39android:id="@+id/title"40android:layout_width="wrap_content"41android:layout_height="wrap_content"42android:text="HelloAlert!"43/>44<TextView45android:id="@+id/message"46android:layout_width="wrap_content"47android:layout_height="wrap_content"48android:paddingTop="10dip"49/>50</LinearLayout>51</LinearLayout>* 通过LayoutInflater 得到上面hello.xml 布局的View viewJava代码52view = this.getLayoutInflater().inflate(yout.hello, null);* 指定AlertDialog.Builder 所需的布局并返回目标AlertDialogJava代码53ab.setView(view);5455aDialog = ab.create();* 通过view.findViewById() 得到目标View 然后设置其内容如:Java代码56TextView title = (TextView) view.findViewById(R.id.title);57title.setTextSize(20);58title.setTextColor(Color.RED);59title.setText("HelloAlert");6061TextView message = (TextView) view.findViewById(R.id.message);62message.setText("Warning: it's Alert Demo!");* 弹出AlertDialogJava代码63findViewById(R.id.button).setOnClickListener(new OnClickListener(){64public void onClick(View v) {65// TODO Auto-generated method stub66aDialog.show();67}68});* 取消AlertDialog写道在整个View 上注册按键监听器关闭AlertDialogJava代码69view.setOnClickListener(new OnClickListener(){70public void onClick(View v) {71// TODO Auto-generated method stub72aDialog.dismiss();73}74});* emulator 运行截图:。
kotlin alertdialog edittext

kotlin alertdialog edittextKotlin中的AlertDialog和EditText用法详解在Kotlin编程语言中,AlertDialog和EditText是两个非常常用的UI组件,可以用于在Android应用中实现对话框和文本输入功能。
本文将一步一步地介绍如何使用Kotlin编写AlertDialog,并在其中添加EditText控件,以及处理用户输入的方法。
第一步:导入依赖库和设置布局在使用AlertDialog和EditText之前,首先需要在项目的构建文件中添加相关的依赖库。
在app级别的build.gradle文件中的dependencies块中添加以下代码:implementation 'androidx.appcompat:appcompat:1.3.0' implementation 'androidx.core:core-ktx:1.5.0'添加完依赖后,接下来需要在布局文件中添加一个按钮,点击按钮后触发显示AlertDialog对话框。
在布局文件中添加一个Button控件,代码如下所示:<Buttonandroid:id="+id/showAlertDialogButton"android:layout_width="wrap_content"android:layout_height="wrap_content"android:text="Show AlertDialog" />第二步:获取AlertDialog实例在Kotlin中,我们可以使用AlertDialog.Builder类来创建AlertDialog 实例。
在MainActivity.kt文件中,首先需要为按钮设置点击事件监听器,并在监听器的回调方法中创建AlertDialog实例。
AlertDialog点击按钮不消失的实现方法

AlertDialog点击按钮不消失的实现⽅法我有⼀个⽂本输⼊对话框,当我点击对话框上的“是”按钮,它会验证输⼊,然后关闭对话框。
但是,如果输⼊错误,我想停留在同⼀个对话框中.。
每⼀次,⽆论输⼊是什么,对话框应该⾃动关闭,当我点击“否”按钮。
我怎么才能禁⽤这个?在⽹上找了很多,⼤部分都是修改布局,添加取消确定什么的,这样并不理想。
现在有个好⽅案,记录下来先://重写“确定”(AlertDialog.BUTTON_POSITIVE),截取监听dialog.getButton(AlertDialog.BUTTON_POSITIVE).setOnClickListener(new View.OnClickListener() {@Overridepublic void onClick(View view) {Toast.makeText(MainActivity.this,"getButton(AlertDialog.BUTTON_POSITIVE)", Toast.LENGTH_LONG).show();//这⾥可以控制是否让对话框消失dialog.dismiss();}});完整Java代码如下:package com.github.azhansy.dialognotdismissdemo;import android.content.DialogInterface;import android.support.v7.app.AlertDialog;import android.support.v7.app.AppCompatActivity;import android.os.Bundle;import android.view.View;import android.widget.EditText;import android.widget.ImageView;import android.widget.Toast;public class MainActivity extends AppCompatActivity {@Overrideprotected void onCreate(Bundle savedInstanceState) {super.onCreate(savedInstanceState);setContentView(yout.activity_main);}//这⾥随便在主布局加个监听事件即可public void onClickText(View vv){AlertDialog.Builder builder = new AlertDialog.Builder(this);builder.setTitle("对话框标题");View view = View.inflate(this, yout.dialog_input_link, null);final EditText linkEdt = (EditText) view.findViewById(R.id.edt_input_link);ImageView clearIv = (ImageView) view.findViewById(R.id.iv_clear_link);builder.setView(view);clearIv.setOnClickListener(new View.OnClickListener() {@Overridepublic void onClick(View view) {linkEdt.getText().clear();}});builder.setPositiveButton(android.R.string.ok, new DialogInterface.OnClickListener() {@Overridepublic void onClick(DialogInterface dialogInterface, int i) {Toast.makeText(MainActivity.this,"确定", Toast.LENGTH_LONG).show();}});builder.setNegativeButton(android.R.string.cancel, new DialogInterface.OnClickListener() {@Overridepublic void onClick(DialogInterface dialogInterface, int i) {Toast.makeText(MainActivity.this,"取消", Toast.LENGTH_LONG).show();}});final AlertDialog dialog = builder.create();dialog.setCanceledOnTouchOutside(false);dialog.show();//重写“确定”,截取监听dialog.getButton(AlertDialog.BUTTON_POSITIVE).setOnClickListener(new View.OnClickListener() {@Overridepublic void onClick(View view) {Toast.makeText(MainActivity.this,"getButton(AlertDialog.BUTTON_POSITIVE)", Toast.LENGTH_LONG).show();//这⾥可以控制是否让对话框消失dialog.dismiss();}});}}对话框布局:<?xml version="1.0" encoding="utf-8"?><LinearLayoutxmlns:android="/apk/res/android"xmlns:tools="/tools"android:layout_width="match_parent"android:layout_height="match_parent"android:orientation="vertical"android:paddingLeft="10dp"android:paddingRight="10dp"><RelativeLayoutandroid:layout_width="match_parent"android:layout_height="wrap_content"><EditTextandroid:id="@+id/edt_input_link"android:layout_width="match_parent"android:layout_height="48dp"android:gravity="center_vertical"android:maxLines="1"android:paddingRight="30dp"android:textSize="16sp"tools:text="fhafafa"/><ImageViewandroid:id="@+id/iv_clear_link"android:layout_width="30dp"android:layout_height="30dp"android:layout_alignParentRight="true"android:layout_centerInParent="true"android:scaleType="center"android:src="@drawable/ic_clear"/></RelativeLayout></LinearLayout>以上所述是⼩编给⼤家介绍的AlertDialog点击按钮不消失的实现⽅法,希望对⼤家有所帮助,如果⼤家有任何疑问请给我留⾔,⼩编会及时回复⼤家的。
kotlin dialog用法

Kotlin Dialog用法什么是DialogDialog是Android应用中常用的一种交互式组件,用于在屏幕上显示一段临时性的信息或与用户进行交互。
Dialog可以是一个简单的提示框,也可以是一个复杂的自定义界面。
在Kotlin中,我们可以使用Dialog类来创建和管理Dialog。
创建Dialog要创建一个Dialog,我们可以使用Dialog类的构造函数,或者使用AlertDialog.Builder类。
下面是使用构造函数创建Dialog的示例代码:val dialog = Dialog(context)dialog.setContentView(yout.dialog_layout)dialog.show()在上面的代码中,我们首先创建了一个Dialog对象,并将其与一个布局文件关联。
然后,我们调用show()方法来显示Dialog。
使用AlertDialog.Builder类创建Dialog的示例代码如下:val builder = AlertDialog.Builder(context)builder.setTitle("提示")builder.setMessage("这是一个提示框")builder.setPositiveButton("确定") { dialog, which ->// 点击确定按钮后的逻辑处理}builder.setNegativeButton("取消") { dialog, which ->// 点击取消按钮后的逻辑处理}val dialog = builder.create()dialog.show()在上面的代码中,我们首先创建了一个AlertDialog.Builder对象,并设置了对话框的标题和消息。
然后,我们使用setPositiveButton()和setNegativeButton()方法设置了对话框的按钮,并在按钮的点击事件中添加逻辑处理。
[Android教程_兄弟连马剑威]_009_对话框
![[Android教程_兄弟连马剑威]_009_对话框](https://img.taocdn.com/s3/m/a414b5de76eeaeaad1f330f3.png)
第9讲:对话框课程•1、Dialog对话框介绍•2、Dialog的类型大纲1、Dialog对在d d开发中我们经常会需要在dd•Android开发中,我们经常会需要在Android界面上弹能我们叫它Android Dialog对话框,在我们使用Androi对话框介绍弹出些对话框比如询问用户或者让用户选择这些功弹出一些对话框,比如询问用户或者让用户选择。
这些功d的过程中,Android Dialog的类型有不同的类型。
2、Dialo o g的类型2、Dialol l•AlertDialog实现方法(建造者模式)•实例化建造者AlertDialog.Builder•利用builder设置对话框的各种属性tTitl(–setTitle(标题)–setMessage(消息)–setCancelable(boolean b)—设置是否可以取消)正面”按钮及点击–setPositiveButton( ‐‐‐设置”正面按钮,及点击–setNegativeButton( )‐‐‐设置“反面”按钮,及点og的类型击该按钮的事件处理点击该按钮的事件处理2、Dialo多项–setItems(CharSequence[] items, DialogInterface.O多项单选tSi l Ch i It(Ch S []it i t–setSingleChoiceItems(CharSequence[]items,intc•builder.create( ); 创建(实例化)对话框•builder.show( ); 显示对话框og的类型OnClickListener listener)h k dIt Di l I t f O Cli kLi t li t)checkedItem, DialogInterface.OnClickListener listener)。
- 1、下载文档前请自行甄别文档内容的完整性,平台不提供额外的编辑、内容补充、找答案等附加服务。
- 2、"仅部分预览"的文档,不可在线预览部分如存在完整性等问题,可反馈申请退款(可完整预览的文档不适用该条件!)。
- 3、如文档侵犯您的权益,请联系客服反馈,我们会尽快为您处理(人工客服工作时间:9:00-18:30)。
.show();
我们传入了一个ImageView来显示图片,这里显示了一个经典的android小绿人图标~ ~,当然这里还可以放上网络图片,具体的实现方法就不介绍了,留给大家来练习吧~
最后总结一下,android平台为我们开发提供了极大的便利,DialogBuilder能做的不止这些,这里给大家展示的只是冰山一角,我们可以尽情的发挥想象,创造我们自己的对话框。
首先是一个最简单的应用,就是弹出一个消息框,在android中可以这样实现
new AlertDialog.Builder(self)
.setTitle("标题")
.setMessage("简单消息框")
.setPositiveButton("确定", null)
.show();
效果如下:
上面的代码中我们新建了一个AlertDialog,并用Builder方法形成了一个对象链,通过一系列的设置方法,构造出我们需要的对话框,然后调用show方法显示出来,注意到Builder方法的参数self,这个其实是Activity对象的引用,根据你所处的上下文来传入相应的引用就可以了。例如在onCreate方法中调用,只需传入this即可。
public void onClick(DialogInterface dialog, int which) {
dialog.dismiss();
}
}
)
.setNegativeButton("取消", null)
.show();
1
new AlertDialog.Builder(self)
2
.setTitle("多选框")
幸运的是,android提供了这种问题的解决方案,刚开始接触android的时候,我在做一个自定义对话框的时候,也是通过继承的方式来实现,后来随着对文档了解的深入,发现了android起始已经提供了相应的接口Dialog Builder,下面我就吧相关的内容在这里分享一下,也能让更多的初学者少走弯路。
.setNegativeButton("取消", null)
.show();
如上代码,我们用setView方法,为我们的对话框传入了一个文本编辑框,当然,你可以传入任何的视图对象,比如图片框,WebView等。。尽情发挥你的想象力吧~
下面是单选框与多选框,也是非常有用的两种对话框:
new AlertDialog.Builder(self)
1
ImageView img = new ImageView(self);
2
img.setImageResource(R.drawable.icon);
3
4
new AlertDialog.Builder(self)
5
.setTitle("图片框")
6
.setView(img)
7
.setPositiveButton("确定", null)
下面是带确认和取消按钮的对话框:
new AlertDialog.Builder(self)
.setTitle("确认")
.setMessage("确定吗?")
.setPositiveButton("是", null)
.setNegativeButton("否", null)
.show();
注意到,这里有两个null参数,这里要放的其实是这两个按钮点击的监听程序,由于我们这里不需要监听这些动作,所以传入null值简单忽略掉,但是实际开发的时候一般都是需要传入监听器的,用来响应用户的操作。
列表对话框:
1
new AlertDialog.Builder(self)
2
.setTitle("列表框")
3
.setItems(new String[] {"列表项1","列表项2","列表项3"}, null)
4
.setNegativeButton("确定", null)
5
.show();
最后,在对话框中显示图片:
.setTitle("请选择")
.setIcon(android.R.drawable.ic_dialog_info)
.setSingleChoiceItems(new String[] {"项1","选项2","选项3","选项4"}, 0,
new DialogInterface.OnClickListener() {
下面是一个可以输入文本的对话框:
new AlertDialog.Builder(self)
.setTitle("请输入")
.setIcon(android.R.drawable.ic_dialog_info)
.setView(new EditText(self))
.setPositiveButton("确定", null)
Android详细的对话框AlertDialog.Builder使用方法
我们在平时做开发的时候,免不了会用到各种各样的对话框,相信有过其他平台开发经验的朋友都会知道,大部分的平台都只提供了几个最简单的实现,如果我们想实现自己特定需求的对话框,大家可能首先会想到,通过继承等方式,重写我们自己的对话框。当然,这也是不失为一个不错的解决方式,但是一般的情况却是这样,我们重写的对话框,也许只在一个特定的地方会用到,为了这一次的使用,而去创建一个新类,往往有点杀鸡用牛刀的感觉,甚至会对我们的程序增加不必要的复杂性,对于这种情形的对话框有没有更优雅的解决方案呢?
3
.setMultiChoiceItems(new String[] {"选项1","选项2","选项3","选项4"}, null, null)
4
.setPositiveButton("确定", null)
5
.setNegativeButton("取消", null)
6
.show();
单选和多选对话框应该是我们平时用的非常多的,代码应该很好理解,下面再最后介绍两个