eNSP模拟器的仿真项目综合实验-含配置文档
eNSP使用和实验教程详细讲解
eNSP使用和实验教程详解一.ENSP软件说明1.ENSP使用简介2.ENSP整体介绍a)基本界面。
b)选择设备,为设备选择所需模块并且选用合适的线型互连设备。
c)配置不同设备。
d)测试设备的连通性。
二.终端设备的使用(PC,Client,server,MCS,STA,Mobile)1.Client使用方法2.server使用方法3.PC使用方法4.MCS使用方法5.STA和Mobile使用方法三.云设备,HUB,帧中继1.Hub只是实现一个透传作用,这边就不作说明了。
肯定会无师自通的2.帧中继使用方法3.设备云使用方法四.交换机五.AR(以一款AR为例)六.WLAN(AC,AP)1.AC使用2.AP使用方法一. eNSP软件说明1.eNSP使用简介全球领先的信息与通信解决方案供应商华为,近日面向全球ICT从业者,以及有兴趣掌握ICT相关知识的人士,免费推出其图形化网络仿真工具平台——eNSP。
该平台通过对真实网络设备的仿真模拟,帮助广大ICT从业者和客户快速熟悉华为数通系列产品,了解并掌握相关产品的操作和配置、故障定位方法,具备和提升对企业ICT 网络的规划、建设、运维能力,从而帮助企业构建更高效,更优质的企业ICT网络。
近些年来,针对越来越多的ICT从业者的对真实网络设备模拟的需求,不同的ICT厂商开发出来了针对自家设备的仿真平台软件。
但目前行业中推出的仿真平台软件普遍存在着仿真程度不够高、仿真系统更新不够及时、软件操作不够方便等系列问题,这些问题也困扰着广大ICT从业者,同时也极大的影响了模拟真实设备的操作体验,降低了用户了解相关产品进行操作和配置的兴趣。
为了避免现行仿真软件存在的这些问题,华为近期研发出了一款界面友好,操作简单,并且具备极高仿真度的数通设备模拟器——eNSP(Enterprise Network Simulation Platform)。
这款仿真软件运行是物理设备的VRP操作系统,最大程度地模拟真实设备环境,您可以利用eNSP模拟工程开局与网络测试,协助您高效地构建企业优质的ICT网络。
案例模拟实验二(模拟双线接入配置)

案例模拟实验二【实验背景】企业集团总部通过使用一台USG5320防火墙作为路由连接外网。
各个子公司分别通过电信运营商和联通运营商接入集团总部网络。
【实验目的】1.了解防火墙的基本工作原理;2.掌握防火墙安全区域的划分配置;3.掌握防火墙基本安全策略的配置;4.掌握防火墙NAT的基本配置。
【实验内容】模拟配置USG5320防火墙,实现防火墙基本功能。
区域划分,双线接入,内网外网隔离。
【实验环境】计算机一台,华为模拟软件ensp【实验原理】一、安全区域在防火墙中引入“安全区域”的概念是为了对流量来源进行安全等级的划分,以判断何时对流量进行检测。
通常情况下,相同安全区域中的流量流动是不需要检测的,而跨安全区域的流量由于存在安全风险,是需要受到防火墙控制的。
(详见配置指南7.2.1、7.2.2、7.2.3、7.2.4)二、安全策略安全策略用于对流经设备或访问设备的流量进行安全检查、控制哪些流量可以通过或访问设备。
如果安全策略错误将直接影响网络的正常通信。
(详见配置指南7.5.1、7.5.2、7.5.3、7.5.4)三、配置NATNAT 主要用于多个私网用户使用一个公网IP 地址访问外部网络的情况,从而减缓可用IP 地址资源枯竭的速度。
随着NAT 技术的发展,NAT 已经不仅可以实现源地址的转换,还可以实现目的地址的转换。
(详见配置指南7.9.1、7.9.2、7.9.3、7.9.4、7.9.5、7.9.9.1、7.9.9.2)【实验拓扑】在模拟实验一拓扑结构基础上,模拟双线接入的连接,为了进行配置的测试,电信和联通端的设备用两台主机来模拟。
【实验步骤】IP地址规划:1. 配置硬件接口地址<USG5320>system view[USG5320]interface GigabitEthernet0/0/0 #进入g0/0/0[USG5320-GigabitEthernet0/0/1]ip address 119.97.211.26 255.255.255.252 #为g0/0/0配置IP地址[USG5320]interface GigabitEthernet0/0/1[USG5320-GigabitEthernet0/0/1]ip address 220.249.97.114 255.255.255.248[USG5320]interface GigabitEthernet0/0/2[USG5320-GigabitEthernet0/0/2] ip address 10.0.0.1 255.255.255.2402.划分安全区域,把相应的接口加入到安全区域内#将集团总部内网划分到trust区域[USG5320]firewall zone trust[USG5320-zone-trust]add interface GigabitEthernet0/0/2[USG5320-zone-trust]description to-neiwang#将连接电信的外网划分到untrust区域[USG5320]firewall zone untrust[USG5320-zone-untrust] add interface GigabitEthernet0/0/0[USG5320-zone-trust]description to-dianxin#将连接联通的外网划分到isp区域[USG5320]firewall zone name isp[USG5320-zone-isp]set priority 10[USG5320-zone-isp] add interface GigabitEthernet0/0/1[USG5320-zone-trust]description to-liantong3.配置基本安全策略(1)配置域间包过滤,以保证网络基本通信正常[USG5320]firewall packet-filter default permit interzone local trust direction inbound [USG5320]firewall packet-filter default permit interzone local trust direction outbound[USG5320]firewall packet-filter default permit interzone local untrust direction inbound[USG5320]firewall packet-filter default permit interzone local untrust direction outbound[USG5320]firewall packet-filter default permit interzone local isp direction inbound[USG5320]firewall packet-filter default permit interzone local isp direction outbound(2)禁止内网访问外网,允许外网数据流通过#untrust->trustpolicy interzone trust untrust inboundpolicy 0action permit#trunst->untrustpolicy interzone trust untrust outboundpolicy 0action deny#isp->trustpolicyinterzone trust isp inboundpolicy 0action permit#trust->isp2policyinterzone trust isp outboundpolicy 0action deny(3)禁止ftp、qq、msn通信#firewall interzone trust untrustdetect ftpdetect qqdetect msn#firewall interzone trust ispdetect ftpdetect qqdetect msn4.NAT配置(此部分配置再参考案例模拟实验四中的相关配置)(1)创建地址池电信:nat address-group 0 119.97.211.26 119.97.211.26联通:nat address-group 1 220.249.97.114 220.249.97.118(2)配置转换策略#通过电信访问Internetnat-policy interzone trust untrust outboundpolicy 902action source-natpolicy source 10.0.0.0 0.0.255.255address-group 0#通过联通访问Internetnat-policy interzone trust isp outboundpolicy 900action source-natpolicy source 10.0.0.0 0.0.255.255address-group 15.验证给“dianxin”这台主机配置相应的IP地址,与业务服务器进行互ping。
eNSP使用和实验教程详解(2021年整理精品文档)

(完整word)eNSP使用和实验教程详解编辑整理:尊敬的读者朋友们:这里是精品文档编辑中心,本文档内容是由我和我的同事精心编辑整理后发布的,发布之前我们对文中内容进行仔细校对,但是难免会有疏漏的地方,但是任然希望((完整word)eNSP使用和实验教程详解)的内容能够给您的工作和学习带来便利。
同时也真诚的希望收到您的建议和反馈,这将是我们进步的源泉,前进的动力。
本文可编辑可修改,如果觉得对您有帮助请收藏以便随时查阅,最后祝您生活愉快业绩进步,以下为(完整word)eNSP使用和实验教程详解的全部内容。
eNSP使用和实验教程详解一.ENSP软件说明1.ENSP使用简介2.ENSP整体介绍a)基本界面.b)选择设备,为设备选择所需模块并且选用合适的线型互连设备。
c)配置不同设备。
d)测试设备的连通性.二.终端设备的使用(PC,Client,server,MCS,STA,Mobile)1.Client使用方法2.server使用方法3.PC使用方法4.MCS使用方法5.STA和Mobile使用方法三.云设备,HUB,帧中继1.Hub只是实现一个透传作用,这边就不作说明了。
肯定会无师自通的2.帧中继使用方法3.设备云使用方法四.交换机五. AR(以一款AR为例)六. WLAN(AC,AP)1.AC使用2.AP使用方法一. eNSP软件说明1.eNSP使用简介全球领先的信息与通信解决方案供应商华为,近日面向全球ICT从业者,以及有兴趣掌握ICT相关知识的人士,免费推出其图形化网络仿真工具平台—-eNSP.该平台通过对真实网络设备的仿真模拟,帮助广大ICT从业者和客户快速熟悉华为数通系列产品,了解并掌握相关产品的操作和配置、故障定位方法,具备和提升对企业ICT网络的规划、建设、运维能力,从而帮助企业构建更高效,更优质的企业ICT网络.近些年来,针对越来越多的ICT从业者的对真实网络设备模拟的需求,不同的ICT厂商开发出来了针对自家设备的仿真平台软件。
利用eNSP构建虚拟的网络技术实验室-文档资料

利用eNSP构建虚拟的网络技术实验室1 概述在进行网络技术的学习时,经常需要调试各种网络设备,然而现实环境中一般很难找到如此多种类型的网络设备,通过查阅文献发现,使用eNSP软件能够建立虚拟的网络技术实验环境。
该文利用eNSP软件构建了RIP路由实验环境,并结合eNSP安装软件包中自带的Wireshark软件进行RIP路由协议的分析。
2 相关软件介绍2.1 eNSP[1]ENSP(Enterprise Network Simulation Platform)是一款由华为公司提供的免费、可扩展、图形化操作的网络仿真工具平台,主要对企业网络路由器、交换机进行软件仿真,完美呈现真实设备实景,支持大型网络模拟,让广大用户在没有真实设备环境下能够进行网络技术的模拟与演练。
目前ENSP最新版本为1.2.00.350版本,支持路由、交换、无线、防火墙等设备的连接及设备的配置与调试,其具体所支持的设备如表1所示,从表中可以看出,eNSP所支持的设备种类是非常多的,尤其是支持比较全面的交换机功能,这个功能是在市面上其他许多网络模拟软件所不支持的。
Wireshark是世界上最流行的网络分析工具之一,可应用于网络故障的诊断和分析、网络测试软件工具和网络协议的开发和研究领域。
Wireshark能够在网络接口卡处捕捉数据包、实时显示包的详细协议信息并对数据进行导出,同时提供了统计分析结果,提供了非常直观方便的操作内容。
该软件为免费开源软件,具有良好的扩展性,目前可以支持500多种协议解析。
该文使用Wireshark对RIP协议进行分析。
3 构建RIP虚拟网络实验环境3.1 RIP网络拓扑设计本次实验使用3台路由器构建路由实验环境,启动eNSP3后,单击左侧路由器图标后会显示出该软件所支持的路由器设备,然后单击AR2220路由器,在该软件中白色区域中分别点击三次,会出现3台路由器设置,然后选择双绞线将3台路由器互联。
本次实验中使用RIPv2协议,通过Wireshark验证RIPv2协议的特性,利用eNSP软件搭建的网络拓朴及IP地址配置如图1所示。
ensp具体操作过程的实践报告

ensp具体操作过程的实践报告英文回答:Introduction.Cisco Enterprise Network Simulator (ENS) is a powerful network simulation tool that allows users to design, implement, and test network configurations in a virtual environment. It provides a wide range of networking devices, protocols, and configurations, enabling users to create complex network topologies and scenarios.Step 1: Install and Configure ENS.Download and install ENS from the Cisco website.Launch ENS and create a new project.Configure the network settings, including IP addresses, subnet masks, and default gateways.Step 2: Add Network Devices.Drag and drop devices from the library onto the canvas.Configure device properties, such as type, model, and interfaces.Connect devices using virtual cables or Ethernet ports. Step 3: Configure Routing.Configure routing protocols (e.g., OSPF, EIGRP) on routers.Define static routes or add dynamic routing protocolsto establish network connectivity.Step 4: Configure Switching.Configure VLANs and trunks on switches.Implement Spanning Tree Protocol (STP) to prevent network loops.Step 5: Add Traffic Sources and Destinations.Place hosts or end devices on the network.Configure IP addresses and interface settings.Create traffic flows between hosts to simulate network traffic.Step 6: Simulation and Testing.Start the simulation and monitor traffic flow.Use tools like Wireshark to analyze network packets.Troubleshoot network issues and optimize performance.Conclusion.ENS provides a valuable platform for network design, implementation, and testing. By following these steps, users can create and simulate complex network topologies, evaluate configurations, and identify potential issues.中文回答:ENS具体操作过程的实践报告。
eNSP桥连Virtualbox构建虚拟网络仿真

文档说明:eNSP可以模拟各种网络设备,但是在模拟PC和服务器就不行了,华为实验中有关于Agile Controller的实验就需要PC与eNSP配合实现一个真实网络仿真环境,本人健忘,此文档算是备忘,写的笼统,见谅。
1.新建虚拟机
2.初始化硬件配置:初次创建我没有添加虚拟硬盘,过后指定一下存放位置,默认位置我不是很喜欢
3.设置磁盘:添加光盘,硬盘,并安装系统,以上步骤的细节网上都有,并非重点
4.设置网络,与eNSP其它网络设备公用一个Host-only网卡,理解为Vbox在主机中模拟出一张专供虚拟机使用的网卡,所有虚拟设备都是桥接到该网卡上的,通过配置相同的网段,虚拟设备之间可以相通。
举例1:Host-only网卡配置与虚拟机一个网段,可以让真机与虚机相通。
举例2:各虚机配置相同网段,各虚机相通。
虚拟机ip设置为10.0.1.10
eNSP网络拓扑如下
云设备配置如下:
交换机配置如下:
5测试连通性
虚拟机ping eNSP的交换机
eNSP里的交换机ping 虚拟机。
计算机网络综合实训指导书-基于eNSP

计算机网络综合实训项目需求:使用IP地址:10.100+学号后两位.100+学号后两位.0/23对该公司进行子网划分。
要求根据主机数量进行可变长子网掩码(VLSM)划分。
根据主机数量需求和子网号顺序依次分配子网。
业务网段的路由器AR1,AR3,AR4的端口分配对应子网的第一个主机地址,图中的交换机需要管理地址,分配对应子网的最后主机地址。
其他地址自行确定。
填写好地址表后完成各项实验步骤。
!!!请严格按照文档的步骤依次完成任务,配置命令后就记得保存若保存后开启设备原先配置丢失,则需要重新配置。
对各个网络设备配置命令后,都需要保存配置。
在用户视图下执行save保存命令保存。
在提示的时候记得选择yes,在关闭eNSP软件时候要选择保存topo。
路由器保存的时候要在<huawei>下输入save 再输入y 然后可以导出配置了;交换机也是在<huawei>下输入save 然后输入y这个时候就提示保存成功了“Save the configuration successfully.”可以导出配置了。
1、规划地址表1.1子网划分计算过程采用VLSM列出详细的子网划分过程,并填写子网表和地址分配表。
需要进行子网划分的地址为1.2子网表1.3地址分配表2.将各网络设备改为拓扑图上的设备名称并截图示例syssysname 设备名称quitsave 保存配置----------------------------------------------------------------------------------------------------AR1:AR2:AR3:AR4:LSW1:LSW2:LSW3:LSW4:LSW5:3.根据地址表配置各设备地址并将查询到配置的IP地址截图3.1终端类IP地址配置截图:PC1:PC2:PC3:PC4:PC5:PC6:PC7:CLIENT:DNS:WEB SERVER:FTP SERVER:3.2网络设备类接口IP地址配置截图:示例配置三层接口GE,而不是二层接口,若用二层接口需要要vlanif.交换机的端口不能直接设置IP地址,只能划入vlan。
华为模拟器实验文档
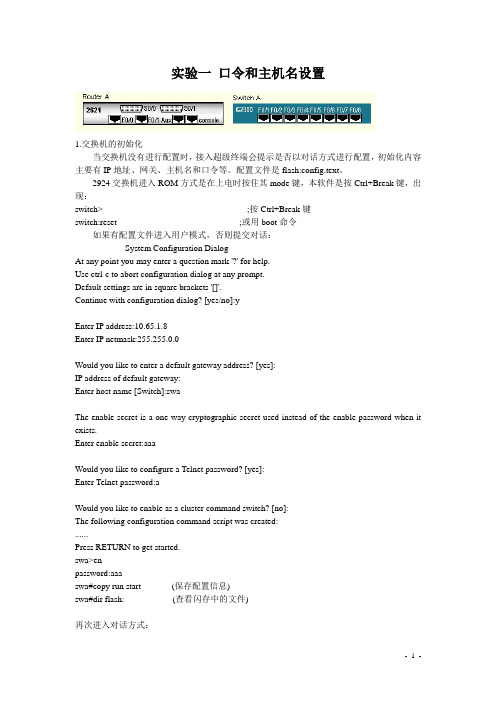
实验一口令和主机名设置1.交换机的初始化当交换机没有进行配置时,接入超级终端会提示是否以对话方式进行配置,初始化内容主要有IP地址、网关、主机名和口令等。
配置文件是flash:config.text。
2924交换机进入ROM方式是在上电时按住其mode键,本软件是按Ctrl+Break键,出现:switch> ;按Ctrl+Break键switch:reset ;或用boot命令如果有配置文件进入用户模式,否则提交对话:--- System Configuration Dialog ---At any point you may enter a question mark '?' for help.Use ctrl-c to abort configuration dialog at any prompt.Default settings are in square brackets '[]'.Continue with configuration dialog? [yes/no]:yEnter IP address:10.65.1.8Enter IP netmask:255.255.0.0Would you like to enter a default gateway address? [yes]:IP address of default gateway:Enter host name [Switch]:swaThe enable secret is a one-way cryptographic secret used instead of the enable password when it exists.Enter enable secret:aaaWould you like to configure a Telnet password? [yes]:Enter Telnet password:aWould you like to enable as a cluster command switch? [no]:The following configuration command script was created:......Press RETURN to get started.swa>enpassword:aaaswa#copy run start (保存配置信息)swa#dir flash: (查看闪存中的文件)再次进入对话方式:swa#setup2.路由器的初始化(路由器初始化与交换机类似)router> ;用户模式,按Ctrl+Break rommon>reset ;进入ROM监控状态,复位引导Continue with configuration dialog? [yes/no]:yesAt any point you may enter a question mark '?' for help.Use ctrl-c to abort configuration dialog at any prompt.Default settings are in square brackets '[ ]'.Would you like to enter basic management setup? [yes/no]:yesConfiguring global parameters:Enter host name [router]:ra回车The enable secret is a password used to protect access toprivileged EXEC and configuration modes. This password,after entered,becomes encrypted in the configuration.Enter enable secret:aaa回车The enable password is used when you do not specify anenable secret password,with some older software versions,and some boot images.Enter enable password:aa回车The virtual terminal password is used to protectaccess to the router over a network interface.Enter virtual terminal password :a回车Enter interface name used to connect to the managementnetwork from the above interface summary:FastEthernet0/0回车Configuring interface FastEthernet0/0:回车Use the 100 Base-TX (RJ-45) connector? [yes]:回车Operate in full-duplex mode? [no]:回车Configure IP on this interface? [yes]:回车IP address for this interface [ ]:10.1.1.1回车Subnet mask for this interface [ ]:255.0.0.0回车[0] Go to the IOS command prompt without saving this config.[1] Return back to the setup without saving this config.[2] Save this configuration to nvram and exit.Enter your selection [2]:回车ra>enpassword aaa (进入特权模式)ra#show run (显示配置信息)ra#w (保存配置信息)ra#dir flash: (显示配置文件)(配置文件在2621路由器不能删除,放弁配置文件要用寄存器设置0x2142);3. 用命令行设置交换机和路由器的口令和主机名先对交换机进行操作,双击SwitchA,出现:switch>en ;第一次密码为空switch#conf t ;进入全局配置模式switch(config)#hostname swa ;设置交换机名swa(config)#enable secret aaa ;设置特权加密口令为aaaswa(config)#enable password aax ;设置特权非密口令为aaxswa(config)#line console 0 ;进入控制台口(Rs232)swa(config-line)#password aa ;设置console登录口令为aaswa(config-line)#login ;登录要求口令验证swa(config-line)#line vty 0 4 ;进入虚拟终端virtual ttyswa(config-line)#password a ;设置vty的登录口令为aswa(config-line)#login ;登录要求口令验证swa(config-line)#exit ;返回上一层swa(config)#exit ;返回上一层swa#sh run ;看配置信息swa#exit ;返回命令swa>enpassword: ;请问输入哪个口(aaa)secret是设置加密口令,一般都使用这种口令设置方式,它优先级高,即没设置secret 口令时,非加密口令才有效。
- 1、下载文档前请自行甄别文档内容的完整性,平台不提供额外的编辑、内容补充、找答案等附加服务。
- 2、"仅部分预览"的文档,不可在线预览部分如存在完整性等问题,可反馈申请退款(可完整预览的文档不适用该条件!)。
- 3、如文档侵犯您的权益,请联系客服反馈,我们会尽快为您处理(人工客服工作时间:9:00-18:30)。
综合项目实施需求分析(共计70分)#C3YB91!!ip address#interface Serial0/0/1link-protocol ppp#interface Serial0/0/2link-protocol ppp#interface Serial0/0/3link-protocol ppp#interface GigabitEthernet0/0/0ip address#interface GigabitEthernet0/0/1#interface GigabitEthernet0/0/2interface GigabitEthernet0/0/3 #wlan#interface NULL0#interface LoopBack0ip address#ospf 1areanetworknetworknetworkstub no-summary#user-interface con 0user-interface vty 0 4user-interface vty 16 20#Return《changc-lsw4》#sysname changc-lsw4#router id#vlan batch 4 to 5 300#cluster enablentdp enablendp enable#drop illegal-mac alarm#dhcp enable#diffserv domain default#drop-profile defaultaaaauthentication-scheme defaultauthorization-scheme defaultaccounting-scheme defaultdomain defaultdomain default_adminlocal-user admin password simple admin local-user admin service-type http#interface Vlanif1#interface Vlanif4ip addressdhcp select interfacedhcp server dns-list#interface Vlanif5ip addressdhcp select interfacedhcp server dns-list#interface Vlanif300ip address#interface MEth0/0/1#interface Ethernet0/0/1port link-type accessport default vlan 4#interface Ethernet0/0/2port link-type accessport default vlan 5#interface Ethernet0/0/3#interface Ethernet0/0/4#interface Ethernet0/0/5#interface Ethernet0/0/6#interface Ethernet0/0/7interface Ethernet0/0/8#interface Ethernet0/0/9#interface Ethernet0/0/10#interface Ethernet0/0/11#interface Ethernet0/0/12#interface Ethernet0/0/13#interface Ethernet0/0/14#interface Ethernet0/0/15#interface Ethernet0/0/16#interface Ethernet0/0/17#interface Ethernet0/0/18#interface Ethernet0/0/19#interface Ethernet0/0/20#interface Ethernet0/0/21#interface Ethernet0/0/22#interface GigabitEthernet0/0/1 port link-type accessport default vlan 300#interface GigabitEthernet0/0/2 #interface NULL0#ospf 1areanetworknetworknetworkstub no-summary#user-interface con 0user-interface vty 0 4#Return《shengy-AR2》#sysname shengy-AR2#router id#aaaauthentication-scheme defaultauthorization-scheme defaultaccounting-scheme defaultdomain defaultdomain default_adminlocal-user admin password cipher OOCM4m($F4ajUn1vMEIBNUw# local-user admin service-type http#firewall zone Localpriority 16#interface Ethernet0/0/0#interface Ethernet0/0/1#interface Serial0/0/0link-protocol frfr dlci 100fr map ip 100 broadcastip address#interface Serial0/0/1link-protocol ppp#interface Serial0/0/2link-protocol ppp#interface Serial0/0/3link-protocol ppp#interface GigabitEthernet0/0/0 ip address#interface GigabitEthernet0/0/1 #interface GigabitEthernet0/0/2 #interface GigabitEthernet0/0/3 #wlan#interface NULL0#ospf 1peer areanetworknetworkstub no-summary#user-interface con 0user-interface vty 0 4user-interface vty 16 20#Return《shengy-lsw5》#sysname shengy-LSW5#router id#vlan batch 6 to 7 400#cluster enablentdp enablendp enable#drop illegal-mac alarm#dhcp enablediffserv domain default#drop-profile default#aaaauthentication-scheme defaultauthorization-scheme defaultaccounting-scheme defaultdomain defaultdomain default_adminlocal-user admin password simple admin local-user admin service-type http#interface Vlanif1#interface Vlanif6ip addressdhcp select interfacedhcp server dns-list#interface Vlanif7ip addressdhcp select interfacedhcp server dns-list#interface Vlanif400ip address#interface MEth0/0/1#interface Ethernet0/0/1port link-type accessport default vlan 6#interface Ethernet0/0/2port link-type accessport default vlan 7#interface Ethernet0/0/3#interface Ethernet0/0/4#interface Ethernet0/0/5interface Ethernet0/0/6#interface Ethernet0/0/7#interface Ethernet0/0/8#interface Ethernet0/0/9#interface Ethernet0/0/10#interface Ethernet0/0/11#interface Ethernet0/0/12#interface Ethernet0/0/13#interface Ethernet0/0/14#interface Ethernet0/0/15#interface Ethernet0/0/16#interface Ethernet0/0/17#interface Ethernet0/0/18#interface Ethernet0/0/19#interface Ethernet0/0/20#interface Ethernet0/0/21#interface Ethernet0/0/22#interface GigabitEthernet0/0/1 port link-type accessport default vlan 400#interface GigabitEthernet0/0/2 #interface NULL0#ospf 1areanetworknetworknetworkstub no-summary#user-interface con 0 user-interface vty 0 4 #return。