General_软件兼容列表_04年1月
工程软件宝典
...工程软件宝典——理工科人才必须要用的Science.General通用科学工具软件CAD计算机辅助设计CAE计算机辅助工程CAM计算机辅助制造CFD计算流体动力学EDA电子设计自动化(Electronic Design Automation)EFD (Engineering Fluid Dynamics 工程流体动力学), 属于CFD软件的一个分支FDA(Flight Data Analysis)飞行数据分析FEA有限元分析Finite Element AnalysisMCU(Micro Control Unit)中文名称为微控制单元Others其他Reverse.Engineering逆向工程Virtual.Protot虚拟。
Virtual.Reality虚拟现实,虚拟现实是利用电脑模拟产生一个三维空间的虚拟世界CAD:一、Product.Development.Aids1.Cadenas Partsolutions v8.1.06 中文版(工模具三维零部件):2.INNEO Startup TOOLS v2009 (产品开发辅助环境)二、tools1.AllyCAD v3.5 R12 1CD(专业CAD软件)2.《智能工程绘图工具包》(CAD SCHROER STHENO ADV ANCED V3.1.1)3.ITI_TRANSCENDA TA_CADFIX,CADFIX能够找出并评估模型中几何以及拓扑的缺陷4.TRANSCENDATA.CADfix 7.1-MAGNiTUDE CAD修复,它支持多种格式之间的转换5.Transmagic.Expert.v7.0.SP2-SHooTERS 三维CAD转换软件三、《CAD/CAE/CAM一体化软件》(DASSAULT SYSTEMES CATIA V5R18 SP6)...CATIA是法国达索飞机公司开发的高档CAD/CAM软件四、PTC1.PTC.InterComm.Expert.v5.2.F000-ZWTiSO 电子设计协同2.ProE零件库3.PTC.Mathcad.v14.0.M030 工程计算4.《PTC PRO ENGINEER WILDFIRECAD/CAM/CAE集成软件》5.PTC.Pro.Toolmaker.v8.1.WiNNT2K-oDDiTy 软件简介:优化模具制作和高速加工6.如何将PROE文件倒入ADAMS五、SolidWorks:SolidWorks为达索系统(Dassault Systemes S.A)下的子公司,专门负责研发与销售机械设计软件的视窗产品六、UniGraphics:Unigraphics Solutions公司(简称UGS)是全球著名的MCAD供应商,主要为汽车与交通、航空航天、日用消费品、通用机械以及电子工业等领域通过其虚拟产品开发(VPD)的理念提供七、ZwCAD:中望CAD是国产CAD平台软件的领导品牌.其界面、操作习惯和命令方式与Auto CAD保持一致,CAD文件格式也可高度兼容,并具有国内CAD领先的稳定性和速度,是CAD正版化首选解八、Others1.Ashampoo 3D CAD Professional 中文名称:Ashampoo三维CAD专业版2.Autodsys IntelliCAD 2009 Pro Plus v6.4.23.2 (三维建模软件3.Axcad2008.v6.3.153-BEAN AXCAD是一个具有自主版权,以DWG格式为核心,全面兼容AutoCAD,与AutoCAD命令高度一致的CAD。
AnyConnect:使用CLI为Cisco IOS路由器头端配置基本SSL VPN说明书

AnyConnect:使用CLI为Cisco IOS路由器头端配置基本SSL VPN简介目录简介先决条件要求使用的组件背景信息不同IOS版本的许可信息显着的软件增强功能配置步骤1.确认许可证已启用步骤2.在路由器上上传和安装AnyConnect安全移动客户端软件包步骤3.生成RSA密钥对和自签名证书步骤4.配置本地VPN用户帐户步骤5.定义客户端使用的地址池和拆分隧道访问列表步骤6.配置虚拟模板接口(VTI)步骤7.配置WebVPN网关步骤8.配置WebVPN环境和组策略第9步(可选)配置客户端配置文件验证故障排除相关信息本文档介绍Cisco IOS®路由器作为AnyConnect安全套接字层VPN(SSL VPN)头端的基本配置。
先决条件要求Cisco 建议您了解以下主题:Cisco IOSqAnyConnect 安全移动客户端q常规SSL操作q使用的组件本文档中的信息基于以下软件和硬件版本:运行15.3(3)M5的思科892W路由器qAnyConnect安全移动客户端3.1.08009q本文档中的信息都是基于特定实验室环境中的设备编写的。
本文档中使用的所有设备最初均采用原始(默认)配置。
如果您的网络处于活动状态,请确保您了解所有命令的潜在影响。
背景信息不同IOS版本的许可信息无论使用哪个Cisco IOS版本,使用SSL VPN功能都需要securityk9功能集。
qCisco IOS 12.x - SSL VPN功能集成到以12.4(6)T开头的所有12.x映像中,这些映像至少具有安q全许可证(即advsecurityk9、adventerprisek9等)。
Cisco IOS 15.0 — 早期版本要求在路由器上安装LIC文件,该文件允许10、25或100个用户连q接。
使用权*许可证在15.0(1)M4中实施Cisco IOS 15.1 — 早期版本要求在路由器上安装LIC文件,该文件允许10、25或100个用户连q接。
Apogee Duet快速入门指南 V1,2013年4月说明书

Apogee DuetQuickStart GuideV1, April, 2013ContentsOverview!4 ...........................................................................................................................Introduction!4Package contents!5Duet panel tour!7OLED Screen Tour!8Connecting to your Mac!11................................................................................................System Requirements!11Install Duet Software!11Connect to Headphones or Speakers!12Configuring the Input!13...............................................................................................Connecting to your iPad!15 System Requirements!15Install Maestro from App Store!15Connect to Headphones or Speakers!17Configuring the Input!18Adjusting Input & Output Levels!21..................................................................................Software Setup!25 ...............................................................................................................Using Duet with iOS Apps!33Additional Support!34........................................................................................................Warranty & Notifications!35 Registration and Warranty Information!35Warnings!37Copyright Notice!38Software Notice!38Declarations of Conformity!39OverviewIntroductionThank you for purchasing Duet. This QuickStart guide describes how to set up Duet with your Mac and iPad, connect speakers or headphones to play back music and connect mics and instruments to record yourown creations.DuetThe Industry Standard for Personal RecordingApogee Duet is an award-winning audio interface, headphone amp and MIDI interface making it easy to create professional recordings anywhere on your iPod touch, iPhone, iPad or Mac. With Apogee’s legendary digital audio conversion and world-class mic preamps, Duet is the best way to capture your music with incredible dimension and detail.Package contentsThe following items are included in the Duet box: •Duet•Breakout cable with:•2 combination line/mic/instrument inputs•2 balanced line outputs•2 meter USB cable•30-pin iOS cable•Universal power supply with NA, EU, UK, AU, JP•QuickStart GuideSoftware, firmware and the Duet User’s Guide are available online only. Please register your product and download the latest installer here:/downloadsDuet panel tourFull Color Interactive OLED DisplayMulti-function Controller Knob User Assignable T ouchpadsDurable Cast Aluminum Body 1/4” Stereo Headphone OutputAnalog In and OutDC Power USB Stereo Headphones OutMIDIOLED Screen Tour Home ViewDetail View (Input)Grouped InputsGroup Input Type Input Level MetersPhaseSoft LimitDetail View (Output)Output LevelOutput Assignment Output Type Mute Dim Sum MetersPhones OUT 1-2-47Connecting to your MacSystem Requirements•Computer: Intel Mac 1.5GHz or faster•Memory: 2 GB RAM minimum, 4 GB recommended•OS: 10.6.8, 10.7.5 or greater•Connection and power: Any available USB port on a Mac•USB bus powered; DC power optional (DC power supply included)Install Duet Software1.Connect Duet’s USB port to a USB port on your Mac using the supplied USB 2 cable.2.Go to /downloads.php3.Download the latest Duet software installer.4.Once you have downloaded the package, double-click the Apogee icon to run the firmware updater.5.After the firmware update has completed, double-click the open-box icon to run the software installer6.You will be required to restart your computer after the install is complete.Choosing Duet for Mac Sound I/OAfter connecting Duet, installing the software and restarting your Mac, a dialog box will prompt you to choose Duet for Mac sound input and output. Click Yes.Connect to Headphones or SpeakersConnect headphones to the headphone output on the front of the unit.Connect the provided breakout cable to I/O Breakout Port on the rear of the unit. Then connect Duet’s 1/4” speaker outputs 1-2 to the inputs of your active (powered) studio monitors or amplifier.Configuring the InputConnect a microphone or instrument to the breakout cable’s combo jack.Open Apogee Maestro software (found in your Mac’s Applications folder), andselect the Input tab.Select the Analog Level setting that corresponds to the device you have connected to Duet’s input(s). For example, if you have a microphone connected to the XLR input of channel 1, select “Mic” from the Analog Level menu on channel 1. If you have a 1/4” instrument connected to the input, then select “Inst”Note: If you are using a condenser microphone that requires phantom power, select the 48V box on the Input tab of the appropriate channelin Maestro. Phantom power is indicated on Duet’s display by a reddot above the microphone icon.48V Phantom power button in Maestro 48V Phantom powerindicator on OLED DisplayConnecting to your iPadSystem Requirements•iPhone 4, iPhone 4S, iPad, iPad 2, iPad (3rd gen.)•Connection: 30-pin dock connector•iPod Touch (5th gen.), iPhone 5, iPad (4th gen.), iPad Mini•Connection: Apple’s Lighting to 30-pin adapter (sold separately)•iOS version: 5.1.1 or greater•DC power required: DC power supply includedInstall Maestro from App Store1.Connect the provided external power supply to Duet. When connecting to iPad/iPhone, the external powersupply is required.2.Connect Duet to your iPad/iPhone using the provided 30-pin iOS cable.3.On the iPad/iPhone, open Settings and choose General > About > Duet, then choose "Find App for Accessory".The App Store will open and navigate automatically to the Apogee Maestro app.5.Once you've signed in to the App Store, download Apogee Maestro.Note: it's possible to record through the mic inputs and play back audio without installing Maestro Connect to Headphones or SpeakersConnect headphones to the headphone output on the front of the unit.Connect the provided breakout cable to I/O Breakout Port on the rear of the unit. Then connect Duet’s 1/4” speaker outputs 1-2 to the inputs of your active (powered) studio monitors or amplifier.Configuring the InputConnect a microphone or instrument to the breakout cable’s combo jack.Open Apogee Maestro app, choose Duet from the main menu and select the Input tab.Select the Analog Level setting that corresponds to thedevice you have connected to Duet’s input(s). Forexample, if you have a microphone connected to the XLRinput of channel 1, select “Mic” from the Analog Levelmenu on channel 1. If you have a 1/4” instrumentconnected to the input, then select “Inst”48V Phantom power button in Maestro48V Phantom power indicator on OLED DisplayNote: If you are using a condenser microphone that requires phantom power, select the 48V box on the Input tab of the appropriate channel in Maestro. Phantom power is indicated on Duet’s display by a red dot above the microphone icon.Adjusting Input & Output LevelsInput levelTo change Duet’s input level (i.e the preamp gain of microphones and instruments):1)Push the Multi-function Controller Knob until the microphone or instrument icon is lit on the Duet’s display2)Turn the Controller Knob until the desired recording level is obtained.IN 2The controller knob operates in parallel with Maestro’s input controls.Adjusting Input & Output Levels - Apogee Duet Quick Start GuideSpeaker Output levelTo change Duet’s speaker output level (i.e the listening level of connected speakers):1)Push the Multi-function Controller Knob until thespeaker icon is lit on the Duet’s display2)Turn the controller knob to the desired listening level.SpeakerThe controller knob operates in parallel with anysoftware output controls.Adjusting Input & Output Levels - Apogee Duet Quick Start GuideHeadphone Output levelTo change Duet’s headphone output level (i.e the listening level of connected headphones):1)Push the Multi-function Controller Knob until theheadphone icon is lit on the Duet’s display2) Turn the controller knob to the desired listening level.The controller knob operates in parallel with Maestro’s headphone control.Adjusting Input & Output Levels - Apogee Duet Quick Start GuideSoftware Setup Mac OS: Using Duet with Logic1) Go to the Logic Pro or Logic Express menu and choose Preferences > Audio.2)In the Core Audio pane of the Device tab, select Duet for Output Device and Input Device.at the bottom of the Preferences window.Mac OS: Using Duet with Logic (continued)4) Now close the Logic Pro Preferences window and select New > Empty Project > from the File Menu.5) If you are recording a single microphone or instrument, make the following selections in the New Tracks dialog box:6) Logic will now ask you to name the project and save in on your hard drive.7) Click the Record button in the transport control at the bottom of the Logic window.Mac OS: Using Duet with Avid Pro Tools (9 or greater) 1) Choose Setup menu > Playback Engine.2) Choose Duet for Current Engine.3) Set the Buffer Size to 64. Click OK.4) The following dialog box will appear. Click Yes.Mac OS: Using Duet with Ableton Live1) Choose Live > Preferences. Click on the Audio tab.2) Select CoreAudio in the Driver Type menu.3) Select Duet in both the Audio Input Device and Audio Output Device menus.4) Set Buffer Size to 1285)Close the Preferences window after making settings.Using Duet with iOS AppsDuet works with any iOS Core Audio compatible app on iPod Touch, iPhone or iPad. Simply download your favorite app, connect Duet and you’re ready to go!Recommended apps:GarageBand - https:///us/app/garageband/id408709785?mt=8Auria - https:///us/app/auria/id524122834?mt=8Cubasis - https:///us/app/cubasis/id583976519?mt=8Visit /knowledgebasefor the most up to date list of compatible appsAdditional Support For more information:• Complete Apogee Duet User's Guide• Apogee KnowledgeBase and FAQs• Apogee Product Registration• How to contact Apogee Technical SupportVisit: /support/Warranty & NotificationsRegistration and Warranty InformationTo receive free tech support, important information and product updates rst...Register your new Apogee product here:/register/If you do so, Apogee can contact you with any update information. As enhancements and upgrades are developed, you will be contacted at the registration address. Firmware updates are free for the rst year of ownership unless otherwise stated.APOGEE ELECTRONICS CORPORATION warrants this product to be free of defects in material and manufacture under normal use for a period of 12 months. The term of this warranty begins on the date of sale to the purchaser (proof of purchase in the form of a receipt may be required). Units returned for warranty repair to Apogee or an authorized Apogee warranty repair facility will be repaired or replaced at the manufacturer’s option, free of charge.ALL UNITS RETURNED TO APOGEE OR AN AUTHORIZED APOGEE REPAIR FACILITY MUST BE PREPAID, INSURED AND PROPERLY PACKAGED, PREFERABLY IN THEIR ORIGINAL BOX.Apogee reserves the right to change or improve design at any time without prior notification. Design changes are not implemented retroactively, and the incorporation of design changes into future units does not imply the availability of an upgrade to existing units. This warranty is void if Apogee determines, in its sole business judgment, the defect to be the result of abuse, neglect, alteration or attempted repair by unauthorized personnel. The warranties set forth above are in lieu of all other warranties, expressed or implied, and Apogee specifically disclaims any and all implied warranty of merchantability or of fitness for a particular purpose. The buyer acknowledges and agrees that in no event shall the company be held liable for any special, indirect, incidental or consequential damages, or for injury, loss or damage sustained by any person or property, that may result from this product failing to operate correctly at any time.Warranty Exclusions•Used products purchased through a third party or online.•Products with missing or defaced serial numbers.•Products damaged by environmental factors, such as oxidation and/or damages caused by natural disaster.•Units that have NOT been opened by user within the one year warranty period.•Physical Damages which include, but not limited to the following:•Unauthorized modifications•Misuse, neglect or improper assembly•Transport damages due to improper packaging or carrier•Burns resulting from faulty or failed electric power•Missing/bent parts•Cracked components•Liquid/water damageUSA: Some states do not allow for the exclusion or limitation of implied warranties or liability for incidental or consequential damage, so the above exclusion may not apply to you. This warranty gives you specific legal rights, and you may have other rights which vary from state to state.Service InformationYour Apogee product contains no user-serviceable components; refer to qualified service personnel for repair or upgrade. Your warranty will be voided if you tamper with the internal components. If you have any questions with regard to the above, please contact Apogee.In the event your Apogee product needs to be upgraded or repaired, it is necessary to contact Apogee prior to shipping, and a Return Merchandise Authorization (RMA) number will be assigned.WarningsFCC warningThis equipment has been tested and found to comply with the limits for a Class A digital device, pursuant to Part 15 of the FCC rules. These limits are designed to provide reasonable protection against harmful interference when operated in a commercial environment. This equipment generates, uses, and can radiate radio frequency energy and, if not installed and used in accordance with the instruction manual, may cause harmful interference to radiocommunications. Operation of this equipment in a residential area is likely to cause harmful interference, in which case the user will be required to take whatever measures necessary to correct the interference at his own expense.Copyright NoticeDuet is a computer-based device, and as such contains and uses software in ROMs. This software, and all related documentation, including this User’s Guide contain proprietary information which is protected by copyright laws. All rights are reserved. No part of the software and its related documentation may be copied, transferred, or modi ed. You may not modify, adapt, translate, lease, distribute, resell for pro t or create derivative works based on the software and its related documentation or any part thereof without prior written consent from Apogee Electronics Corporation, U.S.A.Software NoticeRedistribution and use in source and binary forms, with or without modi cation, are permitted provided that the following conditions are met:1. Redistributions of source code must retain the above copyright notice, this list of conditions and the following disclaimer.2. Redistributions in binary form must reproduce the above copyright notice, this list of conditions and the following disclaimer in the documentation and/or other materials provided with the distribution.THIS SOFTWARE IS PROVIDED BY THE COPYRIGHT HOLDERS AND CONTRIBUTORS “AS IS” AND ANY EXPRESS OR IMPLIED WARRANTIES, INCLUDING, BUT NOT LIMITED TO, THE IMPLIED WARRANTIES OF MERCHANTABILITY ANDFITNESS FOR A PARTICULAR PURPOSE ARE DISCLAIMED. IN NO EVENT SHALL THE COPYRIGHT OWNER OR CONTRIBUTORS BE LIABLE FOR ANY DIRECT, INDIRECT, INCIDENTAL, SPECIAL, EXEMPLARY, OR CONSEQUENTIAL DAMAGES (INCLUDING, BUT NOT LIMITED TO, PROCUREMENT OF SUBSTITUTE GOODS OR SERVICES; LOSS OF USE, DATA, OR PROFITS; OR BUSINESS INTERRUPTION) HOWEVER CAUSED AND ON ANY THEORY OF LIABILITY, WHETHER IN CONTRACT, STRICT LIABILITY, OR TORT (INCLUDING NEGLIGENCE OR OTHERWISE) ARISING IN ANY WAY OUT OF THE USE OF THIS SOFTWARE, EVEN IF ADVISED OF THE POSSIBILITY OF SUCH DAMAGE. Declarations of ConformityThis device complies with Part 15 of the FCC Rules. Operation is subject to the following two conditions:1. This device may not cause harmful interference2. This device must accept any interference received, including interference that may cause undesired operation. This equipment has been tested and found to comply with the limits of a Class B digital device, pursuant to Part 15 of the FCC Rules. These limits are designed to provide reasonable protection against harmful interference in a residential installation. This equipment generates, uses and can radiate radio frequency energy and, if not installed and used in accordance with the instructions, may cause harmful interference to radio communications. If this equipment does cause harmful interference to radio or television reception, which can be determined by turning the equipment off and on, the user is encouraged to try to correct the interference by one or more of the following measures:1. Re-orient or relocate the receiving antenna.2. Increase the separation between the equipment and receiver.3. Connect the equipment into an outlet on a different circuit from that to which the receiver is connected.4. Consult the dealer or an experienced radio/TV technician for help.NOTE: The use of non-shielded cable with this equipment is prohibited.CAUTION: Changes or modi cations not expressly approved by the manufacturer responsible for compliance could void the user’s authority to operate the equipment.Apogee Electronics Corp.1715 Berkeley StreetSanta Monica,CA 90404, USAIndustry Canada NoticeThis Class B digital apparatus meets all requirements of the Canadian Interference-Causing Equipment Regulations. Cet appareil numérique de la classe B respecte toutes les exigences du Règlement sur le matérial brouilleur du Canada.Declaration of Conformity – CEApogee Electronics Corporation hereby declares that the product, the Duet, to which this declaration relates, is in material conformity with the following standards or other normative documents:• EN50081-1/EN55022; 1995• EN50082-1/IEC 801-2, 3, 4; 1992following the provisions of:• 73/23/EEC – Low Voltage Directive89/336/EEC – EMC DirectiveDeclaration of Conformity – JapanApogee Electronics Corporation hereby declares that Duet, to which this declaration relates, is in material conformity with the VCCI Class A standard.Declaration of Conformity – AustraliaApogee Electronics Corporation hereby declares that the Duet is in material conformity with AN/NZS standard requirements.Apogee Electronics Corp. Santa Monica, CA Part #: 7010-0063-0160Revision 4.0。
2004cad

2004 CADIntroductionCAD (Computer-Aided Design) is a technology that revolutionized the field of design and drafting. It allows engineers and designers to create, modify, and optimize designs digitally, replacing traditional manual drawing techniques. In this document, we will explore the advancements in CAD software in the year 2004.CAD Software in 2004In 2004, CAD software had reached a level of sophistication that was unparalleled at the time. Several companies were offering powerful CAD tools to cater to the needs of various industries. Some of the notable CAD software available in 2004 were:1.AutoCAD 20042.SolidWorks 20043.CATIA V54.Pro/ENGINEER Wildfire 2.05.NX (formerly Unigraphics)Key Features of CAD Software in 20041. 3D ModelingCAD software in 2004 had advanced 3D modeling capabilities, allowing designers to create realistic and detailed 3D models of their designs. This enabled designers to visualize their concepts and make accurate modifications, leading to better product development and reduced time-to-market.2. Assembly DesignCAD software provided efficient assembly design tools that helped engineers to create complex assemblies consisting of multiple components. It allowed them to check for interferences, simulate movement, and ensure proper fit and functionality of the assembled parts.3. Drafting and AnnotationCAD software also offered robust drafting and annotation features. Engineers could create accurate 2D drawings with dimensions, notes, and symbols, making it easier to communicate design intent to manufacturing teams. These tools ensured that the manufacturing process went smoothly without any ambiguity.4. Simulation and AnalysisAnother significant feature of CAD software in 2004 was simulation and analysis capabilities. Engineers could perform stress analysis, motion analysis, and thermal analysis on theirdesigns. This helped them identify potential issues, optimize designs, and validate their decisions, resulting in improved product performance and reliability.5. Collaboration and DocumentationCAD software allowed designers and engineers to collaborate seamlessly, even if they were working in different locations. It offered features like version control, markup tools, and shared project folders, enabling efficient collaboration between team members. It also facilitated the creation of comprehensive documentation, including bill of materials, exploded views, and user manuals.Impact of CAD Software in 2004The availability of advanced CAD software in 2004 had a significant impact on various industries. It streamlined the design process, reduced errors, and accelerated the product development cycle. Here are some key impacts:1.Increased Productivity: CAD software brought asignificant boost in productivity for designers andengineers. The ability to create, modify, and analyzedesigns digitally saved a tremendous amount of timecompared to traditional manual drawing methods.2.Improved Design Quality: The 3D modeling andsimulation capabilities of CAD software allowed designers to optimize designs and identify and rectify potential issues early in the development process. This resulted in betterdesign quality and reduced manufacturing defects.3.Reduced Costs: CAD software helped in reducingcosts associated with design iterations. Since the changescould be made digitally and simulations could beperformed, expensive physical prototypes could beminimized, saving time and money.4.Enhanced Collaboration: CAD software’s ability tofacilitate seamless collaboration between team membersimproved communication and coordination. Designers,engineers, and other stakeholders could worksimultaneously on a project, reducing errors and rework.5.Faster Time-to-Market: With the aid of CADsoftware, product development cycles were significantlyshortened. Designs could be completed faster, prototypescould be built more efficiently, and manufacturingprocesses could be started sooner, resulting in faster time-to-market for new products.ConclusionThe advancements in CAD software in 2004 played a significant role in transforming the design and drafting process. The introduction of powerful 3D modeling, simulation, and collaboration tools revolutionized the way engineers and designers work. With the ability to create accurate and detailed digital representations of designs, CAD software not only increased productivity but also improved design quality, reduced costs, and accelerated the product development cycle.。
Mydrivers驱动精灵2004V1.9.0.930详细资料大全

Mydrivers驱动精灵2004V1.9.0.930详细资料大全Mydrivers驱动精灵目前版本为国产,供用户免费学 *** 一款软体。
基本介绍•中文名:Mydrivers驱动精灵2004V1.9.0.930•大小: 6084 KB•软体语言:简体中文•类别:国产软体软体简介,主要特色,功能改进,软体简介软体大小: 6084 KB 软体语言:简体中文软体类别:国产软体/ 免费版 / 系统备份主要特色该软体主要拥有如下几项特色:1、更专业的驱动备份功能:能够检测用户计算机系统中的硬体设备,将全部或任意部分硬体的驱动程式提取备份出来,并能够将备份出来的驱动程式做成Zip压缩档案或自解压档案。
速度敏捷,这份工作快到只需30秒就能全部完成。
通过驱动备份功能,大家可以完全免去重新安装系统后驱动程式丢失的烦恼,多台同配置机器也不再需要那数不胜数的驱动光碟了。
此外,软体还支持区域网路备份功能。
2、更专业驱动还原功能:完全免去了新手不会安装驱动程式的烦恼,在重新安装系统后再也不需要一个一个手动安装驱动,只需点击一下按钮就能将您备份出来的驱动程式自动安装到系统上,干净利落。
3、直接更新驱动程式: 可以辨识上万种即插即用型设备,识别几乎所有的PCI和AGP汇流排的板卡(包括主版集成)设备。
通过不依赖于作业系统的的检测*** ,还可以识别设备管理器中标有黄色问号的“未知设备”,并直接给出驱动程式下载地址,无需查找。
此外,用户也可以使用这款软体对硬体产品的真伪进行辨别。
4、智慧型升级功能:驱动之家网站每天都会更新大量的驱动程式下载资讯,利用智慧型升级功能,您可以让您的驱动精灵软体与驱动之家网站随时保持同步,最新驱动程式尽在掌握!此外,在用户同意的情况下,如果驱动精灵软体出现了新的版本,智慧型升级功能还能够完成对自身的升级。
功能改进功能改进:1.重新 *** 驱动信息资料库,修复了资料库中的所有错误。
2.改进了驱动搜寻引擎,速度更快,识别更准确。
VFP数据库系统Visual FoxPro的基础知识
第二章Visual FoxPro 6.0的基础知识2.1Visual FoxPro 6.0系统菜单的使用2.2Visual FoxPro 6.0辅助设计工具2.3Visual FoxPro 6.0的基本概念2.4Visual FoxPro 6.0的数据类型和数据存储2.5运算符与表达式2.6函数2.7数组2.1.1Visual FoxPro 6.0用户界面2.1 Visual FoxPro 6.0系统菜单的使用菜单栏工具栏标题栏命令窗口状态栏工作区2.1.2 主菜单栏主菜单又称系统菜单,它包含:文件、编辑、显示、格式、工具、程序、窗口和帮助共8个菜单选项。
2.1.3 工具栏VFP 6.0有如下11种:常用、布局、表单控件、表单设计器、查询设计器、视图设计器、数据库设计器、报表控件、报表设计器、调色板和打印预览工具栏。
通过“显示”菜单的“工具栏”命令管理各种工具2.1.4 配置Visual FoxPro 6.0栏。
通过“工具”菜单的“选项”命令配置需要开发环境。
2.2 Visual FoxPro 6.0辅助设计工具2.2.1 向导向导是一种快捷设计工具,能以对话框的形式引导用户分步完成某项任务。
2.2.2 设计器设计器用来创建或修改VFP应用程序所需要的构件,其功能比向导更强。
2.2.3 生成器生成器的主要功能是在VFP应用程序的构件中生成并加入一个构件,如生成一个组合框或列表框等。
VFP提供了21种向导、9种设计器、10种生成器。
2.3 Visual FoxPro 6.0的基本概念2.3.1Visual FoxPro 6.0的文件使用Visual FoxPro 6.0开发应用程序时会创建很多文件,这些文件的文件类型多而繁杂。
常用的文件类型有:数据库、表、项目、索引、查询、视图、程序、表单、菜单、报表、标签等。
2.3.2Visual FoxPro 6.0的项目项目是指文件、数据、文档和各种对象的集合。
Maya菜单中英文对照表
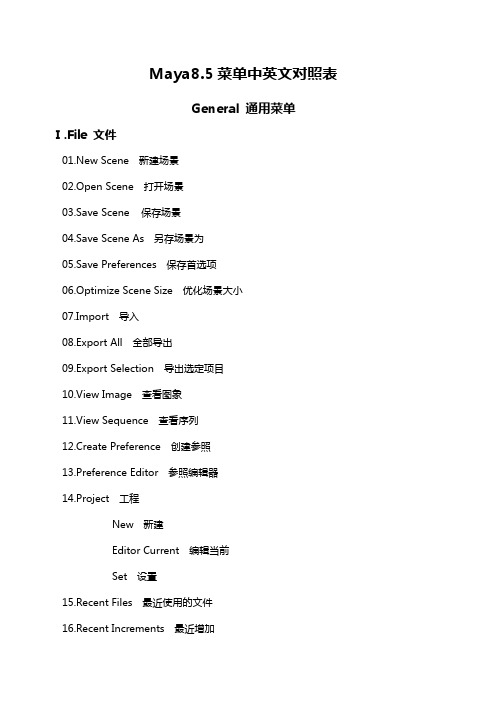
Maya8.5菜单中英文对照表General 通用菜单Ⅰ.File 文件01.New Scene 新建场景02.Open Scene 打开场景03.Save Scene保存场景04.Save Scene As 另存场景为05.Save Preferences 保存首选项06.Optimize Scene Size 优化场景大小07.Import 导入08.Export All 全部导出09.Export Selection 导出选定项目10.View Image 查看图象11.View Sequence 查看序列12.Create Preference 创建参照13.Preference Editor 参照编辑器14.Project 工程New 新建Editor Current 编辑当前Set 设置15.Recent Files 最近使用的文件16.Recent Increments 最近增加17. Recent Projects 最近使用方案18.Exit 退出Ⅱ.Edit 编辑01.Undo 返回上一步操作02.Redo 返回上一步撤消的操作03.Repeat 重复执行上一次的操作04.Recent Commands List 最近使用命令列表05.Cut 剪切06.Copy 拷贝07.Paste 粘贴08.Keys 关键帧Cut Keys 剪切关键帧Copy Keys 拷贝关键帧Paste Keys 粘贴关键帧Delete Keys 删除关键帧Delete FBIK Keys 删除完整躯体IK关键帧Delete All FBIK Keys 删除全部FBIK关键帧Delete Body Part Keys 删除躯体部分关键帧Delete Selected FBIK Keys 删除选定FBIK关键帧Scale Keys 缩放关键帧Snap Keys 捕捉关键帧Bake Simulation 模拟烘焙09.Delete 删除10. Delete by Type 按类型删除History 历史记录Non-Deformer History 非变形器历史记录Channels 通道Static Channels 静态通道Motion Paths 运动路径Non-Particle Expressions 非粒子表达式Constraints 约束Sounds 声音No Sounds available 没有可用的声音Rigid Bodies 刚体11. Delete All by Type 按类型全部删除History 历史记录Non-Deformer History 非变形器历史记录Channels 通道Static Channels 静态通道Clips 剪辑Motion Paths 运动路径Non-Particle Expressions 非粒子表达式Constraints 约束Sounds 声音Joints 关节IK Handles IK控制柄Lattices 晶格Clusters 丛集Sculpt Objects 雕刻物体Nonlinears 非线性Wires 线框Lights 灯光Cameras 摄象机Image Planes 图象平面Shading Groups and Materials 着色组和材质Particles 粒子Rigid Bodies 刚体Rigid Constraints 刚体约束Fluids 流体Fur 毛发Strokes 笔划nCloths 新世代布料nRigids 新世代刚体Dynamic Constraints 动态约束12.Select Tool 选择工具sso Select T ool 套索选择工具14.Paint Selection Tool 绘图选择工具15. Select All 全选16.Deselect 取消选择17. Select Hierarchy 选择层级18.Invert Selection 反选19. Select All By Type 按类型全选Joints 关节IK Handles IK控制柄Lattices 晶格Clusters 丛集Sculpt Objects 雕刻物体Wires 线框Transform 变换Geometry 几何体NURBS Curves NURBS曲线NURBS Surfaces NURBS曲面Polygon Geometry 多边形几何体Subdiv Geometry 细分几何体Lights 灯光Cameras 摄影机Image Planes 图象平面Particles 粒子Rigid Bodies 刚体Rigid Constraints 刚体约束Fluids 流体Fur 毛发Strokes 笔划Brushes 笔刷nCloths 新世代布料nRigids 新世代刚体Dynamic Constraints 动态约束20.Quick Select Sets 快速选择组No Quick Select Sets Defined 没有定义快速选择组21.Duplicate 复制22. Duplicate Special 复制特定23. Duplicate with Transform 以变换复制24.Group 成组25.Ungroup 解组26.Level of Detail 细节层级27.Parent 父子关系28. Unparent 取消父子关系Ⅲ.Modify 修改01.Transformation T ools 变换工具Move Tool 移动工具Rotate Tool 旋转工具Scale Tool 缩放工具Universal Manipulator 通用操纵器Move Normal T ool 移动法线工具Move/Rotate/Scale T ool 移动/旋转/缩放工具Show Manipulator Tool 显示操纵器工具Default Oblect Manipulator 默认物体操纵器None 无Move 移动Rotate 旋转Scale 缩放Transform 变换Proportional Modification Tool 比例修改工具Soft Modification Tool 柔性修改工具02.Reset Transformations 重置变换03.Freeze Transformations 冻结变换04.Snap Align Objects 捕捉对齐物体Point to Point 点对点2 Points to 2 Points 2点对2点3 Points to 3 Points 3点对3点Align Objects 对齐物体05. Align Tool 对齐工具06. Snap Together Tool 捕捉在一起工具07.Evaluate Nodes 结算节点Evaluate All 全部结算Ignore All 全部忽略Ik Solvers Ik解算器Constraints 约束Expressions 表达式Fluids 流体Global Stitch 全局缝合nCloths 新世代布料nRigids 新世代刚体Dynamic Constraints 动态约束Nucleuses 核子Particles 粒子Rigid Bodies 刚体Snapshots 快照08.Make Live 实时09.Center Pivot 中心轴10.Prefix Hierarchy Names 为层级名称添加前缀11.Search and Replace Names 搜索并置换名称12.Add Attribute 添加属性13.Edit Attribute 编辑属性14.Delete Attribute 删除属性15.Convert 转换NURBS to Polygons NURBS转多边形NURBS to Subdiv NURBS转细分Polygons to Subdiv 多边形转细分Subdiv to Polygons 细分转多边形Subdiv to NURBS 细分转NURBSPaint Effects to Polygons 笔刷特效转多边形Paint Effects to NURBS 笔刷特效转NURBSPaint Effects to Curves 笔刷特效转曲线Texture to Geometry 纹理转几何体Displacement to Polygons 置换转多边形Fluid to Polygons 流体转多边形16.Paint Scripts Tool 脚本绘图工具17. Paint Attributes T ool 属性绘图工具Ⅳ.Create 创建01.NURBS Primitives NURBS原始物体Sphere 球体Cube 立方体Cylinder 圆柱体Cone 圆锥体Plane 平面Torus 圆环Circle 圆形Square 正方形Interactive Creation 交互创建Exit On Completion 完成后退出02.Polygon Primitives 多边形原始物体Sphere 球体Cube 立方体Cylinder 圆柱体Cone 圆锥体Plane 平面Torus 圆环Prism 棱柱体Pyramid 棱锥体Pipe 软管Helix 螺旋体Soccer Ball 足球Platonic Solids 理想固体Interactive Creation 交互创建Exit On Completion 完成后退出03.Subdiv Primitives 细分原始物体Sphere 球体Cube 立方体Cylinder 圆柱体Cone 圆锥体Plane 平面Torus 圆环04.Volume Primitives 体积原始物体Sphere 球体Cube 立方体Cone 圆锥体05.Lights 灯光Ambient Light 环境光Directional Light 平行光Point Light 点光源Spot Light 聚光灯Area Light 区域光Volume Light 体积光06.Cameras 摄影机Camera 摄影机Camera and Aim 摄影机和瞄准Camera,Aim,and Up摄影机,瞄准,和向上07.CV Curve Tool CV曲线工具08.EP Curve Tool EP曲线工具09.Pencil Curve Tool 铅笔曲线工具10.Arc Tools 圆弧工具Three Point Circular ArcTwo Point Circular Arc11.Measure Tools 测量工具Distance ToolParameter ToolArc Length Tool12.Text 文本13.Adobe Illustrator Object Adobe Illustrator 物体14.Construction Plane 构造平面15.Locator 定位器16.Annotation 注解17.Empty Group 空组18.Sets 设置Set 设置Partition 分区Quick Select Set 快速选择设置Ⅴ.Display 显示01.Grid 网格02.Heads Up Display 题头显示Object Details 物体细节Poly Count 多边形计数Subdiv Details 细分细节Animation Details 动画细节Frame Rate 帧率Camera Names 摄影机名称View Axis 视图轴Origin Axis 原点轴Tool Message 工具信息03.UI Elements 用户界面元素Status Line 状态栏Shelf 工具架Time Slider 时间滑块Range Slider 范围滑块Command Line 命令栏Help Line 帮助栏Toolbox 工具箱Attribute Editor 属性编辑器Tool Settings 工具设置Channel Box/Layer Editor 通道栏/层编辑器Hide All UI Elements 隐藏全部用户界面元素Show All UI Elements 显示全部用户界面元素Restore UI Elements 恢复用户界面元素04.Hide 隐藏Hide Selection 隐藏选定项目Hide Unselected Objects 隐藏未选定物体Hide Unselected CVs 隐藏未选定CVAll 全部Hide Geometry 隐藏几何体All 全部NURBS Surfaces NURBS曲面NURBS Curves NURBS曲线Polygon Surfaces 多边形曲面Deforming Geometry 变形几何体Subdiv Surfaces 细分曲面Strokes 笔划Stroke Path Curves 笔划路径曲线Stroke Control Curves 笔划控制曲线Hide Kinematics 隐藏运动学All 全部Joints 关节Ik Hendles IK控制柄Hide Deformers 隐藏变形器All 全部Lattices 晶格Sculpt Objects 雕刻物体Clusters 丛集Nonlinears 非线性Wrap Influences 包裹影响Smooth Skin Influences 平滑蒙皮影响Lights 灯光Cameras 摄影机Texture Placements 纹理布置Construction Planes 构造平面Fluids 流体Hair Systems 头发系统Follicles 毛囊Fur 毛皮nCloths 新世代布料nRigids 新世代刚体Dynamic Constraints 动态约束Animation Markers 动画标记Light Manipulators 灯光操纵器Camera Manipulators 摄影机操纵器05.Show 显示Show Selection 显示选定项目Show Last Hidden 显示最近隐藏All Surface CVs 全部曲面CVAll 全部Show Geometry 显示几何体All 全部NURBS Surfaces NURBS曲面NURBS Curves NURBS曲线Polygon Surfaces 多边形曲面Deforming Geometry 变形几何体Subdiv Surfaces 细分曲面Strokes 笔划Stroke Path Curves 笔划路径曲线Stroke Control Curves 笔划控制曲线Show Kinematics 显示运动学All 全部Joints 关节IK Handles IK控制柄Show Deformers 显示变形器All 全部Lattices 晶格Sculpt Objects 雕刻物体Clusters 丛集Nonlinears 非线性Wrap Influences 包裹影响Smooth Skin Influences 平滑蒙皮影响Lights 灯光Cameras 摄影机Texture Placements 纹理布置Construction Planes 构造平面Fluids 流体Hair Systems 头发系统Follicles 毛囊Fur 毛皮nCloths 新世代布料nRigids 新世代刚体Dynamic Constraints 动态约束Animation Markers 动画标记Light Manipulators 灯光操纵器Camera Manipulators 摄影机操纵器06.Wireframe Color 线框颜色07.Object Display 显示物体Template 冻结Untemplate 取消冻结Bounding Box 边界框No Bounding Box 无边界框Geometry 几何体No Geometry 无几何体Ignore Hardware Shader 忽略硬件着色器Use Hardware Shader 使用硬件着色器Fast Interaction 快速交互08.Transform Display 变换显示Local Rotation Axes 局部旋转轴Rotate Pivots 旋转枢轴Scale Pivots 缩放枢轴Selection Handles 选定项目控制柄09.Polygons 多边形Backface Culling 背面消隐Culling Options 消隐选项Keep Wire 保留线框Keep Hard Edges 保留硬边线Keep Vertices 保留顶点Vertices 顶点UVs UVUnshared UVs 不共享的UVComponent IDs 部件标示码Vertices 顶点Edges 边线Faces 面UVs UVFace Normals 面法线Vertex Normals 顶点法线Tangents 切线Normals Size 法线大小Standard Edges 标准边线Soft/Hard Edges 软/硬边线Hard Edges 硬边线Border Edges 边界边线Crease Edges 皱褶边线Texture Border Edges 纹理边界边线Edge Width 边线宽度Face Centers 面中心线Face Triangles 面三角格Non-planar Faces 非平面的面Reset Display 重设显示Limit to Selected 限制到选定项目Custom Polygon Display 自定义多边形显示10.NURBS NURBSCVs CVEdit Points 编辑点Hulls 外壳Normals (Shaded Mode) 法线(着色模式)Patch Centers 面片中心线Surface Origins 曲面原点Custom 自定义Hull 外壳Rough 粗略Medium 中等Fine 精细Custom Smoothness 自定义平滑度11.Subdiv Surfaces 细分曲面Vertices 顶点Edges 边线Faces 面UVs UVNormals (Shaded Mode) 法线(着色模式)UV Borders (Texture Editor) UV边界(纹理编辑器)Hull 外壳Rough 粗略Medium 中等Fine 精细12.Animation 动画Lattice Points 晶格点Lattice Shape 晶格图形Joint Size 关节大小Ik/FK Joint Size IK/FK关节大小Ik Handle Size IK控制柄大小Joint Labels 关节标签13.Rendering 渲染Camera/Light Manipulator 摄影机/灯光操纵器Select Camera or Light 选择摄影机或灯光Paint Effects Mesh Display 显示画笔特效网络Stroke Display Quality 笔划显示质量Ⅵ.Window 窗口01.General Editors 常规编辑器Component Editor 部件编辑器Attribute Spread Sheet 属性展开表Connection Editor 连接编辑器Visor 样品库Display Layer Editor 显示层编辑器Blind Date Editor 遮挡数据编辑器Channel Control 通道控制Script Editor 脚本编辑器Command Shell 命令解释器02.Rendering Editors 渲染编辑器Render View 渲染视图Render Settings 渲染设置Hypershade 超着色Render Layer Editor 渲染层编辑器Rendering Flags 渲染旗标Shading Group Attributes 着色组属性Multilister 多重列表器Hardware Render Buffer 硬件渲染缓冲03.Animation Editors 动画编辑器Graph Editor 图表编辑器Trax Editor 追踪编辑器Dope Sheet 动画内幕表Blend Shape 融合图形Expression Editor 表达式编辑器Device Editor 设备编辑器04.Relationship Editors 关联编辑器Sets 组Deformer Sets 变形器组Character Sets 角色组Partitions 分区Display Layers 显示层Render Layers 渲染层Dynamic Relationships 动态关联Light Linking 灯光链接Light Centric 以灯光为准Object Centric 以物体为准UV Linking UV链接Texture Centric 以纹理为准UV Centric 以UV为准Paint Effects/UV 画笔特效/UVHair/UV 头发/UVFur/UV 毛皮/UVHair/Fur Linking 头发/毛皮链接05.Settings/Preferences 设置/参数Preferences 参数Tool Settings 工具设置Performance Settings 性能设置Hotkey Editor 快捷键编辑器Color Settings 颜色设置Marking Menu Editor 注标菜单编辑器Shelf Editor 工具架编辑器Panel Editor 面板编辑器Plug-in Manager 插件管理器06.Attribute Editor 属性编辑器07.Outliner 大纲08.Hypergraph:Hierarchy 超图表:层级09.Hypergraph:Connections 超图表:连接10.Paint Effects 画笔特效11.UV Texture Editor UV纹理编辑器12.Playblast 快速动画演示13.View Arrangement 视图排列Single Pane 单一窗格Two Panes Side by Side 两个窗格并排Two Panes Stacked 两个窗格层叠Three Panes Split Top 三窗格顶端分裂Three Panes Split Left 三窗格左侧分裂Three Panes Split Bottom 三窗格底端分裂Three Panes Split Right 窗格右侧分裂Four Panes 四窗格Previous Arrangement 上一排列Next Arrangement 下一排列14.Saved Layouts 保存的布局Single Perspective View 单一透视图Four View 四视图Persp/Hypergraph 透视图/超图表Persp/Graph/Hypergraph 透视图/图表/超图表Hypershade/Render/ Persp 超着色/渲染/透视图Hypershade/Outliner/ Persp 超着色/大纲/透视图Hypershade/ Persp 超着色/透视图Persp/ Outliner 透视图/大纲Persp/ Graph/ Outliner 透视图/图表/大纲Persp/Trax 透视图/追踪编辑器Persp/Trax/ Outliner 透视图/追踪编辑器/大纲Persp/ Graph 透视图/图表Persp/Relationship Editor 透视图/关联编辑器Persp/UV T exture Editor 透视图/UV纹理编辑器Script Edior/Persp 脚本编辑器/透视图Hypershade/Render/ Persp Vertical 超着色/渲染/透视图垂直Edit Layouts 编辑布局15.Save Current Layout 保存当前布局16.Frame All in All Views 在所有窗口中显示所有物体17.Frame Selection in All Views 在所有窗口中显示选定物体18.Minimize Application 应用程序最小化19.Raise Main Window 激活主窗口20.Raise Application Windows 激活应用程序窗口Polygons 多边形Ⅰ.Select 选择01.Object/Component 物体/部件02.Vertex 顶点03.Edge 边线04.Face 面05.UV UV06.Vertex Face 顶点面07.Select Edge Loop Tool 选择循环边线工具08. Select Edge Ring Tool 选择环形边线工具09. Select Shortest Edge Path T ool 选择边界边线工具10.Convert Selection 转换选定项目To Vertices 为顶点To Vertex Faces 为顶点面To UVs 为UVTo UV Shell 为UV壳To Uv Border 为UV边界To Shell 为壳To Shell Border 为壳边界To Edges 为边线To Edge Loop 为循环边线To Edge Ring 为环形边线To Contained Edges 为包含边线To Faces 为面To Face Path 为面路径To Contained Faces 为包含面11.Grow Selection Region 生长选定区域12.Shrink Selection Region 收缩选定区域13. Select Selection Boundary 选择选定项目的边界14. Select Contiguous Edges 选择邻近边线15. Select Using Constraints 使用约束选择Ⅱ.Mesh 网格bine 组合2.Separate 分开3.Extract 榨取4.Booleans 布尔运算Union 合并Difference 相减Intersection 相交5.Smooth 平滑6.Average Vertices 平均顶点7.Transfer Attributes 转移属性8.Paint Transfer Attributes Weights Tool 描绘转移属性权重工具9.Copy Mesh Attributes 拷贝网格属性10.Clipboard Actions 剪贴板属性Copy Attributes 拷贝属性Paste Attributes 粘贴属性Clear Clipboard 清除剪贴板11.Reduce 减少12.Paint Reduce Weights Tool 描绘简化权重工具13.Cleanup 清理14.Triangulate 三角格15.Quadrangulate 四角格16.Fill Hole 填充洞17.Make Hole Tool 生成孔洞工具18.Create Polygon Tool 创建多边形工具19.Sculpt Geometry Tool 雕刻几何体工具20.Mirror Cut 镜像剪切21. Mirror Geometry 镜像几何体Ⅲ.Edit Mesh 编辑网格01.K eep Faces Together 保持面在一起02.E xtrude 挤出03.B ridge 桥接04.A ppend to Polygon T ool 附加多边形工具05.C ut Faces Tool 剪切面工具06.S plit Polygon Tool 分割多边形工具07.I nsert Edge Loop Tool 插入循环边线工具08.O ffset Edge Loop Tool 偏移循环边线工具09.A dd Divisions 添加分割10.T ransform Component 变换部件11.F lip Triangle Edge 翻转三角格边线12.P oke Face 拨开面13.W edge Face 楔入面14.D uplicate Face 复制面15.D etach Component 分离部件16.M erge 合并17.M erge to Center 合并到中心线18.M erge Edge Tool 合并边线工具19.D elete Edge/Vertex 删除边线/顶点20.C hamfer Vertex 斜切顶点21.B evel 倒角Ⅳ.Proxy 代理01.S ubdiv Proxy 细分代理02.R emove Subdiv Proxy Mirror 移除细分代理镜像03.C rease Proxy Edge Tool 褶皱代理边线工具04.T oggle Proxy Display 切换代理显示05.B oth Proxy and Subdiv Display 代理和细分显示Ⅴ.Normals 法线01.V ertex Normal Edit T ool 顶点法线编辑工具02.S et Vertex Normal 设置顶点法线03.L ock Normals 锁定法线04.U nlock Normals 解锁法线05.A verage Normals 平均法线06.S et to Face 设置为面法线07.R everse 倒转08.C onform 统一09.S often Edge 软边线10.H arden Edge 硬边线11.S et Normal Angle 设置法线角度Ⅵ.Color 颜色01.P relight 预设灯光02.B atch Bake 批量烘焙03.A ssign New Vertex Bake Set 指定新顶点烘焙组04.A ssign Existing Bake Set 指定现有的烘焙组No bakesets defined 没有定义烘焙组05.E dit Assigned Bake Set 编辑指定烘焙组06.C reate Empty Color Set 创建空颜色组07.D elete Current Color Set 删除当前颜色组08.R ename Current Color Set 重命名当前颜色组09.M odify Current Color Set 修改当前颜色组10.C olor Set Editor 颜色组编辑器11.S et Keyframe for Vertex Color 设置顶点颜色的关键帧12.A pply Color 应用颜色13.P aint Vertex Color Tool 描绘顶点颜色工具14.T oggle Display Colors Attribute 切换显示颜色属性15.C olor Material Channel 颜色材质通道None 无Ambient 环境光Ambient+Diffuse 环境光+漫反射Diffuse 漫反射Specular 高光Emission 发射16.M aterial Blend Setting 材质混合设置Overwrite 覆盖Add 加法Subtract 减法Multiply 乘法Divide 除法Average 平均Modulate2x 调整两倍Ⅶ.Create UVs 创建UV01.P lanar Mapping 平面贴图02.C ylindrical Mapping 圆柱形贴图03.S pherical Mapping 球形贴图04.A utomatic Mapping 自动贴图05.C reate UVs Based On Cemera 创建基于摄影机的UV06.B est Plane Texturing Tool 最佳平面纹理工具07.A ssign Shader to Eath Projection 指定着色器到每一个投影08.C eate Empty UV Set 创建空的UV组09.C opy UVs to UV Set 拷贝UV到UV组No Object Selected 没有选择任何物体Copy Into New UV Set 拷贝到新UV组10.S et Current UV Set 设置当前UV组11.R ename Current UV Set 重命名当前UV组12.D elete Current UV Set 删除当前UV组Ⅷ.Edit UVs 编辑UV01.N ormalize 规格化02.U nitize 整合03.F lip 翻转04.R otate 旋转05.G rid 网格06.A lign 对齐07.W arp Image 歪曲图象08.M ap UV Border 映射UV边界09.S traighten UV Border 拉直UV边界10.R elax 释放11.U nfold 删除折叠12.L ayout 布局13.C ut UV Edges 剪切UV边界14.S plit UVs 分割UV15.S ew UV Edges 缝合UV边界16.M ove and Sew UV Edges 移动并缝合UV边线17.M erge UVs 合并UV18.D elete UVs 删除UV19.U V Texture Editor UV纹理编辑器Surface 曲面Ⅰ.Edit Curves 编辑曲线01.D uplicate Surface Curves 复制曲面曲线02.A ttach Curves 连接曲线03.D etach Curves 分离曲线04.A lign Curves 对齐曲线05.O pen/Close Curves 打开/关闭曲线06.M ove Seam 移动接缝07.C ut Curves 剪切曲线08.I ntersect Curves 相交曲线09.C urve Fillet 曲线圆角10.I nsert Kont 插入节点11.E xtend 伸展Extend Curve 伸展曲线Extend Curve On Surface 伸展曲面上曲线12.Offset 偏移Offset Curve 偏移曲线Offset Curve On Surface 偏移曲面上曲线12.R everse Curve Direction 倒转曲线方向13.R ebuild Curve 重建曲线14.F it B-spline 适配B样条15.S mooth Curve 平滑曲线16.C V Hardness CV硬化17.A dd Points Tool 添加点工具18.C urve Editing Tool 曲线编辑工具19.P roject Tangent 投影切线20.M odify Curves 修改曲线Lock Length 锁定长度Unlock Length 解锁长度Straighten 伸直Smooth 平滑Curl 卷曲Bend 弯曲Scale Curvature 缩放曲率21.S election 选定项目Select Curve CVs 选择曲线CVSelect First CV on Curve 选择第一个曲线上的CVSelect Last CV on Curve 选择最后一个曲线上的CVCluster Curve 丛集曲线Ⅱ.Surfaces 曲面01.R evolve 旋转02.L oft 放样03.P lanar 平面04.E xtrude 挤出05.B irail 双轨Birail 1 Tool 双轨1工具Birail 2 Tool 双轨2工具Birail 3+ Tool 双轨3+工具06.B oundary 边界07.S quare 正方形08.B evel 倒角09.B evel Plus 增强倒角Ⅲ.Edit NURBS 编辑NURBS01.D uplicate NURBS Patches 复制NURBS面片02.P roject Curve on Surface 投影曲线在曲面上03.I ntersect Surfaces 相交曲面04.T rim Tool 修整工具05.U ntrim Surfaces 取消修整曲面06.B ooleans 布尔运算Union T ool 合并工具Difference Tool 相减工具Intersection Tool 相交工具07.A ttach Surfaces 连接曲面08.A ttach Without Moving 连接而不移动09.D etach Surfaces 分离曲面10.A lign Surfaces 对齐曲面11.O pen/Close Surfaces 打开/关闭曲面12.M ove Seam 移动接缝13.I nsert Isoparms 插入结构线14.E xtend Surfaces 伸展曲面15.O ffset Surfaces 偏移曲面16.R everse Surface Direction 倒转曲面方向17.R ebuild Surfaces 重建曲面18.R ound T ool 圆角工具19.S urface Fillet 曲面圆角Circular Fillet 圆形圆角Freeform Fillet 自由形式圆角Fillet Blend Tool 圆角融合工具20.S titch 缝合Stitch Surface Points 缝合曲面点Stitch Edges Tool 缝合边线工具Global Stitch 全局缝合21.S culpt Geometry Tool 雕刻几何体工具22.S urface Editing 曲面编辑Surface Editing T ool 曲面编辑工具Break Tangent 断开切线Smooth Tangent 平滑切线23.S election 选定项目Grow CV Selection 生长CV选定项目Shrink CV Selection 收缩CV选定项目Select CV Selection Boundary 选择CV选定项目边界Select Surface Border 选择曲面边界Ⅳ.Subdiv Surfaces 细分曲面01.T exture 纹理Planar Mapping 平面贴图Automatic Mapping 自动贴图Layout UVs 布局UV02.F ull Crease Edge/Vertex 完整褶皱边线/顶点03.P artial Crease Edge/Vertex 部分褶皱边线/顶点04.U ncrease Edge/Vertex 取消褶皱边线/顶点05.M irror 镜像06.A ttach 连接07.M atch Topology 匹配拓扑08.C lean Topology 清除拓扑09.C ollapse Hierarchy 塌陷层级10.S tandard Mode 标准模式11.P olygon Proxy Mode 多边形代理模式12.S culpt Geometry 雕刻几何体工具13.C onvert Selection to Faces 转换选定物体为面14.C onvert Selection to Edges 转换选定物体为边线15.C onvert Selection to Vertices 转换选定物体为顶点16.C onvert Selection to UVs 转换选定物体为UV17.R efine Selected Components 精致选定部件18.S elect Coarser Components 选择粗糙部件19.E xpand Selected Components 扩展选定部件20.C omponent Display Level 部件显示级别Finer 精细Coarser 粗糙Base 基本21.C omponent Display Filter 部件显示过滤器All 全部Edits 编辑Dynamics 动力学Ⅰ.Particles 粒子01.Particle Tool 粒子工具02.Create Emitter 创建发射器03.Emit from Object 从物体发射e Selected Emitter 使用选定发射器05.Per-Point Emission Rates 每点发射速率06.Make Collide 使碰撞07.Particle Collision Event Editor 粒子碰撞事件编辑器08.Goal 标的09.Instancer(Replacement) 实例器(置换)10.Sprite Wizard 精灵向导11.Connect to Time 连接到时间Ⅱ.Fluid Effects 流体特效01.Create 3D Container 创建三维容器02.Create 2D Container 创建二维容器03.Add/Edit Contents 添加/编辑内容Emitter 发射器Emit From Object 从物体发射Gradients 渐变Paint Fluids Tool描绘流体工具With Curve 带有曲线Initial States 初始状态04.Create 3D Container With Emitter 创建带有三维发射器的容器05.Create 2D Container With Emitter 创建带有二维发射器的容器06.Get Fluid Example 获取流体范例07.Get Ocean/Pond Example 获取海洋/池塘范例08.Ocean 海洋Create Ocean 创建海洋Add Preview Plane 添加预览平面Create Wake 创建激发Add Ocean Surface Locator 添加海洋曲面定位器Add Dynamic Locator 添加动态定位器Add Boat Locator 添加船舶定位器Add Dynamic Buoy 添加动态浮力Float Selected Objects 漂浮选定物体Make Boats 生成船舶Make Motor Boats 生成马达船舶09.Pond 池塘Create Pond 创建池塘Create Wake 创建激发Add Pond Surface Locator 创建池塘曲面定位器Add Dynamic Locator 添加动态定位器Add Boat Locator 添加船舶定位器Add Dynamic Buoy 添加动态浮力Float Selected Objects 漂浮选定物体Make Boats 生成船舶Make Motor Boats 生成马达船舶10.Extend Fluid 伸展流体11.Edit Fluid Resolution 编辑流体分辨率12.Make Collide 使碰撞13.Make Motion Field 生成拖动场14.Set Initial State 设置初始状态15.Clear Initial State 清除初始状态16.Save States As 另存状态为17.Create Cache 创建缓存18.Append to Cache 附加到缓存19.Replace Cache Frame 置换缓存帧20.Truncate Cache 截短缓存21.Delete Cache 删除缓存Ⅲ.Fields 场01.A ir 空气02.D rag 拖动03.G ravity 重力04.N ewton 牛顿05.R edial 辐射06.T urbulence 湍流07.U niform 统一08.V ortex 旋涡09.V olume Axis 体积轴10.U se Selected as Source of Field 使用选定作为场的来源11.A ffect Selected Objects 影响选顶物体Ⅳ.Soft/Rigid Bodies 柔体/刚体01.C reate Active Rigid Body 创建活动刚体02.C reate Passive Rigid Body 创建被动刚体03.C reate Nail Constraint 创建钉子约束04.C reate Pin Constraint 创建栓约束05.C reate Hinge Constraint 创建铰链约束06.C reate Spring Constraint 创建弹簧约束07.C reate Barrier Constraint 创建栅栏约束08.S et Active Key 设置活动关键帧09.S et Passive Key 设置被动关键帧10.B reak Rigid Body Connections 断开刚体连接11.C reate Soft Body 创建柔体12.C reate Springs 创建弹簧13.P aint Soft Body Weights Tool 描绘柔体权重工具Ⅴ.Effects 特效01.C reate Fire 创建火焰02.C reate Smoke 创建烟雾03.C reate Fireworks 创建烟花04.C reate Lightning 创建闪电05.C reate Shatter 创建粉碎06.C reate Curve Flow 创建曲线流体07.C reate Surface Flow 创建曲面流体08.D elete Surface Flow 删除曲面流体Ⅵ.Solvers01.I nitial StateSet for SelectedSet for All Dynamic02.R igid Body Solver Attributes03.C urrent Rigid SolverNo Rigid Solvers found04.C reate Rigid Body Solver05.S et Rigid Body Interpenetration06.S et Rigid Body Collision07.M emory CachingEnableDisableDelete08.C reate Particle Disk Cache09.E dit Oversampling or Cache Settings10.I nteractive Playback Ⅶ.Hair01.C reate Hair02.S cale Hair Tool03.P aint Hair Follicles04.P aint Hair TexturesBaldnessHair ColorSpecular Color05.G et Hair Example06.D isplayCurrent PositionStart PositionRest PositionCurrent and StartCurrent and RestAll Curves。
第四节 Serv-U用户属性之“General”(常用)

第四节 Serv-U用户属性之“General”(常用)一、“General”(常用)选项。
如下图:二、各项说明和应用实例1、Lock user in home directory(将用户锁定在主目录):如果选中则只允许用户访问“主目录”以下的文件和目录(主目录即为根目录);如果不选中,则用户可一直访问到主目录所在盘的实际根目录(比如“d:\”)下——当然,可能并没有读其下其他文件目录或写等权限,但是仍建议一般选中此项。
2、Hide 'hidden' files(隐藏“隐含”文件):在列表时不显示属性为“隐含”的文件。
3、Always allow login(总是接受登录):本帐户永远有效。
4、Allow only N login(s) from same IP address(只接受同一个IP地址的N个用户登录):对于限制外部局域网接入的机器数量非常有用!5、Allow user to change password(接受用户改变密码):有些FTP客户端有允许用户改变自己FTP密码的功能,此处就是为它们准备的。
6、Max. upload speed(最大上载速率):可以限制客户端上传文件的最大速率(以kb/s 为单位)。
7、Max. download speed(最大下载速率):下传文件的最大速率(以kb/s为单位)。
8、Idle time-ou(空闲溢出时间):超过某分钟不工作(读写等操作)就丢弃已产生的连接。
9、Max. no. of users(最大用户数):允许同时连接到本服务器的最多的用户数目。
10、Logging message file(登录信息文件):在这里可以输入(或选择)一个事先建立好的文本文件(一般)的完整路径和文件名,登录成功之后就会出现相关提示信息。
提示信息如下图:11、Password type(密码类型):一般选默认的“Regular Password”(常规密码)。
- 1、下载文档前请自行甄别文档内容的完整性,平台不提供额外的编辑、内容补充、找答案等附加服务。
- 2、"仅部分预览"的文档,不可在线预览部分如存在完整性等问题,可反馈申请退款(可完整预览的文档不适用该条件!)。
- 3、如文档侵犯您的权益,请联系客服反馈,我们会尽快为您处理(人工客服工作时间:9:00-18:30)。
Siemens Aktiengesellschaft CopyrighteSiemens AG 2004Subject to alterationA5E00267310-011Compatibility list for SIMATIC software packages with various versions of the STEP 7 Standard package.Description of characters:X =combination perwithted –=combination not perwithted (–)=combintion not testedNote:•For Windows NT 4.0 and STEP 7 V5.1, it is assumed that SP5 or SP 6a for Windows NT 4.0 has been installed, even if not explicitly stated.•For Windows 2000 Professional, it is assumed that SP1 has been installed, SP3 or higher is recommended, even if not explicitly stated.•For Windows XP Professional SP1 or higher is recommended.•All statements regarding compatibility are related to the installation and joint operation of the software on the same PC/programming device•Statements regarding compatibility for a STEP 7 Version are generally valid for the service packs for this version (this means, for example that the compatibilitystatements for STEP 7 V 5.2 are also valid for STEP 7 V5.2 +SP1, ...) unless otherwise stated .•Statements regarding compatibility for a Version of an S7 optional package are generally valid for each service pack for this version (this means, for example thatthe compatibility statements for CFC V5.2 are also valid for CFC V5.2+SP1, ...) unless otherwise stated .•Windows 95 in connection with STEP 7 V5.2: MS Windows 95 is no longer supported by Microsoft. This especially affects the availability of drivers forcommunication purposes. As a result, the use of STEP 7 V5.2 with MS Windows 95 may cause problems in online connecitons between your PG/PC and an S7target system. At least MS Windows, Version 95b or Service Release OSR2 for OEM versions are required.•The new function Multiproject introduced with STEP 7 V5.2 is not yet actively supported by many optional packages of version <V5.2. This means, you can only use theoptional package to open and edit the individual project of a multiproject, and not the Multiproject as a whole.•The Microsoft Windows operating systems are abbreviated in the table below as follows:•95Microsoft Windows 95•98SE Microsoft Windows 98 Second Edition •NT 4.0Microsoft Windows NT 4.0•ME Microsoft Windows Millennium Edition•2000 Prof.Microsoft Windows 2000 Professional Edition •XP Prof.Microsoft Windows XP Professional EditionCompatibility List01/2004-01bA&D Data Management (ADDM)Product Name Version Order NumerSTEP 7 V5.2STEP 7 V5.39598SE NT 4.0ME 2000 Prof XP Prof 2000 Prof XP ProfA&D Data Management V5.16BQ3 030–1AA30–3AB0(–)X X X X X X X A&D Data ManagementV5.06BQ3 030–1AA30–3AB0(–)XX XX –X –AuthorsWProduct NameVersionOder NumberSTEP 7 V5.2STEP 7 V5.39598SE NT 4.0ME 2000 Prof XP Prof 2000 Prof XP ProfAuthorsW V2.5.2 1)––––XXX XX X X 2)X 2)1) STEP 7 V5.2+SP1 setup component2) not suited for the handling of STEP7 V5.3 License Keys or other new products. The Automation License Manager is required insteadAutomation License ManagerProduct NameVersion Order Number STEP 7 V5.2STEP 7 V5.39598SE NT 4.0ME 2000 Prof XP Prof 2000 Prof XP Prof Automation License ManagerV1.0 1)––––(–)(–)(–)(–)(–)(–)X X1) STEP 7 V5.3 component; replaces AuthorsWCFCProduct Name Version Order Number STEP 7 V5.2STEP 7 V5.39598SE NT 4.0ME 2000 Prof XP Prof 2000 Prof XP ProfCFCV6.06ES7 813–0CC05–0YX0X X X X X X X X CFCV5.26ES7 813–0CC05–0YX0XXX XX –X –D7–SYS for T400, FM 458, SIMATIC TDC, SIMADYN DProduct Name Version Order Number STEP 7 V5.2STEP 7 V5.39598SE NT 4.0ME2000 Prof XP Prof2000 Prof XP Prof D7–SYS V6.1 2)6DD1 801–5DA8––––––X X(6DD1801–4DA8)(6DD1807–5DA8)D7–SYS–SFC 1)V6.1 2)6DD1 801–7DA8––––––X–(6DD1801–6DA8)X X X X X X––D7–SYS V6.0 2)6DD1 801–5DA7(6DD1801–4DA7)(6DD1807–5DA7)D7–SYS–SFC 1)V6.0 2)6DD1 801–7DA7––––X–––(6DD1801–6DA7)1) contains SFC V6.02) Minimum requirement is: CFC V6.0DOCPROProduct Name Version Order Number STEP 7 V5.2STEP 7 V5.39598SE NT 4.0ME2000 Prof XP Prof2000 Prof XP Prof DOCPRO V5.1+SP16ES7 803–0CC02–0YE0X X X X X X X X DOCPRO V5.0+SP16ES7 803–0CC01–0YE0X X X X X–X–Compatibility List01/2004-01bDrive ES BasicProduct Name Version Order Number STEP 7 V5.2STEP 7 V5.39598SE NT 4.0ME 2000 Prof XP Prof 2000 Prof XP ProfDrive ES Basic V5.26SW1 700–5JA00–2AA0X X X X X X (–)(–)Drive ES BasicV5.16SW1 700–5JA00–1AA0X 1)X 1)X 1)X 1)X 1)X 1)(–)(–)1) Projects are not to be saved on networksDrive ES GraphicProduct Name Version Order Number STEP 7 V5.2STEP 7 V5.39598SE NT 4.0ME 2000 Prof XP Prof 2000 Prof XP ProfDrive ES GraphicV5.26SW1 700–5JB00–2AA0X X X X X X (–)(–)Drive ES GraphicV5.16SW1 700–5JB00–2AA0XXX XX X (–)(–)M7–PRO C/C++Product Name Version Order Number STEP 7 V5.2STEP 7 V5.39598SE NT 4.0ME 2000 Prof XP Prof 2000 Prof XP Prof M7–PRO C/C++V3.1.11)6ES7 812–0CA01–0YX0XXX –X 2)(–) 2)X 2)(–) 2)The symbol table cannot be called from ProC/C++.Remedy: Activate the symbol table from the SIMATIC Manager using the “Symbol Table“ button.1) The M7–SYS V2.0 package and the C Compiler Borland C++ Version 5.01 are required when running M7 ProC/C++.2) During setup for M7-Pro C/C++ the extra option “–ntall“ has to be entered. (Setup execution via the command line).M7–SYS RTProduct NameVersionOrder NumberSTEP 7 V5.2STEP 7 V5.39598SE NT 4.0ME2000 Prof XP Prof 2000 Prof XP Prof M7–SYS RT V5.06ES7 802–0FA15–0XX0X X X –X 1)(–) 1)X 1)(–) 1)M7–SYS RT V4.06ES7 802–0FA14–0XX0X X X –X 1)(–) 1)X 1)(–) 1)3)MOBY OM for ASM 470/ 473/ 475Product Name Version Order Number STEP 7 V5.2STEP 7 V5.39598SE NT 4.0ME2000 Prof XP Prof2000 Prof XP Prof MOBY OM for ASM 473/475 1)V5.36GT2 080–2AA10(–)(–)(–)(–)(–)(–)X X MOBY OM for ASM 473/475 2)V5.26GT2 080–2AA10(–)X X X X X(–)(–) MOBY OM for ASM 470 3)V5.16GT2 080–2AA10(–)X X X X X X X1) component part of the CD Software MOBY V3.61) component part of the CD Software MOBY V3.51) component part of the CD Software MOBY V3.5 and V3.6Modular PID CONTROLProduct Name Version Order Number STEP 7 V5.2STEP 7 V5.39598SE NT 4.0ME2000 Prof XP Prof2000 Prof XP Prof Modular PID Control (Tool)V4.0.16ES7 830–1AA10–0YX0X X X X X X X X Modular PID Control (FBs for S7)V4.1.16ES7 860–1AA10–0YX0X X X X X X X X Modular PID Control (FBs for M7)V4.0.16ES7 884–1FA10–0YX0X X X–X–(–)–PC–Adapter USBProduct Name Version Order Number STEP 7 V5.2STEP 7 V5.39598SE NT 4.0ME2000 Prof XP Prof2000 Prof XP Prof PC–Adapter USB V1.16ES7 972–0CB20–0XA0––––X X X X PC–Adapter USB V1.06ES7 972–0CB20–0XA0––––X X X XCompatibility List01/2004-01bPID Self–TunerProduct Name Version Order Number STEP 7 V5.2STEP 7 V5.39598SE NT 4.0ME 2000 Prof XP Prof 2000 Prof XP ProfPID Self–Tuner (FBs)V5.0.16ES7 860–4AA01–0YX0XXX XX X X XProAgentProduct Name Version Order Number STEP 7 V5.2STEP 7 V5.39598SE NT 4.0ME 2000 Prof XP Prof 2000 Prof XP ProfProAgent CSV6.0+SP26A V6 582–2BX06–0CX0–X X X X X X X ProAgent RT/ MP/ OP V6.0+SP26A V6 582–2BX06–0CX0––X –X X X X ProAgent CSV5.2+SP36A V6 582–2BX05–2CX0X X X X X –X –ProAgent RT/ MP/ OPV5.2+SP36A V6 582–2BX05–2CX0XXX XX –X –ProAgent for WinCCProduct NameVersionOrder Number STEP 7 V5.2STEP 7 V5.39598SE NT 4.0ME 2000 Prof XP Prof 2000 Prof XP ProfProAgent for WinCC 1)V6.06A V6 371–1DG06–0AX0––––X X X X ProAgent for WinCC 2)V5.66A V6 371–1DG05–6AX0––X –X –X –WinCC V6.0 is required in addition 2) WinCC V5.1 is required in additionProTool /ProProduct Name Version Order Number STEP 7 V5.2STEP 7 V5.39598SE NT 4.0ME 2000 Prof XP Prof 2000 Prof XP ProfProTool /Pro CS V6.0+SP26A V6 582–2BX06–0CX0–X X X X X X X ProTool /Pro RT V6.0+SP26A V6 582–2BX06–0CX0–X X X X X X X ProTool /Pro CS V5.2+SP36A V6 582–2BX05–2CX0X X X X X –X –ProTool /Pro RTV5.2+SP36A V6 582–2BX05–2CX0XXX XX –X –ProVisionProduct Name Version Order Number STEP 7 V5.2STEP 7 V5.39598SE NT 4.0ME2000 Prof XP Prof2000 Prof XP Prof ProVision Videomat V2.16GF8 007–1AA21X X X X X X X XS7–200 OPC ServerProduct Name Version Order Number STEP 7 V5.2STEP 7 V5.39598SE NT 4.0ME2000 Prof XP Prof2000 Prof XP Prof S7–200 OPC Server V1.06ES7 810–2MS00–0YX0X X X X 1)X 1)–X 1)–1) only as of S7-200 OPC Server V1.0+SP1 or laterS7–Distributed SafetyProduct Name Version Order Number STEP 7 V5.2STEP 7 V5.39598SE NT 4.0ME2000 Prof XP Prof2000 Prof XP Prof S7–Distributed Safety V5.26ES7 833–1FC00–0YX0X X X X X X X XS7–Distributed Safety V5.1 1)6ES7 833–1FC00–0YX0X X X X X X(–)(–)2) Restrictions in combination with S7 F SystemsCompatibility List01/2004-01bS7–GRAPHProduct Name Version Order Number STEP 7 V5.2STEP 7 V5.39598SE NT 4.0ME 2000 Prof XP Prof 2000 Prof XP ProfS7–GRAPH V5.26ES7 811–0CC05–0YX0X X X X X X X X S7–GRAPHV5.16ES7 811–0CC04–0YX0XXX XX –X –S7–HiGraphProduct NameVersionOrder Number STEP 7 V5.2STEP 7 V5.39598SE NT 4.0ME 2000 Prof XP Prof 2000 Prof XP ProfS7–HiGraph V5.26ES7 811–3CC04–0YE0X X X X X X X X S7–HiGraph V5.06ES7 811–3CC03–0YE0XXX X 1)X 1)–X 1)–1) only as of S7-HiGraph V5.0+SP1 or laterS7–H SystemsProduct NameVersionOrder NumberSTEP 7 V5.2STEP 7 V5.39598SE NT 4.0ME 2000 Prof XP Prof 2000 Prof XP ProfS7–H Systems V5.26ES7 833–2AC00–2YX0X X X X X X – 1)– 1)S7–H Systems V5.16ES7 833–2AC00–2YX0X X X X X X – 1)– 1)1)S7–PDIAGProduct Name Version Order Number STEP 7 V5.2STEP 7 V5.39598SE NT 4.0ME 2000 Prof XP Prof 2000 Prof XP ProfS7–PDIAG V5.16ES7 840–0CC03–0YE0X X X X X X X X S7–PDIAGV5.06ES7 840–0CC02–0YE0XXX XX (–)(–)(–)S7–TechnologyProduct Name Version Order Number STEP 7 V5.2STEP 7 V5.39598SE NT 4.0ME2000 Prof XP Prof2000 Prof XP Prof S7–Technology V1.06ES7 864–1CC10–0YX0––X 1)–X 1)X 1)X X1) as of STEP 7 V5.2+SP1+HF1 or laterSIMATIC ComputingProduct Name Version Order Number STEP 7 V5.2STEP 7 V5.39598SE NT 4.0ME2000 Prof XP Prof2000 Prof XP Prof SIMATIC Computing V3.1––––––X–X X X X SIMATIC Computing V3.06ES7 806–0CC00–0YE0––X–X 1)–X 1)–1) only as of SIMATIC Computing V3.0+SP1 or laterSIMATIC iMapProduct Name Version Order Number STEP 7 V5.2STEP 7 V5.39598SE NT 4.0ME2000 Prof XP Prof2000 Prof XP Prof SIMATIC iMap V2.06ES7 820–0CC03–0YX0––––X 1)X 1)X X SIMATIC iMap V1.26ES7 820–0CC02–0YX0––––X(–)––1) only as of STEP 7 V5.2+SP1 or laterCompatibility List01/2004-01bSIMATIC NETProduct NameVersion Order NumberSTEP 7 V5.2STEP 7 V5.39598SE NT 4.0ME 2000 Prof XP Prof 2000 Prof XP ProfSIMATIC NET PC Software Consisting of:DP–5613S7–5613FMS–5613SOFTNET–DP SOFTNET–DP Slave SOFTNET–S7CP5613/CP5614 Software DP–Base S7–1613SOFTNET–S7SOFTNET–PG SOFTNET–S7 Lean S7–RedConnect upgrade S7–RedConnectSNMP OPC Server Basic SNMP OPC Server Extended SNMP OPC Server Power Pack DX OPC Server PN OPC Server NCM PC / S7V6.2(11/2003)V6.2V6.2V6.2V6.2V6.2V6.2V6.2V6.2V6.2V6.2V6.2V6.2V6.2V6.2V6.2V6.2V6.2V6.2V5.2.16GK1 704–0AA62–3AA06GK1 713–5DB62–3AA06GK1 713–5CB62–3AA06GK1 713–5FB62–3AA06GK1 704–5DW62–3AA06GK1 704–5SW62–3AA06GK1 704–5CW62–3AA0Is delivered with CP 6GK1 716–1CB62–3AA06GK1 704–1CW62–3AA06GK1 704–1PW62–3AA06GK1 704–1LW62–3AA06GK1 716–0HB62–3AA46GK1 716–0HB62–3AA06GK1 706–1NW62–3AA06GK1 706–1NX62–3AA06GK1 706–1NW62–3AA46GK1 706–0XW62–3AA06GK1 706–0HB62–3AA0––––––––X X X X2)The optional packages NCM IE and NCM PB are no longer necessary as of STEP 7 V5.3. This functionality is integrated in STEP 7 V5.3.3) from SIMATIC NET CD 5/2000 + SP2SIMATIC PDMProduct Name Version Order Number STEP 7 V5.2STEP 7 V5.39598SE NT 4.0ME2000 Prof XP Prof2000 Prof XP Prof SIMATIC PDM V5.26ES7 658–3AX05–0YC0X X X X X X 1)X X 1) SIMATIC PDM V5.16ES7 658–3AX01–0YC0X X X–X–(–)–1) only as of SIMATIC PDM V5.2+SP1SIMATIC WinBDEProduct Name Version Order Number STEP 7 V5.2STEP 7 V5.39598SE NT 4.0ME2000 Prof XP Prof2000 Prof XP Prof SIMATIC WinBDE V7.26A V6 371–1EW06–0*X0––X–X X X X SIMATIC WinBDE 1)V7.16BQ3 090–2AB20–0CA0X–X–X–X–1) bevor SIMATIC IT WinBDESIMOCODE–DPProduct Name Version Order Number STEP 7 V5.2STEP 7 V5.39598SE NT 4.0ME2000 Prof XP Prof2000 Prof XP Prof WIN–SIMOCODE–DP V1.33UF5 710–0AA00–0(–)(–)(–)(–)(–)(–)X X OM–SIMOCODE–DP V1.13UF5 712–0AA00–0(–)(–)(–)(–)(–)(–)X XSIMOTION SCOUTProduct Name Version Order Number STEP 7 V5.2STEP 7 V5.39598SE NT 4.0ME2000 Prof XP Prof2000 Prof XP Prof SIMOTION Scout V2.16AU1 810–0BA21–0XA0––X 1)–X 1)–(–)(–)1) Projects are not to be save on networksSINAUT ST7Product Name Version Order Number STEP 7 V5.2STEP 7 V5.39598SE NT 4.0ME2000 Prof XP Prof2000 Prof XP Prof SINAUT ST7V3.46NH7 997–0CA15–0AA0(–)(–)(–)(–)(–)(–)X X SINAUT ST7V3.16NH7 997–0CA15–0AA0(–)X X X X X(–)(–)SIWAREXProduct Name Version Order Number STEP 7 V5.2STEP 7 V5.39598SE NT 4.0ME2000 Prof XP Prof2000 Prof XP Prof SIWAREX FTA V5.27MH4 900–2AA01(–)X X X X X X X SIWAREX A V5.17MH4 483–3DA63X X X X X X X X SIWAREX M V5.17MH4 583–3FA63X X X X X X X X SIWAREX U V5.17MH4 683–3AA63X X X X X X X XSM 338 – UltraschallProduct Name Version Order Number STEP 7 V5.2STEP 7 V5.39598SE NT 4.0ME2000 Prof XP Prof2000 Prof XP ProfX X X X X X X X SM 338 – Ultraschall V5.1HW: 6ES7 338–7UH01–0AC0SW: 6AT1 733–5DA00–2YA0STARTER (Starter commissioning tool)Product Name Version Order Number STEP 7 V5.2STEP 7 V5.39598SE NT 4.0ME2000 Prof XP Prof2000 Prof XP Prof STARTER (standalone)V3.1––––––X–X X X XSTEP 7 LiteProduct Name Version Order Number STEP 7 V5.2STEP 7 V5.39598SE NT 4.0ME2000 Prof XP Prof2000 Prof XP Prof STEP 7 Lite V2.06ES7 810–3CC05–0YE0–X–X X X X XSTEP 7–Micro/WIN 32Product Name Version Order Number STEP 7 V5.2STEP 7 V5.39598SE NT 4.0ME2000 Prof XP Prof2000 Prof XP Prof STEP 7–Micro/WIN 32V3.26ES7 810–2BC02–0YX0X X X X X X 1)X X 1) STEP 7–Micro/WIN 32V3.1.16ES7 810–2BC01–0YX0X X X X X–(–)– only as of STEP 7-Micro/WIN 32 V3.2+SP3 or laterSwitch ESProduct Name Version Order Number STEP 7 V5.2STEP 7 V5.39598SE NT 4.0ME2000 Prof XP Prof2000 Prof XP Prof Switch ES Motor Starter V2.13ZS1 310–0CC20–0YA0X X X X X X X X Switch ES Motor Starter V2.03ZS1 310–0CC20–0YA0X X X X X X(–)(–) Switch ES Motor Starter V1.03RK1 803–2FB04–0FA0X X X X X–(–)–Switch ES Power V1.03WL6 111–0AS01X X X X X X X XTechnical Product Data for CAx ApplicationsProduct Name Version Order Number STEP 7 V5.2STEP 7 V5.39598SE NT 4.0ME2000 Prof XP Prof2000 Prof XP Prof 03/2003E86060–D1000–A207–A4–6300X X X–X X X X Technical Product Data for CAxLow–V oltage Controls and Distribu-tion11/20026ES7 991–0CC00–0YX0X X X–X X X X Technical Product Data for CAxIndustrial Automation SystemsTechnological FunctionsProduct Name STEP 7 V5.3STEP 7 V5.2Order NumberVersionXP Prof2000 ProfXP Prof2000 ProfMENT 4.098SE95FM 352, 452 Cam V4.0.16ES7 352–1AH01–7AG0HW: 6ES7 352–1AH01–0AE0HW: 6ES7 352–1AH00–0AE06ES7 452–1AH00–7AG0HW: 6ES7 452–1AH00–0AE0X X X–––––FM 352–5 Programming Environment V1.16ES7 352–5AH00–7XG0HW: 6ES7 352–5AH00–0AE0(–)X X X X X X XFM 353 Step V4.036ES7 353–1AH01–7AG0HW: 6ES7 353–1AH01–0AE0HW: 6ES7 353–1AH00–0AE0X X X X X X X XFM 354 Servo V4.036ES7 354–1AH01–7AG0HW: 6ES7 354–1AH01–0AE0HW: 6ES7 354–1AH00–0AE0X X X X X X X XFM 453 Step/Servo V3.036ES7 453–3AH00–7AG0HW: 6ES7 453–3AH00–0AE0X X X X X X X X FM 355, 455 PID Control V5.0.1HW: 6ES7 355–yVHz0–0AE0HW: 6ES7 455–yVS00–0AE0y = 0,1; z = 0,1X X X X X X X XFM 355, 455 PID Control V4.06ES7 355–0VH10–7AE0HW: 6ES7 355–yVHz0–0AE06ES7 455–0VS00–7AE0HW: 6ES7 455–yVS00–0AE0y = 0,1; z = 0,1X X X–––––FM 355–2V5.1HW: 6ES7 355–2CH00–0AE0HW: 6ES7 355–2SH00–0AE0(–)X X X X X X XTechnological FunctionsVersionOrder NumberSTEP 7 V5.2Product Name STEP 7 V5.398SE95MENT 4.02000 Prof2000 ProfXP ProfXP Prof Modbus Master V3.1.16ES7 870–1AA00–0YA0X X X X X X(–)(–)HW: 6ES7 341–1yH00 –0AE0and 6ES7 341–1yH01 –0AE0;y=A,B,C, with Tool V4.1.2 2)HW: 6ES7 441–2AA0x–0AE0x>1 with Tool 3) V4.0X X X–––––Modbus Master V3.06ES7 870–1AA00–0YA0HW: 6ES7 341–1yH00 –0AE0and 6ES7 341–1yH01 –0AE0;y=A,B,C, with Tool V4.1.2 2)HW: 6ES7 441–2AA0x–0AE0x>1 with Tool 3) V4.0Modbus Slave V3.1.36ES7 870–1AB00–0YA0X X X X X X X XHW: 6ES7 341–1yH00–0AE0and 6ES7 341–1yH01–0AE0;y=A,B,C, with Tool V4.1.2 2)HW: 6ES7 441–2AA0x–0AE0x>1 with Tool 3) V4.0X X X X X X(–)(–) Modbus Slave V3.1.26ES7 870–1AB00–0YA0HW: 6ES7 341–1yH00–0AE0and 6ES7 341–1yH01–0AE0;y=A,B,C, with Tool V4.1.2 2)HW: 6ES7 441–2AA0x–0AE0x>1 with Tool 3) V4.02) Or Tool V4.0 and above from 04/ 98 onwards, German and English only3) If the file MFCUIA32. DLL is present in WINNT. 400\ SYSTEM32TeleServiceProduct Name Version Order Number STEP 7 V5.2STEP 7 V5.39598SE NT 4.0ME2000 Prof XP Prof2000 Prof XP Prof TeleService V5.26ES7 842–0CC03–0YE0X X X X X X X X TeleService V5.16ES7 842–0CC02–0YE0X X X X X–(–)–Version Cross CheckerProduct Name Version Order Number STEP 7 V5.2STEP 7 V5.39598SE NT 4.0ME2000 Prof XP Prof2000 Prof XP Prof Version Cross Checker (VXC) 1)V6.06ES7 658–1CX06–2YB0X X X X X X X X1) Minimum requirement is: CFC V5.2+SP1 or laterVicos RTUProduct Name Version Order NUmber STEP 7 V5.2STEP 7 V5.39598SE NT 4.0ME2000 Prof XP Prof2000 Prof XP Prof Vicos RTU V1.1.2–(–)(–)(–)(–)(–)X X Vicos RTU V1.1.1 1)–X X X X X(–)(–)1) previous Vicos RTU versions must be uninstalled first2) only as of MS Windows XP Prof. + SP13) only as of WinAC Basis V3.0+SP1 or later4)ProTool/Pro V6.0 + SP2 is required in additionWinAC Slot 412/416Product Name Version Order Number STEP 7 V5.2STEP 7 V5.39598SE NT 4.0ME2000 Prof XP Prof2000 Prof XP Prof WinAC Slot 412V3.46ES7 673–2CC02–0YA0––––X X X X WinAC Slot 412V3.36ES7 673–2CC01–0YA0––––X X X X WinAC Slot 412V3.26ES7 673–2CC00–0YX0––X–X–X–WinAC Slot 412V3.16ES7 673–2CC00–0YX0––X–––––WinAC Slot 416V3.46ES7 673–6CC22–0YA0––––X X X X WinAC Slot 416V3.36ES7 673–6CC21–0YA0––––X X X X WinAC Slot 416V3.26ES7 673–6CC20–0YX0––X–X–X–WinAC Slot 416V3.16ES7 673–6CC20–0YX0––X–––––WinAC Slot T–Kit V3.36ES7 673–0CC00–2YX0––X–X X X X WinAC Slot T–Kit V3.26ES7 673–0CC00–2YX0––––X–X–WinCCProduct Name Version Order Number STEP 7 V5.2STEP 7 V5.39598SE NT 4.0ME2000 Prof XP Prof2000 Prof XP Prof WinCC 1)V6.0+SP16A V6 381–1BC06–0AX0––––X X X X WinCC 1)V6.06A V6 381–1BC06–0AX0––––X X(–)(–) WinCC V5.1+SP16A V6 381–1BC05–1AX0––X–X–X–WinCC V5.16A V6 381–1BC05–1AX0––X 2)–X 2)–(–)–1) installation requirement is an SQL server 2000+SP3 and MS Message Queue services2)not tested with STEP 7 V5.2+SP1; Hotfix 0 for WinCC V5.1 necessary (available on the STEP 7 V5.2 CD)WinCC flexibleProduct Name Version Order Number STEP 7 V5.2STEP 7 V5.39598SE NT 4.0ME2000 Prof XP Prof2000 Prof XP Prof WinCC flexible20046A V6 61*–0AA01–0AA0––––––X X。