Openstack-newton手动安装配置
任务六 Neutron的手工安装与外部环境配置

OPENSTACK配置与管理
任务六 neutron的手工安装与配置
四.任务步骤及其详解: 步骤一:Neutron基本组件的安装(此处有视频:9-1(1)Neutron的安装及其配置) 在controller节点上执行yum源安装命令安装Neutron相关依赖包, 命令如下。 [root@controller ~]# yum -y install openstack-neutron openstack-neutron-ml2 python-neutronclient openstackneutron-openvswitch 执行上述安装命令成功后,我们可以看到成功标志,所有controller节 点Neutron依赖包都安装完成,如图1所示。
OPENSTACK配置与管理
任务六 neutron的手工安装与配置
步骤三:创建Neutron数据库并授权 相关操作与前面几个服务创建数据库类似,首先,用root用户登录 MySQL数据库,命令如下。 [root@controller ~]# mysql -uroot -p000000 接着创建Neutron数据库,命令如下。 mysql> CREATE DATABASE neutron; 看到提示Query OK, 1 row affected (0.00 sec),表明数据库创建成 功。 下面,创建MySQL的Neutron用户,并赋予其Neutron数据库的操作 权限,使得本地及远程都能访问,密码为000000,命令如下。 mysql> GRANT ALL PRIVILEGES ON neutron.* TO 'neutron'@'localhost' IDENTIFIED BY '000000'; mysql> GRANT ALL PRIVILEGES ON neutron.* TO 'neutron'@'%' IDENTIFIED BY '000000'; mysql> exit
openstack安装图解

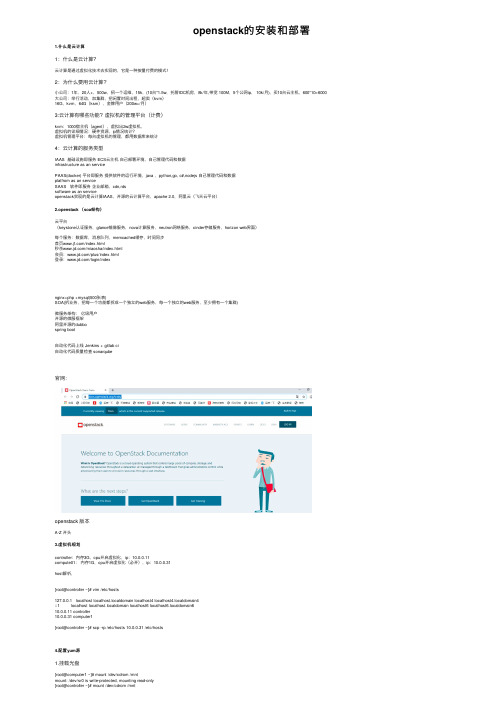
本帖最后由cryboy2001 于2014-08-15 14:52 编辑目录1、云计算与openstack介绍传统的信息中心云计算介绍openstack介绍物理架构2、openstack架构3、安装openstack方法4、使用openstack5、openstack配置文件6、管理openstack7、详解openstack计算资源池存储资源池网络资源池Glance镜像资源池前端界面Keystone认证管理(不管会不会写完,象openstack一样,先把框架搞大点)一、云计算与openstack介绍1、传统的信息中心。
当然下面画的很简单(自己画的),如果加上多个出口、设备冗余、线路冗余、服务器集群就会复杂。
云计算就是用虚拟技术实现以下功能,如果理解了下面的网络功能,要理解openstack会很简单的,在openstack中都有与下面图中对应的模块。
缺点:1、部署应用时间长,工作量大,至少几个月2、资源利用率,有的服务器资源不够用,有的服务器大量资源浪费。
2、管理复杂3、扩展麻烦,灵活性差。
等等,这些也是云计算的优点。
2、云计算介绍云计算(Cloud Computing )是网格计算(Grid Computing )、分布式计算(Distributed Computing )、并行计算(Parallel Computing )、效用计算(Utility Computing )、网络存储(Network Storage Technologies )、虚拟化(Virtualization )、负载均衡(Load Balance )等传统计算机技术(如以上图)和网络技术发展融合的产物。
个人理解:把一堆功能小的设备,整合成一大个功能强大设备,再把这个强大的设备划分成小设备,然后按你的需要买给你。
公用云(Public Cloud)、私有云(Private Cloud)、混合云(Hybrid Cloud)云计算解决方案:VMware vSphere、微软云计算解决方案、亚马逊AWS、OpenStack 等等3、openstack介绍OpenStack是一个NASA和Rackspace2010年6月合作成立的,以Apache许可证授权,并且是一个自由软件和开放源代码项目。
OpenStackUbuntuSwift多节点安装手册

OpenStackUbuntuSwift多节点安装手册展云科技Openstack控制节点安装Ubuntu版目录1安装前说明 (4)1系统配置 (4)1.1网卡配置 (4)1.2安装bridge (5)1.3设置NTP (5)2安装swift (5)2.1安装swift相关组件 (6)2.2创建并配置目录 (6)2.3配置 swift /etc/swift/swift.conf文件 (6)3安装Proxy节点 (6)3.1安装代理节点 (6)3.2创建SSL自签名认证 (6)3.3修改memcached监听接口 (7)3.4配置proxy-server.conf (7)4配置节点信息(Ring) (7)4.1创建账户、容器、对象配置信息 (7)4.2为存储节点添加物理映射信息 (7)4.3验证ring的内容 (8)4.4平衡ring (8)4.5确保/etc/swift所有权属于swift用户 (8)4.6重启代理服务 (8)5配置存储节点 (8)5.1安装swift相关组件 (8)5.2在每个节点的设备上安装XFS卷 (8)5.3创建备份配置文件/etc/rsyncd.conf (9)5.4配置rsync开机启动 (9)5.5配置swift日志文件 (9)5.6创建/etc/swift/account-server.conf (9)5.7创建/etc/swift/container-server.conf (9)5.8创建/etc/swift/object-server.conf (10)5.9启动swift所有服务 (10)5.10验证swift服务 (10)6备注 (10)6.1rsync相关错误 (10)1安装前说明swift多节点安装,官方建议一台代理服务器,五台存储节点。
基本的结构和组成如下:1、节点(node):物理主机运行一个或者多个Swift服务。
2、代理节点(Proxy node):该节点运行代理服务,同时运行临时授权服务。
openstack安装手册

1. OpenStack Basic InstallTable of ContentsIntroduction (1)Architecture (2)Requirements (2)Controller Node (3)Introduction (3)Common services (3)Keystone (5)Glance (7)Nova (7)Cinder (10)Quantum (10)Dashboard (Horizon) (11)Network Node (11)Introduction (11)Common services (12)Network Services (13)Virtual Networking (14)Compute Node (15)Introduction (15)Common services (15)Hypervisor (16)Nova (17)Quantum (19)Create your first VM (20)Conclusion (20)IntroductionThis document helps anyone who wants to deploy OpenStack Folsom for developmentpurposes with Ubuntu 12.04 LTS (using the Ubuntu Cloud Archive).We are going to install a three-node setup with one controller, one network and onecompute node.Of course, you can setup as many computes nodes as you want. This document is a goodstart for beginners in OpenStack who want to install a testing infrastructure.ArchitectureA standard Quantum setup has up to four distinct physical data center networks:•Management network. Used for internal communication between OpenStackcomponents. The IP addresses on this network should be reachable only within the datacenter.•Data network. Used for VM data communication within the cloud deployment. The IPaddressing requirements of this network depend on the Quantum plugin in use.•External network. Used to provide VMs with Internet access in some deploymentscenarios. The IP addresses on this network should be reachable by anyone on theInternet.•API network. Exposes all OpenStack APIs, including the Quantum API, to tenants. The IPaddresses on this network should be reachable by anyone on the Internet. This may bethe same network as the external network, as it is possible to create a quantum subnetfor the external network that uses IP allocation ranges to use only less than the full rangeof IP addresses in an IP block.RequirementsYou need at least three machines (virtual or physical) with Ubuntu 12.04 (LTS) installed.Table 1.1. Architecture and node informationcontroller network compute Hostname folsom-controller folsom-network folsom-computeServices MySQL, RabbitMQ, Nova,Cinder, Glance, Keystone,Quantum Quantum-L3-agent,Quantum-DHCP-agent,Quantum Agent with Open-vSwitchnova-compute, KVM, nova-api, Quantum Agent withOpen-vSwitchMinimum number of disks211External + API network7.7.7.7/247.7.7.8/24-Management network192.168.0.1/24192.168.0.2/24192.168.0.3/24Data network-10.10.10.1/2410.10.10.2/24Total number of NIC232 Controller NodeIntroductionThe Controller node will provide :•Databases (with MySQL)•Queues (with RabbitMQ)•Keystone•Glance•Nova (without nova-compute)•Cinder•Quantum Server (with Open-vSwitch plugin)•Dashboard (with Horizon)Common servicesOperating System1.Install Ubuntu with this parameters :•Time zone : UTC•Hostname : folsom-controller•Packages : OpenSSH-ServerAfter OS Installation, reboot the server.2.Since Ubuntu 12.04 LTS has OpenStack Essex by default, we are going to use the UbuntuCloud Archive for Folsom :apt-get install ubuntu-cloud-keyringEdit /etc/apt/sources.list.d/cloud-archive.list :deb /ubuntu precise-updates/folsommainUpgrade the system (and reboot if you need) :apt-get update && apt-get upgrade3.Configure the network :•Edit /etc/network/interfaces file :# Management Networkauto eth0iface eth0 inet staticaddress 192.168.0.1netmask 255.255.255.0gateway 192.168.0.254dns-nameservers 8.8.8.8# API + Public Networkauto eth1iface eth1 inet staticaddress 7.7.7.7netmask 255.255.255.0•Edit /etc/sysctl.conf :net.ipv4.conf.all.rp_filter = 0net.ipv4.conf.default.rp_filter = 0Then, restart network service :service networking restart•Edit the /etc/hosts file and add folsom-controller, folsom-network and folsom-compute hostnames with correct IP.4.Install Configure NTP :•Install the package :apt-get install -y ntp•Configure /etc/ntp.conf file :server iburstserver 127.127.1.0fudge 127.127.1.0 stratum 10•Restart the service :service ntp restartMySQL Database Service1.Install the packages :apt-get install mysql-server python-mysqldb2.Allow connection from the network :sed -i 's/127.0.0.1/0.0.0.0/g' /etc/mysql/f3.Restart the service :service mysql restart4.Create Databases, Users, Rights :mysql -u root -ppassword <<EOFCREATE DATABASE nova;GRANT ALL PRIVILEGES ON nova.* TO 'nova'@'localhost' \IDENTIFIED BY 'password';GRANT ALL PRIVILEGES ON nova.* TO 'nova'@'192.168.0.1' \IDENTIFIED BY 'password';GRANT ALL PRIVILEGES ON nova.* TO 'nova'@'192.168.0.2' \IDENTIFIED BY 'password';GRANT ALL PRIVILEGES ON nova.* TO 'nova'@'192.168.0.3' \IDENTIFIED BY 'password';CREATE DATABASE cinder;GRANT ALL PRIVILEGES ON cinder.* TO 'cinder'@'localhost' \IDENTIFIED BY 'password';CREATE DATABASE glance;GRANT ALL PRIVILEGES ON glance.* TO 'glance'@'localhost' \IDENTIFIED BY 'password';CREATE DATABASE keystone;GRANT ALL PRIVILEGES ON keystone.* TO 'keystone'@'localhost' \IDENTIFIED BY 'password';CREATE DATABASE quantum;GRANT ALL PRIVILEGES ON quantum.* TO 'quantum'@'localhost' \IDENTIFIED BY 'password';GRANT ALL PRIVILEGES ON quantum.* TO 'quantum'@'192.168.0.2' \IDENTIFIED BY 'password';GRANT ALL PRIVILEGES ON quantum.* TO 'quantum'@'192.168.0.3' \IDENTIFIED BY 'password';FLUSH PRIVILEGES;EOFRabbitMQ Messaging Service1.Install the packages :apt-get install rabbitmq-server2.Change the default password :rabbitmqctl change_password guest passwordKeystone1.Install the packages :apt-get install keystone python-keystone python-keystoneclient2.Edit /etc/keystone/keystone.conf :[DEFAULT]admin_token = passwordbind_host = 0.0.0.0public_port = 5000admin_port = 35357compute_port = 8774verbose = Truedebug = Truelog_file = keystone.loglog_dir = /var/log/keystonelog_config = /etc/keystone/logging.conf[sql]connection = mysql://keystone:password@localhost:3306/keystoneidle_timeout = 200[identity]driver = keystone.identity.backends.sql.Identity[catalog]driver = keystone.catalog.backends.sql.Catalog(...)3.Restart Keystone and create the tables in the database :service keystone restartkeystone-manage db_sync4.Load environment variables :•Create novarc file :export OS_TENANT_NAME=adminexport OS_USERNAME=adminexport OS_PASSWORD=passwordexport OS_AUTH_URL="http://localhost:5000/v2.0/"export SERVICE_ENDPOINT="http://localhost:35357/v2.0"export SERVICE_TOKEN=password•Export the variables :source novarcecho "source novarc">>.bashrc5.Download the data script and fill Keystone database with data (users, tenants, services) :./keystone-data.sh6.Download the endpoint script and create the endpoints (for projects) :./keystone-endpoints.shIf an IP address of the management network on the controller node is different from this example, please use the following:./keystone-endpoints.sh -K <ip address of the management network>Glance1.Install the packages :apt-get install glance glance-api python-glanceclient glance-common2.Configure Glance :•Edit /etc/glance/glance-api.conf and /etc/glance/glance-registry.conf files andmodify :sql_connection = mysql://glance:password@localhost/glanceadmin_tenant_name = serviceadmin_user = glanceadmin_password = passwordFor glance-api.conf, modify :notifier_strategy = rabbitrabbit_password = password•Restart Glance services :service glance-api restart && service glance-registry restart•Create Glance tables into the database :glance-manage db_sync•Download and import Ubuntu 12.04 LTS UEC Image :glance image-create \--location /releases/12.04/release/ubuntu-12.04-server-cloudimg-amd64-disk1.img \--is-public true --disk-format qcow2 --container-format bare --name"Ubuntu"•Check if the image has been introduced in the index :glance image-list+--------------------------------------+--------+-------------+------------------+-----------+--------+| ID | Name | Disk Format | ContainerFormat | Size | Status |+--------------------------------------+--------+-------------+------------------+-----------+--------+| 0d2664d3-cda9-4937-95b2-909ecf8ea362 | Ubuntu | qcow2 | bare| 233701376 | active |+--------------------------------------+--------+-------------+------------------+-----------+--------+•You can also install Glance Replicator (new in Folsom). More informations about ithere.Nova1.Install the packages :apt-get install nova-api nova-cert nova-common \nova-scheduler python-nova python-novaclient nova-consoleauth novnc \ nova-novncproxy2.Configure Nova :•Edit /etc/nova/api-paste.ini file and modify :admin_tenant_name = serviceadmin_user = novaadmin_password = passwordSince we are going to use Cinder for volumes, we should also delete each partconcerning "nova-volume" :============================================================[composite:osapi_volume]use = call:nova.api.openstack.urlmap:urlmap_factory/: osvolumeversions/v1: openstack_volume_api_v1========================================================================================================================[composite:openstack_volume_api_v1]use = call:nova.api.auth:pipeline_factorynoauth = faultwrap sizelimit noauth ratelimit osapi_volume_app_v1keystone = faultwrap sizelimit authtoken keystonecontext ratelimitosapi_volume_app_v1keystone_nolimit = faultwrap sizelimit authtoken keystonecontextosapi_volume_app_v1========================================================================================================================[app:osapi_volume_app_v1]paste.app_factory = nova.api.openstack.volume:APIRouter.factory========================================================================================================================[pipeline:osvolumeversions]pipeline = faultwrap osvolumeversionapp[app:osvolumeversionapp]paste.app_factory = nova.api.openstack.volume.versions:Versions.factory ============================================================•Edit /etc/nova/nova.conf file and modify :[DEFAULT]# MySQL Connection #sql_connection=mysql://nova:password@192.168.0.1/nova# nova-scheduler #rabbit_password=passwordscheduler_driver=nova.scheduler.simple.SimpleScheduler# nova-api #cc_host=192.168.0.1auth_strategy=keystones3_host=192.168.0.1ec2_host=192.168.0.1nova_url=http://192.168.0.1:8774/v1.1/ec2_url=http://192.168.0.1:8773/services/Cloudkeystone_ec2_url=http://192.168.0.1:5000/v2.0/ec2tokensapi_paste_config=/etc/nova/api-paste.iniallow_admin_api=trueuse_deprecated_auth=falseec2_private_dns_show_ip=Truedmz_cidr=169.254.169.254/32ec2_dmz_host=192.168.0.1metadata_host=192.168.0.1metadata_listen=0.0.0.0enabled_apis=ec2,osapi_compute,metadata# Networking #network_api_class=work.quantumv2.api.APIquantum_url=http://192.168.0.1:9696quantum_auth_strategy=keystonequantum_admin_tenant_name=servicequantum_admin_username=quantumquantum_admin_password=passwordquantum_admin_auth_url=http://192.168.0.1:35357/v2.0libvirt_vif_driver=nova.virt.libvirt.vif.LibvirtHybridOVSBridgeDriver linuxnet_interface_driver=work.linux_net.LinuxOVSInterfaceDriver firewall_driver=nova.virt.libvirt.firewall.IptablesFirewallDriver# Cinder #volume_api_class=nova.volume.cinder.API# Glance #glance_api_servers=192.168.0.1:9292image_service=nova.image.glance.GlanceImageService# novnc #novnc_enable=truenovncproxy_base_url=http://192.168.0.1:6080/vnc_auto.htmlvncserver_proxyclient_address=127.0.0.1vncserver_listen=0.0.0.0# Misc #logdir=/var/log/novastate_path=/var/lib/novalock_path=/var/lock/novaroot_helper=sudo nova-rootwrap /etc/nova/rootwrap.confverbose=true•Create Nova tables into the database :nova-manage db sync•Restart Nova services :service nova-api restartservice nova-cert restartservice nova-consoleauth restartservice nova-scheduler restartservice nova-novncproxy restartCinder1.Install the packages :apt-get install -y cinder-api cinder-scheduler cinder-volume iscsitarget \open-iscsi iscsitarget-dkms python-cinderclient linux-headers-`uname -r`2.Since there is a bug in tgtadm, we have to modify /etc/tgt/targets.conf :# include /etc/tgt/conf.d/*.confinclude /etc/tgt/conf.d/cinder_tgt.conf3.Configure & start the iSCSI services :sed -i 's/false/true/g' /etc/default/iscsitargetservice iscsitarget startservice open-iscsi start4.Configure Cinder :•Edit /etc/cinder/cinder.conf file and modify :[DEFAULT]sql_connection = mysql://cinder:password@localhost:3306/cinderrabbit_password = password•Edit /etc/cinder/api-paste.ini file and modify :admin_tenant_name = serviceadmin_user = cinderadmin_password = password•Create the volume (on the second disk) :fdisk /dev/sdb[Create a Linux partition]pvcreate /dev/sdb1vgcreate cinder-volumes /dev/sdb1•Create Cinder tables into the database :cinder-manage db sync•Restart the services :service cinder-api restartservice cinder-scheduler restartservice cinder-volume restartQuantum1.Install the packages :apt-get install quantum-server2.Configure Quantum services :•Edit /etc/quantum/quantum.conf file and modify :core_plugin = \quantum.plugins.openvswitch.ovs_quantum_plugin.OVSQuantumPluginV2auth_strategy = keystonefake_rabbit = Falserabbit_password = password•Edit /etc/quantum/plugins/openvswitch/ovs_quantum_plugin.ini file and modify : [DATABASE]sql_connection = mysql://quantum:password@localhost:3306/quantum[OVS]tenant_network_type = gretunnel_id_ranges = 1:1000enable_tunneling = TrueNoteIt's more handy to choose tunnel mode since you don't have to configureyour physical switches for VLANs.•Edit /etc/quantum/api-paste.ini file and modify :admin_tenant_name = serviceadmin_user = quantumadmin_password = password3.Start the services :service quantum-server restartDashboard (Horizon)Install the packages :apt-get install apache2 libapache2-mod-wsgi openstack-dashboard \memcached python-memcacheOpenStack Dashboard is now available at http://<controller_node>/horizon. We can loginwith admin / password credentials or demo / password.Network NodeIntroductionThe Network node will provide :•Virtual Bridging (Open-vSwitch + Quantum Agent) with tunneling•DHCP Server (Quantum DHCP Agent)•Virtual Routing (Quantum L3 Agent)Common servicesOperating System1.Install Ubuntu with this parameters :•Time zone : UTC•Hostname : folsom-network•Packages : OpenSSH-ServerAfter OS Installation, reboot the server.2.Since Ubuntu 12.04 LTS has OpenStack Essex by default, we are going to use CloudArchives for Folsom :apt-get install ubuntu-cloud-keyringEdit /etc/apt/sources.list.d/cloud-archive.list :deb /ubuntu precise-updates/folsommainUpgrade the system (and reboot if you need) :apt-get update && apt-get upgrade3.Configure the network :•Edit /etc/network/interfaces file :# Management Networkauto eth0iface eth0 inet staticaddress 192.168.0.2netmask 255.255.255.0gateway 192.168.0.254dns-nameservers 8.8.8.8# Data Networkauto eth1iface eth1 inet staticaddress 10.10.10.1netmask 255.255.255.0# Public Bridgeauto eth2iface eth2 inet manualup ifconfig $IFACE 0.0.0.0 upup ip link set $IFACE promisc ondown ifconfig $IFACE down•Edit /etc/sysctl.conf :net.ipv4.ip_forward=1net.ipv4.conf.all.rp_filter = 0net.ipv4.conf.default.rp_filter = 0Then, restart network service :service networking restart•Edit the /etc/hosts file and add folsom-controller, folsom-network and folsom-compute hostnames with correct IP.4.Install Configure NTP :•Install the package :apt-get install -y ntp•Configure /etc/ntp.conf file :server 192.168.0.1•Restart the service :service ntp restartNetwork ServicesOpen-vSwitch1.Install the packages :apt-get install quantum-plugin-openvswitch-agent \quantum-dhcp-agent quantum-l3-agent2.Start Open vSwitch:service openvswitch-switch start3.Create Virtual Bridging :ovs-vsctl add-br br-intovs-vsctl add-br br-exovs-vsctl add-port br-ex eth2ip link set up br-exQuantumConfigure Quantum services :•Edit /etc/quantum/l3_agent.ini file and modify :auth_url = http://192.168.0.1:35357/v2.0admin_tenant_name = serviceadmin_user = quantumadmin_password = passwordmetadata_ip = 192.168.0.1use_namespaces = False•Edit /etc/quantum/api-paste.ini file and modify :auth_host = 192.168.0.1admin_tenant_name = serviceadmin_user = quantumadmin_password = password•Edit /etc/quantum/quantum.conf file and modify :core_plugin = \quantum.plugins.openvswitch.ovs_quantum_plugin.OVSQuantumPluginV2auth_strategy = keystonefake_rabbit = Falserabbit_host = 192.168.0.1rabbit_password = password•Edit /etc/quantum/plugins/openvswitch/ovs_quantum_plugin.ini file and modify : [DATABASE]sql_connection = mysql://quantum:password@192.168.0.1:3306/quantum[OVS]tenant_network_type = gretunnel_id_ranges = 1:1000enable_tunneling = Trueintegration_bridge = br-inttunnel_bridge = br-tunlocal_ip = 10.10.10.1NoteIt's more handy to choose tunnel mode since you don't have to configureyour physical switches for VLANs.•Edit /etc/quantum/dhcp_agent.ini file and add :use_namespaces = FalseStart the services :service quantum-plugin-openvswitch-agent startservice quantum-dhcp-agent restartservice quantum-l3-agent restartVirtual NetworkingCreate Virtual Networking1.Load environment variables :•Create novarc file :export OS_TENANT_NAME=adminexport OS_USERNAME=adminexport OS_PASSWORD=passwordexport OS_AUTH_URL="http://192.168.0.1:5000/v2.0/"export SERVICE_ENDPOINT="http://192.168.0.1:35357/v2.0"export SERVICE_TOKEN=password•Export the variables :source novarcecho "source novarc">>.bashrc2.Download the Quantum script. We are using the "Per-tenant Routers with PrivateNetworks" use-case.3.Edit the script belong your networking (public network, floatings IP).4.Execute the script.L3 Configuration•Copy the external network ID :quantum net-list•Edit /etc/quantum/l3_agent.ini and paste the ID :gateway_external_network_id = ID•Copy the provider router ID :quantum router-list•Edit /etc/quantum/l3_agent.ini and paste the ID :router_id = ID•Restart L3 Agent :service quantum-l3-agent restartCompute NodeIntroductionThe Compute node will provide :•Hypervisor (KVM)•nova-compute•Quantum OVS AgentCommon services1.Install Ubuntu with this parameters :•Time zone : UTC•Hostname : folsom-compute•Packages : OpenSSH-ServerAfter OS Installation, reboot the server .2.Since Ubuntu 12.04 LTS has OpenStack Essex by default, we are going to use CloudArchives for Folsom :apt-get install ubuntu-cloud-keyringEdit /etc/apt/sources.list.d/cloud-archive.list :deb /ubuntu precise-updates/folsommainUpgrade the system (and reboot if you need) :apt-get update && apt-get upgrade3.Configure the network :•Edit /etc/network/interfaces file :# Management Networkauto eth0iface eth0 inet staticaddress 192.168.0.3netmask 255.255.255.0gateway 192.168.0.254dns-nameservers 8.8.8.8# Data Networkauto eth1iface eth1 inet staticaddress 10.10.10.2netmask 255.255.255.0•Edit /etc/sysctl.conf :net.ipv4.conf.all.rp_filter = 0net.ipv4.conf.default.rp_filter = 0Then, restart network service :service networking restart•Edit the /etc/hosts file and add folsom-controller, folsom-network and folsom-compute hostnames with correct IP.4.Install & Configure NTP :•Install the package :apt-get install -y ntp•Configure /etc/ntp.conf file :server 192.168.0.1•Restart the service :service ntp restartHypervisor1.Install the packages that we need :apt-get install -y kvm libvirt-bin pm-utils2.Configure libvirt :•Edit /etc/libvirt/qemu.conf file and add :cgroup_device_acl = ["/dev/null", "/dev/full", "/dev/zero","/dev/random", "/dev/urandom","/dev/ptmx", "/dev/kvm", "/dev/kqemu","/dev/rtc", "/dev/hpet", "/dev/net/tun"]•Disable KVM default virtual bridge to avoid any confusion :virsh net-destroy defaultvirsh net-undefine default•Allow Live Migrations :Edit /etc/libvirt/libvirtd.conf file :listen_tls = 0listen_tcp = 1auth_tcp = "none"Modify libvirtd_opts variable in /etc/init/libvirt-bin.conf file :env libvirtd_opts="-d -l"Edit /etc/default/libvirt-bin file :libvirtd_opts="-d -l"3.Restart libvirt :service libvirt-bin restartNova1.Install the packages :apt-get install nova-compute-kvm2.Configure Nova :•Edit /etc/nova/api-paste.ini file and modify :admin_tenant_name = serviceadmin_user = novaadmin_password = password•Edit /etc/nova/nova-compute.conf file and modify :[DEFAULT]libvirt_type=kvmlibvirt_ovs_bridge=br-intlibvirt_vif_type=ethernetlibvirt_vif_driver=nova.virt.libvirt.vif.LibvirtHybridOVSBridgeDriverlibvirt_use_virtio_for_bridges=True•Edit /etc/nova/nova.conf file and modify :[DEFAULT]# MySQL Connection #sql_connection=mysql://nova:password@192.168.0.1/nova# nova-scheduler #rabbit_host=192.168.0.1rabbit_password=passwordscheduler_driver=nova.scheduler.simple.SimpleScheduler# nova-api #cc_host=192.168.0.1auth_strategy=keystones3_host=192.168.0.1ec2_host=192.168.0.1nova_url=http://192.168.0.1:8774/v1.1/ec2_url=http://192.168.0.1:8773/services/Cloudkeystone_ec2_url=http://192.168.0.1:5000/v2.0/ec2tokensapi_paste_config=/etc/nova/api-paste.iniallow_admin_api=trueuse_deprecated_auth=falseec2_private_dns_show_ip=Truedmz_cidr=169.254.169.254/32ec2_dmz_host=192.168.0.1metadata_host=192.168.0.1metadata_listen=0.0.0.0enabled_apis=metadata# Networking #network_api_class=work.quantumv2.api.APIquantum_url=http://192.168.0.1:9696quantum_auth_strategy=keystonequantum_admin_tenant_name=servicequantum_admin_username=quantumquantum_admin_password=passwordquantum_admin_auth_url=http://192.168.0.1:35357/v2.0libvirt_vif_driver=nova.virt.libvirt.vif.LibvirtHybridOVSBridgeDriver linuxnet_interface_driver=work.linux_net.LinuxOVSInterfaceDriver firewall_driver=nova.virt.libvirt.firewall.IptablesFirewallDriver# Compute #compute_driver=libvirt.LibvirtDriverconnection_type=libvirt# Cinder #volume_api_class=nova.volume.cinder.API# Glance #glance_api_servers=192.168.0.1:9292image_service=nova.image.glance.GlanceImageService# novnc #novnc_enable=truenovncproxy_base_url=http://192.168.0.1:6080/vnc_auto.htmlvncserver_proxyclient_address=127.0.0.1vncserver_listen=0.0.0.0# Misc #logdir=/var/log/novastate_path=/var/lib/novalock_path=/var/lock/novaroot_helper=sudo nova-rootwrap /etc/nova/rootwrap.confverbose=true•Restart Nova services :service nova-api-metadata restartservice nova-compute restartQuantumOpen vSwitch1.Install the packages:apt-get install -y openvswitch-switch2.Start Open vSwitch serviceservice openvswitch-switch start3.Configure Virtual Bridgingovs-vsctl add-br br-intQuantum1.Install the packages :apt-get install -y quantum-plugin-openvswitch-agent2.Edit /etc/quantum/quantum.conf file and modify :core_plugin = \quantum.plugins.openvswitch.ovs_quantum_plugin.OVSQuantumPluginV2auth_strategy = keystonefake_rabbit = Falserabbit_host = 192.168.0.1rabbit_password = password3.Edit /etc/quantum/plugins/openvswitch/ovs_quantum_plugin.ini file and modify :[DATABASE]sql_connection = mysql://quantum:password@192.168.0.1:3306/quantum[OVS]tenant_network_type = gretunnel_id_ranges = 1:1000integration_bridge = br-inttunnel_bridge = br-tunlocal_ip = 10.10.10.2enable_tunneling = True4.Start the Agent :service quantum-plugin-openvswitch-agent restartCreate your first VM1.You can now use OpenStack API or the Dashboard to manage your own IaaS :http://192.168.0.1/horizon with demo / password credentials.2.Edit the security group "Default" to allow ICMP and SSH.3.Create a personal keypair.4.In the Dashboard, go to "Instances" and click "Launch Instance" for spawning a new VM.5.Since Horizon does not manage L3 in Folsom release, we have to configure floating IPfrom Quantum CLI (using demo tenant). To do that, you need to get the ext_net ID andthe port_id of your VM :quantum net-list -- --router:external Truequantum port-list -- --device_id <vm-uuid>6.Now, we are going to create a floating-IP attached to the virtual port of our VM androuted to the external network :quantum floatingip-create --port_id <port_id> <ext_net_id>7.That's it! You should be able to ping your VM using floating IP. ConclusionWe have built a basic architecture for advanced testing purpose. This kind of architectureis close to the production, without High Availability (HA) and some services such as thosefor running OpenStack Object Storage. You can of course add as many compute nodes asyou want. If you need more specific help, please read the official documentation of eachproject or write a post to an OpenStack mailing list.。
OpenStack安装、配置和测试手册
OpenStack安装、配置和测试手册目录一实验环境 (3)二实验拓扑 (3)三安装控制节点 (3)3.1 系统配置 (3)3.2 安装NTP服务 (5)3.3 MySQL安装配置 (5)3.4 Qpid安装配置 (6)3.5 安装OpenStack工具包 (7)3.6 Keystone安装配置 (7)3.6.1 初始化Keystone (7)3.6.2 定义Users、Tenants and Roles (9)3.6.3 定义Services 和API Endpoints (10)3.7 Glance安装配置 (10)3.7.1 初始化Glance (10)3.7.2 创建User、定义Services 和API Endpoints (11)3.7.3 配置Glance服务 (12)3.7.4 Glance测试 (14)3.8 Nova安装配置 (15)3.8.1 初始化Nova (15)3.8.2 创建User、定义Services和API Endpoints (15)3.8.3 配置Nova服务 (16)3.9 Horizon安装配置 (19)3.10 Neutron安装配置 (20)3.10.1 初始化Neutron (20)3.10.2 创建User、定义Services 和API Endpoints (21)3.10.3 配置网络服务 (22)3.11 Cinder安装配置 (26)3.11.1 初始化Cinder (26)3.11.2 创建User、定义Services 和API Endpoints (26)3.11.3 配置Cinder服务 (28)3.12 Swift安装配置 (29)3.12.1 初始化Swift (29)3.12.2 创建User、定义Services 和API Endpoints (29)3.12.3 配置Swift (30)四安装计算节点 (35)4.1 系统配置 (35)4.2 设置时间同步 (37)4.3 配置libvirtd服务 (37)4.4 Neutron安装配置 (38)4.4.1 初始化Neutron-openvswitch (38)4.4.2 配置Neutron服务 (38)4.5 Nova安装配置 (40)4.5.1 初始化Nova-compute (40)4.5.2 配置Nova服务 (40)五测试 (42)一实验环境1、硬件环境一台HP DL380G5服务器2、软件环境CentOS 6.4 x86_64、OpenStack、esxi 5.5二实验拓扑三安装控制节点3.1 系统配置1、导入第三方软件源# rpm -Uvh/pub/epel/6/x86_64/epel-release-6-8.noarch.rpm # rpm -Uvh/rpmforge-release/rpmforge-release-0.5.3-1.el6.rf.x86_64.r pm# yum install/openstack/openstack-havana/rdo-release-havana-7.noar ch.rpm2、修改yum源[root@controller ~]# cat /etc/yum.repos.d/rdo-release.repo[openstack-havana]name=OpenStack Havana Repositorybaseurl=https:///repos/openstack/EOL/openstack-havana/ep el-6/enabled=1gpgcheck=0priority=13、配置/etc/hosts文件4、网络设置5、关闭selinux6、修改/etc/sysctl.conf参数运行以下命令,使其生效:# sysctl –p7、升级系统# yum -y update8、重启机器# reboot3.2 安装NTP服务1、安装NTP时钟同步服务器# yum install -y ntp2、编辑/etc/ntp.conf3、启动ntp服务,设置开机自启动# service ntpd start# chkconfig ntpd on3.3 MySQL安装配置1、安装MySQL# yum install -y mysql mysql-server MySQL-python 2、修改mysql启动文件3、启动MYSQL服务,设置开机启动# service mysqld start# chkconfig mysqld on4、修改root用户密码为openstack# mysqladmin -uroot password 'openstack';history –c 3.4 Qpid安装配置1、安装qpid# yum install -y qpid-cpp-server memcached2、修改/etc/qpidd.conf配置文件,将auth设置为no3、启动qpid服务,设置开机自启动# service qpidd start# chkconfig qpidd on3.5 安装OpenStack工具包# yum install -y openstack-utils3.6 Keystone安装配置3.6.1 初始化Keystone1、安装keystone# yum install -y openstack-keystone2、创建keystone数据库,修改配置文件中的数据库链接# openstack-db --init --service keystone# openstack-config --set /etc/keystone/keystone.conf sql connectionmysql://keystone:keystone@localhost/keystone3、使用openssl随即生成一个令牌,将其存储在配置文件中# export SERVICE_TOKEN=$(openssl rand -hex 10) //随机生成SERVICE_TOKEN值# export SERVICE_ENDPOINT=http://127.0.0.1:35357/v2.0# mkdir /root/work# echo $SERVICE_TOKEN > /root/work/ks_admin_token# cat /root/work/ks_admin_token# openstack-config --set /etc/keystone/keystone.conf DEFAULT admin_token $SERVICE_TOKEN注:将生成的SERVICE_TOKEN值写入文件中保存,以备后续使用,后面涉及到的SERVICE_TOKEN值都是在ks_admin_token文件中获取的。
openstack的安装和部署
openstack的安装和部署1.什么是云计算1:什么是云计算?云计算是通过虚拟化技术去实现的,它是⼀种按量付费的模式!2:为什么要⽤云计算?⼩公司:1年,20⼈+,500w,招⼀个运维,15k,(10台*1.5w,托管IDC机房,8k/年,带宽 100M,5个公⽹ip, 10k/⽉), 买10台云主机,600*10=6000⼤公司:举⾏活动,加集群,把闲置时间出租,超卖(kvm)16G,kvm,64G(ksm),⾦牌⽤户(200w+/⽉)3:云计算有哪些功能?虚拟机的管理平台(计费)kvm:1000宿主机(agent),虚拟出2w虚拟机,虚拟机的详细情况:硬件资源,ip情况统计?虚拟机管理平台:每台虚拟机的管理,都⽤数据库来统计4:云计算的服务类型IAAS 基础设施即服务 ECS云主机⾃⼰部署环境,⾃⼰管理代码和数据infrastructure as an servicePAAS(docker) 平台即服务提供软件的运⾏环境,java ,python,go, c#,nodejs ⾃⼰管理代码和数据platfrom as an serviceSAAS 软件即服务企业邮箱,cdn,rdssoftware as an serviceopenstack实现的是云计算IAAS,开源的云计算平台,apache 2.0,阿⾥云(飞天云平台)2.openstack (soa架构)云平台(keystone认证服务,glance镜像服务,nova计算服务,neutron⽹络服务,cinder存储服务,horizon web界⾯)每个服务:数据库,消息队列,memcached缓存,时间同步⾸页/index.html秒杀/miaosha/index.html会员:/plus/index.html登录:/login/indexnginx+php +mysql(500张表)SOA(拆业务,把每⼀个功能都拆成⼀个独⽴的web服务,每⼀个独⽴的web服务,⾄少拥有⼀个集群)微服务架构:亿级⽤户开源的微服框架阿⾥开源的dubbospring boot⾃动化代码上线 Jenkins + gitlab ci⾃动化代码质量检查 sonarqube官⽹:openstack 版本A-Z 开头3.虚拟机规划controller:内存3G,cpu开启虚拟化,ip:10.0.0.11compute01:内存1G,cpu开启虚拟化(必开),ip:10.0.0.31host解析,[root@controller ~]# vim /etc/hosts127.0.0.1 localhost localhost.localdomain localhost4 localhost4.localdomain4::1 localhost localhost.localdomain localhost6 localhost6.localdomain610.0.0.11 controller10.0.0.31 computer1[root@controller ~]# scp -rp /etc/hosts 10.0.0.31 /etc/hosts4.配置yum源1.挂载光盘[root@computer1 ~]# mount /dev/cdrom /mntmount: /dev/sr0 is write-protected, mounting read-only[root@controller ~]# mount /dev/cdrom /mntmount: /dev/sr0 is write-protected, mounting read-only#查看(如果有内容代表挂载成功)[root@computer1 ~]# ll /mnttotal 686-rw-rw-r-- 1 root root 14 Nov 26 2018 CentOS_BuildTagdrwxr-xr-x 3 root root 2048 Nov 26 2018 EFI-rw-rw-r-- 1 root root 227 Aug 30 2017 EULA-rw-rw-r-- 1 root root 18009 Dec 10 2015 GPLdrwxr-xr-x 3 root root 2048 Nov 26 2018 imagesdrwxr-xr-x 2 root root 2048 Nov 26 2018 isolinuxdrwxr-xr-x 2 root root 2048 Nov 26 2018 LiveOSdrwxrwxr-x 2 root root 663552 Nov 26 2018 Packagesdrwxrwxr-x 2 root root 4096 Nov 26 2018 repodata-rw-rw-r-- 1 root root 1690 Dec 10 2015 RPM-GPG-KEY-CentOS-7-rw-rw-r-- 1 root root 1690 Dec 10 2015 RPM-GPG-KEY-CentOS-Testing-7-r--r--r-- 1 root root 2883 Nov 26 2018 TRANS.TBL[root@controller ~]# scp -rp openstack_rpm.tar.gz 10.0.0.31:/optrz 上传openstack_rpm.tar.gz到/opt,并解压⽣成repo配置⽂件root@controller opt]# vim/etc/yum.repos.d/local.repo[local]name=localbaseurl=file:///mntgpgcheck=0[openstack]name=openstackbaseurl=file:///opt/repogpgcheck=0root@controller opt]#echo 'mount /dev/cdrom /mnt' >>/etc/rc.localroot@controller opt]# chmod +x /etc/rc.d/rc.local[root@controller opt]# scp -rp /etc/yum.repos.d/local.repo 10.0.0.31:/etc/yum.repos.d/local.repo [root@computer1 opt]# vim /etc/yum.repos.d/local.repo[root@computer1 opt]# echo 'mount /dev/cdrom /mnt' >>/etc/rc.local[root@computer1 opt]# chmod +x /etc/rc.d/rc.local#注意:两台都要配2.安装基础服务在所有节点上执⾏:a:时间同步[root@controller opt]# yum install -y chrony[root@computer1 opt]# yum install -y chrony#编辑控制节点配置⽂件[root@controller opt]# vim /etc/chrony.conf1.将 server iburst 改成server iburst另三⾏删掉2.将 #allow 192.168.0.0/1改成allow 10.0.0.0/24#重启服务[root@controller opt]# vim /etc/chrony.confsystemctl restart chronyd#编辑计算节点[root@computer1 opt]# vim /etc/chrony.conf将 server iburst 改成server 10.0.0.11 iburst另三⾏删掉[root@computer1 opt]# systemctl restart chronyd5.安装openstack客户端和openstack-selinux1.在所有节点上执⾏[root@control ~]# yum install python-openstackclient openstack-selinux -y[root@computer1 ~]# yum install python-openstackclient openstack-selinux -y查看官⽅⽂档6.安装数据库以及安全初始化2.仅控制节点执⾏:[root@control ~]# yum install mariadb mariadb-server python2-PyMySQL -y在官⽅⽂档上有https:///mitaka/zh_CN/install-guide-obs/environment-sql-database.html3.创建并编辑 /etc/f.d/f[root@control ~]# cat /etc/f.d/f[mysqld]bind-address = 10.0.0.11 # 值为控制节点的管理⽹络IP地址以使得其它节点可以通过管理⽹络访问数据库default-storage-engine = innodb #默认存储引擎innodb_file_per_table #为每个表独⽴表空间⽂件max_connections = 4096 #最⼤连接数collation-server = utf8_general_ci # 默认字符集character-set-server = utf84.启动mariadb 并加⼊开机⾃启[root@control ~]# systemctl start mariadb[root@control ~]# systemctl enable mariadb5. 为了保证数据库服务的安全性,运⾏[root@control ~]# mysql_secure_installation ⼀定要执⾏要不然后⾯时间同步会有坑脚本。
OpenStacknewton部署
OpenStacknewton部署一、环境共需要2台主机安装cento7.2关闭防火墙(控制节点和计算节点都做)关闭elinu某/etc/yconfig/elinu某SELINU某=diabledetenforce0关闭iptable ytemctltartfirewalld.erviceytemctltopfirewalld.erviceytemctl diablefirewalld.ervice下面的表格给出了需要密码的服务列表以及它们的关系:密码名称描述密码名称ADMIN_PASSCEILOMETER_DBPASSCEILOMETER_PASSCINDER_DBPASSCINDER_PA SSDASH_DBPASSDEMO_PASSGLANCE_DBPASSGLANCE_PASSHEAT_DBPASSHEAT_DO MAIN_PASSHEAT_PASSKEYSTONE_DBPASSNEUTRON_DBPASSNEUTRON_PASSNOVA_ DBPASSNOVA_PASSRABBIT_PASSSWIFT_PASSadmin用户密码描述数据库密码(不能使用变量)数据库的root密码Telemetry服务的数据库密码Telemetry服务的ceilometer用户密码块设备存储服务的数据库密码块设备存储服务的cinder密码Databaepawordforthedahboarddemo用户的密码镜像服务的数据库密码镜像服务的glance用户密码Orchetration服务的数据库密码Orchetration域的密码Orchetration服务中``heat``用户的密码认证服务的数据库密码网络服务的数据库密码网络服务的neutron用户密码计算服务的数据库密码计算服务中``nova``用户的密码RabbitMQ的guet用户密码对象存储服务用户``wift``的密码1.控制节点服务器控制节点共配置2块网卡eth1:192.168.100.181eth2:不设置ip为trunk模式添加/etc/hot设置NTP服务#yumintallchrony编辑/etc/chrony.confallow192.168.100.0/24允许192.168.100.0网段访问启动NTP服务#ytemctlenablechronyd.ervice#ytemctltartchronyd.ervice安装opentack源及软件包yumintallcento-releae-opentack-newtonyumupgradeyumintallpython-opentackclientyumintallopentack-elinu某yumintallmariadbmariadb-erverpython2-PyMySQLyumintallrabbitmq-erveryumintallopentack-nova-apiopentack-nova-conductoropentack-nova-conoleopentack-neutron-linu某bridgeebtableipetyumintallopentack-dahboard开启nova用户的登录权限.uermod-/bin/bahnova生成秘钥(各个计算节点执行)控制节点也需要互信u–nova/ur/bin/h-keygen-tra/ur/bin/h-keygen-tda所有计算节点均配置cat<<EOF>~/.h/configHot某StrictHotKeyCheckingnoUerKnownHotFile=/dev/nullEOFcpid_da.pub192.168.100.181:/var/lib/nova/.h/id_da.pub3cpid_r a.pub192.168.100.181:/var/lib/nova/.h/id_ra.pub3controller (192.168.100.181):catid_da.pubid_da.pub2id_ra.pubid_ra.pub2id_ra.pub3id_da.pub 3>authorized_keychmod644authorized_key修改权限chownnova:nova/var/lib/nova/.h/id_ra/var/lib/nova/.h/authori zed_key数据库配置[myqld]bind-addre=192.168.100.181default-torage-engine=innodbinnodb_file_per_tablema某_connection=4096 collation-erver=utf8_general_cicharacter-et-erver=utf8启动mariadb#ytemctlenablemariadb.ervice#ytemctltartmariadb.ervic为了保证数据库服务的安全性,运行``myql_ecure_intallation``脚本。
Openstack_newton手动安装配置
Openstack_newton⼿动安装配置Openstack-newon版本安装安装环境Centos7,vmware12.2单节点,单⽹卡安装准备⼯作NAT⽅式下的⽹络配置:1.找到需要的⽹络配置参数:打开⽹络设置具体步骤如下出现虚拟机创建双⽹卡选取NAT⽹络模式,详细⽹络配置见上图外⽹:内⽹:下⾯是本⼈的⽹络配置(此虚拟机图⽚与本⼈虚拟机不同)[root@localhost ~]# cat /etc/sysconfig/network-scripts/ifcfg-eno16777736 TYPE="Ethernet"BOOTPROTO=staticDEFROUTE="yes"IPV4_FAILURE_FATAL="no"IPV6INIT="yes"IPV6_AUTOCONF="yes"IPV6_DEFROUTE="yes"IPV6_FAILURE_FATAL="no"NAME="eno16777736"UUID="e52041f9-6cce-49f5-9f75-dced407765a4"DEVICE="eno16777736"ONBOOT="yes"IPADDR=192.168.174.222NETMASK=255.255.255.0GATEWAY=192.168.174.2PEERDNS="yes"DNS1=8.8.8.8IPV6_PEERDNS=yesIPV6_PEERROUTES=yes修改主机名:[root@localhost ~]# hostnamectl set-hostname controller --static –transient 修改hosts⽂件:[root@controller ~]# vi /etc/hosts192.168.174.222 controller安装NTP_SERVER[root@controller ~]# yum install chrony启动ntp:[root@controller ~]# systemctl enable chronyd.service[root@controller ~]# systemctl start chronyd.service检查ntp[root@controller ~]# chronyc sources效果如图:安装rdo源:[root@controller ~]# yum install centos-release-openstack-newton –y[root@controller ~]# yum install https:///doc/16d70a284a73f242336c1eb91a37f111f1850dfb.html /repos/rdo-release.rpm -y 进⾏升级:[root@controller ~]# yum upgrade安装openstack客户端:[root@controller ~]# yum install python-openstackclient–y[root@controller ~]# yum install openstack-selinux -y安装mysql数据库:[root@controller ~]# yum install mariadbmariadb-server python2-PyMySQL –y配置mysql/etc//doc/16d70a284a73f242336c1eb91a37f111f1850dfb.htmlf.d//doc/16d70a284a73f242336c1eb91a37f111f1850dfb.html f[root@controller ~]# vim /etc//doc/16d70a284a73f242336c1eb91a37f111f1850dfb.htmlf.d//doc/16d70a284a73f242336c1eb91a37f111f1850dfb.html f[mysqld]bind-address = 0.0.0.0default-storage-engine = innodbinnodb_file_per_tablemax_connections = 4096collation-server = utf8_general_cicharacter-set-server = utf8完成安装:Start the database service and configure it to start when the system boots: [root@controller ~]# systemctl enable mariadb.service[root@controller ~]# systemctl start mariadb.service设置mysql⽤户root登陆密码:root[root@controller ~]# mysql_secure_installation安装消息队列:Install the package[root@controller ~]# yum install rabbitmq-server –y启动:[root@controller ~]# systemctl enable rabbitmq-server.service[root@controller ~]# systemctl start rabbitmq-server.service创建⽤户Add the openstack user:[root@controller ~]# rabbitmqctladd_useropenstack RABBIT_PASS设置权限Permit configuration, write, and read access for the openstack user[root@controller ~]# rabbitmqctlset_permissionsopenstack ".*" ".*" ".*"安装memcached[root@controller ~]# yum install memcached python-memcached–y设置开机启动:[root@controller ~]# systemctl enable memcached.service[root@controller ~]# systemctl start memcached.service安装认证服务:keystone1.To create the database, complete the following actions:[root@controller ~]# mysql -u root -prootCreate the keystone database:MariaDB [(none)]> CREATE DATABASE keystone;Grant proper access to the keystone database:MariaDB [(none)]> G RANT ALL PRIVILEGES ON keystone.* TO 'keystone'@'localhost' \-> IDENTIFIED BY 'KEYSTONE_DBPASS';Query OK, 0 rows affected (0.00 sec)MariaDB [(none)]>GRANT ALL PRIVILEGES ON keystone.* TO 'keystone'@'%' \-> IDENTIFIED BY 'KEYSTONE_DBPASS';Query OK, 0 rows affected (0.00 sec)1.Run the following command to install the packages:2.dit the /etc/keystone/keystone.conf file and complete the following actions: In the [database] section, configure database access:Replace KEYSTONE_DBPASS with the password you chose for the database.In the [token] section, configure the Fernet token provider:3.pulate the Identity service database:同步数据库#su -s /bin/sh -c "keystone-manage db_sync" keystone4.nitialize Fernet key repositories:#keystone-manage fernet_setup --keystone-user keystone --keystone-groupReplace ADMIN_PASS with a suitable password for an administrative user。
手动安装OpenStack 实验2:认证服务Keystone的安装、配置
实验二:认证服务Keystone的安装、配置实验目的本次实验的目的是为了让学生通过实际安装配置Keystone来加深对Keystone组件的理解。
(本次实验Keystone安装在controller上)实验内容配置认证服务配置apache服务创建服务实体和API端点创建一个domain,projects、users、roles验证操作创建OpenStack脚本实验步骤①、首先输入密码123456,登录进入虚拟机。
②、然后单击Terminal,进入命令行界面。
③、由于所有步骤与操作均需要在root权限下执行,所以需要切换到root用户下:su输入密码:1234561. 配置认证服务(CONTROLLER下)以root用户身份进入数据库(本环境中默认MYSQL数据库密码为123456):mysql -u root -p创建keystone数据库:CREATE DATABASE keystone;赋予keystone相关权限(替换KEYSTONE_DBPASS为你自己的密码,如123456):GRANT ALL PRIVILEGES ON keystone.* TO 'keystone'@'localhost' IDENTIFIED BY '123456';GRANT ALL PRIVILEGES ON keystone.* TO 'keystone'@'%' IDENTIFIED BY '123456';退出数据库:quit生成一个20位随机值作为初始配置期间管理令牌并记录下来:openssl rand -hex 10例如:我们这里生成的值为34755335fed9c5827e34禁用keystone自动启动:echo "manual" > /etc/init/keystone.override安装软件包keystone apache2 libapache2-mod-wsgi:apt-get install keystone apache2 libapache2-mod-wsgi编辑/etc/keystone/keystone.conf:gedit /etc/keystone/keystone.conf在[DEFAULT]下面添加(替换ADMIN_TOKEN为之前生成的20位随机数,例如本例中生成的34755335fed9c5827e34),记得把注释的#去掉。
openstack安装配置文档
openstack(kilo版)安装配置文档写在前面:本文档所有指令在拷贝的时候注意空格和换行,由于文档的排版原因可能会出现自动换行等误差。
一、实验环境物理机器上的3台虚拟机分别模拟控制节点、网络节点、计算节点。
采用VMware虚拟机管理软件,首先建立一个模板,在上面安装第五部分所涉及到的基本组件,分别克隆出3台虚拟机作为控制、网络、计算节点。
虚拟机操作系统为Ubuntu 14.04.3,openstack版本为kilo版。
所需各部分组件均采用apt-get自动安装。
二、openstack的两种常用上网方式1、在官方文档的三个网卡基础上,我们使用第四个网卡上网(NAT 方式或桥接方式均可)。
另外三个网卡采用host-only方式。
2、使用管理网络上网。
本文采用第二种方式对网络进行配置,即将管理网络根据自己的网络环境配置成可上网的IP地址段(NAT和host-only均可)。
由于对第一种方式进行尝试时最终会遇到ping不通外网的情况,所以不建议尝试。
具体可见/thread-13508-1-1.html三、各节点的网络配置各节点建立好以后,根据openstack-install-guide-apt-kilo官方文档对各节点进行网络配置。
本例采用OpenStack Networking (neutron)方式进行网络配置。
使用OpenStack网络(neutron)的架构样例中,需要一个控制节点、一个网络节点以及至少一个计算节点。
控制节点包含一个在管理网络上的网络接口。
网络节点在包含一个在管理网络上的网络接口,一个在实例隧道网络上的网络接口和一个在外部网络上的网络接口。
计算节点包含一个在管理网络上的网络接口和一个在实例隧道网络上的接口。
所以此时需要在虚拟机管理界面添加虚拟网络,由于采用第二部分提到的第二种方式(即管理网络上网),所以网络分配如下:◆管理网络使用 192.168.109.0/24 带有网关 192.168.109.2◆实例隧道网络使用 10.0.1.0/24 无网关◆外部通道网络使用192.168.109.0/24 带有网关192.168.109.2首先需要配置管理网络采用NAT方式上网:VMware默认VMnet8为NAT模式,打开系统的网络适配器设置,可以看到VMnet8的网络配置信息,如下图:这个ip地址,因个人而异,也就是说不同网络,不同环境,这个ip变化的概率是很大的。
- 1、下载文档前请自行甄别文档内容的完整性,平台不提供额外的编辑、内容补充、找答案等附加服务。
- 2、"仅部分预览"的文档,不可在线预览部分如存在完整性等问题,可反馈申请退款(可完整预览的文档不适用该条件!)。
- 3、如文档侵犯您的权益,请联系客服反馈,我们会尽快为您处理(人工客服工作时间:9:00-18:30)。
Openstack-newon版本安装安装环境Centos7,vmware12.2单节点,单网卡安装准备工作NAT方式下的网络配置:1.找到需要的网络配置参数:打开网络设置具体步骤如下出现虚拟机创建双网卡选取NAT网络模式,详细网络配置见上图外网:内网:下面是本人的网络配置(此虚拟机图片与本人虚拟机不同)[root@localhost ~]# cat /etc/sysconfig/network-scripts/ifcfg-eno16777736 TYPE="Ethernet"BOOTPROTO=staticDEFROUTE="yes"IPV4_FAILURE_FATAL="no"IPV6INIT="yes"IPV6_AUTOCONF="yes"IPV6_DEFROUTE="yes"IPV6_FAILURE_FATAL="no"NAME="eno16777736"UUID="e52041f9-6cce-49f5-9f75-dced407765a4"DEVICE="eno16777736"ONBOOT="yes"IPADDR=192.168.174.222NETMASK=255.255.255.0GATEWAY=192.168.174.2PEERDNS="yes"DNS1=8.8.8.8IPV6_PEERDNS=yesIPV6_PEERROUTES=yes修改主机名:[root@localhost ~]# hostnamectl set-hostname controller--static –transient 修改hosts文件:[root@controller ~]# vi /etc/hosts192.168.174.222 controller安装NTP_SERVER[root@controller ~]# yum install chrony启动ntp:[root@controller ~]# systemctl enable chronyd.service[root@controller ~]# systemctl start chronyd.service检查ntp[root@controller ~]# chronyc sources效果如图:安装rdo源:[root@controller ~]# yum install centos-release-openstack-newton –y[root@controller ~]# yum install https:///repos/rdo-release.rpm -y 进行升级:[root@controller ~]# yum upgrade安装openstack客户端:[root@controller ~]# yum install python-openstackclient –y[root@controller ~]# yum install openstack-selinux -y安装mysql数据库:[root@controller ~]# yum install mariadb mariadb-server python2-PyMySQL –y配置mysql /etc/f.d/f[root@controller ~]# vim /etc/f.d/f[mysqld]bind-address = 0.0.0.0default-storage-engine = innodbinnodb_file_per_tablemax_connections = 4096collation-server = utf8_general_cicharacter-set-server = utf8完成安装:Start the database service and configure it to start when the system boots: [root@controller ~]# systemctl enable mariadb.service[root@controller ~]# systemctl start mariadb.service设置mysql用户root登陆密码:root[root@controller ~]# mysql_secure_installation安装消息队列:Install the package[root@controller ~]# yum install rabbitmq-server –y启动:[root@controller ~]# systemctl enable rabbitmq-server.service[root@controller ~]# systemctl start rabbitmq-server.service创建用户Add the openstack user:[root@controller ~]# rabbitmqctl add_user openstack RABBIT_PASS设置权限Permit configuration, write, and read access for the openstack user[root@controller ~]# rabbitmqctl set_permissions openstack ".*" ".*" ".*"安装memcached[root@controller ~]# yum install memcached python-memcached –y设置开机启动:[root@controller ~]# systemctl enable memcached.service[root@controller ~]# systemctl start memcached.service安装认证服务:keystone1.To create the database, complete the following actions:[root@controller ~]# mysql -u root -prootCreate the keystone database:MariaDB [(none)]> CREATE DATABASE keystone;Grant proper access to the keystone database:MariaDB [(none)]> G RANT ALL PRIVILEGES ON keystone.* TO 'keystone'@'localhost' \-> IDENTIFIED BY 'KEYSTONE_DBPASS';Query OK, 0 rows affected (0.00 sec)MariaDB [(none)]> GRANT ALL PRIVILEGES ON keystone.* TO 'keystone'@'%' \-> IDENTIFIED BY 'KEYSTONE_DBPASS';Query OK, 0 rows affected (0.00 sec)1.Run the following command to install the packages:2.dit the /etc/keystone/keystone.conf file and complete the following actions: In the [database] section, configure database access:Replace KEYSTONE_DBPASS with the password you chose for the database.In the [token] section, configure the Fernet token provider:3.pulate the Identity service database:同步数据库# su -s /bin/sh -c "keystone-manage db_sync" keystone4.nitialize Fernet key repositories:# keystone-manage fernet_setup --keystone-user keystone --keystone-group 5.strap the Identity service:Replace ADMIN_PASS with a suitable password for an administrative user。
Configure the Apache HTTP server1.Edit the /etc/httpd/conf/httpd.conf file and configure the ServerName option toreference the controller node:2.Create a link to the /usr/share/keystone/wsgi-keystone.conf file:3.Start the Apache HTTP service and configure it to start when the system boots:4.Configure the administrative account.Create a domain, projects, users, and roles1.This guide uses a service project that contains a unique user for each service that youadd to your environment. Create the service project--description "Service Project" service2.Regular (non-admin) tasks should use an unprivileged project and user. As anexample, this guide creates the demo project and user.Create the demo project:--description "Demo Project" demoCreate the demo user:--password-prompt demo密码:demoCreate the user role:openstack role create userAdd the user role to the demo project and user:Verify operation1.For security reasons, disable the temporary authentication token mechanism:Edit the /etc/keystone/keystone-paste.ini file and remove admin_token_auth from the [pipeline:public_api],[pipeline:admin_api], and [pipeline:api_v3] sections.2.Unset the temporary OS_AUTH_URL and OS_PASSWORD environment variable:3.As the admin user, request an authentication token:--os-project-name admin --os-username admin token issueCreating the scripts1.Edit the admin-openrc file and add the following content:export OS_IMAGE_API_VERSION=2执行[root@controller ~]# . admin-openrc[root@controller~]# openstack --os-auth-url http://controller:35357/v3 --os-project-domain-name default --os-user-domain-name default --os-project-name admin --os-username admin token issueUsing the scripts1.Load the admin-openrc file to populate environment variables with the location of the Identity service and the admin project and user credentials:2.Request an authentication token:openstack token issueImage service1.To create the database, complete these steps:Use the database access client to connect to the database server as the root user:Create the glance database:Grant proper access to the glance database:3.To create the service credentials, complete these steps:$ openstack user create --domain default --password-prompt glance Add the admin role to the glance user and service project:Create the glance service entity:--description "OpenStack Image" imageCreate the Image service API endpoints:image public http://controller:9292image internal http://controller:9292openstack endpoint create --region RegionOne \image admin http://controller:9292安装glance:1.Edit the /etc/glance/glance-api.conf file and complete the following actions:In the [database] section, configure database access:In the [keystone_authtoken] and [paste_deploy] sections, configure Identity service access:In the [glance_store] section, configure the local file system store and location of image files:2.Edit the /etc/glance/glance-registry.conf file and complete the following actions: In the [database] section, configure database access:In the [keystone_authtoken] and [paste_deploy] sections, configure Identity serviceaccess:3.Populate the Image service database:Finalize installation2.Download the source image:4.format, and public visibility so all projects can access it:5.Confirm upload of the image and validate attributes:安装nova1.To create the databases, complete these steps:Use the database access client to connect to the database server as the root user:Create the nova_api and nova databases:Grant proper access to the databases:2.To create the service credentials, complete these steps:Create the nova user:密码:novaAdd the admin role to the nova user:Create the nova service entity:3.Create the Compute service API endpoints:openstack endpoint create --region RegionOne \ compute internal http://c ontroller:8774/v2.1/%\(tenant_id\)sopenstack endpoint create --region RegionOne \ compute admin http://cont roller:8774/v2.1/%\(tenant_id\)sInstall and configure components1. Install and configure components2.it the /etc/nova/nova.conf file and complete the following actions:In the [DEFAULT] section, enable only the compute and metadata APIs:In the [api_database] and [database] sections, configure database access:In the [DEFAULT] section, configure RabbitMQ message queue access:In the [DEFAULT] and [keystone_authtoken] sections, configure Identity service access:In the [DEFAULT] section, configure the my_ip option to use the management interface IP address of the controller node:In the [DEFAULT] section, enable support for the Networking service:In the [vnc] section, configure the VNC proxy to use the management interface IP address of the controller node:In the [glance] section, configure the location of the Image service API:In the [oslo_concurrency] section, configure the lock path:Populate the Compute databases:Finalize installationInstall and configure a compute node(注:以下文件所需配置的大部分内容已经在上步骤已经完成,只需配置没有配置的即可)2. Edit the /etc/nova/nova.conf file and complete the following actions:In the [DEFAULT] section, enable only the compute and metadata APIs:In the [DEFAULT] section, configure RabbitMQ message queue access:In the [DEFAULT] and [keystone_authtoken] sections, configure Identity service access:In the [DEFAULT] section, configure the my_ip option:In the [DEFAULT] section, enable support for the Networking service:In the [vnc] section, enable and configure remote console access:In the [glance] section, configure the location of the Image service API:In the [oslo_concurrency] section, configure the lock path:Finalize installation1.Determine whether your compute node supports hardware acceleration for virtualmachines:If this command returns a value of one or greater, your compute node supports hardware acceleration which typically requires no additional configuration.If this command returns a value of zero, your compute node does not support hardware acceleration and you must configure libvirt to use QEMU instead of KVM.输出值大于2 libvirt 配置成KVMEdit the [libvirt] section in the /etc/nova/nova.conf file as follows:2.Start the Compute service including its dependencies and configure them to startautomatically when the system boots:3.List service components to verify successful launch and registration of each process:openstack compute service listNetworking servicePrerequisites1.To create the database, complete these steps:Use the database access client to connect to the database server as the root user:Create the neutron database:Grant proper access to the neutron database, replacing NEUTRON_DBPASS with a suitable password:2.To create the service credentials, complete these steps:Create the neutron user:密码:neutronAdd the admin role to the neutron user:Create the neutron service entity:3.Create the Networking service API endpoints:openstack endpoint create --region RegionOne \openstack endpoint create --region RegionOne \Configure the metadata agentNetworking Option 2: Self-service networksConfigure the server component1. Edit the /etc/neutron/neutron.conf file and complete the following actions:In the [database] section, configure database access:In the [DEFAULT] section, enable the Modular Layer 2 (ML2) plug-in, router service, and overlapping IP addresses:In the [DEFAULT] section, configure RabbitMQ message queue access:In the [DEFAULT] and [keystone_authtoken] sections, configure Identity service access:In the [DEFAULT] and [nova] sections, configure Networking to notify Compute of network topology changes:In the [oslo_concurrency] section, configure the lock path:Configure the Modular Layer 2 (ML2) plug-in1.Edit the /etc/neutron/plugins/ml2/ml2_conf.ini file and complete the followingactions:In the [ml2] section, enable flat, VLAN, and VXLAN networks:In the [ml2] section, enable VXLAN self-service networks:In the [ml2] section, enable the Linux bridge and layer-2 population mechanisms:In the [ml2] section, enable the port security extension driver:In the [ml2_type_flat] section, configure the provider virtual network as a flat network:In the [ml2_type_vxlan] section, configure the VXLAN network identifier range for self-service networks:rules:Configure the Linux bridge agentEdit the /etc/neutron/plugins/ml2/linuxbridge_agent.ini file and complete the following actions:In the [linux_bridge] section, map the provider virtual network to the provider physical network interface:In the [vxlan] section, enable VXLAN overlay networks, configure the IP address of the physical network interface that handles overlay networks, and enable layer-2 population:In the [securitygroup] section, enable security groups and configure the LinuxConfigure the layer-3 agentEdit the /etc/neutron/l3_agent.ini file and complete the following actions:In the [DEFAULT] section, configure the Linux bridge interface driver and external network bridge:Configure the DHCP agentEdit the /etc/neutron/dhcp_agent.ini file and complete the following actions:•In the [DEFAULT] section, configure the Linux bridge interface driver, Dnsmasq DHCP driver, and enable isolated metadata so instances on providernetworks can access metadata over the network:Install the componentsConfigure the common component Edit the /etc/neutron/neutron.conf file and complete the following actions:•In the [database] section, comment out any connection options because compute nodes do not directly access the database.•In the [DEFAULT] section, configure RabbitMQ message queue access:In the [DEFAULT] and [keystone_authtoken] sections, configure Identity service access:In the [oslo_concurrency] section, configure the lock path:Configure networking options Configure Compute to use NetworkingEdit the /etc/nova/nova.conf file and complete the following actions: •In the [neutron] section, configure access parameters:Finalize installationRestart the Compute service:Start the Linux bridge agent and configure it to start when the system boots:1. The Networking service initialization scripts expect a symboliclink /etc/neutron/plugin.ini pointing to the ML2 plug-in configurationfile, /etc/neutron/plugins/ml2/ml2_conf.ini. If this symbolic link does not exist, create it using the following command:2. Populate the database:3. Restart the Compute API service:4. Start the Networking services and configure them to start when the system boots.For both networking options:For networking option 2, also enable and start the layer-3 service:验证网络配置:the dashboard on the controller node1. Edit the /etc/openstack-dashboard/local_settings file and complete the following actions:•Configure the dashboard to use OpenStack services onthe controller node:•Allow all hosts to access the dashboard:•Configure the memcached session storage service:•Enable the Identity API version 3:•Enable support for domains:•Configure API versions:•Configure default as the default domain for users that you create via the dashboard:•Configure user as the default role for users that you create via the dashboard:•If you chose networking option 1, disable support for layer-3 networking services:•Optionally, configure the time zone:Finalize installationOK,安装完成可以使用啦刚开始进入的时候先创建网络网络创建完毕后创建云主机类型Ok可以创建虚拟机啦由于做的比较简单当下一步到网络的时候就可以直接点击创建云主机啦OK大功告成。