
随译典俄语电子词典st500简介.doc
随译典俄语电子词典ST500简介
随译典ST500电子词典是中俄边贸翻译学习机,是“随译典俄汉专家”系列中的最新版电子词典,产品主要特点:8部海量专业词典,集俄汉、
汉俄、英俄、俄英、俄俄、英汉、汉英、英英、词典等专业词典为一体。
该产品具有超大彩色屏幕,手写\软键盘\键盘三输入,10mm超薄设计。
该产品不但适合中国人还适合俄罗斯语系及英语语系国家的人们使用。
真切希望该产品能为您的工作和学习带来快捷和方便。
1、海量词汇
(1)、28种行业分类词典,涉及医学、财务、地域、组织服装、通讯、宗教、体育、建筑、边贸等行业的大量词汇,一机在手得心应手。
以满足各领域的专
业人士使用;该词典经俄籍专家校对,翻译更准确。
(2)、俄汉80万、汉俄80万。
(3)、英俄30万、俄英30万、俄俄26万。
(4)、英汉10万、汉英10万、英英12万。
2、独创中俄双引擎翻译超级搜索系统,全球首次实现中文俄语即时翻译,会中文
就能说俄语,会俄语就能说中文。
3、实用而全面的俄汉和英汉双语会话;俄汉英三语发音;
4、科学计算器和贸易计算器便捷实用,本地时间、世界时间和万年历随时查。
5、该产品使用超大彩色屏幕,LCD为低温屏,可适合寒冷气候使用;手写\软键
盘\键盘三输入,10mm超薄设计。
6、使用2G的超大容量存储体;电影、动漫、FLASH、歌曲、音乐、图片浏览……
随心随放;游戏、电影、MP3、E-BOOK全支持,任意下载;录音机和电子支持中英文听书(广播)功能。
7、方便的PDA功能,电话簿、名片、备忘、约会等功能,安排事务井井有条,支持
中、英、俄三语输入。
8、PC-LINK电脑连接线支持网络下载。
精美包装,随机附件:USB电脑连接线、充电器、触摸笔、黑色真皮皮套、高档耳机、说明书、保修卡、合格证。
扑灭-迈克尔·扑灭 ST50022STDQ 产品说明书
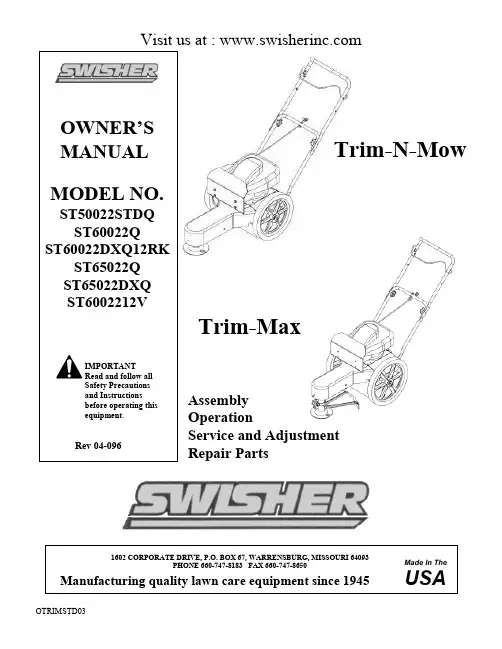
Visit us at : Trim-N-MowTrim-MaxIMPORTANTRead and follow allSafety PrecautionsAssemblyOperationService and AdjustmentRepair PartsLIMITED WARRANTYThe manufacturer’s warranty to the original consumer purchaser is: This product is free from defects in materials and workmanship for a period of two (2) years from the date of purchase by the original consumer purchaser. We will repair or replace, at our discretion, parts found to be defective due to materials or workmanship. This warranty is subject to the following limitations and exclusions:1) Engine Warranty All engines utilized on our products have a separate warranty extendedto them by the individual engine manufacturer. Any engine servicedifficulty is the responsibility of the engine manufacturer and in no wayis Swisher Mower Co., Inc. or its agents responsible for the enginewarranty. The Briggs & Stratton Engine Service Hot-Line is 1-800-233-3723. The Tecumseh Engine Service Hot-Line is 1-800-558-5402.2) Commercial Use This product is not intended for commercial use and carries nocommercial warranty.3) Limitation This warranty applies only to products which have been properlyassembled, adjusted, and operated in accordance with the instructionscontained within this manual. This warranty does not apply to anyproduct of Swisher Mower Co., Inc., that has been subject to alteration,misuse, abuse, improper assembly or installation, shipping damage, or tonormal wear of the product.4) Exclusions Excluded from this warranty are normal wear, normal adjustments, andnormal maintenance.In the event you have a claim under this warranty, you must return the product to an authorized service dealer. All transportation charges, damage, or loss incurred during transportation of parts submitted for replacement or repair under this warranty shall be borne by the purchaser. Should you have any questions concerning this warranty, please contact us toll-free at 1-800-222-8183. The model number, serial number, date of purchase, and the name of the authorized Swisher dealer from whom you purchased the mower will be needed before any warranty claim can be processed.THIS WARRANTY DOES NOT APPLY TO ANY INCIDENTAL OR CONSEQUENTIAL DAMAGES AND ANY IMPLIED WARRANTIES ARE LIMITED TO THE SAME TIME PERIODS STATED HEREIN FOR ALL EXPRESSED WARRANTIES. Some states do not allow the limitation of consequential damages or limitations on how long an implied warranty may last, so the above limitations or exclusions may not apply to you. This warranty gives you specific legal rights and you may have other rights, which vary from state-to-state. This is a limited warranty as defined by the Magnuson-Moss Act of 1975.• Read, understand and follow all instructions in the manual and on the trimmer before starting• Read this manual carefully. Become familiar with the controls and how to operate the unit properly.• Only allow responsible adults, who are familiar with the instructions, to operate the unit.• Clear the area of objects such as rocks, toys, etc. that could be thrown by the unit.• Be sure the area is clear of other people before trimming. Stop the unit if anyone enters the area.• Be aware of the direction of the trimmer discharge and do not direct it at anyone. Do not direct trimmer discharge at breakable objects, such as windows, etc.• Do not operate trimmer without all guards and shields in place. • Never leave the machine running unattended. • Trim only in daylight or good artificial light.• Do not operate the trimmer while under the influence of alcohol or drugs. • Watch for traffic when operating near roadways.• Use the trimmer as the manufacturer intended and as described in the manual.• Do not operate trimmer if it has been dropped or damaged in any manner. Always have the damage repaired before operating.• Always wear safety glasses or eye shields when using the trimmer.• Dress properly. Do not operate the trimmer when barefoot or wearing open sandals. Wear only solid shoes for good traction when trimming. Wear long sleeved shirts or jackets, also long pants. Do not trim in shorts.• Keep your eyes and mind on your trimmer and the area being trimmed. • Do not let other interests distract you.• Do not put hands and feet near or under rotating parts.• Before cleaning, inspecting or repairing your trimmer, stop the engine and disconnect the spark plug wire and keep it away from the spark plug to prevent accidental starting.• Do not operate the trimmer if it vibrates abnormally. Excessive vibration is a sign of damage. Stop the engine and safely check for damage and repair as required.• Do not operate the trimmer in wet grass, where good footing may not be possible. Walk; never run• Stop the trimmer when crossing gravel drives, etc.Safety InstructionsSlope Operation• DO: Trim across the face of a slope and not up and down.• DO: Remove objects such as rocks, tree limbs, etc.• DO: W atch for holes, ruts or bumps. Tall grass can hide obstacles.• DO NOT: Mow near drop-offs, ditches or embankments. The operator could loose footing or balance.• DO NOT: Trim excessively steep slopes• DO NOT: Trim on wet grass. Reduced footing could cause slipping.Children• Keep children out of the area and under the watchful care of another responsible adult.• Be alert and turn the machine off if children enter the area.• Before and when backing, look behind and down for sm all children.• Never allow children to operate this m achine.• Use extra care when approaching blind corners, shrubs, trees or other objects that m ay obstruct vision.Service• Use extra care handling gasoline and other fuels. They are flammable and vapors are explosive.• Use only an approved container.• Never rem ove gas cap or add fuel with the engine running.• Allow engine to cool before refueling. Do not sm oke• Never refuel the machine indoors.• Never store the machine or fuel container where there is an open flam e, such as a water heater.• Never run a machine inside a closed area.• Keep nuts and bolts tight and equipment in good condition.• Never tam per with safety devices.• Keep machine free of grass, leaves or other debris build up. Clean oil or fuel spillage. Allow machine to cool before storing.• Stop and inspect the equipm ent if you strike an object. Repair if necessary before restarting.• Never make repairs or adjustm ents with the engine running.AssemblyContents of Box: • Trimmer• Parts bag containing: • Manual• Engine manual • Safety goggles • Bottle of engine oil• 4 sets of .155 trimmer lineTools Required: • ½” wrenchInstallation of handles• Remove loose fasteners from lower handles.• Pivot handles up and align lower hole in handles with hole on trimmer frame.Install hardware removed in previous step. Snug, but do not tighten bolts. • Pivot upper handles to fit the lower handles. Tighten knobs. • Adjust handles for comfortable operation. • Tighten all bolts.• Hold the control bail against the handle and slowly pull the engine recoilhandle rope out. Thread the rope through the holder in the center of the lower handle.Handles may be adjusted up and down and in and out for comfortable operation.Handle AdjustmentInstall Yellow Plastic Sleeve On Tilt HandleApplying soap to handle may ease installationSlip yellow sleeve over handlePreparing Unit For First Use• Fill engine crankcase with oil. A bottle has been provided with this unit. D ON O T O V E R FILL.• Fill the engine fuel tank with gasoline. G A SO LIN E S H O ULD B E AD D E DO U T S ID E IN A W ELL-V E N T ILAT E D A R E A.• C heck to ensure string has been installed properly. A diagram is providedjust above the wheel for proper installation.OperationTo start the trim m er:• R em ove any built up debris from engine. • P ull control bail against the handle and hold. • P ush prim er button on engine as directed. • P ull back sharply on recoil starter handle. • B egin trim m ing.Im portant! For safest operation, m ake sure debris is directed aw ay from you and others. Im portant! 12 Volt U nits. For optim um battery perform ance, you should run engine for at least 15 m inutes after each start to keep battery chargedTo stop the trim m er:• R elease the control bail. Engine w ill stop im m ediately.• Do not lift the trim m er head when trim m ing. Let the head rest lightly touchingthe ground.• Keep an eye on the length of the trim m er strings. As the strings get shorterthey becom e less effective at cutting and will take longer to trim properly. Replace the string as necessary. (See installing string) • Do not trim wet grass.• Use caution when trim m ing slopes.• Use the proper length of string. Using a string too long for the unit will causestalling and unacceptable operation.Trimming HintsImportant! To ensure proper operation, clean the engine and trimmer regularly. See page for details.Important! Use the proper length of string. Using a string too long for the unit will cause stalling and unacceptable operation.3 – 5 HP use 16” String5+ HP use 18” String• Loosely fold string in half.• Place loop of string against outside of loop on the trimmer head.• Bring ends around and through the loop and over the string loop.• Pull ends to tighten loop.Installing StringTrim-Max OperationThe Trim-Max trimmer is designed to also be used as an edge trimmer and tooffset left to right for easier close trimming.Edge trimming/ Bevel CuttingThe trimmer disk may be tilted from horizontal to vertical so that it may be usedas an edge trimmer. The head may also be tilted slightly to trim closer. This may be handy for trimming foundations without damaging the siding.To Tilt:• Stop unit.• Make sure head is in the straight forward position. (see offset operation) • Loosen the trimmer tilt clamp lever. (Clockwise)• Tilt head to desired position.• Tighten trimmer tilt clamp lever. (Counter Clockwise)• Adjust Lower trimmer shield to keep debris from coming back at operator. Offset trimming.The trimmer head may be offset to the left or right to allow trimming under bushes, etc.To Offset:• Stop unit.• Raise offset lever.• Push or pull handles to achieve desired offset.• Release offset lever. Make sure head has locked into position.• Adjust lower trimmer shield to keep debris from coming back at operator. Important! Note direction of debris when offsetting head. Offsetting trimmer to the left is recommended. Trim-Max Pivot AdjustmentTrim-Max Tilt AdjustmentOD63 Direction Of DebrisEngine• Refer to the engine service m anual provided with this unit. Belt• Occasionally check the belt for wear. A worn belt should be replaced . Belt Adjustment•The TRIM-N-MOW has an autom atic belt tightener and needs no further adjustm ent•The TRIM-MAX has an autom atic belt tightener that autom atically adjusts when the head is tilted. If you do not regularly tilt the head on your trim m er, it is recomm ended that you loosen the head twice a year. (See edge trim m ing)Belt Replacement• Rem ove front belt cover.• Push trim m er head toward back of unit, com pressing tensioner spring. • Rem ove old belt.• Install new belt by first routing belt under the engine and around the engine pulley. • Push trim m er head toward back of unit, com pressing tensioner spring. • Install belt over front pulley.•Release trim m er head. Ensure that belt is correctly installed in the groove of the engine and front pulleys.Re install front belt shield. M a ke sure you r trim m er is in safe w orking co ndition by keep in g the follow ing gu id elin es in m ind every tim e yo u use yo ur trim m er.• K eep trim m er in good o perating co ndition and ke ep a ll gu ards and shields inplace. D O N O T operate this trim m er if an y of th e shields an d guard s are m issing.• C he ck all fastene rs fo r secu re fit to kee p equipm ent in safe w o rking ord er.M ake adjustm ents a s n ecessary.• T o re duce fire h azard s, keep engin e free of grass leaves o r e xce ssive grea se. • D O N O T ope rate trim m er w ith a dam a ged or m issing m uffle r. D O N O Ttam p er w ith exhau st syste m ; th is m ay cau se a fire ha za rd.• D O N O T ope rate en gin e if air cle ane r o r the cover over the carbureto r a irin take is m issing. R em oval of these parts could create a fire ha za rd.• B efo re clea ning, m aking a djustm e nts or re pairin g the trim m er, S T O P e ngine,disco nnect spark plug w ire a nd a llow en gine to cool.• H an dle G aso line w ith ca re. D O N O T sm o ke or use open flam e near ga so line.U se o nly app rove d ga so line conta iners. N ever fu el or ru n trim m e r in p oorly ve ntila ted are as, such as a gara ge o r u tility bu ilding.• A lw a ys replace fuel tan k cap. B e sure to clean up an y sp illed gasoline.• D o not ch ange the engine gove rno r se ttings or over-sp eed the engine ; severein ju ry or da m age m ay re su lt.• N eve r sto re m ow er, w ith gasoline in the tank, inside a bu ilding w he re fum esm ay reach an o pen flam e or sp ark. A lw ays a llow en gin e to cool beforeTrimmer MaintenanceTrim-N-MowSee Detail Page 11123111918171615141335101198763411331133111214” Wheel Part # 20021711234859106123125131416181719192015910Trimmer HeadAssembly for Deluxeand 12V DeluxeTrimmer HeadAssembly for StandardTrim-Max Axle SetupDeluxe Axle12 Volt Deluxe Axle13574674432DeluxeSee Detail Page 11117161415182425222253424562482510119131920217122312 Volt Deluxe123For Additional PartsSee Page 13NotesVisit us at: Each trimmer has its own model number. Each engine has itsown model number. The model number for the trimmer will befound on the right hand side of the drive belt housing. Themodel number for the engine will be found on the top of theblower fan housing.All trimmer parts listed herein may be ordered directly fromSwisher Mower & Machine Co. Inc. or your nearest Swisherdealer.All engine parts may be ordered from the nearest dealer of theengine supplied with your mower.WHEN ORDERING PARTS, PLEASE HAVE THEFOLLOWING INFORMATION AVAILABLE:* PRODUCT –TRIMMER* SERIAL NUMBER -_______________* MODEL NUMBER -_______________* ENGINE MODEL NUMBER -_______________TYPE -_______________* PART NUMBER WITH PAINT CODE* PART DESCRIPTIONTELEPHONE -1-800-222-8183FAX -1-660-747-8650SWISHER MOWER & MACHINE CO. INC.1602 CORPORATE DRIVEP.O. BOX 67WARRENSBURG, MO 64093。
俄语не+动词过去时”结构中体的运用。

1. “не+动词过去时”结构中体的运用。
随译典ST500手写词典- 外贸战斗机【实拍】1. “не+动词过去时”结构中体的运用。
a. “не+未完成过去时”表示动作没有进行,没有发生过。
例如:—Я не писал письмо родителям.—Мы не встречали туристов.—Об этом я ничего не говорил.b. “не+完成过去时”表示动作还没有完成,没有达到结果。
例如:—Саша не перевѐл эту статью.—Мы не встретили гостей на вокзале: они прилетели на самолѐте.c. 如果某动作应该发生,但说话时仍未发生,正期待着发生,他俩体通用,意义基本相同。
例如:—Сегодня мы ещѐ не получали газеты.—Мы ещѐ не получили газеты сегодня. Может быть, получим после ужина.如果动作应该发生,却没有发生,说话时不在期待其发生,通常用完成体。
例如:—Никто не знал, почему Наташа не пришла на собрание сегодня.—Нина, почему ты мне не позвонила вчера?未完成体表示经常,多次,长时间否定的动作,完成体则表示一次否定的动作。
例如:—Коля давно не ходил купаться.—Шура долго не получал письмо от родителей.—Сегодня Настя не выполнила своѐ слово.—Максим не сдал письменную работу.2.动词不定式体的运用a. 表示开始,继续,结束等意义的动词(如начинать-начать, кончать-кончить, переставать-перестать, продолжать等)要和未完成体不定式连用。
ST500说明书

ST500智能型电动机控制器技术说明书ST500智能型电动机控制器技术说明书北京瀚博英电力科技有限公司目录一、概述 (3)1.1用途及适用范围 (3)1.2主要性能介绍 (3)1.3主要功能模块 (3)二、产品分类及订购说明 (4)2.1 控制器的功能配置 (4)2.2控制器的面板及端子布置 (5)2.3控制器的端子号定义 (7)2.4控制器的定购选型说明 (9)一. 安装 (11)3.1控制器的外形及安装尺寸(100A) (11)3.2控制器的外形及安装尺寸(250A) (11)3.3ST522显示模块外形尺寸 (12)3.4ST500手持编程器的外形尺寸 (12)3.5外部电流互感器ZT40的外形及安装尺寸 (13)3.6外部漏电互感器ZT30的外形及安装尺寸 (13)3.7控制器与各种模块间的连接方式 (14)二. 技术参数 (17)4.1符号对照表 (17)4.2测量显示误差 (17)4.3保护设定参数 (18)4.4各种保护特性说明 (20)4.4.1过负载保护4.4.2缺相不平衡保护4.4.3接地漏电保护4.4.4欠电流保护4.4.5堵转保护4.4.6过热保护4.4.7欠压保护4.4.8过压保护4.4.9欠功率保护4.4.10起动加速超时保护4.4.11外部故障保护4.4.12相序保护五、特殊控制功能说明 (25)5.1 外部停车5.2 上电延时自动重起动5.3 欠压或失压延时重起动5.3 远程就地控制权限附录附录一 ST500智能电动机控制器的使用说明(保护模式)附录二 ST500智能电动机控制器的使用说明(直接起动)附录三 ST500智能电动机控制器的使用说明(双向/可逆起动) 附录四 ST500智能电动机控制器的使用说明(星三角起动)附录五 ST500智能电动机控制器的使用说明(自耦变压器起动) 附录六 ST500智能电动机控制器的使用说明(电阻降压起动) 附录七通讯规约一.概述1.1 用途及适用范围ST500系列智能型(电动机)控制器(以下简称控制器)。
卡西欧电子词典介绍
卡西欧电子词典介绍.txt爱尔兰﹌一个不离婚的国家,一个一百年的约定。
难过了,不要告诉别人,因为别人不在乎。
★真话假话都要猜,这就是现在的社会。
卡西欧电子词典 - 广州学友书店一级代理 淘宝店 拍拍店 /1345036341CASIO品牌介绍卡西欧电子词典产品系列:E-ST100E-A99E-A200E-A300E-A400CASIO品牌介绍卡西欧电子词典产品系列: E-ST100E-A99E-A200E-A300E-A400卡西欧(CASIO)TYO: 6952(Casio, Inc.) (日语:カシオ计算器株式会社 Kashio Keisanki) 是个总部位于日本东京,生产电子仪器,电子计算机的公司。
卡西欧手表是日本三大品牌之一,多年来以真正多功能的G-SHOCK手表著称于世。
卡西欧手表所代表的活力、年轻、时尚、多功能的品牌形象已深入民心。
卡西欧公司一向以技术领先于同行为己任,历年都会有技术的突破。
将高、精、尖的科技结合新型液晶技术,恰当地运用于腕上时计,不断地提高腕上计时的发展水平——卡西欧一贯以来所倡导的“腕上科技”精神在中国国内也被得以沿袭和传播。
编辑本段卡西欧电子词典产品系列:E-ST100适用中学、大学,英语基础,常规使用Casio Voice真人发音技术,清晰精准,提升听、说能力通过USB和电脑相连,下载和创建个人学习资料库。
Casio独创超坚固机身构造,经实验证明可以充分对抗实际使用过程中的压力、震动及抗摔。
查询单词在多本词典中的解释、例句、惯用语。
可在多本词典间跳查比较。
拼错也能查。
词语搭配,尽在掌握。
可在多词典中查询例句。
追加辨析含义相近的单词用法。
可运用“*”与“?”符号代表不确定的字母,进行查询。
点击例句或解释图标可以进一步查看例句或解释。
多语种输入又快又准确。
收录辞书一键切换。
根据自己的阅读需要,切换多种显示格式。
字体可以自由缩放,方便各种阅读习惯。
可以查看每本辞书或全部辞书的查询记录。
几本俄语词典介绍

新编汉俄分类词汇手册(修订版) 49.90《新编汉俄分类词汇手册(修订版)》是在原书的基础上,根据目前社会主义经济建设、改革开放的新形势进行了修改和补充。
特别是经济部分由原来的一个题目扩大为经济、商业、对外贸易三个题目,其他部分也进行了适当的补充或修改。
鉴于有的材料虽已过时,但仍反映了某一历史阶段的情况,所以仍然保留。
此次本书再版时,汉俄对照词汇按政治、军事、外交、法律、经济、商业、外贸、农业、工业、交通运输、邮电、文化艺术、教育、体育、医药卫生、民族、宗教、参观访问、生活接待、社会科学、自然科学方面分成二十个题目。
另有附录十二项。
二、本书主要供俄语口译人员从事外贸商务活动使用,亦可供俄语专业师生和广大俄语自学者作为学习俄语的工具书。
精编俄汉汉俄词典45.90本词典分为俄汉部分和汉俄部分。
收词量大,共收5万余条,其中俄汉部分2万多,汉俄部分3万多;收词范围广,既包括基础词汇,又包括常用短语、技术词汇和新词语;携带方便,双向查阅,是俄语初学者的理想工具书。
俄汉国际商务词典42.90信息量大。
收词语万余条涵盖各经济活动领域。
新词语比重大,占总量50%左右。
释义严谨,精确,专业外研社现代汉俄词典48.90本词典共收汉语条目约六万条,包括字、词、成语、例句等。
从实用角度考虑,多选改革开放以来的新词语。
这些新语包括经济、政治、文化、教育、法制、国防、外交等方方面面。
在词语的选录中力求做到科学性、实用性、规范性;力求多角度、多层次地为读者服务。
本词典中等普及型工具书,可供大专院校俄语师生、俄语自学者和广大涉外俄语工作者使用。
现代俄汉词典49.90《现代俄汉词典》()是外语教学与研究出版社最近出版的一部中型词典。
它是应日渐发展的中国与独联体国家合作交流的需要、应我国广大学习俄语和使用俄语的读者的需求而编纂出版的。
词典的编者全部来自北京外国语大学的教授、副教授,他们都具备较强的使用语言的能力。
在编写这部词典的过程中,他们力求收词多、内容新、释义准确、编排合理、开本适中、字体醒目。
三星 ST500 说明书

应用不同效果
• 相片风格(应用色调) 60 • 图像调整(调整饱和度、鲜明度或对比度)
拍摄动作相片
• 连拍, 动体拍摄 59
61
减少相机抖动
• 光学图像稳定 (OIS) • d 模式 36 47 27
拍摄文字、昆虫或花卉相片
• s 模式 > 近距, 文本 32 • 微距, 自动微距, 超级微距 (拍摄近距相片) • 白平衡 (更改色调) 57
请小心操作和存放相机
• 请勿使相机受潮,水份可能会导致相机严重损坏。 请勿用湿 手操作相机。 因水份对相机造成的损坏,制造商概不负责。
1
健康与安全信息
• 请勿将相机长时间暴露于阳光直射或高温下。 长时间暴露 于阳光直射或极端温度下可能会对相机内部的部件造成永久 性损坏。 • 避免在多灰、多尘、潮湿或通风较差的地方使用或存放相 机,否则可能会对移动部件和内部部件造成损坏。 • 相机长期存储不用时,请取出电池。 长期不用时,安装的电 池可能会漏液或造成腐蚀,进而对相机造成严重损坏。 • 在沙滩或其他类似地方使用相机时,请勿让沙粒或尘土掉入 相机中。 • 切勿让相机和显示屏受到碰撞、粗暴操作或严重震动,避免 严重损坏。 • 连接电缆或适配器以及装入电池和存储卡时请务必小心谨 慎。 对接头强行用力、采用不当方式连接电缆或装入电池和 存储卡可能会损坏端口、接头和配件。 • 请勿将任何异物插入相机的任何体槽、插槽或接入点内。 因使用不当造成的损坏不在保修范围之内。
请保护好电池、充电器和存储卡,避免损坏
• 请避免将电池或存储卡暴露在过低或过高的温度下(低于 0º C/32º F 或高于 40º C/104º F)。 极端温度可能会降低电 池的充电容量,并可能导致存储卡出现故障。 • 请避免电池接触金属物品,否则会将电池的 + 极和 - 极接 通,导致电池暂时或永久性损坏。 • 请避免存储卡接触液体、灰尘或异物。 如果存储卡已被弄 脏,请先用软布擦拭干净,然后再插入相机中。 • 请防止液体,脏物或外物进入接触存储卡槽。这样可能导致 相机故障。 • 插入或取出存储卡时,请关闭相机。 • 请勿弯折存储卡,且避免掉落或受重力撞击或重压。 • 请勿使用在其他相机或电脑中格式化过的存储卡。 请使用您 的相机将存储卡重新格式化。 • 切勿使用已损坏的充电器、电池或存储卡。
SC500操作手册说明书
11/2014 Revised 07/2017(C)9099974000DeutschFrançaisEnglishNederlands9087400020, 9087401020, 9087402020See previous manual for the models no.:9087350020, 9087351020, 9087355020INSTRUCTIONS FOR USE ENGLISH9099974000 - SC500111/2014revised 07/2017TABLE OF CONTENTSINTRODUCTION (2)MANUAL PURPOSE AND CONTENTS ..........................................................................................................................................2TARGET ...........................................................................................................................................................................................2HOW TO KEEP THIS MANUAL .......................................................................................................................................................2DECLARATION OF CONFORMITY ................................................................................................................................................2IDENTIFICATION DATA ...................................................................................................................................................................2OTHER REFERENCE MANUALS ...................................................................................................................................................2SPARE PARTS AND MAINTENANCE .............................................................................................................................................2CHANGES AND IMPROVEMENTS ................................................................................................................................................2OPERATION CAPABILITIES ...........................................................................................................................................................3CONVENTIONS (3)UNPACKING/DELIVERY .................................................................................................................................................3SAFETY (3)VISIBLE SYMBOLS ON THE MACHINE .........................................................................................................................................3SYMBOLS THAT APPEAR ON THIS MANUAL ...............................................................................................................................4GENERAL INSTRUCTIONS (4)MACHINE DESCRIPTION (6)MACHINE STRUCTURE .................................................................................................................................................................6CONTROL PANEL ...........................................................................................................................................................................8ACCESSORIES/OPTIONS .. (9)TECHNICAL DATA (9)WIRING DIAGRAM (10)USE/OPERATION (11)MAGNETIC SMART KEY ...............................................................................................................................................................11BATTERY CHECK/SETTING ON A NEW MACHINE .....................................................................................................................11BATTERY INSTALLATION ..............................................................................................................................................................11BEFORE MACHINE START-UP ....................................................................................................................................................12MACHINE START AND STOP .......................................................................................................................................................14MACHINE OPERATION (SCRUBBING/DRYING) .........................................................................................................................15TANK EMPTYING ..........................................................................................................................................................................17AFTER USING THE MACHINE .....................................................................................................................................................17MACHINE LONG INACTIVITY (17)MAINTENANCE (18)SCHEDULED MAINTENANCE TABLE .........................................................................................................................................18BATTERY CHARGING ..................................................................................................................................................................19SUPERVISOR KEY (yellow) ..........................................................................................................................................................20SQUEEGEE CLEANING ...............................................................................................................................................................22SQUEEGEE BLADE CHECK AND REPLACEMENT ....................................................................................................................22CLEANING THE BRUSH ...............................................................................................................................................................23RECOVERY TANK CLEANING .....................................................................................................................................................23SOLUTION FILTER CLEANING ....................................................................................................................................................24MACHINE TRACKING ADJUSTMENT ..........................................................................................................................................24DETERGENT TANK CLEANING ...................................................................................................................................................25DRAINING THE ECOFLEX SYSTEM............................................................................................................................................26FUSE CHECK/REPLACEMENT . (26)TROUBLESHOOTING ...................................................................................................................................................27SCRAPPING (28)ENGLISH INSTRUCTIONS FOR USE 2SC500 - 909997400011/2014revised 07/2017INSTRUCTIONS FOR USE ENGLISH9099974000 - SC500311/2014revised 07/2017ENGLISH INSTRUCTIONS FOR USE 4SC500 - 909997400011/2014revised 07/2017INSTRUCTIONS FOR USE ENGLISH9099974000 - SC500511/2014revised 07/2017ENGLISH INSTRUCTIONS FOR USE 6SC500 - 909997400011/2014revised 07/2017INSTRUCTIONS FOR USE ENGLISHrevised 07/2017ENGLISH INSTRUCTIONS FOR USE 8SC500 - 909997400011/2014revised 07/2017LMK50INSTRUCTIONS FOR USE ENGLISH9099974000 - SC500911/2014revised 07/2017ACCESSORIES/OPTIONSIn addition to the standard components, the machine can be equipped with the following accessories/options, according to the machine specific use:–GEL batteries–Electronic battery charger –Brushes of different materials–Pads of different materials–Splash guard–Natural rubber squeegee blades –EcoFlex–USB portFor further information concerning the optional accessories, contact an authorised Retailer.TECHNICAL DATAModelNilfisk SC500 53 BNilfisk SC500 53R BSolution tank capacity 45 litres Recovery tank capacity 45 litresMachine length1,277 mm1,302 mm Machine width with squeegee 720 mmMachine width without squeegee 532 mm538 mmMachine height 1,063 mm Cleaning width 530 mm Driving wheel diameter200 mm Driving wheel specific pressure on the floor 0.7 N/mm 2Rear wheel diameter80 mm Rear wheel specific pressure on the floor 2.1 N/mm 2Brush/pad diameter530/508 mmBrush pressure with extra pressure function turned off 15 kg 22 kg Brush pressure with extra pressure function turned on 30 kg 30 kgSolution flow values0.75 cl/m / 1.5 cl/m 3.0 cl/m / 2.8 l/min0.38 cl/m / 0.75 cl/m 1.5 cl/m / 2.8 l/minEcoFlex system detergent percentage0.25 % ÷ 3 %Sound pressure level at workstation (ISO 11201, ISO 4871, EN 60335-2-72) (LpA)63 ± 3 dB(A)65 ± 3 dB(A)Sound pressure level at workstation in silent mode (LpA)60 ± 3 dB(A)61 ± 3 dB(A)Machine sound power level (ISO 3744, ISO 4871, EN 60335-2-72) (LwA)81 dB(A)83 dB(A)Vibration level at the operator’s arms (ISO 5349-1, EN 60335-2-72)< 2.5 m/s 2Maximum gradient when working 2 %Drive system motor power 200 W Drive speed (variable)0 - 5 km/h Vacuum system motor power 280 W Vacuum system circuit capacity 760 mm H 2OBrush motor power 450 W 670 W Brush rotation speed 155 rpm-Total absorbed power (*)500 W IP protection class X4Protection class (electric)III (I for the battery charger)Battery compartment size 350x350x260 mmSystem voltage 24 V Standard batteries (2)12 V 105 AhC5Battery charger 24 V 13 A Work autonomy (*)3.5 hourWeight without batteries and with empty tanks 83 kg85 kg (full package)88 kg Gross vehicle weight (GVW)207 kg210 kg Shipping weight114 kg192 kg (full package)119 kg(*) Values reflect standard operating conditions (EN 60335-2-72)icon (50), wait until the brush is lowered onto the floor.0,75 cl/m OFF 1,5 cl/m3,0 cl/m2,8 l/min0,38 cl/m0,75 cl/m1,5 cl/mOFFFigure 7Press the EcoFlex push-button (46) when stronger washing power is needed temporarily.With the EcoFlex system activated (LED flashing), increased solution flow, activation of the extra pressure of the brush and an increase in the solution detergent concentration (level 2 if the level was set to 1 - level 1 if the level was set to 0) is obtained. Press the EcoFlex push-button (46) again, to restore the original settings (LED on).If the push-button (46) is not pressed again, the original settings are restored automatically after 60 seconds.All of the above solution flow and detergent concentration values are factory settings.To change these settings, see the Supervisor key paragraph in Maintenance chapter.Press and hold the One-Touch push-button (43) for more than 1 second. The extra pressure function activation is shown by LED which turns from green to red, and by the iconTo return to normal pressure, press and hold the One-Touch push-button (43) for more than 1 second.appears on the display (50), contact an authorised Nilfisk Service Centre for scheduled maintenance.FFigure 8Figure 9 Figure 10 Figure 11DETERGENT TANK CLEANING(For machines with EcoFlex system)Clean the detergent tank (25) as follows.1. Drive the machine to the appointed disposal area.2. Ensure that the machine is off and the user key (51) has been removed.3. Lift the cover (34) and check that the recovery tank (33) is empty; if not, empty it using the drain hose (12).4. Close the cover (19).5. Grasp the handle (16) and carefully lift the tank (33).6. Unscrew the cap (A, Fig. 15) from the detergent tank (B).7. Remove the tank.8. Rinse and wash out the tank with clean water in the appointed disposal area.9. Replace the detergent tank (B) as shown in the figure, then refit the plug (A).10. When the detergent tank has been drained, it may be necessary to drain the EcoFlex system too (see procedure in followingsection).ABFigure 15P100853SCRAPPINGHave the machine scrapped by a qualified scrapper.Before scrapping the machine, remove and separate the following materials, which must be disposed of properly according to the Law in force:–Batteries–Brushes–Plastic hoses and components–Electrical and electronic components (*)(*) Refer to the nearest Nilfisk Center especially when scrapping electrical and electronic components.Machine material composition and recyclabilitySC500 weight percentageType RecyclablepercentageAluminium100 %7 %Electric motors - various29 %29 %Ferrous materials100 % 2 %Wiring harness80 % 2 %Liquids100 %0 %Plastic - non-recyclable material0 % 2 %Plastic - recyclable material100 %7 %Polyethylene92 %48 %Rubber20 % 2 %。
诺亚舟NT500说明书
六 计算功能....................................... 30 1 计算器...................................... 30 2 科学计算.................................... 30 3 统计计算.................................... 32 4 进制换算.................................... 32 5 贷款按揭.................................... 33 6 单位换算.................................... 33 7 所得税...................................... 34 8 增值税...................................... 34 9 汇率换算.................................... 35
1.1 发音、复读功能.......................... 14 1.2 普通查询................................ 15 1.3 属性功能................................ 15 1.4 顺序查询................................ 18 1.5 模糊查询................................ 18 1.6 反查.................................... 19 1.7 回顾.................................... 20 1.8 生词库.................................. 21 2 现汉双语.................................... 22 3 新英汉...................................... 23 4 英汉词典.................................... 23 5 汉英词典.................................... 23 6 汉语字典.................................... 24 7 成语词典.................................... 25 8 新课标...................................... 25 9 分级词典.................................... 25 A 常备词典.................................... 25 B 新词词典.................................... 26 C 网络词典.................................... 26 五 记事........................................... 27 1 名片盒...................................... 27 2 备忘录...................................... 28 3 理财簿...................................... 28 4 课程表...................................... 29 5 行程提醒.................................... 29
艾利和电子词典
时尚外观
当前具有黑、白、粉、银四种颜色,4.3英寸1600万色WQVGA(分辨率480×272)的触摸屏。机身上屏幕面 板两端隐藏大功率立体声扬声器,机身一侧内藏手写笔,另一侧标准小型USB接口,3.5毫米耳机插口,tf卡插槽 等扩展方式。D8采用了配备标准的QWEPRTY结构键盘。
白/黑/粉/银典雅四色四款颜色的艾利和D8 外观圆润,平滑曲线设计 应用QWERTY悬浮式键盘,宛如一部迷你笔记本电脑 自动休眠,低耗电并可快速激活 舒适的UI交互界面,可更换背景 实用的桌面小工具和快捷菜单
艾利和电子词典
艾利和旗下电子词典
01 简介
03 时尚外观 05 词典收录
目录
02 基本规格 04 产品亮点 06 功能特色
艾利和电子词典,辞典功能:内置28本权威辞典,可TTS真人发音,可进行英,日,法,德,俄,西6种语言 中外互译。
简介
2010年初,iriver了推出首款多媒体电子词典产品——“迪福”D8系列。但7月15日,D8作为艾利和的一款 主打产品内容更新升级了, D8升级选用的词典3种,其中包括由“韩国高丽大学民族文化研究院”主编的中韩、 韩中词典,是韩国出版的最经典的中韩互译词典,之前的D8具有TTS(机械发音)功能,此次升级又补充了真人 发音的21世纪大英汉词典(中国人民大学出版社出版),可以帮助大家更好的学习口语。另外,D8升级还新增了 “朗文当代英语大辞典”的使用方法,帮助使用者更加轻松的了解词典,学习外语。
功能特色
学习功能
娱乐功能
三本牛津英英词典+一本朗文双解词典 同时收录汉/英/日/法/德/俄/西班牙多国语言词典 查询结果中同时呈现例句/解释/惯用法,即学即用 TTS真人发音,语言学习必备功能 多国语会话教材,含日/法/德/韩/西/俄语900句,轻松学习日常会话,方便实用 魔法英语语法学习,涵盖中学阶段所有语法,精选高考题巩固练习 整句翻译,支持文本文件导入翻译 单词复习,随时使用生词本复习单词
ST500使用说明书
ST500智能型电动机控制器的使用说明书调试手册苏州万龙集团有限公司2006年4月目录一、控制器面板及端子布置 (3)1.1 控制器正面布置 (3)1.2 控制器侧边端子的端子号布置图及功能说明 (4)1.3控制器端子号定义 (4)二、ST522显示模块功能介绍 (7)三、普通用户菜单功能介绍 (7)四、高级用户菜单功能介绍 (10)五、参数设置参考 (11)5.1各种保护特性说明k系数设置参照表 (11)5.2 系统参数设置 (12)5.3 电动机功率范围和额定电流关系5.4 控制权限设定表六、各种运行方式典型二次接线图 (18)6.1、直接起动典型接线图6.2、保护模式下的典型接线图6.3、双向/可逆启动模式的典型接线图6.4、星三角起动模式的典型接线图七、常见故障分析及排除方法 (18)八、安全事项 (17)一、控制器面板及端子布置1.1 控制器正面布置(控制器的DI/DO端子功能可编程,其不同功能见1.3定义)万龙电器图1 控制器面板布置图序1: 开关量输入公共端(对应端子号1)。
序2: DI1开关量,按逆时针顺序 DI1~DI9 共9个可编程光隔开关量输入端。
序3:开关量输出 DO1,DO2公共端。
序4:开关量输出DO1。
序5:开关量输出DO2。
序6:开关量输出 DO3,DO4公共端。
序7:开关量输出 DO3,一般为常闭,正常工作时为常开。
序8:开关量输出 DO4。
序9:电源输入端子(对应端子号17,18)。
序10:指示灯:故障指示灯,在故障报警延时过程中闪烁,发生故障跳闸后恒亮。
总线提示灯,在远程通讯建立后恒亮,未建立时不亮。
运行指示灯,在运行状态下闪烁,在停车时恒亮。
序11:复位按键,用于清除状态指示和故障报警接点信号。
序12:通讯接口,用于连接远程通讯网络。
序13:用于连接显示模块ST522接口。
插页:为增加继电器的容量,采用增加ST202模块的方法,具体接线图如下:101817B C COM DA DO2DO1DO4DO3A DCOMC B ST202模块1.3.2 控制器DI/DO端子的可编程功能编号说明见下表控制器光隔开关量输入端子最多同时用9个,继电器输出最多同时用4个。