DIlli数码标签印刷机 数码标签喷墨印刷机 不干胶喷墨印刷机
数码印刷设备清单
数码印刷设备清单随着科技的不断发展,数码印刷设备在各个行业的应用越来越广泛。
无论是印刷出版业、广告行业还是办公室等领域,数码印刷设备都起到了至关重要的作用。
本文将为大家介绍一些常见的数码印刷设备,以帮助读者了解它们的用途和特点。
一、数码印刷机数码印刷机是一种利用电脑控制的印刷设备,具有高效快速、高质量的特点。
它可以直接从电脑或者数码存储设备上获取图像信息,通过喷墨、激光等方式将图像打印到纸张或其他介质上。
数码印刷机广泛应用于印刷出版业,可以打印书籍、杂志、报纸等各种印刷品。
它还可以用于制作广告宣传品、名片、贺卡等,具有较高的灵活性和个性化定制的能力。
二、数码印刷设备配件1.数码印刷机墨盒数码印刷机墨盒是数码印刷设备不可或缺的配件之一。
墨盒中含有颜料或染料,通过喷射或喷墨技术将图像打印到纸张上。
不同类型的数码印刷机使用的墨盒也不同,有的使用墨囊,有的使用墨水瓶。
墨盒的质量和墨水的配方对打印效果有着重要影响,因此选择适合自己设备的墨盒是很重要的。
2.数码印刷机耗材数码印刷机耗材包括纸张、打印介质、喷头、维护液等。
不同的数码印刷设备需要使用不同类型的耗材,选择合适的耗材可以提高打印效果和设备寿命。
三、数码印刷设备维护工具数码印刷设备的维护工具是保证设备正常运行的关键。
常见的维护工具有清洗液、清洗棉、清洗笔、维护软件等。
定期清洁和维护设备可以延长设备的使用寿命,保证打印质量。
四、数码印刷设备安全设备数码印刷设备在使用过程中需要注意安全问题。
常见的安全设备包括防护罩、防护网等。
这些设备可以保护操作人员的安全,防止意外发生。
五、数码印刷设备软件数码印刷设备软件是控制设备操作的重要工具。
常见的软件有打印驱动程序、图像处理软件、打印控制软件等。
这些软件可以帮助用户更好地控制和管理设备,提高工作效率。
总结数码印刷设备在现代社会中发挥着重要的作用。
通过数码印刷设备,我们可以实现高效、高质量的印刷和个性化定制,满足人们不断增长的印刷需求。
“彩打自由”时代到来 得力彩色打印机携黑科技突破外资品牌包围
“彩打自由”时代到来得力彩色打印机携黑科技突破外资品牌包围作为国内文创科技企业的领军羊,得力日前重磅发布国产自研彩色打印机,宣布将从技术和成本上双向奔赴“彩打自由”。
据介绍,新产品实现了彩色打印的全场景解决方案,通过彩印喷头的自研自制和创新的“分体式墨盒设计”,大大降低了打印耗材的成本,真正做到了彩打也便宜。
其中,得力自研的彩打喷头采用微机电MEMS工艺制造,拥有上千个微米级喷嘴,能够实现超精密彩印。
全新产品不仅构成得力彩色打印机新品的全阵容,也给国内打印机市场带来震荡。
在由疫情催生的新生活常态中,打印机已不再仅仅是办公用品,也成为居家必备电器之一。
在疫情初期,口罩、消毒液、打印机是最热销也最常断货的三样家庭必备物品。
但对于普通家庭用户而言,打印机此前主要作为商务办公工具,属于精密仪器,家庭用户缺乏相关维护保养知识。
调查显示,打印不清晰、卡纸以及耗材更换等问题频繁困扰消费者,因此,更方便、更经济的高质量低成本打印机已成为消费者的主要诉求。
而另一方面,打印机行业是技术密集型和专利密集型的行业,同时也是高附加值行业。
在日美品牌长期占据打印机市场,并且垄断核心技术的环境下,通过耗材来盈利的模式一直难以打破。
“面对巨大的市场需求和产品力不足,很多国产科技企业不断觉醒,其中就包括像得力这样的民族企业”。
得力集团CEO陈雪强表示,得力自2015年组建打印机研发团队,目前是国内唯一一家同时掌握激光、喷墨打印核心技术的企业,也是国内唯一一家拥有激光、喷墨、热敏、针打等全系列打印产品的企业,而最新推出的彩色喷墨打印机是得力7年的技术集大成者。
通过对核心技术的持续投入和自研自产模式,得力近些年致力于从传统文具企业向文创科技型企业的转型。
彩色打印机的自研成功,无疑使得力打造“大国品牌”的战略将再添重要支柱。
国产打印机突围:“彩打也便宜”“打印机行业门槛高、技术壁垒深,一定程度上代表着企业的技术实力和创新能力”。
对于“自研”在打印机领域的重要性,得力集团CEO陈雪强对经济观察网记者表示,美国、日本打印机品牌通过持续不断的专利发明和科技创新迅速崛起,同时不断利用知识产权来树立起行业垄断。
不干胶印刷机操作教程
不干胶印刷机操作教程不干胶印刷机是一种常用于标签印刷的设备,下面我将为你详细介绍不干胶印刷机的操作步骤。
第一步,打开不干胶印刷机的电源开关,确认设备已经接通电源。
接下来,在机器的控制面板上设置相关参数,如印刷速度、温度和颜色等。
根据需要,可以选择自动或手动操作模式。
第二步,将印刷材料放置在不干胶印刷机的卷取部分,并调整张力,使其紧凑但不会过紧。
确保卷取材料的宽度与印刷机的适应范围相匹配,避免出现偏差。
第三步,将需要印刷的图案或文字输入到印刷机的控制系统中,通过软件进行编辑和调整。
可以选择不同的字体、大小和格式以满足印刷需求。
第四步,对印刷机进行预热。
这个步骤非常重要,因为不干胶印刷需要高温才能将墨水快速干燥。
通常,印刷机需要在设定的温度下运行一段时间,以确保温度稳定。
第五步,调整印刷机的卷放速度和张力,确保印刷材料进出机器的平稳。
可以通过控制面板上的按钮或旋钮进行调整,根据需要进行微调。
第六步,进行试印。
将印刷机调整到较低的印刷速度,进行试印。
检查试印结果,以确定印刷效果是否符合预期。
如果需要,可以对图案或文字进行进一步调整。
第七步,开始正式的印刷。
确认试印结果满意后,将不干胶印刷机调整到所需的印刷速度和温度。
将印刷材料输入到印刷机中,观察印刷过程中是否有任何异常情况。
第八步,观察印刷质量。
在印刷过程中,及时检查印刷质量,并及时调整印刷机的参数,以确保印刷效果的一致性和准确性。
如果发现任何问题,应及时进行排除。
第九步,完成印刷后,及时切断印刷材料,并将其卸下。
清洁印刷机的卷放部分和印刷头部分,以确保设备的正常运行和印刷质量。
第十步,关闭不干胶印刷机的电源开关,断开电源。
将设备周围的工作区域保持整洁,清除杂物和垃圾。
以上就是不干胶印刷机的操作教程,希望对你有帮助!。
伟迪捷喷码机1210安全操作及保养规程

伟迪捷喷码机1210安全操作及保养规程1. 前言伟迪捷喷码机1210是一款高质量、高效率的打码设备,其功能和性能已经得到了广泛认可。
为了防止设备损坏,保护员工安全,本文档为操作人员提供使用说明和保养规程。
2. 安全操作2.1 健康和安全•眼部保护–操作人员必须佩戴护目镜,并确保设备的光源与操作人员的眼部距离足够远。
•皮肤保护–操作人员必须佩戴手套,以防手指被夹或切伤。
•禁止操作–儿童禁止靠近设备。
–未经许可禁止更改设备设置。
•防火安全–设备使用时不得靠近易燃品和可燃气体。
2.2 设备操作•正确安放–设备必须安放在干燥、通风的地方,并确保稳固无摇晃。
•电器注意事项–设备上电前务必确认电源开关处于关闭状态。
–在拆卸、移动或接近设备时,必须先将电源关闭。
•操作注意事项–设备加热时,加热板表面温度很高,不得触摸。
–在操作设备时,不得将手指或其他物品伸进设备内部。
2.3 规避故障•避免损坏–禁止在设备上面放置物品。
–不要在机器上磕碰、敲打、淋雨等直接伤害设备的操作。
•接线–设备上有标识线缆依从规范的运用,仅使用原配的线缆。
–避免针接头接触的反复弯曲和拔插。
3. 保养规程3.1 设备保养•日常清理–清除设备表面的灰尘、污垢等,使用清洁布清洁打印头和机器内部。
•确认加热板温度–在设备启动前确认加热板温度。
•驱动保护–遵循设备手册和操作说明,进行设备安装、使用和维护•检查供电线和连接线–保证供电稳定和连接正常。
3.2 润滑•在机器的黏合部分给予还润滑油,确保系统的稳定性。
•定期检查辊子和皮带等易磨和易损的部分。
3.3 设备存储•保存设备的文档,共享,存放在干燥通风的室内。
•取下打印头的位置,在待用期间保持遮挡作用。
结论伟迪捷喷码机1210是一款先进、高质量、高效率的设备,为了更好地保护设备和员工,本文档提供了安全操作和保养规程。
按照规格进行操作和保养,可以保证设备长期安全、稳定地运行,为生产工作提供更好的保障。
dimsLabel 印刷机说明书
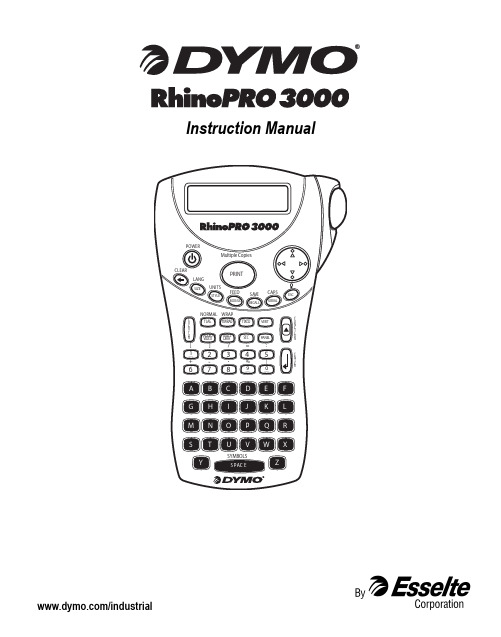
Instruction Manual/industrial qFigure 1 RhinoPRO 3000 PrinterAbout Your New PrinterWith your new DYMO RhinoPRO™ 3000 label printer, you can create a wide variety of high-quality, self-adhesive labels. You can choose to print your labels in many different sizes and styles. The printer uses DYMO RhinoPRO Industrial label cassettes in widths of 3/8” (9mm), or 1/2” (12mm). RhinoPRO label cassettes are also available in a wide range of materials.Visit /industrial for information on obtaining tapes and accessories for your printer. Warranty RegistrationPlease complete the warranty registration card and return it to the appropriate address, or you can register online at /industrial. Getting StartedFollow the instructions in this section to print your first label.Power SupplyThe printer is powered by standard batteries or an AC power adapter. To save power, the printer will automatically turn off after five minutes of inactivity. Inserting the BatteriesThe printer uses six 1.5 volt AA alkaline batteries. To insert the batteries1.Press the thumb latch on the bottom of the printer to open the battery compartment door. See Figure2.2.Insert the batteries following the polarity markings (+ and –).3.Close the battery compartment door.Connecting the AC AdapterYou can also use an optional AC power adapter to power the printer. Connecting the AC adapter disconnects the batteries as a power source.To connect the AC adapter1.Plug the power adapter into the power connector on the top of the printer.2.Plug the other end of the power adapter into a power outlet.latch3Inserting the Tape CassetteYour printer comes with one label tape cassette. Visit /industrial for information about purchasing additional label cassettes.To insert the tape cassette1.Press the thumb catch on the right side of the printer to open the tape cassette door.2.Make sure that the tape cassette switch is set to 9/12mm. See Figure 4. A notch in the cassette fits over the switch when the cassette is in the correct position.the print head and pinch roller. See Figure 4.Figure 43.Make sure the tape and ribbon are taut across the mouth of the cassette and that the tape passes between the guideposts.4.Insert the cassette with the tape and ribbon positioned between the print head and pinch roller. See Figure5.Figure 55.Press firmly until cassette clicks into place. Make sure tape and ribbon are positioned correctly.6.Close the tape cassette door and press A to turn on the power.SettingsYou can select the language and corresponding units of measure you want the printer to use. Selecting a LanguageSeveral language-related features are determined by the language setting, such as availability of special characters. Three languages are available: English (default), Spanish, and French.See Using International Characters on page6 for information about international characters.1.2.3.You can set the units of measure to display asinches (default) or millimeters.1.2.inches or mm.3.4Printing Your First LabelYou are now ready to print your first label.To print a label1.Enter text to create a simple label.2.3.towards the back of the printer. See Figure 6.4.Become familiar with the location of the feature and function keys on your printer. See Figure1 on the inside front cover of this manual. The following sections describe each feature in detail. PowerThe A button turns the power on and off. If no keys are pressed after five minutes, the power is switched off automatically.LCD DisplayThe printer’s LCD display typically shows a row of thirteen characters. However, you can enter up to 99 characters and/or spaces. Feature and function indicators appear on the top, side, and bottom of the display to indicate that a feature or function is selected. See Figure 7.Figure 7 BacklightingWhen the printer is used in a low-light environment, the display may become difficult to read. The♦The Caps key toggles capitalization on and off. When Caps mode is turned on, the Caps indicator is shown on the display and all letters that you enter will be capitalized. The default setting is Caps mode on. When Caps mode is off, all letters♦the Language menu appears.Backspace KeyThe Backspace keyremain unchanged.FLAG HWRAP FIXED VERT PANEL SIZE XLA ACAPSAbcSERIAL;:56You review and edit your label using the arrows onDesigning Your LabelYou can choose from a number of formattingoptions to enhance the appearance of your labels.Changing the Font SizeYou can print the text on your label in four fontsizes: small, medium, large, and extra-large.you have selected.1.2.You can print the text on your label in three styles:normal (default), italic, or outline. The selected font style applies to all characters on the label.1.2.3.Adding a Box or UnderlineYou can further highlight your text by choosing a box or underline style. See Figure 8.Figure 8A label can be underlined or enclosed in a box, but not both together. When you apply the underline style to a two-line label, both lines are underlined. When you apply a box to a two-line label, the entire label text is enclosed in a single box. To add a box or underline1.2.Creating Multi-Line LabelsYou can create multi-line labels depending uponthe size of the label tape, as follows:To create a multi-line label1.2.Type the text for the next line.Using International CharactersThe printer supports the extended Latin character set using RACE technology. Similar to using a mobile phone keypad, typing a letter multiple times quickly will scroll through variations of that letter.S M L XLTape Size 3/8” (9 mm)1/2” (12 mm)Number of Lines227For example, if French is selected as the language and you repeatedly press the letter a , you will see a àâæ and so on through all the variationsavailable. The character variations and the order in which the variations appear depend on the language you have selected to use.Adding SymbolsThe printer supports the extended symbol set as shown in Figure 9.Figure 91.e the arrow keys to move to the desiredsymbol. You can move horizontally and vertically through the rows of symbols.3.symbol to your label.Saving your LabelYou can save up to 25 labels in memory.To save a label1.2.(01, 02 ... 25). If a memory location contains a saved label, the label content is displayed next to the number.3.4.Once a label is saved to memory, you can recall the label to print or edit.1.2.A !¡?¿.B ,'#%&C ;"+=*D -:/()E ~\@±½F $£¢$¼G_H I J K L M Ø°N O¬8Deleting a Label from MemoryWhen you no longer need a stored label, you can delete it from memory.1.e the arrow keys to move to the memorying the Hot Key FunctionsYour printer includes several Hot Key TM functions that allow you to print specific types of labels. Hot Keys are available for printing flag, wrap, fixed-modes, the labelmaker remains in that print mode until you either select another hot key or selectnormal mode.♦Flag labels wrap around a wire or cable leaving the text part of the label extending out from the cable. See Figure 10.Figure 10The default diameter is 3/8” (9 mm). The length ofthe label tape between the label text (U )is approximately 1.1” (28.27mm).The text on flag labels is automatically printed on both ends of the label leaving a blank space in the middle that wraps around the cable. When the labelis applied to the cable, both ends of the label are applied back to back leaving a tail or flag . The result is a label that can be read from both sides.1.2.Printing Wrap LabelsYou can create labels that wrap arounda cable orwire. A line of text is placed horizontally or vertically along the width of the cable, and repeated so that you can read the label from any angle.Horizontal Wrap LabelsHorizontal wrap labels can contain letters, numbers, or symbols.1.2.Vertical Wrap LabelsVertical wrap labels are printed in a fixed length of 1.5” (40 mm) and can contain up to five letters or numbers; but no symbols.1.2.Printing Fixed-Length LabelsNormally, the length of the label is determined by the length of the text entered. However, you may wish to make a label for a specific purpose that is a fixed length regardless of the length of the text.UFM RMFM RMFM RMLeft Speaker Left SpeakerLeft Speaker Left Speaker1231231231231231231239You can specify a fixed length for a label in 0.1” (2mm) increments between 1.5” (40mm) and 25.0” (650mm). The preset fixed length is 1.5” (40mm). Any change you make to the fixed length setting remains in effect until you change it.To set the label length1.2.3.Figure 11Printing Distribution Panel LabelsDistribution panel mode allows you to create a label that contains boxes of information for labeling multiple items in one location; for example, anumber of ports on a distribution panel. You define the number of boxes to label, set the length and enter the text for each box, and then print. The result is a long label with correctly spaced boxes of text for each port.1.2.Enter the number of boxes and press3.default length is 1.5” (40mm).4.Select 1 or 2 lines of text, and press5.Enter the text for the first box and pressshows TextBox01Row2 indicating.6.are ready to enter text for the next box.7.Repeat steps 5 and 6 until all boxes are printed.Printing Vertical LabelsLabels can be printed with the text running vertically. For two-line labels, the second line prints directly below the first line, separated by a space.1.2.Using the Pre-defined Text KeysYour printer includes four Hot Keys that allow you to access pre-defined text. These Hot Keys include Location, Audio/Video, Voice/Data, and Security.To add text to a label1.Press one of the text Hot Keys.2.Select the label text using one of the following methods:e the arrow keys to scroll through the list.4.Press the first letter of the text label you wish to use. The cursor jumps to the first label that5.shown on the next page.Location Hot KeyThese pre-defined text keys can be very powerful when used with flag and wrap mode. The following example shows how to quickly print a flag label for a speaker wire in your home-entertainment system. 1.2.3.Press the letter L. Left Back Speaker appears inAtticBack Basement Bath Bedroom Billiards Room Center ClosetDeck DemarcDenDining Room Dressing Room FloorFoyerFront GarageGateGuest Bath Guest House Guest Room GymHot Tub Inside Kitchen Laundry Room LeftLibraryLiving Room LobbyLowerMain Floor Master Bath Master Bedroom Media Room Office OutsidePatioPlay Room PoolPorchRightSitting Room SpaStudy Sunroom Theater UpperUtility RoomAnalogCATVCDCenter Back Speaker Center Front Speaker Component CompositeDigitalDVDDVIDVRHDMIHDTVIRKeypadLeft Back Speaker Left Front Speaker Left Outdoor Speaker Left Side Speaker Left Surround Speaker MonitorOpticalPhono ProjectorRemoteRFRGBRight Back SpeakerRight Front SpeakerRight Outdoor SpeakerRight Side SpeakerRight Surround SpeakerRS-232SATSpeakerSubwooferSurroundS-VideoTapeTouch ScreenTVVCRVESAVideo GameVolume ControlZoneCable ModemCODemarcDesktopDSLDSLAMFaxInternetLANLaptopNetworkPhonePhone SystemUSBVoIPWirelessBack DoorCameraCarbon MonoxideCCTVCellContactControllerDoorDoor ContactDrivewayDual TechDuctFan CutoffFront DoorGarage DoorGasGateGlass BreakGroundHeat DetectorHigh WaterHornKeypadLow TempMotion SensorPhonePIRPoolPowerRemoteSensorShock SensorSirenSlidersSmoke DetectorSpareStrobeWater DetectorWindowWindow Sensor1011Printing OptionsYou can choose to print multiple copies of the same label, print serialized labels, or print a combination of both.Printing Multiple CopiesYou can print up to 50 copies of the same label at one time. When printing multiple copies, a dotted cut-line is printed between each label.1.2.;copies to print. The default is 2 copies.3.Press the : arrow to decrease the number of 4.When printing is finished, the number of copies to print returns to 2.Serializing Your LabelsYou can print serialized labels numerically or alphabetically. Numbers can be incremented from 1-99 and letters from A-Z.You can serialize any number or letter by placing the cursor (|) behind the position to beincremented, such as the number 2 in 12|3 or the letter B in AB|C. For example, with the cursor behind the 2 in 12|3 and the increment #=3, the resulting labels would print as 123, 133, and 143.Figure 12When the letter Z or the number 9 is reachedduring serialization, a letter or number is added to increase the increment. For example, Z increments to AA and 9 increments to 10.space are serialized. To serialize your labels1.Enter the text for your label.e the arrow keys to move the cursor behindthe letter or number to serialize.3.4.Printing begins automatically.Advancing the Label TapeThe default leader space for all labels isapproximately 7/16” (11.5mm). To add additional blank space to the beginning or end of your label,you can feed the tape in 0.25” (6mm) increments.♦Depending on the label material you choose, you may need to lighten or darken the print on the label. Adjusting the print head temperature allows you to control the print quality (±20).1.2.temperature 3.the print quality.123133143Cleaning Your PrinterYour printer is designed to give you long and trouble-free service, while requiring very little maintenance.Clean your printer from time to time to keep it working properly. Clean the cutter blade each time you replace the label cassette.To clean the cutter blade1.Remove the label cassette.2.Place the tip of a ball-point pen or pencil on the L-shaped piece as shown in Figure 13, and press the piece down.3.While holding the L-shaped piece down, press and hold the cutter lever to expose the cutter blade.e a cotton ball and alcohol to clean both sides of the blade.5.Release the cutter lever.To clean the print head♦Clean the print head using the cleaning tool located inside the tape compartment lid.You can also use the optional cleaning pen to clean the cutter blade and print head.1213TroubleshootingReview the following possible solutions if you encounter a problem while using your printer.If you still need assistance, contact DYMO Customer Support for your country. A list of contact numbers for each country is included on the inside back cover of this manual.Documentation FeedbackWe are constantly working to produce the highest quality documentation for our products. We welcome your feedback. Send us your comments or suggestions about our documentation. Please include the following information with your feedback:•Product name, version number, and page number•Brief description of content (instructions that are inaccurate or unclear, areas where more detail is needed, and so on)We also welcome your suggestions about additional topics you would like to see covered in the documentation.Send email messages to: **********************Please keep in mind that this email address is only for documentation feedback. If you have a technical question, please contact Customer Support.Error Message/Problem SolutionNo display •Ensure the printer is turned on.•Replace discharged batteries.Poor Print Quality•Replace discharged batteries.•Ensure tape cassette is installed properly.•Clean the print head.•Replace the tape cassette.Poor Cutter PerformanceClean the cutter blade. See Cleaning Your Printer .L= n.nn” (or nnnn.n mm)Fixed length setting is too small for text.•Set the fixed length to a size longer than the text, or •Decrease the amount of text.Text Too LongExceeded maximum number of characters in buffer.Delete some or all of the buffer text.Too many linesExceeded maximum number of lines allowed.Select another format.Print ErrorUndetermined printer error.Check for label jam, empty label cassette, discharged batteries, or other problems.Tape Too SmallTape size is too small for label content entered.•Insert a larger size label cassette, or •Decrease the size of the label content.No TapeLabel cassette missing or empty.Insert a new label cassette.Battery lowBatteries almost discharged.Replace batteries or connect AC power adapter.Tape JamMotor is stalled due to label jam.•Remove jammed tape and replace label cassette. •Clean cutter blade.This product is CE marked in accordance with the EMC directive and the low voltage directive and is designed to conform with the following international standards:US FCC Class B CompatibilitySafety - EN 60950, IEC 950, UL 1950EMC Compatibility EN 61000 3-2/3; EN 61000 4-2/3/4/5/6/8/11; ENV 50204;EU Immunity – EN 55024 & addendums A1, A2 Electromagnetic Compatibility (EMC) - Information Technology equipment, Immunity CharacteristicsEmissions – EN 61000-6-3: Electromagnetic Compatibility (EMC) - Part 6: Generic Standards - Section 3: Emission standard for residential, commercial and light industrial environments.Esselte is an ISO 14001 registered company. Plastic components of this printer have been marked to enable final disposal in a manner that is sensitive to the environment.14Contacting Customer SupportThe following table provides a list of telephone numbers to reach DYMO Sales and Support departments. You can also reach DYMO at .Country Telephone Support Fax SupportAustralia1800/ 633 8681800/ 817 558Austria01/ 599 14 20 1202/627-400-160Belgium02/ 713 38 08+31/ 20/ 581 93 80Canada(800) 263-6105Czech Republic02/619 12 720+02/619 12 730Denmark35 25 65 08+31/ 20/ 581 93 80Finland09 229 07 04+31/ 20/ 581 93 80France01/69 32 49 32+31/ 20/ 581 93 80Germany069/ 66 56 85 29+31/ 20/ 581 93 80Hong Kong+852 2527 1928Hungary 1 424 6600 1 424 6601Ireland(+35)3 14118934Italy02/ 45 28 13 08+31/ 20/ 581 93 80Mexico+01 5368 2066The Netherlands020/581 93 86020/ 581 93 80New Zealand0800 803 9660800 737 212Norway22 97 17 10+31/ 20/ 581 93 80Poland00800/311 12 50+31/ 20/ 581 93 80Slovakia(+420) 2/619 12 720(+420) 2/619 12 730Spain/Portugal91/662 31 49+31/ 20/ 581 93 80Sweden08/ 632 00 57+31/ 20/ 581 93 80 Switzerland01/342 04 66+31/ 20/ 581 93 80Turkey212/ 286 26 30 PBX212/ 286 26 28United Kingdom(+44) 020/ 7341 55 29+31/ 20/ 581 93 80United States(203) 588-2500DYMO Corporation44 Commerce RoadStamford, CT 06902© 2004 DYMO Corporation. All Rights Reserved. 11/04No part of this document may be reproduced or transmitted in any form or by any means or translated into another language without the prior written consent of DYMO Corporation.RhinoPRO and Hot Key are trademarks of DYMO Corporation. DYMO is a registered trademark of Esselte Corporation. All other trademarks are the property of their respective holders.。
打印机与不干胶标签学习资料

打印机与不干胶标签分类一、条码打印机碳带知识条码打印机的打印方式通常分为热敏和热转印。
对于热转印方式的条码打印机,需要一种专用的色带来将条码和文字等信息打印在标签上,而热敏打印方式则不需要专用色带,但需要特殊的涂布加工纸(即热敏纸)作为标签介质。
1、碳带组成结构热转印打印机的专用色带(俗称碳带),一般由基膜、耐热涂层、油墨涂层等三部分组成。
基膜是色带的载体,一般选用4.5μm厚的聚酯薄膜,它的强度、厚度直接影响碳带的延伸率和应用领域;耐热涂层主要作用是隔热、减小摩擦、减少打印头沾附灰尘,能够保护打印头,延长打印头的寿命;油墨涂层由颜料、树脂、蜡、添加剂等多种成分构成,它影响色带的转印温度、打印质量、色带的颜色、印迹的耐摩擦性等主要性能,是色带的核心,常用的黑色色带油墨成分中有碳粉,这也是这色带常被称为碳带的原因。
碳带在热转印打印机上,耐热涂层与热转印头直接接触,热转印油墨与承印物(标签)直接接触,工作时热转印头瞬间放热,放热点的热量通过耐热涂层和基膜传送给热转印油墨涂层,油墨熔化而被烫印到标签上,形成文字、图像。
高质量的色带在其转印后受热部分无热转印油墨的残留物。
2、碳带的分类碳带从缠绕方式分可分为内碳和外碳,内碳是指有油墨的一面与碳带上的轴相接触,外碳是指无油墨的一面与轴接触。
一般的条码打印机两种碳带都可以使用,只有个别的打印机才固定只能使用内碳与或外碳的碳带。
分辨碳带正反面可以通过用手摸,观察手上是否有黑色物质来判断;如果觉得用手摸无法判断,可以用不干胶粘性部分粘一下,观察是否有黑色物质。
碳带还从使用打印机的打印头分为平压式碳带和边压式碳带,分别适用于平压式打印机和边压式打印机。
两种碳带是不能混用的。
碳带从化学成分(材质)分为三种:蜡基、混合基和树脂基。
一般蜡基碳带指石蜡比例达到70%的碳带,混合基碳带是指石蜡与树比例各占50%的碳带,树脂基碳带是指石蜡的比例低于50%的碳带。
(1)蜡基色带具有高灵敏度、高分辨率、高密度等特点,广泛的适用性,如普通纸、铜版纸、粗制纸、光滑纸、涂覆纸、合成纸等;(2)混合基色带具有耐污性、高清晰度、高分辨率,具有广泛适用性,适用于各种标签,如铜版纸、光滑纸、涂覆纸、合成纸、PET、PVC等;(3)树脂基色带具有优质的抗刮性、抗污性、抗溶剂性、高分辨率等,适用于各种材质的标签,尤其是各种聚脂和塑料标签,如合成纸、PVC、PET、水洗标等。
威利3150 Si 喷码机手册

威利3150 Si简明操作手册Brief Operation Manual珠海经济特区伟迪捷电子有限公司目录安全指导 (1)第一章 3150喷码机安装参数1.概述 (2)2.电源供给 (2)3.工作环境 (2)4.压缩空气供给 (2)5.喷头与产品距离 (3)第二章 喷印信息及参数调整1.建立、编辑喷印信息 (4)2.选择喷印信息 (6)3.删除喷印信息 (6)4.调整喷印字符宽度 (6)5.调整喷印位置 (7)6.双喷头间喷印延时 (7)7.字符间距 (8)8.斜率控制 (8)9.反向颠倒喷印 (9)10.喷印开/关 (10)11.喷嘴清洗 (11)12.设定系统时间 (11)第三章 日常操作1.日常开机 (12)2.日常关机 (12)3.更换墨水 (12)第四章 维护保养1.常规保养 (13)2.喷嘴清洗 (14)3.常见故障排除 (15)附录:3150操作指令表 (17)安全指导安全指导注意:以下操作应在伟迪捷工程师培训后进行,严格遵循操作规程并请专人维护。
即使您熟悉其它类型的喷码机,也一定要接受培训和阅读以下指导,并保留此手册以备参考,更详细说明请阅读伟迪捷公司3150大字机操作手册。
将喷码机安装在水平、稳定的生产线上,并远离辐射体或热源、火源墨水和清洗剂为易燃品。
在喷码机附近严禁吸烟,墨水和清洗剂应密封存放好并置于远离热源、火源的通风地方使用伟迪捷公司指定专用的墨水和清洗剂处理墨水和洗剂时总是佩带防护眼镜和手套。
避免长时间呼吸墨水和清洗剂蒸气仅使用喷码机所规定的电源类型使用良好接地的电源插座(机箱对地电阻要小于1Ω);避免在插座的同一回路中使用频繁地在开和关之间切换的大功率设备避免碰撞打印头。
安装和移动墨水瓶时要先调节减压阀,把墨水瓶的压力调为零,不得将有压力的墨水瓶移出保护罩按操作说明正确操作喷码机。
留出足够的空间以便于操作和维护第一章 3150喷码机安装参数1.概述1)3150控制器通过配备不同的软件可驱动1个716喷头或1个816喷头;或者可驱动2个707喷头或2个807喷头,但不能同时驱动700和800喷头。
B3和B2规格单张纸胶印机新进展
B3和B2规格单张纸胶印机新进展德累斯顿附近的拉德博伊尔工厂,是高宝单张纸胶印技术创新的先锋,向全球商业、包装和书刊印刷商们供应最先进的单张纸胶印机系列产品,纸张幅面从360×520mm至1,500×2,050mm(19 1/4×27英寸至59×80 3/4英寸),并新添了许多独特功能。
我们还提供大量其他制造商不能提供的,以用户为导向的选购装置来支持多种功能。
在使用复合油墨系统(UV和普通)进行联机上光领域和环保印刷技术的开发领域,高宝的拉德博伊尔工厂都走在了前列。
Genius 52Genius52是为流行的B3幅面设计的—款结构紧凑的无水胶印机,立足中、短版印刷市场,可提供四色、五色的机型。
简便的单人操作、基本功能的自动化、高速的活件更换、开机废页数量少、适用于高质量印刷的无鬼影、无墨键供墨装置和处理多种承印物的能力,这一切证明了Genius52是真正的多面天才。
利必达74另一种用于B2幅面尺寸系列的顶级产品是利必达74,最大印刷速度是18,000张小时,可配置2至10色。
该机特点包括双倍径压印滚筒和传纸滚筒,这种滚筒的曲率半径大,使得纸张、纸板或塑料等承印物能够平稳运行。
其它特点还包括自动换版、不停机连续给纸和收纸装置、Densitronic S闭环密度计量法和光谱测量法、压印滚筒和橡皮布的清洗装置、以及可集成在JDF工作流程中以便于操作的先进的控制技术。
可为利必达74提供各种选购的附加装置(例如可自动转换的翻转装置、上光装置、打孔器或打号码装置、Corona静电消除器等),以满足用户的特殊需要。
利必达74 GTM利必达74G是世界上首台配备有我们的Gravuflow无墨键供墨系统专利机组式印刷机。
它为短版活件的商业印刷商、包装印刷商和塑料或膜片印刷商提供了一种高效的生产工具,使得他们能够以低档的价格获得高档的印刷质量,在业界独领风骚。
少于10张的开机废页意味着该机即使在对昂贵的承印物进行极少数量的活件印刷时,也可获得经济效益。
- 1、下载文档前请自行甄别文档内容的完整性,平台不提供额外的编辑、内容补充、找答案等附加服务。
- 2、"仅部分预览"的文档,不可在线预览部分如存在完整性等问题,可反馈申请退款(可完整预览的文档不适用该条件!)。
- 3、如文档侵犯您的权益,请联系客服反馈,我们会尽快为您处理(人工客服工作时间:9:00-18:30)。
Dilli数码标签喷墨印刷机
1. 设备是喷墨印刷,无需制版,只需导入文件即可印刷,效率高
2. 可变数据印刷,我们可以实现全彩、张张不同!
3. 设备不需要专业的人工,只需一个大学生会电脑的就可以操作,简单便捷!
4. 我们的设备使用的是进口的UV油墨,环保无污染,色泽亮丽、鲜艳,清晰度高!
5. 我们采用的是京瓷工业压电式喷头,经久耐用!
6. 我们采用的是非接触式印刷,材料的适应性非常的强,基本无需材料的预处理!
7. 我们设备有自动配色功能(RIP),可以调配1670万种颜色,免去了很多专色墨水的问题。
8. 我们的设备占地面积小,设备尺寸:3285*2158*2035mm
9. 多次固化,使得网点扩大率基本为零
10. 简易的维护和保养
主要技能及特性
1.每分钟最高50M/Min的喷印速度
CMYK生动的全彩以50M/Min的速度快速、准确的表现。
2.高精度
最高600*1200DPI的解析度照片级的喷印精度。
3.前处理(Corona Discharge Treatment)系统
内置改善材料表面以提高喷印品质的前处理系统,在任何材料的表面都可以表现优异的品质4.除静电装置及清洁系统
内置的材料表面除静电及清洁装置,增强喷印品质
5.材料回卷系统
喷印完成后自动计算已喷印的图像尺寸,把空白材料自动回卷减少材料浪费。
6.材料导向、张力调节系统
双重自动导向、张力调节系统,保证材料输送时一致的张力维持,自动导向系系统保证材料送、收卷时整齐。
7.数码的最高魅力VDP(可变数据印刷)
Variable Data Print(可变数据印刷)轻松实现印刷带有序列号或QR码的邀请函及标签。
8.采用环保油墨
使用墨水成分不含voc(挥发性有机化合物),倡导跟进主流。
9.无需铜板及菲林版
无需印刷用铜板及菲林版,也不需要额外的保管场所。
10.缩短作业提高工作效率。