QJ说明书中英文
产品说明书中英文对照
3M TM Attest TM 1264/1264PBiological Indicator生物指示剂Product description: The 3M Attest 1264 Biological Indicator (green cap) is designed for monitoring of EO sterilization process.The presence of Bacillus atrophaeus spores is detected by a visual color change (media turns yellow). The yellow color change indicates a sterilization process failure. The final readout of a negative result (media remains green) is made after 48 hours of incubation.产品描述:3M Attest 1264生物指示剂(绿帽)用来监测环氧乙烷灭菌过程。
可通过视觉上的颜色变化(培养基变成黄色)来检测枯草杆菌芽孢是否存在。
如果培养基变成黄色,则表明灭菌过程失败;如果培养基保持绿色不变,经48小时潜伏期后,最终得到阴性结果。
Monitoring frequency: Attest biological indicators should be placed in an appropriate test tray or package, and be used to monitor every load. This presents an appropriate challenge and improves the performance of the sterilization process.监测频率:Attest生物指示剂应放置在适当的测试盘或包装内,以便监测每一个负载。
产品说明书中文英文
深圳市慧拓鑫科技有限公司Shenzhen Hui Tuo Xin Technology Co., Ltd.产品资料Product information1、TOP电源防雷箱系列(TOP Power lightning protection box series)产品介绍Product introductionTOP电源防雷箱系列依据IEC标准设计,8/20波形最大通流容量20KA-100KA,能对电源系统的浪涌电压进行有效的钳制,电源B、C、D级产品均具备。
TOP Power lightning protection box series is designed according to IECstandard, 8/20 wave maximum flow capacity of 20KA-100KA, to power system voltage surge effectively clamped, power supply B, C, D products have.TOP电源防雷箱配系列具备测试指示灯功能,能有效的指示防雷箱工作电源、浪涌防护状态,并可选备雷击计数、远程遥信监测功能。
TOP Power lightning protection box series Have a test indicator function,Can effectively indicate the lightning protection box power supply、Surge protection status And optional lightning counting、Remote remote monitoring function★电涌保护器失效报警功能/相零反接及接地不良报警★(Surge protection device failure alarm function / Phase zero reverse connection and grounding alarm)★雷击计数显示、电源指示功能(可选)★ Lightning counting display,Power indicator function(Optional)★电浪保护器远程监测功能(失效)★ Remote monitoring function(Failure)★残压低、响应时间快★ Residual depression and Fast response time★安装设计人性化、结构严谨★ Installation design of humanity and Strict structure★工作环境温度适应性强★ Working environment temperature adaptability★外壳保护等级高★ Shell protection grade产品性能参数(共性)Product performance parameters(Common)产品性能参数(个性)Product performance parameters(Personality)产品适用范围:The scope of products:▲通信、电力、金融、民航、铁路等电源系统的保护▲Communications, electricity, finance, civil aviation, railways and other power sy protection▲建筑物总配箱、室外配电箱、楼层分配箱▲Buildings with a total box, outdoor distribution box, floor distribution box▲配电柜电箱无安装位置但须安装第一级防雷设施的环境▲Power distribution cabinet electric box without installation position but must installed first stage lightning protectionfacility environment▲无人值守但须安装第一级带遥信指示的防雷设备的环境▲Unmanned but to be fitted with remote signal indicative of the first levelof mine equipment environment▲需要有第一级电涌保护失效指示及报警指示及雷电泄放记录的环境▲Need to have the first surge protection failure indication and alarm indication and lightning discharge recording environment产品图:Product picture:产品尺寸:Prodct size chart:安装说明:Installation instructions:1、取出箱子钥匙,插进锁孔打开防雷箱面板1、Remove the box keys,Inserted into the keyhole to open the thunder box panel2、防雷箱体固定在墙面上。
说明书的英语作文

说明书的英语作文IntroductionAn instruction manual is a vital document that guides users through the process of using a product or service effectively. In English composition, writing an instruction manualrequires clarity, organization, and attention to detail. This essay will explore the essential elements of crafting a clear and effective instruction manual in English.Purpose and ScopeThe purpose of an instruction manual is to provide step-by-step guidance to users, ensuring they can operate a device or perform a task without difficulty. The scope should beclearly defined, outlining what the manual covers and any prerequisites the user should be aware of.Structure and OrganizationA well-structured instruction manual is easy to navigate. It should include:1. Table of Contents: A detailed list of sections and sub-sections for quick reference.2. Introduction: A brief overview of the product or service and its purpose.3. Safety Precautions: Any necessary warnings or safetyinformation.4. Getting Started: Initial setup or preparation steps.5. Detailed Instructions: Step-by-step guidance through the process.6. Troubleshooting: Common issues and their resolutions.7. Maintenance: Tips for keeping the product in good working order.8. Conclusion: Final notes and contact information forfurther assistance.Clarity and ConcisenessEach step should be written in clear, concise language. Avoid jargon and technical terms that may confuse the user. If specialized terms are necessary, include a glossary for reference.Visual AidsIncorporating diagrams, illustrations, or photographs can greatly enhance understanding. Visual aids should be clearly labeled and referenced in the text.Language and ToneThe language should be straightforward and easy to understand. The tone should be helpful and encouraging, fostering a positive user experience.Revision and FeedbackBefore finalizing the instruction manual, it's important to revise for clarity and accuracy. Feedback from potential users can provide valuable insights for improvement.ConclusionAn effective instruction manual in English composition is a blend of clear instructions, organization, and helpful visuals. By following these guidelines, writers can create manuals that empower users to confidently operate products and services.References- List any sources or references used during the composition of the manual.Appendices- Include any additional information, such as warranty details, that may be helpful to the user but do not fit within the main body of the manual.By adhering to these principles, an instruction manual can serve as an indispensable resource for users, ensuring they can utilize a product or service to its fullest potential.。
使用说明书英文模板
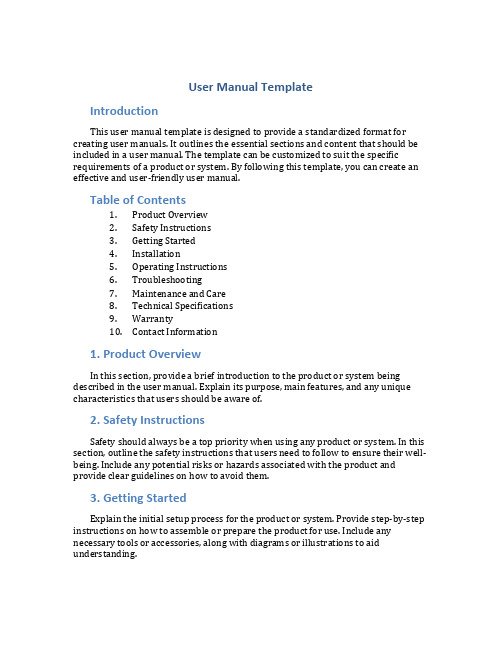
User Manual TemplateIntroductionThis user manual template is designed to provide a standardized format for creating user manuals. It outlines the essential sections and content that should be included in a user manual. The template can be customized to suit the specific requirements of a product or system. By following this template, you can create an effective and user-friendly user manual.Table of Contents1.Product Overview2.Safety Instructions3.Getting Started4.Installation5.Operating Instructions6.Troubleshooting7.Maintenance and Care8.Technical Specifications9.Warranty10.Contact Information1. Product OverviewIn this section, provide a brief introduction to the product or system being described in the user manual. Explain its purpose, main features, and any unique characteristics that users should be aware of.2. Safety InstructionsSafety should always be a top priority when using any product or system. In this section, outline the safety instructions that users need to follow to ensure their well-being. Include any potential risks or hazards associated with the product and provide clear guidelines on how to avoid them.3. Getting StartedExplain the initial setup process for the product or system. Provide step-by-step instructions on how to assemble or prepare the product for use. Include any necessary tools or accessories, along with diagrams or illustrations to aid understanding.4. InstallationIf the product or system requires installation, provide detailed instructions on how to install it properly. Include any specific requirements or recommendations for installation, such as mounting instructions or electrical connections.5. Operating InstructionsThis section should provide comprehensive instructions on how to operate the product or system. Break down the instructions into clear, step-by-step procedures, using simple language and avoiding technical jargon. Include any necessary diagrams, illustrations, or screenshots to enhance clarity.6. TroubleshootingSometimes users may encounter problems or difficulties when using the product or system. In this section, list common issues that may occur and provide detailed troubleshooting steps to resolve them. Include clear explanations and any relevant error codes or messages.7. Maintenance and CareTo ensure the longevity and optimal performance of the product or system, users need to know how to properly maintain and care for it. Provide instructions on regular maintenance tasks, such as cleaning or replacing parts. Include any specific maintenance schedules or recommendations.8. Technical SpecificationsInclude comprehensive technical specifications of the product or system in this section. Provide details such as dimensions, weight, power requirements, operating temperature range, and any certifications or standards compliance.9. WarrantyIf applicable, explain the warranty terms and conditions for the product or system. Include information on the duration of the warranty, what it covers, and any actions users need to take to claim warranty service.10. Contact InformationProvide contact information for customer support or technical assistance in this section. Include phone numbers, email addresses, and any other relevant contact details. Encourage users to reach out for assistance or inquiries.ConclusionBy using this user manual template, you can create a well-structured and informative user manual for your product or system. Remember to tailor the content to the unique requirements of your product and ensure that it is user-friendly and easy to understand. A well-written user manual can greatly enhance the user experience and reduce customer support inquiries.。
中英版QL系列说明书

z 不要自行改造扭力扳手。 自行改造会削弱扭力扳手的强度,从而引起 准确度的误差,还会造成伤害事故。
z 不要扔掷扭力扳手,不要对扭力扳手施加冲 击力。 否则会引起扳手损坏和变形,同时引起准确 度和使用寿命的降低,造成伤害事故。
z 搬运大型扭力扳手时,请对四周加以充分 注意。 如果使用者不注意,手持大型扭力扳手转弯 或走动时可能会造成伤害事故。
头部 Htary Garduation
(QL25N-QL280N,QL100N4,QL200N4)
主刻度 Main Graduation
QLE 型
头部 Head
QLE Model
套管 Tube
主刻度 Main Graduation
副刻度盘 Supplementary Garduation
1 警告
z 除了进行紧固以外,不要用于其它用途。 本扭力扳手是专用于紧固螺栓的产品。
z 不要使用扭力扳手来松动螺栓或螺母。 如果用来松动螺栓或螺母,过大的扭矩会 造成扭力扳手损坏、引起伤害事故。
z 请保持手柄的清洁,不要沾上油污等脏物。 否则在紧固时会打滑,从而引起伤害事故。
z 检查是否有裂痕、刮痕及锈斑。 这些破损将造成扭力扳手损坏,并可能导 致 人 身 伤害。如有必 要请 进行功 能 测 试 和 修理。
■TOHNICHI QL•QL4•QLE•QL-MH•QL4-MH 型扭力扳手
英文说明书

英文说明书Dear valued customer,Thank you for purchasing our product. We hope that this user manual will provide you with all the information you need to use our product effectively and efficiently.Product introduction:Our product is a high-quality electronic device that has been designed to provide you with a range of features and functions that will enhance your daily life. The device is user-friendly, versatile and has been built to the highest standards of quality and durability.Getting started:Before using the product, please ensure that you have read and understood the following points:- Unpack the product carefully and ensure that all the parts are present and in good condition.- Make sure that you have the necessary batteries, charging cable or other accessories that are required to use the device.- Familiarize yourself with the features and functions of the device by referring to the user manual.- Follow the instructions carefully to ensure that the device is set up correctly and is ready to use.Features and Functions:Our product is equipped with a range of features and functions that are designed to make your life easier and more convenient. Here are some of the key features:1. High-Quality Display:Our product has a high-resolution display that provides sharp and clear images, making it easy to use the device for work, entertainment, or communication.2. Multiple Modes:The device has been designed to work in multiple modes, including gaming, browsing, watching videos, and more. You can switch between modes easily and quickly.3. Long Battery Life:Our product has a long battery life, allowing you to use the device for long periods without worrying about running out of power. The battery iseasily rechargeable, which makes it convenient to use when you are on the go.4. High-Quality Camera:The device is equipped with a high-quality camera that allows you to capture stunning images and videos. You can use the camera for personal or professional purposes.5. Bluetooth Connectivity:Our product has Bluetooth connectivity, which means that you can connect it to other devices such as speakers, headphones, or a smartwatch easily.6. Easy To Use:Our product has an intuitive user interface that makes it easy to navigate and use the various features and functions of the device.User Manual:1. Powering On/Off the DeviceTo power on the device, press and hold the power button located on the side of the device until the startup logo appears on the screen.To power off the device, press and hold the power button for a few seconds until the device shuts down.2. Home ScreenThe home screen displays apps, widgets, and notifications. You can customize the home screen by adding or removing widgets and apps, adjusting the wallpaper or theme, and so on.To access the home screen, press the home button located at the bottom of the device.3. AppsThe device comes with pre-installed apps that you can use for various purposes, including communication, entertainment, productivity, and more.To access the apps, swipe left or right from the home screen.To download additional apps, go to the App Store or Google Play Store and download the desired app.4. SettingsTo access the settings, swipe down from the top of the device and tap on the gear icon.From the settings, you can adjust various settings related to Wi-Fi, mobile data, sound, display, storage, and more.5. Taking Photos or VideosTo take a photo or video, open the camera app from the home screen or app drawer.Choose the desired camera mode (rear or front) and adjust the settings as needed.Tap the shutter button to take a photo or press and hold the button to record a video.6. Bluetooth ConnectivityTo connect the device to a Bluetooth device:Turn on the Bluetooth device that you want to connect to (such as headphones or speakers).On your device, go to settings and turn on Bluetooth.Select the device that you want to connect to from the list of available devices.7. Battery Life and ChargingThe device has a long battery life, but you can also extend the battery life by taking the following steps:Reduce the screen brightnessTurn off Wi-Fi, Bluetooth, or mobile data when not in useExit apps that are not being usedThe device comes with a charging cable that you can use to charge the battery. The charging port is located at the bottom of the device.8. TroubleshootingIf you experience any issues with the device, you can try the following steps:Restart the deviceUpdate the softwareUninstall and reinstall the app causing the issueContact customer support for further assistanceConclusion:We hope that this user manual has provided you with all the information you need to use our product effectively and efficiently. If you have any further queries or concerns, please do not hesitate to contact us.Thank you for choosing our product.。
产品英文说明书(范本)
产品英文说明书产品英文说明书篇一:产品说明书——超级胶水产品中英文说明书产品说明书髙材**** ******* 原英文说明书 High gra de Super G lue Suppli er: Yiu Xi nqi SuperGlue Prduc t Factry B asic inf T ype: Liqui d Glue 图片已关闭显示,点此查看图片已关闭显示,点此查看 Brand Name: Bes t glue Mde l Number:BG-1200 Pl ace f rigi n: Zhejian g China (M ainland) M aterial: C yanacrylat e adhesive ther name:502,supe r glue Pac king: Cust mized Vlum e: 3g--30g Packaging DeliveryPackagingDetail:3gr ams/pc,12p cs/card,72cards/bx D elivery De tail:7-30d ays Specif icatins Hi gh grade s uper glueused fr d,rubber ,pl astics,met al,leather,ceramic...etc Super glue bnds is instan t bnding s ingle pnen t adhesive that bndalmst allclse fitti ng smth su rface in s ecnds.it r equires nmixing ,nheating ,n lamping.(1) Fea ture: Mate rial:C yanacrylat e adhesive Glue perce nt:≥70% r custmi zed Cuttin g strength:≥10Mp a perating temperatu re:Aru nd 25°c Ce rtificatin:SGS ,MSDS Bndsin:Aru nd in 10se cnds Speci fic gravit y:as c ustmized V alidity: 12 mnth s (20°c) (2) Caut in : 1: Strng adh esin t ski n, dn’t pe el it dire ctly if be ing glued, bathing i thin ht at er fr a hi le r ipe i t ff ith a cetne. 2: Strng s mell hen v latilize ,make suret use it u nder ide a nd air-fli ng circums tance henrking ithit fr a ln g time. 3:Seal t he pen end tightly t prevent v latilizati n. 4:S trage unde r the requ ired cndit in strictl y, highte mperaturer etness i ll shrtenthe strage perid. 5:Please keep ut f reach f c hildren. 高级瞬间胶供应商:义乌市新奇超级胶水生产厂基本信息类型:液体胶品牌名称:最佳胶水型号:BG- 1200 产地:浙江中国(内地)材质:氰基丙烯酸盐黏合剂其他名称:502,超级胶水包装:定制容量:3克 - 30克包装及送货包装说明:3克/瓶,12瓶/卡,72卡/箱递货时间详情: 7~30天产品说明高级瞬间胶适用于木材,橡胶,塑料,金属,皮革,陶瓷...等超级胶水可以在几乎所有紧贴的光滑表面通过粘合剂组分几秒内粘结,不需要混合,不需要加热,不需要光照。
说明书的英语作文
说明书的英语作文Welcome to the user manual! This document is designedto provide you with all the information you need to effectively use our product. We hope you find it helpfuland easy to understand.First and foremost, it is important to carefully read the instructions before using the product. This will ensure that you are aware of all the features and functions available to you.In order to get the best results from the product, itis essential to follow the recommended operating procedures. This will help to maximize the product's performance and longevity.Please note that regular maintenance is required tokeep the product in good working condition. Be sure torefer to the maintenance section of this manual fordetailed instructions on how to properly care for theproduct.If you encounter any issues or have any questions about the product, please refer to the troubleshooting section of this manual. This will provide you with helpful tips and solutions to common problems.We hope that this user manual provides you with the information you need to make the most of our product. If you have any further questions or concerns, please do not hesitate to contact our customer support team for assistance. Thank you for choosing our product, and we hope you enjoy using it!。
英文说明书的翻译
英文说明书的翻译英文说明书的翻译目前,我国的产品说明书的翻译有许多不尽如人意的地方,概括起来,是由于不懂英语说明书的句型和选词不当所致。
以下,我们就来讨论一下说明书的句型和选词问题。
一、产品说明书的若干句型句型是语言结构的要素。
无论英译汉还是汉译英都离不开句型。
学习、掌握和使用句型是翻译工作者的必由之路。
现将英文产品说明书的若干常见句型说明如下:1.(情态动词)be+形容词(或过去分词)+目的状语这种句型用语文章开头,说明该产品是做什么用的,例如:1)本冲床主要用于冲孔、落料、弯曲、浅拉伸、剪切等冷冲工艺。
This press is mainly suitable for cold working operations, such as punching, blanking, bending, shallow drawing, cutting and so on.2)该产品用于温度225℃以下的热水管或蒸汽管道上。
This product can be used in hot water or steam line with the temperature limited to 225℃.类似常见的类型还有:... is used for...... is used to ...... is used as...... is designed to...... is suitable to be used in......is available for (to)......may be applicable to......may be used to......can be used as......can be designed as......is adapted for (to)......is designed to be...so as to......is capable of...2.(情态动词)+be+介词短语情态动词should,can,may+be+介词短语,这种句型用于说明物体的特征、状态和范围,以及计量单位等。
英文说明书模板
英文说明书模板Instruction Manual TemplateIntroduction:\nAn instruction manual is a document that provides step-by-step guidance on how to use a product or perform a specific task. This template is designed to help you create aneffective instruction manual that is clear, concise, and easy to understand.Section 1: Product Overview\n- Provide a brief introduction to the product, including its purpose and main features.\n- Include any important safety information or warnings that users should be awareof before using the product.Section 2: Getting Started\n- Explain how to set up the product and any initial steps that need tobe taken.\n- Include clear diagrams orillustrations to help users understand the process.Section 3: Operating Instructions\n- Provide detailed instructions on how to use the product, including any specific settings or modes.\n- Break down complex tasks into smaller steps and usebullet points or numbered lists for clarity.\n- Include any troubleshooting tips or common issues that users may encounter.Section 4: Maintenance and Care\n- Explain howto properly clean and maintain the product for optimal performance.\n- Provide guidelines on storage, battery replacement, or any othernecessary maintenance tasks.Section 5: Frequently Asked Questions (FAQs)\n- Compile a list of common questions that users may have about the product.\n- Provide clear and concise answers to each question.Section 6: Troubleshooting Guide\n- Create a troubleshooting guide that helps users identify and resolve common issues.\n- Include step-by-step instructions for each troubleshooting scenario.Section 7: Warranty Information\n- Clearly state the warranty terms and conditions for theproduct.\n- Explain how customers can contact customer support for assistance with warranty claims or other issues.Conclusion:\nAn effective instruction manual should provide clear and concise guidance on how to use a product. By following this template, you can create an instruction manual that is easy for users to understand and follow. Remember to use simple language, include visual aids when necessary, and organize the information in a logical manner.。
- 1、下载文档前请自行甄别文档内容的完整性,平台不提供额外的编辑、内容补充、找答案等附加服务。
- 2、"仅部分预览"的文档,不可在线预览部分如存在完整性等问题,可反馈申请退款(可完整预览的文档不适用该条件!)。
- 3、如文档侵犯您的权益,请联系客服反馈,我们会尽快为您处理(人工客服工作时间:9:00-18:30)。
QJ系列气体继电器QJ Series of Gas Relay安装使用说明书Operating Instruction Manual沈 阳 科 奇 电 器 有 限 公 司SHENYANG KEQI ELECTRICAL EQUIPMENT CO.,LTD地址:沈阳市沈北新区辉山经济开发区辉山大街123-15 邮编Postcode:110164 Add: No.123.huishan street,HuiShan New&High Techagricul Development电话Tel:(024)88082828传真Fax:(024)88082929 E-mail:kqdq@一、产品简述气体继电器是油浸式变压器及有载分接开关所用的一种保护装置。
气体继电器安装在变压器箱盖与油柜的联管上,可装导气管,实现地面排气和取样。
在变压器内部故障而使油分接产生气体或造成油流冲动时,使继电器的接点动作,以接通指定的控制回路,并及时发出信号或自动切除变压器。
二、型号说明标注实例:QJ1-80A-10表示第1次设计的管路通径为Φ80mm,带防雨罩及取气盒导管长度为10000mm 的气体继电器. 注:设计序号后带“G”表示改进型产品三、使用条件1.允许工作温度:-30℃~95℃2.安装方式:继电器管路轴线应与变压器箱盖平行,允许通往储油柜的一端稍高,但其轴线与水平面的倾斜度不超过4%。
四、结构与性能参数QJ 系列继电器结构基本相同。
本继电器机芯结构如图1所示,机芯上部由1气塞、2气塞螺母、3探针、4封塞、5开口杯(浮子)、6重锤、7挡板、8磁铁、9接线端子、10弹簧、11调节杆、12干簧接点组成动作于跳闸的流速装置。
盖上的气塞1是供安装时排气以及运行中抽取故障气体之用。
探针3是供检查跳闸机构的灵活性和可靠性之用。
123456781211109图1QJ 设计序号气体继电器管路通径 (mm)A-带防雨罩、取气盒导气管长度(1/1000)mm五、工作原理继电器正常运行时其内部充满变压器油,浮杯(浮子)处于图1所示的上倾位置。
当变压器内部出现轻微故障时,变压器油由于分解而产生的气体聚集在继电器上部的气室内,迫使其油面下降,浮杯5随之下降到一定位置,其上的磁铁8使干簧接点12吸合,接通信号回路,发出报警信号。
当变压器内部发生严重故障时,邮箱内压力瞬时升高,将会出现油的涌浪,冲动挡板7,当挡板旋转到某一限定位置时,其上的磁铁8使干簧接点12吸合,接通跳闸回路,不经预先报警而直接切断变压器电源,从而起到保护变压器的作用。
六、主要技术参数(见表1、表2)抗震能力:当震动频率(正弦波)4-20HZ ,加速度为4g ,继电器不误动。
防护等级:继电器防喷水等级为1PX5。
注:产品本身具备防雨功能。
特殊情况增加防雨罩需另购。
密封性能:继电器内充满变压器油在常温下加压200KPa,持续20min 无渗漏。
-表1 -接点容量工作电压工作电流AC: 220V-240V 0.3 A ~1A cos Φ≤0.6 DC: 110V-240V0.3 A ~1AS ≤0.005S-表2 -技术参数产品型号 管路直径(mm )积聚气体数量(ml )油速整定范围(m/s )QJ1-50 Φ50 250~300 0.6~1.2 QJ1-80 Φ80 250~300 0.7~1.5 QJ3-50 Φ50 250~300 0.6~1.2 QJ3-80 Φ80 250~300 0.7~1.5 QJ4-50 Φ50 250~300 0.6~1.2 QJ4(13)-80 Φ80 250~300 0.7~1.5 QJ5-80 Φ80 250~300 0.7~1.5 QJ12-80 Φ80 250~300 0.7~1.5 QJ13-80 Φ80 250~300 0.7~1.5 QJ14-80Φ80 250~300 0.7~1.5七、外形及安装尺寸图(见图2、表3)图2-表3- 安装尺寸产品型号 D0HL DAd B 质量(kg)QJ1-50 Ф50 220 160 Ф130 120M12100 10QJ1-80 Ф80 220 160 Ф130 120M12100 9QJ4(13)-50 Ф50 215 185 Ф125 125Ф14100 11QJ4-80 Ф80 235 185 Ф160 160Ф18100 13QJ3,QJ5,QJ12-80 Ф80 235 185 Ф160 160Ф18100 13 QJ13,QJ14-80 Ф80 235 185 Ф160 160Ф18100 13八、安装及调试8.1安装1、新出厂的继电器安装使用前必须先取出继电器机芯,拆除运输固定用的绑扎带。
并检查所有紧固件是否松动,浮杯(浮子)及挡板是否动作灵活,接点是否可靠开闭。
2、继电器应安装在油浸式变压器的油箱与储油柜质检的联管上,联管的内径应与继电器的管路通径(口径)一致,继电器上的箭头必须指向储油柜。
允许储油柜端稍高,但联管的轴线与水平面的倾斜度不得超过4%,或采用安装倾斜连气管的方法,使变压器内部的气体顺利进入继电器内。
3、为方便运行现场对气体继电器的检修,其安装位置应保证继电器机芯能顺利的从壳体中取出。
QJ-50\80型取出高度为150mm。
4、安装完毕后,打开连接管上的油阀,拧下气塞防尘罩用手拧松气塞螺母2(注意不将螺母拧下来),让空气排出,直到气嘴逸油位置,再拧紧螺母。
5、如需接引导气盒时,在没打开油阀之前,将继电器上盖上的封塞螺钉4拧下,然后把接线座3拧上,再将导气盒6用螺母4,胶垫5接到引座3上(见图2、图3),接导气盒后继电器上的气塞可正常使用。
至导气盒图3DQ-2型导气盒连接示意图6、电气接线如图4所示,继电器接线可按接线图;既可采用串联接法,也可以采用并联接法,还可以单独使用,用户可根据不同要求接线。
注:接点1、2为信号输出接点 , 接点3、4、5为带公共点双路跳闸接点,一个接线孔图4-1QJ1型、QJ4型接线示意图注:接点1、2为信号输出接点 , 接点3、4、5、6为双路跳闸接点,两个接线孔图4-2 QJ3型、QJ5型、QJ12型接线示意图注:接点1、2 , 3 、4 为两对独立信号输出接点,接点5、6,7、8为两对独立信号跳闸接点,两个接线孔图4-3 QJ13型、QJ14型接线示意图8.2调试QJ系列继电器是油浸式变压器的重要保护装置,因此运行部门均有特殊规定,诸如必须经检验部门调试、整定及出具证明后方可以投入使用,故调试和油速整定工作应按有关规定执行。
8.3气体容积量的调整改变干簧接点的位置,可以调节信号接点动作的气体容积,干簧接点上移时气体容积量减少,干簧接点下移时气体容量增大。
调整后应拧紧锁牢螺钉。
8.4油速调整调节与弹簧连接的调节杆可改变挡板弹簧的拉力,即可改变跳闸接点动作的油速(继电器出厂时已整定好,其数值见出厂检验报告),调整后应锁牢螺母。
动作油速整定工作应由专业人员在专用流速校验设备上进行。
8.5挡板旋转角度调整调节止挡螺钉可以改变挡板的旋转角,即可调节磁铁与干簧接点间距离(0.5~1.0mm),借以保证干簧接点可靠开闭。
从气嘴1处打入气体,可检查“信号”接点的动作可靠性。
将探针罩拧下,按动探针2,可以检查“跳闸”接点动作的可靠性。
在运行中采集气样时,首先拧下气塞防尘罩,然后将气样瓶胶管插在气嘴上,再拧松气塞螺母,气样即可充入瓶内,采样后再拧紧螺母回装防尘罩。
九、保养维修继电器应每年进行一次外观检查及信号回路的可靠性和跳闸回路的可靠性检查。
已运行的继电器应每两年开盖一次,进行内部结构和动作可靠性检查。
已运行的继电器应每五年进行一次工频耐压试验。
十、注意事项磁铁不能剧烈震动,也不能放在强磁场及温度超过100℃和低于-40℃的环境中,以防退磁。
不要随意拆卸干簧接点,特别是根部引线不得任意弯拆,以免损坏。
十一、承诺用户单位在使用本产品时要按照说明书进行操作;本产品在安装之日起18个月内,并在公司发货给用户不超过24个月的期限内,我公司对产品实行三包。
1. summaryMain ApplicationGas relay is a kind of protective devices used for oil-immersed transformers and oil-immersed on Load tap changers.Gas relay(hereinafter referred to as the relay) is installed in the pipe connector Between a transformer cover and a conservator and may be fitted with an air duct box to real-ize ground exhaustion and sampling. The relay is contacts act to make connect with control loopdesignated and signal in time or automatically cut off the transformer in the case of oil decomposed and gasified or oil flow implusion caused by internal failure of the transformer.2. Model3.Service Conditions3.1.Permissible operating temperatures:-30~+953.2Assembling method: the relayis pipe axis should be parallel to the transformer case cover,And it is allowed for the end leading to the conservator id higher, however the inclination between The axis and level surface may not exceed 4%.4.Structure & Operating PrincipleStructure of the Gas RelayQJ series of relays are basically in similar structure.the relay’ s core structure is shown in Fig.1, and the relay’ supper core consists of gas lock 1,gas lock nut 2,probe 3, blocking 4, snap ring(float)5, weights drop 6, guard board7, magnet 8, connecting terminal9, spring 10, regulating rod11, and dry reed contact12, forming a flow device that acts on tripping. Gas lock 1 in the cover is used for exhaustion in the case of assembly and extracting gas out of order. Probe 3 is used to check flexibility and reliability of the tripping mechanism.123456781211109QJSerial number designed Gas relayPipe diameter (nominal valve) mmA-with waterproof coversand gas-collecting boxFig.15.Operating Principle of Gas RelayIn the case of normal operation it is full of transformer oil inside the relay.The snap ring(float) isin inclined position upward as shown in Fig.1.Gas produced by the transformer oil decomposed gathers in upper gas chamber of the relay and forces the oil surface to reduce,snap ring 5 reducesto a certain position together with it,and magnet 8 thereon makes dry reed contact 12 suck to connect with the signal circuit to give alarm signal in the case of slight circuit to give alarm signal.In the case of serious failure inside the transrormer the pressure in the oil tank rises instantaneously,oil surging occurs and impulses guard board7,and magnet 8 thereon makes sryreed contace 12 suck to connect with the tripping circuit to give alarm signal and cut off the teansformer.6.Main Technical Parameters (see List 1, List 2)6.1 Shock resistance : if frequency of shock (sine wave) is 4 to 2o Hz and acceleration 4g therewill be no accidental operation of the relay.6.2 Level of protection:the relay is at 1P×5 level of water spray prevention.Note:the product is provided with the function of flashing.In special cases,to add rain screen needs to be purchased additionally.6.3 Sealing property:there is no leakage to pressurize 200Kpa for 20 minutes at normal temperature when it is full of transform oil in the relay.-List 1(Contact Rating)Operating voltage Working currentAC:220V-250V 0.3A~1A cosΦ≤0.6 DC:110V-240V 0.3A~1A S≤0.005S- List 2 (Technical Parameters)Model Pipediameter(mm)Accumulative gas quantity(ml)Oil speed setting range(m/s)QJ1-50 Φ50 250~300 0.6~1.2 QJ1-80 Φ80 250~300 0.7~1.5 QJ3-50 Φ50 250~300 0.6~1.2 QJ3-80 Φ80 250~300 0.7~1.5 QJ4(13)-50 Φ50 250~300 0.6~1.2 QJ4-80 Φ80 250~300 0.7~1.5 QJ5-80 Φ80 250~300 0.7~1.5 QJ12-80 Φ80 250~300 0.7~1.5 QJ13-80 Φ80 250~300 0.7~1.5 QJ14-80 Φ80 250~300 0.7~1.57.External & Installation Dimensions(see Fig.2 , List 3)External appearance and dimensions of QJ-50 and 80 are shown in Fig.2,and pleaserefer to List 3 for the installation dimensions.Fig.2- List 3 (Installation Dimensions)Model D0 H L D A d B Weight(kg)QJ1-50 Ф50 220 160Ф130 120M12100 10QJ1-80 Ф80 220 160Ф130 120M12100 9QJ4(13)-50 Ф50 215 185Ф125 125Ф14100 11 QJ4-80 Ф80 235 185Ф160 160Ф18100 13 QJ3(QJ12)-80 Ф80 235 185Ф160 160Ф18100 13 QJ13-80 Ф80 235 185Ф160 160Ф18100 13 QJ14-80 Ф80 235 185Ф160 160Ф18100 138.Installation & Debugging8.1.Relay Installation8.1.1. The relay core must be taken out and the bandage used to fix in transit be disassembled berore installation of the relay leaving factory.Check all of the fastenings if they become flexible,if the snap ring(float) and guard board move flexibly,and if the contacts open and close reliably.8.1.2.The relay should be installed in the pipe connector between an oil-immersed transformer’soil tank and a conservator.Internal diameter of the pipe connector should be the same with the relay’s pipe diameter(caliber),and the arrow on the relay must be directed to the conservator. It is allowed that the conservator end is higher however the degree of inclination may not exceed 4% between the pipe connector’s axis and level surface or the method for installation of inclined air fitting pipe may be used so that the gas inside the taansformer can smoothly enter into the relay.8.1.3. In order to be converient to overhaul the gas relay at site,its installation site needs to guarantee that the relay’s core may be smoothly taken out of the case.The height for QJ4-25 typeto be taken out is 130mm, and that for QJ4-50 and 80 types 150mm.8.1.4 .Open the valve in the connecting pipe, take down the gas lock dust cover, and unscrew gas lock nut 2 by hand (not to take down the nut) after installation to exhaust air till the air nozzle’s oil spill, and then screw down the nut.8.1.5.Take down blocking screw 4 in the cover of the relay before open the oil valve if it is necessary to connect with the air dust box, then srew on joint chair 3, and then connect conduct pipe 6 to joint chair 3 with nut 4 and cushion 5 (please refer to Fig.2 and 3). The gas block in the relay can be normally used after connected with the air duct box.to gas collecting boxFig.38.1.6 The electric connection is show in Fig.4.The relay’s connection may be made in series or inparallel according to the connection diagram, it may be separately used also,and users can make wire connection according to different requirements. Screw out press line nut 13 in the case of threading, piece the cable into the wire connection from the nut hole through rubber ring 14 and screw down nut 13 after connection so that the rubber ring clips the cable and buddle them firmly with adhesive tape to prevent from water inflow.1,2:Signal ; 3,4,5:TrippingFig.4-1 QJ1\QJ41,2:Signal; 3,4,5,6:TrippingFig.4-2 QJ3\QJ5\ QJ121,2,3,4:Signal ; 5,6,7,8:TrippingFig.4-3 QJ13\ QJ148.2 DebuggingQJ series of relays is an important protective device of oil-immersed transformer so there are special provisions stated for an operational unit, for example it may be only brought into service after an inspection department’s debugging, examination, and issuing cofirming documentation,and accordingly works on debugging and oil speed examination should be done according to pertinent regulations.8.3.Gas Volumetric Quantity AdjustmentTo change the dry reed contact’s position may adjust volumetric quantity the action of signal contact, volumetric volume may reduce when the dry reed contact moves upwards and may increase when the dry reed contact moves downwards. The screwd down and locked firmly after adjustmen.8.4. Oil Speed AdjustmenTo adjust the regulating rod connected with the spring may change the pulling force of the baffle board spring, namely the acting oil speed shall be done with a special flow rate checking facilty by professionals.8.5. Adjustment of the Ballle Baffle Board’s Angle of Rotation8.5.1.To adjust the backstop screw may change the baffle board’s angle of rotation, namely the distance (0.5~1.0mm) between the magent and dry reed contact may be adjusted to ensure that the dry reed contact may be opened and closed reliably.8.5.2. To pump gas in from nozzle 1 may cheek action reliability of the “signal” contact.8.5.3.Take down the probe cover and press probe 2 to check action reliability of the “tripping” contact.8.5.4 To collect gas sample in service, take down the gas lock dust cover at first, then insert the gas Sample rubber tube in the air nozzle,unscrew the gas lock nut, and the gas sample may be filled in the bottle. Screw down the nut after sampling and fix the dust cover.9. Maintenance and Several9.1. An inspection of appearance of the relay should be made and an inspection of reliability of the signal circuit as well as that of the tripping circuit should be made once annually.9.2. The relay that is in service should be opened up once every two years to made an inspection of its internal structure and action reliability.9.3.power frequency and breakdown tests of the relay that in service should be done once every five years.10.Notice10.1. The magnet may neither be vibrated acutely nor put in strong magnetic field or an environment at temperature higher than 100℃ or lower than -40℃ to prevent from being demagnetized .10.2. Don not disassemble the dry reed contant at will;espedially dotnot bend the root of the lead to avoid from being damaged.。