oraclesolaris11上手指南
Oracle11g On SUN 安装指南
Oracle11g On SUN 安装指南infoX-MDSP错误!未知的文档属性名称目录目录1 安装前的准备工作............................................................................ ........................................... 1-11.1 检查与配置硬件环境 ........................................................................... ....................................................... 1-2 1.2 检查与配置软件环境 ........................................................................... ....................................................... 1-3 1.2.1 检查操作系统版本 ........................................................................... .................................................. 1-3 1.2.2 操作系统包需求 ........................................................................... ...................................................... 1-3 1.3 配置网络 ........................................................................... ........................................................................... 1-4 1.3.1 配置/etc/hosts文件............................................................................ ................................................. 1-4 1.3.2 配置允许root用户通过telnet方式登录主机 ........................................................................... ....... 1-5 1.3.3 配置允许root用户通过FTP方式登录主机 ........................................................................... ......... 1-5 1.3.4 同步双机时钟 ........................................................................... .......................................................... 1-5 1.4 创建相关用户和用户组 ........................................................................... ................................................... 1-6 1.4.1 创建..................................................................... 1-61.4.2 建用户 ........................................................................... ..................................................................... 1-6 1.5 建立双机互信关系 ........................................................................... ........................................................... 1-7 1.6 配置内核参数和环境变量 ........................................................................... ............................................... 1-7 1.6.1 配置内核参数(Solaris 10) .......................................................................... ........................................ 1-7 1.6.2 配置环境变量的文件 ........................................................................... .............................................. 1-9 1.7 创建安装目录 ........................................................................... ................................................................... 1-9 1.8 其他事项 ........................................................................... ......................................................................... 1-102 Sun Cluster安装与配置 ........................................................................... .................................. 2-12.1 Cluster规划 ........................................................................... ....................................................................... 2-2 2.2 Cluster安装准备 ........................................................................... ............................................................... 2-3 2.3 安装Cluster ...................................................................... ........................................................................... 2-4 2.4 安装Cluster补丁 ........................................................................... ............................................................. 2-6 2.5 配置Cluster ...................................................................... ........................................................................... 2-7 2.6 配置IPMP .........................................................................2.7 配置仲裁设备 ........................................................................... ................................................................. 2-113 外置磁盘配置............................................................................ ................................................... 3-13.1 外置磁盘规划 ........................................................................... ................................................................... 3-2 文档版本错误!未知的文档属性名称 (2021-11-26)错误!未知的文档属性名称i1 安装前的准备工作infoX-MDSP错误!未知的文档属性名称3.2 建立3个数据库状态副本 ........................................................................... ............................................... 3-3 3.3 创建DG ........................................................................... ............................................................................ 3-3 3.4 创建LV ........................................................................... ............................................................................. 3-3 3.5 创建裸设备配置文件 ........................................................................... ....................................................... 3-44 在节点1上安装数据库 ........................................................................... ................................... 4-14.1 安装数据库软件 ........................................................................... ............................................................... 4-2 4.1.1 安装 ........................................................................... ......................................................................... 4-2 4.1.2 安装后检查............................................................................ ............................................................. 4-8 4.2 NET配置 ........................................................................... ........................................................................... 4-8 4.3 创建数据库 ........................................................................... ..................................................................... 4-13 4.3.1 使用DBCA建库 ........................................................................... .................................................. 4-13 4.3.2 建库后配置与验证 ........................................................................... ................................................ 4-27 4.4 补丁 ........................................................................... .............................................................................. ... 4-30 4.4.1 打补丁的步骤 ........................................................................... ........................................................ 4-30 4.4.2 错误1及解决方法 ........................................................................... ................................................ 4-31 4.4.3 错误2及解决方法 ........................................................................... ................................................ 4-315 在节点2上安装数据库 ........................................................................... ................................... 5-1 6 注册Cluster的资源与双机切换 ........................................................................... .................... 6-16.1 创建资源组 ........................................................................... ....................................................................... 6-2 6.2 安装Oracle的dataservices ......................................................................................................................... 6-3 6.2.1 安装 ........................................................................... ......................................................................... 6-3 6.2.2 修改配置文件 ........................................................................... .......................................................... 6-3 6.3 配置Oracle 的dataservices ................................................................. ........................................................ 6-47 安装中的问题及处理方法 ........................................................................... ............................... 7-17.1 注册oracle资源报错 ........................................................................... ....................................................... 7-2 7.2 节点2的监听启动不了 ........................................................................... ................................................... 7-28 其他常用命令............................................................................ ................................................... 8-1ii 错误!未知的文档属性名称文档版本错误!未知的文档属性名称(2021-11-26)infoX-MDSP错误!未知的文档属性名称插图目录插图目录图4-1 Select a Product toinstall ...................................................................... ................................................... 4-2 图4-2 Specify Inventory directory and credentials................................................................... .......................... 4-3 图4-3 Product-Specific PrerequisiteChecks ....................................................................... ............................... 4-4 图4-4Summary ...................................................................... ............................................................................4-5 图4-5Install ...................................................................... .............................................................................. ... 4-6 图4-6 Execute Configurationscripts ...................................................................... ............................................ 4-7 图4-7 End ofinstallation ................................................................. ................................................................... 4-8 图4-8 Welcome ...................................................................... ............................................................................4-9 图4-9 ListenerConfiguration,Listener ....................................................... ...................................................... 4-10 图4-10 Listener Configuration,SelectProtoco ...................................................................... ........................... 4-11 图4-11 ListenerConfiguration ................................................................ ......................................................... 4-11 图4-12 Listener ConfigurationDone ......................................................................... ...................................... 4-12 图4-13Welcome ...................................................................... ........................................................................ 4-13 图4-14Operations ................................................................... ......................................................................... 4-14 图4-15 DatabaseTemplates .................................................................... .......................................................... 4-14 图4-16Databaseidentification ............................................................... .......................................................... 4-15 图4-17 ManagementOptions ...................................................................... ..................................................... 4-15 图4-18 Database Credentials .................................................................. .......................................................... 4-16 图4-19 Storage Options ...................................................................... ........................................................... 4-17 图4-20 Choose the recovery option for thedatabase ..................................................................... .................. 4-17 图4-21 DatabaseContenet ..................................................................... .......................................................... 4-18 图4-22 InitializationParameters ................................................................... ................................................... 4-19 图4-23 Sizing标签 ........................................................................... ............................................................... 4-20 图4-24 Character Sets标签 ........................................................................... .................................................. 4-20 图4-25 Connection Mode 标签 ........................................................................... ............................................. 4-21 文档版本错误!未知的文档属性名称 (2021-11-26)错误!未知的文档属性名称iii1 安装前的准备工作infoX-MDSP错误!未知的文档属性名称图4-26 SecuritySettings ..................................................................... ............................................................. 4-22 图4-27 Automatic MaintenanceTasks ........................................................................ ..................................... 4-22 图4-28 DatabaseStorage ...................................................................... ............................................................ 4-23 图4-29 CreationOptions ...................................................................... ............................................................ 4-24 图4-30 Confirmation ................................................................. ....................................................................... 4-25 图4-31 Database ConfigurationAssistant .................................................................... .................................... 4-26 图4-32 信息确认窗口 ........................................................................... ......................................................... 4-26iv 错误!未知的文档属性名称文档版本错误!未知的文档属性名称(2021-11-26)infoX-MDSP错误!未知的文档属性名称表格目录表格目录表1-1 交换空间相关参数............................................................................ ..................................................... 1-2 表1-2 操作系统与数据库版本对应关系表 ........................................................................... .......................... 1-3 表1-3 oracle11g release1对操作系统包需求说明表 ........................................................................... ............ 1-4 表1-4 Solaris 10内核参数说明表............................................................................ ......................................... 1-7 表2-1 Sun Cluster规划说明表 ........................................................................... ............................................... 2-2 表2-2 Resource Group规划说明表 ........................................................................... ........................................ 2-2 表3-1 磁盘卷划分说明表............................................................................ ..................................................... 3-2 表3-2 vg_ora规划说明表 ........................................................................... ...................................................... 3-2文档版本错误!未知的文档属性名称 (2021-11-26)错误!未知的文档属性名称 v感谢您的阅读,祝您生活愉快。
Oracle Solaris 11.4 E60977-02 更新手册说明书

Updating Your Operating System to Oracle Solaris 11.4E60977-02May 2023Updating Your Operating System to Oracle Solaris 11.4, E60977-02Copyright © 2006, 2023, Oracle and/or its affiliates. Primary Author: Cathleen Reiher, Alta ElstadCopyright © 2006, 2023, Oracle et/ou ses affiliés.Contents1 Updating an Oracle Solaris 11.3 System to Oracle Solaris 11.4How to Update from Oracle Solaris 11.3 to Oracle Solaris 11.41-1 How to Install and Run the Pre-Update Enterprise Health Check Tool1-3iv1Updating an Oracle Solaris 11.3 System to Oracle Solaris 11.4This book explains how to update an Oracle Solaris 11.3 system to Oracle Solaris 11.4.To transition from Oracle Solaris 10 to Oracle Solaris 11, you must either do a freshinstallation of Oracle Solaris 11 or migrate Oracle Solaris 10 OS instances or zones to anOracle Solaris 10 zone on an Oracle Solaris 11 system. For more information, see Creatingand Using Oracle Solaris Zones.How to Update from Oracle Solaris 11.3 to Oracle Solaris 11.4Review Installation Considerations in Oracle Solaris 11.4 Release Notes for system memoryand disk space requirements and for platform support, including firmware and device support.Review Update Considerations in Oracle Solaris 11.4 Release Notes for work that you mightneed to do such as check the setterm package, check the java mediated link, remove filesfrom /var/tmp, or export the OpenLDAP database to LDIF format.1.Update the system to Oracle Solaris 11.3 SRU 23 or newer.If the system to be updated is running Oracle Solaris 11.3 SRU 23 or newer, continue toStep 2.If the system to be updated is running a release of Oracle Solaris 11.3 that is older thanSRU 23, update to at least Oracle Solaris 11.3 SRU 23.a.Check configured publishers.Ensure that the configured publishers provide Oracle Solaris 11.3 SRU 23 or a newerOracle Solaris 11.3 SRU. The following command lists all Oracle Solaris 11.3 SRUsthat are available from the publishers that are configured on the system:$ ********************.11-0.175.3NAME (PUBLISHER) VERSION IFOentire 0.5.11-0.175.3.27.0.4.0 ---entire 0.5.11-0.175.3.26.0.5.0 ---entire 0.5.11-0.175.3.25.0.3.0 ---entire 0.5.11-0.175.3.24.0.4.0 ---entire 0.5.11-0.175.3.23.0.5.0 ---entire 0.5.11-0.175.3.22.0.3.0 ---b.Update to Oracle Solaris 11.3 SRU 23 or a newer Oracle Solaris 11.3 SRU.The following example shows updating to Oracle Solaris 11.3 SRU 27:$ ***********************************.11-0.175.3.27c.Boot to the boot environment (BE) that was created in the previous step.2.Check that the system supports Oracle Solaris 11.4.a.Run the Oracle Solaris 11.4 readiness checker.If you are running Oracle Solaris 11.3 SRU 35 or newer, see How to Install and Runthe Pre-Update Enterprise Health Check Tool.1-1Chapter 1How to Update from Oracle Solaris 11.3 to Oracle Solaris 11.4b.Fix any check failures that are documented in the report.3.Update the system to Oracle Solaris 11.4.a.Get access to Oracle Solaris 11.4 packages.Use one of the following methods:•Use the Oracle Solaris support package repository.Configure the https:///solaris/support/ location forthe solaris publisher.•Provide a local Oracle Solaris 11.4 package repository.Download the repository files and installation script from the Oracle Solaris11.4 Support Repository Updates (SRU) Index (Doc ID 2433412.1) pageon My Oracle Support (MOS).See Creating Package Repositories in Oracle Solaris 11.4 for informationabout downloading and installing a local package repository, configuringthe solaris publisher to use the local repository, and providing access tothe local repository from other systems.b.Check configured publishers.Confirm that the system can access Oracle Solaris 11.4 packages:$ *********************NAME (PUBLISHER) VERSION IFO...entire 11.4-11.4.14.0.1.5.0 ---...entire 11.4-11.4.1.0.1.4.0 –--If you do not see Oracle Solaris 11.4 packages, make sure you did not skipsolaris publisher location configuration in the previous step.c.View the Oracle Solaris 11.4 license.The license associated with Oracle Solaris 11.4 must be accepted in order toperform the update. View the contents of this license prior to acceptance, toensure that you understand it. The following command shows the summarylicense:$ pkg info -r --license install-image/solaris-auto-installThe full license is available at https:///assets/terms-oracle-solaris-170415.pdf for users of Oracle server hardware, and is available athttps:///downloads/licenses/solaris-cluster-express-license.html for developers. If you agree to accept this license, then proceedwith the update.1-2Chapter 1How to Install and Run the Pre-Update Enterprise Health Check Toold.Test the update.If any software on the system has been obsoleted in Oracle Solaris 11.4, thatsoftware will be removed when you upgrade to Oracle Solaris 11.4, as noted inPlatform Support in Oracle Solaris 11.4 Release Notes. To see the list of packagesthat will be removed on upgrade, use the pkg update -nv command. The -noption shows what will be done but does not actually perform the update. The -voption shows what packages will be removed, and shows the full package versions.For software that will be removed, check the End of Feature Notices for OracleSolaris 11 list for a suggested replacement or other workaround.If the test update fails, check whether your platform is supported for Oracle Solaris11.4 (Installation Considerations in Oracle Solaris 11.4 Release Notes) or whetheryou need to check the setterm package as described in Pre-Update Checks inOracle Solaris 11.4 Release Notes.e.Update to Oracle Solaris 11.4.The following command updates to the newest version of Oracle Solaris 11.4 that isavailable from configured publishers. Update to the newest version to ensure that youhave all the fixes that you have in the Oracle Solaris 11.3 boot environment that youare updating.Using the --accept option signals your legal acceptance of the above license.$ pkg update --acceptIf you are updating to a version of Oracle Solaris 11.4 that is earlier than OracleSolaris 11.4 SRU 13, use the --be-name option to give the new boot environment ameaningful name. Starting with Oracle Solaris 11.4 SRU 13, the names of the bootenvironments created are based upon the name of the installed SRU. For example,the default name of the Oracle Solaris 11.4 SRU 14 boot environment is11.4.14.5.0.f.Boot to the new Oracle Solaris 11.4 BE.TroubleshootingCheck that your new BE is updated as expected:•Chapter 4, Updating or Upgrading an Oracle Solaris Image in Updating Systems and Adding Software in Oracle Solaris 11.4•Appendix A, Troubleshooting Package Installation and Update in Updating Systems and Adding Software in Oracle Solaris 11.4Next StepsReview Update Considerations in Oracle Solaris 11.4 Release Notes for steps that you mightneed to take after update.How to Install and Run the Pre-Update Enterprise Health Check ToolTo install this tool, the system must be running at least Oracle Solaris 11.3 SRU 35.To conduct this assessment, the user must be assigned the Compliance Assessor rightsprofile or have all zone privileges and the pliance.assess authorization.1-3Chapter 1How to Install and Run the Pre-Update Enterprise Health Check Tool Oracle provides a pre-update checker to help you determine whether a system that is running Oracle Solaris 11.3 is ready to update to Oracle Solaris 11.4. The report generated by this checker identifies superseded software versions and unsupported hardware. This procedure describes how to install and run the Pre-Update Enterprise Health Check (EHC) tool and how to generate the Oracle Solaris 11.4 readiness report.1.Install the required packages.On a system that is running at least Oracle Solaris 11.3 SRU 35, install thefollowing packages:# pkg install compliance update-check2.Verify that the ehc-update check is available.# compliance list3.Run the ehc-update check.# compliance assess -b ehc-update4.Verify that an assessment was generated.# compliance list5.Create the report.# compliance reportThe HTML report can be viewed on any browser. For failed checks, the reportprovides a description of the corrective action to be taken.1-4。
Oracle ATG 一手指南版本 11.0说明书
Version 11.0Repository Guide Oracle ATGOne Main StreetCambridge, MA 02142USARepository GuideProduct version: 11.0Release date: 01-10-14Document identifier: AtgRepositoryGuide1402071827Copyright © 1997, 2014 Oracle and/or its affiliates. All rights reserved.Oracle and Java are registered trademarks of Oracle and/or its affiliates. Other names may be trademarks of their respective owners.This software and related documentation are provided under a license agreement containing restrictions on use and disclosure and are protected by intellectual property laws. Except as expressly permitted in your license agreement or allowed by law, you may not use, copy, reproduce, translate, broadcast, modify, license, transmit, distribute, exhibit, perform, publish, or display any part, in any form, or by any means. Reverse engineering, disassembly, or decompilation of this software, unless required by law for interoperability, is prohibited.The information contained herein is subject to change without notice and is not warranted to be error-free. If you find any errors, please report them to us in writing.If this is software or related documentation that is delivered to the U.S. Government or anyone licensing it on behalf of the U.S. Government, the following notice is applicable:U.S. GOVERNMENT END USERS: Oracle programs, including any operating system, integrated software, any programs installed on the hardware, and/or documentation, delivered to U.S. Government end users are "commercial computer software" pursuant to the applicable Federal Acquisition Regulation and agency-specific supplemental regulations. As such, use, duplication, disclosure, modification, and adaptation of the programs, including any operating system, integrated software, any programs installed on the hardware, and/or documentation, shall be subject to license terms and license restrictions applicable to the programs. No other rights are granted to the U.S. Government.This software or hardware is developed for general use in a variety of information management applications. It is not developed or intended for use in any inherently dangerous applications, including applications that may create a risk of personal injury. If you use this software or hardware in dangerous applications, then you shall be responsible to take all appropriate fail-safe, backup, redundancy, and other measures to ensure its safe use. Oracle Corporation and its affiliates disclaim any liability for any damages caused by use of this software or hardware in dangerous applications.Oracle and Java are registered trademarks of Oracle and/or its affiliates. Other names may be trademarks of their respective owners.Intel and Intel Xeon are trademarks or registered trademarks of Intel Corporation. All SPARC trademarks are used under license and are trademarks or registered trademarks of SPARC International, Inc. AMD, Opteron, the AMD logo, and the AMD Opteron logo are trademarks or registered trademarks of Advanced Micro Devices. UNIX is a registered trademark of The Open Group.This software or hardware and documentation may provide access to or information on content, products, and services from third parties. Oracle Corporation and its affiliates are not responsible for and expressly disclaim all warranties of any kind with respect to third-party content, products, and services. Oracle Corporation and its affiliates will not be responsible for any loss, costs, or damages incurred due to your access to or use of third-party content, products, or services.For information about Oracle's commitment to accessibility, visit the Oracle Accessibility Program website at /pls/ topic/lookup?ctx=acc&id=docacc.Access to Oracle Support: Oracle customers have access to electronic support through My Oracle Support. For information, visit http:// /pls/topic/lookup?ctx=acc&id=info or visit /pls/topic/lookup?ctx=acc&id=trs if you are hearing impaired.Table of Contents1. Introduction (1)2. Repository API (3)Repository Architecture (4)Repository Items (4)Item Descriptors (5)MutableRepository (6)Core Repository API Elements (6)atg.repository.Repository (7)atg.repository.RepositoryView (7)atg.repository.RepositoryItem (8)atg.repository.MutableRepository (8)atg.repository.PropertiesChangedEvent (10)Cloning Repository Items (11)3. Repository Queries (13)Repository Query API (13)atg.repository.QueryBuilder (13)atg.repository.QueryOptions (14)Repository Query Examples (15)Repository Queries in the ATG Control Center (17)Repository Query Language (18)RQL Overview (18)Comparison Queries (19)Text Comparison Queries (19)Date and Timestamp Queries (20)Property of Property Queries (20)Logical Operators (20)Multi-Valued Property Queries (20)INCLUDES ITEM (21)IS NULL (21)COUNT (21)ALL (22)PROPERTY HINT (22)Full Text Search Queries (22)ID-based Queries (22)ORDER BY (23)RANGE (23)Parameters in Queries (24)Parameterized Field Queries (24)RQL Examples (25)RQL Grammar (25)4. SQL Repository Overview (27)5. SQL Repository Architecture (29)Repositories and Transactions (29)Managing Transactions (30)Repository Definition Files (31)Default Values and XML File Combination (32)SQL Repository Items (32)SQL Repository Item Descriptors (33)6. SQL Repository Data Models (35)Primary and Auxiliary Tables (35)id Property (35)Repository Guide iiiCompound Repository IDs (36)IdSpaces and the id Property (37)Database Sequences and Repository IDs (38)Auxiliary Tables (38)References Constraints (39)Properties and Database Columns (39)One-to-Many Relationships: Multi-Valued Properties (40)Operating on Multi-Valued Properties (42)Many-to-Many Relationships (42)Default Item Descriptor (43)Cascading Data Relationships (43)Cascade Insert (43)Cascade Update (44)Cascade Delete (44)Cascade Example (45)Item Descriptor Inheritance (46)Benefits of Item Descriptor Inheritance (47)Queries and Item Descriptor Inheritance (49)Item Descriptor Inheritance with the copy-from Attribute (49)Limitations of SQL Repository Inheritance (49)Derived Properties (50)Derivation Syntax (50)Override Properties (52)Properties Derived from the Same Item (52)Complex Derivations (52)Derivation Methods (53)Repository Items and Session Backup (56)7. SQL Repository Item Properties (59)Enumerated Properties (59)enumerated (60)enumerated String (61)Required Properties (62)Unique Properties (63)Date and Timestamp Properties (63)Last-Modified Properties (63)Null Properties (64)Grouping and Sorting Properties (64)Property Validation with a Property Editor Class (65)Maintaining Item Concurrency with the Version Property (66)Repository Items as Properties (67)Multiple Item Properties (68)Adding an Item to a Multi-Item Property (69)Querying Subproperties (70)Transient Properties (70)Assigning FeatureDescriptorValues with the <attribute> Tag (70)Attributes Used in the ACC (71)Linking between Repositories (72)SQL Types and Repository Data Types (72)User-Defined Property Types (73)Identifying a User-Defined Property Type (74)Using the property-type Attribute (74)Implementing a User-Defined Property Type (74)Property Conversion Methods (76)iv Repository GuideNull Values in User-Defined Property Types (76)User-Defined Properties and the ACC (76)User-Defined Property Type Examples (77)Property Fetching (79)Handling Large Database Columns (80)8. SQL Repository Queries (81)Repository Filtering (81)<rql-filter> (82)filterQuery and rqlFilterString Properties (83)Overriding RQL-Generated SQL (83)Parameterized Queries (84)Parameterized Query API (84)Query Types that Support Parameters (85)QueryCache and Parameterized Queries (85)Parameterized Query Example (85)Named Queries (87)Named Queries in an SQL Repository Definition File (87)Java Code Access to Named Queries (90)Text Search Queries (92)Simulating Text Search Queries (94)Wildcards in Queries (94)Not Queries and Null Values (95)Outer Joins (95)Table Ownership Issues (96)Constraints (97)Setting Ownership at the Repository Level (97)Unsupported Queries in the SQL Repository (97)9. Localizing SQL Repository Definitions (99)Defining a Resource Bundle (99)Localizing Properties (100)Localizing Enumerated Properties (100)10. SQL Repository Caching (103)Item and Query Caches (103)Item Caches (104)Query Caches (104)Caching Modes (104)Setting Caching Mode (105)Disabling Caching (105)Inherited Caching Modes (106)Simple Caching (106)Locked Caching (106)Prerequisites (106)ClientLockManager Component (107)ServerLockManager Component (107)Processing Lock Requests (109)Isolation Levels (110)Locking Exceptions (111)Resolving Lock Contention (111)Monitoring Lock Managers (112)Locking Scenarios and Workflows (113)Distributed Caching Modes (114)Simple versus Distributed Caching (114)Distributed Caching Mode Options (114)Repository Guide vDistributed TCP Caching (115)Distributed TCP Caching Setup (116)Restoring Subscriber Data (117)Invalidating Cached Items (117)Disabling Automatic Updates to das_gsa_subscriber (117)Distributed JMS Caching (118)Distributed JMS Caching Setup (118)Distributed Hybrid Caching (119)Distributed Hybrid Caching Setup (120)Distributed Hybrid Caching Initialization (123)Optimizing Performance (123)Monitoring Cache Manager Activity (124)Distributed External Caching (124)Cache Configuration (124)Query Cache Tuning (126)Item Cache Tuning: ATG Commerce (126)Cache Timeout (126)Monitoring Cache Usage (127)Weak Cache Hashtable (128)Caching by Repository IDs (129)Restoring Item Caches (129)Preloading Caches (130)Enabling Lazy Loading (131)Lazy Loading Settings (132)Integration with Batch Loading (133)Using Preloading Hints in Lazy-Loaded Queries (133)Cache Flushing (134)Flushing All Repository Caches (134)Flushing Item Caches (135)Flushing Query Caches (136)Cache Invalidation Service (136)Enabling the Cache Invalidator (136)Invoke the Cache Invalidator Manually (136)Use the Cache Invalidator with Distributed JMS Caching (137)11. External SQL Repository Caching (139)Choosing Repository Items for External Caching (139)Configuring Repository Items for External Caching (139)Cache Locality (140)Cache Modes for External Caching (141)External Caching and Cache Invalidation (142)External Caching and Cache Warming (142)External Cache Naming (143)External Caching Statistics (144)Batch Mode for External Caching (145)Enabling Batch Mode for External Caching (145)Repository Configuration for Batch Mode (146)12. Developing and Testing an SQL Repository (147)Adding Items (147)Adding Items with Composite IDs (148)Adding Items without Specifying IDs (148)Adding Items to Multi-Item Properties (149)Updating Items (149)Removing Items (150)vi Repository GuideRemoving References to Items (150)Querying Items (151)Importing and Exporting Items and DDLs (151)startSQLRepository (151)Requirements (152)Syntax (152)Exporting Repository Data (155)Importing Repository Data (155)Importing to a Versioned Repository (156)SQL Repository Test Example (157)Using Operation Tags in the Repository Administration Interface (158)Debug Levels (159)Modifying a Repository Definition (159)13. SQL Repository Reference (161)SQL Repository Definition Tag Reference (161)<!DOCTYTPE> (162)<gsa-template> (162)<header> (162)<item-descriptor> (163)<property> (168)<derivation> (173)<option> (173)<attribute> (174)<table> (175)<expression> (176)<rql-filter> (176)<named-query> (177)<rql-query> (177)<rql> (177)<param> (177)<sql-query> (177)<sql> (177)<input-parameter-types> (178)<returns> (178)<dependencies> (178)<transaction> (178)<rollback-transaction> (179)<add-item> (179)<update-item> (180)<remove-item> (180)<remove-all-items> (181)<query-items> (181)<print-item> (182)<set-property> (183)<import-items> (183)<export-items> (184)<load-items> (184)<dump-caches> (185)<print-ddl> (186)DTD for SQL Repository Definition Files (186)Sample SQL Repository Definition Files (192)Simple One-to-One (193)One-to-One with Auxiliary Table (194)Repository Guide viiOne-to-Many with an Array (195)One-to-Many with a Set (196)One-to-Many with a Map (197)One-to-Many Mapping to Other Repository Items (198)Ordered One-to-Many (199)Many-to-Many (200)Multi-Column Repository IDs (201)Configuring the SQL Repository Component (203)Registering a Content Repository (203)SQL Repository Component Properties (204)14. SQL Content Repositories (213)Setting Up an SQL Content Repository (213)Creating an SQL Content Repository Definition (214)Folder and Content Item Descriptors (214)Path and Item ID Attributes (215)Defining Content Item Descriptors (217)Content Attributes and Properties (217)Storing Content on a File System (218)Content Repository Example (218)Book Item Type Properties (219)Locating the Content with Path and Folder Properties (219)Book Example Repository Definition File (220)Book Example SQL Table Creation Statements (220)Adding Content to the Content Repository (221)Accessing Items in the Content Repository (221)Configuring an SQL Content Repository (222)15. Repository Loader (223)Repository Loader Architecture (223)Repository Loader Components (224)FileSystemMonitorScheduler (225)FileSystemMonitorService (225)LoaderManager (227)TypeMapper and TypeMappings (229)ContentHandlers (232)Repository Loader Administration (233)RLClient (234)Supplemental RLClient Parameters (234)Repository Loader Manifest (235)Manifest File Tags and Attributes (236)Importing Versioned Repository Data (236)Configuring the VersionedLoaderEventListener (237)Importing Targeters that Reference rules Files (240)Configuring TypeMapping Components for the PublishingFileRepository (241)Repository Loader Example (241)User Item Type (242)Item Pathnames (243)Type Mappings and Content Handlers (244)TypeMapper (244)xml2repository Schemas (245)Running the Repository Loader Example (245)16. Purging Repository Items (247)Selecting Repository Items (248)Related Conditions and Actions (249)viii Repository GuidePurge Statistics (249)Scheduling a Purge Operation (251)Stopping a Purge Operation (252)Asset Purge Error Handling (252)Throttling and Performance (252)Configuring Throttle Settings for an Asset Purge Function (252)Configuring the Thread Count for an Asset Purge Function (253)Using the Profile Asset Purge Function (253)Creating and Configuring an Asset Purge Function (254)Asset Purge Process Overview (255)Configuring Asset Condition Components (256)Configuring Related Condition Components (257)Configuring Related Action Components (260)Configuring Basic Purging Components (264)Configuring Additional Processing Components (267)Configuring the Asset Purge Pipeline (267)Configuring the Asset Purge User Interface (270)17. Repository Web Services (271)GetRepositoryItem Web Service (271)PerformRQLQuery Web Service (274)PerformRQLCountQuery Web Service (275)Repository Web Service Security (277)18. Composite Repositories (279)Use Example (279)Primary and Contributing Item Descriptors (279)Item Inheritance and Composite Repositories (280)Transient Properties and Composite Repositories (280)Non-Serializable Items and Composite Repositories (280)Property Derivation (281)Configuring a Composite Repository (281)Property Mappings (281)Excluding Properties (282)Link Methods (282)Creating Composite and Contributing Items (283)Missing Contributing Items (283)Configuring the Composite Repository Component (284)Composite Repository Queries (284)Composite Repository Caching (285)Composite Repository Definition Tag Reference (285)<composite-repository-template> (285)<header> (composite repository) (285)<item-descriptor> composite repository (286)<primary-item-descriptor> (287)<contributing-item-descriptor> (288)<attribute> composite repository (288)<property> composite repository (289)<primary-item-descriptor-link> (290)<link-via-id> (291)<link-via-property> (292)DTD for Composite Repository Definition Files (292)Sample Composite Repository Definition File (294)19. Secured Repositories (299)Features and Architecture (299)Repository Guide ixCreating a Secured Repository (301)Modify the Underlying Repository (301)Configure the Secured Repository Adapter Component (302)Register the Secured Repository Adapter Component (303)Create the Secured Repository Definition File (304)Secured Repository Example (305)Modify the SQL for the Repository Data Store (305)Modify the XML definition file (306)Define the Secured Repository Adapter’s Definition File (307)Configure a Secured Repository Adapter Component (308)Register the Repositories (309)ACL Syntax (309)Standard Access Rights (310)ACL Examples (310)Secured Repository Definition File Tag Reference (311)<secured-repository-template> (311)<item-descriptor> secured repository (311)<property> secured repository (312)<default-acl> (312)<descriptor-acl> (312)<owner-property> (313)<acl-property> (313)<creation-base-acl> (313)<creation-owner-acl-template> (314)<creation-group-acl-template> (314)DTD for Secured Repository Definition File (315)Performance Considerations (317)Exceptions Thrown by the Secured Repository (318)20. LDAP Repositories (319)Overview: Setting Up an LDAP Repository (320)LDAP Directory Primer (320)Hierarchical Tree Structure (321)LDAP Data Representation (321)Hierarchical Entry Types (322)Directory Schema (322)LDAP and JNDI (324)LDAP Sources (324)LDAP Repository Architecture (324)LDAP Repository Items and Repository IDs (325)Item Descriptors and LDAP Object Classes (325)Item Descriptor Hierarchies and Inheritance (327)Id and ObjectClasses Properties (328)Additional Property Tag Attributes (329)New Item Creation (330)Repository Views in the LDAP Repository (331)Repository View Definition (331)LDAP Repository View Example (332)LDAP Repository Queries (333)ID Matching Queries (333)Unsupported Queries in the LDAP Repository (334)Configuring LDAP Repository Components (334)/atg/adapter/ldap/LDAPRepository (335)/atg/adapter/ldap/InitialContextPool (336)x Repository Guide/atg/adapter/ldap/InitialContextEnvironment (337)/atg/adapter/ldap/LDAPItemCache (339)/atg/adapter/ldap/LDAPItemCacheAdapter (339)/atg/adapter/ldap/LDAPQueryCache (339)/atg/adapter/ldap/LDAPQueryCacheAdapter (340)LDAP Password Encryption (340)LDAP Repository Definition Tag Reference (341)<!DOCTYPE>LDAP repository (341)<ldap-adapter-template> (342)<header>LDAP repository (342)<view> (342)<item-descriptor>LDAP repository (342)<id-property> (343)<object-classes-property> (344)<object-class> (345)<property>LDAP repository (345)<option>LDAP repository (347)<attribute>LDAP repository (347)<child-property> (348)<new-items> (349)<search-root> (350)Sample LDAP Repository Definition File (351)DTD for LDAP Repository Definition Files (352)Index (355)Repository Guide xixii Repository Guide1 Introduction 11IntroductionData access is a large part of most Internet applications. Oracle ATG Web Commerce Data Anywhere Architecture™ provides a unified view of content and data across a business for organizations and their customers. The core of the Oracle ATG Web Commerce Data Anywhere Architecture is the Repository API.Through the Repository API, you can employ a single approach to accessing disparate data types, including SQL databases, LDAP directories, content management systems, and file systems.With the Oracle ATG Web Commerce Data Anywhere, the application logic created by developers uses the same approach to interact with data regardless of the source of that data. One of the most powerful aspects of this architecture is that the source of the data is hidden behind the Oracle ATG Web Commerce Repository abstraction. It is easy to change from a relational data source to an LDAP directory as none of the application logic needs to change. After data is retrieved from a data source, it is transformed into an object-oriented representation. Manipulation of the data can be done using simple getPropertyValue and setPropertyValue methods. The Repository API ties in closely with Oracle ATG Web Commerce’s targeting APIs, so you can retrieve items from the repository based on a variety of targeting rules, as well as retrieving specific identified items.The figure below provides a high-level overview of the Oracle ATG Web Commerce Data Anywhere Architecture.Oracle ATG Web Commerce Data Anywhere Architecture offers several advantages over the standard data access methods such as Java Data Objects (JDO), Enterprise JavaBeans (EJB), and Java Database Connectivity (JDBC).Among the differences:Data source independenceOracle ATG Web Commerce Data Anywhere Architecture provides access to relational database managementsystems, LDAP directories, and file systems using the same interfaces. This insulates application developersfrom schema changes and also storage mechanism. Data can even move from a relational database to an LDAPdirectory without requiring recoding. Java Data Objects support data source independence, but it is up tovendors to provide an LDAP implementation.Fewer lines of Java codeLess code leads to faster time-to-market and reduced maintenance cost. Persistent data types created withOracle ATG Web Commerce Data Anywhere are described in an XML file, with no Java code required.Unified view of all customer interactionsA unified view of customer data (gathered by web applications, call center applications, and ERP systems) can beprovided without copying data into a central data source. This unified view of customer data leads to a coherentand consistent customer experience.Maximum performanceIntelligent caching of data objects ensures excellent performance and timely, accurate results. The JDO and EJBstandards rely on a vendor implementation of caching that might not be available.Simplified transactional controlThe key to overall system performance is minimizing the impact of transactions while maintaining the integrityof your data. In addition to full Java Transaction API (JTA) support, Oracle ATG Web Commerce Data Anywherelets both page developers and software engineers control the scope of transactions with the same transactionalmodes—required, supports, never—used by EJB deployment engineers.Fine-grained access controlYou can control who has access to which data at the data type, data object, even down to the individualproperty with Access Control Lists (ACLs).Integration with ATG product suitesOracle ATG Web Commerce personalization, scenarios, commerce, portal, and content administrationapplications all make use of repositories for data access. A development team is free to use EJBs along sideof Oracle ATG Web Commerce technology, but the easiest way to leverage investment in Oracle ATG WebCommerce technology is to follow the example set by the solution sets. The Oracle ATG Web Commerce solutionsets satisfy all their data access needs with repositories.2 1 Introduction2Repository APIThe Oracle ATG Web Commerce Repository API (atg.repository.*) is the foundation of persistent objectstorage, user profiling, and content targeting in Oracle ATG Web Commerce products. A repository is a dataaccess layer that defines a generic representation of a data store. Application developers use this genericrepresentation to access data by using only interfaces such as Repository and RepositoryItem. Repositoriesaccess the underlying data storage device through a connector, which translates the request into whatever callsare needed to access that particular data store. Connectors for relational databases and LDAP directories areprovided out-of-the-box. Connectors use an open, published interface, so additional custom connectors can beadded if necessary.Developers use repositories to create, query, modify, and remove repository items. A repository item is likea JavaBean, but its properties are determined dynamically at runtime. From the developer’s perspective, theavailable properties in a particular repository item depend on the type of item they are working with. One itemmight represent the user profile (name, address, phone number), while another might represent the meta-dataassociated with a news article (author, keywords, synopsis).The purpose of the Repository interface system is to provide a unified perspective for data access. For example,developers can use targeting rules with the same syntax to find people or content.Applications that use only the Repository interfaces to access data can interface to any number of back-end datastores solely through configuration. Developers do not need to write a single interface or Java class to add a newpersistent data type to an applicationEach repository connects to a single data store, but multiple repositories can coexist within Oracle ATG WebCommerce products, where various applications and subsystems use different repositories or share the samerepository. Applications that use only the Repository API to access data can interface to any number of back-end data stores solely through configuration. For example, the security system can be directed to maintainits list of usernames and passwords in an SQL database by pointing the security system at an SQL repository.Later, the security system can be changed to use an LDAP directory by reconfiguring it to point to an LDAPrepository. Which repositories you use depends on the data access needs of your application, including thepossible requirement to access data in a legacy data store.The Oracle ATG Web Commerce platform includes the following models for repositories:•SQL repositories use Oracle ATG Web Commerce’s Generic SQL Adapter (GSA) connector to map betweenOracle ATG Web Commerce and the data in an SQL database. You can use an SQL repository to access content,user profiles, application security information, and more.•SQL profile repository, included in the Oracle ATG Web Commerce Personalization module, uses the GenericSQL Adapter connector to map user data that is contained in an SQL database. See the PersonalizationProgramming Guide.•LDAP Repositories (page 319) use the Oracle ATG Web Commerce LDAP connector to access user data in anLDAP directory. See the LDAP Repositories (page 319) chapter.•Composite Repositories (page 279) let you use multiple data stores as sources for a single repository.2 Repository API3。
Oracle Solaris 11.2 系统升级指南说明书

从 Oracle® Solaris 10 转换至 Oracle Solaris 11.2文件号码 E53709-032014 年 12 月版权所有 © 2011, 2014, Oracle 和/或其附属公司。
保留所有权利。
本软件和相关文档是根据许可证协议提供的,该许可证协议中规定了关于使用和公开本软件和相关文档的各种限制,并受知识产权法的保护。
除非在许可证协议中明确许可或适用法律明确授权,否则不得以任何形式、任何方式使用、拷贝、复制、翻译、广播、修改、授权、传播、分发、展示、执行、发布或显示本软件和相关文档的任何部分。
除非法律要求实现互操作,否则严禁对本软件进行逆向工程设计、反汇编或反编译。
此文档所含信息可能随时被修改,恕不另行通知,我们不保证该信息没有错误。
如果贵方发现任何问题,请书面通知我们。
如果将本软件或相关文档交付给美国政府,或者交付给以美国政府名义获得许可证的任何机构,必须符合以下规定:U.S. GOVERNMENT END USERS: Oracle programs, including any operating system, integrated software, any programs installed on the hardware, and/or documentation, delivered to U.S. Government end users are "commercial computer software" pursuant to the applicable Federal Acquisition Regulation and agency-specific supplemental regulations. As such, use, duplication, disclosure, modification, and adaptation of the programs, including any operating system, integrated software, any programs installed on the hardware, and/or documentation, shall be subject to license terms and license restrictions applicable to the programs. No other rights are granted to the U.S. Government.本软件或硬件是为了在各种信息管理应用领域内的一般使用而开发的。
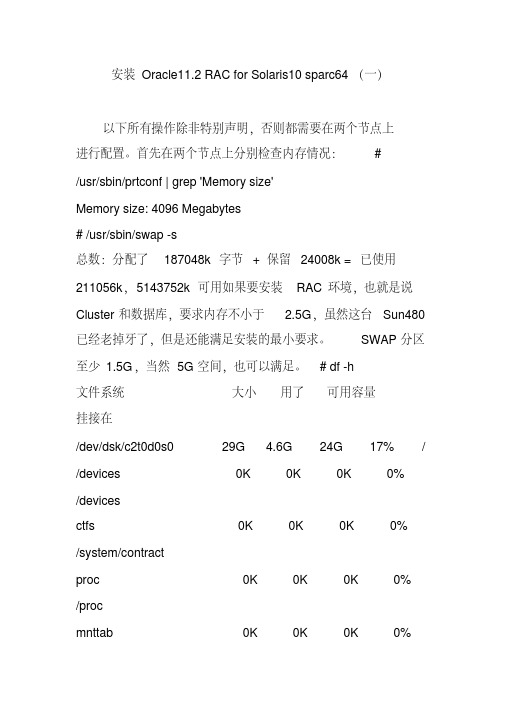
安装Oracle11.2RACforSolaris10sparc64(一)
mnttab
0K
0K
0K
0%
/etc/mnttab
swap
4.9G 696K 4.9G
1%
/etc/svc/volatile
objfs
0K
0K
0K
0%
/system/object
sharefs
0K
0K
0K
0%
/etc/dfs/sharetab
/platform/sun4u-us3/lib/libc_psr/libc_psr_hwcap1.so.1
# chown -R oracle:oinstall /export/home/oracle
# passwd oracle 在两个节点上分别创建 CLUSTER 和
ORACLE 的安装目录: # mkdir /data/grid
# mkdir -p /data/oracle/product/11.2
system
SUNWxwfnt X Window System platform.
required fonts
错误 : 未发现 'SUNWi1cs' 的信息
错误 : 未发现 'SUNWi15cs' 的信息 11.2 要求 Solaris10 以
上版本,对于缺少的 SUNWi1cs 和 SUNWi15cs 包,似乎在
至少 1.5G,当然 5G 空间,也可以满足。 # df -h
文件系统 挂接在
大小 用了 可用容量
/dev/dsk/c2t0d0s0
29G 4.6G 24G 17% /
/devices
0K
0K
0K
0%
/devices
SUSE10 & Oracle 11g安装指南_new
SUSE10 & Oracle 11g安装指南1 概述本指导书用于指导安装SUSE 10、配置FTP和Telnet以及基于SUSE10上的Oracle 11g 的安装。
2 安装前准备工作光盘及安装包收集3 操作步骤本文档安装环境:Lenovo(内存4GB)3.1 安装SUSE101. 系统从光盘引导开始安装选择“Installation”系统开始安装显示“Language”界面。
2. 选择“English(US)”,单击“Next”,显示“License Agreement”界面。
3. 选择“Yes, I Agree to the License Agreement”,单击“Next”,显示“Installation Mode”界面。
4. 在“Select Mode”区域框中选择“New Installation”,单击“Next”,显示“Clock and Time Zone”界面。
5. 设置时间和时区。
a. 根据当地实际情况设置“Region”和“Time Zone”。
b. 在“Hardware Clock Set To”中选择“Local Time”。
c. 单击“Change”按钮设置时间。
d. 单击“Next”。
显示“Installation Settings”界面。
6. 设置分区其它分区可根据需要划分:a) 选择“Change > Partitioning”,显示“SuggestedPartitioning”界面。
b) 选择“Create Custom Partition Setup”,单击“Next”。
c) 选择“Custom partitioning (for experts)”,单击“Next”。
显示“Expert Partitioner”界面。
d) 选择“Create”,弹出“Partition Type”对话框。
e) 选择“Primary partition”创建主分区,单击“OK”,显示设置分区界面。
Oracle11gR2 for solaris 10_U10a安装手册
Solaris 10安装oracle 11g R2_x64安装环境:vmware workstation 9系统版本:solaris 10 _U10 64-bit主机名:shawnIP地址:192.168.0.2081、用root身份创建用户和组:bash-3.2 #groupadd oinstallbash-3.2# groupadd dbabash-3.2#useradd –g oinstall –G dba –d /export/home/oracle –s /bin/csh –m oracle(g 表示用户所属组、-G 表示用户所属附加组、-d 表示用户主目录、-s 表示用户默认shell 类型、oracle 表示用户名,-m 参数表示自动创建此用户的主目录)bash-3.2#passwd oracle(为oracle用户设置密码,密码设置为:oracle123)2、修改修改oracle 用户的环境变量用户的环境变量(一定要注意环境变量的一定要注意环境变量的shell)以oracle用户登陆,在oracle用户的主目录下找到并修改它的环境变量.profile(这是一个隐藏文件,ls时须加-a参数)。
ORACLE_BASE=/export/home/oracle/app/oracleexport ORACLE_BASEORACLE_HOME=$ORACLE_BASE/product/11.2.0/dbhome_1export ORACLE_HOMEORACLE_SID=shawnexport ORACLE_SIDPATH=$ORACLE_HOME/bin:/bin:/sbin:/usr/ccs/bin:/usr/local/binexport PATH使文件生效:-bash-3.2$ source .profile3、修改Solaris系统参数:(1)使用root 账户登录,创建/etc/system 文件的一个备份(也可以不用创建此文件,而直接在system 文件上面进行编辑),例如:bash-3.2# cp /etc/system /etc/system.orig(2)编辑/etc/system,在最后添加如下:set semsys:seminfo_semmni=100set semsys:seminfo_semmns=1024set semsys:seminfo_semmsl=256set semsys:seminfo_semvmx=32767set shmsys:shminfo_shmmax=4294967295set shmsys:shminfo_shmmni=100(3) 重启系统使参数生效:bash-3.2#reboot4、将Oracle11gR2的ZIP文件拷贝到本地文件夹(必须使用二进制传输文件,否则容易报错invalid entry size),并解压出来运行其安装程序runInstaller,(Oracle的安装包有两个,这两个包必须解压在同一个文件夹下面,否则安装将报错)在oracle用户下面运行runIstaller文件进入ORACLE的安装界面(如果是在root用户下面运行./runInstaller进行安装,那么安装程序将自动结束安装),运行完./runinstaller之后会弹出如下画面:(1)不勾选安全更新,(点下一步会弹出一个对话框,直接选“是”)(2)选创建和配置数据库(3)选择服务器类(4)如果没有集群环境,选择单实例安装(5)安装类型选择高级安装(6)产品语言选择简体中文和英语(7)数据库版本选择企业版(8)指定基目录(9)指定产品清单目录和组名(10)选择一般用途(11)填写全局数据库名和SID(12)内存大小以实际情况为准(13)字符集使用ZHS16GBK(14)选择使用Database Control管理数据库(15)数据库文件位置选择默认值(16)选择不启用备份(17)这里选择对所有账号使用相同口令,根据建议标准使用强密码如:oracle1.A。
Oracle 11g完全手册
一.Window下关闭Oracle 11g正常在Windows下安全关闭Oracle数据库系统的步骤如下:1.从命令行下找到oracle的BIN目录,然后输入isqlplusctl stop命令停止isqlplus进程。
2.同样在BIN目录下,emctl stop dbconsole停止企业管理器的控制台进程。
3.同样在BIN目录下,lsnrctl stop停止监听进程。
4.在命令行下输入sqlplus /nolog , 然后conn / as sysdba连接到数据库shutdown immediate;====================================================================== select username,password from dba_users; --查看用户信息select username,account_status from dba_users; --查看用户是否解锁alter user scott account unlock; --解锁scott用户alter user scott account lock;--锁scott用户alter user scott identified by tiger; --为scott用户修改密码为tiger创建用户以及给表赋予权限:创建用户create user user_name identified by password;grant dba to user_name;查询表的权限grant select on gecs_law to user_name;select file_name from dba_data_files; --查看数据文件路径select name from v$controlfile; --查看控制文件路径select member from v$logfile; --查看日志文件路径====================================================================== Oracle关于shutdown、startup几个参数:shutdown有四个参数:normal、transactional、immediate、abort。
Solaris11培训文档_toc
Transition to Oracle Solaris 11 Student Guide D73488GC21 Edition 2.1 July 2013D82581f ul i nT a n g(15213282229@139ฺc o m ) h a s a n o n -t r a n s f er a b l el i c en s e t o u s e t h i s S t u d e n t G u i d e ฺU n a u t h o r i z e d r e p r o d u c t i o n o r d i s t r i b u t i o n p r o h i b i t e d ฺ C o p y r i g h t © 2013, O r a c l e a n d /o r i t s a f f i l i a t e s ฺCopyright © 2013, Oracle and/or its affiliates. All rights reserved.DisclaimerThis document contains proprietary information and is protected by copyright and other intellectual property laws. You may copy and print this document solely for your own use in an Oracle training course. The document may not be modified or altered in any way. Except where your use constitutes "fair use" under copyright law, you may not use, share, download, upload, copy, print, display, perform, reproduce,publish, license, post, transmit, or distribute this document in whole or in part without the express authorization of Oracle.The information contained in this document is subject to change without notice. If you find any problems in the document, please report them in writing to: Oracle University, 500 Oracle Parkway, Redwood Shores, California 94065 USA. This document is not warranted to be error-free.Restricted Rights NoticeIf this documentation is delivered to the United States Government or anyone using the documentation on behalf of the United States Government, the following notice is applicable:U.S. GOVERNMENT RIGHTSThe U.S. Government’s rights to use, modify, reproduce, release, perform, display, or disclose these training materials are restricted by the terms of the applicable Oracle license agreement and/or the applicable U.S. Government contract.Trademark NoticeOracle and Java are registered trademarks of Oracle and/or its affiliates. Other names may be trademarks of their respective owners.AuthorVijetha ChippeTechnical Contributors & Reviewers Juanita Heieck Peter Dennis David Comay Glynn Foster EditorsMalavika Jinka Raj KumarSmita Kommini Richard WallisGraphic Designers Seema Bopaiah Divya ThallapPublishers Jobi Varghese Michael Sebastian Pavithran AdkaJayanthy Keshavamurthyf u li nT a n g(15213282229@139ฺc o m ) h a s a n o n -t r an s f er a b l el i c en s e t o u s e t h i s S t u d e n t G u i d e ฺU n a u t h o r i z e d r e p r o d u c t i o n o r d i s t r i b u t i o n p r o h i b i t e d ฺ C o p y r i g h t © 2013, O r a c l e a n d /o r i t s a f f i l i a t e s ฺContents1 IntroductionOverview 1-2 Course Goals 1-3 Agenda 1-4Introductions 1-5Your Lab Environment 1-6Practice 1 Overview: Course Introduction 1-72 Introducing Oracle Solaris 11 New Features and EnhancementsWorkflow Orientation 2-2 Objectives 2-3 Agenda 2-4Oracle Solaris 11 New Features and Enhancements 2-5 Oracle Solaris 11 Features and Enhancements 2-6 Image Packaging System (IPS) 2-8 Operating System Installation 2-9 Oracle Solaris 11 Zones 2-10Networking Features and Enhancements 2-12 Storage Enhancements 2-14User Environment Enhancements 2-16 System Security Enhancements 2-17 Lesson Agenda 2-19Comparing Key Features of Oracle Solaris 10 and Oracle Solaris 11 2-20 Lesson Agenda 2-21Transitioning Strategy 2-22 Summary 2-233 Managing Software Packages in Oracle Solaris 11Workflow Orientation 3-2 Objectives 3-3 Agenda 3-4IPS: Overview 3-5 Planning for IPS 3-6 IPS Components 3-7 Agenda 3-9f u li nT a n g(15213282229@139ฺc o m ) h a s a n o n -t r an s f er a b l el i c en s e t o u s e t h i s S t u d e n t G u i d e ฺU n a u t h o r i z e d r e p r o d u c t i o n o r d i s t r i b u t i o n p r o h i b i t e d ฺ C o p y r i g h t © 2013, O r a c l e a n d /o r i t s a f f i l i a t e s ฺLocal Package Repository 3-10 Creating a Local Repository 3-11 Configuring the IPS Clients 3-13 Configuring a Repository Mirror 3-14 Practices 3-1 and 3-2: Overview 3-16 Agenda 3-17Package Management: pkg (1) 3-18pkg Command Examples: search and info 3-19 pkg Command Examples: install 3-20pkg Command Examples: list, verify, and contents 3-21 pkg Command Examples: uninstall 3-22 Package Manager 3-23Managing Packages by Using a Web Browser 3-24 Update Manager 3-25Upgrading Oracle Solaris 11 to Oracle Solaris 11.1 OS 3-26Upgrading the OS by Using the Oracle Solaris 11 Support Repository 3-27 Upgrading the OS by Using the Oracle Solaris 11 Release Repository 3-32 Practices 3-3 and 3-4: Overview 3-34 Agenda 3-35Boot Environment (BE) 3-36 beadm Utility 3-37beadm Command Examples: list 3-39 beadm Command Examples: create 3-40beadm Command Examples: activate, rename, and destroy 3-41 beadm Command Examples: mount and unmount 3-42 Package Manager BE Features 3-43 Quiz 3-44Summary 3-49Practice 3-5: Overview 3-504 Installing the Oracle Solaris 11 Operating SystemWorkflow Orientation 4-2 Objectives 4-3 Agenda 4-4Oracle Solaris 11 Installation Options 4-5 Oracle Solaris 11 System Requirements 4-6 Agenda 4-7Oracle Solaris 11 Text Installer 4-8Oracle Solaris 11 Text Installation: Disks 4-11 Oracle Solaris 11 Text Installation: Network 4-13 Oracle Solaris 11 Text Install: Users 4-14 f u li nT a n g(15213282229@139ฺc o m ) h a s a n o n -t r an s f er a b l el i c en s e t o u s e t h i s S t u d e n t G u i d e ฺU n a u t h o r i z e d r e p r o d u c t i o n o r d i s t r i b u t i o n p r o h i b i t e d ฺ C o p y r i g h t © 2013, O r a c l e a n d /o r i t s a f f i l i a t e s ฺOracle Solaris 11 Text Installation: Support 4-15 Oracle Solaris 11 LiveCD 4-16Oracle Solaris 11 LiveCD: Device Driver Utility 4-17 Oracle Solaris 11 LiveCD: Partition Editor 4-18 Oracle Solaris 11 LiveCD Installer: Disk 4-19Oracle Solaris 11 LiveCD Installer: Time Zone 4-21 Oracle Solaris 11 LiveCD Installer: Users 4-22 Oracle Solaris 11 LiveCD Installer: Support 4-23 Practices 4-1 and 4-2: Overview 4-24SMF-Based System and Network Configuration 4-25 Configuring an Oracle Solaris 11 Image 4-27 Agenda 4-28Oracle Solaris 11 Automated Installation 4-29 How Automated Installation Works 4-30 AI Environmental Requirements 4-31 IPS Case: Using Default Manifest 4-33 IPS Case: Using Custom Manifest 4-35 IPS Case: Using an SC Profile 4-37 IPS Case: Multiple AI Services 4-38 Configuring the AI Server 4-39 Setting Up the AI Server 4-40 AI Manifests 4-41 default.xml File 4-42 Criteria Manifest 4-44Criteria Manifest: Examples 4-46 System Configuration Profiles 4-47 SC Profile: Example 4-48Administering the AI SMF Service 4-50 AI Server Configuration Walkthrough 4-51 Agenda 4-55Comparing JumpStart to AI 4-56Comparing Rules Keywords and Criteria Directives 4-57 Converting a JumpStart Profile to an AI Manifest 4-60 Agenda 4-63Distribution Constructor 4-64Distribution Constructor Manifest Files 4-65 Building an OS Image 4-66 Quiz 4-67Summary 4-73Practices 4-3, 4-4, and 4-5: Overview 4-74f u li nT a n g(15213282229@139ฺc o m ) h a s a n o n -t r an s f er a b l el i c en s e t o u s e t h i s S t u d e n t G u i d e ฺU n a u t h o r i z e d r e p r o d u c t i o n o r d i s t r i b u t i o n p r o h i b i t e d ฺ C o p y r i g h t © 2013, O r a c l e a n d /o r i t s a f f i l i a t e s ฺ5 Administering Oracle Solaris 11 ZonesWorkflow Orientation 5-2 Objectives 5-3 Agenda 5-4Oracle Solaris 11 Zones 5-5 New Zones Features 5-6 Agenda 5-8Oracle Solaris 10 Zones 5-9Migrating Oracle Solaris 10 Zones (V2V) 5-11Migrating Oracle Solaris 10 Global Zones (P2V) 5-13 Agenda 5-15Configuring Nonglobal Zones by Using the Automated Installer (AI) 5-16 Specifying a Nonglobal Zone in the AI Manifest 5-17 Nonglobal Zone Configuration Files 5-18Adding a Nonglobal Zone Manifest and Profile 5-19 Agenda 5-20Delegating Zone Administration 5-21Monitoring Zone Resource Consumption 5-22 Monitoring Zone Memory Consumption 5-23 Monitoring Zone CPU Consumption 5-24Monitor Total and High Zone Resource Consumption 5-25 Monitoring File System Statistics 5-26 Quiz 5-27Summary 5-29Practice 5 Overview: Migrating Oracle Solaris 10 Zones to Oracle Solaris 11 5-306 Oracle Solaris 11 Network EnhancementsWorkflow Orientation 6-2 Objectives 6-3 Agenda 6-4Introducing Oracle Solaris 11 Network Enhancements 6-5 Agenda 6-8Reactive Network Configuration 6-9How Reactive Network Profiles Work 6-12Interaction of Reactive Networking with Other Oracle Solaris Networking Technologies 6-14 netcfg Command 6-16 netadm Command 6-17 SMF Network Services 6-18Configuring Reactive Network Profiles 6-19f u li nT a n g(15213282229@139ฺc o m ) h a s a n o n -t r an s f er a b l el i c en s e t o u s e t h i s S t u d e n t G u i d e ฺU n a u t h o r i z e d r e p r o d u c t i o n o r d i s t r i b u t i o n p r o h i b i t e d ฺ C o p y r i g h t © 2013, O r a c l e a n d /o r i t s a f f i l i a t e s ฺPractice 6-1: Overview 6-21 Agenda 6-22 ipadm Utility 6-23dladm Enhancements 6-26 Practice 6-2: Overview 6-28 Agenda 6-29Transitioning to Virtual Networking 6-30 Virtual Network Components 6-32 Building a Simple Virtual Network 6-34 Configuring a Private Virtual Network 6-35Accessing a Virtual Network Configuration 6-36 Bandwidth Management 6-37 Managing Bandwidth 6-38 Practice 6-3: Overview 6-39 Agenda 6-40IP Multipathing (IPMP) 6-41 IPMP Components 6-42 IPMP Configurations 6-43Failure and Repair Detection in IPMP 6-44 How IPMP Works: Active-Active 6-45 How IPMP Works: Active-Standby 6-49 Configuring IPMP: Active-Active 6-54 Configuring IPMP: Active-Standby 6-55 Monitoring IPMP 6-56Practice 6-4: Overview 6-59 Agenda 6-60Link Aggregation 6-61Types of Link Aggregation 6-63 Creating a Trunk Aggregation 6-65 Creating a DLMP Aggregation 6-66 Agenda 6-67Network Bridging 6-68Configuring a Network Bridge 6-70 Practices 6-5 and 6-6: Overview 6-71 Agenda 6-72Integrated Load Balancer (ILB) 6-73 ILB Operation Modes 6-75ILB Operation Modes: DSR 6-76 ILB Operation Modes: NAT 6-77 ILB Algorithms 6-78 ILB Processes 6-79f u li nT a n g(15213282229@139ฺc o m ) h a s a n o n -t r an s f er a b l el i c en s e t o u s e t h i s S t u d e n t G u i d e ฺU n a u t h o r i z e d r e p r o d u c t i o n o r d i s t r i b u t i o n p r o h i b i t e d ฺ C o p y r i g h t © 2013, O r a c l e a n d /o r i t s a f f i l i a t e s ฺWorking of ILB: Client-to-Server Packet Processing 6-80 Working of ILB: Server-to-Client Packet Processing 6-81 Enabling and Disabling ILB 6-82 Configuring ILB 6-83 Agenda 6-84wireshark Utility 6-85 dlstat Utility 6-86dlstat: Examples 6-87 flowstat Utility 6-89flowstat: Examples 6-90 Quiz 6-91Summary 6-105Practice 6-7: Overview 6-1067 Oracle Solaris 11 ZFS EnhancementsWorkflow Orientation 7-2 Objectives 7-3 Agenda 7-4Introducing Oracle Solaris 11 ZFS Enhancements 7-5 Agenda 7-7ZFS Shadow Data Migration 7-8Shadow Migration Considerations 7-9Configuring ZFS Shadow Data Migration 7-11 Agenda 7-12Splitting a Mirrored ZFS Storage Pool 7-13 Splitting a ZFS Mirrored Pool: Example 7-14 Agenda 7-15Identifying ZFS Snapshot Differences 7-16Identifying ZFS Snapshot Differences: Example 7-17 Using Time Slider 7-18Enabling and Disabling Time Slider 7-19 Agenda 7-20ZFS Deduplication 7-21ZFS Deduplication Properties 7-23 ZFS Deduplication: Example 7-24 Agenda 7-25Common Multiprotocol SCSI Target (COMSTAR) 7-26 COMSTAR: Benefits and Limitations 7-28f u li nT a n g(15213282229@139ฺc o m ) h a s a n o n -t r an s f er a b l el i c en s e t o u s e t h i s S t u d e n t G u i d e ฺU n a u t h o r i z e d r e p r o d u c t i o n o r d i s t r i b u t i o n p r o h i b i t e d ฺ C o p y r i g h t © 2013, O r a c l e a n d /o r i t s a f f i l i a t e s ฺConfiguring COMSTAR 7-30 Quiz 7-32Summary 7-39Practice 7 Overview: Oracle Solaris 11 ZFS Enhancements 7-408 Oracle Solaris 11 Security EnhancementsWorkflow Orientation 8-2 Objectives 8-3 Agenda 8-4Oracle Solaris 11 Security Enhancements 8-5 Agenda 8-9Oracle Solaris Cryptographic Framework 8-10 Administrative Command: Examples 8-12 User Command: Examples 8-15 Agenda 8-17ZFS Data Set Encryption 8-18ZFS Pool Encryption: Example 8-19ZFS File System Encryption: Example 8-20 Agenda 8-21Read-Only (Immutable) Zones 8-22 file-mac-profile Property 8-23Administering Read-Only Zones 8-24 Agenda 8-26Basic Audit Reporting Tool (BART) 8-27 BART: Example 8-28 Agenda 8-30Oracle Solaris Auditing 8-31Enabling and Disabling the Audit Service 8-34 Audit Log: Example 8-35 Quiz 8-36Summary 8-40Practice 8 Overview: Oracle Solaris 11 Security Enhancements 8-41f u li nT a n g(15213282229@139ฺc o m ) h a s a n o n -t r an s f er a b l el i c en s e t o u s e t h i s S t u d e n t G u i d e ฺU n a u t h o r i z e d r e p r o d u c t i o n o r d i s t r i b u t i o n p r o h i b i t e d ฺ C o p y r i g h t © 2013, O r a c l e a n d /o r i t s a f f i l i a t e s ฺf u li nT a n g(15213282229@139ฺc o m ) h a s a n o n -t r an s f er a b l e l i c en s e t o u s e t h i s S t u d e n t G u i d e ฺU n a u t h o r i z e d r e p r o d u c t i o n o r d i s t r i b u t i o n p r o h i b i t e d ฺ C o p y r i g h t © 2013, O r a c l e a n d /o r i t s a f f i l i a t e s ฺ。
Solaris Flare LR Q+ 快速上手指南说明书
Quick Start GuideSolaris Flare LR Q+ Quick Start GuideSolaris-Flare-LRQ+QSG-v1.0Effective 14 April 2021© Copyright 2021, TMBAll rights reservedTMB authorizes its customers to download and print this electronically published Quick Start Guide for professional use only. TMB prohibits reproduction, modification or distribution of this document for any other purposes, without express written consent. Specifications are subject to change without notice. The information in this document supersedes all previously supplied information before the effective date listed above. TMB has confidence in the accuracy of the document information herein but assumes no responsibility or liability for any loss occurring as a direct or indirect result of errors or exclusions whether by accident or any other cause.LIMITED WARRANTYSolaris fixtures are warranted by TMB against defective materials or workmanship for a period of two (2)years from the date of original sale by TMB.TMB’s warranty shall be restricted to the repair or replacement of any part that proves to be defective and for which a claim is submitted to TMB before the expiration of the applicable warranty periods.This Limited Warranty is void if the defects of the Product are the result of:•Opening the casing, repair, or adjustment by anyone other than TMB or persons specifically authorized by TMB•Accident, physical abuse, mishandling, or misapplication of the product.•Damage due to lightning, earthquake, flood, terrorism, war, or act of God.TMB will not assume responsibility for any labor expended, or materials used, to replace and/or repair the Product without TMB’s prior written authorization. Any repair of the Product in the field, and any associated labor charges, must be authorized in advance by TMB. Freight costs on warranty repairs are split 50/50: Customer pays to ship defective product to TMB; TMB pays to ship repaired product, ground freight, back to Customer.This warranty does not cover consequential damages or costs of any kind.A Return Merchandise Authorization (RMA) Number must be obtained from TMB prior to return of any defective merchandise for warranty or non-warranty repair. For all repairs please contact TMB Tech Support Repair using ************************************************************.US UK527 Park Ave. 21 Armstrong WaySan Fernando, CA 91340 Southall, UB2 4SD EnglandTel: +1 818.899.8818 Tel: +44 (0)20.8574.9700Fax: +1 818.899.8813 Fax: +44 (0)20.8574.9701******************************** SETUPS AFETY I NSTRUCTIONS• Keep this Quick Start Guide for future reference. If unit is sold to another user, make sure they also receive this instruction booklet.• Ensure the unit is connected to proper voltage, and that line voltage is not higher than that stated on the device.• Make sure there are no flammable materials close to the unit while operating.• Always disconnect from the power source before servicing or fuse replacement. Always use the fuse specified in this manual.• Maximum ambient temperature (Ta) is 40°C (104°F). Do not operate unit at temperatures above this rating.•In the event of a serious operating problem, stop using the unit immediately. Repairs must be carried out by trained, authorized personnel. Contact the nearest authorized technical assistance center. Only OEM spare parts should be used.• Do not connect the device to a dimmer pack.• Make sure power cord is never crimped or damaged.• Never disconnect power cord by pulling or tugging on the cord.Caution! There are no user serviceable parts inside the unit. Do not open the housing or attempt any repairs yourself. In the unlikely event your unit may require service, please contact your distributor.U NPACKING I NSTRUCTIONSUpon receipt of the unit, carefully unpack the carton and check the contents to ensure that all parts arepresent and in good condition. Notify the shipper immediately and retain packing material for inspection if any parts appear to be damaged from shipping or if the carton itself shows signs of mishandling. Save the carton and all packing materials. In the event that a unit must be returned to the factory, it is important that it be returned in the original factory box and packing.P OWER R EQUIREMENTSBefore powering the unit, make sure the line voltage is within the range of accepted voltages. This unitaccommodates 100-240VAC, 50/60Hz. All units must be powered directly from a switched circuit and cannot be operated with a rheostat (variable resistor) or dimmer circuit, even if the rheostat or dimmer channel is used solely for a 0-100% switch.Please read these instructions carefully. This user guide contains important information about the installation, usage, and maintenance of this product.Always consult a certified rigging specialistbefore suspending any device overhead. R IGGING S OLARIS F LARE Q+ LRSolaris Flare Q+ LR weighs approx. 24.3 lbs (11 kg) and requires multiple attachment points for safety. Use ProBurger ® couplers or equivalent C- or O-type clamps for attaching to truss, rated for fixture weight. After establishing the desired position, tighten all appropriate bolts.• Always use safety cables!• When selecting installation location, consider routine maintenance.• Team lift the fixture into mounting location, never try to mount fixture with one person.• Never mount fixture where it will be exposed to excess moisture, high h umidity, extreme temperatures, orrestricted ventilation for long periods of timeS OLARIS F LARE Q+ LR A TTACHABLE F EETSolaris Flare Q+ LR has optional feet attachments which allow for floor mounting applications. The PreSet™ Yoke automatically snaps to 15° increments from -45° to +135° for ease of use and focusing.N AVIGATION O VERVIEWThe default menu display shows the current DMX address, mode and footprint, as well as the option to rotate the screen and enter further menu options. Four control panel buttons are located near each corner of the LCD Display.Press and hold the <MENU> button to scroll through the top-level menu items. Use the <Up> and <Down> buttons, located to the right of the LCD screen, to navigate the menu map and menu options. Press the < ✔ > button to access the menu function currently displayed or to enable a menu option. To return to the top of the menu map or menu without changing the value, press the < X > button.M ENU M APF LARE Q+LR P IXEL M APSolaris Flare Q+ LR feature 108 10W Cree LEDs located in 3 rows and 36 columns. The LEDs have multiple options of control, subdivided into different “pixel” quantities. In Advanced Control Modes the Flare Q+ LR has the additional function of selecting a desired pixel group.LEDs are grouped into the following pixel options:•1-pixel unit – 1 group of 108 LEDs•2-pixel unit – 2 groups of 54 LEDs•3-pixel unit – 3 groups of 36 LEDs•4-pixel unit – 4 groups of 27 LEDs•6-pixel unit – 6 groups of 18 LEDs•12-pixel unit – 12 groups of 9 LEDsNote! Each mode can be inverted when last pixel becomes the first.B ASIC C ONTROL M ODESBasic control modes for RGB and RGBW control the Flare Q+ LR as 1-pixel mode for color wash applications.Mode Channel DMX values Preset FunctionRGBW 8bit 10 - 255 0 - 100 Red Intensity 20 - 255 0 - 100 Green Intensity 30 - 255 0 - 100 Blue Intensity 40 - 255 0 - 100 White IntensityRGBW 16bit 10 - 255 0 - 100 Red Intensity HI Byte20 - 255 0 - 100 Red Intensity LOW Byte 30 - 255 0 - 100 Green Intensity HI Byte 40 - 255 0 - 100 Green Intensity LOW Byte 50 - 255 0 - 100 Blue Intensity HI Byte60 - 255 0 - 100 Blue Intensity LOW Byte 70 - 255 0 - 100 White Intensity HI Byte 80 - 255 0 - 100 White Intensity LOW ByteMode Channel DMX values Preset FunctionRGB 8bit 10 - 255 0 - 100 Red Intensity 20 - 255 0 - 100 Green Intensity 30 - 255 0 - 100 Blue IntensityRGB 16bit 10 - 255 0 - 100 Red Intensity HI Byte20 - 255 0 - 100 Red Intensity LOW Byte 30 - 255 0 - 100 Green Intensity HI Byte 40 - 255 0 - 100 Green Intensity LOW Byte 50 - 255 0 - 100 Blue Intensity HI Byte60 - 255 0 - 100 Blue Intensity LOW ByteS TROBE M ODESStrobe Value Breakdown:DMX Value DMX Percent Strobe Intensity0 - 5 0 - 2 Blackout6 - 255 3 - 100 Intensity levelStrobe Duration0 - 254 0 - 99 0 - 650ms (50Hz AC)255 100 HYPERStrobe Rate0 - 5 0 - 2 No flash6 - 255 3 - 100 0.5 - 25Hz (50Hz AC); 0.6 - 30Hz (60Hz AC)Strobe effects0 - 4 0 - 2 No effect5 3 Wash Override (only available in RGB Strobe and RGBW Strobe modes) 16 - 42 4 -16 Ramp up43 - 85 17 - 33 Ramp down86 - 128 34 - 50 Ramp up - down129 - 171 51 - 67 Random172 - 214 68 - 84 Lighting215 - 240 85 - 92 Spikes241 - 245 93 - 95 Burst (use Rate at full) 2246 - 250 96 - 98 "Meltdown" Random Pixels w/ Solid Background 3251 - 255 99 - 100 "Meltdown" Random Pixels w/ Burst Background4Mode Channel DMX Value Percent FunctionRGB Strobe 10 - 255 0 - 100 Red Strobe Intensity 20 - 255 0 - 100 Green Strobe Intensity 30 - 255 0 - 100 Blue Strobe Intensity 40 - 255 0 - 100 Strobe Intensity50 - 255 0 - 100 Strobe Duration60 - 255 0 - 100 Strobe Rate70 - 255 0 - 100 Strobe FXRGBW Strobe 10 - 255 0 - 100 Red Strobe Intensity 20 - 255 0 - 100 Green Strobe Intensity 30 - 255 0 - 100 Blue Strobe Intensity 40 - 255 0 - 100 White Strobe Intensity 50 - 255 0 - 100 Strobe Intensity60 - 255 0 - 100 Strobe Duration70 - 255 0 - 100 Strobe Rate80 - 255 0 - 100 Strobe FXStrobe OnlyMode 10 - 255 0 - 100 Strobe Intensity 20 - 255 0 - 100 Strobe Duration 30 - 255 0 - 100 Strobe Rate40 - 255 0 - 100 Strobe FXA DVANCED RGB S TROBE M ODESA DVANCED RGBW S TROBE M ODESRDM S ENSORS AND F UNCTIONSSolaris Flare Q+ LR can be operated via Remote Device Management (RDM) that will assist with fixture setup and maintenance.PID NameCategory - Status Collection0x0020 QUEUED_MESSAGECategory - RDM Information0x0050 SUPPORTED_PARAMETERS0x0051 PARAMETER_DESCRIPTIONCategory – Product Information0x0060 DEVICE_INFO0x0080 DEVICE_MODEL_DESCRIPTION0x0081 MANUFACTURER_LABEL0x0082 DEVICE_LABEL0x0090 FACTORY_DEFAULTS0x00C0 SOFTWARE_VERSION_LABELCategory - DMX512 Setup0x00E0 DMX_PERSONALITYDMX_PERSONALITY_DESCRIPTION0x00F0 DMX_START_ADDRESSCategory – Sensors0x0200 SENSOR_DEFINITION0x0201 SENSOR_VALUE0x0202 RECORD_SENSORSCategory – Control0x1000 IDENTIFY_DEVICE0x1001 RESET_DEVICECONTACT INFORMATIONLOS ANGELES HEADQUARTERS 527 Park Avenue | San Fernando, CA 91340, USA Tel: +1 818.899.8818 | Fax: +1 818.899.8813*************TMB 24/7 TECH SUPPORTUS/Canada: +1.818.794.1286 Toll Free: 1.877.862.3833 (1.877.TMB.DUDE)UK: +44 (0)20.8574.9739Toll Free: 0800.652.5418*******************LOS ANGELES +1 818.899.8818LONDON +44 (0)20.8574.9700NEW YORK +1 201.896.8600BEIJING +86 10.8492.1587CANADA +1 519.538.0888A full service company providing technicalsupport, customer service, and follow-up.Providing p roducts and services for the industrial, entertainment, installation, defense, broadcast, research, telecommunications, and signage industries.Servicing the global market from offices in Los Angeles, London, New York, Toronto, and Beijing.。
- 1、下载文档前请自行甄别文档内容的完整性,平台不提供额外的编辑、内容补充、找答案等附加服务。
- 2、"仅部分预览"的文档,不可在线预览部分如存在完整性等问题,可反馈申请退款(可完整预览的文档不适用该条件!)。
- 3、如文档侵犯您的权益,请联系客服反馈,我们会尽快为您处理(人工客服工作时间:9:00-18:30)。
作者:Brian Leonard 和 Glynn Foster注:本文替代Solaris 11 Express 版本。
Oracle 不再支持 Oracle Solaris 11 Express。
Oracle Solaris 11 安装简介,包括安装新软件和管理其他系统配置的步骤。
Oracle Solaris 11 分发时有多个不同安装选项:基于服务器的无需手动操作的自动化安装、基于文本的交互式安装(也适用于服务器)和包括完整桌面环境的交互式图形安装程序。
OTN 旨在帮助您充分熟悉Oracle 技术以便作出明智的决策。
提供文章、软件下载、文档等。
立即加入以获取完成工作所需的技术资源。
尽管本文所讨论的许多概念也适用于其他 Oracle Solaris 11 安装选项,但本文重点介绍交互式图形安装程序。
强烈建议使用 Oracle Solaris 10 的用户阅读从 Oracle Solaris 10 转移到 Oracle Solaris 11指南。
图形安装程序的正式名称为“Live Media”。
这意味着 Oracle Solaris 将被引导到 RAM 中,不会对现有操作系统造成任何影响。
加载安装安装程序后,您就可以随意体验 Oracle Solaris,然后确定是否确实要将其安装到系统中。
您可以下载适用于 x86 的 Oracle Solaris 11 Live Media(该映像文件约为 800 MB)并使用 DVD 刻录机刻盘,也可以在虚拟机中或通过 Oracle Integrated Lights Out Manager (ILOM) 远程控制台直接使用该 ISO 映像。
Live Media 不适合长期使用。
例如,关闭系统后,您对系统的所有更改都将丢失。
因此,接下来您需要在系统上安装 Oracle Solaris。
通过 Live Media 在桌面上放置的 Install Oracle Solaris 图标,您可以轻松进行安装。
在继续下一步之前,我们先来了解一下安装选项。
安装选项可通过以下几种方式安装 Oracle Solaris 11:安装到现有操作系统的虚拟机上作为独立的操作系统安装到计算机上在已经安装了其他操作系统的计算机上进行安装(多重引导方案)安装在虚拟机上开始使用 Oracle Solaris 的最简单方法是将其安装到现有操作系统的虚拟机上。
图 1 显示在使用Oracle VM VirtualBox 的 Apple OS X 上安装的 Oracle Solaris 11。
图 1. Apple OS X 上的 Oracle SolarisOracle Solaris 11 可以识别虚拟机提供的虚拟设备。
实际上,如果以全屏幕模式运行 Oracle Solaris 11,您甚至会忘记这是在另一个操作系统上运行。
该方法的一个缺点是您需要足够的内存来同时运行两个操作系统,为了保持良好的性能,建议内存最小为 2 GB。
您还需要至少 7 GB 的磁盘空间来安装操作系统。
Oracle VM VirtualBox是一个可以免费下载的虚拟机监控程序,支持将 Microsoft Windows、Apple OS X、Linux 和 Oracle Solaris 作为主机平台,当然,Oracle Solaris 也可以作为它的一个来宾操作系统。
为方便您采用此方法,Oracle 为 Oracle VM VirtualBox 提供了一些专用于特定用途(如评估 Oracle Solaris 11 上可用的开发工具)的预先安装的虚拟机。
通过 Live Media 引导启动之后,安装过程变得非常简单。
只需单击桌面上的Install Oracle Solaris图标,即可启动图形安装程序,如图 2 所示。
图 2. Oracle Solaris 图形安装程序如图 2 所示,安装过程十分简单,只是在部署一组固定的程序包之前询问几个基本问题。
Oracle Solaris 安装成功之后,您可以使用 Package Manager 轻松定制安装。
安装过程完成后,就可以直接重新启动进入新的 Oracle Solaris 环境或查看 Oracle Solaris 安装日志,如图 3 所示。
图 3. 查看安装日志作为独立的操作系统安装到计算机上如果您有一个 x86 系统专门用于安装 Oracle Solaris 11,则此安装过程实际上与将操作系统安装到虚拟机中相同。
只需引导 Live Media 并启动图形安装程序。
此方法最大的问题是 Oracle Solaris 11 是否有适合您硬件设备的驱动程序。
如果您运行 Live Media,就可以轻松确定您设备的受支持程度。
Live Media 桌面上有一个 Device Driver Utility 图标,如图 4 所示。
双击该图标,等待扫描完成。
从 Live Media 引导时,默认的用户登录名和口令都是jack。
如果需要成为 root 用户,可以使用口令solaris。
稍后我们将进一步讨论如何在 Oracle Solaris 安装过程中设置初始用户。
图 4. Oracle Solaris Device Driver Utility如果缺少驱动程序,该实用程序会告诉您从何处获得帮助。
您也可以用 Google 搜索驱动程序。
如果仍无法解决问题,建议您在获得所需驱动程序或购买新系统、组件来解决驱动程序问题之前先使用 Oracle VM VirtualBox。
如果要在基于 SPARC 的系统上安装 Oracle Solaris 11,则必须使用交互文本安装程序。
与 Live Media 不同,该安装将有选择地安装适合面向服务器环境的软件。
它不包括桌面环境。
初始安装之后,可以使用Package Manager 安装solaris-desktop程序包来安装完整桌面环境。
多重引导方案在多重引导方案中,可以在已经安装了其他操作系统的计算机上安装 Oracle Solaris 11。
该方案最复杂,且需要一些准备。
Oracle Solaris 11 Live Media 包括 GNOME Partition Editor (GParted),可用于对硬盘进行分区。
您应创建 Oracle Solaris 安装程序可识别的Linux swap类型的分区。
如果现有操作系统为 Windows,则 Oracle Solaris 引导加载程序可以顺利识别。
如果现有操作系统为Linux,请确保备份了GRUB配置文件,因为您需要把它的内容添加到 Oracle Solaris GRUB菜单中。
请参见针对这些方案的Oracle Solaris 11 产品文档。
用户现在,Oracle Solaris 11 已经安装好,我们来讨论如何利用分配给用户 ID(在安装期间创建)的权限来管理您的系统。
请回想一下,您在安装期间创建了一个用户帐户,如图 5 所示。
图 5. Oracle Solaris 图形安装程序—配置用户安装程序仅向您询问一个口令,以此作为root帐户和初始用户帐户的口令。
但是,root口令很快会过期,如果您尝试切换到root帐户就会发现这一点:bleonard@solaris:~$ suPassword:su: Password for user 'root' has expiredNew Password:需要管理员权限的 GUI 工具还将提示您输入root口令,然后说明该 root 用户已经到期,必须提供新的口令,如图 6 所示。
图 6. 提示输入新的root口令root角色如果您查看/etc/passwd文件,可以看到root已经定义。
bleonard@solaris:~$ cat /etc/passwdroot:x:0:0:Super-User:/root:/usr/bin/bashdaemon:x:1:1::/:bin:x:2:2::/usr/bin:sys:x:3:3::/:adm:x:4:4:Admin:/var/adm:lp:x:71:8:Line Printer Admin:/:...然而,您仍然无法作为root登录。
出于安全考虑,Oracle Solaris 11 不会将root定义为传统用户帐户。
如果您查看/etc/user_attr文件,将看到root被定义为一个角色,如清单 1 所示。
清单 1:验证root被定义为角色bleonard@solaris:~$ cat /etc/user_attr## The system provided entries are stored in different files# under "/etc/". They should not be copied to this file.## Only local changes should be stored in this file.# This line should be kept in this file or it will be overwritten.#root::::type=rolebleonard::::type=normal;lock_after_retries=no;profiles=System Administrator;roles=root您还可以看到,默认情况下,为安装程序创建的用户 ID 分配了root角色。
因此,虽然无法作为root登录,但可以切换到root角色,此时将提示您输入root口令。
注:使用su时,默认用户名为root且不是必填的,这在前面更改默认口令的示例中已经介绍过。
bleonard@solaris:~$ su rootPassword:bleonard@solaris:~#sudo命令除了为安装时创建的用户分配root角色外,还将其添加到/etc/sudoers文件中。
/etc/sudoers文件提供了详细记录。
您可以定义非常细粒度的规则,规定特定用户可执行的操作。
而安装期间创建的用户可以执行任何操作(就像root用户一样)。
安装期间所创建用户的条目如下所示:bleonard ALL=(ALL) ALL上述条目说明,用户bleonard可以在任何主机上作为任何用户运行任何命令。
要详细了解如何微调用户权限,请参阅sudoers手册页面。
理论上讲,您永远不应切换到root角色来执行授权的操作,例如,将文件写入文件系统根目录:bleonard@solaris:~$ touch /file1touch: cannot touch `/file1': Permission denied通过为命令添加前缀sudo可获得完成操作所需的权限:bleonard@solaris:~$ sudo touch /file1Password:注意,sudo所需的口令并非root口令,而是您的用户帐户口令。