PowerPoint tutorial - Design with Themes - Part 1
POWETPOINT教学大纲

POWET POINT第一节基础知识POWET POINT是一种能够制作集文字\图形\图像\声音及视频为一体的媒体演示或展示制作软件。
用POWET POINT 制作出的文稿叫做演示文稿,演示文稿可以包括若干个幻灯片,每个幻灯片可以包括文字\图像\声音\动画和影片等元素。
一、POWET POINT 的启动与退出:二、界面组成:标题栏、菜单栏、工具栏、编辑栏、状态栏。
三、视图方式:1、普通视图:包括三个窗口,左边显示幻灯片的大纲,右边上半部分显示当前的幻灯片,下半部分窗口显示幻灯片的备注。
2、幻灯片浏览视图:演示文稿中的幻灯片呈横行纵列排布,可调整演示效果,在该视图中可设置幻灯片的背景,配色方案,添加、复制、删除幻灯片以及幻灯片的排列顺序,但不能编辑幻灯片。
3、大纲视图:可以对幻灯片进行整理。
4、幻灯片视图:声音文件扩展名:WAR·MID·RMI5、幻灯片放映视图:电影/视频:ARI·MPEG四、打开/保存演示文稿。
注:使用POWET POINT建立的文件扩展名为“·PPT”第二节幻灯片的编辑一、文字输入:在POWET POINT 的普通视图、大纲视图和幻灯片视图中都可编辑幻灯片。
在大纲视图中编辑:在左边窗口要编辑的幻灯片处直接输入修改文本内容,或在右边的窗口的演示例上编辑在普通视图和幻灯片视图中的编辑:用鼠标直接单击编辑对象的位置输入内容二、设置文字的格式:1、“格式”-“字体”,可改变字体、字号、颜色、效果、下划线、底纹等。
注:POWET POINT每个设计模板均带有一套三配色方案,单击“格式”-“幻灯片设计”,其颜色对演示文稿中所有的对象都有效。
三、幻灯片的操作:1、排列幻灯片:在幻灯片浏览视图中,将鼠标指向要移动的幻灯片、按左键拖动到位置后,释放鼠标。
2、添加幻灯片:单击“插入”-“新幻灯片”或在幻灯片浏览视图时,选定一张幻灯片,单击工具栏上的“新幻灯片”按钮,即可在当前幻灯片之后添加一张新幻灯片。
《PowerPoint 2010多媒体课件制作案例教程》第二章
第 26 页
2.4.1 添加第2张幻灯片
3
单击“插入〞选项卡“图像〞组中的“图片〞
按钮,在翻开的“插入图片〞对话框中选择本
书配套素材“素材与实例〞>“第2章〞>“大洋
和大洲素材〞文件夹中的“目录.jpg〞图像素材,
单击“插入〞按钮,再调整插入图片的位置,
如下图。
2
在第2张幻灯片中的“标题占位符〞中输入
PowerPoint 2010
多媒体课件制作案例教程
PowerPoint 2010 Multimedia courseware production case tutorial
第2章 制作“陆地和海洋〞课件 ——PPT课件制作快速入门
PowerPoint 2021是一款用于设计和制作演示文稿的软件。利用它可以 制作集文字、图形、图像、表格、声音、视频及动画等元素于一体的演示文 稿〔简称PPT〕。由于PowerPoint功能强大、使用简单且制作出来的演示文 稿专业、美观、实用,因此许多一线教师都将它作为制作多媒体课件的首选 软件。本章通过制作“陆地和海洋〞课件,学习PowerPoint 2021的入门知 识。
素材,单击“插入〞按钮,如下图。
第 21 页
2.3.2 设置文本的字符格式
8
选中插入的图片,单击“图片工具 格式”选项卡“图片样式”组中的“其他”按钮 ,在展开的下拉
列表中选择“矩形投影”图片样式,如图所示。
第 22 页
2.3.2 设置文本的字符格式
9
单击“插入”选项卡“插图”组中“形状”按钮下方的小三角按钮,在展开的形状下拉列表中选择
足需要的符号,可单击“自定义〞或“图片
〞按钮,本例单击“图片〞按钮,如下图。
使用PowerPoint控件制作交互式课件

复选框旳初步小结
复选框旳Value值表达措施:CheckBox1.Value=True
程序中判断多种复选框旳Value同步为真旳措施: If CheckBox1.Value=True and CheckBox2.Value=True then ……. Else ……. Endif
在弹出犯错消息框后,程序自动恢复多种复选框旳Value值为False: If …… then …… Else ……. CheckBox1.Value=False CheckBox2.Value=False …… Endif
命令按钮和选项按钮旳初步小结
进入控件属性旳措施:鼠标右键单击某控件,选择【属性】
进入控件事件代码旳措施:鼠标右键单击某控件,选择【查看代码】 消息框旳程序代码:MsgBox(“”)
选项按钮旳Value值旳表达措施: OptionButton1.Value=False 程序中用于判断旳语句: If……Then …… Else …… Endif
文本框旳初步小结
文本框旳Value值旳表达措施:TextBox1.Value=“……”
程序中判断文本框旳Value满足某个特定值旳措施: If TextBox1.Value = “……” then ……. Else ……. Endif
在弹出犯错消息框后,程序自动恢复文本框旳Value值为空: If …… then …… Else ……. TextBox1.Value=“” …… Endif
3、复选框能否用于设计单项选择题?尝试将选项按钮制 作旳单项选择题改用复选框制作。
利用命令按钮和文本框制作填空题
目前能够利用学过旳技巧制作交互式旳填空题了: 1、利用【插入|文本框】制作题目 2、利用文本框制作填写答案区域,同步完毕控件旳属性设置、对齐等 3、利用命令按钮制作判断答案正确是否旳程序部分
PowerPoint基础教程PPT教学课件

03 幻灯片美化与设计
使用主题和模板
主题
PowerPoint提供了多种主题供选 择,选择合适的主题可以使幻灯 片更加美观和专业。
模板
模板是预先设计好的幻灯片样式 ,可以直接套用,方便快捷。
调整幻灯片背景
背景颜色
可以设置纯色背景或渐变色背景,使 幻灯片更加突出。
背景图片
可以使用图片作为背景,但需要注意 图片的清晰度和与内容的协调性。
统一设置。通过使用母版,可以快速地更改字体、颜色、背景等格式,
并应用到所有幻灯片上。
02
自定义母版
用户可以根据自己的需求创建自定义母版,以适应特定的演示需求。自
定义母版可以包含特定的布局、图形、颜色和字体,使演示文稿更具专
业性和个性化。
03
幻灯片母版
幻灯片母版是演示文稿中所有幻灯片的模板,可以用来设置标题、页脚
保存演示文稿
分享演示文稿
选择“文件”菜单,然后选择“保存 ”。
选择“文件”菜单,然后选择“共享 ”,可以将演示文稿分享给其他人。
导出为PDF或视频
选择“文件”菜单,然后选择“导出 为”,可以选择导出为PDF或视频格 式。
05 高级功能与技巧
使用母版视图
01
母版视图
在PowerPoint中,母版视图允许用户对幻灯片的整体风格和布局进行
更改切换速度
选择“幻灯片放映”菜单,然后选择“切换到此幻灯片”,在弹出的列表中选择 “速度”。
录制演示文稿
录制演示文稿
选择“幻灯片放映”菜单,然后选择 “录制幻灯片演示”。
编辑录制内容
在录制完成后,可以选择“幻灯片放 映”菜单,然后选择“编辑幻灯片演 示”,对录制的内容进erPoint基础教程
“职场精英必学课件-PPT制作技巧与实战应用”

欢迎各位来到本次精彩的演讲!在这个课件中,我们将分享关于如何制作令 人着迷的PPT以及实战应用的技巧和策略。
Presentation Design Principles
1 Visual Appeal
2 Clear Structure
Choose captivating images and colors that resonate with your message and engage the audience.
Include short video clips to add
Audio Enhancement
2
depth and engage the audience with dynamic visuals.
Incorporate relevant audio
elements, such as background
Storytelling Techniques
Emotional Appeal
Evoke emotions and connect with your audience by telling stories that resonate with them personally.
Narrative Structure
Metaphorical Images
Enhance understanding and emotional connection by using relevant visual metaphors.
Engaging Slide Transitions
1
Slide Animations
Add subtle animations to bring elements to life and create a dynamic presentation.
PowerPoint英文教程
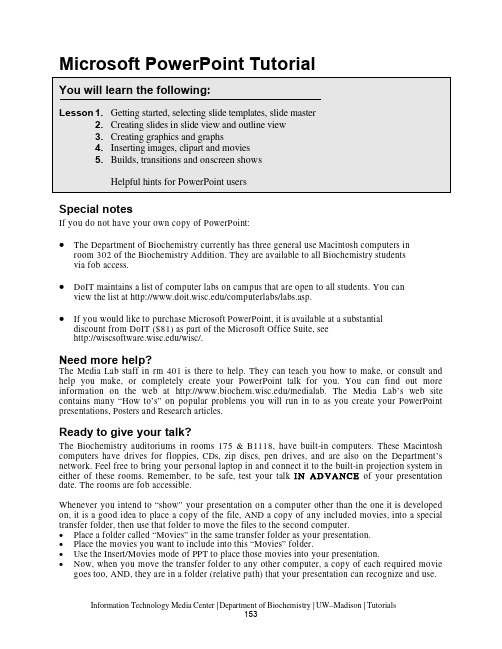
Microsoft PowerPoint TutorialSpecial notesIf you do not have your own copy of PowerPoint:•The Department of Biochemistry currently has three general use Macintosh computers in room 302 of the Biochemistry Addition. They are available to all Biochemistry studentsvia fob access.•DoIT maintains a list of computer labs on campus that are open to all students. You can view the list at /computerlabs/labs.asp.•If you would like to purchase Microsoft PowerPoint, it is available at a substantial discount from DoIT ($81) as part of the Microsoft Office Suite, see/wisc/.Need more help?The Media Lab staff in rm 401 is there to help. They can teach you how to make, or consult and help you make, or completely create your PowerPoint talk for you. You can find out more information on the web at /medialab. The Media Lab’s web site contains many “How to’s” on popular problems you will run in to as you create your PowerPoint presentations, Posters and Research articles.Ready to give your talk?The Biochemistry auditoriums in rooms 175 & B1118, hav e built-in computers. These Macintosh computers hav e driv es for floppies, CDs, zip discs, pen driv es, and are also on the Department’s network. Feel free to bring your personal laptop in and connect it to the built-in projection system in either of these rooms. Remember, to be safe, test your talk I I N AD VA NCE of your presentation date. The rooms are fob accessible.Whenever you intend to “show” your presentation on a computer other than the one it is developed on, it is a good idea to place a copy of the file, AND a copy of any included movies, into a special transfer folder, then use that folder to move the files to the second computer.•Place a folder called “Movies” in the same transfer folder as your presentation.•Place the movies you want to include into this “Movies” folder.•Use the Insert/Movies mode of PPT to place those movies into your presentation.•Now, when you move the transfer folder to any other computer, a copy of each required movie goes too, AND, they are in a folder (relative path) that your presentation can recognize and use.For security reasons, the computers in rooms 175 and B1118 do not appear on the Macintosh Chooser Appletalk menu. Instead, there is a separate serv er called “Maitre d” in the Biochemistry AppleTalk zone. Log on as “guest” v ia the chooser (no username or password required), or as “” via ftp (username: transfer, password: bioshow). Place a copy of your transfer folder (label with your name, please!) into the “pub” subdirectory of this serv er. You can retriev e it onto the auditorium Mac before your presentation. O O R… go directly to one of the auditoriums and link to your computer from there and then transfer your files.1) Open PowerPoint .Double click on the H H ardD rive folder iconDouble click on the A A pplications folder then the M M icrosoft O ffice X folderDouble click on the M M icrosoft PowerPoint program2) Starting a newpresentation . When you firstopen PPT, the program willshow you the project gallery,choose PowerPoint and a blankpresentation will open.3) Selecting a slidelayout . The next window topop up will ask you about thegeneral layout of the slides thatyou wish to use in thispresentation. Although there aremany options here (title slides,slides with or without additionaltext, slides with graphs, slides with clipart, etc) don’t let this bother you! Any particular slide can be changed later, and you can insert images, graphs, or movies at any stage on any kind of slide. You can see all 24 possible layouts by scrolling within this dialogue box.Select a generic slide layout with title and text called “B B ulleted List ”, as shown above.Click on the indicated slide template, then click O O K . The chosen slide (blank) will now fill your screen.Note:depending upon how PPT is configuredwhen first installed, and the settings in the PPT customize folder (Tools/customize), the v arioustoolbars and menus may look different fromplatform to platform.Don’t panic! All PPT functions are av ailablesomewhere in the menus and toolbars, you mayjust have to hunt a bit to find them.4)Use the Master Slide!!! You may set the background color, text size, font and style for each slide in your presentation by using the various menus at the top of the screen but it is much easier to pick a common format by specifying your preferences on the Master slide. This format will automatically be followed for all slides in your presentation, unless you turn it off for particular slides or chose to change any elements for a particular slide.Master”Choose the “F F ormat” menu, and then explore thevarious options in the “M M aster layout”, “S S lide colorscheme”, “B B ackground” and “Apply design” menu.Install any of these “looks” as your Master Slide, orchose your own fonts, colors, backgrounds and stylesfrom among the many selections (e.g., Format menu,Fonts).The presentation you are going to create is one that you and your colleague, Christopher Columbus, will use to convince Queen Isabella to finance your new venture, called New World Expeditions. There are three views one can use to create PPT slides: Normal, Outline and Slide. In Slide View you see one slide at a time as you type the text and draw the graphics. In Outline view you see the outline of all the text on your slide. In Normal View, you see the outline, the slide and a place for speaker notes.1) Return to the first blank slide in your presentation (NOT the Master slide), by c c licking on the Slide icon in the views button in the lower left corner of your screen (or select S S lides from the View menu)2) Type the title of the first slide into the title boxClick in the title box, then type: W W e must act soonClick inside the Body text box, then type the following short list, pressing return as indicated:F avorable weather <rtn>Increase in competition <rtn>Available c rew(don’t press <rtn>!)Click anywhere outside of the body or title boxes to deselect them.3)Save your work by choosing “S S ave” from the File menu, and selecting an appropriate file name (e.g. P P ractice_1.ppt).4) Now we will make 2 more slides from the Normal View. This method is a really slick way to enter lots of nicely formatted text. You can easily use it to create a lot of slides for a lecture.Choose N N ormal from the V V iew menu, or click the N N ormal icon in the lower left corner of the screen.Now click the NN ew Slide button, or select N N ew Slide from the I I nsert menu. This will create another “slide icon” in your outline and place the cursor next to it.Type the title of slide 2: E E xpedition plan then press <<rtn>Click the “Demote” arrow (see image), to indent, or demote one level in the outline.Type the two bullet items:P repare a fleet of three ships <rtn>H and-select a staf f of able office rs and sailors (press Option + <<rtn>)Type in the following title for slide 3: BB enefits to Spain <rtn>Now press the Tab key to indent one lev el and type the following the same way you typed thebulleted items above.S ignificant rise in trade <rtn>M ore revenue for the crown (don’t press <rtn>!)Your outline should look something like this.5) Go back to Slide view to see the new slides you have made. If you click on the thick double-arrow icons at lower right of screen, you can shuffle back and forth among your slides.6) Reordering slides in SlideSorter view.Click on the S S lideSorter icon (lower left), or select SlideSorter from the View menu.Click on the picture of slide 3, hold down the mouse button and d d rag this slide to position 2 of your presentation. Note how the slide content remains exactly the same but the slide order is now different.Note: the SlideSorter v iew is an excellent way to cut and paste slides from one presentation into another, or to reorder and/or delete slides from within a presentation. Just remember that each presentation will take its master format from its own master slide, and if you transfer in slides from another PPT file, they will assume the new master’s format in font, size, color and background. Therefore, it may be a good idea to pick a layout and master slide “look” that you like, and stick with it for many of your (and your lab-group’s) presentations. That way, you can mix and match slides from various presentations without messing up their carefully chosen color schemes!PPT contains text and drawing tools so you can create your own graphics to illustrate your presentation. In these Lessons, we will draw some simple pictures, then create a graph for inclusion on a slide. In subsequent Lessons (D) we will expand these processes by importing pre-existing graphics that you might already have prepared in another graphics program, or perhaps downloaded from the web.1) Return to Slide view , then i i nsert a new slide after slide 3.Click the N N ew Slide button at the top of the screen (or Insert menu New Slide)Select a slide format “Title Only”, but with no other body or insert boxes (see next figure).2) Use the PPT drawing tools and drawing toolbars at the left or bottom of the screen to create some images that Christopher C. can use to help convince the Queen that his ships are seaworthy and can cross the ocean. These drawing tools are standard for most graphics programs. Explore a bit, and ask for help if you have NEVER done anything like this before. A sample slide is shown below.Save your file again, so this elegant piece of work is properly enshrined on the hard drive.Special note: it is a GOOD piece of advice to sav e your file frequently, especially when working on irreplaceable artwork. Some systems can crash, and many a potential Picasso has ended up in electronic vapor-land, when the file wasn’t properly saved!3) Now insert another slide (#5), in which we will create a graph to show the Queen how her costs vs profits may stack up during the next 4 quarters of the fiscal year.Note: PPT contains sev eral automatic graphing, clipart, and organizational chart functions that make it easy to create these types of aids in your presentation. The chart function essentially contains a small spreadsheet and the projected chart is drawn from the data in this sheet. If you wish, you may link the data to an external spreadsheet (preferably Microsoft Excel), or copy existing data into the PPT sheet. Either way, when you update the data in the spreadsheet, the displayed chart is automatically updated too. The chart menu bar which appears when you initiate a chart (Insert a new slide, with a chart function, or choose “Chart” from the Insert menu) allows you to choose the type of chart, color it, label the axis, title the graph, etc.Change the default data in the chart spreadsheet to indicate how much profit in gold and silver the Queen might expect, vs her costs for this voyage. To do this, just select each spreadsheet cell in turn, and change its label or v alue. Note how the graph changes too, when you enter new v alues. (Example values, below left)When you are finished playing with the data and the chart, c c hoose Quit (Command or Control Q), to return to SlideView.Now you can add a title into the title box:P rofit vs CostsAlso a a dd some text to the body box to explain your data:1st through 3rd Qtr costs may increase slightly until New Worldmines are operational <rtn>Therea fter, the looted gold and silver should vastly exceedexpedition costs.Note how the program automatically creates bullets to start each new body text object. If you wish to turn off the bullets, select the appropriate text with your mouse, then select the Bullet option in the Format Palette or Format menu. This is also how you can change the shape of the bullets, or their size and color.1) Inserting PPT clipartIf you have not already done so, S S ave your file again.In Slide view, s s croll back to the “My Ships” graphic slide you created earlier.In the Insert menu, select P P icture then C C lipart. The Microsoft Clipart Gallery will open.You may wish to explore the v arious categories and clipart figures so you know what is available here.Select the category “w w eather” then highlight “t t he storm” to add to your presentation. (Thismay help convince the Queen that your voyage will be exceedingly dangerous!).Your selected clipart will appear on the slide, and sometimes be too big or too small.To Resize click once on it to highlight it, then use the mouse to grab and mov e one of the corner boxes in or out. If you hold down the Shift key while doing this, the picture’s height and width proportions will remain unchanged..Alternatively, double-click the image and the F F ormat Picture window will appear so you can scale your object by a defined percentage. Type 1120 in the dialogue box (120% of current size) then “O O K”. Your clipart will grow in proportion. D D r ag the storm with your mouse to a menacing position above your boats.Click once on the storm to select it. Then c c lick and drag it with the mouse w w hile you holddown the option key, the storm will duplicate when you let go of the mouse. When usingthe o o ption drag you must begin dragging the object before you hold down the option keyAND you must let go of the mouse button first and then the option key.Add a bunch of rain clouds, draw some lightning, create a thunderstorm on your slide!Note: as with most computer programs, pictures, clipart or movies inserted into PPT can be resized by clicking on their corner boxes and dragging to an appropriate shape. Howev er, this method can distort the figure’s proportions, display the pixels of the image or in the case of movies or .pict files, can also impair their ability to be displayed in OnScreenShows. We recommend that you only use the Object/Scale method of resizing for clipart, N N O T for images or mov ies. You may also use this feature to enlarge things by choosing a % that is >100 (e.g. 150%).2) Inserting MoviesNote: Ann Palmenberg has provided some sample QuickTime movies for use in your tutorial PPT presentation. Go to /acp and click on Public Data, Class Resources to download a quicktime movie file.Note: If you highlight an inserted mov ie you can select Loop from the Mov ie tools in the formatting palette. This way your movie will play over and over during your onscreen show.Note: PPT will use the QuickTime mov ie player that is installed on your Macintosh or PC. It does NOT have its own internal movie player. Moreover, unlike images that can be inserted into your PPT presentation, when you tell PPT to insert a movie, the program only really inserts a pointer to the location of that mov ie on your harddriv e. That is, PPT remembers where you told it to find that movie and goes back to that location whenever you want to play the movie. This is an IMPORTANT concept, because if you transfer your PPT presentation to another computer, you must also transfer the inserted movie files too, or the program can’t find them or play them.3) Inserting pictures into PPT is similar to the insertion of clipart.Create a new slides at the end of your presentation that contains only a title box. (Just like Lesson 3.1 above).Open this new slide in Slide view, then select “P P icture/ From File” from the “I I nsert” menu. In the dialogue box choose an image from your hard drive or download one from the web.Select a file then click O O K. The picture will appear in your slide, where it can be dragged to a favorable location.Note: You can insert many popular graphics formats into your PPT presentation: Joint Photographic Experts Group (JPEG), Macintosh Picture (PICT), Macintosh paint (PNTG), Portable Network Graphics (PNG), Windows Bitmap (BMP), Portable Document Format (PDF), Encapsulated postscript (EPS), Graphics Interchange Format (GIF), and Tagged Image File Format (TIFF).Note: Images should be inserted into PPT at the correct size. You should not have to scale them up or down in size. Scaling images up in size may show their pixels and scaling them down in size means the files are too large in size (bytes of information). There is a separate tutorial at /medialab under “How to” that goes ov er “getting images into PPT correctly”.Note: In the “Picture Palette” under “Tools” is a v ery useful element for working with pictures,called “Crop” (). Should you only require a small portion of a figure, the rest can be removed by judiciously cropping the edges of the inserted picture with this tool. You can also duplicate the picture and crop different portions from each image.1) Slide to slide transitions.Use Slide View to go back to the first slide of your presentation. Then click on the “O O nScreen” icon (the one that looks like a mov ie screen) in the lower left corner of your screen. The slide should FILL your Macintosh screen.Click <<rtn>, or click the mouse button, OR press the down-arrow key, to advance to the next slide. Note: There are 3 different ways to adv ance your slides sequentially during an “OnScreen” show: (1) by pressing the <rtn> key, (2) by pressing the “down-arrow” key, and (3) by clicking on your mouse. As you advance through your presentation, you can reverse the direction with the up-arrow key. Remember, some of these slides contain a lot of material, and each time you advance by any of the 3 modes, the computer must think a bit. Be patient.When you reach your movie slide, click twice on the movie to make it play. When you reach the end of your presentation, PPT will kick you out of OnScreenView and place you back into SlideView. You can end the OnScreen show at any time, by pressing the Escape (esc) key. Fun, isn’t it!If you wish, r r ear range the order of your slides using the SortViewer .While you are in the SortView mode, you can easily add animated transitions for the slides, so they appear to morph into one another during your On Screen show. To do this, c c lick on any slide, or group of slides to highlight it (them), then select a “S S lide t ransition” from the S S lideShow menu. Select “B B oxIn” “Checkerboard” or whatever else seems interesting.Save your file, then run it through the OnScreenShow again, to see what effects the v arious transitions have.If you like, you may select a different transition between every slide... but if you actually do this for a REAL presentation, your audience will probably find it distracting to the information flow.2) Building “body object” text.The entry of text into the “body-object” boxes that we practiced in Lesson 3, has two practical purposes. First, body-object text can be very easily entered in OutlineView, so it is directly formatted on new slides with almost no hassle. The second purpose for body text, is so text itself can be “built” or appear to be phased in, line by line, or point by point, during an OnScreenShow.Return to S S lideView, and select any of the 1st three slides we made (the slide should include a title and also several lines of body-text). Click on the body text to highlight it.In the S S lideShow menu, select A A nimation then W W ipe Right or any other effect, then return to SlideView.Now rerun your O O nScreenShow and watch what happens when you hit this slide. Each click of the mouse should have an effect.Note: When the text of a slide is “built” the first click of the mouse will launch the slide. The title and any graphics will appear according to the “transition” mode that is selected. The next click of the mouse will launch the first key point of the body text, and each subsequent click will launch the subsequent points, so they appear on the screen one at a time, even though in reality they are all part of the same slide.3) Building graphics, movies and other objects.PowerPoint will also allow you to “animate” v irtually any text, pictures, graphics, charts or mov ies on your slides and play them with desired effects during your presentations. If you hav e sev eral objects you want to link as a unit, be sure to “group” them before doing the following Lesson.Go to any of your slides that contains a few items of text, and perhaps some graphics, like your boat slide.Open the S S lideShow Custom animation menu.Choose an item on this slide (Group 3) that you wish to animate and then choose an E E ntry E f fect: for that item.If you choose to animate more than one object make sure you s s elect the order for each animation in the O O rder and Timing Tab. Decide whether you want that ev ent to happen at a specified timed interval, or at the next sequential mouse click.Remember also that you can t t est the ef fects you have created, by clicking on the P P lay button.Helpful hints for PowerPoint users1.Another way to “build” graphics is make successive slides, each with another part of the figure.Actually, it is easier to make the last slide (or the most complex slide) first, copy it successively in the Slide Sorter, then “erase” stuff from the initial slides so that it seems as if you are gradually adding more figures or text.2.Slide titles should nev er be less than 32 pt, for visibility. Text should nev er be less than 20 pt,and preferably larger.3.Remember the “Rule of 5 & 5”. In general, no more than fiv e lines of text on a slide and nomore than five words in each line of text on the slide! Think about it… if you use five lines of text and five words in each line that is 25 words for an audience to read and comprehend when they should be paying attention to you!4.Although PPT will allow the use of millions of colors, in truth there are few colors that makeeffective slides. Dark backgrounds (blue or black) are OK if the projection room is dark. In this case, yellow, white or light blue text will show up better. Other darker colors like green, orange, red may detract from your talk. Be careful if you use red text on a dark background. It may look fine on your computer but will project with poor contrast on the screen. Light backgrounds (white, grey) with dark text (black, dark blue, dark green), will always project nicely. Hint: the PPT default color schemes in F F ormat/ Color Schemes are effective, attractive and easy to use.5.If your mov ies don’t play right. Delete them then reinsert them. Sometimes, the PPT pathpointers get screwed up.6.OnScreenShows require an LCD projector that can hook up to your computer. Properlyinstalled, whatev er you then see on your computer screen will be projected for the audience.Sev eral campus halls, including Biochem 175 and B1118 are equipped for this. If you are planning to do a presentation elsewhere though, make sure you check out the equipment ahead of time in the Media Lab (rm 401 Biochem 98 Addition)/medialab.。
《中文版powerpoint基础与实训》项目二PowerPoint的基本操作

设置幻灯片的动画效果
添加动画效果
可给幻灯片元素添加各种动画效果,如淡入、飞入、旋转等 。
编辑动画路径
可调整动画的运动路径、速度、方向等属性,制作出更丰富 的动画效果。
04
powerpoint的实训任务
制作个人简历
目的
学习掌握powerpoint的基本操作,提高实际应用能力,制作出精美的个人简历
内容
创建个人简历的演示文稿,包括封面、个人信息、教育背景、工作经历、技能特长、自我 评价等部分,并按照设计风格进行美化
方法
通过实际操作,熟悉演示文稿的创建、编辑、格式设置、动画设置等基本操作,运用好工 具栏和菜单栏,掌握常用的快捷键
企业产品宣传册制作
01
目的
学习运用powerpoint制作宣传册,熟悉企业产品的特点和优势,掌
02
PowerPoint的早期版本主要面向Mac用户,后来逐渐扩展到Windows平台, 成为微软Office套件中的一部分。
03
随着版本的升级和技术的不断更新,PowerPoint的功能也不断增加和完善,例 如增加了动画效果、音频视频嵌入和网络发布等功能。
02
powerpoint的基础操作
启动与退出powerpoint
powerpoint的优点和特性
简单易用
PowerPoint的操作界面简洁明了,使得用户能够 快速上手,制作演示文稿。
兼容性好
PowerPoint可以兼容多种文件格式,如Word、 Excel和Access等,方便用户进行数据共享和转换 。
功能强大
PowerPoint提供了丰富的功能和工具,包括动画 效果、声音效果、视频插入和幻灯片定制等,能 够满足用户的各种需求。
BasicPowerPointArtTutorial

The first thing to know about this procedure is that you can "build" your artwork however you want. But the easiest way is to start with the biggest part first and go from there. In this case, it's Ms. Orange's head. Use the Curve Tool to make an outline shaped just like this. By default, PowerPoint colors it in for you with this color. If not, you've probably messed around with the program once or twice. There's no problem in doing that, I actually encourage you to mess around all you want. Next thing we need to do is give her a decent skin color. Point to it, Right-click | Format Autoshape.
Jerry Lee
JERRY LEE Please visit my PowerPoint art gallery at: /
The following tutorial rests on the assumption that you are not a 3 year old. Please be aware of this as we progress.
- 1、下载文档前请自行甄别文档内容的完整性,平台不提供额外的编辑、内容补充、找答案等附加服务。
- 2、"仅部分预览"的文档,不可在线预览部分如存在完整性等问题,可反馈申请退款(可完整预览的文档不适用该条件!)。
- 3、如文档侵犯您的权益,请联系客服反馈,我们会尽快为您处理(人工客服工作时间:9:00-18:30)。
利用主题设计演示文稿 - 第 1 部分:基础知识主题是一组协调的字体、颜色和可视效果。
仅需一次单击,即可将许多内置主题之一应用于任何 PowerPoint 演示文稿。
通过为数不多的几次单击,即可自定义主题,将其保存后可反复重用。
学习本教程了解如何使用主题。
开设之前 (1)1. 应用主题 (2)2. 浏览主题的元素 (4)3. 选择不同的颜色、字体和背景 (5)4. 保存主题 (8)5. 创建使用您的主题的演示文稿 (10)课程摘要卡 (13)开始之前将要学习的内容完成此教程后,您将能够:∙将内置主题应用于演示文稿。
∙标识主题的元素。
∙应用不同的主题字体和颜色。
∙保存和重用修改的主题。
要求∙PowerPoint for Mac 2011∙基本 PowerPoint 技巧,包括如何打开演示文稿,插入幻灯片和向幻灯片中添加内容。
提示如果您是第一次使用 PowerPoint,请首先学习教程教程:PowerPoint 基础知识。
练习文件应按顺序观看指导教程。
在学习教程时,下载并使用此练习文件进行实践体验。
Themes1.pptx (112 K)估计的完成时间: 20 分钟1. 应用主题Office 带有许多专业设计的主题。
在应用某个主题时,所有文本和对象都会采用在该主题中定义的字体、颜色和效果。
注意在 PowerPoint 中,主题将替代上一个“设计模板”。
在您需要设计一致的演示文稿但又不需要包括幻灯片内容(如占位符文本和图像)时,主题是最有用的。
现在将主题应用于演示文稿。
打开练习文件,该文件位于此教程的开始部分。
在左窗格中,依次单击每张幻灯片,并注意文本和对象的显示方式。
提示如果看不到左侧窗格,请单击“视图”>“普通”。
在“主题”选项卡上,在“主题”下,单击“黑领结”。
提示若要查看所有主题,请指向某个主题,然后单击。
注意,该主题将排列所有幻灯片上的文本和对象并设置它们的格式。
提示在使用演示文稿时可随时应用不同的主题。
提示∙若要将某个主题应用于特定幻灯片,请在按住 的同时,在左窗格中单击要将该主题应用到的幻灯片。
然后单击所需主题。
在您继续之前确保您可以执行下列操作:∙将主题应用于演示文稿。
2. 浏览主题的元素主题可定义文档的总体视觉设计。
每个主题包含一组协调的字体、颜色、背景和视觉效果选项,它们可为文档提供一致的外观。
现在查看主题元素在幻灯片4上的显示方式。
“主题标题字体”:标题文本的字体和颜色。
例如,在“黑领结”主题中,标题文本的格式被设置为灰色,18 磅,Garamond 字体。
可以更改主题标题字体的字体和颜色。
“主题正文字体”:正文文本的字体和颜色。
例如,在“黑领结”主题中,正文文本的格式被设置为白色,20 磅,Garamond 字体。
可以更改主题正文字体的字体和颜色。
“主题颜色”:协调的文本、背景、超链接和强调底纹颜色组。
可以定义任何主题的自定义颜色。
“主题图像效果”:所有幻灯片图像和对象的效果(如阴影和框架)组。
“背景设计”:幻灯片背景的颜色和图形元素。
提示∙所有 Office 文档都有主题。
如果您不应用任何主题,系统将默认应用 Office 主题。
∙在 PowerPoint 中,每个主题包括一种幻灯片背景设计。
在其他 Office 应用程序中,主题不包括背景设计。
在您继续之前确保您可以执行下列操作:∙标识已应用主题的基本设计元素。
3. 选择不同的颜色、字体和背景每个主题包含一个预设配色方案、一个字体方案和一种背景设计。
如果您不需要这些设计元素中的任何一个,都可以另外进行选择。
现在为应用于演示文稿的主题选择新的配色方案、字体方案和背景。
在左窗格中,单击幻灯片 2。
在“主题”选项卡上,在“主题选项”下,单击“颜色”,然后单击“首都”。
单击“字体”,然后单击“微风”。
单击“背景”,然后单击“样式11”。
注意,PowerPoint 将新颜色和字体应用到所有幻灯片。
提示∙若要创建自己的主题颜色,请单击“格式”>“主题颜色”。
∙如果手动将任何字体样式应用于演示文稿,则应用主题不会更改这些字体样式。
在您继续之前确保您可以执行下列操作:∙为当前主题选择不同的字体方案、颜色方案和背景。
4. 保存主题若要重用字体和颜色的新组合,需要将其保存为新主题的一部分。
在保存主题之后,它将与其他 Office 主题一起在“主题”选项卡上显示。
现在保存自定义主题。
在“主题”选项卡上,在“主题”下,单击“保存主题”。
在“位置”弹出菜单中,确保“我的主题”出现。
提示通过在默认的“我的主题”文件夹中保存您的主题,路径为:/Users/username/Library/Application Support/Microsoft/Office/User Templates/我的主题),可以确保该主题位于主题库和 PowerPoint 演示文稿库。
在“存储为”框中,键入“我的新主题”,然后单击“存储”。
在“主题”选项卡上,在“主题”下,指向任一主题,然后单击出现的箭头。
注意,主题在“自定义”下显示。
提示∙所有 Office 主题文件的扩展名都是 .thmx。
∙若要与他人共享主题,请以电子邮件附件的形式向其发送主题文件(例如,MyCustomTheme.thmx),要求其他人将该文件复制到其“我的主题”文件夹下,路径为:/Users/username/Library/ApplicationSupport/Microsoft/Office/User Templates/我的主题。
随后,该主题将出现在他们的 PowerPoint 演示文稿库中。
∙若要使当前主题作为未来演示文稿的默认主题,请在“主题”选项卡上,在“主题”下,单击“保存主题”旁边的箭头,再单击“将当前主题设置为默认值”。
在您继续之前确保您可以执行下列操作:∙保存自定义主题。
∙在“主题”选项卡上查找主题。
5. 创建使用您的主题的演示文稿在保存主题之后,即可像应用其他 Office 主题那样将其应用于任何打开的演示文稿。
或者创建使用该主题的新演示文稿。
现在创建使用您的主题的新演示文稿。
单击“文件”>“根据模板新建”。
在左窗格中,单击“我的主题”。
单击“我的新主题”,然后单击“选择”。
注意,新演示文稿随应用的自定义主题一起显示。
提示添加到演示文稿的每张新幻灯片都使用该主题。
提示∙如果您的主题未在“主题”选项卡上或 PowerPoint 演示文稿库中显示,请确保您的主题文件在默认的“我的主题”文件夹(位于 /Users/username/Library/Application Support/Microsoft/Office/User Templates/我的主题)中。
∙所有主题 (.thmx) 文件都可以在 Office for Windows 与 Office for Mac 之间共享。
在您继续之前确保您可以执行下列操作:∙创建使用自定义主题的新演示文稿。
课程摘要卡若要执行此操作将内置主题应用于当前演示文稿在“主题”选项卡上,在“主题”下,单击要应用的样式。
可以随时应用不同的主题。
将某个主题应用于特定幻灯片在按住 键的同时,在左窗格中,单击要将该主题应用到的幻灯片。
然后应用所需主题。
更改某个主题的默认字体在“主题”选项卡上,在“主题选项”下,单击“字体”,然后选择所需字体。
创建自定义主题颜色单击“格式”>“主题颜色”。
将当前主题设置为未来演示文稿的默认主题在“主题”选项卡上,在“主题选项”下,单击“保存主题”旁的箭头,然后单击“将当前主题设置为默认值”。
创建使用自定义主题的新演示文稿单击“文件”>“根据模板新建”。
在“我的主题”下,单击所需主题,然后单击“选择”。
共享主题向您希望共享的用户发送主题文件(例如,MyCustomTheme.thmx)。
然后要求该用户将文件复制到其“我的主题”文件夹中(路径为:/Users/username/Library/ApplicationSupport/Microsoft/Office/User Templates/我的主题)。
随即该主题将出现在其 PowerPoint 演示文稿库中。
更多提示∙在 PowerPoint 中,主题将替代上一个“设计模板”。
在您需要设计一致的演示文稿但又不需要包括幻灯片内容(如占位符文本和图像)时,主题是最有用的。
∙主题可定义标题和正文字体、颜色、效果以及 PowerPoint 演示文稿中的背景设计和颜色。
∙所有 Office 文档都有主题。
如果您不应用任何主题,系统将默认应用 Office 主题。
∙可以通过主题文件的文件扩展名 .thmx(例如,MyCustomTheme.thmx)区分它与其他 Office 文件。
∙对于要出现在“主题”选项卡上的自定义主题,必须将其保存到“我的主题”文件夹中,路径为:/Users/username/Library/Application Support/Microsoft/Office/User Templates/我的主题。
∙主题 (.thmx) 文件在 Office for Mac 与 Office for Windows 此二者中都具有兼容性。