exercise sheet for 2
SOLIDWORKS 平板钢制工程指南说明书

SOLIDWORKS Sheet MetalDassault Systèmes SolidWorks Corporation175 Wyman StreetWaltham, Massachusetts 02451 USA© 1995-2022, Dassault Systemes SolidWorks Corporation, a Dassault Systèmes SE company, 175 Wyman Street, Waltham, Mass. 02451 USA. All Rights Reserved.The information and the software discussed in this document are subject to change without notice and are not commitments by Dassault Systemes SolidWorks Corporation (DS SolidWorks).No material may be reproduced or transmitted in any form or by any means, electronically or manually, for any purpose without the express written permission of DS SolidWorks.The software discussed in this document is furnished under a license and may be used or copied only in accordance with the terms of the license. All warranties given by DS SolidWorks as to the software and documentation are set forth in the license agreement, and nothing stated in, or implied by, this document or its contents shall be considered or deemed a modification or amendment of any terms, including warranties, in the license agreement.For a full list of the patents, trademarks, and third-party software contained in this release, please go to the Legal Notices in the SOLIDWORKS documentation.Restricted RightsThis clause applies to all acquisitions of Dassault Systèmes Offerings by or for the United States federal government, or by any prime contractor or subcontractor (at any tier) under any contract, grant, cooperative agreement or other activity with the federal government. The software, documentation and any other technical data provided hereunder is commercial in nature and developed solely at private expense. The Software is delivered as "Commercial Computer Software" as defined in DFARS 252.227-7014 (June 1995) or as a "Commercial Item" as defined in FAR 2.101(a) and as such is provided with only such rights as are provided in Dassault Systèmes standard commercial end user license agreement. Technical data is provided with limited rights only as provided in DFAR 252.227-7015 (Nov. 1995) or FAR 52.227-14 (June 1987), whichever is applicable. The terms and conditions of the Dassault Systèmes standard commercial end user license agreement shall pertain to the United States government's use and disclosure of this software, and shall supersede any conflicting contractual terms and conditions. If the DS standard commercial license fails to meet the United States government's needs or is inconsistent in any respect with United States Federal law, the United States government agrees to return this software, unused, to DS. The following additional statement applies only to acquisitions governed by DFARS Subpart 227.4 (October 1988): "Restricted Rights - use, duplication and disclosure by the Government is subject to restrictions as set forth in subparagraph (c)(l)(ii) of the Rights in Technical Data and Computer Software clause at DFARS 252-227-7013 (Oct. 1988)."In the event that you receive a request from any agency of the U.S. Government to provide Software with rights beyond those set forth above, you will notify DS SolidWorks of the scope of the request and DS SolidWorks will have five (5) business days to, in its sole discretion, accept or reject such request. Contractor/ Manufacturer: Dassault Systemes SolidWorks Corporation, 175 Wyman Street, Waltham, Massachusetts 02451 USA.Document Number: PMT2306-ENGContents IntroductionAbout This Course . . . . . . . . . . . . . . . . . . . . . . . . . . . . . . . . . . . . . . . . 2Prerequisites . . . . . . . . . . . . . . . . . . . . . . . . . . . . . . . . . . . . . . . . . . 2Using this Book . . . . . . . . . . . . . . . . . . . . . . . . . . . . . . . . . . . . . . . . . . 2About the Training Files. . . . . . . . . . . . . . . . . . . . . . . . . . . . . . . . . . . . 3Training Templates. . . . . . . . . . . . . . . . . . . . . . . . . . . . . . . . . . . . . 3Accessing Training Templates in SOLIDWORKS . . . . . . . . . . . . 3Conventions Used in this Book . . . . . . . . . . . . . . . . . . . . . . . . . . . . . . 4Windows OS. . . . . . . . . . . . . . . . . . . . . . . . . . . . . . . . . . . . . . . . . . . . . 5Use of Color . . . . . . . . . . . . . . . . . . . . . . . . . . . . . . . . . . . . . . . . . . . . . 5More SOLIDWORKS Training Resources. . . . . . . . . . . . . . . . . . . . . . 5Local User Groups . . . . . . . . . . . . . . . . . . . . . . . . . . . . . . . . . . . . . 5 Lesson 1:Basic Flange FeaturesWhat are Sheet Metal Parts?. . . . . . . . . . . . . . . . . . . . . . . . . . . . . . . . . 8Sheet Metal Methods . . . . . . . . . . . . . . . . . . . . . . . . . . . . . . . . . . . . . . 8Unique Sheet Metal Items. . . . . . . . . . . . . . . . . . . . . . . . . . . . . . . . . . 10Flange Method . . . . . . . . . . . . . . . . . . . . . . . . . . . . . . . . . . . . . . . . . . 11Base Flange/Tab . . . . . . . . . . . . . . . . . . . . . . . . . . . . . . . . . . . . . . . . . 11Sheet Metal Parameters . . . . . . . . . . . . . . . . . . . . . . . . . . . . . . . . . . . 13Sheet Metal Thickness and Bend Radius . . . . . . . . . . . . . . . . . . . . . . 14Bend Allowance . . . . . . . . . . . . . . . . . . . . . . . . . . . . . . . . . . . . . . . . . 15K-Factor . . . . . . . . . . . . . . . . . . . . . . . . . . . . . . . . . . . . . . . . . . . . 16Bend Allowance . . . . . . . . . . . . . . . . . . . . . . . . . . . . . . . . . . . . . . 16Bend Deduction . . . . . . . . . . . . . . . . . . . . . . . . . . . . . . . . . . . . . . 16Specifying the Bend Allowance. . . . . . . . . . . . . . . . . . . . . . . . . . 17iContents SOLIDWORKSii Auto Relief . . . . . . . . . . . . . . . . . . . . . . . . . . . . . . . . . . . . . . . . . . . . . 17 Editing Sheet Metal Parameters . . . . . . . . . . . . . . . . . . . . . . . . . . . . . 18 Sheet Metal Bend Features. . . . . . . . . . . . . . . . . . . . . . . . . . . . . . . . . 20 Flat-Pattern Feature. . . . . . . . . . . . . . . . . . . . . . . . . . . . . . . . . . . . . . . 20 Flatten and Exit Flatten. . . . . . . . . . . . . . . . . . . . . . . . . . . . . . . . . 21 Toggle Flat Display . . . . . . . . . . . . . . . . . . . . . . . . . . . . . . . . . . . 21 Additional Flange Features. . . . . . . . . . . . . . . . . . . . . . . . . . . . . . . . . 23 Edge Flanges. . . . . . . . . . . . . . . . . . . . . . . . . . . . . . . . . . . . . . . . . . . . 23 Edge Flange Settings . . . . . . . . . . . . . . . . . . . . . . . . . . . . . . . . . . 25 Editing the Flange Profile. . . . . . . . . . . . . . . . . . . . . . . . . . . . . . . . . . 28 Flange Profile Relations . . . . . . . . . . . . . . . . . . . . . . . . . . . . . . . . 28 Edge Flanges on Curved Edges . . . . . . . . . . . . . . . . . . . . . . . . . . . . . 30 Miter Flanges . . . . . . . . . . . . . . . . . . . . . . . . . . . . . . . . . . . . . . . . . . . 31 Miter Flange Settings . . . . . . . . . . . . . . . . . . . . . . . . . . . . . . . . . . 32 Hem Feature . . . . . . . . . . . . . . . . . . . . . . . . . . . . . . . . . . . . . . . . . . . . 33 Hem Settings. . . . . . . . . . . . . . . . . . . . . . . . . . . . . . . . . . . . . . . . . 34 Tab Features . . . . . . . . . . . . . . . . . . . . . . . . . . . . . . . . . . . . . . . . . . . . 35 Cuts in Sheet Metal. . . . . . . . . . . . . . . . . . . . . . . . . . . . . . . . . . . . . . . 37 Summary of Flange Features . . . . . . . . . . . . . . . . . . . . . . . . . . . . . . . 41 Exercise 1: Sheet Metal Bracket. . . . . . . . . . . . . . . . . . . . . . . . . . . . . 43 Exercise 2: Flange Features . . . . . . . . . . . . . . . . . . . . . . . . . . . . . . . . 44 Exercise 3: Edit Flange Profile. . . . . . . . . . . . . . . . . . . . . . . . . . . . . . 50 Exercise 4: Sheet Metal Box. . . . . . . . . . . . . . . . . . . . . . . . . . . . . . . . 54 Exercise 5: Assorted Framing Hangers . . . . . . . . . . . . . . . . . . . . . . . 57Lesson 2:Working with the Flat PatternWorking with the Flat Pattern. . . . . . . . . . . . . . . . . . . . . . . . . . . . . . . 60Flat Pattern Settings . . . . . . . . . . . . . . . . . . . . . . . . . . . . . . . . . . . . . . 60Features for Manufacture . . . . . . . . . . . . . . . . . . . . . . . . . . . . . . . . . . 63Corner-Trim Feature. . . . . . . . . . . . . . . . . . . . . . . . . . . . . . . . . . . . . . 63Corner-Trim Settings . . . . . . . . . . . . . . . . . . . . . . . . . . . . . . . . . . 64Corners in the Formed State. . . . . . . . . . . . . . . . . . . . . . . . . . . . . . . . 66Closed Corner. . . . . . . . . . . . . . . . . . . . . . . . . . . . . . . . . . . . . . . . . . . 67Closed Corner Settings. . . . . . . . . . . . . . . . . . . . . . . . . . . . . . . . . 68Corner Relief. . . . . . . . . . . . . . . . . . . . . . . . . . . . . . . . . . . . . . . . . . . . 72Break Corner/Corner Trim . . . . . . . . . . . . . . . . . . . . . . . . . . . . . . . . . 73Producing the Flat Pattern. . . . . . . . . . . . . . . . . . . . . . . . . . . . . . . . . . 74Sheet Metal Cut List Properties . . . . . . . . . . . . . . . . . . . . . . . . . . . . . 74Accessing Cut List Properties. . . . . . . . . . . . . . . . . . . . . . . . . . . . 76Sheet Metal Drawings. . . . . . . . . . . . . . . . . . . . . . . . . . . . . . . . . . . . . 78Flat Pattern Drawing Views . . . . . . . . . . . . . . . . . . . . . . . . . . . . . . . . 78Flat Pattern View Properties. . . . . . . . . . . . . . . . . . . . . . . . . . . . . . . . 81Cut List Properties as a Note . . . . . . . . . . . . . . . . . . . . . . . . . . . . . . . 82Exporting the Flat Pattern. . . . . . . . . . . . . . . . . . . . . . . . . . . . . . . . . . 83Exercise 6: Flat Pattern Settings. . . . . . . . . . . . . . . . . . . . . . . . . . . . . 85Exercise 7: Working with Corners . . . . . . . . . . . . . . . . . . . . . . . . . . . 91SOLIDWORKS Contents Lesson 3:Standardizing Sheet Metal DesignsStandardizing Gauge Numbers and Bend Radii. . . . . . . . . . . . . . . . 100Standardizing Bend Allowance. . . . . . . . . . . . . . . . . . . . . . . . . . . . . 100Topics for Standardizing Parameters . . . . . . . . . . . . . . . . . . . . . . . . 100Using Tables . . . . . . . . . . . . . . . . . . . . . . . . . . . . . . . . . . . . . . . . . . . 101Gauge Tables . . . . . . . . . . . . . . . . . . . . . . . . . . . . . . . . . . . . . . . 101Bend Tables . . . . . . . . . . . . . . . . . . . . . . . . . . . . . . . . . . . . . . . . 102Bend Allowance . . . . . . . . . . . . . . . . . . . . . . . . . . . . . . . . . . . . . 106Editing the Gauge Table Selection. . . . . . . . . . . . . . . . . . . . . . . 107Gauge Table Training Files . . . . . . . . . . . . . . . . . . . . . . . . . . . . 107Defining Table File Locations . . . . . . . . . . . . . . . . . . . . . . . . . . 107Custom Sheet Metal Materials . . . . . . . . . . . . . . . . . . . . . . . . . . . . . 111Sheet Metal Templates . . . . . . . . . . . . . . . . . . . . . . . . . . . . . . . . . . . 115Sheet Metal Part Document Properties. . . . . . . . . . . . . . . . . . . . 117Other Part Template Settings . . . . . . . . . . . . . . . . . . . . . . . . . . . 119Sensors for Sheet Metal . . . . . . . . . . . . . . . . . . . . . . . . . . . . . . . 119Sheet Metal Drawing Document Properties. . . . . . . . . . . . . . . . 125Sheet Metal Tables in Drawings. . . . . . . . . . . . . . . . . . . . . . . . . . . . 130Adding a Cut List Table . . . . . . . . . . . . . . . . . . . . . . . . . . . . . . . 130Adding a Bend Table . . . . . . . . . . . . . . . . . . . . . . . . . . . . . . . . . 132Mapping DXF Output. . . . . . . . . . . . . . . . . . . . . . . . . . . . . . . . . . . . 134Options for Map File. . . . . . . . . . . . . . . . . . . . . . . . . . . . . . . . . . 137Exercise 8: Standardizing Sheet Metal Designs. . . . . . . . . . . . . . . . 140 Lesson 4:Additional Sheet Metal TechniquesAdditional Sheet Metal Methods . . . . . . . . . . . . . . . . . . . . . . . . . . . 142Designing from the Flat . . . . . . . . . . . . . . . . . . . . . . . . . . . . . . . . . . 142Sketched Bend Feature. . . . . . . . . . . . . . . . . . . . . . . . . . . . . . . . . . . 142Jog Feature . . . . . . . . . . . . . . . . . . . . . . . . . . . . . . . . . . . . . . . . . . . . 147Adding Features in an Unfolded State . . . . . . . . . . . . . . . . . . . . . . . 150Unfold and Fold . . . . . . . . . . . . . . . . . . . . . . . . . . . . . . . . . . . . . . . . 150Creating Cuts in the Flat Pattern. . . . . . . . . . . . . . . . . . . . . . . . . 153Swept Flange. . . . . . . . . . . . . . . . . . . . . . . . . . . . . . . . . . . . . . . . . . . 153Swept Flange Flat Pattern Options. . . . . . . . . . . . . . . . . . . . . . . . . . 155Lofted Bends. . . . . . . . . . . . . . . . . . . . . . . . . . . . . . . . . . . . . . . . . . . 157Bent Lofted Bends . . . . . . . . . . . . . . . . . . . . . . . . . . . . . . . . . . . 157Bent Bend Region Options. . . . . . . . . . . . . . . . . . . . . . . . . . . . . 158Formed Lofted Bends. . . . . . . . . . . . . . . . . . . . . . . . . . . . . . . . . 161Formed Bend Region Options . . . . . . . . . . . . . . . . . . . . . . . . . . 163Lofted Bends in the Design Library. . . . . . . . . . . . . . . . . . . . . . . . . 165Exercise 9: Sheet Metal from Flat . . . . . . . . . . . . . . . . . . . . . . . . . . 166Exercise 10: Jogs and Hems. . . . . . . . . . . . . . . . . . . . . . . . . . . . . . . 169Exercise 11: Fold & Unfold . . . . . . . . . . . . . . . . . . . . . . . . . . . . . . . 176iiiContents SOLIDWORKSiv Exercise 12: Conical Swept Flange . . . . . . . . . . . . . . . . . . . . . . . . . 179 Exercise 13: Lofted Bends . . . . . . . . . . . . . . . . . . . . . . . . . . . . . . . . 181 Exercise 14: Using Symmetry . . . . . . . . . . . . . . . . . . . . . . . . . . . . . 184 Manual Relief Cut. . . . . . . . . . . . . . . . . . . . . . . . . . . . . . . . . . . . 184 Sheet Metal Library Features . . . . . . . . . . . . . . . . . . . . . . . . . . . 190Lesson 5:Converting to Sheet MetalSheet Metal Conversion . . . . . . . . . . . . . . . . . . . . . . . . . . . . . . . . . . 194Insert Bends Method. . . . . . . . . . . . . . . . . . . . . . . . . . . . . . . . . . . . . 194Adding Rips . . . . . . . . . . . . . . . . . . . . . . . . . . . . . . . . . . . . . . . . . . . 195Insert Bends . . . . . . . . . . . . . . . . . . . . . . . . . . . . . . . . . . . . . . . . . . . 196Associated Features . . . . . . . . . . . . . . . . . . . . . . . . . . . . . . . . . . 198Switching Between States. . . . . . . . . . . . . . . . . . . . . . . . . . . . . . 199Making Changes. . . . . . . . . . . . . . . . . . . . . . . . . . . . . . . . . . . . . . . . 199Welded Corner . . . . . . . . . . . . . . . . . . . . . . . . . . . . . . . . . . . . . . . . . 203Converting Cones and Cylinders . . . . . . . . . . . . . . . . . . . . . . . . . . . 205Convert to Sheet Metal. . . . . . . . . . . . . . . . . . . . . . . . . . . . . . . . . . . 210Convert to Sheet Metal Settings. . . . . . . . . . . . . . . . . . . . . . . . . 212Using Rip Sketches. . . . . . . . . . . . . . . . . . . . . . . . . . . . . . . . . . . 216Exercise 15: Working with Imported Geometry. . . . . . . . . . . . . . . . 218Exercise 16: Unrolling a Cylinder . . . . . . . . . . . . . . . . . . . . . . . . . . 220Exercise 17: Convert to Sheet Metal Practice . . . . . . . . . . . . . . . . . 225Exercise 18: Convert with Rips . . . . . . . . . . . . . . . . . . . . . . . . . . . . 226Exercise 19: Sheet Metal Hopper. . . . . . . . . . . . . . . . . . . . . . . . . . . 228 Lesson 6:Multibody Sheet Metal PartsMultibody Sheet Metal Parts . . . . . . . . . . . . . . . . . . . . . . . . . . . . . . 234Tools to Create Multibody Sheet Metal Parts. . . . . . . . . . . . . . . 235Multibodies with Base Flange . . . . . . . . . . . . . . . . . . . . . . . . . . . . . 235Sheet Metal Parameters for Multibodies . . . . . . . . . . . . . . . . . . . . . 238Solid Body Feature History . . . . . . . . . . . . . . . . . . . . . . . . . . . . 238Cut List Item Properties for Multibodies . . . . . . . . . . . . . . . . . . . . . 239Flat Pattern Drawing Views for Multibodies . . . . . . . . . . . . . . . . . . 240Cut List Balloon Annotations. . . . . . . . . . . . . . . . . . . . . . . . . . . . . . 244Exporting to DXF/DWGs with Multibodies. . . . . . . . . . . . . . . . . . . 247Convert with Multibodies. . . . . . . . . . . . . . . . . . . . . . . . . . . . . . . . . 248Hiding and Showing Bodies. . . . . . . . . . . . . . . . . . . . . . . . . . . . . . . 250Hide and Show . . . . . . . . . . . . . . . . . . . . . . . . . . . . . . . . . . . . . . 250Hide/Show Bodies Command. . . . . . . . . . . . . . . . . . . . . . . . . . . 250Isolate . . . . . . . . . . . . . . . . . . . . . . . . . . . . . . . . . . . . . . . . . . . . . 250The Display Pane . . . . . . . . . . . . . . . . . . . . . . . . . . . . . . . . . . . . 251Sensors for Multibody Parts. . . . . . . . . . . . . . . . . . . . . . . . . . . . 253SOLIDWORKS ContentsUsing Split with Sheet Metal Parts. . . . . . . . . . . . . . . . . . . . . . . . . . 255Patterning for Multibodies . . . . . . . . . . . . . . . . . . . . . . . . . . . . . . . . 257Using Edge Flanges to Merge Bodies. . . . . . . . . . . . . . . . . . . . . . . . 260Interfering Bodies. . . . . . . . . . . . . . . . . . . . . . . . . . . . . . . . . . . . . . . 261Combining Sheet Metal with Other Bodies . . . . . . . . . . . . . . . . . . . 263Assigning Materials to Bodies . . . . . . . . . . . . . . . . . . . . . . . . . . 264Exercise 20: Toolbox . . . . . . . . . . . . . . . . . . . . . . . . . . . . . . . . . . . . 266Exercise 21: Mirroring and Merging Bodies . . . . . . . . . . . . . . . . . . 280Exercise 22: Sheet Metal Trailer . . . . . . . . . . . . . . . . . . . . . . . . . . . 285 Lesson 7:Forming Tools and GussetsSheet Metal Forming Tools. . . . . . . . . . . . . . . . . . . . . . . . . . . . . . . . 300How They Work. . . . . . . . . . . . . . . . . . . . . . . . . . . . . . . . . . . . . 300Forming Tools in the Design Library . . . . . . . . . . . . . . . . . . . . . . . . 301The Forming Tools Folder . . . . . . . . . . . . . . . . . . . . . . . . . . . . . 301Using an Existing Forming Tool . . . . . . . . . . . . . . . . . . . . . . . . 303Form Tool Feature Settings . . . . . . . . . . . . . . . . . . . . . . . . . . . . 304Form Tool Features in the Flat . . . . . . . . . . . . . . . . . . . . . . . . . . . . . 306Part Document Properties. . . . . . . . . . . . . . . . . . . . . . . . . . . . . . . . . 306Custom Forming Tools. . . . . . . . . . . . . . . . . . . . . . . . . . . . . . . . . . . 308Split Line. . . . . . . . . . . . . . . . . . . . . . . . . . . . . . . . . . . . . . . . . . . . . . 309Forming Tool Feature. . . . . . . . . . . . . . . . . . . . . . . . . . . . . . . . . . . . 310Legacy Behavior for Forming Tools. . . . . . . . . . . . . . . . . . . . . . . . . 314Form Tools in Drawings. . . . . . . . . . . . . . . . . . . . . . . . . . . . . . . . . . 314Punch Tables and Punch ID . . . . . . . . . . . . . . . . . . . . . . . . . . . . 314Sheet Metal Gusset. . . . . . . . . . . . . . . . . . . . . . . . . . . . . . . . . . . . . . 317Exercise 23: Customizing a Forming Tool. . . . . . . . . . . . . . . . . . . . 320Exercise 24: Sheet Metal Gusset . . . . . . . . . . . . . . . . . . . . . . . . . . . 329 Lesson 8:Additional Sheet Metal FunctionsAdditional Sheet Metal Functions . . . . . . . . . . . . . . . . . . . . . . . . . . 332Cross-Breaks. . . . . . . . . . . . . . . . . . . . . . . . . . . . . . . . . . . . . . . . . . . 332Cross Break Settings. . . . . . . . . . . . . . . . . . . . . . . . . . . . . . . . . . 333Cross Breaks in Drawings. . . . . . . . . . . . . . . . . . . . . . . . . . . . . . 334Vent Features. . . . . . . . . . . . . . . . . . . . . . . . . . . . . . . . . . . . . . . . . . . 336Fill Pattern. . . . . . . . . . . . . . . . . . . . . . . . . . . . . . . . . . . . . . . . . . . . . 338Mirror Part . . . . . . . . . . . . . . . . . . . . . . . . . . . . . . . . . . . . . . . . . . . . 340Tab and Slot . . . . . . . . . . . . . . . . . . . . . . . . . . . . . . . . . . . . . . . . . . . 343Process Plans. . . . . . . . . . . . . . . . . . . . . . . . . . . . . . . . . . . . . . . . . . . 348Exercise 25: Vent Cover. . . . . . . . . . . . . . . . . . . . . . . . . . . . . . . . . . 352vContents SOLIDWORKS Appendix A:Sheet Metal TablesTables . . . . . . . . . . . . . . . . . . . . . . . . . . . . . . . . . . . . . . . . . . . . . . . . 358The Sample Tables . . . . . . . . . . . . . . . . . . . . . . . . . . . . . . . . . . . 358Templates and Other Tables. . . . . . . . . . . . . . . . . . . . . . . . . . . . 358Customizing Tables. . . . . . . . . . . . . . . . . . . . . . . . . . . . . . . . . . . . . . 359K-Factor Ratio Tables. . . . . . . . . . . . . . . . . . . . . . . . . . . . . . . . . 360 vi。
剑桥雅思Test4READINGPASSAGE3
剑桥雅思Test4READINGPASSAGE3READING PASSAGE 3You should spend about 20 minutes on Questions 28-40 which are based on Reading Passage 3 on the following pages.Questions 28-31Reading Passage 3 has five sections A-E.Choose the correct heading for sections A and C-E from the list of headings below.Write the correct number i-viii in boxes 28-31 on your answer sheet.28 Section A29Section C30Section D31Section Eshould be allocated or apportioned, so that they are distributed in both the most just and mostemerged awareness in Western societies that resources for the provision of fossil fuel energy were finite and exhaustible and that the capacity of nature or the environment to sustain economic development and population was also finite. In other words, we became aware of the obvious fact that there were ‘limits to growth’. The new consciousness that there were also severe limits to health-care resources was part of this general revelation of the obvious. Looking back, it now seems quite incredible that in the national health systems that emerged in many countries in the years immediately after the 1939-45 World War, it was assumed without question that all the basic healthneeds of any community could be satisfied, at least in principle; the ‘invisible hand’ of economic progress would provide.Section CHowever, at exactly the same time as this new realization of the finite character of health-care resources was sinking in, an awareness of a contrary kind was developing in Western societies: that people have a basic right to health-care as a necessary condition of a proper human life. Like education, political and legal processes and institutions, public order, communication, transport and money supply, health-care came to be seen as one of the fundamental social facilities necessary for people to exercise their other rights as autonomous human beings. People are not in a position to exercise personal liberty and to be self-determining ifthey are poverty-stricken, or deprived of basic education, or do not live within a context of law and order. In the same way, basic health-care is a condition of the exercise of autonomy.Section DAlthough the language of ‘rights’ sometimes leads to confusion, by the late 1970s it was recognized in most societies that people have a right to health-care (though there has been considerable resistance in the United States to the idea that there is a formal right to health-care). It is also accepted that this right generates an obligation or duty for the state to ensure that adequate health-care resources are provided out of the public purse. The state has no obligation to provide a health-care system itself, but to ensure that such a system is provided. Put another way, basic health-care is now recognized as a ‘publicgood’, r ather than a ‘private good’ that one is expected to buy for oneself. As the 1976 declaration of the World Health Organization put it: ‘The enjoyment of the highest attainable standard of health is one of the fundamental rights of every human being without distinction of race, religion, political belief, economic or social cond ition.’ As has just been remarked, in a liberal society basic health is seen as one of the indispensable conditions for the exercise of personal autonomy.Section EJust at the time when it became obvious that health-care resources1 Organisation for Economic Cooperation and Development2 Gross Domestic ProductQuestions 32-35Classify the following as first occurringA between 1945 and 1950B between 1950 and 1980C after 1980Write the correct letter A, B or C in boxes 32-35 on your answer sheet.32 the realization that the resources of the national health systems were limited33 a sharp rise in the cost of health-care34 a belief that all the health-care resources the community needed would be produced by economic growth35 an acceptance of the role of the state in guaranteeing the provision of health-careQuestions 36-40Do the following statements agree with views of the writer in Reading Passage 3?In boxes 36-40 on your answer sheet writeYES if the statement agree with the views of the writerNO if the statement contradicts the views of the writerNOT GIVEN if it impossible to say what the writer thinks about this 36Personal liberty and independence have never been regarded as directly linked to health-care.37 Health-care came to be seen as a right at about the same time that the limits of health-care resources became evident.38 In OECD countries population change have had an impact on health-care costs in recent years.39OECD governments have consistently underestimated the level of health-care provision needed.40 In most economically developed countries the elderly will have to make special provision for their health-care in the future.。
2023六月大学英语四级考试真题一

2023六月大学英语四级考试真题一全文共3篇示例,供读者参考篇12023 June CET-4 ExamPart I Writing (30 minutes)Directions: For this part, you are allowed 30 minutes to write an essay on the topic "The Importance of Physical Exercise". You should write at least 150 words but no more than 200 words.Physical exercise plays a crucial role in our overall health and well-being. It not only helps us stay fit but also has numerous other benefits. First and foremost, regular exercise is essential for maintaining a healthy weight and preventing obesity. In today's sedentary lifestyle, where most of us spend hours sitting in front of screens, exercise is vital to counteract the negative effects of a lack of physical activity.Moreover, physical exercise is beneficial for our mental health as well. It has been proven to reduce stress, anxiety, and depression by releasing endorphins, also known as "feel-good" hormones. Exercise also enhances cognitive function, improvesmemory, and boosts creativity. It can help us relax, clear our minds, and improve our overall mood.In addition, regular exercise strengthens our immune system, reduces the risk of chronic diseases such as heart disease, diabetes, and cancer, and improves our overall quality of life. It is never too late to start incorporating physical activity into our daily routine, whether it's going for a run, taking a yoga class, or simply going for a walk.In conclusion, the importance of physical exercise cannot be overstated. It is a key component of a healthy lifestyle and has numerous positive effects on both our physical and mentalwell-being. Let's make a commitment to prioritize exercise and reap its many benefits.Part II Reading Comprehension (40 minutes)Directions: There are four passages in this part. Each passage is followed by some questions or unfinished statements. For each of them, there are four choices marked A, B, C, and D. You should decide on the best choice and mark the corresponding letter on Answer Sheet 2 with a single line through the center.Passage OneQuestions 1 to 5 are based on the following passage.What Can We Learn from Snowflakes?Like fingerprints or faces, no two snowflakes are alike, but the hexagonal structure of the crystals-their "sixfold symmetry"-is something unique to those gems of the cold we call snow. While all snowflakes have the sixarms, some may have more or fewer beams than others, making each one a unique blend of foundation patterns and environmental influences.How does a snowflake form? It begins its life in a cloud high up in the sky, where dust particles surround water droplets. The water droplets freeze around the dust particles and form ice crystals. As the ice crystals grow, they become heavier and fall towards the Earth. As the crystals move through different atmospheric conditions, such as temperature and humidity changes, they develop their unique and intricate shapes.Snowflakes are a reminder of the beauty and diversity of nature. They are not only visually stunning but also serve important ecological functions. For example, snowflakes help regulate the Earth's temperature by reflecting sunlight and creating a protective layer of insulation on the ground against temperature extremes.1. According to the passage, what is unique about snowflakes?A. Their sizeB. Their symmetryC. Their colorD. Their weight2. How do snowflakes form according to the passage?A. By meltingB. By evaporatingC. By freezingD. By condensing3. What do snowflakes help regulate according to the passage?A. Air qualityB. Soil pHC. Earth's temperatureD. Ocean currents4. Why are snowflakes compared to fingerprints or faces?A. Because they are colorfulB. Because they are transparentC. Because they are uniqueD. Because they are round5. What is the main idea of the passage?A. Snowflakes are made of water droplets.B. Snowflakes have a unique hexagonal structure.C. Snowflakes help regulate the Earth's temperature.D. Snowflakes are visually stunning and diverse.Part III Listening Comprehension (30 minutes)Section ADirections: In this section, you will hear three news reports. At the end of each news report, you will hear two or three questions. Both the news report and the questions will be spoken only once. After you hear a question, you must choose the best answer from the four choices marked, A, B, C, and D. Then, mark the corresponding letter on Answer Sheet 2 with a single line through the center.News Report 1Questions 6 to 8 are based on the news report you have just heard.6. What is the main topic of the news report?A. A new movie releaseB. A popular restaurant openingC. A charity eventD. A traffic jam7. According to the news report, why are people excited about the new movie?A. It has a famous cast.B. It is based on a bestselling book.C. It has received positive reviews.D. It features cutting-edge special effects.8. What can be inferred about the protagonist of the movie?A. He is a detective.B. He is a journalist.C. He is a superhero.D. He is a doctor.News Report 2Questions 9 to 11 are based on the news report you have just heard.9. What is the main purpose of the new app mentioned in the news report?A. To help people find lost itemsB. To organize personal financesC. To facilitate carpoolingD. To enhance social networking10. According to the news report, how does the app work?A. By tracking users' kilometers drivenB. By connecting users to local businessesC. By notifying users of nearby traffic accidentsD. By matching users with potential carpool partners11. What is the speaker's opinion of the new app?A. It is innovative.B. It is time-consuming.C. It is expensive.News Report 3Questions 12 to 14 are based on the news report you have just heard.12. What does the news report mainly focus on?A. A new art exhibitionB. A famous artist's latest workC. A controversial paintingD. A public auction13. According to the news report, why is the painting causing controversy?A. It is based on a true story.B. It depicts a violent scene.C. It is painted in black and white.D. It is abstract and hard to interpret.14. What is the speaker's overall opinion of the painting?A. It is thought-provoking.B. It is offensive.D. It is aesthetically pleasing.Part IV Translation (30 minutes)Directions: For this part, you are allowed 30 minutes to translate a passage from Chinese into English. You should write at least 150 words.文明是人类社会的共同追求。
cnckad激光切割教程(英文)
Laser Cutting Tutorial Laser Tutorial Overview and Aims How to use this Tutorial A brief explanation about Clicking A brief explanation about Selection This Tutorial is designed to give the newcomer to cncKad a quick and easy start with the program, while teaching the use of some of the most common commands. The exercises are set out so that the user may work with the program in conjunction with this book. The exercises are of varying difficulty, each one designed to teach the new user a different aspect of the program. For instance, there are exercises that teach various drafting techniques, while others teach more about utilizing laser cutting technology. Each exercise is accompanied by detailed steps that allow a new user to create and learn everything from the easiest to the most complicated procedures within the program.Having completed the exercises in this book you will be able to successfully draw and cut your own sheet metal parts, using many of the cncKad commands. You will be able to take the geometry and cuts and create a working NC program that can be sent to your machine.This Tutorial should be used in conjunction with the cncKad Drafting & Nesting Manual and the cncKad Laser Manual . Working with these manuals will give you the ultimate reference and teaching ser Cutting Tutorial Laser Cutting Tutorial> Laser Tutorial Overview and Aims > How to use this TutorialHow to use this TutorialThe first page of each chapter shows the part we will create during the exercise.Throughout the exercise you will find tips that will help you create the draft and then cut it. These tips will be denoted by the sign, e.g.:This book is written for work in conjunction with version 8.5 of cncKad . If you have theDOS version of cncKad please refer to the appropriate books. If you have a differentversion of cncKad Windows, while most of the exercises and commands are compatible,you may find slight discrepancies between the commands and the procedures as listedhere and your software. If this is the case, please consult the user manual that came withyour copy of the program or the update pamphlet.The Shapes commands are quick and easy methods for building differentcontours that are typical to the sheet metal industries.Laser Cutting Tutorial > Laser Tutorial Overview and Aims > How to use this Tutorial Laser Cutting Tutorial > Laser Tutorial Overview and Aims > A brief explanation about ClickingA brief explanation about ClickingWhen working with cncKad , it is important to remember that the basic unit of drafting isthe Entity. An Entity can be a line, an arc, a circle or a point. As you create parts, you willneed to choose a specific Entity or CAM to manipulate.When you click your mouse to choose a specific Entity, it is imperative you remember thatcncKad uses the following process to interpret your action:The following example illustrates this interpretation process:LineA has been cut; if you wish to manipulate this processing (e.g. change Cutting Speed), you can click on points1 or 2, but NOT on 3, 4 or 5.Each entity can be associated only with one process. If you want to place more processes on the line, you should split it into few ser Cutting Tutorial > Laser Tutorial Overview and Aims > A brief explanation about Clicking Laser Cutting Tutorial > Laser Tutorial Overview and Aims > A brief explanation about Selection A brief explanation about SelectionThere are two modes of selection:1. Which Entityhas been chosen?2. Which Endpoint of the entity has been chosen (lines and arcs have 2 Endpoints)?3. Which Side of the Entity has been chosen?When selecting a processing definition, you must still select the Entityassociated with this definition.•Pre-selection –this can be done in two ways:o by mouse –first select the Entities, then perform the command. Holding Ctrlkey you can select a few Entities at a time. Clicking Esc ape key deselects yourchoice.o by window –there are two options of pre-selecting entities by window and theydepend on the side to which you drag the window:to the right side –the dragged window is solid. Only Entities fully fallinginside window's frame will be affected by the command you will choose toapply to those entities.to the left side –the dragged window is dashed. All Entities that fall withinLaser Cutting Tutorial > Laser Tutorial Overview and Aims > A brief explanation about SelectionLaser Cutting Tutorial > Exercise 1 –Basic Drafting and CuttingOverviewWhat you will learn in this exercise:TipsThe aim of this first exercise is to give you the ability to open a new file in cncKad , createa basic drawing, place cuts on the drawing and simulate the NC code created from thegeometry.In this exercise we will be creating the following part:Laser Cutting Tutorial > Exercise 1 –Basic Drafting and CuttingLaser Cutting Tutorial > Exercise 1 –Basic Drafting and Cutting > Overview > What you will learn in this exercise:the frame of the window will be affected.•Post-selection –first choose the command and then select the Entities you wantthe command to apply to.What you will learn in this exercise:Laser Cutting Tutorial > Exercise 1 –Basic Drafting and Cutting > Overview > What you will learn in this exercise:Laser Cutting Tutorial > Exercise 1 –Basic Drafting and Cutting > Overview > TipsTipsLaser Cutting Tutorial > Exercise 1 –Basic Drafting and Cutting > Overview > TipsLaser Cutting Tutorial > Exercise 1 –Basic Drafting and Cutting > Creating a New PartCreating a New Part1. Opening a new part file.2. Selecting the active machine for a workstation.3. Placing shapes and holes on the part.4. Creating inner rectangle.5. Creating fillets.6. Running geometry checks.7. Saving a part.8. Adding laser cuts.9. Defining the sheet size.10. Generating NC code.11. Simulating the NC.•When the new drawing is opened a rectangle is created –this will be the basis for drawing the part.•The bottom left corner of the draft is placed at coordinate position X=0, Y=0.•You can position the shapes and circles using absolute coordinates.•You can use Help Linesto find a position on the part.1. Double click on the cncKad icon to open the program.2. From the File Menu (at the top of the screen) select the New => New Part option,or click the New Part buttonfrom the Standard toolbar . The following dialogwill be displayed.The procedure for opening new files in cncKad is the same as for opening anynew file in Windows programs -press the Ctrl+N combination on yourLaser Cutting Tutorial > Exercise 1 –Basic Drafting and Cutting > Creating a New PartLaser Cutting Tutorial > Exercise 1 –Basic Drafting and Cutting > Selecting the Active Machine ModelSelecting the Active Machine ModelIt often happens that a workstation supports more than one machine model, for exampleone (or more) for laser cutting and one (or more) for punching.Before beginning to draft the part, we should make sure that we are working on a lasercutting machine.To select the machine model that will be the active one:Laser Cutting Tutorial > Exercise 1 –Basic Drafting and Cutting > Selecting the Active Machine ModelKeyboard.3. In the File Name box type “Exer1”instead of “Part1”. You can do this by double-clicking on the name "Part1" and then typing-in the new name. When you are done,click on the Save button.4.The following dialog will now be displayed:Remember that you define the size of the part when you open a new part andnot the size of the sheet.If you make a mistake while typing the values –use the Backspace key toerase the value and retype it, and the Tab key to move between fields.5. This dialog allows you to define the part Size, sheet Material and Thickness. InPart Size , set the X size to 300 and Y size to 200.6. Select a material from the dropdown list and define the thickness as 1mm. Leaveall the rest of the options at their defaults. For the time being we will not fill out theUser Data options, so just click on the OKbutton to confirm your part definitions.The User Data tab allows the user to associate certain information with thepart, for instance –Order Number, Drawing Name, Revisions, and Notes. Thisinformation can then be inserted in the Report File .7.A white rectangle of the defined size will appear on the screen.1. On the State Bar , at the left side of the cncKad window, click on the Machine button .2. A list will open with the models that are installed on this workstation, with the active one marked by a check mark:3. To change the active machine, simply click on the one you want.Laser Cutting Tutorial > Exercise 1 –Basic Drafting and Cutting > Positioning Holes with Help LinesPositioning Holes with Help LinesIn this stage we will be placing holes on the drawing and positioning them by snappingthem to intersections of the Help Lines, which will enable us the exact positioning of the holes.Help Lines are always displayed as green lines that cross the entire extent ofthe screen.Any position can be located by entering the absolute coordinate, butsometimes it is easier to use Help Lines to find the position.1. From the Help Lines Toolbar–click the ParallelHelp Line at Distance button –.2. In the dialog that appears define a distance of 50 and click on the OK button.3. Position the Help Line by clicking the mouse on the inner side of the left verticalline.4. Repeat this for the right vertical line.5. Press the Space bar and redefine the parallel distance as 30. Click the OK buttonto close the dialog.6. Click the bottom horizontal line on its inner side, and then click the top horizontalline on its inner side. The result should be as shown below:7. From the Shapes Toolbar–select theDraw Circle button . The following dialog box will be displayed:8. Define a diameter of 15 and click on the Apply button.9. The dialog will disappear and you will be able to move the circle with the cursor.Click on the Snap=Auto button on the top left side of the screen. A menu willappear, from this menu select the Snap Intersection option (or press F7 key).You can define any snap position as the default by clicking on the Snapbutton at the top left of the screen, and selecting the snap position from themenu i.e. Endpoint, Center, Intersection etc.Unless defined otherwise the line will automatically "snap" to the nearest snappoint. This can be an endpoint of a line, a center of a circle or a line and anintersection between two entities.10. Position the cursor near the intersection of the help lines and click the mouse. TheLaser Cutting Tutorial > Exercise 1 –Basic Drafting and Cutting > Positioning Holes with Help LinesLaser Cutting Tutorial > Exercise 1 –Basic Drafting and Cutting > Creating the Inner RectangleCreating the Inner RectangleIn this stage we will be creating a rectangle by using the help lines to define the rectangle corners. We will then draw a line by snapping to the intersections of the help lines. Thereare also other methods for creating rectangles –for instance you could use the Shapesoptions.circle will snap to the intersection. Repeat this for the other three holes.11. From the Delete toolbar –click the Delete Help Lines button –.12. The Select Option Toolbar –will open. Clickthe "A " icon (or the press the letter A your keyboard) and press Enter to confirmthe selection.13. Press Esc key and clean the screen by clicking on the Redraw button –(or press F2). The part should appear as shown below:The Shapes commands allow you to build certain shapes parametrically, i.e.you define the dimensions and orientation of the shapes, and to place them onthe drawing.There are eleven types of shapes available (from the Shapes toolbar or fromthe Draw menu => Shapes )-oRectangle oOval oSingle-D oDouble-D oTrapeze (Connector)oBolt Hole oBanana Shape oEllipse oPunched Sheet oTriangle o Polygon1. From the Help Lines toolbar click on the Vertical Help Line icon .2. Click the cursor on the bottom horizontal line, near the middle of the line. A green,vertical help line will be placed through the midpoint of this line.3.From the same toolbar click on the Horizontal Help Line button .4. Now click the left vertical line near the midpoint. The part should now be similar tothe drawing shown below.5. From the Help Lines Toolbar select the Parallel Help Line at Distance button .The distance dialog box will appear, enter a value of 100 and click on the OKbutton.6. Click the vertical help line on either its left or right side. A new help line will beplaced 100mm from the original vertical help line.7. Click the other side of the (vertical) center help line. There should now be threevertical help lines with a 100mm distance between each of them.8. Click on the Parallel Help Line by Distance button again and reenter the value as50. Click the OK button, and click the horizontal help line once on each side. Nowthe part should be as on the picture shown below.9. From the Shapes Toolbar–select theLine, Auto Snap button –.The Line, Auto Snap command automatically snaps the cursor to the nearestSnap position. There is no need to place the cursor exactly at the desiredposition. The start and endpoint of the lines will be placed at the closestsnapping positions.The Line, Auto Snap option is a quick and accurate way of snapping tointersections created by the help lines.10. With the aid of the cursor click the four intersections of the help lines, as shownbelow, and then click the first one again (to close the rectangle).11. Click the right mouse button –this is the Esc ape button and closes the command.12. From the Delete Toolbar click on the Delete Help Lines button –. Click the ALaser Cutting Tutorial > Exercise 1 –Basic Drafting and Cutting > Creating the Inner RectangleLaser Cutting Tutorial > Exercise 1 –Basic Drafting and Cutting > Filleting Contours Filleting ContoursIn this stage we will be placing fillet radii on the outer and inner contours.Laser Cutting Tutorial > Exercise 1 –Basic Drafting and Cutting> Filleting ContoursLaser Cutting Tutorial > Exercise 1 –Basic Drafting and Cutting > Geometry Checks icon from the Select Option Toolbar and then press Enter to delete all the helplines.13. Click on the Redraw button from the Zoom Toolbar to clean the screen.The screen can be redrawn any time by using the Redraw button.Use the Zooming commands to enlarge a portion of the drawing to enableaccurate work.1. From the Edit Toolbar –click the Fillet button .The following menu will appear:The Fillet menu gives you the options of creating one single fillet on a corner,or of creating the same fillet radius on every corner making up a closedcontour, or of creating fillet radiuses on every corner of the part.2. Select the second option –the Contour command.3. Click the inner rectangle on one of its lines. When asked if "OK to fillet selectedcontour ", click the Yes button.4. The Radius Definition dialog will be displayed. Define a radius of 10 and click theOK button. The inner contour will be filleted on all four corners.5. Click the outer contour. The contour will be highlighted and you will be asked againif this is the correct contour, click on the Yes button. Define a radius of 20 and clickon the OK button. The outer contour will be filleted.6. The part should now be as shown below:Geometry ChecksWe will now check the part for any errors or problems.It is important to execute these checks before entering the cutting stage, so that cncKadwill be able to recognize the part correctly.These checks not only verify the legality of the existing geometry, but also repair it, ifneeded –you can choose to delete duplicate entities (e.g. Circles placed on top of eachother), join all the breaks in the geometry, examine the part to see if all the contours areconnected properly.Laser Cutting Tutorial > Exercise 1 –Basic Drafting and Cutting > Geometry ChecksLaser Cutting Tutorial > Exercise 1 –Basic Drafting and Cutting > Saving the PartSaving the PartIt is important to save your part after each important change you make, so that you will not loose a lot of work if there is a problem. To do this, select the Save buttonfrom the File toolbar .If you want to change the part’s name select Save As from the File Menu . The followingdialog will appear:Type-in a new name for the file and click the Save button. The dialog will disappear andthe part will be saved under the new name.1. From the View menu (at the top of the screen) select the Check option, or click theCheck button .2. The dialog, as shown below, will be displayed. Make sure that the options are setas shown:3. Press the OK button, to execute the checks. If there are any gaps in contoursbigger than 1mm, the examination process will stop, a red X will be placed at thatposition and you will be allowed to press Enter to continue with the checks.Gaps in the contours that are smaller than 1mm will be repaired automatically.The size of the repaired gap can be set by editing the Connect Tolerancefield.You can also do this by pressing the Ctrl+S key combination on yourKeyboard.This dialog is displayed only the first time that you save the part, or when you use theSave As command.Laser Cutting Tutorial > Exercise 1 –Basic Drafting and Cutting > Saving the PartLaser Cutting Tutorial > Exercise 1 –Basic Drafting and Cutting> Cutting the PartCutting the PartThe part’s drawing is now complete, and it is time to cut it.To cut the part we will use the AutoCut option.Click the AutoCut button on the Common Toolbar , and the following dialog will open:At this point we will not go into all the options this dialog offers –simply click the Runbutton.The part will be cut automatically (as you will see from the addition of the yellow cuttinglines), and the following message will appear:Confirm by clicking OK and view your part:The cuts will be presented on the drawing as yellow lines, placed to one sideof the contour (white) lines.The dotted lines are the Rapid Tool Path . You can turn this feature on and offfrom the View menu , or by pressing the Alt+B keyboard combination.The Entry into a cut is marked with the circular piercing graphic:Laser Cutting Tutorial > Exercise 1 –Basic Drafting and Cutting > Cutting the PartLaser Cutting Tutorial > Exercise 1 –Basic Drafting and Cutting > Defining the Sheet SizeDefining the Sheet SizeWe will now define the size of the sheet, the number of parts that fit on it and the offsets of the actual parts from the sheet’s edges.1. Click the Set Sheet and Clamps button from the Common toolbar (you canalso access this dialog from the CAM menu).2. The following dialog will appear. Go to the Sheet tab and define the Sheet Sizeand the Offsets as shown below:When defining a sheet size, cncKad will attempt to fit in as many part copiesas possible. These copies are called "multiple parts". The amount of parts thatfit on the sheet is displayed in the Number of Parts fields, below the SheetSize definition fields.3. Click on the Part tab and note the Distance Between Parts section; here you candefine the distances of each part from the next.It is important to separate the parts enough to allow for the Entry and Exitcuts of the parts’outer contours.4. Confirm the new definitions by clicking the OK button. Your sheet should now looklike this:Remember to Save your work periodically.Laser Cutting Tutorial > Exercise 1 –Basic Drafting and Cutting > Defining the Sheet Size Laser Cutting Tutorial > Exercise 1 –Basic Drafting and Cutting > Generating the NC Code Generating the NC CodeIt is now time to convert the part’s drawing and cutting definitions into NC code.Laser Cutting Tutorial > Exercise 1 –Basic Drafting and Cutting > Generating the NC CodeLaser Cutting Tutorial > Exercise 1 –Basic Drafting and Cutting > Simulating the NC Program Simulating the NC ProgramRunning the SimulationAfter the Post Processor finishes, the Simulation is opened in a separate window from the drawing, presenting the preview of the processed sheet and the code generated:1. Click the button in the Common Toolbar , or open the File menu and selectthe Post Process option.2. The User Data dialog will open; at this point we will ignore it. Click the Next buttoncontinue.3. This dialog shows you for which machine this NC code is being generated (whichpost processor is being used).4. This dialog deals with Laser Optimization . You can leave the definitions as theyare, or set different ordering for the cuts. For now, accept the defaults and click theNext button.5. This dialog enables you to add Tool Functions to your cuts. Again, click the Nextbutton to skip it.6. This dialog is the Post Processor Options . Here you can define the name anddirectory for the NC file, whether or not to create a Report file and various otheroptions. For now accept the defaults and click the Finish button.7. The Post Processor will start and when it finishes you will receive a summary suchas the following:8. Click the OK button and the Simulation will be loaded.Laser Cutting Tutorial > Exercise 1 –Basic Drafting and Cutting > Simulating the NC ProgramLaser Cutting Tutorial > Exercise 1 –Basic Drafting and Cutting > Simulating the NC Program > Running the SimulationRunning the SimulationThe simulation’s running and speed are controlled by the Execute toolbar:•To run the simulation, simply click the Run button .• To Pause or Stop it, use the and buttons.• To adjust the speed, use the slider .You can also run the NC code line after line:1. Click the Line button on the left side of screen so that it shows Line=ON.2. Click the Run button to move from one line to the next one.3. To exit the simulation –from the File menu select the Exit option.Laser Cutting Tutorial > Exercise 1 –Basic Drafting and Cutting > Simulating the NC Program > Running the SimulationLaser Cutting Tutorial > Exercise 1 –Basic Drafting and Cutting > SummarySummaryIn this exercise we created a simple part, used the AutoCut feature to process it, defineda sheet size and created multiple parts, generated NC code for it and run this code in theSimulation.You might want to create a few parts on your own and process them to gain someconfidence before continuing to the next exercise, which will be more advanced.Laser Cutting Tutorial > Exercise 1 –Basic Drafting and Cutting > SummaryLaser Cutting Tutorial > Exercise 2 –Setting Cuts ManuallyOverviewWhat you will learn in this exercise:In this exercise we will use the part we created in the former exercise to see how we canmanually set the cuts on our part.Laser Cutting Tutorial > Exercise 2 –Setting Cuts ManuallyLaser Cutting Tutorial > Exercise 2 –Setting Cuts Manually > Overview > What you will learn in this exercise:What you will learn in this exercise:Laser Cutting Tutorial > Exercise 2 –Setting Cuts Manually > Overview > What you will learn in this exercise:Laser Cutting Tutorial > Exercise 2 –Setting Cuts Manually > Saving a File Under a New Name Saving a File Under a New Name Because we will now make changes to the part, it is good procedure to save it under a new name:1.Adding Dimensions 2. Stretching 3. Setting AutoCut definitions 4. Editing individual cuts 1.Select Save As from the File Menu . The following dialog will appear:2. Type-in “Exer2”in the File name field and click the Save button.The dialog will close and the part will be saved under the new name.Laser Cutting Tutorial > Exercise 2 –Setting Cuts Manually > Saving a File Under a New NameLaser Cutting Tutorial > Exercise 2 –Setting Cuts Manually > Adding a DimensionAdding a DimensionAmong the other drafting tools, cncKad enables you to add dimensions on your part:1. From the Dimension toolbar–, select the AddDimension button.2. The Add Dimension/Text dialog will open. Define the parameters as presentedbellow and click OK :3. Click on the part’s left side and then on its right side. A Dimension line will bedrawn on the cursor, moving as it moves.4. Move the cursor above the part and click. The Dimension will positioned and itssize shown:Laser Cutting Tutorial > Exercise 2 –Setting Cuts Manually > Adding a DimensionLaser Cutting Tutorial > Exercise 2 –Setting Cuts Manually > Stretching the PartStretching the PartIt often happens that you want to resize a part, or a section of it:1. From the Transform Toolbar–, select the StretchEntities button .Laser Cutting Tutorial > Exercise 2 –Setting Cuts Manually > Stretching the PartLaser Cutting Tutorial > Exercise 2 –Setting Cuts Manually > Deleting Existing Cuts on the PartDeleting Existing Cuts on the PartAs you can see all the cuts have been removed from the ser Cutting Tutorial > Exercise 2 –Setting Cuts Manually > Deleting Existing Cuts on the Part2. The cursor will change to a cross with a W letter. This indicates that you need toselect a window to perform the Stretch. Click positions 1 and 2as shown below:3. When the rectangle is similar to the drawing –click the left mouse button again.The entities that are to be stretched or moved should be colored blue.Entities that are entirely inside the Stretching window will be moved, notresized –note the two round holes.4. Now the Stretch dialog will open. Set dX value of 50 and click OK:5.The part will be resized as below:Note that the cutting definitions have been updated, and also that the Dimension now shows the new size.1. From the Delete toolbar , click the Delete CAMs button.2. Click the A icon (or press the letter A on the Keyboard) and press Enter .3. From the Zoom toolbar , click the Zoom Part button(or press F5).Laser Cutting Tutorial > Exercise 2 –Setting Cuts Manually > Setting AutoCut DefinitionsSetting AutoCut DefinitionsWe will now add new cuts, using manual definitions.Laser Cutting Tutorial > Exercise 2 –Setting Cuts Manually > Setting AutoCut DefinitionsLaser Cutting Tutorial > Exercise 2 –Setting Cuts Manually > Setting Individual Cuts Setting Individual Cuts We will now see how to change the cutting definitions for an individual cut.The changes we make here are reserved for specialized cases –usually thestandard setting should be used.1. Click the AutoCut button on the Common toolbar , and the AutoCut willopen.2. Un-check the Use Technology table for Entry and Exit option, and Approach andExit sections will be un-grayed:3. For the Approach and the Exit , set the Geo-Type and Length parameters asabove, click the Run button, and the part will be cut with the new definitions.4. Using the Zoom Window buttonzoom to the inner rectangle, to the sectionwith the Entry and the Exit: Note that the Entry (marked with the piercing) is much longer and steeper than theExit, as per our definitions.When you set the AutoCut Approach /Exit definitions, you do it for the entirepart –zoom-in to other contours on the part to see this.1. From the CAM toolbar, click the Edit CAM button.。
大学英语四级考试模拟二

大学英语四级考试模拟二姓线号学封班卷试密学大峡三大学英语四级考试全真模拟试题二Part I Writing(30 minutes)Directions: For this part, you are allowed 30 minutes to write a composition on the topic:Lectures or Discussions. You should write at least 120 words following the outline givenbelow in Chinese.1.一些学生赞成讲座式教学2.另一些学生偏爱讨论式教学3.你的看法Part II Reading Comprehension (Skimming and Scanning) (15 minutes)Directions: In this part, you will have 15 minutes to go over the passage quickly andanswer the question on Answer Sheet 1For questions 1-7,markY (for YES) if the statement agrees with the information given in the passage;N (for NO) if the statement contradicts the information given in the passage;NG (for NOT GIVEN) if the information is not given in the passage.For questions 8-10, complete the sentences with the information given in the passage.SpidersSpiders can be distinguished from other Arachnids because the prosoma (combined headand thorax) is only separated from the opisthosoma (abdomen) by a narrow waist, inother Arachnids the whole body appears to be much more of a single unit. All spidersproduce silk, but only some construct webs to catch their homes and to protect their eggs.All spiders possess poison glands but very few of them are dangerous to humans, of the600+species in Britain only 12 (at least one of these is a recent human assisted colonist)are strong enough to pierce the human skin, and apart from allergies, none are moredangerous than a common wasp. Most spiders have 8 eyes (though some have 6,4,2 or 0),as well as 8 legs. (by the way if you count the claws as separate leg section [which youshouldn?t really] then their legs have 8 parts as well [coxa, trochanter, femur, patella, tibia,tarsus, metatarus, claws]) There are more than 32000 known species of spider in theworld. No human being has ever been officially recorder ashaving died as the result of a…tarantula? bite.All spiders are carnivorous and feed only on liquids, i.e. their preys natural juices and thebreakdown products of external digestion (meaning they spit, exude or inject digestivejuices onto/into their prey ad suck up the resulting soup). So why not invite some to yournext social do?What’s In a NameThe word …Arachnida? comes from the Greek word …Arachne? who was the daughter ofIdmon of Colophon in Lydia, a dyer by trade. Arachne herself was a weaver, the best inall the known world. However in a foolish moment she challenged Athene, the daughterof Zeus and goddess of, among other things, waving to a weaving competition. Arachnewove so perfect a cloth that she tore it to shreds. Arachne became depressed after this andin the end she hung herself. Athene stirred to remorse at the knowledge of what her angerhad wrought turned the rope Arachne had used to hang herself into a web and Arachneherself into a spider so that the beauty of her spinning should not be lost to the world everagain.The Great Household Spider SafariThere are just over six hundred different sorts of spider in the British Isles. But of theseonly a handful are commonly found in houses. At the front of the head are a pair of whatappear to be small legs. These are called palps and are used to guide food to the spider?smouth. The front of the head also has a group of six or eight eyes. On the underside of thebody at the rear, are four or six small conical bumps or cylinders. There are the spinneretsfrom which the spider produces the silk to make its webs.Telling male and female spiders apart is easily done by looking at their palps. Males haveswollen ends to their palps which makes them look as if they are wearing boxing gloves,these are often strange shapes if looked at with a hand lens. Females have normal lookingpalps that are not swollen at the ends.The largest spider is the Goliath spider, the female of which grows to reach a leg span often inches. The largest spider in Britain is the Cardinal spider which is a close cousin ofTim Tegenaria. Females can achieve a leg span of four and a half inches. It is known asthe Cardinal spider as it was common in Hampton Court when Cardinal Wolsey livedthere. The sight of these long legged spiders wandering around the palace at night used tofrighten him. So far 32000 different kinds of spider have been discovered from all overthe world. Britain has 630 different kinds of spider of which 250 are tiny Money spiders.The smallest of which has a body less than one millimeter long.1. All the silk produced by spiders construct webs to catch their food2. Not all the poison glands possessed by spiders are dangerous to human beings.3. Spiders often kill humans in Britain when they pierce human skin.4. After seeing her enemy commits suicide, Arachne turned Athena into a spider.5. TimTegenaria spiders are closely related to tarantula spiders; both are found in Britain.6. So far32000 different kinds of spiders have been discovered from all over the world.7. Money spiders are the smallest spiders found in the Arachnids family.8. There are more than _____ known species of spider in the world.9. Telling male and female spiders apart is easily done by ______ .10. The largest spider is _______.姓线号学封班卷试密学大峡三Part ⅢListening Comprehension (35 minutes)Section ADirections: In this section, you will hear 8 short conversations and 2 longconversations. At the end of each conversation, one or more questions will be askedabout what was said. Both the conversation and the questions will be spoken onlyonce. After each question there will be a pause. During the pause, you must read thefour choices marked A), B), C) and D), and decide which the best answer is. Thenmark the corresponding letter on Answer sheet 2 with a single line through thecentre. Questions 11 to 18 are based on the conversation you have just heard.11.[A] The man is out of shape.[B] The man doesn?t need a new racket.[C] The man also needs new tennis shoes.[D] The man spent too much on his tennis shoes.12.[A] She prefers chemistry.[B] She hasn?t got a partner yet.[C] She is too tired of chemistry.[D] She is too busy to work on her chemistry.13.[A] Customer and waitress.[B] Teacher and student.[C] Boss and secretary.[D] Lawyer and client.14.[A] He was satisfied with the service on the ship.[B] It was the first time he had been abroad.[C] He had never been on a warship.[D] He has been on the warship before.15.[A] He is confident.[B] He is worried.[C] He is bored.[D] He is angry.16. [A] The woman offered to help the man find his box.[B] The man doesn?t know where to go.[C] The woman will buy the man’s lunch for him.[D] The woman will give the man a treatment.17. [A] It?s enjoyable.[B] It?s terrific.[C] It?s too modern.[D] It?s old-fashioned.18.[A] Near the stairs.[B] On the platfomp3.[C] At the ticket office.[D] At the infomp3ation desk.Conversation OneQuestions 19 to 21 are based on the conversation you have just heard.19. [A] In a college bookstore.[B] In a lecture hall.[C] In a library.[D] In a domp3itory.20. [A] English.[B] Biology.[C] Introduction to English Literature.[D] A required course.21. [A] He lives on the 10th floor of Butler Hall.[B] He never wants to listen to students.[C] He used to teach biology.[D] He is an excellent professor.Conversation 2Questions 22 to 25 are based on the conversation you have just heard.22.[A] When to move.[B] Where to live the following year.[C] How much time to spend at home.[D] Whose house to visit.23. [A] Take some money to the housing office.[B] Infomp3 the director of student housing in a letter.[C] Fill out a fomp3 in the library.[D] Maintain a high grade average.24. [A] Both live on campus.[B] Both live off campus.[C] The man lives on campus; the woman lives off campus.[D] The woman lives on campus; the man lives off campus.姓线号学封班卷试密学大峡三25. [A] Grades.[B] Privacy.[C] Sports.[D] Money.Section BDirections: In this section, you will hear 3 short passages. At the end of eachpassage, you will hear some questions. Both the passage and the questions will bespoken only once. After you hear a question, you must choose the best answer fromthe four choices marked A), B), C) and D). Then mark the corresponding letter onAnswer Sheet 2 with a single line through the centre.Passage OneQuestions 26 to 28 are based on the passage you have just heard.26.[A] The importance of advertisement.[B] The society?s great need of advertisement.[C] The origin of advertisement.[D] The prosperity of advertisement.27. [A] The local governments.[B] Their owners families.[C] Advertisements.[D] The audience.28. [A] Advertising is personal.[B] Advertisements are convincing.[C] Advertisements are unreliable.[D] Advertisements are misleading.Passage TwoQuestions 29 to 31 are based on the passage you have justheard.29. [A] The games shouldn?t be held in Salt Lake City.[B] The games have met their environmental goals.[C] The games did little to protect the environment.[D] The games have caused lasting damages to the area.30. [A] Sports competition.[B] Cultural exchange.[C] Economic development.[D] Environmental protection.31. [A] Building ski jumps farther away from the city.[B] Developing better public transportation in the city.[C] Planting more trees around the fields.[D] Promoting the use of cleaner energy.Passage ThreeQuestions 32 to 35 are based on the passage you have just heard.32. [A] Diet.[B] Weight control.[C] Aerobic exercise.[D] Eating habits and exercise.33. [A] Nuts.[B] Sugar.[C] Vegetable oil.[D] Dairy products.34. [A] Forty or fifty minutes of exercise once a week.[B] Twenty or thirty minutes of exercise every day.[C] Fifteen or twenty minutes of exercise five days a week.[D] Thirty or forty minutes of exercise three or four days a week.35. [A] Carbohydrates.[B] Indirect fat.[C] Body fluid.[D] Fat.Section CDirections: In this section, you will hear a passage three times. When the passage isread for the first time, you should listen carefully for its general idea. When thepassage is read for the second time, you are required to fill in the blanks numberedfrom 36 to 43 with the exact words you have just heard. For blanks numbered from44 to 46 you are required to fill in the missing information. For these blanks, youcan either use the exact words you have just heard or write down the main points inyour own words. Finally, when the passage is read for the third time, you shouldcheck what you have written.姓线号学封班卷试密学大峡三Today, students who want to learn English in the US havea wide choice of courses andinstitutions to (36) ______from. And, because the US is such a big country, they alsohave a huge (37) ______of locations in which to study. The US has a long (38) ______ofteaching English because, (39) ______its history, the country has welcomed (40)______from all over the world, most of whom have needed to learn English. Today, theUS?s English language teaching sector is well developed and its teachers are highlyqualified and (41) ______American universities and colleges welcome many thousandsof (42) ______students each year, who (43) ______on degree or post graduate courses.(44) ___________________________________________. These courses are calledIntensive English Language Progmp3s and (45) ________________________. Inaddition to language tuition, Intensive English Language Progmp3s give students (46)____________________________________________.Part ⅣReading Comprehension (Reading in Depth) (25 minutes)Section ADirections: In this section, there is a passage with ten blanks. You are requiredto select one word for each blank from a list of choices given in a word bankfollowing the passage. Read the passage through carefullybefore making yourchoices. Each choice in the bank is identified by a letter. Please mark thecorresponding letter for each item on Answer Sheet 2 with a single line through thecentre. You may not use any of the words in the bank more than once.Questions 47 to 56 are based on the following passage.As the plane circled over the airport, everyone sensed that something was wrong. Theplane was moving unsteadily through the air, and 47the passengers had fastened theirseat belts, they were suddenly 48 forward. At that moment, the air-hostess 49 .She lookedvery pale, but was quite 50 .Speaking quickly but almost in a whisper, she 51 everyonethat the pilot had 52 and asked if any of the passengers knew anything about machines orat 53 how to drive a car. After a moment 54 , a man got up and followed the hostess intothe pilot's cabin. Moving the pilot 55 , the man took his seat and listened carefully to the56 instructions that were being sent by radio from the airport below. The plane was nowdangerously close to ground, but to everyone's relief, it soon began to climb.A. althoughB. anxiousC. thrownD. shiftedE. appearedF. urgentG. presentedH. asideI. even J. informed K. calm L. leastM. fainted N. length O. hesitationSection BDirections: There are 2 passages in this section. Each passage is followed bysome questions or unfinished statements. For each of them there are four choicesmarked A), B), C) and D). You should decide on the best choice and mark thecorresponding letter on Answer Sheet 2 with a single line through the centre.Passage OneQuestions 57 to 61 are based on the following passage.In the early days of the internet, many people worried that as people in the rich worldembraced new computing and communications technologies, people in the poor worldwould be left stranded on the wrong side of a “digital divide.” Yet the debate over thedigital divide is founded on a myth —hat plugging poor countries into the internet willhelp them to become rich rapidly.This is highly unlikely, because the digital divide is not a problem in itself, but asymptom of deeper, more important divides: of income, development and literacy. Fewerpeople in poor countries than in rich ones own computers and have access to the internetsimply because they are too poor, are illiterate, or have other more immediate concerns,such as food, health care and security. So even if it were possible to wave a magic wandand cause a computer to appear in every household on earth, it would not achieve verymuch: a computer is not useful if you have no food or electricity and cannot read. Yetsuch Wand-waving —through the construction of specific local infrastructure projectssuch as rural telecenters —is just the sort of thing for which the UN's new fund isintended.This sort of thing is the wrong way to go about addressing the inequality in access todigital technologies: it is treating the symptoms, rather than the underlying causes. Thebenefits of building rural computing centers, for example, are unclear. Rather than tryingto close the divide for the sake of it, the more sensible goal is to determine how best touse technology to promote bottom-up development. And the answer to that question turnsout to be remarkably clear: by promoting the spread not of PCs and the Internet, but ofmobile phones.57. What is the main idea of this passage?A) Plugging poor countries into the Internet will help themto become rich rapidly.B) Poor countries should be given more basic devices other than advanced ones.C) Rich countries should help poor ones becoming rich.D) People in poor countries cannot afford devices such as computer.58. What did the author mean by referring "digital divide." (Line 3, Para. 1)?A) Digital technology will make the gap between rich world and poor world wider.B) Digital technology will divide people into rich and poor world.C) People can be divided digitally.D) To divide people in digital world is wrong.姓线号学封班卷试密学大峡三59. We can infer from the 2nd paragraph that.A) people in poor countries cannot use computer because of illiteracy.B) poor people cannot use computers.C) there would be no magic to cause a computer to appear in every household on earth.D) people in poor countries need more basic living conditions than computers.60. Considering the following sentences, which one would the author most agree?A) Digital technology is useless.B) Digital divide will help poor countries becoming rich.C) Poor people need more immediate concerns, such as food, health care and security.D) Mobile phones should be promoted firstly.61. The following passage will probably be:A) How to promote using of mobile phones.B) How to use technology to promote bottom-up development.C) The benefits of building rural computing centers.D) How to meet the need of food, health and security in poor countries.Passage TwoQuestions 62 to 66 are based on the following passage.Space is a dangerous place, not only because of meteors (流星) but also because of raysfrom the sun and other stars. The atmosphere again acts as our protective blanket on earth.Light gets through, and this is essential for plants to make the food which we eat. Heat,too, makes our environment endurable. Various kinds of rays come through the air fromouter space, but enormous quantities of radiation from the sun are screened off. As soonas men leave the atmosphere they are exposed to this radiation but their spacesuits or thewalls of their spacecraft, if they are inside, do prevent a lot of radiation damage.Radiation is the greatest known danger to explorers in space. The unit of radiation iscalled “rem”. Scie ntists have reason to think that a man can put up with far moreradiation than 0.1 rem without being damaged; the figure of 60 reins has been agreed on.The trouble is that it is extremely difficult to be sure about radiation damage — a personmay feel perfectly well, but the cells of his or her sex organs may be damaged, and thiswill no be discovered until the birth of deformed children or even grandchildren.Missions of the Apollo flights have had to cross belts of high amount of rems. So far, nodangerous amounts of radiation have been reported, but the Apollo missions have beenquite short. We simply do not know yet how men are going to get on when they spendweeks and months outside the protection of the atmosphere, working in a spacelaboratory. Drugs might help to decrease the damage done by radiation, but no reallyeffective ones have been found so far.62. According to the first paragraph, the atmosphere is essential to man in that ____.A) It protects him against the harmful rays from spaceB) It provides sufficient light for plant growthC) It supplies the heat necessary for human survivalD) It screens off the falling meteors63. We know from the passage that ____.A) Exposure to even tiny amounts of radiation is fatalB) The effect of exposure to radiation is slow in comingC) Radiation is avoidable in space explorationD) Astronauts in spacesuits needn't worry about radiation damage64. The harm radiation has done to the Apollo crew members ____A) is significant B) seems overestimatedC) is enormous D) remains unknown65. It can be inferred from the passage that ____.A) The Apollo mission was very successfulB) Protection from space radiation is no easy jobC) Astronauts will have deformed children or grandchildrenD) Radiation is not a threat to well-protected space explorers66. The best title for this passage would be ____.A) The Atmosphere and Our EnvironmentB) Research on RadiationC) Effects of Space RadiationD) Importance of Protection Against RadiationPart ⅤCloze (15 minutes)Directions: There are 20 blanks in the following passage. For each blank thereare four choices marked A), B), C), and D) on the right side of the paper. You shouldchoose the ONE that best fits into the passage. Then mark the corresponding letteron Answer Sheet 2 with a single line through the centre.姓线号学封班卷试密学大峡三80. A)While B) As C)but D)Therefore81. A)see B)keep C)stand D)catch82. A)parents B)boys C)kid D)relatives83. A)to B)in C)of D)out84. A)timely B)currently C)incidentally D)instantly85. A)handle B)cope C)endure D) bear86. A)tragedians B)losers C)victims D)capturesPart VI Translation (5 minutes)Directions: Complete the sentences by translating into English the Chinese given in brackets. Please write your translation on Answer Sheet 2.87. _______________(直到失去健康) that people know the value of health.88. The bag was stuffed _____________.(脏衣服)89. __________(很多朋友不在), we decided to put the meeting off.90. _______________(给我印象最深的) were her liveliness and sense of humor.91. There engines are ___________.(不如我们制造的那些发动机功率大)。
会计英文单词

Lesson Three L & Equity Section
Withdrawal are amounts of money
taken out of the business by its owner.
a
•What are the liabilities?
Liabilities, or creditors’ equity ,are the obligations ,or debts, that the firm must pay in money or services at some time in the future .
Declaration of Dividends
Retain Earnings
Dividends Payable
Lesson Three L & Equity Section
Payment of Dividends
Dividends payable
Assets
Questions
• What are the liabilities? • What are the owners’ equity? • When the owners of a business withdraw
220 000
270 000
• USD 620 000
• Less: Capital Withdrawals during the Year
80 000
• K. Menton, Capital (Dec. 31, 2006)
USD 540 000
Test
Exercise 1-2 3
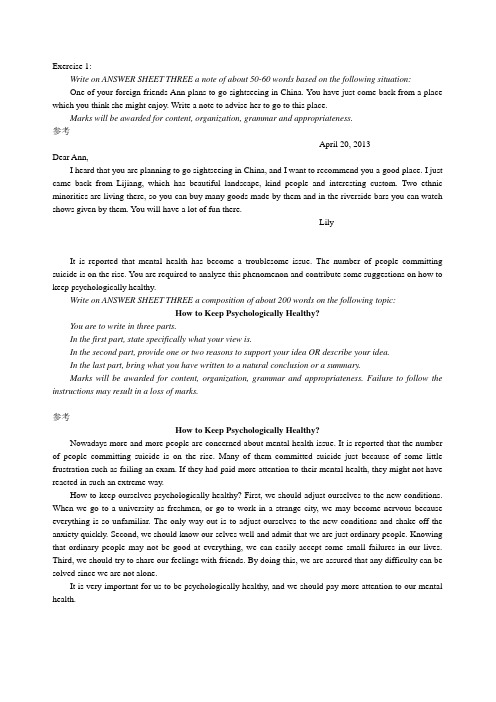
Write on ANSWER SHEET THREE a note of about 50-60 words based on the following situation:One of your foreign friends Ann plans to go sightseeing in China. You have just come back from a place which you think she might enjoy. Write a note to advise her to go to this place.Marks will be awarded for content, organization, grammar and appropriateness.参考April 20, 2013Dear Ann,I heard that you are planning to go sightseeing in China, and I want to recommend you a good place. I just came back from Lijiang, which has beautiful landscape, kind people and interesting custom. Two ethnic minorities are living there, so you can buy many goods made by them and in the riverside bars you can watch shows given by them. You will have a lot of fun there.LilyIt is reported that mental health has become a troublesome issue. The number of people committing suicide is on the rise. You are required to analyze this phenomenon and contribute some suggestions on how to keep psychologically healthy.Write on ANSWER SHEET THREE a composition of about 200 words on the following topic:How to Keep Psychologically Healthy?You are to write in three parts.In the first part, state specifically what your view is.In the second part, provide one or two reasons to support your idea OR describe your idea.In the last part, bring what you have written to a natural conclusion or a summary.Marks will be awarded for content, organization, grammar and appropriateness. Failure to follow the instructions may result in a loss of marks.参考How to Keep Psychologically Healthy?Nowadays more and more people are concerned about mental health issue. It is reported that the number of people committing suicide is on the rise. Many of them committed suicide just because of some little frustration such as failing an exam. If they had paid more attention to their mental health, they might not have reacted in such an extreme way.How to keep ourselves psychologically healthy? First, we should adjust ourselves to the new conditions. When we go to a university as freshmen, or go to work in a strange city, we may become nervous because everything is so unfamiliar. The only way out is to adjust ourselves to the new conditions and shake off the anxiety quickly. Second, we should know our-selves well and admit that we are just ordinary people. Knowing that ordinary people may not be good at everything, we can easily accept some small failures in our lives. Third, we should try to share our feelings with friends. By doing this, we are assured that any difficulty can be solved since we are not alone.It is very important for us to be psychologically healthy, and we should pay more attention to our mental health.Write on ANSWER SHEET THREE a note of about 50-60 words based on the following situation:You have heard that your friend, Jim, wishes to sell his bike. Write him a note expressing your interest in it, asking him about its condition and offering a price for it.Marks will be awarded for content, organization, grammar and appropriateness.参考April 20, 2013Dear Jim,I have heard that you wish to sell your bike. At the moment I just need a bike by which I can go to do my part-time job on the weekend. Would you please tell me what color your bike is and how well it works? And is it possible that I buy it at the cost of 50 yuan?MaryHelping strangers used to be considered as a virtue. But nowadays people tend to be very cautious of strangers. They are afraid that helping others can sometimes bring them trouble. What’s your opinion?Write on ANSWER SHEET THREE a composition of about 200 words on the following topic:Should We Help Strangers?You are to write in three parts.In the first part, state specifically what your opinion is.In the second part, support your opinion with appropriate details.In the last part, bring what you have written to a natural conclusion or a summary.Marks will be awarded for content, organization, grammar and appropriateness. Failure to follow the instructions may result in a loss of marks.参考Should We Help Strangers?We used to appreciate those who like to help strangers, but nowadays people tend to be very cautious of strangers, because they are afraid that helping others can sometimes bring them trouble. In my opinion, we should try our best to help others in a reasonable way.We should try to help others, no matter they are strangers or not. First, helping others is a virtue, and it will make our society more harmonious. Just imagine what a terrible world it would be if everyone was coldhearted! Second, to some extent, helping others is helping oneself. We may come across some trouble and need others’ help some day. If everyone t urns a blind eye to our trouble and turns a deaf ear to our appeal for aid just because we are strangers to them, what shall we do at that time? Therefore, we should be glad to help others.However, helping others may sometimes bring us trouble or even put us in danger. So when we are helping others, we should also protect ourselves and offer our help in an appropriate way. For example, to help someone who was robbed, calling the police is a much wiser way than chasing the robbers alone.Write on ANSWER SHEET THREE a note of about 50-60 words based on the following situation:Your friend, Ann, just lost her grandmother, and is feeling very sad about it. Write a note to comfort her.Marks will be awarded for content, organization, grammar and appropriateness.Recently some banks extend their business to university campus and offer credit cards to students. A lot of people worry that credit cards may ring harm to students, while others don’t think so. What is your opinion?Write on ANSWER SHEET THREE a composition of about 200 words on the following topic:Will Credit Cards Bring Harm to the Students?You are to write in three parts.In the first part, state specifically what your opinion is.In the second part, support your opinion with appropriate details.In the last part, bring what you have written to a natural conclusion or a summary.Marks will be awarded for content, organization, grammar and appropriateness. Failure to follow the instructions may result in a loss of marks.。
广州市初一英语教学通讯-广州市中学英语教研网

新课程教学资料交流与分享广州市七年级英语教学通讯总第2期《牛津英语(上海版) 》7A广州市教育局教研室中英科2007年11月目录词汇教学篇—牛津版初一英语词汇教学心得P 3增城市增城中学初一英语科组语法教学篇——Teaching Plan for Language in Unit 3P 6广州市花地中学林李华听说教学篇—1.T eaching Plan for Listening and Speaking in Unit 1 P11广州市第二中学林汉杰2.一节听说课的设计---- Listening Part B, Unit 1教学反思P16广州市泰安中学王晓玲阅读教学篇——1.教贵设疑打破学生头脑“平静”P18广州市汇景实验学校陈洋2.一节阅读课的反思P21广州市育才中学东校区王丽莉作文教学篇-牛津版教材Unit 2 writing P23 广州市豪贤中学张阳教材感悟篇——1.整合教材,提高教学效率P26 广州市东圃中学张虹2.教学感悟两则P29 广州市十七中学张晓燕3.新课程理念下的教材使用P37 广州市天秀中学刘莉4.新教材的挑战,我们的迎战!P35 广大附中秦维平与你切磋广州市教育局教研室中英科词汇教学篇牛津版初一英语词汇教学心得增城市增城中学初一英语科组牛津版教材内容丰富,课文知识内容较广、相对较难,词汇量很大,重点培养学生听、说、读、写等综合能力。
对于那些小学英语知识不扎实的学生来说,根据牛津版新教材,教师不容易开展英语教学。
所以教师在教学思路和方法上求实、求新、求变;同时注意学生在学习方法上的突破,养成良好的学习习惯和形成有效的学习策略;培养自主学习的能力以及观察、记忆、思维、想象能力和创新精神,拓展视野,为他们的终身学习和发展打下良好的基础。
在学生英语成绩参差不齐以及中、小学英语知识脱节的情况下,要提高听、说、读、写等各个方面的能力,必须掌握一定的词汇量。
词汇是语言的基础构建材料,离开了词汇,语言就失去了实际意义。
- 1、下载文档前请自行甄别文档内容的完整性,平台不提供额外的编辑、内容补充、找答案等附加服务。
- 2、"仅部分预览"的文档,不可在线预览部分如存在完整性等问题,可反馈申请退款(可完整预览的文档不适用该条件!)。
- 3、如文档侵犯您的权益,请联系客服反馈,我们会尽快为您处理(人工客服工作时间:9:00-18:30)。
The car belongs to you.
15.prepare, teacher, lecture, information
The teacher prepare the information of the lecture.
1.according to, plan, travel, Peter
According to the plan, Peter will travel by train.
2. against, proposal, majority,class
Majority classes areagainst the proposal.
Yesterday, the quarrel broke out.
10.search, information, business, internet
They search the information about the business on the internet.
11.congratulate, promotion, recent, you
You congratulated me on the recent promotion.
plain, keep, all day, can’t
We can’t keep complaining all day.
13.marry, ask, John, him
John asked Kate to married him.
3.serve, customer, heart, soul
Serve the customer heart and soul.
4.reach, in,Beijing, plane
The plane reachedBeijingin the morning.
5.address(vt.), wedding, father, bride
The girl dress beautifully to the ball.
8. survive, miracle, earthquake, he
He survived the earthquake, which was another miracle.
9.break out, quarrel, yesterday
Item
Class
Student Number
Name
(Chinese)
re
Writing sentences
Three
12
黎宝瑶
Write sentences with the provided words or phrases, and please make sure that all of them are used in your sentences.
Father is going to address the bride’s wedding.
6.escape, eye, nothing, likely
Nothing is likely to escape people’s eyes.
7.dress (vt.), girl, beautifully, ball