SFF-8654 Rev 0.2( Slimline SAS4.0)
IBM小型机配件
X3755 CPU 内存板 42D3093 44R5988 42D3097 40K7532 42D3108 P6 550 CPU 内存板
42R6609 44V3841 模块 44V6625 97P5095
IBM P570 7782 cpu 内存板 实物拍摄
? IBM X366 X260 X3800 CPU 板
42D3097
X365 散热片 FRU: 90P5046
3850M2 散热片
? COMPAQ PL3000 风扇 PL5000 风扇 Nhomakorabea
3650T 风扇 扇组
风
X340 风扇 X342 风扇 00N7248 20L1399 5000 风 扇
59P2572 风扇 X255 风扇
06p3609 百兆网卡
13N2195 6I 阵列卡
59p2952 X360 远程卡
39R8852 sas 卡 IBM 服务器 X250 X350 7600 CPU 终结板 10L6936 73p9246 IBM 远程控制卡
09N7292 IBM 光纤网卡
?
IBM P550 5264 CPU 内存板
07P6825
07P6793 46K8035 P6 550 CPU 内存板
42D3107 IBM X3755 CPU 内存板
P550 IBM 5264 CPU 内存板 1.5G 2-WAY
P6 570 CPU 内存板
46K6860 42R5983 42R5967 散热片
柔性检查作用域套件-USB 产品说明书
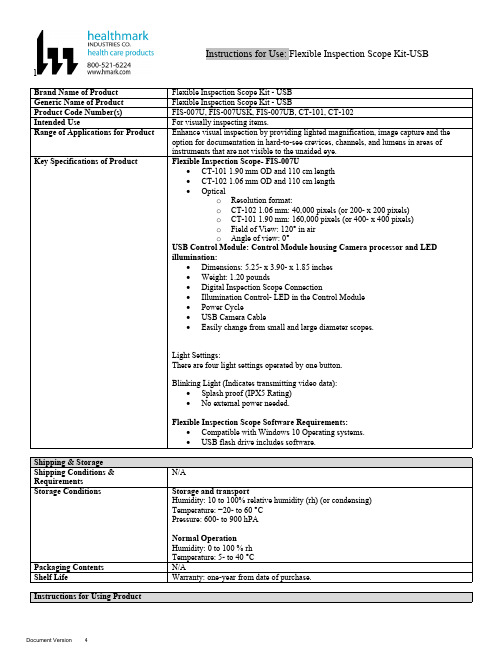
lInstructions for Use: Flexible Inspection Scope Kit-USB Brand Name of ProductFlexible Inspection Scope Kit - USB Generic Name of ProductFlexible Inspection Scope Kit - USB Product Code Number(s)FIS-007U, FIS-007USK, FIS-007UB, CT-101, CT-102Intended UseFor visually inspecting items.Range of Applications for ProductEnhance visual inspection by providing lighted magnification, image capture and the option for documentation in hard-to-see crevices, channels, and lumens in areas of instruments that are not visible to the unaided eye.Key Specifications of Product Flexible Inspection Scope- FIS-007U∙CT-101 1.90 mm OD and 110 cm length∙CT-102 1.06 mm OD and 110 cm length∙Opticalo Resolution format:o CT-102 1.06 mm: 40,000 pixels (or 200- x 200 pixels)o CT-101 1.90 mm: 160,000 pixels (or 400- x 400 pixels)o Field of View: 120° in airo Angle of view: 0°USB Control Module: Control Module housing Camera processor and LEDillumination:∙Dimensions: 5.25- x 3.90- x 1.85 inches∙Weight: 1.20 pounds ∙Digital Inspection Scope Connection∙Illumination Control- LED in the Control Module∙Power Cycle∙USB Camera Cable∙Easily change from small and large diameter scopes.Light Settings:There are four light settings operated by one button.Blinking Light (Indicates transmitting video data):∙Splash proof (IPX5 Rating)∙No external power needed.Flexible Inspection Scope Software Requirements:∙Compatible with Windows 10 Operating systems.∙USB flash drive includes software.Unpacking Flexible Inspection Scope:Carefully inspect for shipping damage. If there is any damage contact the shipping carrier and Heatlhmarkcustomer service 800-521-6224 immediately.USB Control Module: (Fig. 1).1.Digital Inspection Scope Connection 2.Illumination Control 3.Power Cycle B (Type C) on the right side of the boxFigure 1Flexible Inspection Scope™: (Fig. 2).∙CT-101 1.90 mm O.D. and 110 cm length ∙CT-102 1.06 mm O.D. and 110 cm lengthLarge1.90 mmSmall 1.06 mmFigure 2Flexible Inspection Scope™ Features3214Light/Illumination Settings: (Fig. 3).∙Five (5) light settingso Light on control indicats setting levelo Fifth setting is OFF∙Press light button to advance to next setting.∙Fifth setting turns the light OFF.Figure 3Power Cycle ButtonPress button to RESET camera (Fig. 4).Figure 41.Flexible Inspection Scope™ Plug (Fig. 5).Contains camera video connection as well as LED Light for illumination.1Figure 52.Flexible Working Length (Fig. 6).The portion of the Flexible Inspection Scope™ that is inserted into an item during visual inspection.The measuring scale markings on the Flexible Working Length are in centimeters (accuracy = ± 0.5 cm)2Figure 63.Distal Camera (Fig. 7).Distal portion of Flexible Inspection Scope™ that contains the camera lens3Figure 7SOFTWARE INSTALLATION:Note: This section is done only once when connecting the scope to the computer for the first time.∙System Requirements: MS Windows 10∙Install the Flexible Inspection Scope™ Software from the USB flash drive on a computer.Note: If you have any IT policies that may block this installation, please contact your IT team to give access to Healthmark scope viewer to install.1. Insert the USB Flash drive into your computer, and double click on the Healthmark Scope Viewer installer package to begin installation.2. The “Welcome to the Healthmark Scope Viewer Setup Wizard” screen pops up. Click on Next.3. Select the first tab Typical or setup type of your choice, click Next.4. Click Install and wait for installation to complete.5. Click Finish.STARTING SOFTWARE & CONNECTING SCOPE TO PC:(Fig 8).1.Open the Windows PC viewer software.2.Connect the Control Module to PC using USB Cable.3.Plug the Flexible Inspection Scope into the Control Module.4.In the viewer software, click Settings and Select USB Video Device, click on the desiredresolution, select the preferred Video Output Format, and then Click OK.5.Press the Power Cycle Button.Figure 86.Now you can start using the scope.Verifing OperationFollowing the steps listed below will ensure the proper use and performance of the Flexible Inspection Scope™. The Flexile Inspection Scope™ can be checked for normal operation by connecting it as described in the Startup section of this IFU.Normal operation includes:∙An image appearing on your computer monitor or HDMI Monitor.∙ A blinking light on Control Module near the Power Cycle button that indicates the image feed is transmitting.∙White light emitting from the distal end of the Digital Inspection Scope.∙An LED light on the control module top panel that indicates the light intensity of the device. Using SoftwareHealthmark Scope Viewer Software (Fig. 9).1.Capture button: Captures a Reference Image and saves it to the Reference Image folder.2.Main Image Window: Displays the image from the camera.3.Reference Image Window: Displays a reference image.4.Clear Button: Removes the image from the Reference image window.5.Open Reference Image button: Allows selection of a reference image from the Reference Imagefolder.6.Settings Button: Click to select the video camera and resolution settings.7.File Location Button: Click to change location where captured images are being saved.8.File Location Window: Shows the file path where captured images are being saved currently.9.Capture Image Button: Captures images and adds them to the File Location selected by the user(as shown in the File Location Window).10.Capture Video button: Click to record video. Click again to stop recording video.11.File Prefix: Type in text that you would like included in the file name of Captured Images.Figure 9Selecting Video Device or CameraFollow the directions below to select the video device or camera used to capture images using the Flexible Inspection Scope™ Viewer Software. (Fig. 10).1.Click Settings button in the lower left of the Scope Viewer software to display a list of videodevices or cameras being detected by your computer2.Select a device for capturing images using the Scope Viewera.The example below shows a webcam and USB Video Device in the Settings box. Select theUSB Video Device for the Flexible Inspection Scope™.b.You can also select your preferred Video Output Format from the dropdown box3.Click OK to view the selected Video Device.231Figure 10Capturing Still PicturesFollow the instructions for capturing still pictures from the Main Image Window.Select the Capture Image button. (Fig. 11).Figure 11Note: When an image is captured, “Image Captured” in red text will flash on the lower portion of the screen and a new file will appear in the Files Location.Capturing Video ImagesFollow the instructions below for capturing video from the Main Image Window.1.Select the Capture Video Button (Fig. 12).Figure 122.When the video is recording “Recording…” in red text will appear toward the bottom of thesoftware window.3.To stop recording, click Stop Capture. (Fig. 13).Figure 13Setting File PrefixFollowing the steps below allows you to create a file prefix that will appear after the underscore of image file names save to the File Location specified by the user.1.Click in the field next to File Prefix.2.Enter the characters that you would like to be included in the file name. (Fig 14).Figure 14Setting Location for Saved FilesFollowing the steps below allows you to set the file location of saved images using the Scope Viewer software.1.Click the File Location button.2.Select the file location you want to save captured images. (Fig 15).Figure 15Displaying Reference ImageThere are two ways to display a still image in the Reference Image Window on the Scope Viewer software.1.To display an image currently being displayed in the Main Image Window, click the Capture button. Note: The images will be saved in a file folder titled Reference Images in the designated File Location that the user specified in the File Location field. (Fig. 16).Figure 162.To display a saved image in the Reference Image Window from your File Location:a.Click the Open Reference Image button (Fig. 16 above).b.Select the file you want to display (Fig. 17 below).c.Click the OK Button, to display the image in the Reference Image Window. (Fig. 17).Figure 17Switching to a Different Flexible Inspection Scope™ on the Control Module:1.Press the Power button on the Control Module once.2.Disconnect the current Flexible Inspection Scope from the Control Module.3.Repeat the steps in the “STARTING SOFTWARE & CONNECTING SCOPE TO PC” procedure.Inserting Scope in ItemFigure 1Rotating Device to Avoid ObstacleFigure 2 Performing InspectionWipe down the Flexible Inspection Scope™ with a compatible wipe. Follow the manufacturer’s (Mfr.’s)Instructions for Use (IFU) for appropriate wipe usage. Click here to see the Chemical Compatibility Chart(PDF) for approved cleaning.The Flexible Inspection Scope™ is made of the same material as other common endoscopes. Any wipe,solution, or low temperature (≤ 60 °C [140 °F]) method intended for the reprocessing of endoscopes is likelycompatible with the Generation II Flexible Inspection Scope™ Catheters if used according to the productlabeling.Solutions Containing (Flexible Inspection Scope Only)Alcohol Ethoxylates Neutral or Near-Neutral pH DetergentsEnzymatic Cleaning Solutions Enzymatic DetergentsSodium Borated, Decahydrate Tetrapotassium PyrophosphateFlexible Inspection Scope™ has a fluid ingress protection rating of IPX7 (Waterproof) and can withstandimmersion in fluid up to one (1)-meter in depth for up to 30 minutes.Control Module USB has a fluid ingress protection rating of IPX5 (Water resistant) and can withstand asustained, low pressure water jet spray for up to three minutes.For Thorough Cleaning: CablesFollow the cleaning agent Mfr.’s IFU.1.Unplug and disconnect all components from the Control box prior to cleaning.2.Do not submerge or soak the cable for disinfection (cable is not waterproof).3.Wipe thoroughly with non-linting wipe moistened with facility approved neutral detergent. Use theappropriate brushes with detergent solution to remove any residues from areas that cannot bereached with the wipes.For Thorough Cleaning: Control Module1.Unplug and disconnect all components from the Control box prior to cleaning.2.Do not submerge or soak the cable for disinfection (Control Box is not waterproof).3.Wipe thoroughly with non-linting wipe moistened with facility approved neutral detergent. Use theappropriate brushes with detergent solution to remove any residues from areas that cannot bereached with the wipes.Note: Do NOT soak. Control Module and cables are not waterproof and should not be immersed.N/ACleaning –AutomatedDisinfection Control Module and CablesThese may be cleaned with alcohol based disinfectant wipes.Compatible agents (wipes and solutions) for disinfecting Flexible Inspection Scope™ and ControlModule:∙Hydrogen peroxide∙Isopropyl alcohol (IPA)∙Sodium hypochlorite (Bleach)∙Ortho-phenylphenol∙Quaternary ammonium.High-Level Disinfection (Flexible Inspection Scope™ Only)∙Select only disinfecting solutions listed in the compatible disinfecting methods.∙Follow all recommendations regarding health-hazards, dispensing, measuring, and storage from the Mfr. of cleaning and disinfecting agents.∙Soak the Flexible Inspection Scope™ in selected disinfecting solution per Mfr.’s IFU.∙Rinse the Flexible Inspection Scope™ with critical (sterile) water, again, following the disinfecting solutions Mfr.’s instructions.Reprocessing Chemical Compatibility Chart (PDF): Click here.。
Littelfuse 保护电路器件 SPD2 4+0 系列商品说明书

Class II/Type 2/Type 1 CA Pluggable Multi-PoleDescriptionSurge protection devices (SPDs) provide equipment protection from transient overvoltage events lasting micro-seconds. By limiting the overvoltage to the equipment during these events, costly damage and downtime can be mitigated.The surge protection devices for the 4+0 configuration are available for 120 V to 480 V nominal voltage sub-distribution board applications.RCLegend L Line N Neutral Protective EarthRC Remote ContactsTD Thermal DisconnectionInternal ConfigurationFeatures & BenefitsModule & Base Ordering InformationCapability to clamp and withstand high-energy transients surge events and higher nominal discharge current to prevent disruption, downtime, and degradation or damage to equipment UL and VDE-IEC compliant in single part number One component can be utilized globally, reducing inventory needs and simplifying allocation of parts Interlocking tab mechanismSecures module to withstand vibration No additionalovercurrent protection devices required in UL applicationsReduces the number of components and costs required for protectionCompact footprint I ncreases panel design flexibilityVisual life indicatorQuick visual determines module replacement status to avoid loss of protectionPluggable modules Fast and simple to replace, minimizing maintenance and downtime. No tools required Thermal protection Eliminates catastrophic failureIP20 protection ratingFinger-safe design increases worker protectionPluggable RC ConnectorReplacement Module Ordering InformationDisclaimer Notice – Information furnished is believed to be accurate and reliable. However, users should independently evaluate the suitability of and test each product selected for their own applications. Littelfuse products are not designed for, and may not be used in, all applications. Read complete Disclaimer Notice at /product-disclaimer.Thermal Protection YesOperating State/Fault Indica tionGreen Flag/No Green FlagRemote Contact Switching Ca pa city AC: 250 V/1 A, 125 V/1 A;DC: 48 V/0.5 A, 24 V/0.5 A, 12 V/0.5 A Remote Contact Conductor Cross Section (max) 1.5 mm 2 (16 AWG) (Solid)Standards Passed* IEC 61643-11:2011 EN 61643-11:2012UL 1449, 4th editionProduct Dimensions 4TE Module and Base H 90.0 mm (3.54”); W 72.0 mm (2.84”);D 70.0 mm (2.76”)1TE Replacement Module H 45.0 mm (1.77”); W 18.0 mm (0.71”);D 57.2mm (2.25”)Package Dimensions 4TE Module and Base H 102.0 mm (4.01”); W 82.0 mm (3.23”);D 110.0 mm (4.33”)1TE Replacement Module H 102.0 mm (4.01”); W 28.0 mm (1.10”);D 110.0 mm (4.33”)SpecificationsNetwork Systems TN-S Mode of Protection L-PE, N-PE Nominal Discharge Current (8/20 µs) (I n ) 20 kA Maximum Discharge Current (8/20 µs) (I max ) Up to 50 kA Protective Elements High Energy MOV Response Time (t A ) < 25 ns Back-Up Fuse (max) 315 A / 250 A Gg Number of Ports 1Mechanical & Environmental Operating Temperature Range (T a ) -40 °C to +80 °C (-40 °F to +185 °F)Permissible Operating Humidity (RH) 5% to 95%Altitude (max) 4,000 m (13,123 ft)Terminal Screw Torque (M max ) 4.5 Nm (39.9 lbf-in)Conductor Cross Section (max) 35 mm² (2 AWG) (Solid, Stranded)/ 25 mm 2 (4 AWG) (Flexible)Mounting 35 mm DIN Rail, EN60715Degree of Protection IP20 (built-in)Housing Material Thermoplastic: Extinguishing Degree UL 94 V-0*SPD2-550-4P0-R and SPD2-550-M are UL Listed onlyWarranty – Visit /warranty for details.Module & Base Part Numbering SystemModule Only Part Numbering SystemSPD2 VVV MModule OnlySeriesMaximum Continuous Operating AC VoltageSPD2 VVV XPZ RModule & Base SeriesNeutralNumber of PolesMaximum Continuous Operating AC Voltage(1=yes or 0=no)。
865PE(IS8)说明书

在您安装主板以及加入硬件设备之前,请仔细阅读本手册提供的相关信息。
在使用本产品前,请确定所有的排线、电源线都已正确连接好。
若您发现有任何重大瑕疵,请尽快联络您的经销商。
为避免发生电气短路情形,请务必将所有没用到的螺丝、回形针及其他零件收好,不要遗留在主板上或电脑主机中。
灰尘、湿气以及剧烈的温度变化都会影响主板的使用寿命,因此请尽量避免放置在这些地方。
请勿将电脑主机放置在容易摇晃的地方。
若在本产品的使用上有任何的技术问题,请和经过检定或有经验的技术人员联络。
为避免可能的电击造成严重损害,在搬运电脑主机前,请先将电脑电源线暂时从电源插座中拔掉。
当您要加入硬件设备到系统中或者要去除系统中的硬件设备时,请务必先连接该设备的信号线,然后再连接电源线。
可能的话,在安装硬件设备前先拔掉电脑的电源供应器电源线。
当您要从主板连接或拔除任何的信号线前,请确定所有的电源线已事先拔掉。
如果电源供应器已损坏,请不要尝试自行修复。
请将之交给专业技术服务人员或经销商来处理。
请确认您所购买的昂达865PEN主板包装盒是否完整,如果有包装损坏或是有任何配件短缺的情形,请尽快与您的经销商联系。
☞昂达865PEN主板一块☞Ultra DMA66/100 IDE排线一根☞Serial ATA排线一根(可选)☞软驱排线一根☞驱动程序光盘一张☞本用户手册一本☞保修卡一张2.1 产品概述昂达865PEN主板采用了Intel 82865PE和82801EB芯片组,为用户提供了一个集成度高、兼容性强、性价比出众的ATX 系统平台,性能稳定,价格合理,适合于高档商业用机、家庭娱乐用。
2.2 特点介绍—板型结构ATX结构,主板尺寸为305mmX218mm—中央处理器支持478 Socket Intel Pentium 4处理器支持400/533/800MHz FSB Intel P4 478结构CPU仅支持Northwood核心的P4和Celeron4,Prescott CPU及Intel Hyper-threading(超线程技术) Pentium 4 CPU—芯片组北桥:Intel 865PE南桥:Intel 82801EB—系统存贮器4个184-PIN 的DDR内存插槽支持DDR266/333/400MHz内存支持双通道DDR内存(两个同类型内存条分别插入DIMM1&3或DIMM2&4可组成双通道,可提高内存性能)—IDE接口功能支持主从两个IDE通道和两个Serial ATA通道可连接四个独立的驱动器支持Ultra DMA 33/66/100/Serial ATA 多种硬盘传输模式—扩展槽5个32位PCI扩展卡扩充插槽—音频6 声道软声卡解码遵循AC97 v2.2规格符合PC2001 音频性能要求可以通过S-Bracket支持SPDIF输出—AGP插槽1个AGP 8X插槽支持AGP 4X/8X数据读写或传输,最高速度可达2GBps—主板I/O接口功能主芯片之间采用中心加速结构连接技术,提供了更高的数据交换带宽两个串行端口,兼容高速16550 UART模式1个并行端口,支持ECP和EPP模式2个PS/2端口(一个键盘和一个鼠标)1个红外端口1个RJ-45 LAN插孔(可选)1个软驱接口,可支持两个软盘驱动器音频插孔(Microphone, Line-in和Line-out)—8 USB2.0接口功能符合USB2.0规范,最高速度为480Mbit/sec—BIOS支持对于周边设备和扩展卡支持即插即用—板载LAN(可选)板上自带10/100M LAN接口支持10Mb/s和100Mb/s自动交换模式兼容PCI v2.2,mini PCI 1.0和板载标准—电源供电和电源管理ATX电源接口,符合ACPI 1.0b和APM 1.2规范支持Modem唤醒,网络唤醒等各种电源管理功能备注:以上位置图与您的主板布局可能存在不同,仅供参考。
索瑞德UPS电源产品

型号容量输入输出电池转换时间LCD 指示 过载能力保护功能报警噪音(1米距离)通讯接口环境外观尺寸 (mm)电磁兼容性抗干扰防护等级220 x (1±4%)VAC (0100% 急剧变化)符合IEC62040-2, EN50091, GB9254符合IEC61000-4IP20220/380x(1±20%)VAC (单相4线+G)50 x (1±10%)VAC 0.8(带滤波器时为0.95)220 x (1±2%)VAC (稳态)与输入同步可调(市电模式); 50 x (1±0.5%)Hz (电池模式)0.8(滞后)正弦波≤ 3% (线性负载), ≤ 5% (非线性负载)3:1≥ 90%12VDC 密闭式免加水360VDC(30 PCS)根据客户需求7~10 小时可充 90% 1~50A (可调)零切换时间(交流到直流或 直流到交流): 小于1毫秒(由旁路到逆变或逆变到旁路)UPS 工作状态, 市电状态, 电池状态, 自动旁路供电, 过载150%可持续30秒, 125%可持续10分钟过压, 欠压, 过载, 过温, 短路, 雷击, 突波过温, 电池, 旁路, 市电异常, 过载, 过压≤ 50dBRS232 (或 RS422), SNMP 远程监控, RJ450℃+40℃10%~90% (不结露)<2000m 电压频率功率因数电压频率功率因数波形失真度峰值不平衡电压效率类型标称电压后备时间充电时间充电电流温度湿度海拔GP9310C 10K GP9310C 15K GP9310C 20K GP9310C 30K 30kVA20kVA15kVA10kVA320285235181注: 产品技术参数如有变更,恕不另行通知。
40kVAGP9310C 40K 350x x 宽 深 高350X660X860 390X660X860 430X762X980(10KVA) (15-20KVA) (30-40KVA) 重量(kg)净重。
硬盘驱动芯片

内存SPD芯片型号:3402W、A21SC、C21SC、24LC02
台式机硬盘3.5英寸,移动硬盘2.5英寸
台式机主要硬盘厂家:Seagate WD Maxtor Samsung Hitachi Fujitsu 硬盘BIOS:25P05VP、20PFS20V、SS725VF512、ST7559207、25P10VP
Seagate(希捷)电机驱动芯片型号:SH6960B,SH6950D,SH6790A/B,SH57828, 100244097,100124439,100317176,100369972,100256186,100143434,100343137,199120018,
H99500460,H995M0405,100217347,1002222354,23400278,23400094,23400269
WD(西部数据)电机驱动芯片型号:L6283、L6256B、L6262、L6282、L6279、L6278 Maxtor(迈拓)电机驱动芯片型号:L7250E
Sansung(三星)电机驱动芯片:HA13627
硬盘不加电维修:1、更换电路板中驱动芯片2、更换BIOS 3、12V二极管击穿
注意:硬盘装好后加电,听到噶噔一声,说明硬盘寻道成功. 如果硬盘加电后听到循环噶噔..
噶噔..噶噔...或其他异响则说明硬盘磁头憋住或硬盘损坏.(但前提要排除电路板故障) 移动硬盘厂家:三星(Samsung),日立(Hitachi),富士通Fujitsu),东芝(T oshiba),希捷(Seagate),西部数据(WD)
日立(Hitachi),富士通Fujitsu)硬盘不加电:电路板中保险击穿或开路.
三星硬盘加电后嗒..嗒..嗒..的异响,说明磁头憋住了.用巧劲震动硬盘将磁头敲归位.。
sff-8654 标准

SFF-8654是一种内部电缆解决方案,符合SFF-8654标准的0.6mm间距22.4mm高(垂直插座,直角插头)中心锁扣连接器。
这个标准定义了用于高速串行互连应用的0.6mm无屏蔽I/O连接器的机械规范和一般性能要求。
具体来说,它是一种24 Gb/s 8通道插孔和配套电缆插头,用于内部SAS连接。
此外,SFF-8654接口常配备在例如戴尔服务器主板等设备上。
用户可以通过Slimline SFF-8654至SFF-8639数据线连接各种高性能的2.5" NVMe U.2 (SFF-8639) SSD固态硬盘。
主机端接口通常是PCIe 3.0x4,用于连接主板上的PCIe插槽,兼容PCIeGen3x4、x8、x16插槽;设备端接口是SFF-8639,用于连接U.2接口的NVMe SSD固态硬盘。
因此,SFF-8654标准在服务器、存储设备等领域有着广泛的应用。
sff-8654 标准 -回复

sff-8654 标准-回复sff8654 标准是什么?sff8654 标准,全称为“Small Form Factor 8654”,是一种用于存储设备的物理接口标准。
该标准定义了一种高速、高密度的连接接口,适用于固态硬盘(SSD)和硬盘驱动器(HDD)等设备。
该标准的设计旨在提供一种小型接口,以满足日益增长的数据存储需求。
因此,sff8654 接口在设计上非常紧凑,可以有效地节省空间并提高设备的性能。
sff8654 标准的特点是什么?sff8654 标准具有多种特点,使其成为存储设备行业中受欢迎的选择:1. 高速传输:sff8654 标准支持高速传输,其传输速率可以达到每秒几十个千兆字节。
这使得存储设备可以快速处理大量数据,提高系统的整体性能。
2. 紧凑设计:sff8654 接口采用紧凑的设计,使得存储设备可以更小巧地安装在计算机和其他设备中。
这对于需要节省空间的设备非常有用,如便携式计算机和服务器。
3. 可靠性:sff8654 标准采用了可靠的连接技术,确保存储设备与计算机之间的稳定连接。
这有助于减少数据传输中的错误和异常,提高系统的可靠性。
4. 弹性扩展:sff8654 标准支持设备的热插拔功能,这意味着用户可以在不关闭系统的情况下添加或移除存储设备。
这便于设备的维护和升级,并提高了系统的灵活性。
如何使用sff8654 标准?使用sff8654 标准的存储设备通常通过一个sff8654 连接线与计算机或其他设备连接。
这个连接线具有与设备接口相匹配的插头,确保稳定的数据传输。
如果用户想要安装新的存储设备,只需将设备的连接口插入计算机或其他设备的sff8654 接口插槽中。
然后,只需按照设备和操作系统的指示进行操作即可。
为了确保最佳性能,用户应该注意以下几个方面:1. 确保连接质量:确保连接线和设备接口干净无尘,并正确插入,以避免不稳定的连接。
2. 适当的供电:根据设备的要求,确保连接设备的电源充足,并与计算机或其他设备的电源连接。
- 1、下载文档前请自行甄别文档内容的完整性,平台不提供额外的编辑、内容补充、找答案等附加服务。
- 2、"仅部分预览"的文档,不可在线预览部分如存在完整性等问题,可反馈申请退款(可完整预览的文档不适用该条件!)。
- 3、如文档侵犯您的权益,请联系客服反馈,我们会尽快为您处理(人工客服工作时间:9:00-18:30)。
SFF Committee documentation may be purchased in electronic form.SFF specifications are available at ftp:///sffSFF CommitteeSFF-8654Specification for0.6mm 24 Gb/s 8X Unshielded I/O ConnectorRev 0.2 April 30, 2014Secretariat: SFF CommitteeAbstract: This specification defines the mechanical specifications and general performance requirements for the 0.6mm 24 Gb/s unshielded I/O connector that is designed for use in high speed serial interconnect applications. One such use is as a 24 Gb/s 8 lane receptacle and mating cable plug for internal SAS connections. This specification provides a common reference for systems manufacturers, system integrators, and suppliers. This document is an internal working specification of the SFF Committee, an industry ad hoc group.This specification is made available for public review, and written comments are solicited from readers. Comments received by the members will be considered for inclusion in future revisions of this specification.The description of a connector in this specification does not assure that the specific component is actually available from connector suppliers. If such a connector is supplied it must comply with this specification to achieve interoperability between suppliers.Support: This specification is supported by the identified member companies of the SFF Committee.POINTS OF CONTACT:Paul Coddington I. Dal AllanAmphenol High Speed Interconnects Chairman SFF Committee20 Valley Street 14426 Black Walnut CourtEndicott, NY 13760 Saratoga, CA 95070408-867-6630 607-754-4444*****************************************************EXPRESSION OF SUPPORT BY MANUFACTURERSThe following member companies of the SFF Committee voted in favor of this industry specification:tbdThe following member companies of the SFF Committee voted against this industry specification:tbdThe following member companies of the SFF Committee voted to abstain on this industry specification:tbdThe user's attention is called to the possibility that implementation to this Specification may require use of an invention covered by patent rights. By distribution of this specification, no position is taken with respect to thevalidity of a claim or claims or of any patent rights in connection therewith. Members of the SFF Committee which advise that a patent exists are required to provide a statement of willingness to grant a license under these rights on reasonable and non-discriminatory terms and conditions to applicants desiring to obtain such a license.ForewordThe development work on this specification was done by the SFF Committee, anindustry group. The membership of the committee since its formation in August 1990has included a mix of companies which are leaders across the industry.When 2 1/2" diameter disk drives were introduced, there was no commonality onexternal dimensions e.g. physical size, mounting locations, connector type, and connector location, between vendors.The first use of these disk drives was in specific applications such as laptopportable computers and system integrators worked individually with vendors todevelop the packaging. The result was wide diversity, and incompatibility.The problems faced by integrators, device suppliers, and component suppliers led tothe formation of the SFF Committee as an industry ad hoc group to address themarketing and engineering considerations of the emerging new technology.During the development of the form factor definitions, other activities weresuggested because participants in the SFF Committee faced more problems than the physical form factors of disk drives. In November 1992, the charter was expanded to address any issues of general interest and concern to the storage industry. The SFF Committee became a forum for resolving industry issues that are either notaddressed by the standards process or need an immediate solution.Those companies which have agreed to support a specification are identified in thefirst pages of each SFF Specification. Industry consensus is not an essential requirement to publish an SFF Specification because it is recognized that in an emerging product area, there is room for more than one approach. By making the documentation on competing proposals available, an integrator can examine the alternatives available and select the product that is felt to be most suitable.SFF Committee meetings are held during T10 weeks (see ), and Specific Subject Working Groups are held at the convenience of the participants. Material presented at SFF Committee meetings becomes public domain, and there are norestrictions on the open mailing of material presented at committee meetings.Most of the specifications developed by the SFF Committee have either beenincorporated into standards or adopted as standards by EIA (Electronic Industries Association), ANSI (American National Standards Institute) and IEC (International Electrotechnical Commission).If you are interested in participating or wish to follow the activities of the SFF Committee, the signup for membership and/or documentation can be found at /ie/join.htmlThe complete list of SFF Specifications which have been completed or are currently being worked on by the SFF Committee can be found atftp:///sff/SFF-8000.TXTIf you wish to know more about the SFF Committee, the principles which guide the activities can be found at ftp:///sff/SFF-8032.TXTSuggestions for improvement of this specification will be welcome. They should besent to the SFF Committee, 14426 Black Walnut Ct, Saratoga, CA 95070.TABLE OF CONTENTS1.Scope 61.1Application Specific Criteria 62.References 62.1Industry Documents 62.2SFF Specifications 62.3Sources 62.4Conventions 62.5Definitions 73.General Description 113.1Signal Assignments 123.2Pin Assignments 134.Mechanical Specifications 134.1Datums 134.2General Tolerances 135.Plug Requirements 145.1Plug Configurations 145.2Plug Paddle Card 206.Receptacle Connector Requirements 226.1Receptacle Connector Configurations 226.2Receptacle Connector Footprints 247.Performance Requirements 267.1EIA 364 TS-1000 Requirements 267.2Electrical Performance Requirements 267.3Mechanical Performance Requirements 267.4Environmental Performance Requirements 26FIGURESFigure 2-1 Mating side Gender Definition 8 Figure 2-2 Direction of Mating 9 Figure 2-3 Direction of Contact 9 Figure 2-4 Continuous Contact 9 Figure 2-5 Split Contact 10 Figure 3-1 Typical Application View 11 Figure 3-2 Alternative Application View 11 Figure 3-3 Cable Signal Assignments 12 Figure 3-4 Plug & Receptacle Pin Assignments 13 Figure 5-1 Straight Plug 14 Figure 5-2 Straight Plug (2) 15 Figure 5-3 Right Angle Plug 17 Figure 5-4 Right Angle Plug (2) 18 Figure 5-5 Plug Paddle Card 20 Figure 6-1 Right Angle Connector with Latch Retention 22 Figure 6-2 Straight Vertical Connector with Latch Retention 23 Figure 6-3 Right Angle Receptacle Connector Footprint 24 Figure 6-4 Straight Vertical Receptacle Connector Footprint 25TABLESTable 5-1 Free Straight Plug Cable Connector Dimensions 16 Table 5-2 Free Right Angle Plug Cable Connector Dimensions 19 Table 5-3 Plug Paddle Card Dimensions 21 Table 6-1 Right Angle Receptacle Connector Dimensions 22 Table 6-2 Straight Vertical Receptacle Connector Dimensions 23Table 6-3 Right Angle Receptacle Footprint Dimensions 24 Table 6-4 Straight Vertical Receptacle Footprint Dimensions 25 Table 7-1 EIA 364 TS-1000 Requirements 26 Table 7-2 Electrical Requirements And Test Conditions 26 Table 7-3 Mechanical Requirements And Test Conditions 26 Table 7-4 Environmental Requirements And Test Conditions 26SFF Committee --0.6mm 24 Gb/s 8X Unshielded I/O Connector1.ScopeThis specification defines the terminology and mechanical requirements for an eight lane, high speed (up to 24 Gb/s per lane), unshielded I/O connector, the mating unshielded cable plug, and the latching requirements for them based upon the 74 position 0.6mm pitch unshielded I/O connector interface defined herein.1.1Application Specific CriteriaThis connector interface is capable of meeting the 24 Gb/s high speed internal I/O electrical performance requirements of T10 SAS-4. The connector design is ribbon cable friendly and supports blade and mainstream server designs.2.References2.1Industry DocumentsThe following interface standards are relevant to many SFF Specifications.- ASME Y14.5 Dimensioning and Tolerancing- EIA 364 Series Electrical Connector/Socket Test Procedures IncludingEnvironmental Classifications.- IPC-A-610 Acceptability of Electronic Assemblies- SFF-8410 High Speed Serial Testing for Copper Links- T10/2212-D Serial Attached SCSI – 3 (SAS-3) [INCITS 519]- T10/ -D Serial Attached SCSI – 4 (SAS-4) [INCITS 534]2.2SFF SpecificationsThere are several projects active within the SFF Committee. The complete list of specifications which have been completed or are still being worked on are listed in the specification at ftp:///sff/SFF-8000.TXT2.3SourcesThose who join the SFF Committee as an Observer or Member receive electronic copies of the minutes and SFF specifications (/ie/join.html). Copies of ANSI standards may be purchased from the InterNational Committee for Information Technology Standards (/incitsgate.tmpl).2.4ConventionsThe dimensioning conventions are described in ANSI-Y14.5, Geometric Dimensioning and Tolerancing. All dimensions are in millimeters, which are the controlling dimensional units (if inches are supplied, they are for guidance only).The ISO convention of numbering is used i.e., the thousands and higher multiples are separated by a space and a period is used as the decimal point. This is equivalent to the English/American convention of a comma and a period.American French ISO0.6 0,6 0.61,000 1 000 1 0001,323,462.9 1 323 462,9 1 323 462.92.5DefinitionsFor the purpose of SFF Specifications, the following definitions apply:Advanced grounding contacts: Connector contacts that make first and break last and are capable of carrying power ground return currents and performing electrostatic discharge. Other terms sometimes used to describe these features are: grounding pins, ESD contacts, grounding contacts, static drain, and pre-grounding contacts. Alignment guides: Connector features that preposition insulators prior toelectrical contact. Other terms sometimes used to describe these features are: guide pins, guide posts, blind mating features, mating features, alignment features, and mating guidesBoard Termination Technologies: Surface mount single row, surface mount dual row, through hole, hybrid, straddle mount, pressfit.Cable Termination: The attachment of wires to the termination side of a connector. Schemes commonly used in the industry are IDC (Insulation Displacement Contact), IDT (Insulation Displacement Termination), wire slots, solder, weld, crimp, braise, etc.Contact mating sequence: Order of electrical contact during mating/unmating process. Other terms sometimes used to describe this feature are: contact sequencing, contact positioning, make first/break last, EMLB (early make late break) staggered contacts, and long pin / short pin.Fixed: Used to describe the gender of the mating side of the connector that accepts its mate upon mating. This gender is frequently, but not always, associated with the common terminology "receptacle". Other terms commonly used are "female" and "socket connector". The term "fixed" is adopted from EIA standard terminology as the gender that most commonly exists on the fixed end of a connection, for example, on the board or bulkhead side. In this specification "fixed" isspecifically used to describe the mating side gender illustrated in Figure 2-1. Fixed Board: A connector that uses a fixed gender mating side and a termination side suitable for any of the printed circuit board termination technologies.Free: Used to describe the gender of the mating side of the connector that penetrates its mate upon mating. This gender is frequently, but not always, associated with the common terminology "plug". Other terms commonly used are "male" and "pin connector". The term "free" is adopted from EIA standard terminology as the gender that most commonly exists on the free end of a connection, for example, on the cable side. In this specification "free" is specifically used to describe the mating side gender illustrated in Figure 2-1.Free Board: A connector that uses a free gender mating side and a termination side suitable for any of the printed circuit board termination technologiesHeight: Distance from board surface to farthest overall connector featureMating side: The side of the connector that joins and separates from the mating side of a connector of opposite gender. Other terms commonly used in the industry are mating interface, separable interface and mating face.Note: The fixed gender is used on the deviceside except in the case of wire termination.FIGURE 2-1 MATING SIDE GENDER DEFINITIONOffset: An alignment shift from the center line of the connectorOptional: This term describes features which are not required by the SFF Specification. However, if any feature defined by the SFF Specification is implemented, it shall be done in the same way as defined by the Specification. Describing a feature as optional in the text is done to assist the reader. If there is a conflict between text and tables on a feature described as optional, the table shall be accepted as being correct.Reserved: Where this term is used for defining the signal on a connector pin its actual function is set aside for future standardization. It is not available for vendor specific use. Where this term is used for bits, bytes, fields and code values; the bits, bytes, fields and code values are set aside for future standardization. The default value shall be zero. The originator is required to define a Reserved field or bit as zero, but the receiver should not check Reserved fields or bits for zero.Right Angle: A connector design for use with printed circuit board assembly technology where the mating direction is parallel to the plane of the printedcircuit boardSingle sided termination: A cable termination assembly style and a connector design style where only one side of the connector is accessible when attaching wires. This style frequently has IDC termination points that point in the same direction.Straight: A connector design for use with printed circuit board assembly technology where the mating direction is perpendicular to the plane of the printed circuit boardSurface mount: A connector design and a printed circuit board design style where the connector termination points do not penetrate the printed circuit board and are subsequently soldered to the printed circuit boardTermination side: The side of the connector opposite the mating side that is used for permanently attaching conductors to the connector. Due to pin numbering differences between mating side genders the termination side shall always be specified in conjunction with a mating side of a specific gender. Other terms commonly used in the industry are: back end, non-mating side, footprint, pc board side, and post sideThrough hole: A connector design and a printed circuit board design style where the connector termination points penetrates the printed circuit board and are subsequently soldered to the printed circuit board.*** Editor’s Note: For the following figures, Figure 2-2, Figure 2-3, Figure 2-4, and Figure 2-5, the references to FIXED and FREE are reversed since these figures were the only Figures available from the SFF document template.If/when these are changed, the wording in the surrounding paragraphs willneed to also be updated accordingly. ***Wipe (Contact Location): The contact location has two components: direction of mating and direction of contact pitch. In the direction of mating, the Free contact location must be a minimum of 0.05 mm from either end of the Fixed contact mating interface after mating and latching.FIGURE 2-2 DIRECTION OF MATINGIn the direction of contact pitch, the Free contact shall have no less than 50% of the available mating width in contact with the Fixed contact and there shall be a minimum clearance to the adjacent Fixed contact. The minimum clearance to the adjacent Fixed contact shall be 0.075 mm for interfaces with a pitch of at least0.70 mm. For pitches less than 0.70 mm, the minimum clearance should be reviewed ona case by case basis to insure that a shorting condition does not exist.FIGURE 2-3 DIRECTION OF CONTACTWipe (Minimum Effective Contact): The distance that the Free contact moves along the Fixed contact without losing electrical connection.FIGURE 2-4 CONTINUOUS CONTACTA split or interrupted contact surface (i.e. a contact interface with a pre-pad) is allowable so long as the gap does not allow for the Free contact to make contactwith a non-conductive surface.FIGURE 2-5 SPLIT CONTACTThe minimum effective wipe is dependent on the finish of the contact interface. Tin-Tin interfaces shall have a minimum effective wipe of 2.00 mm. Gold-Gold interfaces shall have a minimum effective wipe of 0.40 mm.3.General DescriptionThe connector system specification defines a right angle receptacle connector (fixed) and a straight receptacle connector (fixed), the mating plug assembly (free) which can be a straight plug version or a right angle plug version, and the latching mechanism.The design of this connector system is intended to reduce the footprint and form factor versus the MiniSAS HD 8i receptacle connector while providing better signal integrity performance at data rates up to 24 Gb/s, especially with improved NEXT and FEXT performance. The mating plug is designed to work better with ribbon type cables and provide easier routing of the cables and better air flow for cooling in typical blade and mainstream server designs.Figure 3-1 below represents a typical straight plug to right angle receptacle configuration of this connector system.FIGURE 3-1 TYPICAL APPLICATION VIEWFigure 3-2 below represents an alternative application view consisting of a right angle plug to straight or vertical receptacle configuration of this connector system.FIGURE 3-2 ALTERNATIVE APPLICATION VIEW3.1Signal AssignmentsFIGURE 3-3 CABLE SIGNAL ASSIGNMENTS3.2Pin AssignmentsFIGURE 3-4 PLUG & RECEPTACLE PIN ASSIGNMENTS4.Mechanical Specifications4.1Datums*** Editor’s Note: Add a figure (or figures) representing the datums used in thisconnector system here. ***Datum DescriptionA Top Surface of Paddle CardB Free (Plug) Cable Connector StopC Centerline of the Paddle Card / Mating InterfaceD Leading Edge of Third Mate Contacts on Paddle Card*** Editor’s Note: Add any additional definitions of the datums here. ***4.2General TolerancesUnless otherwise specified, the units of all linear dimensions are in millimeters (mm). All width dimensions, where applicable, are centered.*** Editor’s Note: Add any general tolerance information here that would apply toall the following detailed drawings. ***5.Plug Requirements5.1Plug ConfigurationsFIGURE 5-1 STRAIGHT PLUGFIGURE 5-2 STRAIGHT PLUG (2)TABLE 5-1 FREE STRAIGHT PLUG CABLE CONNECTOR DIMENSIONSDesignator Description Dimension (mm) ToleranceC01 Interface Width 22.25 ±0.10 C02 Paddle Card thickness 1.00 ±0.10 A01 Plug Body Width 22.75 ±0.10 A02 Plug Stop Height 0.80 Minimum A03 Plug Body Width 25.95 ±0.10 A04 Plug Datum C to Latch Tab Center 2.42 ±0.10 A05 Latch Tab Width 1.00 ±0.10 A06 Datum A to Anti-Rotation Rib Top Surface 0.40 ±0.05 A07 Datum A to Top of Plug 2.03 ±0.05 A08 Plug Datum B to Latch Tab 1.70 ±0.10 A09 Plug Datum B to Body Front Surface 5.40 ±0.10 A10 Plug Datum B to Edge of Paddle Card 10.45 Basic A11 Plug Top Surface to Latch 3.36 Maximum A12 Plug Key Surface 1.00 ±0.05 A13 Latch Body Width 9.90 ±0.15 A14 Plug Body Thickness 5.10 ±0.10 A15 Anti-Rotation Rib Width 1.90 ±0.05 A16 Datum B to End of Anti-Rotation Rib 2.00 ±0.05 A17 Latch Tab Height (when free) 3.14 Minimum A17 Latch Tab Height (when tab is pressed) 2.88 Maximum A18 Latch Tab Thickness 0.25 ±0.05 A19 Plug Length 19.95 Maximum A20 Radius 0.30 REF. A21 Radius 0.50 REF.FIGURE 5-3 RIGHT ANGLE PLUGFIGURE 5-4 RIGHT ANGLE PLUG (2)TABLE 5-2 FREE RIGHT ANGLE PLUG CABLE CONNECTOR DIMENSIONSDesignator Description Dimension (mm)ToleranceC01 Interface Width 22.25 ±0.10 C02 Paddle Card thickness 1.00 ±0.10 B01 Plug Body Width 22.75 ±0.10 B02 Plug Stop Height 0.80 Minimum B03 Plug Body Width 25.95 ±0.10 B04 Plug Datum C to Latch Tab Center 2.42 ±0.10 B05 Latch Tab Width 1.00 ±0.10 B06 Datum A to Anti-Rotation Rib Top Surface 0.40 ±0.05 B07 Datum A to Top of Plug 2.03 ±0.05 B08 Plug Datum B to Latch Tab 1.70 ±0.10 B09 Plug Datum B to Body Front Surface 5.40 ±0.10 B10 Plug Datum B to Edge of Paddle Card 10.45 Basic B11 Plug Top Surface to Latch 3.36 Maximum B12 Plug Key Surface 1.00 ±0.05 B13 Latch Body Width 9.90 ±0.15 B14 Plug Body Thickness 12.00 ±0.10 B15 Anti-Rotation Rib Width 1.90 ±0.05 B16 Datum B to End of Anti-Rotation Rib 2.00 ±0.05 B17 Latch Tab Height (when free) 3.14 Minimum B17 Latch Tab Height (when free) 2.88 Maximum B18 Latch Tab Thickness 0.25 ±0.05 B19 Plug Length 19.55 Maximum B20 Radius 0.30 REF. B21 Radius 0.50 REF. B22 Plug Body Top Surface to Shroud Bottom Surface 4.53 ±0.10 B23 Plug Datum B to Body Bend Front Surface 4.60 ±0.105.2Plug Paddle CardFIGURE 5-5 PLUG PADDLE CARDTABLE 5-3 PLUG PADDLE CARD DIMENSIONSDesignator Description Dimension (mm) ToleranceC01 Paddle Card Width 22.25 ±0.10 C02 Paddle Card thickness 1.00 ±0.10 C03 First to Last Pad Centers 21.60 Basic C04 Card Center to Outer Pad Center 10.80 Basic C05 Pad Center to Center (Pitch) 0.60 Basic C06 Pad Width 0.40 ±0.03 C07 Pad Length - Third Mate 2.20 Minimum C08 Third Mate to Second Mate 0.50 ±0.05 C09 Third Mate to First Mate 1.30 ±0.05 C10 Third Mate Pad to Card Edge 1.85 ±0.10 C11 Third Mate Pad to Second Mate Pad 0.10 ±0.05 C12 Component Keep Out Area 5.05 Minimum C13 Lead-in Flat 0.40 REF. C14 Lead-in Chamfer ×45 degrees 0.50 ±0.05 C15 Lead-in Chamfer ×45 degrees 0.30 ±0.056.Receptacle Connector Requirements6.1Receptacle Connector ConfigurationsFIGURE 6-1 RIGHT ANGLE CONNECTOR WITH LATCH RETENTION*** Editor’s Note: Add any additional figures representing the right angleconnector here. This figure will be replaced with one with the dimensions replaced with variables to correspond with a table of dimensions to follow. ***TABLE 6-1 RIGHT ANGLE RECEPTACLE CONNECTOR DIMENSIONSTolerance(mm) Designator Description DimensionD01 BasicD02 Basic0.50D03 +/-0.50D04 +/-*** Editor’s Note: Add a table of receptacle dimensions here. This current table isused a placeholder only. ***FIGURE 6-2 STRAIGHT VERTICAL CONNECTOR WITH LATCH RETENTION*** Editor’s Note: Add any additional figures representing the straight connector here. This figure will be replaced with one with the dimensions replaced with variables to correspond with a table of dimensions to follow. ***TABLE 6-2 STRAIGHT VERTICAL RECEPTACLE CONNECTOR DIMENSIONSTolerance(mm) Designator Description Dimension E01 BasicE02 Basic0.50E03 +/-0.50E04 +/-*** Editor’s Note: Add a table of receptacle dimensions here. This current table isused a placeholder only. ***6.2Receptacle Connector FootprintsFIGURE 6-3 RIGHT ANGLE RECEPTACLE CONNECTOR FOOTPRINT *** Editor’s Note: This figure will be replaced with one with the dimensions replaced with variables to correspond with a table of dimensions to follow. *** TABLE 6-3 RIGHT ANGLE RECEPTACLE FOOTPRINT DIMENSIONSDesignator Description Dimension(mm)ToleranceF01 Basic F02 Basic F03 +/-0.50F04 +/-0.50*** Editor’s Note: Add a table of receptacle footprint dimensions here. This current table is used a placeholder only. ***FIGURE 6-4 STRAIGHT VERTICAL RECEPTACLE CONNECTOR FOOTPRINT*** Editor’s Note: This figure will be replaced with a figure of the straight vertical receptacle connector with the dimensions replaced with variables to correspond with a table of dimensions to follow. ***TABLE 6-4 STRAIGHT VERTICAL RECEPTACLE FOOTPRINT DIMENSIONSDesignator Description Dimension(mm)ToleranceG01 BasicG02 BasicG03 +/-0.50 G04 +/-0.50*** Editor’s Note: Add a table of receptacle footprint dimensions here. Thiscurrent table is used a placeholder only. ***7.Performance Requirements7.1EIA 364 TS-1000 RequirementsThis specification conforms to the test sequences as defined in EIA 364 TS-1000.TABLE 7-1 EIA 364 TS-1000 REQUIREMENTSParameter Requirement Rated Durability Cycles 250Field Life (3, 5, 7, or 10 years) 10 yearsField Temperature (57, 60, 65, 75, or 85C) 65C degreesTest Group 4 Option 1BPlating Type (Precious / Non-Precious) PreciousSurface Treatment (Lubricated or Non-Lubricated)Manufacturer to specify7.2Electrical Performance RequirementsTABLE 7-2 ELECTRICAL REQUIREMENTS AND TEST CONDITIONSParameter RequirementTestConditions Current 0.5 A/contactVoltage 30 V AC/contactLow Level Contact Resistance 20 milliohms maximum for signal contacts(initial)EIA 364-6:320 mV DC, 10 mAInsulation Resistance 1e3 MegaOhm Minimum between adjacentcontactsEIA 364-21:100 V DCDielectric Withstanding No defect between adjacent contacts300 V DC for 1minute hold7.3Mechanical Performance RequirementsTABLE 7-3 MECHANICAL REQUIREMENTS AND TEST CONDITIONSParameter RequirementTestConditions Mating Force TBD? N maximum EIA 364-13Un-mating Force TBD? N maximum EIA 364-13Vibration No damageNo discontinuity longer than 1microsecond allowed20 milliohms maximum change from initial (baseline) contact resistanceEIA 364-28Mechanical Shock No damage20 milliohms maximum change from initial (baseline) contact resistanceEIA 364-277.4Environmental Performance RequirementsTABLE 7-4 ENVIRONMENTAL REQUIREMENTS AND TEST CONDITIONSParameter RequirementTestConditions Storage Temperature -20C to +85C degreesHumidity 80% RH Maximum。