GE MRI磁共振操作手册
磁共振成像仪使用指南
磁共振成像仪使用指南磁共振成像(Magnetic Resonance Imaging,MRI)技术是一种通过利用核磁共振原理,对人体或物体进行非侵入性的三维成像的医学检查方法。
它在临床诊断、科学研究以及生物医学领域起着重要作用。
本篇文章将为您介绍磁共振成像仪的使用指南。
一、准备在进行磁共振成像之前,有一系列的准备工作需要完成:1. 安全事项:在进入磁共振室前,请确保身上没有任何金属物品,如首饰、手表、手机等。
这是因为磁共振成像仪使用强磁场,金属物品可能会受到吸引力或产生危险的磁场。
2. 环境要求:磁共振室内需要维持安静,因此,请保持安静,避免不必要的声音干扰。
3. 服装要求:您需要穿上提供的磁共振室专用服装,这些服装通常由无金属材料制成,以避免对磁共振成像的影响。
二、进行磁共振成像在完成准备工作后,可以进行磁共振成像。
以下是具体步骤:1. 入室:在进入磁共振室前,请确保没有手表、钥匙、手机等金属物品。
如果您有身体上的金属假体,例如心脏起搏器或人工骨髓等,请告知医务人员。
2. 体位安排:在进入磁共振仪器前,医务人员会根据您所需成像的部位安排您的体位。
请按照医生的指示准备好,并保持不动。
3. 安全检查:在进行磁共振成像前,医务人员会进行安全检查,确保您身上没有任何金属物品。
他们还会询问您是否有金属植入物或假体,以确保成像过程的安全。
4. 成像过程:成像过程中,您需要进入磁共振设备内。
磁共振仪会发出一系列的噪音,这是正常现象,请放松自己,遵循医生和技术人员的指示,保持不动。
整个成像过程可能需要几分钟到半小时不等,具体时间取决于您需要成像的部位。
5. 结束:成像完成后,医务人员会通知您可以离开磁共振室。
您可以回到更衣室更换衣物,并恢复正常活动。
三、注意事项在进行磁共振成像时,还需要注意以下事项:1. 安全性:磁共振成像是一项安全的检查方法,但对于一些人群来说可能有限制。
如孕妇、有心脏起搏器或金属植入物的人,应在医生的指导下进行成像。
《GE磁共振操作讲义》课件
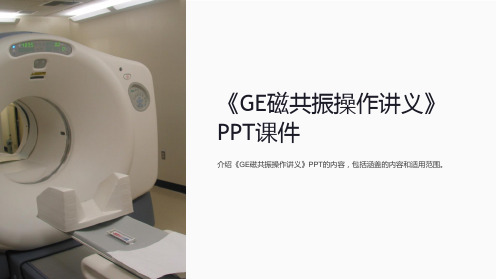
介绍《GE磁共振操作讲义》PPT的内容,包括涵盖的内容和适用范围。
磁共振成像的基本原理
讲解磁共振成像的基本概念、物Байду номын сангаас原理和技术特点。
磁共振成像的准备工作
讲解磁共振成像前的准备工作,包括磁场校准、体征定位和扫描参数设置。
磁共振成像的常见扫描技术
介绍磁共振成像的常见扫描技术,包括T1加权、T2加权、PD加权和FLAIR等。
磁共振成像的临床应用
讲解磁共振成像在临床上的应用,包括神经科学、心血管科学和肿瘤学等领域。
磁共振成像的注意事项
讲解磁共振成像时需要注意的事项,包括禁忌症、安全保护和设备维护等方 面。
总结
对《GE磁共振操作讲义》PPT的内容进行总结,并给出未来发展方向和展望。
GE磁共振操作规程

G E磁共振操作规程(总1页) -CAL-FENGHAI.-(YICAI)-Company One1
-CAL-本页仅作为文档封面,使用请直接删除
磁共振操作规程
1、每天开机前先检查电源工作是否正常,再记录液氦量和磁体压
力,观察氦压机是否正常工作,检查水冷机温度是否正常。
2、确认以上各环节正常时方可开机。
依次打开主机电源、激光相
机电源。
3、接诊时,核对患者一般资料,询问病史,明确检查目的和要
求,制订合理的检查程序和扫描序列。
4、进入检查室前,应要求患者除去身上一切金属物品、磁性物品
及电子器件,向患者认真讲述检查过程,以消除其恐惧心理,争取患者的合作。
5、检查时严格按照各部位的成像方法,力求正确、高质量完成每
例检查,获得最佳的成像每张申请单及其照片,确保无一疏漏。
6、关机时严格按照关机程序,待电脑提示整理稳完毕,可以关机
时再关闭主机电源和激光照相电源。
7、完成每天的检查后,仔细核对。
磁共振成像仪使用说明书
磁共振成像仪使用说明书说明书编号: MRI-2022-001发行日期: 2022年6月15日1. 产品概述磁共振成像仪(MRI)是一种先进的医学影像设备,利用磁场和无害的无线电波来生成人体内部结构的高清图像。
本使用说明书将向您介绍如何正确操作MRI设备,并提供必要的安全指导。
2. 产品安全须知- 请在使用MRI设备前仔细阅读并理解本说明书,并确保所有操作人员熟悉设备的操作方法。
- 在操作过程中,请确保设备正常工作,无任何故障或损坏。
- 定期检查设备的电源线和连接线,确保其完好无损。
- 请注意设备周围的环境应满足一般的安全要求,如通风良好、无易燃物等。
- 使用前,请确认MRI设备已连接地线,以确保操作安全。
- 请确保设备的工作环境符合电磁兼容性要求,避免电磁干扰。
3. 设备操作步骤3.1 打开设备- 将MRI设备连接至稳定的电源,并确保电源稳压器工作正常。
请勿使用不稳定的电源。
- 按下电源按钮,待设备启动并完成自检过程后,进入待机模式。
3.2 患者准备- 将患者位于适当的位置,并确保患者处于舒适状态。
- 为患者提供必要的保护装置,如耳塞、眼罩等。
- 清除患者身上的金属物品,包括首饰、钥匙、银行卡等,以避免磁场干扰。
- 根据患者情况,使用必要的对比剂以提高成像质量。
3.3 图像扫描- 在操作台上调整扫描参数,如扫描层数、扫描时间等。
- 根据患者部位和医生指示选择正确的扫描程序和脉冲序列。
- 帮助患者进入仰卧、侧卧或其他指定位置,并使用固定装置固定患者的身体位置。
- 按下扫描按钮,启动扫描过程。
请确保患者保持静止,并密切观察设备运行情况。
4. 注意事项4.1 安全操作- 在操作设备时,请确保患者和操作人员的安全。
避免发生意外事故。
- 严禁在患者扫描过程中进入磁共振室。
如有需要,请提前停止扫描过程。
- 请勿将带有磁性物质或电子设备的物品接近磁共振室。
4.2 设备维护- 定期对设备进行维护保养,以确保其正常运行。
磁共振成像仪操作规程
磁共振成像仪操作规程一、引言磁共振成像(Magnetic Resonance Imaging,MRI)是一种现代医学影像学技术,通过利用磁场和射频脉冲来获取人体内部结构的高清影像,常被用于疾病的诊断和评估。
本文将介绍磁共振成像仪的操作规程,以确保操作的准确性和安全性。
二、设备准备1. 确保磁共振成像仪处于正常工作状态,没有故障和安全隐患。
2. 检查磁共振成像仪的磁场强度和扫描模式是否符合所需扫描要求。
3. 验证磁共振成像仪的冷却系统和电源供应是否正常,以确保稳定运行。
三、操作步骤1. 患者准备a. 与患者进行必要的沟通,了解其病史和身体状况。
b. 询问患者是否有禁忌症,如心脏起搏器、金属植入物等,并告知相关风险和注意事项。
c. 帮助患者更换合适的服装,移除身上的金属物品,如首饰、手表等。
d. 将患者轻松地安排在磁共振成像仪的操作区域内。
2. 操作流程a. 根据临床需要,选择合适的扫描模式和参数,确保正确获取所需图像。
b. 准确标定患者的扫描区域,并告知患者保持不动,以避免图像模糊。
c. 启动磁共振成像仪,确保各项参数和仪器状态正常。
d. 告知患者各个扫描阶段的持续时间和呼吸指令,确保患者能够配合完成操作。
e. 监测患者的生命体征,确保其安全和舒适,如出现异常情况立即停止扫描。
f. 保存获取的图像数据,并根据需要进行进一步的图像处理和分析。
g. 关闭磁共振成像仪,做好设备维护和清洁工作。
四、安全注意事项1. 操作人员必须熟悉磁共振成像仪的工作原理和操作规程,严格按照标准程序操作。
2. 禁止将含有金属物质的物品靠近磁共振成像仪,以免引发严重的事故。
3. 禁止带有心脏起搏器等禁忌物品的患者接受磁共振成像检查。
4. 进行磁共振成像检查时,操作者和患者必须佩戴适当的防护设备,包括试验台固定和耳塞等。
5. 在急救设备和火灾隐患提示牌等应急设施应低势地点放置,并确保其易于取用。
五、设备维护与质量控制1. 定期对磁共振成像仪进行维护和巡检,确保设备状态良好。
GE T磁共振操作指南 Functool

一、Functool 简介Functool 是 AW工作站及 Console操作台上的一个选配软件包。
它用于对符合条件的数据组图像加以分析后处理。
符合条件的数据组指:数据组中每个层面含有多幅图像,这些多幅的图像或是含有时间变化,或是B值的变化,或是含有频率的变化。
含有时间变化的图像有:Dynamic contrast,Perfusion,fMRI(BOLD)。
含有B值变化的图像: Diffusion。
含有频率变化的图像:MRS (acquired with the Probe/SI)。
所有图像要求是同样的扫描层面、同样的扫描中心、同样的扫描像素。
最多可载入1024幅图像。
分析处理的结果以曲线图或参数伪彩图来表示,这些结果可供保存照像或彩色打印。
注:在启动Functool之前,结束其他所有的应用软件(如Main Viewer, 3D Analysis, IVI, Reformat, etc)。
二、Functool 界面介绍:一、载入图像并启动Functool:1,在Browser中选择符合条件的图像,点击。
显示如下界面:弥散图像的后处理按键灌注及动态扫描的后处理按键灌注及动态扫描的后处理按键脑功能成像的后处理按键弥散张量成像的后处理按键2,左侧界面属于功能版面,各个按键的注释及功能见下图选择新的处理方式科研软件对所选处理方式的功能设定切换至图像管理界面 Functool 分析界面关闭Functool 分析界面图像显示 剪切、复制、粘贴功能版面按键注释用曲线的形式表示不同时相(X轴)感兴趣区信号强度的变化(Y轴)用柱状图的形式表示在某一个信号强度下(X轴)像素的数量(Y轴)以列表的形式表示不同相位上(rank)感兴趣区内的平均信号强度强度3,Functool 工具栏各项按键说明调节窗宽窗位 图像滚动 显示/隐藏网格 显示/隐藏注释添加注释 自由划感兴趣区 融合/分裂 选择 旋转/翻转移动/恢复正常放大/缩小平滑/非平滑对称ROI 方形/圆形ROI组合/分解方形/多角形ROI4,当选择某一个重建功能后即进入到图像显示窗口。
GE型号MR产品使用指南说明书
INTRODUCTIONThese magnetic resonance (MR) protocols were developed by an expert consensus panel for use on General Electric (GE) MR imaging machines, and were developed for high-end platform scanners with multichannel phased array coils and parallel reconstruction capabilities. The protocols are divided into 3 sections:•Body MR imaging•Body MR angiography•Central nervous system (CNS) MR imagingThe protocol parameters can generally be adapted to work with other software platforms or releases and hardware configurations but may require small modifications that can be made by a knowledgeable and experienced MR technologist. Scan times may increase in some circumstances.These protocols provide field strength–specific parameters for 1.5T and 3T. Attention has also been given to patient preparation, streamlining the exam, and making the best use of contrast material, whether it is a standard gadolinium-based extracellular fluid agent, a high-relaxivity gadolinium-based contrast agent (GBCA), such as MultiHance® (gadobenate dimeglumine [Gd-BOPTA]), or agents with hepatobiliary uptake such as Eovist®(gadoxetic acid) and MultiHance®.Each protocol contains a brief description of patient preparation, special notes on coil choice and placement, suggestions for contrast dose and administration rate, and suggestions concerning timing of fluoroscopic triggering, if appropriate.The consensus panel consisted of the following experts in radiology:Thomas Grist, MD University of Wisconsin School of Medicine and Public Health, Madison, Wisconsin Mark C. DeLano, MD ̶ Michigan State University, Advanced Radiology Services, PC, Grand Rapids, Michigan Scott B. Reeder, MD, PhD ̶ University of Wisconsin School of Medicine and Public Health, Madison, Wisconsin Howard A. Rowley, MD ̶ University of Wisconsin School of Medicine and Public Health, Madison, Wisconsin Steffen Sammet, MD, PhD, DABR, DABMRS, FAMP ̶ The University of Chicago Medical Center, Chicago, Illinois Megan E. Vadnais, BSRT, (R)(MR) ̶ University of Wisconsin School of Medicine and Public Health, Madison, WisconsinDisclaimerThe content and views presented in this educational activity are those of the authors and do not necessarily reflect those of Medical Education Resources, ABC Medical Education, and/or Bracco Diagnostics Inc. The authors have disclosed if there is any discussion of published and/or investigational uses of agents that are not indicated by the US Food and Drug Administration (FDA) in their presentations. The protocols presented here were developed for pediatric and adult patients of average weight.Before prescribing any medicine, primary references and the full prescribing information for each product should be consulted. Any procedures, medications, or other courses of diagnosis or treatment discussed or suggested in this activity should not be used by clinicians without evaluation of their patient’s conditions and possible contraindications or dangers in use, review of any applicable manufacturer’s product information, and comparison with recommendations of other authorities. The information presented in this activity is not meant to serve as a guideline for patient management.Off-Label StatementThis educational activity contains discussion of published and/or investigational uses of agents that are not on-label by the FDA. The opinions expressed in the educational activity are those of the faculty. Please refer to the official prescribing information for each product for discussion of approved indications, contraindications, and warnings. Further, participants should critically appraise the information presented and are encouraged to consult appropriate resources for any product or device mentioned in this activity.MR Protocols for Body MR ImagingContrast timing is extremely important for abdominal MR imaging, particularly for high-quality liver imaging. We recommend the use of fluoro-triggering or “SmartPrep” methods rather than the use of a timing bolus.All body MR imaging protocols presented here were developed by Scott B. Reeder, MD, PhD, Steffen Sammet, MD, PhD, DABR, DABMRS, FAMP, and Megan E. Vadnais, BSRT, (R)(MR) for 1.5T and 3T systems. Specific protocols include:•Abdomen‒ Generic Abdomen Pelvis 1.5T and 3T‒ Appendicitis Noncontrast 1.5T and 3T‒ MR Enterography 1.5T and 3T•Liver‒ Liver/Pancreas Extracellular Agent 1.5T and 3T‒ Liver/Pancreas Hepatobiliary Agent 1.5T and 3T‒ Magnetic Resonance Cholangiopancreatography (MRCP) Noncontrast 1.5T and 3T‒ Diffuse Liver Disease 1.5T and 3T•Pelvis‒ Generic Pelvis 1.5T and 3T‒ Female Pelvis Malignant 1.5T and 3T‒ Female Pelvis Benign 1.5T and 3T‒ Uterine Anomaly 1.5T and 3T‒ Rectal Cancer 1.5T and 3T‒ Perianal Fistula 1.5T and 3T‒ Prostate 1.5T and 3T•Adrenal and Renal‒ Adrenal 1.5T and 3T‒ Renal 1.5T and 3TGeneral Notes•Intravenous access should be obtained with an 18- to 22-gauge needle•We suggest the use of a contrast injector and a saline flush of a minimum of 20 to 30 mL at the same injection rate as the contrast injection (1.5-2.0 mL/sec)•Breath-holding is essential for good image quality for thoracic or abdominal MR imaging. Precontrast scans should be used to ensure that the patient can both breath-hold adequately and understand the instructions. We recommend breath-holding at end-expiration (end tidal volume)•When parallel imaging is used, care must be taken to increase the field of view sufficiently to avoid residual aliasing artifact. This is generally more often a problem for coronal imaging, which may require placing the arms over the head or elevating the arms by the patient’s side•In patients with renal failure, consider using a half-dose (0.05 mmol/kg) of a high-relaxivity Group II contrast agent such as MultiHance® (gadobenate dimeglumine), particularly at 3TMR Protocols for Body MR AngiographyAll protocols should use Fluoro-Triggered (FT) magnetic resonance (MR) angiography fluoroscopic imaging for bolus detection. MR imaging protocols for MR angiography presented here include 1.5T and 3T systems, and were developed by Thomas Grist, MD, and Megan E. Vadnais, BSRT, (R)(MR) for the following procedures:•Cardiac MRA–Cardiac Basic Anatomy and Function 1.5T and 3T–Pulmonary Artery 1.5T and 3T–Pulmonary Vein Mapping 1.5T and 3T•Thoracic MRA–Thoracic Aorta MRA 1.5T and 3T–Gated Thoracic Aorta 1.5T and 3T•Abdominal MRA–Contrast-enhanced MRA Abdomen 1.5T and 3T–Noncontrast-enhanced MRA Abdomen 1.5T and 3T–Thoracoabdominal Aortic Aneurysm MRA 1.5T and 3T•Peripheral MRA–Lower Extremity Contrast-enhanced MR Venography (CE MRV) 1.5T and 3T–Runoff Abdomen to Lower Extremity MRA 1.5T and 3T–Peripheral Runoff Noncontrast 1.5T and 3T–Arteriovenous Malformation (AVM) Evaluation 1.5T and 3TThe rationale for the patient preparation for contrast-enhanced MR angiography is based on a hypothetical generic patient. Individual protocols may include important variations and will be delineated in the specific protocol. General Notes•Intravenous access should be obtained with an 18- to 22-gauge needle, inserted preferably in the antecubital fossa. Right side is preferred (when possible) for thoracic or carotid MR angiography•Use respiratory bellows – gating parameters:–R-R intervals = 2-3–Trigger point = 40%–Trigger window = 30%–Delay = minimum•The basic sequences recommended are intended to achieve both anatomic localization and high-quality anatomic imaging to complement the angiographic sequences that are performed. These include:–3-plane localizer–Coronal single-shot fast spin-echo (FSE)–Axial T2 FSE (respiratory triggered)–3D (three-dimensional) contrast-enhanced MR angiography FT (precontrast-practice breath-hold)–3D contrast-enhanced MR angiography FT (postcontrast)–3D contrast-enhanced MR angiography FT (2nd postcontrast)–Axial fast spoiled gradient-echo postcontrast fat-saturated•A power injector is highly recommended with a minimum of 20- to 30-mL saline flush delivered at the same injection rate as the contrast injection•Breath-holding is critical to good image quality for thoracic or abdominal MR angiography. Precontrast or practice scans help ensure that the patient can both breath-hold adequately and understand the instructions•When parallel imaging is used, care must be taken to not have wraparound artifact on the vascular structures. This generally requires prescribing a large field of view beyond the body wall, and for abdominal imaging, it requires placing the arms over the head or elevating the arms at the patient’s side. When performing the calibration scan, overprescribe by one-fourth the area of interest in the superior and inferior directions to reduce scan cutoff. Calibration scans are performed in the axial plane MR Protocols for Central Nervous System (CNS) MR Imaging Newer hardware and software platforms at both 1.5T and 3T allow efficient protocol options for a wide range of CNS indications. This section suggests multiple consensus methods for optimizing examination of patients undergoing MR imaging in the CNS. Core sequences in each protocol are identified, and their aggregate use constitutes a complete examination for each protocol. Alternative sequences of interest are included for emerging technologies, specific target anatomy, or subspecialty preference.1.5T and 3T CNS MR imaging protocols presented here were developed by Howard A. Rowley, MD, Mark C. DeLano, MD, and Megan E. Vadnais, BSRT, (R)(MR) for the following procedures:•Brain–Routine Adult Brain 1.5T and 3T–Brain Neck Magnetic Resonance Angiography (MRA)/Magnetic Resonance Venography (MRV) 1.5T and 3T –Motion Brain 1.5T and 3T–Routine Stroke Fast 1.5T and 3T–Hyperacute Stroke Brain 1.5T and 3T–Tumor Brain 1.5T and 3T–Multiple Sclerosis Brain 1.5T and 3T–Pediatric Brain 1.5T and 3T–Epilepsy Brain 1.5T and 3T•Specialty Brain–Hydrocephalus Brain 1.5T and 3T–Cerebrospinal Fluid Flow 1.5T and 3T–Pituitary 1.5T and 3T–Cranial Nerves/Internal Auditory Canals 1.5T and 3T–Vessel Wall 1.5T and 3T•Head and Neck–Orbits 1.5T and 3T–Soft Tissue Neck 1.5T and 3T–Sinuses/Face 1.5T and 3T•Spine–Cervical Spine 1.5T and 3T–Lumbar Spine 1.5T and 3T–Thoracic Spine 1.5T and 3T–Routine Total Spine 1.5T and 3T–Focused Total Spine 1.5T and 3T–Specialty Spine 1.5T and 3T–Brachial Plexus 1.5T and 3T–Lumbar Plexus 1.5T and 3TGeneral CNS Protocol Notes•Standard brain. There are multiple approaches to obtain various tissue parameter weightings at both1.5T and 3T, such that “standard” imaging refers more to the general-purpose nature of the protocolrather than the core sequence choices. The core preferences of our consensus panel are indicated within each protocol•T1.Six techniques for obtaining T1-weighting are included: spin echo (SE), fast spin echo (FSE), T1 fluid-attenuated inversion recovery (T1-FLAIR), 3D IR-prepared FSPGR (BRAVO), 3D T1 CUBE, and magnetization transfer (MT)–SE is the T1 reference standard for image contrast at 1.5T, although the other sequences have unique advantages and are included as options. Due to T1 prolongation at 3T and associated loss of gray-white contrast there is no consensus standard for T1-weighting, and many sites use inversion recovery preparation to restore tissue contrast–FSE with its intrinsic magnetization transfer effects results in decreased gray-white contrast but may depict contrast enhancement to better advantage–T1-FLAIR and BRAVO are inversion prepared, facilitating excellent gray-white differentiation but with the potential disadvantage of inconspicuous contrast enhancement due to the marked precontrast hypointensity of many lesions and subsequent isointensity to surrounding brain postcontrast –BRAVO, as a standard 3D sequence, has the key advantage of multiplanar reconstruction capability of the isotropic data sets, and excellent gray-white contrast desirable for most applications –T1 CUBE. This T1-weighted FSE-based volumetric sequence can be performed either before or after contrast. Beyond the usual 3D attributes (such as high resolution and multiplanar reconstructions), it has particular advantages postcontrast, where it provides black blood imaging, supports fat saturation, and shows outstanding tissue contrast for enhancing lesions. T1 CUBE is suitable for routine brain imaging and also orbital, cranial nerve, and vessel wall imaging exams. Many sites now use T1 CUBE as a supplement to postcontrast T1 BRAVO and other sequences–MT is an optional feature that can be added to increase contrast enhancement conspicuity on SE imaging, but at the cost of increased SAR and decreased gray-white distinction•T2. Most sites use FSE sequences rather than SE. PROPELLER is effective for dealing with patient motion, and is the primary FSE sequence used at many sites. Some users add fat saturation to T2 imaging as an option•T2-FLAIR.Improves lesion detection particularly at the brain-CSF interface. When done as the first sequence postinjection, postcontrast T2-FLAIR imaging effectively inserts a time delay for subsequent T1-weighted scans, which improves lesion detection on subsequent T1 imaging. The T2-FLAIR images also have some intrinsic T1 contrast that allows visualization of both edema and enhancement on one sequence for many lesions. Both 2D and 3D T2-FLAIR sequences are commonly performed, with the advantage of multiplanar reconstruction capability and fewer CSF pulsation artifacts of the 3D CUBE •Susceptibility. Due to the reduced susceptibility weighting of FSE methods, a T2*-GRE sequence can be added as an option to detect blood products and calcium. The SWAN sequence has been shown to more sensitively detect subtle areas of blood and calcium and has become a common protocol choice•Diffusion. Most brain protocols include a diffusion-weighted imaging sequence that is useful for stroke, infection, and tumor imaging. Apparent diffusion coefficient maps should be included to assess T2 shine-through. In areas near the skull base or orbits, PROPELLER DWI can be a good option to reduce signal pile-up and geometric distortion artifacts•Perfusion. Dynamic susceptibility contrast, perfusion-weighted imaging is becoming increasingly important and can provide clinically significant information regarding blood volume and/or transit time for both stroke and tumor imaging. Arterial spin labeling is also an option for assessing cerebral blood flow at 3T, but must be obtained precontrast•Contrast. The protocols presented here do not list separate imaging sequences for postcontrast imaging; rather, the T1-weighted sequence of choice is typically repeated after contrast agent administration. Most neurologic sequences with contrast are acquired with at least a 3- to 5-minute delay after injection to optimize visualization of disorders of the blood-brain barrier. Some protocols use more than one sequence “family” postcontrast, such as T2-FLAIR, T1-BRAVO, and T1-CUBE Fat Sat due to their complementary information. Many centers prefer routinely acquiring such volumetric series postcontrast to facilitate retrospective multiplanar reconstructions, treatment planning, and neuronavigation applications. T2-FLAIR is an excellent complement to T1 series, and may be done first postcontrast to intentionally provide a time delay before the T1 series are acquired. The method of injection is not important in these cases, and manual injection is typically used. However, power injectors are needed for contrast-enhanced MR angiography and perfusion imaging. Rates of injection vary, but 4 to 5 mL/sec is standard for perfusion, and 1.5 to 2 mL/sec is used for MR angiography. Dosing is weight based and at 0.1 mmol/kg for most protocols aimed at standard extracellular fluid distribution. The dose for an individual injection may be lower for first-pass MRA or perfusion exams, where a split-dose protocol can often be used, keeping overall dose within the standard 0.1 mmol/kg guideline. The ACR has recommended that the lowest dose feasible be used for diagnostic purposes. Because standard dosing recommendations are mostly influenced by lean body mass, and ECF volume in fatty tissues is low, some sites cap the upper limit of contrast for heavier adults at 20 mL total, especially when a high-relaxivity agent is being used.A useful contrast dose calculator (“GadCalc”) is available at https:///contrastCorner/ gadcalc.php and is also available for free download at the Apple and Droid App Stores.。
ge磁共振腿部软组织扫描方法
GE磁共振腿部软组织扫描方法简介磁共振成像(Magnetic Resonance Imaging,MRI)是一种非侵入性的医学成像技术,通过对人体内部的水分子进行成像,可以提供高分辨率、多平面、多序列的图像。
在腿部软组织扫描中,GE(General Electric)磁共振设备是一种常用的设备。
本文将介绍GE磁共振腿部软组织扫描的方法,包括准备工作、扫描序列和参数设置等内容。
准备工作在进行GE磁共振腿部软组织扫描之前,需要进行一些准备工作,以确保扫描的准确性和安全性。
1.询问病史:在进行扫描之前,医生需要询问患者的病史,包括过敏史、手术史、疾病史等。
这有助于医生评估患者的病情,并决定是否需要采取特殊的扫描措施。
2.移除金属物品:GE磁共振扫描对金属物品非常敏感,因此需要患者将身上的金属物品(如首饰、手表、钥匙等)全部取下,以免对扫描结果产生干扰。
3.着装要求:患者需要穿着舒适、宽松的衣物,以方便进行扫描。
最好选择棉质或纯棉的衣物,避免穿着含有金属纤维的衣物。
4.饮食限制:在进行GE磁共振腿部软组织扫描前,患者需要遵循医生的饮食限制要求,如禁食或禁止摄入某些食物。
扫描序列和参数设置GE磁共振腿部软组织扫描通常使用以下序列和参数设置:1.T1加权序列:T1加权序列可提供较好的解剖结构信息,适用于观察腿部软组织的形态和位置。
常用参数设置为:重复时间(TR)=500-800毫秒,回波时间(TE)=10-20毫秒,切片厚度=3-5毫米,间隔=0.5-1毫米。
2.T2加权序列:T2加权序列对液体信号敏感,适用于观察腿部软组织的水肿、炎症等病变。
常用参数设置为:TR=2000-4000毫秒,TE=80-120毫秒,切片厚度=3-5毫米,间隔=0.5-1毫米。
3.脂肪抑制序列:脂肪抑制序列可抑制脂肪信号,增强对软组织的观察。
常用参数设置为:TR=2000-4000毫秒,TE=10-20毫秒,切片厚度=3-5毫米,间隔=0.5-1毫米。
磁共振成像设备使用说明书
磁共振成像设备使用说明书一、概述本使用说明书旨在为用户提供磁共振成像设备的正确操作方法和注意事项,以确保设备的安全性和高效性能。
请用户在操作设备之前仔细阅读本说明书,并按照指导进行操作。
二、设备介绍1. 设备型号:磁共振成像设备(以下简称MRI设备)2. 设备外观:MRI设备为大型机器,由磁体、控制台、操纵台等组成。
3. 设备功能:MRI设备用于通过探测被测体内的磁共振信号,生成高质量的图像,以辅助医生进行诊断。
三、操作准备1. 设备环境:MRI设备应放置在室内,远离电磁干扰源。
设备周围的空间应保持干燥、洁净,并确保有良好的通风。
2. 供电要求:MRI设备应接入稳定的电源,并使用接地插头,确保电源稳定和设备安全。
3. 设备冷却:MRI设备的磁体处于超导状态,需要定期进行冷却。
请确保冷却系统正常运行,并遵循设备的冷却要求。
四、操作步骤1. 操作人员准备:操作人员应穿着适当的防护服,并佩戴无磁性物质制成的防护用具,以确保人员的安全和图像质量。
2. 患者准备:将患者放置在设备中心,遵循医疗流程,确认患者身体状况适合进行MRI扫描。
3. 设备打开:按照设备启动顺序,依次启动磁体、控制台和操纵台,并确保各部位正常工作。
4. 扫描参数设置:根据医生的指示和患者的需要,设置相应的扫描参数,如扫描区域、扫描层数、重建间隔等。
5. 执行扫描:确认扫描参数设置无误后,将患者送入设备中心,根据设备操作界面的指示,执行相应的扫描过程。
6. 图像保存和传输:扫描完成后,将图像保存至指定位置,并及时传输到工作站进行后续处理。
五、安全注意事项1. 磁性物体禁止进入:严禁将任何具有磁性的物体带入设备区域,包括钥匙、手表、手机、金属物品等。
这些物品可能对设备和人员造成严重危害。
2. 设备禁区标识:在设备周围应设置明显的禁止标识,以提醒他人注意设备的安全和操作要求。
3. 紧急情况处理:如果在操作过程中发生紧急情况,如患者出现不适、设备异常运行等,请立即停止操作,并寻求专业人员的帮助。
磁共振成像仪使用说明书
磁共振成像仪使用说明书一、简介本磁共振成像仪使用说明书旨在提供详细的操作指南和注意事项,以确保用户能够正确、安全地操作磁共振成像仪。
二、产品概述磁共振成像仪是一种用于非侵入性诊断的医疗设备,通过磁场和无线电波相互作用的原理获取人体内部组织和器官的图像。
本产品具备以下特点:1. 高分辨率:能够提供清晰、细节丰富的图像;2. 非辐射:相比于其他成像设备,磁共振成像仪不具备辐射危害;3. 多功能:可用于多种医学应用,包括神经科学、心脑血管病变检测等。
三、安全注意事项在操作磁共振成像仪之前,请务必遵守以下安全注意事项:1. 对于身体植入物(如起搏器、心脏支架等)的患者,请在使用前向医生咨询并获得允许;2. 患者进入磁共振成像仪室前,应当将身上携带的金属物品(如手表、手机、钥匙等)取下,以避免磁场对其产生影响;3. 在操作过程中,与患者密切接触的人员应佩戴适当的防护设备,如手套、口罩等;4. 在紧急情况下,如患者出现不适或突发状况,请立即终止成像,并通知医护人员。
四、操作指南1. 患者准备:a. 患者应在进入磁共振成像仪室前更换为适当的病患服装;b. 在进行成像前,请确保患者已将所需的体内植入物告知医生;c. 若需要使用对比剂,医生或技术人员会提前告知患者需要进行的准备工作。
2. 成像操作:a. 在患者进入磁共振成像仪室后,请确保患者身上不携带任何金属物品,并让患者躺倒在仪器床上;b. 根据患者的具体需要,调节仪器的扫描参数,并确保患者的舒适度;c. 启动扫描程序后,保持仪器的稳定状态,避免任何人员干扰成像过程;d. 成像完成后,将患者从磁共振成像仪室中接出,并提供必要的检查结果和建议。
五、维护与保养为确保磁共振成像仪的正常运行和延长使用寿命,请根据以下建议进行维护与保养:1. 定期检查并清洁设备表面,避免积尘;2. 严禁将液体或其他物质溅入设备内部;3. 如发现任何异常情况或故障,请及时联系厂家维修或技术支持部门;4. 维修或更换任何部件时,请务必由专业人员操作以确保安全。