unity3D技术之EditorGUI.Foldout 折叠标签
unity3d拓展编辑器Editor的使用
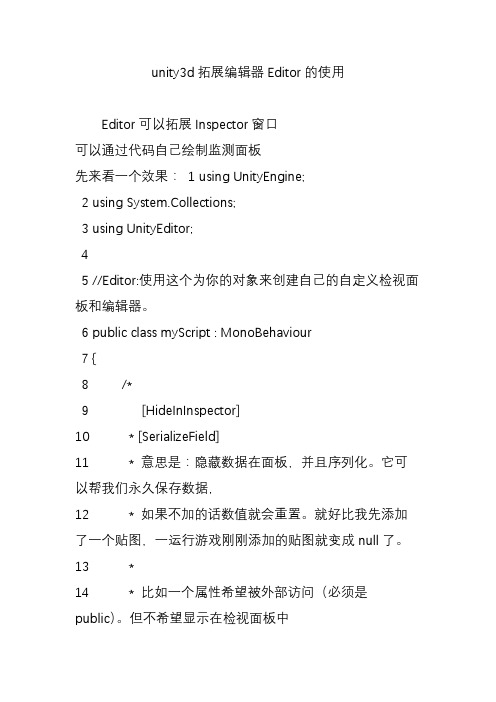
unity3d拓展编辑器Editor的使用Editor可以拓展Inspector窗口可以通过代码自己绘制监测面板先来看一个效果:1 using UnityEngine;2 using System.Collections;3 using UnityEditor;45 //Editor:使用这个为你的对象来创建自己的自定义检视面板和编辑器。
6 public class myScript : MonoBehaviour7 {8 /*9 [HideInInspector]10 * [SerializeField]11 * 意思是:隐藏数据在面板,并且序列化。
它可以帮我们永久保存数据,12 * 如果不加的话数值就会重置。
就好比我先添加了一个贴图,一运行游戏刚刚添加的贴图就变成null了。
13 *14 * 比如一个属性希望被外部访问(必须是public)。
但不希望显示在检视面板中15 *16 * 那么就:17 * [HideInInspector]18 * public int s;19 *20 */2122 [HideInInspector]23 [SerializeField]24 Rect pRectValue;2526 public Rect PRectValue27 {28 get { return pRectValue; }29 set { pRectValue = value; }30 }3132 [HideInInspector]33 [SerializeField]34 Texture pTexture;3536 public Texture PTexture37 {38 get { return pTexture; }39 set { pTexture = value; }40 }4142 [HideInInspector]43 [SerializeField]44 private int a;4546 public int A47 {48 get { return a; }49 set { a = value; }50 }51 }5253 [CustomEditor(typeof(myScript))]54 class show : Editor55 {56 //在这里方法中就可以绘制面板。
Unity3D界面介绍

Unity3D编辑器界面介绍
可以调节右上角的Layout来调节布局:
4个是自带的固定布局,也可以自己调节好然后通过Save Layout来添加自己的界面布局:
基本操作:
点击鼠标滑轮拖动:移动左右的
点击鼠标右键拖动:调整视野方向(围绕焦点旋转视野)注:
1.暂时只发现在3D效果有用,2D变成左右移动
2.在右键的同时可以使用WSAD来进行拉近、远离和左右移动
转动鼠标滑轮:拉近和远离
QWER分别进行移动场景、移动游戏对象、旋转游戏对象、缩放游戏对象的用法(也就是依次是左上角这几个功能)
导入资源包:Assets-->Import Package(自带几个基本的资源包,想要更多的只能自己找了)
狗刨学习网更多资源免费下载使用。
UnityEditor游戏开发工具详解

UnityEditor游戏开发工具详解UnityEditor是一款专业的游戏开发工具,它为开发者提供了丰富的功能和工具,可以在其中进行游戏的设计、开发、测试和调试等工作。
下面我将对UnityEditor进行详细的介绍。
第一章:UnityEditor的基础知识UnityEditor是Unity技术公司开发的一款用于创建、设计和测试游戏的工具。
它与游戏引擎Unity Engine密切结合,提供了完整的游戏开发环境。
使用UnityEditor可以在一个集成的界面下进行游戏项目的管理、场景的编辑、资源的导入和导出、脚本的编写和调试等一系列工作。
它的核心思想是所见即所得,让开发者能够更加高效地进行游戏开发。
第二章:UnityEditor的界面和布局UnityEditor的界面布局由不同的窗口组成,包括场景窗口、资源窗口、检视窗口、层次窗口、控制台窗口等。
通过自定义界面布局,开发者可以根据自己的需求来调整窗口的位置和大小。
此外,UnityEditor还支持多个编辑器实例之间的数据共享,方便不同开发者之间的协作和沟通。
第三章:UnityEditor的场景编辑功能UnityEditor提供了强大的场景编辑功能,开发者可以在其中创建、编辑和组织游戏场景。
场景窗口提供了可视化的编辑界面,开发者可以直接在其中添加、移动和调整游戏对象,设置其属性和行为,并进行实时预览。
此外,UnityEditor还支持实时光照渲染、碰撞检测、路径导航等功能,让开发者可以更加方便地进行场景的设计和优化。
第四章:UnityEditor的资源管理功能UnityEditor提供了丰富的资源管理功能,包括导入和导出资源、资源的打包和压缩、资源的分类和搜索等。
资源窗口可以显示项目中的所有资源,开发者可以通过拖拽的方式将资源添加到场景中,或者将其用于游戏对象的创建和配置。
同时,UnityEditor还支持多种资源格式的导入,包括图片、音频、视频、模型等,方便开发者使用不同类型的资源来创建丰富多样的游戏内容。
掌握代码编辑器中的代码折叠工具的使用方法

掌握代码编辑器中的代码折叠工具的使用方法代码折叠工具是代码编辑器中非常有用的功能,它可以帮助程序员更好地管理和阅读大型项目中的代码。
掌握代码编辑器中的代码折叠工具的使用方法对于提高代码的可读性和开发效率至关重要。
本文将介绍代码折叠工具的作用、使用方法以及一些常用的快捷键。
通过本文的学习,读者将能够熟练地使用代码折叠工具来优化代码编辑体验。
一、代码折叠工具的作用代码折叠工具可以将一段代码段折叠成一个可收起和展开的区域,从而减少屏幕上的冗余代码显示,提高代码的可读性。
它在处理复杂的代码文件时非常有用,特别是当代码文件包含大量的嵌套结构或者函数定义时,使用代码折叠工具可以方便地隐藏和显示相关代码,以便更好地理解代码的结构和功能。
二、使用方法大多数常见的代码编辑器都支持代码折叠功能,并提供了简单的快捷键来操作。
下面将以Visual Studio Code为例介绍代码折叠工具的使用方法。
1. 折叠单行代码在Visual Studio Code中,可以使用快捷键"Ctrl + Shift + ]"将光标所在的行折叠起来,使用"Ctrl + Shift + ["可以将折叠的行展开。
也可以通过在行号区域点击鼠标右键,在弹出菜单中选择"折叠"来实现折叠功能。
2. 折叠多行代码当需要折叠多行代码时,可以使用鼠标选中需要折叠的代码块,然后使用快捷键"Ctrl + Shift + ]"来实现折叠。
同样地,使用"Ctrl + Shift + ["可以将折叠的代码块展开。
此外,也可以通过在行号区域点击鼠标右键,在弹出菜单中选择"折叠区域"来折叠代码块。
3. 折叠函数或类在处理包含函数或类定义的代码文件时,通常会希望将函数或类的内容进行折叠,以便更好地阅读其他部分的代码。
在Visual Studio Code中,可以使用快捷键"Ctrl + Shift + Alt + ]"来折叠函数或类,使用"Ctrl + Shift + Alt + ["来展开折叠的函数或类。
unity 3d使用技巧

unity 3d使用技巧Unity 3D 使用技巧Unity 3D 是一款非常强大且受欢迎的跨平台游戏开发引擎。
它提供了一个直观而且易于使用的界面,使得开发者可以轻松地创建出高质量的游戏。
下面是一些我在使用 Unity 3D 过程中积累的技巧,希望能对你有所帮助。
1. 利用版本控制系统在团队协作中,使用版本控制系统是非常重要的。
Unity 3D 自带了对 Git 和 SVN 的支持,可以帮助开发者更好地管理代码和资源。
通过版本控制系统,可以轻松地回滚代码,查看历史修改记录,以及分支开发。
2. 学习 C# 编程Unity 3D 使用 C# 作为主要的编程语言。
掌握 C# 编程技巧对于开发 Unity 3D 游戏是非常重要的。
通过学习 C# 语言的基础知识和高级技巧,开发者可以更加灵活地控制游戏对象和实现复杂的游戏逻辑。
3. 使用预制体(Prefabs)预制体是 Unity 3D 中非常强大的一个功能。
它可以将游戏对象和其相关组件及属性保存为一个预设,以便在需要时进行复用。
使用预制体可以大大提高开发效率,并且易于维护。
通过修改预制体,可以同时修改所有使用该预制体的实例,从而减少重复的工作。
4. 熟悉 Inspector 窗口Unity 3D 的 Inspector 窗口是一个非常重要的工具。
它可以用于查看和编辑游戏对象的属性和组件。
熟悉 Inspector 窗口的使用方法可以帮助开发者快速设置游戏对象的属性,并且更好地理解游戏对象在场景中的状态。
5. 利用 Unity Asset StoreUnity Asset Store 是 Unity 3D 内置的一个资源商店,提供了大量的免费和付费资源,例如 3D 模型、纹理、插件等。
通过使用 Asset Store 中的资源,可以大大减少开发时间和成本。
同时,开发者也可以将自己的资源上传到 Asset Store 中,分享给其他开发者使用。
6. 使用动画系统Unity 3D 提供了强大的动画系统。
Unity3D----GUI

Unity3D----GUI1、标签:Label (position : Rect, text : string) : voidLabel (position : Rect, image : Texture) : voidLabel (position : Rect, content : GUIContent) : voidLabel (position : Rect, text : string, style : GUIStyle) : voidLabel (position : Rect, image : Texture, style : GUIStyle) : void Label (position t, conte: Recnt : GUIContent, style : GUIStyle) : void Rect:有四个参数x、y、wide、heightText:显示在标签上的文本Image:显示标签上的纹理Style:使用样式如:public Texture2D img;void OnGUI() {bel(new Rect(10, 10, 100, 20), "Hello World!");bel(new Rect(10,50,img.width,img.height),img);}2、盒子:Box (position : Rect, text : string) : voidBox (position : Rect, image : Texture) : voidBox (position : Rect, content : GUIContent) : voidBox (position : Rect, text : string, style : GUIStyle) : voidBox (position : Rect, image : Texture, style : GUIStyle) : voidBox (position : Rect, content : GUIContent, style : GUIStyle) : void 如:public Texture2D img;void OnGUI() {GUI.Box(new Rect(10, 10, 100, 20), "Hello World!");GUI.Box(new Rect(10,50,img.width,img.height),img);}3、按钮:Button (position : Rect, text : String) : boolButton (position : Rect, image : Texture) : boolButton (position : Rect, content : GUIContent) : boolButton (position : Rect, text : String, style : GUIStyle) : boolButton (position : Rect, image : Texture, style : GUIStyle) : boolButton (position : Rect, content : GUIContent, style : GUIStyle) : bool如:GUI.Button(new Rect(10, 80, 150, 20), new GUIContent("我有提示", "恭喜你中奖了!"));// 在旁边的位置显示提示信息。
Foldup 3D的使用详细教程
Foldup!3D的使用详细教程1。
安装及注册:很简单,下载和你的AI版本相匹配的那个foldup3de.aip文件。
将它放到你的illustrator/plug-ins/文件夹里。
启动illustator,会出现一个注册对话框,填写你的名字,单位,键入你得到的注册码就OK了。
进入后你的界面会多这些东西:(红框表示)发个清楚点的:2。
面板的翻译:这里是foldup3d的四个面板的中文意思抱歉,右下角的一个“路径参数”的翻译忘了改了,应该是“数据校验的精确度(阈值)”才对3。
各部分的说明:1)工具箱里的“BASE”工具:用于设置图形折叠时依据的基点2)LAYER MAPPING面板:用于设置文档中各图层与foldup3d各工作图层间的相互对应关系。
3)FOLDING面板:用于设定与折叠有关的参数。
4)DISPLAY CONTROLS面板:用于演示动画的控制及最好的效果图的输出。
5)VERIFY DATA面板:用于对折叠路径的正确性的校验。
4.操作方法:对于每个盒类的设计,在你开始设计的时候,都会事先有一个尺寸,对于专门的设计者来说可能不太关心这个,但对印刷厂里的工艺员可能要熟悉的多。
这就是我们所说的刀版(keyline)。
这是它定义了盒的尺寸、结构。
所以在你开始要用此插件折叠一个盒子之前,应该先把你所设计的盒子的刀版画出来。
笼统的说来,所有的刀版有两种类型的线组成:成型用的钢刀和折叠用的啤线。
钢刀用于切出轮廓,啤线用于压出盒子的折痕。
1)它们分别对应了LAYER MAPPING面板的里CUT(钢刀)层,CREASE(折线)层。
2)对于设计者来说上面两个层只是工具,最重要的是设计的内容,它们都被定义为ARTWORK(线稿)层。
即所用在这一图层的物体都会被贴图到成型的盒体上3)当然,你的设计中可能还会有一些与设计版面无关但又有用的物体,他们都被归结到OTHER图层中。
在此图层的物体在foldup13d插件中不被计算。
unity3D教程之折叠标签
static function Foldout (position : Rect, foldout : bool, content : string, style : GUIStyle = EditorStyles.foldout) : boolstatic function Foldout (position : Rect, foldout : bool, content : GUIContent, style : GUIStyle = EditorStyles.foldout) : bool 【狗刨学习网】Parameters参数∙positionRectangle on the screen to use for the arrow and label.屏幕上用于箭头和标签的矩形区域∙foldoutThe shown foldout state.显示折叠状态∙contentThe label to show. // 显示标签∙styleOptional GUIStyle. // 可选GUIStyle样式Returnsbool - The foldout state selected by the user. If true, you should render sub-objects.返回布尔类型,用户选择的折叠状态,如果为真,应该渲染子对象。
Description描述Make a label with a foldout arrow to the left of it.制作一个左侧带折叠箭头的标签。
This is useful for creating tree or folder like structures where child objects are only shown if the parent is folded out.这对于建立一个树或者文件夹很有用,就像一个结构,子对象只有在父对象展开时才显示Foldout in an Editor Window.在编辑器窗口中的折叠标签。
unityeditor折叠树
unityeditor折叠树需要两个类:树节点类和界⾯实现类1:树节点类(TreeNode)using UnityEngine;using System.Collections;using System.Collections.Generic;public class TreeNode {public enum TreeNodeType{Item,Switch}public string name;public TreeNodeType nodeType = TreeNodeType.Item;public TreeNode parent;public List<TreeNode> children = null;public bool isOpen = false;public static TreeNode _instance = null;public static TreeNode Get(){if (_instance == null){_instance = new TreeNode ();}return _instance;}public void InsertNode(TreeNode node){if (this.children == null){this.children = new List<TreeNode> ();}children.Add (node);node.parent = this;}public void OpenAllNode(TreeNode node){node.isOpen = true;if (node.children != null && node.children.Count > 0){for (int i = 0; i < node.children.Count; i++){OpenAllNode (node.children[i]);}}}public TreeNode GenerateFileTree(List<string> list){TreeNode root = new TreeNode ();root = GenerateFileNode ("", "⽣物/", list);OpenAllNode (root);return root;}public TreeNode GenerateFileNode(string parentFullPath,string path,List<string> list){TreeNode node = new TreeNode ();string[] segment = path.Split ('/');if (segment.Length > 1){string name = segment[0]; = name;node.nodeType = TreeNodeType.Switch;string fullPath = parentFullPath + name+"/";List<string> allChildrenPath = list.FindAll (s=>{if (s.StartsWith(fullPath) && s!=fullPath){return true;}return false;});List<string> dirList = new List<string> ();for (int i = 0; i < allChildrenPath.Count; i++){string childPath = allChildrenPath [i].Remove (0, fullPath.Length);string[] childPathSegment = childPath.Split('/');if (childPathSegment.Length > 1) {string childDirPath = childPathSegment [0];if (!dirList.Contains (childDirPath)) {dirList.Add (childDirPath);TreeNode childNode = GenerateFileNode (fullPath, childDirPath + "/", list); node.InsertNode (childNode);}}else{TreeNode childNode = GenerateFileNode (fullPath, childPath, list);node.InsertNode (childNode);}}}else{ = path;node.nodeType = TreeNodeType.Item;list.Remove (path);}return node;}}2:界⾯实现类(CreateTreeList)using UnityEngine;using UnityEditor;using System.Collections;using System.Collections.Generic;public class CreateTreeList:EditorWindow {private List<string> list = new List<string> ();private static TreeNode root = null;private TreeNode currentNode;private static CreateTreeList _instance = new CreateTreeList();private int treeIndex = 0;private static CreateTreeList window; // ⾃定义窗体[MenuItem("H3D/构建树视图")]static void Init(){window = EditorWindow.GetWindow<CreateTreeList>(); // 创建⾃定义窗体window.titleContent = new GUIContent("构建树视图"); // 窗⼝的标题window.Show();_instance.GetAssets ();_instance.CreateTree ();// 创建树}// void Awake()// {// Debug.Log ("Awake");// }void Start(){Debug.Log ("Start");}// void Update()// {// Debug.Log ("Update");// }private void GetAssets(){list.Clear ();list.Add ("⽣物/动物");list.Add ("⽣物/动物/宠物/猫");list.Add ("⽣物/动物/宠物/狗");// list.Add ("⽣物/动物/野⽣/⽼虎");// list.Add ("⽣物/动物/野⽣/狮⼦");list.Add ("⽣物/植物");list.Add ("⽣物/植物/蔬菜/⽩菜");list.Add ("⽣物/植物/蔬菜/萝⼘");// list.Add ("⽣物/植物/⽔果/苹果");// list.Add ("⽣物/植物/⽔果/橘⼦");Debug.Log ("获取数据完成");}private void CreateTree(){root = TreeNode.Get ().GenerateFileTree (list);Debug.Log ("⽣成⽂件树完成");// ShowFileTree (root, 0);// Debug.Log ("显⽰⽂件树完成");}private void ShowFileTree(TreeNode node, int level){string prefix = "";for (int i = 0; i < level; i++){prefix += "~";}Debug.Log (prefix + );if (node == null || node.children == null){return;}for (int i = 0; i < node.children.Count; i++){ShowFileTree (node.children[i], level+1);}}private void DrawFileTree(TreeNode node, int level){if (node == null){return;}GUIStyle style = new GUIStyle();style.normal.background = null;style.normal.textColor = Color.white;if (node == currentNode){style.normal.textColor = Color.red;}Rect rect = new Rect(5+20*level, 5+20*treeIndex, .Length*25, 20); treeIndex++;if (node.nodeType == TreeNode.TreeNodeType.Switch) {node.isOpen = EditorGUI.Foldout (rect, node.isOpen, , true); }else{if (GUI.Button (rect, , style)){Debug.Log ();currentNode = node;}}if (node==null || !node.isOpen || node.children == null){return;}for (int i = 0; i < node.children.Count; i++){DrawFileTree (node.children[i], level+1);}}void OnGUI(){treeIndex = 0;DrawFileTree (root, 0);}}效果图:(点击后,被点击的节点红⾊显⽰,并在控制台输出被点击的节点的名字)。
Unity3D命令手册(上)
Unity3D命令手册(上)Unity3D下分8个菜单栏分别是File(文件)Edit(编辑)Assets(资源) GameObject(游戏对象)Component(组件)Terrain(地形) Window(窗口) Help(帮助)File(文件)------New Scene 新建场景Open Scene 打开场景Save Scene 保存场景Save Scene as…场景另存为…New Project…新建工程文件Open Project…打开工程文件Save Project…保存工程文件Build Settings…建造设置(这里指建造游戏)Build & Run 建造并运行(这里指建造游戏)Exit 退出Edit(编辑)------Undo 撤销Redo 重复Cut 剪切Copy 复制Paste 粘贴Duplicate 复制Delete 删除Frame selected 当前镜头移动到所选的物体前Select All 选择全部Preferences 参数选择Play 播放Pause 暂停,中断Step 步骤Load selection 载入所选Save selection 存储所选Project settings 工程设置Render settings 渲染设置Graphics emulation图形仿真Network emulation 网络仿真Snap settings 对齐设置Assets (资源)-----Reimport 重新导入Create 创建Show in Explorer 在资源管理器中显示Open 打开(打开脚本)Import New Asset... 导入新的资源Refresh 刷新Import Package... 导入资源包Export Package... 导出资源包Select Dependencies 选择相关Export ogg file 导出OGG文件Reimport All 重新导入所有Sync VisualStudio Project 同步视觉工作室项目GameObject--------Create Empty 创建一个空的游戏对象(游戏对象) Create Other 创建其他组件Center On Children 子物体归位到父物体中心点Make Parent 创建子父集Clear Parent 取消子父集Apply Changes To Prefab 应用变更为预置Move To View 移动物体到视窗的中心点Align With View 移动物体与视窗对齐Align View to Selected 移动视窗与物体对齐Component(组件)---Mesh 网Particles 粒子Physics 物理Audio 音频Rendering 渲染Miscellaneous 杂项Scripts 脚本Camera-Control 摄像机控制Terrain(地形)-----Create Terrain 创建地形Import Heightmap - Raw... 导入高度图Export Heightmap - Raw... 导出高度图Set Resolution... 设置分辨率Create Lightmap... 创建光影图Mass Place Trees... 批量种植树Flatten Heightmap... 展平高度图Refresh Tree and Detail Prototypes 刷新树及预置细节Window(窗口)------Next Window 下个窗口Previous Window 前窗Layouts 布局Scene 场景窗口Game 游戏窗口Inspector 检视窗口Hierarchy 层次窗口Project 工程窗口Animation 动画窗口Profiler 探查窗口Asset Server 资源服务器Console 控制台Help(帮助)--------About Unity 关于UnityEnter serial number 输入序列号Unity Manual Unity手册Reference Manual 参考手册Scripting Manual 脚本手册Unity Forum Unity论坛Welcome Screen 欢迎窗口Release Notes 发行说明Report a Problem 问题反馈第一章File(文件)New Scene 新建场景创建一个新的游戏场景Open Scene 打开场景打开一个游戏场景Save Scene 保存场景保存一个游戏场景Save Scene as 场景另存为游戏场景另存为New Project 新建工程文件创建一个新的工程文件Open Project 打开工程文件打开一个工程文件Save Project 保存工程文件保存一个工程文件Build Settings 建造设置导出游戏的设置Build & Run 建造并运行设置并导出游戏Exit退出这里面我们需要注意的是,创建一个场景与创建一个工程是完全不同的,一个工程文件可以包含多个游戏场景,但场景文件却是唯一的。
- 1、下载文档前请自行甄别文档内容的完整性,平台不提供额外的编辑、内容补充、找答案等附加服务。
- 2、"仅部分预览"的文档,不可在线预览部分如存在完整性等问题,可反馈申请退款(可完整预览的文档不适用该条件!)。
- 3、如文档侵犯您的权益,请联系客服反馈,我们会尽快为您处理(人工客服工作时间:9:00-18:30)。
static function Foldout (position : Rect, foldout : bool, content : string, style : GUIStyle = EditorStyles.foldout) : bool
static function Foldout (position : Rect, foldout : bool, content : GUIContent, style : GUIStyle = EditorStyles.foldout) : bool
Parameters参数
∙position
Rectangle on the screen to use for the arrow and label.
屏幕上用于箭头和标签的矩形区域
∙foldout
The shown foldout state.
显示折叠状态
∙content
The label to show. // 显示标签
∙style
Optional GUIStyle. // 可选GUIStyle样式
Returns
bool - The foldout state selected by the user. If true, you should render sub-objects.
返回布尔类型,用户选择的折叠状态,【狗刨学习网】如果为真,应该渲染子对象。
Description描述
Make a label with a foldout arrow to the left of it.
制作一个左侧带折叠箭头的标签。
This is useful for creating tree or folder like structures where child objects are only shown if the parent is folded out.
这对于建立一个树或者文件夹很有用,就像一个结构,子对象只有在父对象展开时才显示
Foldout in an Editor Window.
在编辑器窗口中的折叠标签。
// Create a foldable menu that hides/shows the selected transform
// position.
//创建一个可折叠菜单隐藏/显示选择的变换位置
// if no Transform is selected, the Foldout item will be folded until // a transform is selected.
//如果没有变换被选中,折页将被折叠,直到变换被选择
class EditorGUIFoldout extends EditorWindow {
var showPosition : boolean = true;
var status : String = "Select a GameObject";
@MenuItem("Examples/Foldout Usage")
static function Init() {
var window = GetWindow(EditorGUIFoldout);
window.position = Rect(0, 0, 150, 60);
window.Show();
}
function OnGUI() {
showPosition =
EditorGUI.Foldout(Rect(3,3,position.width-6,15),showPosition, status);
if(showPosition)
if(Selection.activeTransform) {
Selection.activeTransform.position =
EditorGUI.Vector3Field(Rect(3,25,position.width -6 ,40),
"Position",
Selection.activeTransform.position);
status =
;
}
if(!Selection.activeTransform) {
status = "Select a GameObject";
showPosition = false;
}
}
function OnInspectorUpdate() {
this.Repaint();
}
}。