Visual Basic (8)
VB教学大纲
《Visual Basic程序设计》教学大纲课程名称:《VisualBasic程序设计》适用专业:二年专(高职单招)计算机技术应用专业学时数:70执笔人:郭琦编写日期:一、课程的性质和任务,课程教学目标(一)课程的性质《VisualBasic程序设计》课程是二年专(高职单招)计算机技术应用专业二年级学生的专业必选课。
VisualBasic语言是一种基于面向对象方法论之上的可视化编程语言。
是近年来较为流行的程序设计语言,它具有易于掌握、使用方便、功能强大等优点。
通过本课程的学习,应能具有软件开发、处理实际问题的初步能力,为后续的专业课程的学习打下基础,同时为《动态网页制作》等课程提供更深入的学习基础。
(二)课程的任务本课程的教学任务是:通过本课程的学习,掌握必要的VisualBasic语言的语法知识,在理解语法的同时能从面向对象方法学的角度掌握VisualBasic可视化编程的概念和方法。
通过例题的实际运作,掌握使用VisualBasic开发Windows应用程序的一般方法和特点,理解Windows应用程序的基本概念、主要功能和Windows应用程序开发的基本思想,初步形成分析问题和解决实际问题的能力,能够根据实际需要自行开发简单的Windows应用程序,并为今后进一步使用VisualBasic或其他面向对象的可视化开发工具开发Windows应用程序打下基础。
(三)课程教学目标1、知识教学目标1).理解VisualBasic可视化编程的概念和方法2).掌握必要的VisualBasic语言的语法知识。
3).学会利用VB调试工具调试程序和跟踪程序、错误处理的方法4).掌握VB窗体与常用控件常用属性、事件、方法。
5).熟练掌握在代码窗口中编写事件过程的方法。
掌握使用基本控件设计程序的方法。
6).掌握菜单、工具栏、状态栏的设计方法、学会常见的ActiveX控件的使用。
7).理解面向对象的文件处理。
8).了解VB在数据库等的应用。
算法与程序设计----从零开始学Visual Basic8
算法与程序设计----从零开始学Visual Basic 作者:山东东营胜利第二中学刘健第八课常用的语句与函数2这节课的内容相当重要,因为在山东省信息技术学业考试中,该内容是逢考必有的。
希望大家注意,在学习过程中,我主要讲解重点的内容,其内容希望同学们课后注意学习,防止出现我没有讲到的内容考试中出现了。
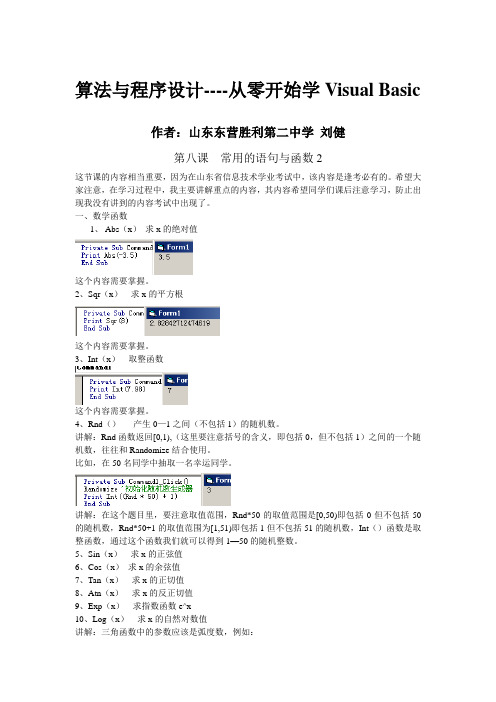
一、数学函数1、Abs(x)求x的绝对值这个内容需要掌握。
2、Sqr(x)求x的平方根这个内容需要掌握。
3、Int(x)取整函数这个内容需要掌握。
4、Rnd()产生0—1之间(不包括1)的随机数。
讲解:Rnd函数返回[0,1),(这里要注意括号的含义,即包括0,但不包括1)之间的一个随机数,往往和Randomize结合使用。
比如,在50名同学中抽取一名幸运同学。
讲解:在这个题目里,要注意取值范围,Rnd*50的取值范围是[0,50)即包括0但不包括50的随机数,Rnd*50+1的取值范围为[1,51)即包括1但不包括51的随机数,Int()函数是取整函数,通过这个函数我们就可以得到1—50的随机整数。
5、Sin(x)求x的正弦值6、Cos(x)求x的余弦值7、Tan(x)求x的正切值8、Atn(x)求x的反正切值9、Exp(x)求指数函数e^x10、Log(x)求x的自然对数值讲解:三角函数中的参数应该是弧度数,例如:二、字符串函数这部分内容很重要,都要求掌握的,考试每考必有。
1、Len(字符串)求字符串的长度2、Left(字符串,截取长度)截取字符串的左边部分3、Mid(字符串,起始截取位置[,截取长度])从中间指定位置截取字符串讲解:在不指定截取长度的情况下,默认是从指定位置开始一直到最后的字符;如果指定截取长度,则从指定的位置开始截取相应长度的字符串。
4、Right(字符串,长度)截取字符串右边部分5、String(数值,字符)生成指定长度与指定字符的字符串讲解:String(n,ch)生成n个同一字符组成的字符串,ch如果是字符串,由它的第一个字符构成重复串。
《Visual BASIC程序设计》期末考试选择题复习(180题)

1. Visual Basic集成开发环境中不包括下列哪些窗口( )。
A、工具箱窗口B、工程资源管理器窗口C、属性窗口D、命令窗口参考答案是:D2. 在设计应用程序时,通过( )窗口可以查看到应用程序工程中的所有组成部分。
A、代码窗口B、窗体设计窗口C、属性窗口D、工程资源管理器窗口参考答案是:D3. 在正常安装Visual Basic6.0后,可以通过多种方式启动Visual Basic。
以下方式中不能启动Visual Basic的是:( )。
A、通过“开始”菜单中的“程序”命令B、通过“我的电脑”找到vb6.exe,双击该文件名C、通过“开始”菜单中的“运行”命令D、进入DOS方式,执行vb6.exe文件参考答案是:D4. Visual Basic 6.0工程文件的扩展名是( )。
A、.vbpB、.frmC、.basD、.cls参考答案是:A5. Visual Basic6.0是面向( )的程序设计语言。
A、过程B、工程C、事件D、对象参考答案是:D6. 下列关于Visual Basic编程特点的叙述中,错误的是( )。
A、Visual Basic 是采用事件驱动编程机制的语言B、构成Visual Basic 程序的多个过程没有固定的执行顺序C、Visual Basic 程序既可以编译运行,也可以解释运行D、Visual Basic 程序不是结构化程序,不具备结构化程序的3 种基本结构参考答案是:D7. Visual Basic 6.0集成开发环境有三种工作状态,不属于三种工作状态之一的是( )。
A、设计状态B、编写代码状态C、运行状态D、中断状态参考答案是:B8. 在Visual Basic 6.0中要获取上下文相关帮助,只需将光标定位在相应位置,再按( )A、F1B、F2C、F3D、F4参考答案是:A9. Visual Basic 6.0集成开发环境的主窗口中不包括( )。
A、标题栏B、菜单栏C、状态栏D、工具栏参考答案是:C10. 下列可以激活属性窗口的操作是( )。
visual basic 2012 大学教程(第8章)
8. FilesConsciousness ... does not appear to itself chopped up in bits. ... A “river”or a “stream” are the metaphors by which it is most naturally described.—William JamesI can only assume that a “Do Not File” document is filed in a “Do NotFile” file.—Senator Frank Church, Senate Intelligence Subcommittee Hearing, 1975ObjectivesIn this chapter you’ll learn:• To use file processing to implement a business app.• To create, write to and read from files.• To become familia r with sequential-access file processing.• To use classes StreamWriter and StreamReader to write text to and read textfrom files.• To organize GUI commands in menus.• To manage resources with Using statements and the Finally block of a Trystatement.Outline8.1 Introduction8.2 Data Hierarchy8.3 Files and Streams8.4 Test-Driving the Credit Inquiry App8.5 Writing Data Sequentially to a Text File8.5.1 Class CreateAccounts8.5.2 Opening the File8.5.3 Managing Resources with the Using Statement8.5.4 Adding an Account to the File8.5.5 Closing the File and Terminating the App8.6 Building Menus with the Windows Forms Designer8.7Credit Inquiry App: Reading Data Sequentially from a Text File8.7.1 Implementing the Credit Inquiry App8.7.2 Selecting the File to Process8.7.3 Specifying the Type of Records to Display8.7.4 Displaying the Records8.8 Wrap-UpSummary | Terminology | Self-Review Exercises | Answers to Self-Review Exercises | Exercises8.1. IntroductionVariables and arrays offer only temporary storage of data in memory—the data is lost, for example, when a local variable ―goes out of scope‖ or when the app terminates. By contrast, files (and databases, which we cover in Chapter 12) are used for long-term retention of large (and often vast) amounts of data, even after the app that created the data terminates, so data maintained in files is often called persistent data. Computers store files on secondary storage devices, such as magnetic disks, optical disks (like CDs, DVDs and Bluray Discs™), USB flash drives and magnet ic tapes. In this chapter, we explain how to create, write to and read from data files. We continue our treatment of GUIs, explaining how to organize commands in menus and showing how to use the Windows Forms Designer to rapidly create menus. We also discuss resource management—as apps execute, they often acquire resources, such as memory and files, that need to be returned to the system so they can be reused at a later point. We show how to ensure that resources are properly returned to the system when the y’re no longer needed.8.2. Data HierarchyUltimately, all data items that computers process are reduced to combinations of 0s and 1s. This occurs because it’s simple and economical to build electronic devices that can assume two stable states—one represents 0 and the other represents 1. It’s remarkable that the impressive functions performed by computers involve only the most fundamental manipulations of 0s and 1s!BitsThe smallest data item that computers support is called a bit, short for ―binary digit‖—a digit that can assume either the value 0 or the value 1. Computer circuitry performs various simple bit manipulations, such as examining the value of a bit, setting the value of a bit and reversing a bit (from 1 to 0 or from 0 to 1). For more information on the binary number system, see Appendix C, Number Systems.CharactersProgramming with data in the low-level form of bits is cumbersome. It’s preferable to program with data in forms such as decimal digits (that is, 0, 1, 2, 3, 4, 5, 6, 7, 8 and 9), letters (that is, the uppercase letters A–Z and the lowercase letters a–z) and special symbols (that is, $, @, %, &, *, (, ), -, +, ", :, ?, / and many others). Digits, letters and special symbols are referred to as characters. The set of all characters used to write programs and represent data items on a particular computer is called that computer’s character set. Because computers process only 0s and 1s, every character in a computer’s character set is represented as a pattern of 0s and 1s. Bytes are composed of eight bits. Visual Basic uses the Unicode character set, in which each character is typically composed of two bytes (and hence 16 bits). You create programs and data items with characters; computers manipulate and process these characters as patterns of bits. FieldsJust as characters are composed of bits, fields are composed of characters. A field is a group of characters that conveys meaning. For example, a field consisting of uppercase and lowercase letters can represent a person’s name.Data HierarchyData items processed by computers form a data hierarchy (Fig. 8.1), in which data items become larger and more complex in structure as we progress up the hierarchy from bits to characters to fields to larger data aggregates.Fig. 8.1. Data hierarchy (assuming that files are organized into records). RecordsTypically, a record is composed of several related fields. In a payroll system, for example, a record for a particular employee might include the following fields:1. Employee identification number2. Name3. Address4. Hourly pay rate5. Number of exemptions claimed6. Year-to-date earnings7. Amount of taxes withheldIn the preceding example, each field is associated with the same employee. A data file can be implemented as a group of related records.1A company’s payroll file normally contains one record for each employee. Companies typically have many files, some containing millions, billions or even trillions of characters of information.1. In some operating systems, a file is viewed as nothing more than a collection ofbytes, and any organization of the bytes in a file (such as organizing the data into records) is a view created by the programmer.To facilitate the retrieval of specific records from a file, at least one field in each record can be chosen as a record key, which identifies a record as belonging to a particular person or entity and distinguishes that record from all others. For example, in a payroll record, the employee identification number normally would be the record key. Sequential FilesThere are many ways to organize records in a file. A common organization is called a sequential file in which records typically are stored in order by a record-key field. In a payroll file, records usually are placed in order by employee identification number. DatabasesMost businesses use many different files to store data. For example, a company might have payroll files, accounts receivable files (listing money due from clients), accounts payable files (listing money due to suppliers), inventory files (listing facts about all the items handled by the business) and many other files. Related files often are stored in a database. A collection of programs designed to create and manage databases is called a database management system (DBMS). You’ll learn about databases in Chapter 12 and you’ll do additional work with databases in Chapter 13, Web App Development with , and online Chapters 24–25.8.3. Files and StreamsVisual Basic views a file simply as a sequential stream of bytes (Fig. 8.2). Depending on the operating system, each file ends either with an end-of-file marker or at a specific byte number that’s recorded in a system-maintained administrative data structure for the file. You open a file from a Visual Basic app by creating an object that enables communication between an app and a particular file, such as an object of class StreamWriter to write text to a file or an object of class StreamReader to read text from a file.Fig. 8.2. Visual Basic’s view of an n-byte file.8.4. Test-Driving the Credit Inquiry AppA credit manager would like you to implement a Credit Inquiry app that enables the credit manager to separately search for and display account information for customers with• debit balances—customers who owe the company money for previously received goods and services• credit balances—customers to whom the company owes money• zero balances—customers who do not owe the company moneyThe app reads records from a text file then displays the contents of each record that matches the type selected by the credit manager, whom we shall refer to from this point forward simply as ―the user.‖Opening the FileWhen the user initially executes the Credit Inquiry app, the Button s at the bottom of the window are disabled (Fig. 8.3(a))—the user cannot interact with them until a file has been selected. The company could have several files containing account data, so to begin processing a file of accounts, the user selects Open...from the app’s custom File menu (Fig. 8.3(b)), which you’ll create in Section 8.6. This displays an Open dialog (Fig.8.3(c)) that allows the user to specify the name and location of the file from which the records will be read. In our case, we stored the file in the folder C:\DataFiles and named the file Accounts.txt. The left side of the dialog allows the user to locate the file on disk. The user can then select the file in the right side of the dialog and click the Open Button to submit the file name to the app. The File menu also provides an Exit menu item that allows the user to terminate the app.a) Initial GUI with Buttons disabled until the user selects a file from which to readrecordsb) Selecting the Open... menu item from the File menu displays the Open dialog inpart (c)c) The Open dialog allows the user to specify the location and name of the fileFig. 8.3. GUI for the Credit Inquiry app.Displaying Accounts with Debit, Credit and Zero BalancesAfter selecting a file name, the user can click one of the Button s at the bottom of the window to display the records that match the specified account type. Figure 8.4(a) shows the accounts with debit balances. Figure 8.4(b) shows the accounts with credit balances. Figure 8.4(c) shows the accounts with zero balances.a) Clicking the Debit Balances Button displays the accounts with positive balances(that is, the people who owe the company money)b) Clicking the Credit Balances Button displays the accounts with negative balances(that is, the people to whom the company owes money)c) Clicking the Zero Balances Button displays the accounts with zero balances (that is, the people who do not have a balance because they’ve already paid or have nothad any recent transactions)Fig.8.4. GUI for Credit Inquiry app.8.5. Writing Data Sequentially to a Text FileBefore we can implement the Credit Inquiry app, we must create the file from which that app will read records. Our first app builds the sequential file containing the account information for the company’s clients. For each client, the app obtains through its GUI the c lient’s account number, first name, last name and balance—the amount of money that the client owes to the company for previously purchased goods and services. The data obtained for each client constitutes a ―record‖ for that client. In this app, the accoun t number is used as the record key—files are often maintained in order by their record keys. For simplicity, this app assumes that the user enters records in account number order.GUI for the Create Accounts AppThe GUI for the Create Accounts app is shown in Fig. 8.5. This app introduces the Menu-Strip control which enables you to place a menu bar in your window. It alsointroduces ToolStripMenuItem controls which are used to create menus and menu items. We show how use the IDE to build the menu and menu items in Section 8.6. There you’ll see that the menu and menu item variable names are generated by the IDE and begin with capital letters. Like other controls, you can change the variable names in theProperties window by modifying the (Name) property.Fig. 8.5. GUI for the Create Accounts app.Interacting with the Create Accounts AppWhen the user initially executes this app, the Close menu item, the TextBox es and the Add Account Button are disabled (Fig. 8.6(a))—the user can interact with these controls only after specifying the file into which the records will be saved. To begin creating a fileof accounts, the user selects File > New... (Fig. 8.6(b)), which displays a Save As dialog (Fig. 8.6(c)) that allows the user to specify the name and location of the file into which the records will be placed. The File menu provides two other menu items—Close to close the file so the user can create another file and Exit to terminate the app. After the user specifies a file name, the app opens the file and enables the controls, so the user can begin entering account information. Figure 8.6(d)–(h) shows the sample data being entered for five accounts. The app does not depict how the records are stored in the file. This is a text file, so after you close the app, you can open the file in any text editor to see its contents. Figure 8.6(j)shows the file’s contents in Notepad.a) Initial GUI before user selects a fileb) Selecting New... to create a filec) Save As dialog displayed when user selects New... from the File menu. In this case,the user is naming the file Accounts.txt and placing the file in the C:\DataFilesfolder.d) Creating account 100e) Creating account 200f) Creating account 300g) Creating account 400h) Creating account 500i) Closing the filej) The Accounts.txt file open in Notepad to show how the records were written to the file. Note the comma separators between the data itemsFig. 8.6. User creating a text file of account information.8.5.1. Class CreateAccountsLet’s now study the declaration of class CreateAccounts, which begins in Fig. 8.7. Framework Class Library classes are grouped by functionality into namespaces, which make it easier for you to find the classes needed to perform particular tasks. Line 3 is an Imports statement, which indicates that we’re using classes from the System.IO namespace. This namespace contains stream classes such as StreamWriter (for text output) and Stream-Reader (for text input). Line 6 declares fileWriter as an instance variable of type Stream-Writer. We’ll use this variable to interact with the file that the user selects.Click here to view code image1' Fig. 8.7: CreateAccounts.vb2' App that creates a text file of account information.3Imports System.IO ' using classes from this namespace45Public Class CreateAccounts6Dim fileWriter As StreamWriter' writes data to text file7Fig. 8.7. App that creates a text file of account information.You must import System.IO before you can use the namespace’s classes. In fact, all namespaces except System must be imported into a program to use the classes in those namespaces. Namespace System is imported by default into every program. Classes like String, Convert and Math that we’ve used frequently in earlier examples are declared in the System namespace. So far, we have not used Imports statements in any of our programs, but we have used many classes from namespaces that must be imported. For example, all of the GUI controls you’ve used so far are classes in theSystem.Windows.Forms namespace.So why were we able to compile those programs? When you create a project, each Visual Basic project type automatically imports several namespaces that are commonlyused with that project type. You can see the namespaces (Fig. 8.8) that were automatically imported into your project by right clicking the project’s name in the Solution Explorer window, selecting Properties from the menu and clicking the References tab. The list appears under Imported namespaces:—each namespace with a checkmark is automatically imported into the project. This app is a Windows Forms app. The System.IO namespace is not imported by default. To import a namespace, you can either use an Imports statement (as in line 3 of Fig. 8.7) or you can scroll through the list in Fig. 8.8 and check the checkbox for the namespace you wish to import.Fig. 8.8. Viewing the namespaces that are pre-Imported into a Windows Forms app.8.5.2. Opening the FileWhen the user selects File > New..., method NewToolStripMenuItem_Click (Fig. 8.9) is called to handle the New... m enu item’s Click event. This method opens the file. First, line 12 calls method CloseFile (Fig. 8.11, lines 102–111) in case the user previously opened another file during the current execution of the app. CloseFile closes the file associated with this app’s StreamWriter.Click here to view code image8' create a new file in which accounts can be stored9Private Sub NewToolStripMenuItem_Click(sender As Object,10 e As EventArgs) Handles NewToolStripMenuItem.Click1112 CloseFile() ' ensure that any prior file is closed13Dim result As DialogResult' stores result of Save dialog14Dim fileName As String' name of file to save data1516' display dialog so user can choose the name of the file to save17Using fileChooser As New SaveFileDialog()18 result = fileChooser.ShowDialog()19 fileName = fileChooser.FileName ' get specified file name20End Using' automatic call to fileChooser.Dispose() occurs here2122' if user did not click Cancel23If result <> Windows.Forms.DialogResult.Cancel Then24Try25' open or create file for writing26 fileWriter = New StreamWriter(fileName, True)2728' enable controls29 CloseToolStripMenuItem.Enabled = True30 addAccountButton.Enabled = True31 accountNumberTextBox.Enabled = True32 firstNameTextBox.Enabled = True33 lastNameTextBox.Enabled = True34 balanceTextBox.Enabled = True35Catch ex As IOException36 MessageBox.Show("Error Opening File", "Error",37MessageBoxButtons.OK, MessageBoxIcon.Error)38End Try39End If40End Sub' NewToolStripMenuItem_Click41Fig. 8.9. Using the SaveFileDialog to allow the user to select the file into whichrecords will be written.Next, lines 17–20 of Fig. 8.9 display the Save As dialog and get the file name specified by the user. First, line 17 creates the SaveFileDialog object (namespace System.Windows.Forms) named fileChooser. Line 18 calls its ShowDialog method to display the SaveFileDialog (Fig. 8.6(c)). This dialog prevents the user from interacting with any other window in the app until the user closes it by clicking either Save or Cancel, so it’s a modal dialog. The user selects the location where the file should be stored and specifies the file name, then clicks Save. Method ShowDialog returns a DialogResult enumeration constant specifying which button (Save or Cancel) the user clicked to close the dialog. This is assigned to the DialogResult variable result (line 18). Line 19 uses SaveFileDialog property FileName to obtain the location and name of the file.8.5.3. Managing Resources with the Using StatementLines 17–20 introduce the Using statement, which simplifies writing code in which you obtain, use and release a resource. In this case, the resource is a SaveFileDialog. Windows and dialogs are limited system resources that occupy memory and should be returned to the system (to free up that memory) as soon as they’re no longer needed. Inall our previous apps, this happens when the app terminates. In a long-running app, if resources are not returned to the system when they’re no longer needed, a resource leak occurs and the resources are not available for use in this or other apps. Objects that represent such resources typically provide a Dispose method that must be called to return the resources to the system. The Using statement in lines 17–20 creates a SaveFileDialog object, uses it in lines 18–19, then automatically calls its Dispose method to release the object’s resources as soon as End Using is reached, thusguaranteeing that the resources are returned to the system and the memory they occupy is freed up (even if an exception occurs).Line 23 tests whether the user clicked Cancel by comparing result to the constant Windows.Forms.DialogResult.Cancel. If not, line 26 creates a StreamWriter object that we’ll use to write data to the file. The two arguments are a String representing the location and name of the file, and a Boolean indicating what to do if the file already exists. If the file doesn’t exist, this statement creates the file. If the file does exist, the second argument (True) indicates that new data written to the file should be appended at the end of the file’s current contents. If the second argument is False and the file already exists, the file’s contents will be discarded and new data will be written starting at the beginning of the file. Lines 29–34 enable the Close menu item and the TextBox es and Button that are used to enter records into the app. Lines 35–37 catch an IOException if there’s a problem opening the file. If so, the app displays an error message. If no exception occurs, the file is opened for writing. Most file-processing operations have the potential to throw exceptions, so such operations are typically placed in Try statements.8.5.4. Adding an Account to the FileAfter typing information in each TextBox, the user clicks the Add Account Button, which calls method addAccountButton_Click (Fig. 8.10) to save the data into the file. If the user entered a valid account number (that is, an integer greater than zero), lines 56–59 write the record to the file by invoking the StreamWriter’s WriteLine method, which writes a sequence of characters to the file and positions the output cursor to the beginning of the next line in the file. We separate each field in the record with a comma in this example (this is known as a comma-delimited text file), and we place each record on its own line in the file. If an IOException occurs when attempting to write the record to the file, lines 64–66 Catch the exception and display an appropriate message to the user. Similarly, if the user entered invalid data in the accountNumberTextBox or balanceTextBox lines 67–69 catch the FormatExceptions thrown by class Convert’s methods and display an appropriate error message. Lines 73–77 clear the TextBox es and return the focus to the accountNumberTextBox so the user can enter the next record. Click here to view code image42' add an account to the file43Private Sub addAccountButton_Click(sender As Object,44 e As EventArgs) Handles addAccountButton.Click4546' determine whether TextBox account field is empty47If accountNumberTextBox.Text <> String.Empty Then48' try to store record to file49Try50' get account number51Dim accountNumber As Integer =52 Convert.ToInt32(accountNumberTextBox.Text)5354If accountNumber > 0Then' valid account number?55' write record data to file separating fields by commas56 fileWriter.WriteLine(accountNumber & "," &57 firstNameTextBox.Text & "," &58 lastNameTextBox.Text & "," &59 Convert.ToDecimal(balanceTextBox.Text))60Else61 MessageBox.Show("Invalid Account Number", "Error",62MessageBoxButtons.OK, MessageBoxIcon.Error)63End If64Catch ex As IOException65 MessageBox.Show("Error Writing to File", "Error",66MessageBoxButtons.OK, MessageBoxIcon.Error)67Catch ex As FormatException68 MessageBox.Show("Invalid account number or balance",69"Format Error", MessageBoxButtons.OK,MessageBoxIcon.Error)70End Try71End If7273 accountNumberTextBox.Clear()74 firstNameTextBox.Clear()75 lastNameTextBox.Clear()76 balanceTextBox.Clear()77 accountNumberTextBox.Focus()78End Sub' addAccountButton_Click79Fig. 8.10. Writing an account record to the file.8.5.5. Closing the File and Terminating the AppWhen the user selects File > Close, method CloseToolStripMenuItem_Click (Fig. 8.11, lines 81–91) calls method CloseFile (lines 102–111) to close the file. Then lines 85–90 disable the controls that should not be available when a file is not open.Click here to view code image80' close the currently open file and disable controls81Private Sub CloseToolStripMenuItem_Click(sender As Object,82 e As EventArgs) Handles CloseToolStripMenuItem.Click8384 CloseFile() ' close currently open file85 CloseToolStripMenuItem.Enabled = False86 addAccountButton.Enabled = False87 accountNumberTextBox.Enabled = False88 firstNameTextBox.Enabled = False89 lastNameTextBox.Enabled = False90 balanceTextBox.Enabled = False91End Sub' CloseToolStripMenuItem_Click9293' exit the app94Private Sub ExitToolStripMenuItem_Click(sender As Object,95 e As EventArgs) Handles ExitToolStripMenuItem.Click9697 CloseFile() ' close the file before terminating app98 Application.Exit() ' terminate the app99End Sub' ExitToolStripMenuItem_Click100101' close the file102Sub CloseFile()103If fileWriter IsNot Nothing Then104Try105 fileWriter.Close() ' close StreamWriter106Catch ex As IOException107 MessageBox.Show("Error closing file", "Error",108MessageBoxButtons.OK, MessageBoxIcon.Error)109End Try110End If111End Sub' CloseFile112End Class' CreateAccountsFig. 8.11. Closing the file and terminating the app.When the user clicks the Exit menu item, method ExitToolStripMenuItem_Click (lines 94–99) respo nds to the menu item’s Click event by exiting the app. Line 97 closes the StreamWriter and the associated file, then line 98 terminates the app. The call to method Close (line 105) is located in a Try block. Method Close throws an IOExceptionif the file cannot be closed properly. In this case, it’s important to notify the user that the information in the file or stream might be corrupted.8.6. Building Menus with the Windows Forms DesignerIn the test-drive of the Credit Inquiry app (Section 8.4) and in the overview of the Create Accounts app (Section 8.5), we demonstrated how menus provide a convenient way to organize the commands that you use to interact with an app without ―cluttering‖ its user interface. Menus contain groups of related commands. When a command is selected, the app performs a specific action (for example, select a file to open, exit the app, etc.).Menus make it simple and straightforward to locate an app’s commands. They can also make it easier for users to use apps. For example, many apps provide a File menu that contains an Exit menu item to terminate the app. If this menu item is always placed in the File menu, then users become accustomed to going to the File menu to terminate an app. When they use a new app and it has a File menu, they’ll already be familiar with the location of the Exit command.The menu that contains a menu ite m is that menu item’s parent menu. In the Create Accounts app, File is the parent menu that contains three menu items—Ne w..., Close and Exit.Adding a MenuStrip to the FormBefore you can place a menu on your app, you must provide a MenuStrip to organize and manage the app’s menus. Double click the MenuStrip control in the Toolbox. This creates a menu bar (the MenuStrip) across the top of the Form (below the title bar; Fig.8.12) and places a MenuStrip icon in the component tray (the gray area) at the bottom of the designer. You can access the MenuStrip’s properties in the Properties window by clicking the MenuStrip icon in the component tray. We set the MenuStrip’s (Name) property to applicationMenuStrip.。
VISUAL BASIC 教案

。
② 将鼠标指针移到窗体上适当位置,此时指针变成十字线,按住鼠标器左键不放, 拖拉出一个大小合适的方框,释放鼠标器左键,就形成一个命令按钮,如图 6-8 所示。
图 6-8 建立控件以后,工具箱中的相应工具和鼠标指针恢复原状。刚建好控件的四周有 8 个
小方块,表示该控件为活动控件。用鼠标器单击控件可选定该控件并使其成为活动控件, 拖动控件到新的位置放开可移动控件。用鼠标器拖动控件四周的小方块可改变控件的大 小。 ⑵ 对象的命名 每个对象都有自己的名字,有了名字才能在程序中引用该对象。在建立对象时,VB 会自动提供一个形如 Command1、Command2、Label1、Label2 之类的缺省名。为了使程序 容易阅读、理解,最好给对象设置一个有意义的名字,如 cmdOk 等。一般约定对象名由 3 个小写字母组成的前缀(指明对象的类型)和表示该对象作用的缩写字母组成,表 6-2 列 出了常用控件的前缀规定和命名举例。 名字是对象的属性之一,可以通过在属性窗口设置名称属性来给对象命名。 表 6-2 对象的类型 Form Command Label TextBox Timer 2. 象的属性、方法和事件 VB中的对象具有自己的属性、方法和事件。可以把属性看作对象的性质,把方法看作 对象的动作,把事件看作对象对外部操作的响应,它们构成了对象的三要素。 日常生活中的对象,如小孩玩的气球同样具有属性、方法和事件。气球的属性包括可 以看到的一些性质,如它的直径和颜色,以及其它一些描述气球状态的属性,如充气或未 充气。气球还具有本身所固有的动作,如放气方法(排出气球中的气体)和上升方法(放 手让气球飞走) 。气球还有预定义的对某些外部事件的响应,例如,气球对刺破它的事件 响应是放气,对放手事件的响应是升空。 ⑴ 属性 属性(property)是对象的性质,对象的许多属性会影响对象的外观及功能,如窗体的 Caption 属性决定窗体标题栏中显示的内容,Name 属性设置窗体的名称,Height 和 Width 属性决定窗体的初始大小,Top 和 left 属性决定窗体的位置,MaxButton 和 MinButton 属 性决定窗体能否最大化或最小化等。 不同的对象有许多相同的属性, 也有许多不同的属性。 对象的属性可以在设计程序界面时通过属性窗口设置。也可以在运行时通过程序代码设 意义 窗体 命令按钮 标签 文本框 定时器 前缀 frm cmd lbl txt tmr 名字举例 frmFind cmdOk lblInput txtSource tmrClock
VISUAL BASIC 常用语句74条详解

首先打开 Microsoft Excel,然后运行程序,单击命令按钮,你将看到 Excel 变成活动窗 体。
下面示例用 Shell 函数启动 Microsoft Excel,然后用 AppActivate 语句来激活 Microsoft Excel。在运行程序前,首先找到 Microsoft Excel 的路径,并关闭 Excel。
元素,以及释放动态数组的存 23
储空间。
模拟错误的发生。
23
定义用户自定义的事件。
24
提前退出控制结构、循环或过
程的语句体。
26
3
20 FileCopy 语句
复制一个文件。
27
21 ForEach...Next 语句
针对一个数组或集合中的每个
元素,重复执行一组语句。
28
22 For...Next 语句
建立一标准工程,在窗体上添加一命令按钮,将下面的程序粘贴过去。 Private Sub Command1_Click() On Error GoTo ErrorHandler '发生错误转到错误处理入口
MsgBox "程序运行" Exit Sub '程序运行完毕,没有错误退出程序 ErrorHandler: '错误处理入口 Beep '发出声响。 MsgBox "出错" End Sub
13 Do...Loop 语句
14 End 语句 15 Enum 语句 16 Erase 语句 17 Error 语句 18 Event 语句 19 Exit 语句
《Visual BASIC程序设计》期末考试编程题复习及答案
第2章1.新建工程,在窗体上创建两个命令按钮Command1、Command2,一个标签Label1,界面如图2-5所示,程序运行要求如下:1)单击“改变颜色”按钮,标签上的文字内容改为“颜色已经改变”,文字颜色改为红色。
“改变颜色”按钮代码:Label1.ForeColor = vbRedLabel1.Caption = "颜色已经改变"2)单击“改变字体”按钮,标签上的字体改为“黑体”。
“改变字体”按钮代码:Label1.FontName = "黑体"图2-5程序运行界面最后将工程文件、窗体文件分别以lx2-2.vbp、lx2-2.frm为文件名保存在D:\EX文件夹下。
2.设计一个留言薄。
新建一个工程,在窗体上创建2个标签,2个文本框,1个命令按钮,属性设置如图2-6所示,。
要求单击“提交”按钮后,上面的文本框内容复制到下面的文本框中,且下面文本框中的内容不能修改。
单击“清除”按钮则清除两个文本框中的内容。
“提交”按钮代码:Text2.Text = Text1.Text“清除”按钮代码:Text1.Text = ""Text2.Text = ""图2-6 程序界面最后将工程文件、窗体文件分别以lx2-4.vbp、lx2-4.frm为文件名保存在D:\EX文件夹下。
3.设计一个程序,程序界面如图2-7所示。
当单击“显示”按钮时,在文本框中显示“欢迎使用VB!”;当单击“清除”按钮时,清除文本框内的文本;当单击“退出”按钮时,结束程序运行。
“显示”按钮代码:Text1.Text = "欢迎使用VB!"“清除”按钮代码:Text1.Text = ""“退出”按钮代码:End图2-7 程序运行界面最后将工程文件、窗体文件分别以lx2-5.vbp、lx2-5.frm为文件名保存在D:\EX文件夹下。
visualbasic课程设计
visualbasic课程设计一、教学目标本课程的教学目标是使学生掌握Visual Basic编程语言的基本语法、编程技巧和相关概念,培养学生独立编写简单应用程序的能力,提高学生分析问题和解决问题的能力。
1.掌握Visual Basic编程语言的基本语法。
2.熟悉Visual Basic集成开发环境(IDE)的使用。
3.理解面向对象编程的基本概念。
4.了解数据库的基本操作。
5.能够使用Visual Basic编写简单的控制台应用程序。
6.能够使用Visual Basic编写简单的图形用户界面(GUI)应用程序。
7.能够使用Visual Basic进行简单的数据库操作。
情感态度价值观目标:1.培养学生的团队合作意识,提高学生与他人协作解决问题的能力。
2.培养学生独立思考、自主学习的习惯。
3.培养学生热爱编程、勇于创新的思维。
二、教学内容本课程的教学内容主要包括以下几个部分:1.Visual Basic编程语言的基本语法:变量、数据类型、运算符、控制结构等。
2.Visual Basic集成开发环境(IDE)的使用:创建项目、添加组件、编写代码等。
3.面向对象编程的基本概念:类、对象、属性、方法等。
4.数据库的基本操作:创建数据库、表、查询等。
5.编写简单的控制台应用程序和图形用户界面(GUI)应用程序。
三、教学方法本课程采用讲授法、案例分析法、实验法等多种教学方法,以激发学生的学习兴趣和主动性。
1.讲授法:通过讲解基本语法、概念和实例,使学生掌握Visual Basic编程的基本知识。
2.案例分析法:分析实际案例,让学生了解如何运用Visual Basic解决实际问题。
3.实验法:让学生动手编写代码、进行实验,提高学生的实际编程能力。
四、教学资源本课程的教学资源包括:1.教材:《Visual Basic编程基础》。
2.参考书:《Visual Basic编程实例教程》。
3.多媒体资料:课件、视频教程。
第二章 Visual Basic语言基础
2.3 Visual Basic中的运算符与表达式
算术运算符
算术运算符用于数 学计算,VB有8个算术 运算符(其中减号运 算符和取负运算符形 式相同)。
运算符 名称 ^ * / \ Mod + - 乘方 负号 乘 除 整除 取模 加 减 优先级 1 2 3 3 4 5 6 6 示例 3^2 -2 2*5 4/5 4\5 5 Mod 4 2+3 4.5-2.4 结果 9 -2 10 .8 0 1 5 2.1
货币型 日期型 字符型 对象型 变体型
Currency Date(time) String Objiect Variant
@ 无 $ 无 无
cur dtm str obj vnt 4
8 8 与字符串长度有关
根据分配确定
2.1 Visual Basic的基本数据类型
数值型数据(Numeric)
数值型数据一般分为整型数和浮点数两类。 整型数分为整数(Integer)和长整数(Long) 浮点数分为单精度浮点数(Single)和双精度浮点 数(Double)。 有时也把货币型数据(Currency)和字节型数据 (Byte)划归数值型数据。
2.1 Visual Basic的基本数据类型
数据类型 字节型 逻辑型 整型 长整型 单精度型 关键字 Byte Boolean Integer Long Single 类型 符 无 无 % & ! 前缀 byt bln int lng sng 所占字节数 1 2 2 4 4 0~255 True与False -32768~32767 -2147483648~2147483647 负数:-3.402823E38~-1.401298E-45 正数:1.401298E-45~3.402823E38 范 围
visual_Basic程序设计教程_课后习题答案及练习
"VB程序设计"综合复习资料第一章 Visual Basic程序设计概述一、填空题1、VisualBasic是一种面向__________的可视化程序设计语言,采取了__________的编程机制。
2、在VB中工程文件的扩展名是____________,窗体文件的扩展名是____________,标准模块文件的扩展名是____________。
3、执行“工程〞菜单下的__________命令,可选择并添加Active*控件。
4、Visual Basic 6.0用于开发__________环境下的应用程序。
二、选择题1、下面不是VB工作模式的是〔〕A.设计模式B.运行模式C.汇编模式D.中断模式2、可视化编程的最大优点是〔〕A.具有标准工具箱B.一个工程文件由假设干个窗体文件组成C.不需要编写大量代码来描述图形对象D.所见即所得3、以下不能翻开属性窗口的操作是〔〕A.执行“视图〞菜单中的“属性窗口〞命令B.按F4键C.按Ctrl+TD.单击工具栏上的“属性窗口〞按钮4、以下可以翻开立即窗口的操作是〔〕A.Ctrl+D B.Ctrl+E C.Ctrl+F D.Ctrl+G5、Visual Basic的编程机制是〔〕A.可视化 B.面向对象 C.面向图形 D.事件驱动三、简答题1、代码窗口主要包括哪几局部?2、在工程资源管理器窗口中,主要列出了哪三类文件?3、窗体布局窗口的主要用途是什么?4、VB的根本特点是什么?5、怎样理解可视化设计?6、怎要理解事件驱动编程?第二章简单的VB程序设计一、填空题1、设置是否可以用Tab键来选取命令按钮,应该用______________属性。
2、一个控件在窗体的位置由_______和________属性决定,其大小由__________和_________属性决定。
3、利用对象的属性setfocus可获得焦点,对于一个对象,只有其visible属性和____________属性为true,才能承受焦点。
- 1、下载文档前请自行甄别文档内容的完整性,平台不提供额外的编辑、内容补充、找答案等附加服务。
- 2、"仅部分预览"的文档,不可在线预览部分如存在完整性等问题,可反馈申请退款(可完整预览的文档不适用该条件!)。
- 3、如文档侵犯您的权益,请联系客服反馈,我们会尽快为您处理(人工客服工作时间:9:00-18:30)。
试卷编号:8782所属语言:Visual Basic试卷方案:2011年VB考前练习1试卷总分:132分共有题型:6种一、填空共19题(共计19分)第1题(1.0分)如果在程序中要将a定义为静态变量,且为整型数,则应使用的语句是【1】答案:=======(答案1)=======Static a%=========或=========Static a As Integer第2题(1.0分)在设计阶段,当双击窗体上的某个控件时,所打开的窗口是【1】答案:=======(答案1)=======代码窗口第3题(1.0分)设a="Visual Basic",语句Left(a,3) 值为【1】, Mid(a,8,5) 值为【2】. 答案:=======(答案1)=======Vis=======(答案2)=======Basic第4题(1.0分)若变量t=20,则表达式t mod 2的值是【1】答案:=======(答案1)=======第5题(1.0分)关系式x≤-5或x≥5所对应的布尔表达式是【1】答案:=======(答案1)=======x<=-5 Or x>=5第6题(1.0分)把条件1<=X<12写成VB关系表达式为【1】.答案:=======(答案1)=======x>=1 and x<12=========或=========1<=x and 12>x=========或=========x>=1 and 12>x=========或=========1<=x and x<12第7题(1.0分)表达式12 MOD 2的值是【1】答案:=======(答案1)=======第8题(1.0分)在VB中,若要改变一个窗体的标题,应在属性窗口中改变这个窗体的【1】属性的值.答案:=======(答案1)=======Caption第9题(1.0分)所有控件都具有的共同属性是【1】属性.答案:=======(答案1)=======name=========或=========名称第10题(1.0分)计时器控件的Interval属性值是指时间间隔,单位为毫秒;当每隔此间隔的时间,计时器会触发一次【1】事件.答案:=======(答案1)=======Timer第11题(1.0分)滚动条响应的重要事件有【1】和Change.答案:=======(答案1)=======Scroll第12题(1.0分)通过改变单选按钮(Option Button)控件的【1】属性值,可以改变按钮的选取状态。
=======(答案1)=======VALUE=========或=========value=========或=========Value第13题(1.0分)InputBox函数返回值的类型为【1】答案:=======(答案1)=======字符型=========或=========字符串=========或=========string第14题(1.0分)下面程序运行后输出的结果是【1】.x=Int(Rnd+3)If x^2>8 Then y=x^2+1If x^2=9 Then y=x^2-2If x^2<8 Then y=x^3Print y答案:=======(答案1)=======7第15题(1.0分)以下程序的功能是:生成20个200-300之间的随机整数,输出其中能被5整除的数并求出它们的和.Private Sub Command1_Click()For i=1 to 20x=int(【1】*101+200)if 【2】=0 thenprint xs=s+【3】End ifNext iprint "sub=";sEnd sub=======(答案1)=======Rnd=======(答案2)=======x mod 5=======(答案3)=======x第16题(1.0分)下列程序的运行结果【1】Private Sub Form_Click()Dim a(5) As StringFor i = 1 To 5a(i) = Chr(Asc("A") + (i - 1))Next iFor Each b In aPrint b;NextEnd Sub答案:=======(答案1)=======ABCDE第17题(1.0分)由Array函数建立的数组的名字必须是【1】类型。
答案:=======(答案1)=======变体=========或=========Variant=========或=========可变体第18题(1.0分)窗体上有一名为Text1的文本框,三个单选按钮构成控件数组,名称为Option1,程序运行后, 单击某个单选按钮,则文本框中的字体随着随选择的单选按钮切换,请完善下面程序. Private Sub Option1_Click(Index As Integer)Select Case 【1】Case 0a = "宋体"Case 1a = "黑体"Case 2a = "楷体_GB2312"End SelectText1.【2】 = aEnd Sub答案:=======(答案1)=======Index=======(答案2)=======FontName=========或=========Font=========或=========第19题(1.0分)设有如下程序Private Sub Form_Click()Dim a As Integer, b As Integera = 20:b = 50p1 a, bPrint "a="; a, "b="; bEnd SubSub p1(x As Integer, y As Integer)x = x + 10y = y + 20End Sub该程序运行后,单击窗体,则在窗体上显示的内容是:a = 【1】和 b = 【2】。
答案:=======(答案1)=======30=======(答案2)=======70二、判断共16题(共计16分)第1题(1.0分)控件是对象,而窗体不是对象,它只是控件对象的窗口.答案:N第2题(1.0分)在代码窗口中输入某行代码并按回车键之后,如果代码变成红色,说明该行代码有语法错误。
答案:Y第3题(1.0分)关系表达式"计算机"<>"计算机世界"运算结果为True。
答案:Y第4题(1.0分)用dim语句声明的局部变量能保存上一次过程调用后的值.答案:N第5题(1.0分)过程中的静态变量是局部变量,当过程再次被执行时,静态变量的初值是上一次过程调用后的值.答案:Y第6题(1.0分)将焦点主动设置到指定的控件或窗体上,应采用Setfocus方法.答案:Y第7题(1.0分)当用户拖动滚动条控件中的滑块时,Scroll和Change事件连续发生。
答案:N第8题(1.0分)标签显示的内容取决于Text属性。
答案:N第9题(1.0分)列表框和组合框主要的不同在于前者能选择多个项目,后者不能。
答案:Y第10题(1.0分)三种方式的组合框都允许用户输入那些不在列边框中的选项。
答案:N第11题(1.0分)在窗体上画一个名称为Command1的命令按钮,然后编写如下事件过程:Private Sub Command1_Click()Move 500,500End Sub程序运行后,单击命令按钮,执行的操作为:命令按钮移动到距窗体左边界、上边界各500 的位置。
答案:N第12题(1.0分)若要在文本框Text1中显示变量a的值,正确的语句是:Text1.Text=a。
答案:Y第13题(1.0分)If语句中的条件表达式中只能使用关系或逻辑表达式。
答案:N第14题(1.0分)程序循环结构中的循环体语句至少会执行一次。
答案:N第15题(1.0分)在VB中,用DIM定义数组时数组元素也自动赋初值为0.答案:N函数过程和子过程的区别是子过程结束将返回过程值,函数过程结束不必返回函数值. 答案:N三、单项选择共27题(共计27分)第1题(1.0分)以下操作不能运行程序的是().A:单击工具栏上的"启动"按钮B:直接按键盘的<F5>键C:单击"运行"菜单的"启动"命令D:AlT+ F5键答案:D第2题(1.0分)在设计阶段,当双击窗体上的某个控件时,所打开的窗口是()A:工程资源管理器窗口B:工具箱窗口C:代码窗口D:属性窗口答案:C第3题(1.0分)以下不可以作为字符串常量的是()A:"True"B:abC:"#9/8/2009"D:"123"答案:B第4题(1.0分)将条件"a大于等于b且a不等于0"写成VB的表达式,其正确的形式是()A:a>=b or a≠0B:a>=b and a<>0C:a>=b or a<>0D:a>=b and a≠0答案:B第5题(1.0分)在 Visual Basic 中,表达式 6 *2\5 Mod 3 的值是()。
A:2B:0C:3D:出现错误提示答案:A以下可以作为VB变量名的是().A:SINB:CO1C:COS(X)D:X(-1)答案:B第7题(1.0分)执行下列程序段后,变量c$的值为()。
a$="Visual Basic Programming"b$="Quick"c$=b$ & UCase(Mid$(a$,7,6))& Right$(a$,12)A:Visual BASIC ProgrammingB:Quick Basic ProgrammingC:QUICK Basic ProgrammingD:Quick BASIC Programming答案:D第8题(1.0分)在VB中用()属性来设置字体颜色.A:FontColorB:ForeColorC:BackColorD:ShowColor答案:B第9题(1.0分)如果要在程序代码中为图片框Picture1动态加载和清除图像,可以利用()函数。
A:inputBoxB:InputC:LoadPictureD:PaintPicture答案:C第10题(1.0分)目录列表框的Path属性的作用是()。