ds-70iwmo说明书
明基i701JD说明书

选择输入信号源 ....................................27
菜单功能 .......................................38
关于屏显菜单 ........................................ 38 使用基本屏显菜单 ............................... 40
基本屏显菜单 - 已连接输入信号 ..........40 基本屏显菜单 - 未连接输入信号 ..........43
- 火警附近的地方。 - 环境温度超过 35°C/95°F 的地方。 - 海拔高于 2000 米 (6562 英尺)的地方。
3. 请勿垂直竖立投影仪,否则会导致投影仪倾 倒,造成伤害或导致投影仪受到损坏。
2000 米 (6562 英
尺)
0米 (0 英尺)
重要安全说明 3
5. 当投影仪打开时 (即使处于待机模式),请勿 9. 在使用过程中不要直视投影仪镜头。强光束可
指示灯...................................................... 63 故障排除 ................................................. 64 规格 .......................................................... 65
7. 请勿踩踏投影仪或在投影仪上面放置任何 物体。
兰德华说明书

智能巡更管理系统使用说明目录一、系统组成二、产品功能特点:三、设备安装四、操作步骤:五、软件使用说明六、注意事项与系统维护七、常见故障处理八、包装、运输及贮存九、客户服务和技术支持承诺一、硬件系统组成巡查管理系统主要由以下几部分组成:巡更棒、智能巡更软件、数据线、巡更点、人员钮二、产品功能特点:●巡更棒巡检人员用来采集地点钮、人员钮、可以设定按时间巡逻。
●地点钮安装在需要巡检的地点或设备上,代表巡检的地点位置名称。
具有防水、防晒功能。
可安装室内和室外,无须供电,安装方便;中间有一个孔,可以用螺丝固定在墙上。
●人员钮巡检员人手一个,代表巡检员身份,便于区别不同巡检员的巡检数据。
每个巡检员各配带1个人员钮,出去巡更前,先用巡更棒读自己的人员钮,再出去巡更,之后的巡更记录有自己的名字。
●数据线巡更棒连接计算机的通讯下载数据USB数据线。
三、设备安装1、如何安装地点钮●圆形地点钮的安装:圆形地点钮中间有一个孔,可用螺丝再用螺丝固定在物体表面。
●管状地点钮的安装:管状地点钮要用10厘的冲击钻在墙上打一个孔,再把钮放进去,表面盖一个标识牌。
地点钮不宜埋得太深,应尽量靠近物体表面,保证巡检机能感应到地点钮。
2、如何使用巡更棒●L-3000EF-1【无屏无显示】将巡更棒塑料读钮头在0~5CM的距离内对准钮,巡检机读到钮时发出“嘀”的一声并闪红灯●L-3000EF-2【有屏无按键】将巡更棒塑料读钮头在0~5CM的距离内对准钮,巡检机读到钮时发出“嘀”的一声并闪红灯,显示储存记录数量、地点钮号、时间。
●L-3000EF-3【有屏有按键】将巡更棒塑料读钮头在0~5CM的距离内对准钮,按中间按键1下开机显示时间,接着按中间按键显示【】读钮巡检机读到钮时发出“嘀”的一声并闪红灯,显示储存记录数量、地点钮号。
注意:为最大限度的省电,一分钟内一个钮只会读一次,但如果一分钟内读A钮后又读B钮,则又可以再读A钮。
●产品参数:四、管理软件安装L-A1.0软件使用说明为了能够使您尽享本系统操作的方便快捷,请您详细阅读本说明:一、系统安装:(一)软件安装:打开您的电脑,将本系统光盘放入光驱,打开我的电脑,打开光盘。
701说明书

DDS-701型电导率仪使用说明书DDS-701型电导率仪(以下简称仪器)是带微处理器的电导率仪。
被广泛用于电厂、各类化工厂以及医药、环保、海水淡化等行业的中心实验室中,对水样进行电导率测定。
仪器具有以下特点:LCD(液晶)大屏幕双排显示,可同时显示被测水样的电导率值(或电阻率值)和水样温度。
用六个触摸式按键,可实现参数设置、测量及校准等全部操作。
对内存参数,具有断电保持功能。
对异常现象,具有自诊断功能,并显示各种出错信息。
具有自动校准功能。
可用二种方法进行温度补偿。
具有标准并行打印机接口。
2. 性能2.1 仪器正常工作条件:a 环境温度:0~40℃b 相对湿度:不大于90%c 供电电源:220V±22V,50H Z±1H Z2.2 测量范围:a 电导率:0~200μS/cm,0~2mS/cm ,0~20mS/cmb 温度:0.0℃~60.0℃2.3 电子单元基本误差:a 电导率:±0.5%F.Sb 温度:±0.5 ℃2.4 仪器基本误差:a 电导率:±0.75%F.Sb 温度:±1.0 ℃2.5 电极常数:a 电极常数允许范围:0.01~19.9cm-1b 电极常数补偿误差:±0.5%2.6 电子单元重复性误差:不大于0.17%F.S2.7 仪器重复性误差:不大于±0.25%F.S2.8 电子单元温度补偿误差:±0.5%F.S2.9 温补系数设置范围:0.00~9.99(%)2.10电子单元稳定性误差:±0.3%F.S /3h2.11仪器功耗:10V A2.12外形尺寸:220mm×110mm×320mm2.13重量:3kg3. 工作原理当电导电极浸入水样中时,电导电极将会把水样中与电导和与温度相应的信号转化以后传送给电子单元,经过电子单元的处理,最后显示出水样的电导率值和温度值。
iDP Smart-70系列ID卡打印机产品介绍说明书

Capacity SMART-70
SMART-70
with Flipper
SMART-70
with Laminator
SMART-70
with Flipper & Laminator
RibbOns for SMART-30/50
series
Capacity SMART-30S/50S
SMART-30D/50D
The easily upgradeable: the printer offers a simple no-tool upgrade strategy that any dealer or IT technican would be able to manage in minutes.
Saving maintenance time for replacing ribbon and laminating patch : 500 card ribbon and laminating patch are provided to match the capacity of the input hopper.
series
Capacity SMART-30 series
SMART-50 series
KO
BlaCk With overlay
1600 Cardi/Roll 0
-..I
eoo Clrdi/ROII 0 0
K
Black
11!1
3000 Clrdi/ROII
w
- --White
--
3000 Cardi/Roll
600 Clrdi/ROII
0
Ha~ Panel SiZe COlor RillllOn with Resin BlaCk and overlay
艾奇安防产品说明书

Privacy Mask Text Overlay Image Orientation
• Audio
Compression Audio-In Audio-Out
• Network
Protocol &larm
Simultaneous dual streams based on two configurations 28 Kbps - 6 Mbps (per stream) Constant, Variable
Basic WDR (74 dB); White balance: automatic, hold, and manual; Brightness; Contrast; Sharpness (auto); Auto gain control; Digital noise reduction; Flickerless
Hemispheric
Dome
Bullet
Box
PRODUCT SPECIFICATION
E81A
• Device
Device Type Image Sensor Sensor Size Day / Night Superior Low Light Sensitivity Minimum Illumination Color to B/W Switch Mechanical IR Cut Filter IR Sensitivity Range IR LED IR Working Distance Electronic Shutter
PHOTO INDICATION
3 4
1 2
1 Reset Button 2 Memory Card Slot 3 Reset Button
iHome iM70可携式充电音箱用户说明书

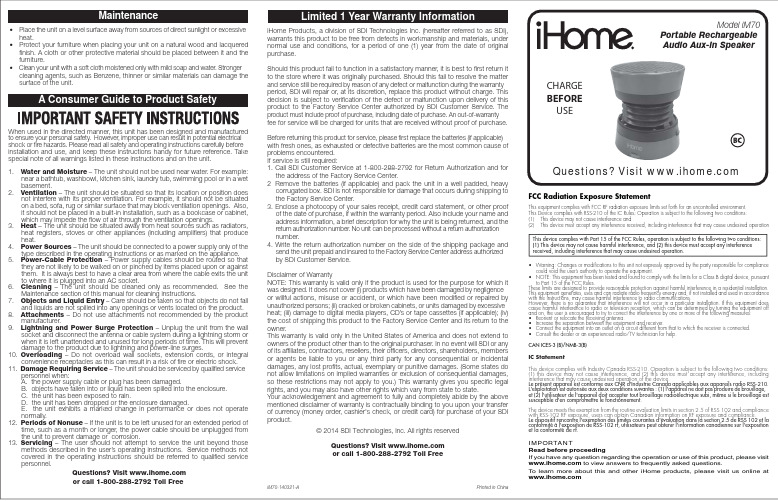
Model iM70Portable RechargeableAudio Aux-in SpeakerQuestions? Visit iHome Products, a division of SDI Technologies Inc. (hereafter referred to as SDI),warrants this product to be free from defects in workmanship and materials, undernormal use and conditions, for a period of one (1) year from the date of originalpurchase.Should this product fail to function in a satisfactory manner, it is best to first return itto the store where it was originally purchased. Should this fail to resolve the matterand service still be required by reason of any defect or malfunction during the warrantyperiod, SDI will repair or, at its discretion, replace this product without charge. Thisdecision is subject to verification of the defect or malfunction upon delivery of thisproduct to the Factory Service Center authorized by SDI Customer Service. Theproduct must include proof of purchase, including date of purchase. An out-of-warrantyfee for service will be charged for units that are received without proof of purchase.Before returning this product for service, please first replace the batteries (if applicable)with fresh ones, as exhausted or defective batteries are the most common cause ofproblems encountered.If service is still required:1. Call SDI Customer Service at 1-800-288-2792 for Return Authorization and forthe address of the Factory Service Center.2 Remove the batteries (if applicable) and pack the unit in a well padded, heavycorrugated box. SDI is not responsible for damage that occurs during shipping tothe Factory Service Center.3. Enclose a photocopy of your sales receipt, credit card statement, or other proofof the date of purchase, if within the warranty period. Also include your name andaddress information, a brief description for why the unit is being returned, and thereturn authorization number. No unit can be processed without a return authorizationnumber.4. Write the return authorization number on the side of the shipping package andsend the unit prepaid and insured to the Factory Service Center address authorizedby SDI Customer Service.Disclaimer of WarrantyNOTE: This warranty is valid only if the product is used for the purpose for which itwas designed. It does not cover (i) products which have been damaged by negligenceor willful actions, misuse or accident, or which have been modified or repaired byunauthorized persons; (ii) cracked or broken cabinets, or units damaged by excessiveheat; (iii) damage to digital media players, CD’s or tape cassettes (if applicable); (iv)the cost of shipping this product to the Factory Service Center and its return to theowner.This warranty is valid only in the United States of America and does not extend toowners of the product other than to the original purchaser. In no event will SDI or anyof its affiliates, contractors, resellers, their officers, directors, shareholders, membersor agents be liable to you or any third party for any consequential or incidentaldamages, any lost profits, actual, exemplary or punitive damages. (Some states donot allow limitations on implied warranties or exclusion of consequential damages,so these restrictions may not apply to you.) This warranty gives you specific legalrights, and you may also have other rights which vary from state to state.Your acknowledgement and agreement to fully and completely abide by the abovementioned disclaimer of warranty is contractually binding to you upon your transferof currency (money order, cashier's check, or credit card) for purchase of your SDIproduct.© 2014 SDI Technologies, Inc. All rights reservedQuestions? Visit or call 1-800-288-2792 Toll FreePrinted in ChinaiM70-140321-AWhen used in the directed manner, this unit has been designed and manufacturedto ensure your personal safety. However, improper use can result in potential electricalshock or fire hazards. Please read all safety and operating instructions carefully beforeinstallation and use, and keep these instructions handy for future reference. Takespecial note of all warnings listed in these instructions and on the unit.1. Water and Moisture – The unit should not be used near water. For example:near a bathtub, washbowl, kitchen sink, laundry tub, swimming pool or in a wetbasement.2. Ventilation – The unit should be situated so that its location or position doesnot interfere with its proper ventilation. For example, it should not be situatedon a bed, sofa, rug or similar surface that may block ventilation openings. Also,it should not be placed in a built-in installation, such as a bookcase or cabinet,which may impede the flow of air through the ventilation openings.3. Heat – The unit should be situated away from heat sources such as radiators,heat registers, stoves or other appliances (including amplifiers) that produceheat.4. Power Sources – The unit should be connected to a power supply only of thetype described in the operating instructions or as marked on the appliance.5. Power-Cable Protection – Power supply cables should be routed so thatthey are not likely to be walked on or pinched by items placed upon or againstthem. It is always best to have a clear area from where the cable exits the unitto where it is plugged into an AC socket.6. Cleaning – The unit should be cleaned only as recommended. See theMaintenance section of this manual for cleaning instructions.7. Objects and Liquid Entry – Care should be taken so that objects do not falland liquids are not spilled into any openings or vents located on the product.8. Attachments – Do not use attachments not recommended by the productmanufacturer.9. Lightning and Power Surge Protection – Unplug the unit from the wallsocket and disconnect the antenna or cable system during a lightning storm orwhen it is left unattended and unused for long periods of time. This will preventdamage to the product due to lightning and power-line surges.10. Overloading – Do not overload wall sockets, extension cords, or integralconvenience receptacles as this can result in a risk of fire or electric shock.11. Damage Requiring Service – The unit should be serviced by qualified servicepersonnel when:A. the power supply cable or plug has been damaged.B. objects have fallen into or liquid has been spilled into the enclosure.C. the unit has been exposed to rain.D. the unit has been dropped or the enclosure damaged.E. the unit exhibits a marked change in performance or does not operatenormally.12. Periods of Nonuse – If the unit is to be left unused for an extended period oftime, such as a month or longer, the power cable should be unplugged fromthe unit to prevent damage or corrosion.13. Servicing – The user should not attempt to service the unit beyond thosemethods described in the user’s operating instructions. Service methods notcovered in the operating instructions should be referred to qualified servicepersonnel.Questions? Visit or call 1-800-288-2792 Toll Free• Place the unit on a level surface away from sources of direct sunlight or excessiveheat.• Protect your furniture when placing your unit on a natural wood and lacqueredfinish. A cloth or other protective material should be placed between it and thefurniture.• Clean your unit with a soft cloth moistened only with mild soap and water. Strongercleaning agents, such as Benzene, thinner or similar materials can damage thesurface of the unit.CHARGEBEFOREUSEFCC Radiation Exposure StatementThis equipment complies with FCC RF radiation exposure limits set forth for an uncontrolled environment.This Device complies with RSS-210 of the IC Rules; Operation is subject to the following two conditions:(1) This device may not cause interference and(2) This device must accept any interference received, including interference that may cause undesired operationThis device complies with Part 15 of the FCC Rules, operation is subject to the following two conditions:(1) This device may not cause harmful interference, and (2) this device must accept any interferencereceived, including interference that may cause undesired operation.• Warning: Changes or modifications to this unit not expressly approved by the party responsible for compliancecould void the user’s authority to operate the equipment.• NOTE: This equipment has been tested and found to comply with the limits for a Class B digital device, pursuantto Part 15 of the FCC Rules.These limits are designed to provide reasonable protection against harmful interference in a residential installation.This equipment generates, uses and can radiate radio frequency energy and, if not installed and used in accordancewith the instructions, may cause harmful interference to radio communications.However, there is no guarantee that interference will not occur in a particular installation. If this equipment doescause harmful interference to radio or television reception, which can be determined by turning the equipment offand on, the user is encouraged to try to correct the interference by one or more of the following measures:• Reorient or relocate the receiving antenna.• Increase the separation between the equipment and receiver.• Connect the equipment into an outlet on a circuit different from that to which the receiver is connected.• Consult the dealer or an experienced radio/TV technician for help.CAN ICES-3 (B)/NMB-3(B)IC StatementThis device complies with Industry Canada RSS-210. Operation is subject to the following two conditions:(1) this device ma y not ca use interference, a nd (2) this device must a ccept a ny interference, includinginterference that may cause undesired operation of the device.Le présent appareil est conforme aux CNR d'Industrie Canada applicables aux appareils radio RSS-210.L'exploitation est autorisée aux deux conditions suivantes : (1) l'appareil ne doit pas produire de brouillage,et (2) l'utilisateur de l'appareil doit accepter tout brouillage radioélectrique subi, même si le brouillage estsusceptible d'en compromettre le fonctionnement.The device meets the exemption from the routine evaluation limits in section 2.5 of RSS 102 and compliancewith RSS-102 RF exposure, users can obtain Canadian information on RF exposure and compliance.Le dispositif rencontre l'exemption des limites courantes d'évaluation dans la section 2.5 de RSS 102 et laconformité à l'exposition de RSS-102 rf, utilisateurs peut obtenir l'information canadienne sur l'expositionet la conformité de rf.IMPORTANTRead before proceedingIf you have any question regarding the operation or use of this product, please visit to view answers to frequently asked questions.T o learn more about this and other iHome products, please visit us online atTo compress and lock speaker, gently press speaker down from the top and twist clockwise to lock in place.To unlock and expand the speaker, grip the top and bottom and give a small twist counter-clockwise. DO NOT pull hard once open, as the built in spring will automatically extend the speaker to its proper position.The iM70 is powered by a rechargeable battery in the speaker. Charge the unit before use .• Connect the larger USB plug to a powered USB port, such as that on a computer. The light on the speaker will stay red while charging and turn blue when fully charged.• Connect the micro-USB plug to the Audio/Charge USB connection port on the side of the speaker. Refer to the Charge Before Use diagram for proper charging connections.When the blue power light turns red, or if you start to notice sound distortion at higher volumes, it's time to recharge the battery.Note: you can continue to listen to the speaker while it is chargingFor Models That Use Lithium Batteries:• Lithium batteries can explode or cause burns if disassembled, shorted, recharged, exposed to water, fire, or high temperatures & not handled appropriately• Do not place loose batteries in a pocket, purse, or other container containing metal objects, do not mix with used or other battery types, or store with hazardous or combustible materials. • Store in cool, dry, ventilated area.• Follow applicable laws and regulations for transport and disposal.• Connect the micro-USB plug to the audio/charge input jack on the speaker.• Connect the stereo 3.5mm audio plug to the headphone jack or line-out of any audio device.• Slide the Power Switch of the speaker to the ON position. The blue power light will come on.• Press play on your audio device and adjust its volume to listen to audio.• If you wish to “daisy-chain” iM70 speakers, connect the 3.5mm audio plug to the Line Out Jack on an iM70 that is already connected to an audio source (see above) and the micro-USB plug to the audio input jack on another iM70.Note: the larger USB plug is used for charging only, not for audio.Power SwitchAudio/Charge USB ConnectionNote: When not in use, turn speaker offto save battery powerOff PositionOn PositionPower/Battery LEDBlue = power on/charged Red = low battery OR charging mode (whenconnected to USB power sourceComputer USB portComputer connected to working outletUSB AC adaptor (not included)USB AC adaptorconnected to working outlet3.5mm Stereo line-out Jack Connect to Audio Input Sourcemobile phonePSP iPodLaptopPCMP3/MP4to playOpen Position for Maximum BassClosed PositionTo audio sourceTo iM70To powered USB portUSB Charging and Audio Connection Cable Included。
道勤DC710说明书

微鲸电视 智慧幕布 产品使用说明书

智慧幕布产品使用说明书感谢您使用本产品,使用前请详细阅读本说明书,以获得正确的使用及保管方式,希望您有一个愉快的使用体验,请妥善保管此说明书。
产品连接示意图包装清单:1:智慧幕布2:产品使用说明书3:安装支架(选项)4:磁吸片5:无线接收器6:电容笔7:Type C数据线8:电机遥控器9:螺钉使用手册1、根据实际需求将智慧幕布安装固定,并保持水平建议按照如下数据安装:2、使用遥控器打开智慧幕布3、将磁吸片安装在磁吸对应的墙体位置上4、打开投影机,将投影机和主机相连,调整投影画面使画面充满智慧幕布的功能区域内,电脑主机调整到复制模式(智慧幕布和显示器显示的内容相同)。
★如果投影方式是扩展模式,请按照如下操作设置:首先设置投影方式为扩展模式打开“控制面板”/“平板电脑设置”,点击“设置”,然后根据文字提示操作5、打开智慧幕布上的触控电源开关,按下后指示灯亮,即可正常工作,电量指示灯会显示目前的电池电量。
★建议非工作状态关闭智慧幕布的电源,以延长续航时间★触控连接有两种方式:方式1、无线连接:将无线接收器插到电脑的USB接口(注:Windows 系统会自动安装驱动,如接收器有遗失或损坏,请及时联系售后)方式2、蓝牙连接:按下智慧幕布上的蓝牙开关,打开手机或者PC机的蓝牙开关,搜索设备“Clint_HID”并进行配对连接(注:使用蓝牙方式连接时蓝牙硬件版本要在4.2以上即蓝牙LMP属性要在版本8以上,投影区域和功能区域匹配时,无需校准)。
◆使用电脑投影模式时,可以使用无线接收器方式也可以使用蓝牙方式连接。
◆使用手机投影模式时,需要使用蓝牙连接方式(目前暂不支持IOS系统产品)。
6、位置校准:使用无线方式连接,请登录链接:https:///jY3Na3Kh下载校准工具及校准说明书,按照校准说明书步骤进行精确定位,校准时需要保证电脑处于可以正常工作状态。
注:以下情况,建议执行校准定位操作:◆首次安装智慧幕布◆智慧幕布和投影机的相对位置发生了变动◆更改了计算机的分辨率◆其他可能导致轨迹偏移的原因7、当电池电量指示灯仅剩两格的时候请及时用5V Type-C接口线给电池充电。
- 1、下载文档前请自行甄别文档内容的完整性,平台不提供额外的编辑、内容补充、找答案等附加服务。
- 2、"仅部分预览"的文档,不可在线预览部分如存在完整性等问题,可反馈申请退款(可完整预览的文档不适用该条件!)。
- 3、如文档侵犯您的权益,请联系客服反馈,我们会尽快为您处理(人工客服工作时间:9:00-18:30)。
ds-70iwmo说明书
一、开机/关机:使用100~240V交流电作为触控一体机供电电源;如果其屏幕未打开,请按遥控器或机器上的待机键。
如果您想关闭触摸一体机系统,请按遥控器或触控一体机上待机键4-5秒关闭系统,进入待机状态。
如果您想完全关闭触摸一体机,请关闭“电源开关”后,断开总电源插
二、自动关机功能:在TV或AV模式中,如果超过五分钟没有输入信号,它将自动切换至待机模式;在电脑(计算机)模式中,如果触控一体机超过五分钟没触控有工作,将自动切换至待机模式。
三、关机前保存:关机时,触摸一体机将保存图像与声音的设置。
这样,当再次打开机器时,将处于关机前的状态。
四、信号源应用注意事项:如果使用PC信号源,请按下列模式设置计算机显卡的分辨率:1920x1080@60HZ、1280x1024@60HZ、1280x720@60HZ、1024x768@60HZ、800x600@60HZ、640x480@60HZ等。
五、内置电脑开/关机:当触控一体机自带内置电脑时,要开启内置电脑,请先按机器或遥控器上的待机键开启屏幕,然后再按机器或遥控器上的PC开关键,开启内置电脑。
要关闭触控一体机前,请先使用触摸或鼠标从开始菜单中按正常电脑关机步骤关闭电脑,待电脑完全关机后,才可使用触控一体机或遥控器上的待机键关闭塌。
