.net实验报告(部分)
实验目的-实验内容-实验报告

实验一
一、实验目的
1、熟悉 4.0网站开发运行环境及配置
2、掌握创建网站、发布网站、复制网站的过程
3、掌握网站设置和虚拟目录设置的过程
二、实验内容及步骤
三、实验总结
实验二
一、实验目的
1、掌握C#基础语法(值类型、引用类型、装箱和拆箱)
2、流程控制(case、while、for、foreach)
3、创建C#类StudentInfo并应用于 4.0 Web窗体中
二、实验内容及步骤
三、实验总结
实验三
一、实验目的
1、理解 4.0页面事件处理流程
2、掌握 4.0标准控件的应用
二、实验内容及步骤
设计并实现一个简易计算器,实现加减乘除的功能。
三、实验总结
实验四
一、实验目的
1、掌握HttpRequest、HttpResponse对象的应用
2、掌握至少三种跨页面提交的方法
3、掌握Cookie、Session、Application应用
二、实验内容及步骤
三、实验总结
实验五
一、实验目的
1、掌握VisualStudio2013中管理数据库的方法(启动服务,连接数据库,建库,建表)
2、掌握数据源控件(SQLDataSource)的使用
3、掌握数据绑定控件(GridView)的使用
二、实验内容及步骤
三、实验总结
实验六
一、实验目的
1、了解 结构和 的组件
2、掌握Command、Connection、DataSet、DataAdapter和DataReader 对象的使用
3、掌握项目多层架构的组成
二、实验内容及步骤
利用对数据库的操作,实现注册和登录功能。
三、实验总结。
计算机网络管理实验报告

计算机网络管理实验报告指导老师:实验1网络配置与网络管理系统的使用实验结果分析: 1. 构建实验网络环境参照下图描述的网络拓扑构建实验网络环境。
(注意计算机与路由器是用交叉线相联,而路由器和交换机、交换机和计算机用直通线相联)Cisco 2950交换机Quidway R2621路由器直通线交叉线直通线以太网口0: 192.0.1.1/24以太网口1:192.0.0.1/24192.0.1.2/24网关:192.0.1.1安装SNMPc,网络管理站192.0.0.2/24(二层交换机可不需IP地址)192.0.0.3/24网关:192.0.0.1图4 实验网络拓扑结构2. 配置各设备的网络参数并启用网管功能:为了配置路由器或交换机,用配置串口线将计算机的COM 口与网络设备的Console 口相连,然后运行超级终端软件(端口设置需还原为默认值)。
(1) 配置Cisco 2950交换机 1、配置IP 地址两层交换机在转发数据时是不需要IP 地址的,但为了交换机要能够被网管,要给它标识一个管理IP 地址,默认情况下CISCO 交换机的VLAN 1为管理VLAN ,为该管理VLAN 配上IP 地址,交换机就可以被网管了。
命令如下: a 、 进入全局模式: Switch> enablePassword: cs608 (如果需要密码的话)Switch# configure terminalb、进入VLAN 1接口模式: Switch(config)#interface vlan 1c、配置管理IP地址: Switch(config-if) #ip address 192.0.0.2 255.255.255.0如果当前VLAN 1不是管理VLAN ,只需将上面命令的vlan的号码换成管理VLAN 的号码即可。
(显示所有VLAN的信息:Switch#show vlan brief)2、打开SNMP协议a、退入到全局配置模式: Switch(config-if)#exitb、配置只读的Community,一般设备默认的只读Community名为publicSwitch(config)#snmp-server community public roc、配置可写的Community,一般设备默认的可读可写Community名为privateSwitch(config)#snmp-server community private rw(注意:前面SNMPc7管理站安装时设置的Community名为public,因此管理站对此设备具有的管理权限为只读。
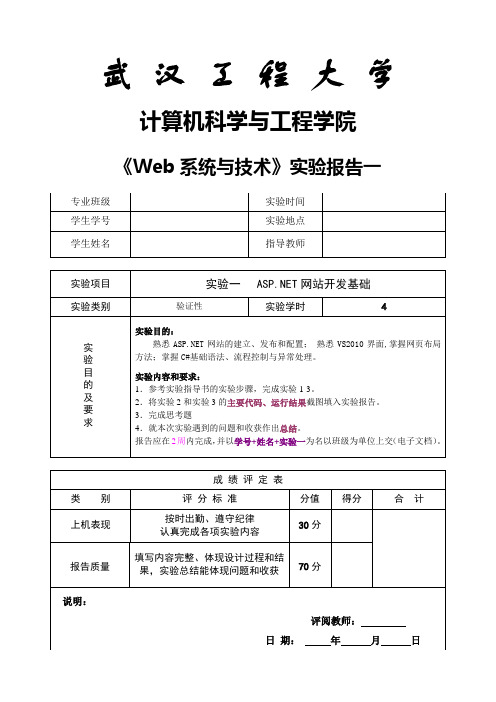
Web开发实验一
</tr>
<tr>
<td colspan="3" style="background-color: #CCFFFF">
登陆状态</td>
</tr>
<tr>
<td colspan="4" style="background-color: #33CCCC">
您的位置:</td>
</tr>
</table>
</td>
<td class="style4" dir="ltr"
style="text-align: center; background-color: #99CCFF">
<asp:LinkButton ID="LinkButtonReset" runat="server">个性重置</asp:LinkButton>
//逐个获取sInput中每个字符,若不是空格将该字符连接到temp中
//否则,将temp值转换为整数后储存到数组元素
for (int i = 0; i <= sInput.Length - 1; i++)
{
if (sInput.Substring(i, 1) != " ")
{
temp += sInput.Substring(i, 1);
<asp:Button ID="btnSubmit" runat="server" onclick="btnSubmit_Click" Text="等级" />
计算机网络实验报告

实验1 以太网组网实验及基本网络命令一、实验目的1.了解网络命令的基本功能2.掌握基本网络命令的使用方法3.掌握使用网络命令观察网络状态的方法二、实验环境1.软件环境:Microsoft Windows 操作系统2.硬件环境:配置网卡的计算机,由IP路由器连接。
三、实验步骤1.安装TCP/IP。
2.手动配置TCP/IP参数。
3.使用ipconfig命令来测试TCP/IP是否安装成功。
4.使用ping命令来验证。
5.学习tracert、netstat、arp、net等命令的功能及使用方法。
1.Ipconfig命令Ipconfig命令可以用来显示本机当前的TCP/IP配置信息。
这些信息一般用来验证TCP/IP 设置是否正确。
常用格式:(1)当使用Ipconfig是不带任何参数选项,那么它为每个已经配置好的接口显示IP地址、子网掩码和默认网关值。
(2)Ipconfig/all。
当使用all选项时,Ipconfig除了显示已配置TCP/IP信息外,还显示内置于本地网卡中的物理地址(MAC)以及主机名等信息。
(3)Ipconfig/release和Ipconfig/renew。
这是两个附加选项,只能在DHCP(动态主机配置协议)服务器租用IP地址的计算机上起作用。
2. Ping命令Ping命令的格式如下:Ping [-t] [-a] [-n count] [-l size] [-f] [-I TTL] [-v TOS] [-r count] [-s count] [[-j host-list]|[-k host-list]] [-w timeout] destination-listPing命令主要参数如下:∙-t:使当前主机不断地向目的主机发送数据,直到按Ctrl+C键中断。
∙-a:将地址解析为计算机名。
∙-n count:发送count 指定的ECHO数据包数,默认值为4 。
∙-l size:发送的数据包的大小。
实验报告三

攀枝花学院实验报告实验课程:Visual C#.NET程序设计教程实验项目:上机实验5 实验日期:系:数计学院成绩:一、实验目的1、区分静态类与非静态类,掌握静态字段、静态方法和静态构造函数的定义方法。
2、理解类的继承性与多态性,掌握其应用方法。
3、理解抽象类、接口的概念,掌握抽象类与接口的定义及使用方法。
4、理解分部类和命名空间的概念,掌握分部类和命名空间的使用方法。
二、实验要求1.熟悉Visual 的基本操作方法。
2.认真阅读本章相关内容,尤其是案例。
3.实验前进行程序设计,完成源程序的编写任务。
4.反复操作,直到不需要参考教材、能熟练操作为止。
三、实验步骤1、设计一个Windows应用程序,在该程序中首先构造一个学生基本类,再分别构造小学生、中学生、大学生等派生类,当输入相关数据,单击不同的按钮(小学生、中学生、大学生)将分别创建不同的学生对象,并输入当前的学生总人数、该学生的姓名、学生类型和平均成绩。
具体要求如下:(1)每个学生都有的字段为:姓名、年龄。
(2)小学生的字段还有语文、数学,用来表示这两科的成绩。
(3)中学生在此基础上多了英语成绩。
(4)大学生只有必修课和选修课两项成绩。
(5)学生类具有方法来统计自己的总成绩,并输出。
(6)通过静态成员自动记录学生总人数。
(7)成员初始化能通过构造函数完成。
源程序如下:using System;using ;using ;using ;using ;using ;using Test3_1{public partial class Form1 : Form{public Form1(){InitializeComponent();}public abstract class Student{protected string name;protected int age;protected static int number;public Student(string name, int age){= name;= age;number++;}public string Name { get { return name; } }public virtual string type{get { return"学生"; }}public abstract double total();public abstract double Average();public string getInto(){string result = ("总人数:{0},姓名:{1},{2},{3}岁", number, Name, type, age);if (type == "小学生")result += (",平均成绩为{0:N2}:\n", total() / 2);else if(type=="中学生")result += (",平均成绩为{0:N2}:\n", total() / 3);elseresult += (",总学分为{0:N2}:\n", total());return result;}}public class Pupil : Student{protected double chinese;protected double math;public Pupil(string name, int age, double chinese, double math): base(name, age){= chinese;= math;}public override string type{get{return"小学生";}}public override double total(){return chinese + math;}}public class Middle : Student{protected double chinese;protected double math;protected double english;public Middle(string name, int age, double chinese, double math,double english) : base(name, age){= chinese;= math;= english;}public override string type{get{return"中学生";}}public override double total(){return chinese + math+english;}}public class University : Student{protected double majors;protected double elective;public University(string name, int age, double majors, double elective): base(name, age){= majors ;= elective;}public override string type{get{return"大学生";}}public override double total(){return majors+elective;}}private void btpupil_Click(object sender, EventArgs e){int age = ;double chinese = ;double math = ;Pupil p = new Pupil, age, chinese, math);+= ();}private void btMiddle_Click(object sender, EventArgs e){int age = ;double chinese = ;double math = ;double english = ;Middle p = new Middle, age, chinese, math,english);+= ();}private void btUniversity_Click(object sender, EventArgs e) {int age = ;double chinese = ;double math = ;University u = new University, age, chinese, math);+= ();}}}运行结果如图所示:2、完善上机实验4-3设计的银行帐户管理系统,增加一个VIP账户的管理。
ASPnet实验报告电子版

实验三 服务器控件实验目的:●掌握 4.0页面时间的处理过程●熟练应用基本的Web服务器控件实验内容及要求:在网站的用户注册页面,通常都可以通过下列列表框动态选择用户的头像。
本实验就是先这样的功能。
要求如下:●当“头像”下拉列表中的选项发生改变时,网页上显示的头像也随之改变。
●单击“提交”按钮,将用户选择的头像信息显示在Label控件上。
实验步骤:(1)启动Visual Studio 2010,创建一个 WEB网站,命名为“课堂练习2”。
(2)在网站根目录下创建一个名为Default.aspx的窗体文件。
(3)设计Web窗体。
切换到设计视图,想页面添加1个Image控件、1个Button 控件、一个DropDownList控件和1个label控件。
(4)设置属性。
(5)设置DropDownList1中的列表项内容。
将鼠标移到DropDownList1控件上,其上方会出现一个向右的小三角。
单击它,弹出“DropDownList任务”列表。
选择列表中的“编辑项”命令,弹出如图所示的“ListItem集合编辑器”对话框。
单击“添加”按钮可像“成员”列表中添加选项,并在“属性”列表中设置选项的Text属性和Value属性,其中,Text属性是列表框控件中显示的文本;而Value属性为对应头像的路径。
最后单击“确定”按钮。
如果要将选项设置为选中的状态,可以将Selected属性设置为true。
(6)编写下拉列表事件代码如下:(7)编写“提交”按钮被单击是执行的时间代码如下:(8)浏览建立的Web窗体进行测试。
实验四 网站设计实验目的:●熟练掌握各种导航控件的使用●能够在网站中创建母版页和内容页实验内容及要求:合理创建商场积分卡管理系统的站点地图Web.sitemap。
要求如下:●站点地图的层次要清晰●编写的代码必须符合站点地图的规范要求实验步骤(1)启动Visual Studio2010,创建一个 Web网站,命名为“课堂练习1”(2)在网站根目录下创建一个名为Web.sitemap的站点地图文件(3)在Web.sitemap的站点地图文件中编写代码如下实验五访问数据库实验目的:●在SQL Server 2008中创建数据库●掌握的操作对象●熟练运用数据访问技术对数据库进行操作实验内容及要求:(1)在SQL Server 2008中创建数据库和数据表。
asp.net程序设计实验报告

程序设计实验报告程序设计实验报告一、引言是一种用于构建Web应用程序的开发框架,它基于微软的.NET平台,具有强大的功能和灵活的扩展性。
本次实验旨在通过设计一个简单的程序,探索其在实际应用中的优势和应用场景。
二、实验目的本次实验的主要目的是熟悉的开发环境和基本概念,掌握程序的设计和实现方法。
通过实际操作,进一步理解的工作原理和特点。
三、实验内容1. 环境搭建在开始实验之前,我们需要搭建的开发环境。
首先,下载并安装Visual Studio,这是一个集成开发环境(IDE),用于编写和调试程序。
其次,安装.NET Framework,这是运行程序所必需的运行时环境。
2. 创建项目在Visual Studio中,我们可以创建一个新的项目。
选择 Web应用程序模板,并指定项目的名称和位置。
在创建项目的过程中,我们可以选择使用C#或作为主要的编程语言。
3. 页面设计使用一种称为Web Forms的技术来创建Web页面。
Web Forms提供了一种类似于Windows窗体的方式来设计和布局Web页面。
在设计页面时,我们可以使用Visual Studio提供的可视化设计器来拖放控件、设置属性和事件处理程序。
4. 数据库连接许多Web应用程序需要与数据库进行交互,存取和操作数据。
提供了丰富的数据库连接和操作功能,可以轻松地与各种数据库进行集成。
我们可以使用技术来连接数据库,并使用SQL语句或存储过程执行数据库操作。
5. 用户交互支持各种用户交互功能,如表单提交、按钮点击、数据验证等。
我们可以使用提供的控件和事件处理程序来实现这些功能。
同时,还提供了一套强大的验证控件,用于验证用户输入的数据的有效性。
6. 网络安全在Web应用程序开发中,网络安全是一个非常重要的问题。
提供了一系列的安全功能,用于保护Web应用程序免受各种网络攻击。
我们可以使用提供的身份验证、授权和加密功能来增强Web应用程序的安全性。
四、实验结果与分析通过实验,我们成功设计并实现了一个简单的程序。
实验报告

试题2某信息科技有限公司是一家中型网络信息服务公司,总部设在北京,有两个部门管理部和网络运维部,管理部拥有电脑30台,网络运维部拥有电脑及服务器70台;石家庄设有分公司,包含市场部和服务部两个部门,市场部拥有电脑130台,服务部拥有电脑50台,应企业发展需求拟在北京的总部和石家庄的分公司组建网络,实现分公司和总部的资源共享以及网络通信,具体要求如下:1、总公司路由器通过以太网接口连接Internet,配置PAT实现共享上网;使用静态映射发布公司内部的网站;通过V35线缆连接分公司路由器,配置帧中继实现两地之间网络通信。
2、总公司路由器下连接一台三层交换机,三层交换机下连接两台二层交换机,所有交换机之间都配置双线线路聚合,配置Trunk实现VLAN中继,开启STP避免环路产生,为管理部和网络运维部各配置一个功能VLAN,管理部仅允许网络运维部访问,其他不可。
3、分公司路由器下连接一台三层交换机,划分两VLAN对应市场部和业务部,业务部配置IP和MAC地址聚合,同时三层交换机配置DHCP中继,为服务部的DHCP服务器提供中继功能。
4、各交换机的VLAN 1设置为管理VLAN,为每个交换机设置一个IP地址和网关,可实现通过管理IP管理所有的交换机。
5、公司内部使用私有IP地址,各业务VLAN尽量使用较小的子网范围,设备互联地址为/30地址。
6、编写本方案的网络实施细则,规划网络拓扑结构图、网络设备配置表、IP地址及VLAN规划表。
一.网络方案设计:结合上述任务的需求分析,我们将网络的拓扑结构做如下设计:二.IP及VLAN规划1、网络实施细则:网络设备接口对应VLAN IP地址Internet路由器F0/1 221.192.233.1/24F0/0 172.19.9.1/24R1 F0/0 172.19.9.2/24 F0/1 192.168.10.5/30 S0/0 192.168.10.1/30SW1 F0/1 192.168.10.6/30F0/2 Port-channel 1 F0/3F0/4 Port-channel 2 F0/5Vlan 10 192.168.1.1/24Vlan 20 192.168.2.1/24Vlan 1 172.10.1.1/24SW2 F0/1 Port-channel 1 F0/2F0/3 Port-channel 3F0/4Vlan 10Vlan 20Vlan 1 172.10.1.2/24SW3 F0/1 Port-channel 1F0/2F0/3 Port-channel 3F0/4Vlan 1 192.168.1.3/24Vlan 10Vlan 20SW4 F0/1 192.168.10.10/30F0/2 Vlan 100 192.168.3.1/24F0/3 Vlan 200 192.168.4.1/24Vlan 1 172.10.1.4/24R2 S0/0 192.168.10.2/30F0/0 192.168.10.9/30PC0 192.168.1.1/24PC1 192.168.2.1/24Server1 192.168.2.2/24PC2 192.168.3.1/24PC3 192.168.4.1/24外网web 221.192.233.2/242.设备清单设备名称规格数量单价总价备注Cisco 2621 XM 外置WIC-1T两块 3Catalyst 3560 2Catalyst 2950 2计算机 4服务器 2V35线缆FC+MT 1直通线7交叉线83.实施过程(1)网络设备配置部分:①Internet路由器的配置文档Building configuration...Current configuration : 436 bytesversion 12.2no service timestamps log datetime msecno service timestamps debug datetime msecno service password-encryption!hostname Internet!interface FastEthernet0/0ip address 172.19.9.1 255.255.255.0 duplex autospeed auto!interface FastEthernet0/1ip address 221.192.233.1 255.255.255.0 duplex autospeed auto!ip classless!line con 0line vty 0 4login!end②R1的配置文档Building configuration...Current configuration : 946 bytesversion 12.2no service timestamps log datetime msec no service timestamps debug datetime msec no service password-encryption!hostname R1!interface FastEthernet0/0ip address 172.19.9.2 255.255.255.0ip nat outsideduplex autospeed auto!interface FastEthernet0/1ip address 192.168.10.5 255.255.255.252 ip nat insideduplex autospeed auto!interface Serial0/0ip address 192.168.10.1 255.255.255.252ip nat insideclock rate 128000!router ripversion 2network 192.168.10.0no auto-summary!ip nat inside source list 1 interface FastEthernet0/0 overload ip nat inside source static 192.168.2.2 172.19.9.3ip classlessip route 0.0.0.0 0.0.0.0 172.19.9.1!access-list 1 permit 192.168.1.0 0.0.0.255access-list 1 permit 192.168.2.0 0.0.0.255access-list 1 permit 192.168.3.0 0.0.0.255access-list 1 permit 192.168.4.0 0.0.0.255line con 0line vty 0 4login!End③SW1的配置文档Running-config文档:Building configuration...Current configuration : 2126 bytes!version 12.2no service timestamps log datetime msecno service timestamps debug datetime msecno service password-encryption!hostname SW1!!!!!ip routing!no spanning-tree vlan 20spanning-tree vlan 1-3,20 priority 24576!interface FastEthernet0/1no switchportip address 192.168.10.6 255.255.255.252 duplex autospeed auto!interface FastEthernet0/2channel-group 1 mode onswitchport trunk encapsulation dot1q switchport mode trunk!interface FastEthernet0/3channel-group 1 mode onswitchport trunk encapsulation dot1q switchport mode trunk!interface FastEthernet0/4channel-group 2 mode onswitchport trunk encapsulation dot1q switchport mode trunk!interface FastEthernet0/5channel-group 2 mode onswitchport trunk encapsulation dot1q switchport mode trunk!interface FastEthernet0/6...interface GigabitEthernet0/2!interface Port-channel 1switchport trunk encapsulation dot1q switchport mode trunk!interface Port-channel 2switchport trunk encapsulation dot1q switchport mode trunk!interface Vlan1ip address 172.10.1.1 255.255.255.0!interface Vlan10ip address 192.168.1.254 255.255.255.0ip access-group 101 out!interface Vlan20ip address 192.168.2.254 255.255.255.0!router ripversion 2network 192.168.1.0network 192.168.2.0network 192.168.10.0no auto-summary!ip classlessip route 0.0.0.0 0.0.0.0 192.168.10.5!access-list 101 permit tcp 192.168.2.0 0.0.0.255 anyaccess-list 101 permit icmp 192.168.2.0 0.0.0.255 any!line con 0line vty 0 4loginendVLAN信息文档:VLAN Name Status Ports---- -------------------------------- --------- -------------------------------1 default active Fa0/1, Fa0/6, Fa0/7, Fa0/8Fa0/9, Fa0/10, Fa0/11, Fa0/12Fa0/13, Fa0/14, Fa0/15, Fa0/16Fa0/17, Fa0/18, Fa0/19, Fa0/20Fa0/21, Fa0/22, Fa0/23, Fa0/24Gig0/1, Gig0/210 VLAN0010 active20 VLAN0020 active1002 fddi-default act/unsup1003 token-ring-default act/unsup1004 fddinet-default act/unsup1005 trnet-default act/unsup④SW2的配置文档Running-config文档:Building configuration...Current configuration : 2169 bytesversion 12.1no service timestamps log datetime msec no service timestamps debug datetime msec no service password-encryption hostname Switchspanning-tree vlan 10,20 priority 24576!interface FastEthernet0/1channel-group 1 mode onswitchport mode trunk!interface FastEthernet0/2channel-group 1 mode onswitchport mode trunk!interface FastEthernet0/3channel-group 3 mode onswitchport mode trunk!interface FastEthernet0/4channel-group 3 mode onswitchport mode trunk!interface FastEthernet0/5switchport access vlan 10switchport mode access.省略.interface GigabitEthernet1/2!interface Port-channel 1switchport mode trunk!interface Port-channel 3switchport mode trunk!interface Vlan1ip address 172.10.1.2 255.255.255.0!line con 0!line vty 0 4loginline vty 5 15loginendVLAN信息文档:VLAN Name Status Ports---- -------------------------------- --------- -------------------------------1 default active Fa0/21, Fa0/22, Fa0/23, Fa0/24Gig1/1, Gig1/210 VLAN0010 active Fa0/5, Fa0/6, Fa0/7, Fa0/8Fa0/9, Fa0/10, Fa0/11, Fa0/12Fa0/13, Fa0/14, Fa0/15, Fa0/16Fa0/17, Fa0/18, Fa0/19, Fa0/20 20 VLAN0020 active1002 fddi-default act/unsup1003 token-ring-default act/unsup1004 fddinet-default act/unsup1005 trnet-default act/unsup⑤SW3的配置文档Running-config文档:Building configuration...Current configuration : 2129 bytesversion 12.1no service timestamps log datetime msecno service timestamps debug datetime msecno service password-encryption!hostname Switch!interface FastEthernet0/1channel-group 2 mode onswitchport mode trunk!interface FastEthernet0/2channel-group 2 mode onswitchport mode trunk!interface FastEthernet0/3channel-group 3 mode onswitchport mode trunk!interface FastEthernet0/4channel-group 3 mode onswitchport mode trunk!interface FastEthernet0/5switchport access vlan 20switchport mode access.省略.interface GigabitEthernet1/2!interface Port-channel 2switchport mode trunk!interface Port-channel 3switchport mode trunk!interface Vlan1ip address 172.10.1.3 255.255.255.0!line con 0!line vty 0 4loginline vty 5 15login!endVLAN信息文档:VLAN Name Status Ports---- -------------------------------- --------- -------------------------------1 default active Fa0/21, Fa0/22, Fa0/23, Fa0/24Gig1/1, Gig1/210 VLAN0010 active20 VLAN0020 active Fa0/5, Fa0/6, Fa0/7, Fa0/8Fa0/9, Fa0/10, Fa0/11, Fa0/12Fa0/13, Fa0/14, Fa0/15, Fa0/16Fa0/17, Fa0/18, Fa0/19, Fa0/20 1002 fddi-default act/unsup1003 token-ring-default act/unsup1004 fddinet-default act/unsup1005 trnet-default act/unsup⑥R2的配置文档Building configuration...Current configuration : 584 bytes!version 12.2no service timestamps log datetime msec no service timestamps debug datetime msec no service password-encryption!hostname R2interface FastEthernet0/0ip address 192.168.10.9 255.255.255.252 duplex autospeed auto!interface FastEthernet0/1no ip addressduplex autospeed autoshutdown!interface Serial0/0ip address 192.168.10.2 255.255.255.252 !router ripversion 2network 192.168.10.0no auto-summary!ip classlessip route 0.0.0.0 0.0.0.0 192.168.10.1!line con 0line vty 0 4login!end⑦SW4的配置文档Running-config文档:Building configuration...Current configuration : 1642 bytes!version 12.2no service timestamps log datetime msec no service timestamps debug datetime msec no service password-encryption!hostname Switch!ip dhcp excluded-address 192.168.3.131 192.168.3.253 !ip dhcp pool pool1network 192.168.3.0 255.255.255.0default-router 192.168.3.254interface FastEthernet0/1no switchportip address 192.168.10.10 255.255.255.252duplex autospeed auto!interface FastEthernet0/2switchport access vlan 100switchport mode access!interface FastEthernet0/3switchport access vlan 200switchport mode access!interface FastEthernet0/4省略。
- 1、下载文档前请自行甄别文档内容的完整性,平台不提供额外的编辑、内容补充、找答案等附加服务。
- 2、"仅部分预览"的文档,不可在线预览部分如存在完整性等问题,可反馈申请退款(可完整预览的文档不适用该条件!)。
- 3、如文档侵犯您的权益,请联系客服反馈,我们会尽快为您处理(人工客服工作时间:9:00-18:30)。
}
else
{
FileUpload.Visible = true; Upload.Text = "上传";
Pic.Visible=false;
}
实验3 验证技术(4学时)
实验目的
掌握验证技术的使用。
实验内容
为实验2所完成的页面添加验证功能。
数据要求:
(1)用户名必填,6~18个字符,包括字母、数字、下划线,以字母开头,字母或数字结尾。
(2)密码必填,密码长度不少于6位,最多16位,字符不能包含’$’和’\’,确认密码要和密码一致。
(3)手机号必须是11位数字,且必须是所有联通的的号码。
(4)Email必须符合格式要求。
实验操作:
1、正则式
用户名:[a-zA-Z]\w{4,16}[a-zA-Z0-9]
密码:[^\$\\]{6,16}
手机号:((13[0-2])|(15[56])|(18[56]))\d{8}
2、验证部分截图
3、运行后跳转页面
4、购物车代码
(1)提交
int count = 0;
for (int i = 0; i <Ball.Items.Count; i++)
{
if (Ball.Items[i].Selected)
switch (i)
{
case 0: Session["ball"+ i.ToString()] = Ball.Items[i].Text + " "+ TextBox1.Text ; count += 120 * int.Parse(TextBox1.Text); break;
case1: Session["ball"+ i.ToString()] = Ball.Items[i].Text + " "+ TextBox2.Text; count += 210 * int.Parse(TextBox2.Text); break;
case 3:Session["ball" + i.ToString()] = Ball.Items[i].Text + " "+ TextBox3.Text; count += 230 * int.Parse(TextBox3.Text); break;
}
else
Session["ball" + i.ToString()] = null;
}
if (Session["sum"] == null)
Session["sum"] = count;
else
Session["sum"] = int.Parse((Session["sum"]).ToString()) + count;
(2)购买物品改变//修改选定物品购买数量的TextBox的属性,开始TextBox 只读、光标不可选定;当CheckBoxList 选定后,对应TextBox 属性变化
for (int i = 0; i < Ball.Items.Count; i++)
实验截图:1、登录界面
2、注册界面
3、提交后显示页面
4、主页面
5、注册后登录。