MicroScribe-G2三维数字化仪--说明书(中文版)
GALILEO_MICROSKID_操作手册

中文 压缩机撬编号 年 入口压力 出口压力 车载瓶组压力 中压瓶组压力 高压瓶组压力 二级出口压力 一级出口压力 出口温度 二级出口温度 一级出口温度 润滑油温度 撬体内环境温度 润滑油压力 辅助润滑润滑油压力
第 6 页 共 33 页
Microskid 操作手册
2).第二窗口
北京中油洁能环保科技有限责任公司
Def. Valves
控制阀
Language
语言
Nr:
压缩机撬编号
8).第八窗口
第 11 页 共 33 页
Microskid 操作手册
北京中油洁能环保科技有限责任公司
英文
中文
OPERATING VALVES
参数设定
Stop Pressure:
停止压力
Start Diff.:
分段压缩启动压力
TO START(t in Sec) 启动时间(秒)
英文
中文
Hours of Use(使用时间)
Compressor:
压缩机
Fan #1:
一号风机
Fan #2:
二号风机
3).第三窗口
第 7 页 共 33 页
Microskid 操作手册
北京中油洁能环保科技有限责任公司
英文
中文
Startups(启动次数)
Compressor:
压缩机
Fan #1:
一号风机
北京中油洁能环保科技有限责任公司
1.3 系统电路 在压缩机电路维护之前,必须切断电源,禁止在压缩机运行时切断或修理系
统电路。 定期检查电线缆的情况,保证电缆远离潮湿的环境。 设备安装时要有良好的接地。
2.产品识别信息 设备识别 GALILEO 设备是通过其型号和序列号来识别的,标志安装在压力表面板上。 这个序列号包含了压缩机撬体所包含的主要部件,下边给出序列号每个字符
M03.0022_Chinese_2022-07说明书

操作说明控制器B500/B510C540/C550P570/P580M03.0022 CHINESISCH原版使用说明书 ◼ Made ◼ in ◼ GermanyCopyright© Copyright byNabertherm GmbH Bahnhofstrasse 2028865 LilienthalFederal Republic of Germany Reg: M03.0022 CHINESISCH Rev: 2022-07内容可能会修改,保留技术更改权利1引言 (7)2质保和责任 (8)2.1一般说明 (8)2.2环境条件 (9)2.3废料处理 (9)2.4产品说明 (9)2.5规定用途 (10)2.6符号说明 (10)3安全说明 (13)4运行 (14)4.1接通控制器/窑炉 (14)4.2关闭控制器/窑炉 (14)5控制器的构造 (15)5.1控制器的各个模块的布局 (15)5.2操作页面区域 (16)5.2.1“菜单栏”区域 (16)5.2.2“小区段播放器”区域 (17)5.2.3“大区段播放器”区域 (18)5.2.4“状态栏”区域 (19)6控制器性能特性 (20)7简要使用说明 B500/B510/C540/C550/P570/P580 (22)7.1基本功能 (22)7.2输入新程序 (程序表) (24)8概览图 (29)8.1“窑炉”概览(无程序处于活动状态) (29)8.2“窑炉”概览(程序处于活动状态) (29)9待机模式 (31)10显示、输入或更改程序 (31)10.1“程序”概览 (32)10.2显示并启动程序 (33)10.3分配并管理程序类别 (34)10.4输入程序 (36)10.5利用NTEdit在电脑上准备程序 (44)10.6管理程序(删除/复制) (44)10.7什么是Holdback? (45)10.8修改正在运行的程序 (46)10.9完成区段跳跃 (47)11设定参数 (48)11.1“设置”概览 (48)11.2校准量程 (48)11.3调节参数 (52)11.4调节性能 (54)11.4.1磨平 (54)11.4.2加热延迟 (55)11.4.3手动区段控制 (56)11.4.4在程序启动时将实际值作为额定值接受 (57)11.4.5受控冷却(选项) (58)11.4.6起动连接/功率限制 (60)11.4.7自优化 (61)11.4.8程序运行中的炉料控制 (63)11.4.9用于各个区间的额定值补偿 (65)11.4.10Holdback (66)11.5用户管理 (67)11.6控制器锁闭和操作禁用 (71)11.7连续锁闭(操作禁用) (71)11.7.1运行中的程序控制器锁闭 (71)11.8配置额外功能 (72)11.9收起或重命名附加功能 (73)11.9.1在一个加热程序运行期间人工操作额外功能 (73)11.9.2在一个加热程序之后人工操作额外功能 (74)11.10警报功能 (75)11.10.1警报 (1 和 6) (75)11.10.2可听报警(可选) (78)11.10.3监测梯度 (78)11.10.4警报配置举例 (80)11.11设定电网中断时的反应 (81)11.12系统设置 (82)11.12.1设定日期和钟点时间 (82)11.12.2设置日期和钟点时间格式 (82)11.12.3设定语种 (83)11.12.4调节显示屏亮度 (84)11.12.5调整温度单位 (°C/°F) (84)11.12.6设定数据接口 (85)11.12.7设置Wi-Fi端口 (88)11.13导入和导出过程数据、程序和参数 (90)11.14登录模块 (92)11.15对空气循环器的控制 (93)12信息菜单 (93)13过程记录 (95)13.1使用NTLog将数据保存到U盘 (95)13.2保存过程数据并使用VCD软件管理程序(可选) (99)14连接到MyNabertherm App (100)14.1故障排除 (104)15与控制器的通信 (104)15.1通过 Modbus-TCP 和上一级系统进行沟通 (104)15.2网络服务器 (105)15.3通信模块的补装 (107)15.3.1供货范围 (107)15.3.2安装一个通信模块 (107)16可设置关闭温度的温度选择限制器(附加配置) (109)17无电势触点用于开启外部设备以及接收监控信号(可选) (109)18故障消息或警告 (110)18.1控制器的故障消息 (110)18.2控制器警告 (112)18.3开关设备的故障 (114)18.4控制器的检查列表 (115)19技术数据 (117)19.1铭牌 (119)20清洁 (119)21维护和备件 (119)21.1更换一个控制器 (120)21.2调节器模块的拆卸 (120)21.3调节器模块的安装 (121)22电气连接 (121)22.1调节器模块 (121)22.2对电缆的要求 (122)22.3一般性连接 (122)22.4至 3.6 kW 的窑炉–用于 B130, B150, B180, C280, P330 的备件,截止 2008 年 12 月止 (123)22.5至 3.6 kW 的窑炉–用于 B130, B150, B180, C280, P330 的备件,从 2009 年 1 月起 (124)22.6窑炉,单区式> 3.6 k,带半导体继电器或接触器 (125)22.7窑炉> 3.6 kW,带 2 个加热回路 (126)23纳博热售后服务 (127)24您的备忘录......................................................................................................... Fehler! Textmarke nicht definiert.1 引言尊敬的客户:非常感谢您对纳博热有限公司产品的信任和支持。
三坐标初级培训ppt课件

按下或将速度快速旋至0. 2)首次自动运行时要保持手一直控制速度旋钮。 3)离开时请将控制盒将探头停留在安全位置,
然后将速度旋钮调零并将其放置在安全位置, 防止其掉落。 4)到反方向操作时,先将针选好,再按下变方 向按钮
最新版整理ppt
7
取消任务 调速旋钮
删除最后一点 删除所有点
控制Z 轴操 纵杆
换针按钮
最新版整理ppt
变 方 向 按 钮
减 速 按 钮
确 定 按 钮
急停按钮
解锁按钮
设置中 间点和 安全平 面按钮
控制XY轴操纵 杆,前后是控制 Y轴,左右是控
制X轴
8
第二章、开机
1.确认室内环境是否达到要求:温度:20±2℃ 湿度:40%~60%
三坐标测量机(CMM)使用 说明
最新版整理ppt
1
第一章、CMM及其配件的介绍
CMM及相关配件有:CMM主机、控制柜、
控制盒。
1、CMM主机:
CONTURA G2
Z轴导轨
X轴导轨 Y轴导轨左支撑
Y轴导轨右支撑
Y轴左导轨 大理石平台
Y轴右导轨 控制盒 驱动开关
最新版整理探ppt头:测头、吸盘、四方、探针
识别相关元素,利用元素建立工件坐标系。 3.建立安全面。保证机器自动运行时行走安全。 4.对所需测量的元素进行打点(各种元素打点的个数详见
Calypso基础中元素部分)。打出该元素的最小点数Calypso 自动识别该元素,并得出该元素的所有特性。 5.设置安全5项,作用是使三坐标能安全的完成自动运行。 6.设置温度补偿,将当前温度,及被测零件的线膨胀系数输入, 减小误差。 7.自动运行。对前面手动打点步骤机器自动运行一次,提高测量 精度。
TA INSTRUMENTS ARES-G2 和 AR 2000ex 流动性仪器说明书
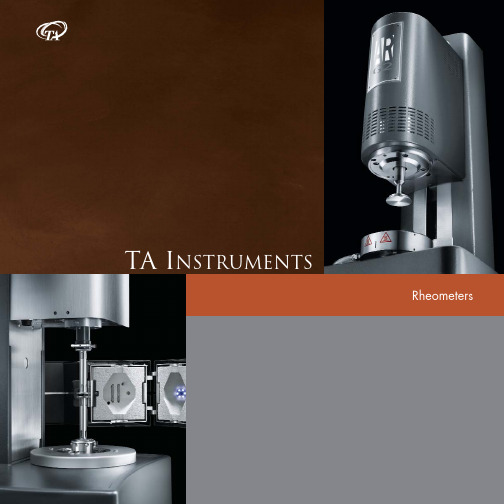
•New Castle, DE USA +1-302-427-4000•Lindon, UT USA+1-801-763-1500•Hialeah, FL USA+1-305-828-4700•Crawley, United Kingdom +44-1293-658900•Shanghai, China +86-21-64956999•Taipei, Taiwan +88-62-25638880•Tokyo, Japan +81-3-5759-8500•Seoul, Korea +82-2-3415-1500•Bangalore, India +91-80-2319-4177-79•Paris, France +33-1-30-48-94-60•Eschborn, Germany +49-6196-400-600•Brussels, Belgium +32-2-706-0080•Etten-Leur, Netherlands +31-76-508-7270•Sollentuna, Sweden +46-8-555-11-521•Milano, Italy +39-02-265-0983•Barcelona, Spain +34-93-600-93-32•Melbourne, Australia +61-3-9553-0813•Mexico City, Mexico +52-55-52-00-18-60L OCAL O FFICES0000ARES-G 21235711143541AR R HEOMETERS15161718192021TM 27354115(1) Patent # 7,017,393 (2) Patent # 6,798,099 (3) Patent # 6,952,950Minimum Torque Oscillation CR 0.003 μN.mMinimum Torque Oscillation CS 0.003 μN.mMinimum Torque Steady CR 0.01 μN.mMinimum Torque Steady CS 0.01 μN.mMaximum Torque 200 mN.mTorque Resolution 0.1 nN.m [1]Motor Inertia 18 μN.m.sAngular Velocity Range CS 0 to 300 rad/sAngular Velocity Range CR 1.4E -9to 300 rad/sFrequency Range 7.5E -7to 628 rad/sDisplacement Resolution 25 nradStep Change in Velocity 7 msStep Change in Strain 30 msDirect Strain Control Standard [2]Thrust Bearing MagneticNormal/Axial Force Range 0.005 to 50 NSmart Swap™StandardSmart Swap Geometry StandardPeltier Plate -40 to 200 °C [3]Environmental Test Chamber (ETC)-160 to 600 °CETC Camera Viewer OptionalConcentric Cylinder -20 to 150 °C [3]Peltier ControlUpper Heated Plate -30 to 150 °C [3]Electrically Heated Plate (EHP)-70 to 400 °C Camera Option with StreamingVideo and Image Capture OptionalT ECHNICAL S PECIFICATIONS16CR - Controlled Rate Mode CS - Controlled Stress Mode [1] Internal Resolution for D to A converter at torque of 0.1 µN.m [2] Direct Strain Control provides single cycle oscillation and continuous oscillations during experiments.[3] Lower temperature limits require use of a suitable fluid in an external circulator.1718Minimum Torque Oscillation CR 0.03 μN.mMinimum Torque Oscillation CS 0.1 μN.mMinimum Torque Steady CR 0.05 μN.mMinimum Torque Steady CS 0.1 μN.mMaximum Torque 200 mN.mTorque Resolution 1 nN.m [1]Motor Inertia 15 μN.m.sAngular Velocity Range CS 0 to 300 rad/sAngular Velocity Range CR 1E -8to 300 rad/sFrequency Range 7.5E -7to 628 rad/sDisplacement Resolution 40 nradStep Change in Velocity 25 msStep Change in Strain 60 msDirect Strain Control Standard [2]Thrust Bearing Porous Carbon AirNormal/Axial Force Range 0.005 to 50 NSmart Swap™StandardPeltier Plate -40 to 200 °C [3]Environmental Test Chamber (ETC)-160 to 600 °CConcentric Cylinder -20 to 150 °C [3]Peltier ControlUpper Heated Plate -30 to 150 °C [3]Electrically Heated Plate (EHP)-70 to 400 °CT ECHNICAL S PECIFICATIONSCR - Controlled Rate Mode CS - Controlled Stress Mode [1] Internal Resolution for D to A converter at torque of 0.1 µN.m [2] Direct Strain Control provides single cycle oscillation and continuous oscillations during experiments.[3] Lower temperature limits require use of a suitable fluid in an external circulator.19Minimum Torque 0.1 μN.m Maximum Torque 150 mN.m Torque Resolution 1 nN.m [1]Motor Inertia15 μN.m.s Angular Velocity Range CS 0 to 300 rad/s Angular Velocity Range CR 1.00E -7to 300 rad/s Frequency Range 7.50E -7to 628 rad/sDisplacement Resolution 40 nrad Step Change in Velocity 25ms Step Change in Strain 6 0ms Thrust Air Bearing Porous Carbon Smart Swap TM Standard Peltier Plate -40 to 200 °C [2]Peltier Plate Camera Optional Peltier Concentric Cylinder -20 to 150 °C [2]Upper Heated Plate -30 to 150 °C [2]Electrical Heated Plates-70 to 400 °C[1] Internal Resolution for D to A converter at torque of 1 µN.m[2] Lower temperature limits require use of a suitable fluid in an external circulator.T ECHNICAL SPECIFICATIONSAR T ECHNOLOGY The AR series represents a family of rheometers uniquely designed to deliver optimum system performance.6 R IGID O NE-P IECE A LUMINUM C ASTING& L INEAR B ALL S LIDEAR-G2 T ECHNOLOGYM AGNETIC T HRUST B EARINGWhy a magnetic bearing? Larger gaps in the absence of a continuous flow of pressurized air translates to unprecedented low levels of friction in the bearing. More importantly, the ability to control and measure torques in the nN.m range. No other rheometer can boast such low-end torque sensitivity. The larger gap in the thrust bearing is robust and not susceptible to contamination. The additional benefits of the magnetic bearing over traditional air bearing designs are the following:• Ultra low torques applied to the sample• Smaller sample volumes can be used• Ability to probe delicate material structures• Study of low viscosity materials over abroad range of conditionsP ATENTED D RAG C UP M OTOROur new patented advanced drag cup motor is designedto further reduce system friction by increasing the motor gap by 100%. Dramatic improvements in low end torque performance are realized without compromising high-end performance. The motor delivers enhanced transient response and an extended angular velocity control range. The motor incorporates a patented drag cup temperature sensor. For the first time in any rheometer design, the temperature of the drag cup is measured, ensuring the mostaccurate torque output.ACTIVE T EMPERATURE C ONTROL(ATC)The AR-G2 Electrically Heated Plate (EHP), Upper Heated Plate (UHP),and Dry Asphalt System all incorporate our new patented(1)non-con-tact temperature sensor for active measurement and control of theupper plate temperature, using a special draw rod. The draw rodhouses a micro PCB and Platinum Resistance Thermometer. AR-G2 T ECHNOLOGYICRO PCBP RIMARY CS ECONDARY C OIL HS SaS MART S WAP TM A CCESSORIESC ONCENTRIC C YLINDERConcentric Cylinders are commonly used for very low viscosity fluids,dispersions of limited stability, and applications where fluid/solventevaporation may be a problem. The Smart Swap Concentric Cylindersystem features Peltier temperature control and provides a temperaturerange of -20 to 150 °C with heating rates up to 15 °C/min.PPER H EATED P LATE(UHP)S MART S WAP TM A CCESSORIESE LECTRICALLY H EATED P LATES(EHP)The EHP is a Smart Swap TM temperature option that provides activeheating and cooling of parallel plate and cone and plategeometries. The EHP is perfect for rheological characterization ofpolymer melts up to a maximum temperature of 400 °C. Otherfeatures include an environmental cover and heated purge gasand an optional Gas Cooling Accessory for temperature controlto -70˚C. An optional clear purge cover is available for sampleviewing and integration with camera viewer. Additionally, for theAR-G2, the EHP offers patented Smart Swap G eometries andnewly patented Active Temperature Control, ATC. ATC makes theAR-G2 EHP the only electrically heated plate system capable ofdirect temperature control of both the upper and lower plates.30S MART S WAP TM A CCESSORIES3133D YNAMIC I NTERFACIAL S HEAR R HEOLOGY U SING THE AR-G2The dynamic interfacial shear moduli G’ and G” are used to monitor the network structure build-up, resulting from the adsorption of proteins at the interface. Proteins unfold at the interface and, therefore, are crucial to the stability of emulsions and foams. The measurement is done with a Du Noüy Ring, positioned at the interface of two liquids, or a liquid and air in a circular glass dish. The ultra-sensitive,nano-torque range of the AR-G2 rheometer is required to make these measurements. Figure 1 shows the dynamic storage modulus of this material continuously increases as the protein migrates to the surface and forms a network structure.0.030.0250.020.0150.010.0050 050100 150time (minutes)G ‘, G ’’ (N /m )34F LOW C URVE FOR D ISPERSIONS F LOW C URVE FOR P OLYMERSV ISCOELASTIC P ROPERTIES S TRAIN S WEEPD YNAMIC M ECHANICAL P ROPERTIES OF S OLIDS IN T ORSION T RANSIENT T ESTS(C REEP AND S TRESS R ELAXATION)D YNAMIC O SCILLATION ON L OW V ISCOSITY F LUIDS U SING ARES AR-G2 N ANO-T ORQUEM EASUREMENTS IN S TRESS& S TRAIN C ONTROL O SCILLATIONS TRESS AND S HEAR R ATE R AMPSE XTENSIONAL V ISCOSITYM EASUREMENTS ON ARESC REEP AND R ECOVERY OF A V ISCOELASTIC F LUIDS TRESS G ROWTH IN A T RANSIENT S TEP R ATE E XPERIMENT41© 2009 TA Instruments. All rights reserved.。
micro技术手册(中文显示)

● 相电流输入量 转换;True RMS,采样时间 1.25 毫秒 范围:相 CT 初级电流整定值的 0.1~10 倍 精确度:相 CT 初级电流值的±0.5%
3.1 MMC micro 开关输入------------------------------------------------------------------------------31 3.2 MMC micro 继电器输出---------------------------------------------------------------------------32 七、通讯-------------------------------------------------------------------------------------------------------33 1 通讯连接---------------------------------------------------------------------------------------------------33 2 通讯规约---------------------------------------------------------------------------------------------------33 2.1Modbus RTU 通讯--------------------------------------------------------------------------------------33 2.2Profibus-DP 通讯--------------------------------------------------------------------------------------46 八、典型接线图例--------------------------------------------------------------------------------------- ---51
双微M系列GNSS产品使用说明书
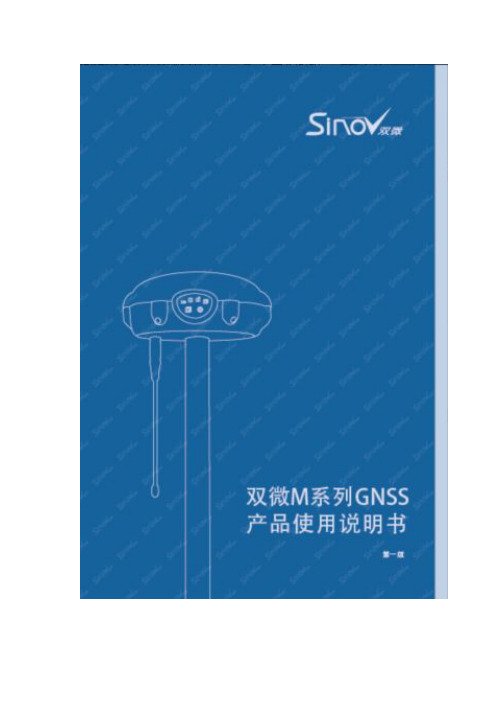
相关信息
您可以通过以下途径找到本说明书: 1、购买双微 M 系列产品后,仪器箱里会配赠一本《双微 M 系列 GNSS 产 品使用说明书》,方便您操作仪器。 2、登陆双微官方网站 ,在【技术支持】→【双微相关下载】 →【说明书】可下载该电子版说明书。
IV
目录
1 产品介绍................................................................................................. 1 1.1 接收机外观..................................................................................1 1.2 工作模式介绍..............................................................................3 1.2.1 RTK 工作模式................................................................... 3 1.2.2 静态工作模式................................................................... 4 1.3 使用与注意事项......................................................................... 5
5 测量....................................................................................................... 28
Microscan采集器操作说明书

Microscan采集器操作说明书Microscan QX-870 中文简明快速设置硬件正确连接后,使用Microscan ESP5.0及以上版本设置QX-870相关参数。
一.硬件设备安装根据产品条码出现的位置使用固定支架固定硬件设备,保证其能够上下移动及前后调整(1)调整采集器到产品之间的距离,该距离由产品条码中最窄条码精度确定。
(2)确保激光扫描产品的夹角大于15度,可以避免外部光源产生的光线干扰。
二. ESP调试软件说明。
1.双击“Microsoft ESP”软件,打开软件。
在弹出的硬件设备表中,选择QX-870,点击OK键。
提示是否连接,点击是按键。
下方红色DISCONNECTED表示未连接。
设置硬件所连接的端口及协议,可以不用选择直接点击Auto Connect.自动连接匹配后提示连接成功。
进入ESP设置界面,下方装讨论显示绿色CONNECTED表示连接成功。
点击左上角App Mode进入菜单设置,并选择第二项Read Cycle.各项参数说明如下:Multisymbol 标签设置Number of Sydbols:一次扫描条码标签的个数。
Multisymbol Separator:指定各标签之间分隔符。
Trigger 触发扫描模式Mode:Continuous Read 连续读取;Countinous Read 1 Output 连续读取只输出1个条码;External Level 外部级别模式;External Edge 外部边沿模式。
Level和External在读取周期开始条件是相同的,但结束时间不一样。
Decodes Bdfore Output 输出前的译码Mode:Non-consecutive 对识读的条码进行无序计数。
Consecutive 对误读的条码进行有序计数。
Number Before Output 设置识读条码输出之前的计数阀值。
End of Read Cycle 结束读周期Mode:Timeout 超时;New Trigger 新触发。
科学实验室用三维微观镜说明书

3B SCIENTIFIC ®PHYSICS1Stereo Microscope, 40x, Rotatable Head115 V, 50/60 Hz: 1005440 / 230 V, 50/60 Hz: 1005441Instruction Manual07/13 ALF1 Eyepiece with eye-shields2 Tube3 Lock-screw4 Adjustment knob for focusing5 Top-light housing6 Pillar7 Rotary switch for illumination 8 Specimen clips 9 Stand 10 Object plate 11 Mains switch 12 Objective13 Head lock screw1. Safety notes•For power supply use only electrical sockets with ground contact.Caution! The Stirling engine becomes hot during use. Risk of burns!• Do not touch the lamp during or immediatelyafter use.2. Description, technical dataThe stereo microscope allows three-dimensional viewing of objects in 20x and 40x magnification. The microscope 1005440 is for operation with a mains voltage of 115 V (±10%), and the 1005441 unit is for operation with 230 V (±10%). Stand: Metal stand, column firmly connected with base, pinion knobs attached on both sides of the stand for coarse and fine focusingTube: Binocular inclined 45°, interocular dis-tance adjustable between 55 and 75 mm, head rotatable by 360°Eyepieces: Pair of wide field eyepieces WF 10x 20 mm with eyepiece lock and rubber eyepiece cups, diopter compensation ±5 on the left eyepiece Objectives: Revolving nosepiece with objective 2x / 4xEnlargement: 20x / 40xObject Plate: Base with detachable object plates (plastic, black/white and glass) 95 mm diam. and 2 specimen clipsIllumination: Top, transmitted and mixed-light illumination, 12 V, 10 W lamp, rotary switch to select light combinationPower supply: 1005440: 115 V, 50/60 Hz 1005441: 230 V, 50/60 HzDimensions: 190 x 300 x 115 mm³ approx. Weight: 2.9 kg approx.3B Scientific GmbH • Rudorffweg 8 • 21031 Hamburg • Germany • Subject to technical amendments © Copyright 2013 3B Scientific GmbH3. Unpacking and assemblyThe microscope is packed in a molded styro-foam container.• Take the container out of the carton removethe tape and carefully lift the top half off the container. Be careful not to let the optical items (objectives and eyepieces) drop down. • To avoid condensation on the optical compo-nents, leave the microscope in the original pack-ing to allow it to adjust to room temperature.• Using both hands (one around the pillar andone around the base), lift the microscope from the container and put it on a stable desk. The microscope is fully assembled except for the eye-shields. Position them over the eyepieces for viewing comfort and to block out any ambient light. In addition, the object plate must be inserted into the stage opening in the base.4. Operation4.1 General information• Set the microscope on a level table.• Place the object to be observed in the centerof the object plate. Use the clips to fasten it into place.• Connect the mains cable to the net and turnon the switch to get the object illuminated. • When using transmitted- or mixed-light illu-mination replace black and white plate with the glass plate.• Turn the objective to get the desired magnification. • On the rotary switch position I is for transmit-tedlight, position II is for top-light and posi-tion III is for mixed-light.• Adjust the interpupillary distance betweenthe eyepieces by grasping the two prism-housings with both hands and moving them until one circle of light can be seen.• Focus the object by turning the side knobs. • It might be necessary to loosen the lock-screw and raise or lower the entire stereo head-bracket until the outline of the object is found in the field of view. Be sure to tighten the lock-screw to fix the height of the stereo head on the pillar.• To rotate the microscope head, loosen thehead lock screw.• Always turn off the light immediately after use. • Be careful not to spill any liquids on the mi-croscope.• Do not mishandle or impose unnecessaryforce on the microscope.• Do not wipe the optics with your hands.• Do not attempt to service the microscope yourself.4.2 Changing the lamp• Turn off the power switch, unplug the mainsplug and let the lamp cool down.• To change the lamp of the top light loosenthe lock-screw for the lamp-housing and re-move the lamp screen.• Remove the lamp and insert a new one. • Remount the lamp screen.• To change the lamp of bottom light removethe cover from the base opening.• Change the lamp in a similar way as de-scribed above.• Remount the cover.4.3 Changing the fuse• Turn off the power switch and unplug themains plug.• Unscrew the fuse holder on the back of thestand base with a screwdriver.• Replace the fuse and reinsert the holder inits socket.5. Storage, cleaning, disposal• Keep the microscope in a clean, dry anddust free place.• When not in use always cover the micro-scope with the dust cover.•Do not expose it to temperatures below 0°C and above 40°C and a max. relative humid-ity of over 85%.• Always unplug the mains plug before clean-ing or maintenance.• Do not clean the unit with volatile solvents or abrasive cleaners.• Do not disassemble objective or eyepieces to attempt to clean them.• Use a soft linen cloth and some ethanol to clean the microscope.• Use a soft lens tissue to clean the optics.• The packaging should be disposed of at local recycling points. •Should you need to dis-pose of the equipment it-self, never throw it away in normal domestic waste. Local regulations for the disposal of electri-cal equipment will apply.。
- 1、下载文档前请自行甄别文档内容的完整性,平台不提供额外的编辑、内容补充、找答案等附加服务。
- 2、"仅部分预览"的文档,不可在线预览部分如存在完整性等问题,可反馈申请退款(可完整预览的文档不适用该条件!)。
- 3、如文档侵犯您的权益,请联系客服反馈,我们会尽快为您处理(人工客服工作时间:9:00-18:30)。
MicroScribe-G2是美国Immersion 公司最新推出的三维数字化仪,用于建立精细的三维电脑模型,是设计工程人员、虚拟现实、动画制作设计师、游戏开发师、建筑师、科学研究人员的理想工具。
MicroScribe-G2由三段碳纤维臂构成,臂之间由球形连接器相连,内置高精度位置和方向传感器,以感知探头所处位置。
MicroScribe -G2是美国Immersion公司最推出的三维数字化仪,它突破了计算机的三维数据空间与现实的三维数据空间的距离,使得被测物体通过“威力手”在计算机的虚拟空间里得以重现。
它适用于模具开发、影视动画、游戏开发等针对外形测量的行业及个人工作室。
数字化率:1,000点/秒
平台支持:pc、Macintosh、SGI/UNIX
接口:RS-232或USB 1.1
型号MicroScribe-G2 - 50”(1270mm)球
MicroScribe-G2X* - 50”(1270mm)球
MicroScribe-G2L - 66”(1676mm)球
MicroScribe-G2LX* - 66”(1676mm)球
* 型号末尾带有“X”为高精度
平面支持可连PC, Macintosh, SGI/UNIX
软件驱动提供多种流行软件驱动如: 3D Studio VIZ, 3D Studio MAX, AutoCAD, Mechnical
Desktop, Alias, Maya, from Z, Lightwave, SolidWork等
数字化率1,000点/秒
精度(100点ANSI球)MicroScribe-G2 : 0.015" (0.38mm)
MicroScribe-G2X : 0.009" (0.23mm)
MicroScribe-G2L : 0.017" (0.43mm)
MicroScribe-G2LX : 0.012" (0.30mm)
台面面积6" x 6"
串口RS232或USB 1.1
∙携带式手提箱
附件
∙数据连线
∙“Triggle”式手动开关
∙“Pager”式手动开关
∙三角支架
∙重型双定位脚踏板
∙数字化转换平台及油灰。