交通流线分析图解k
3交通枢纽--交通流线及疏解
42
同线路同站台形式是一条线路的两个轨道在另一条 线路两轨道的正上方,而相同方向的两个轨道位于同 一竖直平面。其流线特点换乘方向明确,换乘距离短
。但是各个方向之间均需要通过设置在上下站台之间
的楼梯或自动扶梯才能实现换乘,高峰时段易造成人 流拥堵。
43
44
同方向同站台形式是在同一平面上布置两条线路中 同一方向的轨道,保证在同一个站台实现同方向客流 的换乘,不同方向的客流则通过在上下站台之间设置
55
56
③侧式站台之间换乘 上下两个侧式站台呈井字型布置,形成四个交叉点 ,在四个交叉点通过四个换乘楼梯或自动扶梯来完成 站台与站台之间的换乘。
57
58
这三种布置形式各有特点,只需要通过一次上、下 楼梯就可以完成各个方向的换乘。其中岛式站台之间 换乘由于相交于一点,站台宽度有限,一定程度上限
2
一.行人(旅客)交通流线
行人交通是以人的体力为基础的最基本的交通方式。 它是各类交通方式发生的始端和末端的必然形式。 行人交通具有速度慢,一般不成队列,运动速度和方 式一般不受限制,对安全间距要求不太严格等特点。
3
为克服流线冲突,常采用的交通设施有: (1)人行道 (2)人行横道、人行天桥、人行地道 (3)行人交通信号 (4)安全岛 (5)分隔设施 (6)步行街
35
1、水平换乘 当两条轨道线路处于同一水平面时,乘客可以 通过站台实现线路之间的换乘,当站台规模无法满足 枢纽人流量使用时可以通过天桥或地道连接站台来实 现换乘。该站台形式可分为双线双岛式和双线岛侧式 两种。 双线双岛式站台形式是将其中一条线路铺设在 两个岛式站台的外侧,两个岛式站台之间铺设另外一 条线路。适用于折角换乘客流较小而同方向换乘客流 较大的情况 如果衔接的两条线路中有一条为终点站时,则 可将线路铺设中间开两侧车门供乘客上下车,另一线 路不同方向铺设在两站台外侧,中间到站乘客可快速 换乘到另一线路。
交通流线分析图

交通流线3.5 植物园特色——特色游线樱花园月季园海棠苑百草园梅苑槭树园宿州文化园木樨园荫生树木园夏林华语园岩石花卉园果蔬植物园科普学习游线根据植物园的景观结构,园区内策划两条不同主题的游览路线,将不同的特色景点串联起来。
科普学习游线月季园岩石花卉园景观休闲游线入口建筑科普长廊盆景园珍稀树木园展览温室冬景松柏园至次入口景观休闲游线荫生树木园科普学习景点景观休闲景点综合景点童趣植物园童趣植物园湿生植物园湿生植物园两条特色游线串联不同专类园与景点3.6 内部交通系统规划PP村道(建议后期拓宽)接东三环路(相隔500米)二级园路:4m图例:出入口三级园路:2m内部停车场:停车位(20个)外部停车场:停车位(491个)木栈道:1.5m一级主园路:6mP电瓶车集散点环线休憩驿站二级园路:灰色沥青一级主园路:红色沥青三级园路:透水砖、花岗岩等增加次入口与停车设施,三级园路系统分级分材质,强化识别特性自然保育区科研试验、引种、驯化区(含园务管理)科研、管理人员入口项目背景PROJECT BACKGROUND 3.4 交通分析图例:绿道主线(自行车绿道3米)绿道辅线(步行绿道2.5米)景观园路木栈道已建成市政道路未建规划道路生态停车场(共113个车位)自行车驿站主要入口P P P P P P 慢行绿道自行车绿道生态停车场停车场设计原则:1、根据上位规划要求合理设置机动车停车场。
2、机动车停车场的出入口应有良好的视野。
出入口距离人行过街天桥、地道和桥梁、隧道引道须大于50米;距离交叉路口须大于八十米。
3、机动车停车场车位指标大于50个时,出入口不得少于2个;大于500个时,出入口不得少于3个。
出入口之间的净距须大于10米,出入口宽度不得小于7米。
N。
交通流线及疏解

3.流线交叉的疏解
流线交叉点:是枢纽路网中道路与道路、道路与铁路或道路与其 它交通设施产生交叉的地点。 [分类]:平面交叉—优先式交叉点、信号化交叉点、环岛交叉点;
立体交叉点 ——平交路口是道路的隘路、瓶颈,是交通阻滞的主要发生地, 是机动车在市内交通时间约1/3于路口停留或减速 ——平交路口的基本冲突:交叉、合流、分流
成 都 某 路 口
2.交通流线的平行与交叉
3、分歧流线: ——交通流由一个方向分成两个不同的方向; ——在同一时间内,一个交通实体只能选择一个方向。
2.交通流线的平行与交叉
4、交叉流线:P37图3-3 ——包括横断与交织,交通流线从两个不同方向进入交叉点,然 后按两个不同方向离开交叉点; ——在同一时间内,不能同时作业; ——是会合流线与分歧流线形式的组合。
交通流线及疏解
货流流线 客流流线
1.交通流线种类
交通流:指行人、车、船、货物的流动
交通流线:人、车、船、货物在研究范围内流动的轨迹
种类——行人(旅客)交通流线
——行人交通具有速度慢、一般不成队列,运动速度和方式不受限 制,安全间距差异大。 ——行人交通安全设施:人行道、人行横道、行人交通信号、安全 岛、分隔设施、步行街 ——行人交通流线分类:进站、出站旅客流线,长途、短途旅客流 线,市区、市郊旅客流线,国内、国际旅客流线,上行、下行。 ——布置:平面分散、立体布局
判断Fi与Fj相互交叉,但作业时间不冲突的条件是: (pi1,pi2,pi3,pi4,pi5…)∩(pj1,pj2,pj3,pj4,pj5…)≠Φ
且 (ti1,ti2) ∩(tj1,tj2)=Φ
3.流线交叉的疏解
流线交叉的疏解:为了改进流线交叉的性质,减轻流线交叉的 负荷及消除流线交叉所采取的措施。
交通流线设计

北京南站地下一层旅客出站流线
货流流线 客流流线
第一节 交通流线的内涵
二、交通流线的组成要素 交通方式:公、铁、港、航、管道 性质:客、货、交通工具 流量:单位时间 流向:单向、双向;进、出 流距/流程:长、短 流速:快、慢
1.思行人考(:旅结客)合交行通人流交线 通流线的特征,说说相应 是行各人类交的交通通是流方以线式人设发的计生体中的力应始为注端基和础意末的什端最么的基问必本题然的?形交式通方式,
行人交通具有速度慢,一般不成队列,运动速度和方 式一般不受限制,对安全间距要求不太严格等特点。
对行走距离和安全较敏感。
狭义交通概念是和运输紧密联系的。
易经:上下相迭谓之交,往来不穷谓之通.
行人、车船、货物和信息在空间上的移动、传 递和输送的总称。
2、交通流的概念
行人、车船、货物的流动。 交通流的基本要素:速度、密度和流量
3、交通流线
概念一:行人、车船、货物在研究范围内流动的 轨迹称之为交通流线 。
概念二:行人、车船、货物在一定范围内集散活 动,形成一定的流动过程和流动轨迹,称之为 交通流线 。
一、交通流线之间的关系 流线按照流动方向的不同可分为以下两类: 1.同向交通流线
两条流线的运行方向一致。 2.对向交通流线
两条流线的运行方向相反。
交通流线按照相互之间的影响和交叉干扰情况, 可以分为以下四种形式。
平行流线 交通流线之间没有交叉,不占用共同的线路设 备,可以同时平行作业。
会合流线 从两个或两个以上不同方向的交通流汇合成一 个方向的交通流线。在同一时间内,互相妨碍,不能同时 运行。
第二节 交通流线的分类
第三章 交通流线

①按线路别疏解布置
图3—11(a) 按线路别枢纽线路立体琉解布置图 两双线铁路引入枢纽的正线相互位置与区间正线相互位置相 同,枢纽一端修建一座跨线桥,可疏解列车进路交叉点4个。 两端咽喉各存在着两条线路间的转线车流交叉。如右端咽喉 D方向接车与C往B方向的发车进路交叉。C往B方向的发车与A往D 方向的发车进路交叉,左端咽喉也存在着类似的进路交叉。
交通港站与枢纽
③按列车种类别疏解布置
b客货顺列式列车种类别疏解布置 。这种疏解布置方案适用于 顺列式枢纽,其特点是:客运站与编组站顺列布置,旅客列 车正线为外包式,货物列车经由枢纽需要通过客运站,在外 包式方向别疏解布置的基础上,再修建4座跨线桥,以疏解客、 货列车的进出站进路。
客运站 编组站
图3—12 (b) 按列车别客货顺列式枢纽线路立体疏解布置图
(2) 船舶流线与其他流线的立体疏解。主要采用横跨 江河的桥梁为立体疏解形式。必要时,也可采用地 下隧道疏解。
(3) 铁路交通流线与城市道路交通流线的立体疏解。
(4) 城市道路交通流线的立体疏解。一般采用互通式 立交疏解。
(5) 铁路交通流线的立体疏解。
(6) 航空交通流线的立体疏解
交通港站与枢纽
◦ 结合实际车站(航空港)具体设备布局和作业组织, 说明该站有哪些交通流线。
6. 简要说明航空航路的有关规定。
流线的平行、会合、分歧、交叉在各种不同交通运输 方式之间以及在各种交通运输方式内部都大量存在。
图3—4 公路道路交通流线布置的四种基本组合形式
图3—5
公路道路交通流线布置组合形式
交通港站与枢纽
一、流线交叉疏解的意义 流线交叉点是枢纽路网中道路与道路,道路
与铁路或道路与其它交通设施产生交叉的地点。 交叉点可分为:
交通流线分析
交通流线分析交通是我们日常生活中不可或缺的一部分,是城市生活的重要组成部分。
而交通流线分析则是指对一个区域内的交通流线进行分析,排除一些交通瓶颈和缺陷,提高交通系统的运行效率。
在城市规划和交通规划中,交通流线分析是一个必不可少的环节。
交通流线分析主要包括以下几个方面:一、交通瓶颈分析交通瓶颈通常是指那些导致交通流动受阻的地方,如交叉口、道路拥堵等。
在交通流线分析中,需要通过观察交通密集区域的运行情况,找出其中的瓶颈所在,以便后续进行解决。
解决交通瓶颈的方法可以包括改道、加快通行速度、疏导等措施,以提高道路运行效率。
二、路径选择在交通规划中,为了方便行人和车辆的交通,需要设计一些可行的路径选择。
在交通流线分析中,我们需要根据人们的通行需求和交通流量,找出人口密集和交通密集的区域,并设计可行的路径,方便人们的通行。
当然,路径选择的结果是要结合道路条件、交通工具和环境因素等多方面的考虑,以达到最优的通行效果。
三、交通工具交通工具是交通流量分析的重要参数之一。
在交通流量分析中,我们需要考虑不同的交通工具,例如:汽车、火车、轮船、飞机、电车、自行车等等。
根据交通工具的不同特点和运行速度,可以为不同的区域规划不同的交通工具,以提高效率和便捷程度。
四、交通运行参数交通运行参数是指衡量一个区域交通情况的各项参数,如道路流量、交通速度、交通瓶颈、交通事故率等等。
在交通流线分析中,我们需要根据这些参数,设计出适合该区域交通运行的措施,以保证交通系统的正常运行。
除了以上几个方面,交通流线分析还需要结合道路安全、环境保护和人口密度等因素进行分析。
只有综合考虑这些因素,才能实现一个区域的交通系统的优化和提高。
第三章 交通流线设计 PPT

(一)流线设计的原则(客运)
➢缩短旅客在场站内的步行距离,避免迂回。
➢疏散出站人群,避免拥挤。
➢设计具有灵活性,满足多种需求。
➢考虑与其他交通方式的衔接。
公交站
地铁四号线
机场线
出租
车
(二)交通流线设计步骤
•
•
•
•
•
•
•
确定起点到终点的所有可行路线
确定移动方向
边界及出入口的位置、标志、场库的位置
一流线设计的原则客运地铁四号线机场线公交站出租车车有轨电车二交通流线设计步骤?确定起点到终点的所有可行路线?确定移动方向?边界及出入口的位置标志场库的位置?设施设备的特征?设计流线草图?流线优化布局调整设施位置调整?完成流线设计地铁客流流线设计存在的问题1进出口位置设置不合理
We want
PPT模板下载:/moban/
有什么不同?
三 交通流线的关系
按照互相交叉干扰情况,可分为四种形式。
• 平行流线
• 合流线
• 分流线
• 交叉流线
交织和交叉是一回事吗?
四 交通流线分析
为了港站与枢纽的建设布局更加合
理,需要对各类流线进行分析,研
究不同区域的流线占用情况,识别
枢纽中的瓶颈区域,帮助各区域进
行优化。
1.什么是“流线瓶颈”?
2.为什么会有“流线瓶颈”?
3.如何分析交通流线?
如何分析交通流线?
分析的步骤(客流)
1.确定行人流线类型。
划分行人的流线。
客运站:进站流线,出站流线,换乘流线
街道:步行流线,机动车流线,非机动车流线
2.划出流线的分布走向。
标出出入口
箭头 颜色 线条
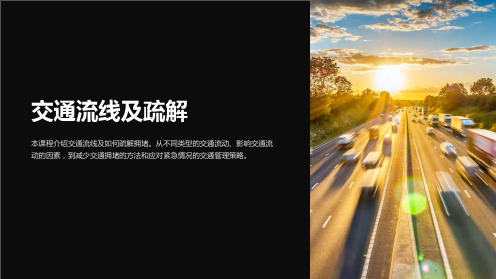
《交通流线及疏解》课件
交通产生的废气对空气质量造成影响。
2 温室气体排放
交通排放的温室气体对气候变化产生负面影响。
3 噪音污染
交通噪音对居民和环境造成不良影响。
智能交通系统
实时交通监控
通过使用实时交通监控技术来 监测道路交通状况。
电子收费
使用电子收费系统提高收费效 率。
智能停车
利用智能停车技术提高停车位 利用率。
1 交通流量
道路上的车辆数量。
2 交通速度
车辆在道路上的行驶速 度。
3 交通密度
道路上的车辆密度。
4 交通构成
5 道路设计
包括机动车、非机动车和行人等的组成。
道路的结构、布局和标线。
交通拥堵类型
瓶颈
道路狭窄或交通流大导致的 常通行。
幽灵拥堵
车辆间因反应滞后而引起的 拥堵。
创新交通解决方案
超级高铁
超级高铁旨在实现高速、高效的交通方式。
自动驾驶汽车
自动驾驶汽车将改变未来交通方式。
飞行汽车
飞行汽车有望解决城市交通拥堵问题。
成功的交通流动管理案例
新加坡
通过多种手段有效控制交通拥 堵。
东京
设计高效的交叉口和交通信号 系统。
伦敦
采用综合交通规划促进可持续 交通。
交通流动与拥堵的未来趋势
减少交通拥堵的方法
公共交通
鼓励人们使用公共交通工具,减少单人驾车。
合乘
多人共享一辆车,减少交通流量。
共享单车
提供共享自行车以鼓励非机动交通。
道路扩建
改善道路基础设施以容纳更多车辆。
交通管理策略
1
交通信号灯
通过交通信号灯进行交通控制。
2
- 1、下载文档前请自行甄别文档内容的完整性,平台不提供额外的编辑、内容补充、找答案等附加服务。
- 2、"仅部分预览"的文档,不可在线预览部分如存在完整性等问题,可反馈申请退款(可完整预览的文档不适用该条件!)。
- 3、如文档侵犯您的权益,请联系客服反馈,我们会尽快为您处理(人工客服工作时间:9:00-18:30)。
交通流线分析图解I received a lot of emails asking if I could explain how I created the pedestrian paths diagram in the previous post. To generate the line work, there are many ways this could be done. In the past, I probably would have used the spline tool in CAD. The line work could also easily be created in Illustrator. However, not many people know about or use the pen tool in Photoshop. It's similar to the pen tool in Illustrator but with some minor differences. In this case, I will be using the pen tool to create a path that I can tell the brush tool to follow.很多人发邮件来问我上篇博文中交通流线的分析图是怎么做的。
交通流线图有很多种画法,以前我大概会直接用CAD里的多段线画,在AI中也很好画。
但是很多人没想过或者是不会用PS中的钢笔工具。
它和ai中的钢笔工具差不多但又有些微不同。
这个案子中,我会使用钢笔工具来画线,并讲解笔刷工具。
1. Setup the Brush settingsI need to first set the brush settings because this is what I am going to use to add a stroke to the path created in the next step. The settings in this step will determine the thickness of the line as well as the color, hardness, and opacity. I chose a hard brush, 6 pixels big, at 100% opacity, and with black paint. You may need to draw a few lines to determine if you have the correct size.1:设置笔刷首先要设置笔刷,因为需要用笔刷描我下一个步骤中画的线。
这一步的设置决定了线宽、颜色、硬度和透明度。
我选择了一个硬笔刷,6像素,不透明度100%,黑色(或者自己喜欢的颜色)。
设置后可以画一段线看看尺寸是否合适。
2. Setup the pen tool and begin creating pathsBefore choosing the pen tool, first create a new layer. The paths will not show up in the layers palette but the stroke that is applied to the paths will be drawn on this layer. Now, choose the pen tool and be sure the "Path" option is selected in the pen tool settings tool bar at the top.With the pen tool activated, begin drawing the paths. To create the curved paths, click and drag when choosing the points on the path. This will create handles that can be used to control the size and shape of the curve at that point.2.设置钢笔工具开始画线在选择钢笔工具之前,先新建一个图层。
路径不会显示在图层面板,但是描边的线会画在这个图层。
然后选择钢笔工具,确定路径是从顶部的钢笔工具设置栏中选中的。
工笔工具就绪,开始画路径。
创建曲线路径,选中路径上的点单击并拖动,通过操纵杆控制曲线的形状和尺度。
3. Stroke PathOnce you get the path where you want it, right click near the path and choose "Stroke Path". If this option is grayed out, double check that you have the new layer selected that was created in the previous step.3.描边路径调整好曲线后,单击右键选择“描边路径”,如果无法选择“描边路径”(文字呈现灰色),双击上一步中新建的图层即可。
A second dialogue box will appear asking what tool to use for the stroke. We want the "Brush" tool since this is what we set up in the first step. Then choose "OK".To finish the path, hit the enter. Repeat these steps to create each path.然后单击“回车”~一条路径就搞定啦~~~然后每条路径都重复上述操作~4. Generate many paths at different levels of opacitiesI want to create a hierarchy of paths revealing different levels of traffic intensity. This is shown through both a density of lines and levels of opacity. For this image, I created three different path layers. The first layer was set to 100% opacity, the second to 50%, and the third to 15%.4.在不同透明度的图层画许多不同的流线我想用不同类别的曲线表示交通强度的不同,主要通过线的密度和透明度来表示。
这张图中,我建了三个流线图层,第一个图层不透明度是100%,第二个是50%,第三个是15%。
5. Add line work glowI want the line work to have more of a presence in the illustration, so a slight glow will be added. This is done simply with the brush tool. I used a soft brush, 90 pixels big,and set the opacity to 12%. Where the lines are dense or converge together, I layered in some black paint.5.给线条加光晕我想让这些线条更有体积感,所以给线条加了一点光晕。
笔刷很容易做到这个效果。
我用了一个软笔刷,90像素,不透明度12%。
在线条密集或者相交处,就在新建的图层上用黑色笔刷画一笔。
I also duplicated the dark paths layer and applied a Gaussian Blur filter. I removed the background so that this step could be seen a little more clearly.我还复制了上面新建的那个图层,并且用了高斯模糊滤镜。
下图我去掉了背景图,以便看清楚这个操作6. Add ColorTo further punch up the paths, I'm going to add color. To make things easier, first merge all of the path layers together. It may be best to first duplicate these layers and turn off visibility so that you will still have the original individual layers available to editif needed later on down the road. To merge, select all of the path layers, right-click on one of the layers, and choose "Merge Layers".6.上色为了让流线图看起来更加高大上,下面我们来给它上色。
为了简化操作,先把流线图层合并,最好是先把这些子流线图层复制一份,关掉图层可见性,以备不时之需。
选择流线图层,右键选择“合并图层”。
Once the layers are merged, right-click on the new single layer and choose "Duplicate Layer".图层合并好后。
右键合并后的新图层,选择“复制图层”。
With the duplicated layer selected, choose "Image>Adjustments>Hue Saturation" at the top. In the dialogue box, first check the "Colorize" box. Then move the "Lightness" slider to the right to lighten the line work. Also move the "Saturation" slider to the right to increase the color. Finally, adjust the "Hue" slider to the color tone you prefer.选择该副本图层,在顶部状态栏选择“图像”、“调整”、“色相饱和度”。