Netapp FAS2554安装配置手册
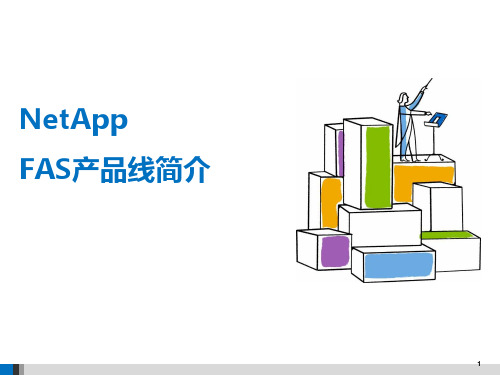
NetApp FAS产品线简介
FAS2554A
4
FAS2552 和 FAS2554 HA 配置
系统背面图
FAS2552 2U 机箱 HA 配置
2U
FAS2554
4U 机箱 HA 配置
4U
5
FAS2552 和 FAS2554 控制器 I/O
控制台端口 管理端口
e0a LNK LNK
e0c 0c
e0d 0d
e0e 0e e0f
0f
A
LNK LNK LNK LNK
NV
0b
0a
SSN
MAC
e0b
B
DC
AC
USB 端口
GbE
1
SAS
UTA2 专用管理端口
x2
2
2
4 个统一目标适配器 (UTA2) 端口
– 10 GbE 以太网 – 16 Gb/秒 FC 或 8 Gb/秒 FC
1 个 GbE 管理端口
1 个专用管理端口
1 个 USB 端口(已禁用) 1 个控制台端口
2 个 GbE 端口 2 个 SAS 端口
6
FAS2520A 详细信息
HA 对
2U 外形规格 36 GB 内存
– 32 GB 物理内存 + 4 GB NVMEM
4 个运行频率为 1.73 GHz 的 64 位 内核
– 每个控制器 1 个双核处理器 FAS2520A
提供低成本 10G Base-T 端口
FAS2552A
4 个运行频 个双核处理器
利用板载统一目标适配器 (UTA2) * 确保 I/O 灵活性
– 能够配置以太网或 FC
支持 NFS、CIFS、iSCSI、FC 和 FCoE GbE 管理端口 利用 System Setup 加快安装速度 新挡板
NetApp配置手册

2. 系统基本维护指南.......................................................... 5
2.1. 2.2. 2.3. 2.4. 2.5. 2.6. 2.7. 2.8. 2.9. 2.10. 2.11. 2.12. 2.13. 2.14. 2.15. 2.16. 2.17. 2.18.
Shanghai PKIT Confidential源自11上海帕科网络科技有限公司
Netapp 存储系统维护手册
Shanghai PKIT Confidential
12
上海帕科网络科技有限公司
Netapp 存储系统维护手册
2.6. 停机及重新启动
从Filer - Shut Down and Reboot项目中可以执行停机以及重新启动,同时还可 以设定等待时间。对于NetApp产品,强烈建议通过这种方式停机并关闭电源, 否则可能会导致NVRAM电池电量过度消耗,进而影响下次系统的正常启动。 针对cluster系统(如FAS2040A FAS3140A等)在关机前一定先要将cluster功能 禁用:telnet到任意一控制器执行命令:cf disable;再按以下操作对每控制器进 关机操作。在开机后.同样telnet到任意一控制器执行命令:cf enable ;开启cluster 功能。注意:再关系统电源时先关控制器再关磁盘柜。开机顺序相反。.
进入管理界面...........................................................................................................5 系统基本信息...........................................................................................................8 系统LOG信息 ..........................................................................................................9 配置Autosupport.....................................................................................................10 设置时区、时间和日期 ......................................................................................... 11 停机及重新启动.....................................................................................................13 管理及创建卷.........................................................................................................13 管理及创建Qtree .................................................................................................... 21 磁盘配额.................................................................................................................25 SnapShot的配置和管理 .........................................................................................36 CIFS的相关信息 ....................................................................................................38 CIFS共享 ................................................................................................................41 启用home directory功能 ........................................................................................44 ISCSI连接Windows................................................................................................45 网络端口的管理.....................................................................................................55 其他网络参数.........................................................................................................57 更改root用户密码 ..................................................................................................60 系统实时状态监控.................................................................................................61
NetApp-FAS系列安装配置说明
NETAPP FAS系列安装配置手册赞融电子上海分公司2003年11月修订控制1简介1.1说明本文简要说明了Network Appliance公司FAS系列存储产品配置过程。
本手册基于DataOntap 6.4.2P6操作系统1.2适用对象和前提本文是针对赞融电子的内部人员。
要求阅读者具有以下方面的专业能力:熟悉Unix操作系统;熟悉Windows操作系统;具有NETAPP FAS系统的基本知识.1.3参考资料Data ONTAP™ System Administrator’s GuideData ONTAP™ Software Setup Guide1.4术语表NFS:Network 网络文件系统CIFS:Common Internet 通用Internet文件系统NAS:Network Attached Storage 网络附加存储WAFL:Write Anywhere 随地写入文件格式2配置过程2.1检查Filer硬件安装2.2设置Filer使用计算机串口连接Filer背板上的Console口使用Windows附件中的超级终端建立连接,参数如下:每秒位数 9600,数据位 8,奇偶校验无,停止位 1,数据流控制无建立连接依次打开Disk Shelf和Filer电源使用setup命令配置Filerfas940> setupPlease enter the new hostname []: fas940Do you want to configure virtual network interfaces? [n]: yNumber of virtual interfaces to configure? [0] 3Name of virtual interface #1 []: vif1Is vif1 a single [s] or multi [m] virtual interface? [m] sNumber of links for vif1? [0] 2Name of link #1 for vif1 []: e5aName of link #2 for vif1 []: e5bName of virtual interface #2 []: vif2Is vif2 a single [s] or multi [m] virtual interface? [m] sNumber of links for vif2? [0] 2Name of link #1 for vif2 []: e9aName of link #2 for vif2 []: e9bName of virtual interface #3 []: vif3Is vif3 a single [s] or multi [m] virtual interface? [m] sNumber of links for vif3? [0] 2Name of link #1 for vif3 []: e11aName of link #2 for vif3 []: e11bPlease enter the IP address for Network Interface vif1 []: 165.204.224.173Please enter the netmask for Network Interface vif1 [255.255.0.0]: 255.255.254.0Please enter media type for vif1 {100tx-fd, tp-fd, 100tx, tp, auto (10/100/1000)} [auto]: Enter Please enter the IP address for Network Interface vif2 []: 165.204.224.174Please enter the netmask for Network Interface vif2 [255.255.0.0]: 255.255.254.0Please enter media type for vif2 {100tx-fd, tp-fd, 100tx, tp, auto (10/100/1000)} [auto]: Please enter the IP address for Network Interface vif3 []: 165.204.224.175Please enter the netmask for Network Interface vif3 [255.255.0.0]: 255.255.254.0Please enter media type for vif3 {100tx-fd, tp-fd, 100tx, tp, auto (10/100/1000)} [auto]: Please enter the IP address for Network Interface e0 []: 165.204.224.172Please enter the netmask for Network Interface e0 [255.255.0.0]: 255.255.254.0Please enter media type for e0 {100tx-fd, tp-fd, 100tx, tp, auto} [auto]:Would you like to continue setup through the web interface? [n]:Please enter the name or IP address of the default gateway: 165.204.224.254 The administration host is given root access to the filer's/etc files for system administration. To allow /etc root accessto all NFS clients enter RETURN below.Please enter the name or IP address of the administration host:Please enter timezone [GMT]: Asia/ShanghaiWhere is the filer located? []: Suzhou ChinaWhat language will be used for multi-protocol files (Type ? for list)?:zh.GBKSetting language on volume vol0The new language mappings will be available after rebootMon Sep 29 03:45:14 GMT [rc:ALERT]: Language on volume vol0 changed to zh.GBK Language set on volume vol0Do you want to run DNS resolver? [n]: yPlease enter DNS domain name []: You may enter up to 3 nameserversPlease enter the IP address for first nameserver []: 165.204.224.2Do you want another nameserver? [n]: yPlease enter the IP address for alternate nameserver []: 139.95.33.235Do you want another nameserver? [n]: EnterDo you want to run NIS client? [n]: EnterThis system will send event messages and weekly reportsto Network Appliance Technical Support. To disable this feature,enter "options autosupport.support.enable off" within 24 hours.Enabling Autosupport can significantly speed problem determinationand resolution should a problem occur on your system.For further information on Autosupport, please see:.Press the return key to continue.Now type 'reboot' for changes to take effect.fas940> Reboot重新启动Filer 之后,进行cifs setup 安装fas940> cifs setupEnable CIFS access to the filer by a Windows(tm) PCYour filer is currently only visible to PCs on the same net.Do you wish to make the system visible via WINS? [no]: yPlease enter next WINS IP address (or return to end list) []: 165.204.224.225Please enter next WINS IP address (or return to end list) []: 163.181.3.225Please enter next WINS IP address (or return to end list) []:CIFS requires local /etc/passwd and /etc/group files for multiprotocol.Default passwd be created containing 'root', 'pcuser',and 'nobody'.Enter the password for root []:Retype the password:This filer is currently licensed for CIFS only.The filer will be configured as a NTFS_only filer. It canbe changed to a Multiprotocol filer by reissuing the CIFS setup command.The default name of this filer will be 'FAS940'.Do you want to modify this name? [no]: EnterCIFS supports three types of user authentication:1. Windows Domain authentication.2. Windows Workgroup authentication using the filer's user accounts.3. /etc/passwd and/or NIS based authentication.What type of authentication will this filer use? [1]: 1The filer will use Windows Domain authentication.Enter the Windows Domain for the filer []:It is highly recommended that you create the local administratoraccount (FAS940\administrator) for this filer. This account enablesaccess to the filer from Windows when domain controllers are notaccessible.Create the FAS940\administrator account? [yes]: yesSet the password for FAS940\administrator:Retype the password:Mon Sep 29 11:53:46 CST [rc:info]: User <administrator> addedMon Sep 29 11:53:46 CST [rc:notice]: security style for /vol/vol0/ changed from unix to ntfs is a Windows 2000(tm) domain.In order to create this filer's domain account, you must supply thename and password of an administrator account with sufficient privilegeto add the filer to the domain.Please enter the Windows 2000 user []:Password for :CIFS - Logged in as .By default, setup creates the filer account in the ActiveDirectory container named 'Computers'. Alternatively, you caninstall the filer in an organizational unit (OU) by specifyingthe domain relative distinguished name of the OU, as in'ou=innerOU,ou=outerOU'.Active Directory container for filer account? [cn=computers]: EnterCIFS - Connecting to domain controller.Mon Sep 29 11:57:22 CST [rc:info]: Connection with DC \\SSUZDC2 establishedMon Sep 29 11:57:22 CST [nbns_timer:info]: All CIFS name registrations complete for local serverWelcome to the AMD () Windows 2000(tm) domain.CIFS local server is running.2.3创建volume通过Telnet或串口,用命令行方式创建卷vol create <volume name, such as ‘/vol/vol1’> [ -r <RAID Size> ] [ disks] 例,创建名为vol1的卷,RAID组最大为8,包含2块盘vol create /vol/vol1 –r 8 2使用vol status –r 命令观察初始化进程通过Web界面创建卷在浏览器中输入点击,根据提示输入用户名密码从右侧窗口Volume Add在New Volume Name栏中填写新建卷名vol1在Raid Group Size中填写RAID组的大小8 在Language中选择Simplified Chinese(GBK)选择Automatic Disk Selection在Number of Disks中填写Volume的磁盘数2点击Add2.4通过CIFS共享通过命令行cifs shares -add <share name> <path> e.g. cifs shares add vol1 /vol/vol1通过Web界面设置→CIFS→Shares→AddShare Name 填写 vol1Mount Point 填写 /vol/vol1点击Add2.5通过NFS共享通过命令行exportfs -o anon=0 /vol/vol1或者通过Web界面配置→NFS→Manage Exports→Insert Line 在Path中输入/vol/vol1Permission选择rwAnonymous UID填写0点击OK3使用介绍3.1Filer菜单3.1.1Show Status 显示Filer的整体状态,包括, Model, System ID,Version, Disks,Status 等信息3.1.2Manage Licenses 管理Filer 的license 如常用的CIFS, NFS, FCP,iSCSI,SnapRestore, SnapMirror, SnapVault, SyncMirror, MultiStore等,详情可参见或(中文网页)3.1.3Report 显示Filer目前配置及使用情况,如Uptime, Network Interfaces, DiskUsage, System Configuration 等信息3.1.4Syslog Messages 这里是系统的syslog messages 信息,里面会记录系统运行时产生的一些信息,特别是一些系统的报错信息,这些信息非常重要,对于发现各种问题有很大帮助,Netapp Technical Support 也需要这些信息,最好每天都查看一下这里的信息3.1.5Use Command Line 在这里可以使用自带的telnet 工具,方便你管理时使用Data Ontap系统的命令。
NetApp FAS存储系统快速参考

可以将同一数据发布到所有地点。通过自动更新这些数据,并支持对镜像数据的本地访问方式, SnapMirror 可以大大提高员工的工作效率。 NetApp SnapMirror 可以方便地部署到任何具有足够的带宽来处理数据传输的网络基础设施中。它能 够支持多种传输方式(FC 和 IP),这一点确保可以更好地利用现有设备,并且还因能够实现路径间 的容错而提高了可用性。 SnapMirror 允许客户选择适当的同步级别(同步、半同步和异步),从而实现了较高的灾难恢复保 护级别。例如,如果选择“同步”选项的话,远程站点的复制数据将始终是最新的,并能在发生故障 后随时提供。这一方式简化了灾难恢复过程,降低了系统宕机时间。而“半同步”允许客户根据站点
二、背景知识介绍;SAN,NAS 和 iSCSI
(有经验的读者请跳过此部分)
FC SAN系统网络环境拓扑图
企业局域网络 Enterprise LAN
FC SAN (Storage Are Network)光纤存储局域网络是 允许存储设备和服务器之间建 立直接的 FC 光纤连接,通过 这种连接实现只受光纤线路长 度限制的集中式存储。SAN 可 以被看作是存储总线概念 和 DAS (Direct Attached Storage)直连存储的一个扩 展,通过 FC 光纤通道,前端 的服务器象使用本地硬盘一样 使用后端的存储。 NAS (Network Attached Storage) 网络存储,简单的说, NAS 是通过 TCP/IP 以太网络连接的存储 设备。NAS 存储设备通过标准的网络拓扑结构(Ethernet)连接到一计算机上,而不象 FC SAN 那 样需要专用的光纤交换机,NAS 使用普通的以太网络交换机。在物理拓扑连接上,NAS 就像一台服 务器一样连接在以太网络中。前端服务器 NAS 就好像使用一个网络文件系统。NAS 所使用的协议是 基于文件的协议(CIFS, NFS 等),而 SAN 使用的是基于外设访问的协议( SCSI 的逻辑指令集)。 iSCSI 存储。在 IP 网络中传输块级数据---使得服务器可以通过 IP 网络连接 SCSI 设备, 并且像使用 本地的设备一样,这一技术是 将现在的 SCSI 存储协议,直 接集成在 IP 协议中,以使存储 和 网络 可以 无缝 的融 合。 当 然,这并不是指,可以在企业 IT 系统中,把存储网络和传统 的 LAN,物理上合并成一个网 络。 而是指在传统的存储结构 中,以 IP 协议替代光纤通道协 议,来构建结构上与 LAN 隔 离,而技术一与 LAN 一致的新 型系统---iSCSI 存储。
netapp客户端操作技巧

目录一、安装客户管理软件 (2)二、磁盘阵列配置 (2)三、Volumes的规划配置 (4)四、luns的规划配置 (5)五、配置重删时间 (8)六、Snapmirror配置 (8)七、Netapp v3220的licenses (11)八、Netapp fas2240的licenses (12)九、网络接口配置 (12)一、硬件介绍二、安装客户管理软件1、先安装jdk1.6或以上版本。
2、安装netapp提供的客户端管理软件(sysmgr-setup-2-1-win),按提示下一步安装即可。
sysmgr-setup-2-1-win.exe三、磁盘阵列配置1、通过管户端管理软件,添加需要管理的netapp设备,只需输入被管理端的ip地址。
2、进入客户端管理界面,进行磁盘阵列划分,由于netapp v3220 使用sata磁盘,划分阵列时有最大的磁盘个数限制(每个阵列不超过20个磁盘),所以规划阵列时,将24块磁盘划分如下:12个划分为aggr0,11个划分为aggr1,另一个作为全局的热备盘。
3、创建阵列4、修改阵列的名称以及阵列的类型,先raid-dp,这是netapp独有的阵列,相当于RAID6,便读写的性能更好。
5、根椐提示进入下一步,按规划选择要做阵列aggr0数量为12个硬盘,并进入下一步配置完阵列,另一个阵列选aggr1需要11个硬盘配置完成阵列,还剩下一个硬盘,netapp 会自动配置作为全局热备盘。
四、Volumes的规划配置根椐规划,会划分四个volume,aggr0会划分三个volume,aggr1会划分为一个volume,每个volume都会开启活动volume功能,最大限度的利用volume的容易,每个volume划分的大小为每个阵列的最大容量的95%,另个5%作为netapp的快照功能,这是netapp公司建议的容量分配方式,虽有小许的容量损失,但能发挥netapp最佳的优能。
netappfas存储之扩容——ds磁盘柜安装配置指南

1.更改磁盘柜的ID开启磁盘柜的电源,但是不要连接SAS线。
更改ID——更改之后的ID必须和现有的ID不一样。
重启磁盘柜。
1.1.4U的DS424X磁盘柜1.2.2U的DS224X磁盘柜2.关闭控制器的disk自动分配功能如下步骤,请在两个控制器CMD下执行。
1、*>options off3.将磁盘柜和控制器互联——SAS线3.1.4U的DS磁盘柜连接方式4.划分磁盘的归宿ownership如下步骤,请在两个控制器CMD下执行。
1、*>options确认disk的自动分配功能已经off2、*> disk show –a #查看当前控制器下的磁盘Local System ID: 72DISK OWNER POOL SERIAL NUMBER------------ ------------- ----- -------------NOTE: Currently 12 disks are unowned. Use 'disk show -n' for additional information.3、*> disk show -v#查看磁盘的归属关系Local System ID: 72DISK OWNER POOL SERIAL NUMBER------------ ------------- ----- -------------Not Owned NONE N000ZK5LNot Owned NONE N000J71LNot Owned NONE N000J5MLNot Owned NONE N000ZN4LNot Owned NONE N000J65LNot Owned NONE J830SRPLNot Owned NONE N000V8KLNot Owned NONE N000YG6LNot Owned NONE N000XZVLNot Owned NONE N001YL7LNot Owned NONE N002K7KLNot Owned NONE N000J0WL举例:将和磁盘分配给当前控制器4、*> disk assign #把磁盘分配给当前控制器disk assign: DisTk assigned but uunable to obtain eowner name. Re- run 'disk assignM' with -o optiona to specify namer 20 08:53:39 GMT [:info]: changing ownership for disk (S/N J830SRPL) from unowned (ID -1) to (ID 72)5、*> disk assign #把磁盘分配给当前控制器disk assign: DisTk assigned but uunable to obtain eowner name. Re- run 'disk assignM' with -o optiona to specify namer 20 08:53:57 GMT [:info]: changing ownership for disk (S/N N000J65L) from unowned (ID -1) to (ID 72)5.后续步骤参见《system manager配置指南》systemmanager配置指南.docx。
NetApp配置及维护手册
N e t A p p存储系统配置手册2011NetAppAll rights reserved本文档包含NetApp公司的商业及技术机密。
未经NetApp公司许可,不得向第三方泄漏或使用。
目录1配置指南 (2)1.1NetApp Filer快速入门 (2)1.2开关机 (2)1.2.1开机顺序: (2)1.2.2关机顺序: (2)2NetApp FAS3050/F3050C 系列 (3)2.1机架指示灯 (4)3设备管理 (7)3.1FILERVIEW 图形管理接口 (7)3.2命令行管理接口(CLI) (10)3.3空间管理:Aggr, V olume和qtree的介绍 (10)3.3.1命令行 (11)3.3.2图形界面 (11)3.3.3Qtree security styles的意义 (13)3.4NFS exports (13)3.4.1命令行 (14)3.4.2图形界面 (14)3.5CIFS Shares (15)3.5.1命令行 (15)3.5.2图形界面 (16)3.5.3用windows 2003或windows 2008管理 (17)3.6Snapshot 管理 (17)3.7Lun create (18)3.7.1命令行 (18)3.7.2图形界面 (19)3.8NetApp Filer常用命令 (21)1 配置指南1.1 NetApp Filer快速入门本指南是为初次使用NetApp存储系统的人员编写的,详细的系统描述和管理命令参见随机手册,在线帮助及/. 特别请您访问NOW (NetApp On the Web) site (), 您可从上面获得几乎所有得产品支持信息,如:电子版手册,知识库,软件下载,等等。
1.2 开关机1.2.1 开机顺序:1、先按照磁盘架编号顺序加电磁盘架的双电源;2、10秒钟后加电控制器。
1.2.2 关机顺序:1、确认所有连接的应用程序已经关闭;2、通过串口或TELNET登陆到系统。
netapp客户端操作技巧
目录一、安装客户管理软件 (2)二、磁盘阵列配置 (2)三、Volumes的规划配置 (4)四、luns的规划配置 (5)五、配置重删时间 (8)六、Snapmirror配置 (8)七、Netapp v3220的licenses (11)八、Netapp fas2240的licenses (12)九、网络接口配置 (12)一、硬件介绍二、安装客户管理软件1、先安装jdk1.6或以上版本。
2、安装netapp提供的客户端管理软件(sysmgr-setup-2-1-win),按提示下一步安装即可。
sysmgr-setup-2-1-win.exe三、磁盘阵列配置1、通过管户端管理软件,添加需要管理的netapp设备,只需输入被管理端的ip地址。
2、进入客户端管理界面,进行磁盘阵列划分,由于netapp v3220 使用sata磁盘,划分阵列时有最大的磁盘个数限制(每个阵列不超过20个磁盘),所以规划阵列时,将24块磁盘划分如下:12个划分为aggr0,11个划分为aggr1,另一个作为全局的热备盘。
3、创建阵列4、修改阵列的名称以及阵列的类型,先raid-dp,这是netapp独有的阵列,相当于RAID6,便读写的性能更好。
5、根椐提示进入下一步,按规划选择要做阵列aggr0数量为12个硬盘,并进入下一步配置完阵列,另一个阵列选aggr1需要11个硬盘配置完成阵列,还剩下一个硬盘,netapp 会自动配置作为全局热备盘。
四、Volumes的规划配置根椐规划,会划分四个volume,aggr0会划分三个volume,aggr1会划分为一个volume,每个volume都会开启活动volume功能,最大限度的利用volume的容易,每个volume划分的大小为每个阵列的最大容量的95%,另个5%作为netapp的快照功能,这是netapp公司建议的容量分配方式,虽有小许的容量损失,但能发挥netapp最佳的优能。
NetApp安装手册V1
NetApp磁盘阵列安装手册一、磁盘阵列的系统安装1.1初始化磁盘阵列NetApp FAS是NetApp产品中一款有双机头的磁盘阵列,在出厂时预先会安装好Data OnTap 操作系统,需要先在每个机头中配置好操作系统,才能正常使用。
配置步骤如下:1,通过笔记本电脑或其它Windows平台PC机的串口,连接到机头上的串口上;2,通过超级终端,以默认值连接来进行操作,进入配置画面。
Please enter the new hostname []: NetappFileA输入这个机头的主机名,这里举例为NetappFileA;Do you want to configure virtual network interfaces? [n]: y问是否要配置虚拟网卡,如果要创建的话,输入y;Number of virtual interfaces to configure? [0] 1输入要配置几块虚拟网卡,如配置1块虚拟网卡,就输入1;Name of virtual interface #1 []: vif0输入虚拟网卡的名称,这里举例为vif0;Is vif1 a single [s] or multi [m] virtual interface? [m] m选择虚拟网卡的类型是single还是multi,这里选择m;Number of links for vif1? [0] 2虚拟网卡所包含真实网卡的数量,如果用两块网卡绑定成一块虚拟网卡就输入2;Name of link #1 for vif1 []: e1a输入用于绑定的真实网卡的设备名,可以从阵列设备后面的网络接口上看到;Name of link #2 for vif1 []: e1b输入用于绑定的真实网卡的设备名,可以从阵列设备后面的网络接口上看到;Please enter the IP address for Network Interface vif1 []: XX.61输入虚拟网卡的IP地址;Please enter the netmask for Network Interface vif1 [255.255.255.0]:输入虚拟网卡的掩码,默认就直接回车;Should virtual interface vif1 take over a partner virtual interface during failover? [n]: y是否允许虚拟网卡在故障时切换到另一个机头上,输入y;The clustered failover software is not yet licensed. To enablenetwork failover, you should run the 'license' command forclustered failover.会提示说没有输入Clustered failover功能的license,需要输入才能实现网络切换功能;Please enter the partner virtual interface name to be taken over by vif1 []: vif0输入另一个机头上的会被切换过来的虚拟网卡的名字;Please enter media type for vif1 {100tx-fd, tp-fd, 100tx, tp, auto (10/100/1000)} [auto]:输入虚拟网卡的类型,一般是自适应,选默认auto;Please enter the IP address for Network Interface e0c []:输入网卡e0c的IP地址,不设置就直接回车;Should interface e0c take over a partner IP address during failover? [n]: n是否允许网卡e0c在故障时切换到另一个机头上,这里不配置就输入n;Please enter the IP address for Network Interface e0d []:输入网卡e0d的IP地址,不设置就直接回车;Should interface e0d take over a partner IP address during failover? [n]: n是否允许网卡e0d在故障时切换到另一个机头上,这里不配置就输入n;Would you like to continue setup through the web interface? [n]: n问是否通过web方式来进行继续的安装,输入n,不需要;Please enter the name or IP address of the default gateway: 问客户要网关输入默认网关的名字和IP地址,无须输入就直接回车;The administration host is given root access to the filer's/etc files for system administration. To allow /etc root accessto all NFS clients enter RETURN below.Please enter the name or IP address of the administration host:输入超级管理主机的主机名或IP地址,没有就直接回车;Where is the filer located? []: shanghai问磁盘阵列设备的位置,可以随便写,比如shanghai,就输入shanghai;Do you want to run DNS resolver? [n]:是否配置DNS,输入n,不配置;Do you want to run NIS client? [n]:是否配置NIS,输入n,不配置;Do you want to configure the Shelf Alternate Control path Management interface for SAS shelves [n]:按提示创建root密码1.2输入license序列号1,通过超级终端登录,可以先执行sysconfig命令查看一下磁盘阵列的配置情况,如下;filer1> sysconfig -aNetApp Release 8.1X47 7-Mode: Fri Mar 23 16:56:50 PDT 2012System ID: 4060371308 (filer1)System Serial Number: 4060371-30-8 (filer1)System Storage Configuration: Multi-PathSystem ACP Connectivity: NAslot 0: System Board 2.5 GHz (NetApp VSim)Model Name: SIMBOXSerial Number: 999999Loader version: 1.0Processors: 2Processor ID: 0x1067aMicrocode Version: 0xa0bMemory Size: 1599 MBMemory Attributes: NoneVirtual NVRAM Size: 32 MBslot 0: 10/100/1000 Ethernet Controller Ve0a MAC Address: 00:0c:29:3f:1a:73 (auto-1000t-fd-up)e0b MAC Address: 00:0c:29:3f:1a:7d (auto-1000t-fd-up)e0c MAC Address: 00:0c:29:3f:1a:87 (auto-1000t-fd-up)e0d MAC Address: 00:0c:29:3f:1a:91 (auto-1000t-fd-up)Device Type: Rev 1memory mapped I/O base 0xd8040000, size 0x20000memory mapped I/O base 0xd8000000, size 0x10000I/O base 0x00000000000010c0, size 0x40memory mapped I/O base 0xd8060000, size 0x20000memory mapped I/O base 0xd8010000, size 0x10000I/O base 0x0000000000001400, size 0x40memory mapped I/O base 0xd8080000, size 0x20000memory mapped I/O base 0xd8020000, size 0x10000I/O base 0x0000000000001440, size 0x40memory mapped I/O base 0xd80a0000, size 0x20000memory mapped I/O base 0xd8030000, size 0x10000I/O base 0x0000000000001480, size 0x402,使用license命令来添加所有已购买的license,如下;filer1> license add DZDACHDA cifs site license has been installed.Run cifs setup to enable cifs.filer1> Mon Jul 30 11:05:53 CST [telnet_0:notice]: cifs licensedfiler1> license add BQOEAZLA nfs site license has been installed.nfs enabled.filer1> Mon Jul 30 11:06:09 CST [telnet_0:notice]: nfs licensedfiler1> license add BKHEXNBA fcp site license has been installed.Run 'fcp start' to start the FCP service.Also run 'lun setup' if necessary to configure LUNs.FCP enabled.filer1> Mon Jul 30 11:06:29 CST [telnet_0:notice]: fcp licensed二、 NetApp存储管理系统System Manager安装及连接2.1System Manger 安装无需存储专业知识即可管理NetApp 存储系统。
- 1、下载文档前请自行甄别文档内容的完整性,平台不提供额外的编辑、内容补充、找答案等附加服务。
- 2、"仅部分预览"的文档,不可在线预览部分如存在完整性等问题,可反馈申请退款(可完整预览的文档不适用该条件!)。
- 3、如文档侵犯您的权益,请联系客服反馈,我们会尽快为您处理(人工客服工作时间:9:00-18:30)。
1
3
1
3
1
3
1
3
B Switched clustered
Microsoft Windows client
Runs the software to con gure your storage system
Download:
• System Setup Software: /NOW/public/system_setup/ • OnCommand System Manager: /NOW/cgi-bin/software/
Disconnect all supply power for complete isolation.
Disconnect all supply power for complete isolation.
Disconnect all supply power for complete isolation.
e0c-e0f —10 GbE Ethernet ports or 0c-0f — Fibre Channel ports (SFP dependent)
Remote/Node Management port (wrench icon)
Gigabit Ethernet ports (2)
Power supply LEDs
N
1
2
3
4
Disconnect all supply power for complete isolation.
2
3
4
2
N
4
2
N
TO DATA
TO MANAGEMENT
NETWORK SWITCH SUBNET
C Switchless clustered
Data ONTAP
1 5
N
1
2
3
4
Disconnect all supply power for complete isolation.
2 Cable controller for 7-Mode Data ONTAP (option A), switched clustered Data ONTAP (option B) or for switchless clustered Data ONTAP (option C)
1 Attach cable management arms.
Connect port e0e | 0e to port e0e | 0e and e0f | 0f to e0f | 0f.
5 Strap the cables to the cable
management arms.
A 7-Mode
1 5
N
1
2
3
4
Disconnect all supply power for complete isolation.
to
the management or subnet switch.
B4
ห้องสมุดไป่ตู้
10 GbE cables
For option B only Connect port e0e | 0e and port e0f | 0f to the cluster switch.
C4
10 GbE cables
For option C only
Installation and Setup Instructions
FAS2554 Systems
1 Prepare for installation
1234 5
In the box:
Con guration worksheet
Starter network, storage, and 10 GbE cables
2
10 GbE cables
Connect port e0c to the data switch.
NOTE: Port e0c is required; other ports are available if needed.
3
Network cables
Connect the wrench port
2 Install hardware
1234 5
Power LED Attention LED Shelf ID display
Bezel
FRONT VIEW OF SYSTEM
Console port (Setting: 9600 N-8-1)
PCM Attention LED
SAS ports (2) NVMEM LED
N
1
2
3
4
Disconnect all supply power for complete isolation.
2
4
3
N
4
2
4
2
N
TO DATA
TO MANAGEMENT
NETWORK SWITCH NETWORK SWITCH
Disconnect all supply power for complete isolation.
BACK VIEW OF SYSTEM
One or two controller modules
ACP port (locked wrench icon)
1 Install system
• Rack the system.
Rail kit: follow instructions in the rail kit. OR System cabinet: install in the system cabinet.
Power cables
Serial cable not needed for this con guration
You provide:
Screwdriver
Rack space - 4U
Additional network cables
For connecting your storage to your network switch and Microsoft® Windows® client
• Place the bezel over the front of the system.
CAUTION LIFTING HAZARD
110 lbs (49.9 kg)
To reduce the weight of the disk shelf, remove the power supplies and controllers before lifting.