VCS586-401-001SM 轮机说明书
TeSys混合电机启动器产品说明书
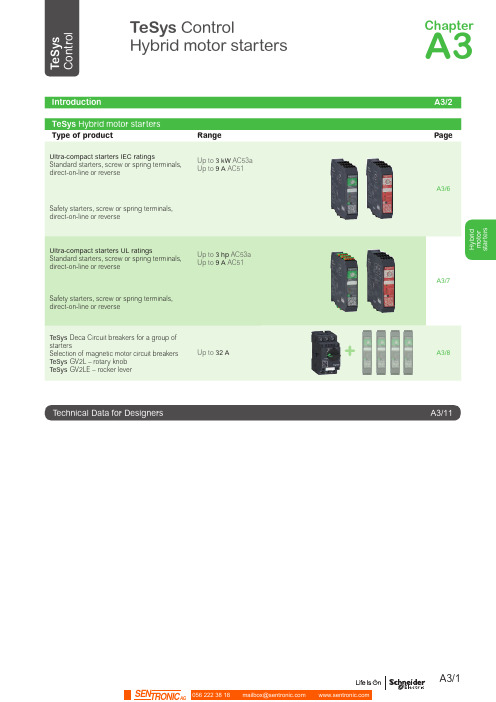
H y b r i d m o t o r s t a r t e r sTeSys ControlHybrid motor startersType of productRangePageUltra-compact starters IEC ratingsStandard starters, screw or spring terminals, direct-on-line or reverseUp to 3 kW AC53a Up to 9 A AC51A3/6Safety starters, screw or spring terminals,direct-on-line or reverseUltra-compact starters UL ratingsStandard starters, screw or spring terminals,direct-on-line or reverseUp to 3 hp AC53a Up to 9 A AC51A3/7Safety starters, screw or spring terminals,direct-on-line or reverseTeSys Deca Circuit breakers for a group of startersSelection of magnetic motor circuit breakers TeSys GV2L – rotary knob TeSys GV2LE – rocker leverUp to 32 AA3/8A3/11ChapterA3The most compact 3 KW / 400 V starterin the worldWith printed QR code, refering directly to the product data sheet.H y b r i d m o t o r s t a r t e r sStandard versionp 2 ratings:- 2.4 A 400 V AC53a - 6.5 A 400 V AC53ap 2 control voltages:- 24 V DC- 110 V / 230 V ACSafety versionp Safe T orque Off embedded:- SIL3 according to IEC61508-1 - Ple according to ISO13849-1 p ATEX:- A s associated devices for motor protectionP B 114714_r .e p sP B 114712_r .e p sP B 114718-r .e p sP B 114716_r .e p sp 2 terminal types:- Screw clamps - Springp C an provide up to3 functions:- Forward running - Reverse running - Overload protectionP B 114712_r.e psP B 114801_r .e psP B 114802_r .e p sP B 114711_r .e p sDirect-on-lineHybrid Standard starterReverseIntroductionH y b r i dm o t o r s t a r t e r sHybrid Safety starterHybrid motor starters 101393.e p s107014.e p s101393.e p s107014.e p s101393.e p s 107014.e p sP B 114847_r .e p sP B 113929_r .e p sP B 113929_r .e p s101393.e p s107014.e p sP B 114847_r .e p sP B 113929_r .e p sP B 113929_r .e p sP B 114711.e psP B 114715.e ps1.5 1.52.23333 1.5...6.5LZ8H6X5pp Spring terminals0.370.370.750.750.750.75 1.10.18...2.4LZ8H2X43pp 1.51.52.233331.5...6.5LZ8H6X53pp(1)Remplace the ●● in the reference by the bobine code: BD (24 V DC) or FU (110-230 V AC).Safety LZ7H2X4pp 9Standard LZ1H6X5pp Safety LZ7H6X5pp Spring terminals2.4Standard LZ1H2X43pp Safety LZ7H2X43pp 9Standard LZ1H6X53pp SafetyLZ7H6X53pp(1) Remplace the ●● in the reference by the bobine code: BD (24 V DC) or FU (110-230 V AC).LZ1H2X4BDLZ7H2X4BDH y b r i d m o t o r s t a r t e r sP B 114713.e psP B 114716.e ps1 1.53 1.5...6.5LZ8H6X5pp Spring terminals1/21/210.18...2.4LZ8H2X43pp 11.531.5...6.5LZ8H6X53pp(1)Remplace the ●● in the reference by the bobine code: BD (24 V DC) or FU (110-230 V AC).Safety LZ7H2X4pp 9Standard LZ1H6X5pp Safety LZ7H6X5pp Spring terminals2.4Standard LZ1H2X43pp Safety LZ7H2X43pp 9Standard LZ1H6X53pp SafetyLZ7H6X53pp(1) Remplace the ●● in the reference by the bobine code: BD (24 V DC) or FU (110-230 V AC).LZ1H2X43BDLZ8H6X5BDMagnetic motor circuit breakers:b GV2L: rotary knob type - Ue = 500 V bGV2LE: rocker lever type - Ue = 415 V.150.011GV2L05GV2LE051.650.011GV2L06GV2LE062.535.011GV2L07GV2LE07412.511GV2L08GV2LE086.38.021GV2L10GV2LE10Deca Magnetic circuit breakers for group protection P B 121671_R .e psP B 114721_r .e psP B 114721_r .e psP B 114721_r .e psP B 114721_r .e p sGV2L + LZ2H2X4BDSelection tableTeSys Control Hybrid motor startersLZ1H2X43BD LZ1H2X43FU LZ1H2X4BD LZ1H2X4FU LZ1H6X53BD LZ1H6X53FU LZ1H6X5BD LZ1H6X5FU LZ2H2X43BD LZ2H2X43FU LZ2H2X4BD LZ2H2X4FU LZ2H6X53BD LZ2H6X53FU LZ2H6X5BD LZ2H6X5FU LZ7H2X43BD LZ7H2X43FU LZ7H2X4BD LZ7H2X4FU LZ7H6X53BD LZ7H6X53FU LZ7H6X5BD LZ7H6X5FU LZ8H2X43BD LZ8H2X43FU LZ8H2X4BD LZ8H2X4FU LZ8H6X53BD LZ8H6X53FU LZ8H6X5BD LZ8H6X5FUProduct referencesAb Thermal overload: the motor currents exceed the set value.b Phase unbalanced: the motor currents differ from each other by more than 33 % b Phase loss: power missing on one or several phasesb Stall and jam: motor current exceeding 45 A for more that 2 s during starting or running phase - No motor is connected - Motor current is lower that the minimum configurable current for more than 2 seconds, on at least two phases.For all this detected situations, the Hybrid motor starter will switch off, activate its TRP/ERR LED and fault signaling contact.Please refer to the “Instruction sheet and User Guide” for more information.PreferredElectrical life time: 30000000 AC53a electrical cyclesSafety Chain Application for Monitoring Emergency STOP Circuits with Two Channel Inputs and Two Channel Outputs with Preventa XPSAF Safety Processing Device.Possible but non- recommendedElectrical life time: 10000 AC53 a electrical cyclesSafety Chain Application for Monitoring Emergency Stop Circuits with Two Channel Inputs and Two Channel Outputs with Preventa XPSAC Safety Processing Device.1, 21, 2CharacteristicsCharacteristics Hybrid motor startersTaI n (A )1020305060704006427531(°C)D B 418907.e p sDerating according:b motor starter control power supply b ambient temperature (Ta)bdistance between devices 1: 20 mm, with spacing2: without spacing.TaI n (A )1020305060704006427531(°C)D B 418908.e p sD B 418914.e p sD B 418916.ep sPower terminalsT1, T2, T3 Motor connection L1, L2, L3 Power inputsControl terminals A1, A2 Auxiliary power unit I.1Control input, direction 1 I.2C ontrol input, direction 2 (LZ2H and LZ8H only)CC ontrol inputs common point (LZ7H and LZ8H only)Y1 Reset mode, common point Y2 Reset mode, remote, manual Y3 Reset mode, automatic98, 96, 95 Trip or error signaling contactDimensions, schemesCharacteristics:。
富斯-i6遥控器中文说明书

富斯-i6遥控器中⽂说明书Digital proportional radio control system1. Introduction (2)简介2. Service (2)服务3. Special symbols (3)特殊标志4. Safety guide (3)安全指导5. 2.4GHz System 2.4G (5)系统6.System characteristic s 系统特征 (6)7. Transmitter specifications 发射机参数 (7)8.FS-iA6Receiver FS -iA6接收机..................................................................................................................7-109. FS-IA6B Receiver operation instruction 接收机操作说明.10-16..................................................................................10. O n Off 开机关机17 ........................................................................................................................................11. Definition of key functions 按键定义. (17) 12. Warning 警告 ..............................................................................................................................................1813. ...................................................................................Right and left stick can be adjustable. 左右⼿摇杆模式调整1914. Main screen 开机画⾯ (20)15. Main menu (21)主菜单16. System settings ............................................................................................................................21 系统设置 16.01. Model select .........................................................................................................................模型选择2116.02. Model name 模型名称 (22)Type select 类型选择.........................................................................................................................16.03.22Model copy 模型复制....................................................................................................................... ..16.04.22 Model reset 模型重置16.05. ...................................................................................................................... ...23 16.06. Trainer mode 教练模式......................................................................................................................23 16.07. Student mode ..................................................................................................................... 学员模式23 16.08. Sticks mode 摇杆模式........................................................................................................................ 24 RX setup 接收机设置.....................................................................................................................16.09. 24-2616.10. LCD brightness 显⽰屏亮度 (27)Firmware version 固件版本................................................................................................................16.11. 27Firmware update 固件升级.................................................................................................................16.12. 2717. Functions settings (28)功能设置 17.01.Reverse .................................................................................................................................. 正逆转2817.02. End points .................................................................................................................... 舵机最⼤⾏程2917.03. Display ....................................................................................................................................... 显⽰2917.04. Auxiliary channels ............................................................................................................... 辅助通道2917.05.Sub trim ..................................................................................................................................... 微调3017.06.Dual rate / exponential .............................................................................................. 双重⽐例/指数3017.07.Throttle curve ..................................................................................................................... 油门曲线3017.08. Pitch curve (variable pitch helicopter only).............................. 螺距曲线(仅适⽤于螺距可变直升机)31 17.09. Swash AFR ................................................................................................. .. 直升机螺距混控系统 3117.10. Mix ............................................................................................................................................. 混控31 升降舵(仅适⽤于飞机)17.11.Elevon (airplane only) (32)17.12.V tail (airplane only)..................................................................................... V 型尾翼(仅适⽤于飞机)3217.13.Gyroscope (helicopter only)....................................................................... 陀螺仪(仅适⽤于直升机)3217.14.Switches assign ................................................................................................................. 开关分配 3317.15. Throttle hold ........................................................................................................................ 油门锁定3318. Packaging content 34包装内容.....................................................................................................................19. FCC Statement 声明.. (34)Table of contentsDigital proportional radio control system多⼈⼀起操作的时候间距⾄少要20CM以上。
德克萨斯工业设备 1 4 英寸空气角 电镀机用户手册说明书

7.With a firm grip on the Die Grinder, lightly apply the Grinding drum to the workpiece, slowly and steadily moving the grinding drum to the right and left until you have achieved the desired appearance (finish) on the workpiece. 8.Once the work is completed, release hand pressure on the trigger, the safety will automatically return to its locked position to prevent the trigger from accidentally being activated. 9.Turn off the air compressor. Trip the safety with your finger, and slowly squeeze the trigger to release any remaining air pressure from the die grinder. Then disconnect the air hose from the tool. 10.Remove the grinding drum from the Die Grinder. Then store the tool in a clean, dry location out of reach of children and untrained operators.
GENERAL SAFETY RULES
关键性设备操作手册.doc
1.锚缆机操作规程----------------------------------------------------------------4 2.首尖舱污水遥控排水系统操作规程-----------------------------------------6 3.压载控制台操作规程-----------------------------------------------------------74. 货舱进水检测装置操作规程--------------------------------------------------95. 货舱污水处理操作规程--------------------------------------------------------116.报警监视系统操作规程--------------------------------------------------------127. 和面机/电炒锅操作规程------------------------------------------------------ 148. 电灶的使用与保养--------------------------------------------------------------159.粉碎机操作规程-----------------------------------------------------------------1610.烤箱的操作规程-----------------------------------------------------------------1711. 蒸馒头/蒸饭机的操作规程------------------------------------------------------1812. 货舱作业的安全规定----------------------------------------------------------1913. 甲板作业的安全规定---------------------------------------------------------2014. 开关舱作业的安全规定------------------------------------------------------2115. 系解缆作业的安全规定------------------------------------------------------2216. 舷外、水上作业的安全规定------------------------------------------------2417. AIS操作规程-------------------------------------------------------------------2518. C站操作规程-----------------------------------------------------------------2719. EPIRB 操作规程---------------------------------------------------------------2820. F站操作规程-----------------------------------------------------------------2921. GPS NAVIGATOR操作规程--------------------------------------------------3022. NAVTEX 操作规程-------------------------------------------------------------3323. NBDP 操作规程----------------------------------------------------------------3424. VDR 操作规程------------------------------------------------------------------3625. VHF 操作规程------------------------------------------------------------------3726. 电子海图操作规程------------------------------------------------------------3827. 雷达使用操作规程------------------------------------------------------------3928. 气象传真机操作规程---------------------------------------------------------4429. 自动舵操作规程---------------------------------------------------------------4730. 驾机联系制度------------------------------------------------------------------4831. 驾驶台规则---------------------------------------------------------------------5132. EEBD 操作规程----------------------------------------------------------------5233. 火警控制面板操作规程-----------------------------------------------------5334. 机舱大型二氧化碳灭火系统操作规程-----------------------------------5435. 机舱水雾灭火系统操作规程-----------------------------------------------5536. 救生筏释放程序--------------------------------------------------------------5637. 救生艇操作规程--------------------------------------------------------------5738. 消防员装备操作规程--------------------------------------------------------5839. 机炉舱规则--------------------------------------------------------------------6040. 机舱值班制度-----------------------------------------------------------------6241. 检修作业注意事项-----------------------------------------------------------6642. 主机操作规程-----------------------------------------------------------------6743. 副机操作规程-----------------------------------------------------------------6944. 燃油锅炉操作规程-----------------------------------------------------------7045. 主空压机操作规程-----------------------------------------------------------7246. 空调装置操作规程-----------------------------------------------------------7347.燃油分油机操作规程--------------------------------------------------------7448. 滑油分油机操作规程--------------------------------------------------------7549. 主机滑油泵操作规程--------------------------------------------------------7650. 主机缸套水泵操作规程-----------------------------------------------------7751. 主海水泵操作规程-----------------------------------------------------------7852. 重油驳运泵操作规程--------------------------------------------------------7953. 造水机操作规程--------------------------------------------------------------8054. 油水分离器操作规程--------------------------------------------------------8155. 生活污水处理装置操作规程-----------------------------------------------8256. 应急发电机操作规程--------------------------------------------------------8357. 应急救火泵操作规程--------------------------------------------------------8458. 应急空压机操作规程--------------------------------------------------------8559. 冰机操作规程-----------------------------------------------------------------8660. 焚烧炉操作规程--------------------------------------------------------------8764. 主配电板操作规程-----------------------------------------------------------8865. 应急配电板操作规程--------------------------------------------------------89 63. 压载泵操作规程--------------------------------------------------------------90目录64. 消防通用泵操作规程---------------------------------------------------------9165. 污水泵操作规程---------------------------------------------------------------9266. 机舱电力中断应急操作------------------------------------------------------9367. 触电的预防和急救------------------------------------------------------------9568. 总用电瓶及充放电板操作规程---------------------------------------------9669. 机舱报警检测系统操作规程------------------------------------------------9770. 机舱局部灭火系统操作规程------------------------------------------------9871. 机舱水雾灭火系统高压泵操作规程---------------------------------------9972. 主机机侧应急操作规程------------------------------------------------------10073. 主机盘车机操作规程---------------------------------------------------------10174. 饮水消毒柜操作规程---------------------------------------------------------10275. 砂轮机操作规程---------------------------------------------------------------10376. 气焊作业安全规定------------------------------------------------------------10477. 电焊作业安全规定------------------------------------------------------------10578. 车床作业安全规定----------------------------------------------------------10679. 救生艇机操作规程------------------------------------------------------------10780. 油渣泵操作规程---------------------------------------------------------------10881. 钻床作业操作规程------------------------------------------------------------10982. 火警T1016控制面板操作规程---------------------------------------------11083. 舵机操作规程------------------------------------------------------------------112锚缆机操作规程O P E R A T I O N I N S T R U C T I O N S F O R M O O R I N G W I N C H&W I N D L A S S 一、绞缆机操作的注意事项1)操作前必须要检查以下事项:●离合器的位置,齿轮箱上档位杆的位置,传感器上的指示灯,●检查刹车杆及刹车带是否完好,工作是否正常,●缆绳的出绳方向是否与刹车带底部连接块侧一致,●检查滚筒转动方向是否与操作杆指令方向一致,●检查所有的油脂润滑点,油位是否符合要求。
厦门优维 測漏機 操作說明書

測漏機操作說明書一.測漏控制機操作說明1.本機負載電壓1-1.電源 AC~220V1-2.電器功率:<30W2.調整及設定2-1.將氣源接至本機氣源輸入口,調整氣源壓力至約4~8kg /c㎡。
2-2.压力传感器設定方法见附录A。
2-3.設定保壓計時器之時間,此時間為測漏開始至結束之時間。
3.動作及泄漏判断3-1.測試開始,當按下此鍵後測試中燈亮,氣缸下壓至充气口後,灌氣閥打開灌氣,灌氣計時器(T1)開始計時,若T1时间内压力无法达到压力下限(PLo),则产品有漏,灌氣超時红灯亮,蜂鳴器響---NG;若在T1時間內壓力表到達上限(PHi)則停止灌氣,进入保持状态,同時保壓計時器(T2)開始計時,若T2到達時气压未降至下限(PLo)则产品OK,绿灯亮,若保持时间内压力降至Plo以下产品有漏,红灯亮,蜂鳴器響---NG。
3-3.測試OK完成后,直接按測試開始键即可作下一回之測試。
3-4.測試後發生異常燈號,蜂鳴器響,須按測試停止鍵解除(或等5秒自动解除)警報及異常,才可作下一回之重新啟動。
二.測漏機台操作說明1.將待測物放入測試機台內.2.同時下壓兩個綠色按鍵,氣缸即會下壓(注意手勿放入機台內以免壓傷),此時測漏控制機會灌氣至待測物直至壓力充至設定之壓力即開始測試,依所設定之測試時間檢查待測物是否洩漏,如洩漏至設定之規格以下則測漏控制機會鳴叫同時顯示紅燈表示此待測物會洩漏,如洩漏無低於設定規格則顯示綠燈則表示此待測物通過測試.3.如洩漏太大造成充氣無法達到設定值,則於灌氣時間完成後即顯示紅燈及鳴叫,則表示此待測物會洩漏(灌气超时).4.紅色按鈕為緊急開關,緊急時按下此按鈕則氣缸升起.同時也可做氣缸升起之操作.三.操作注意事項1.不可兩人同時操作此機台,操作前應避免其他人接近測漏機台.2.如要維修需專業人士方可進行維修,維修前應先關閉氣源,電源並注意防止觸電事件發生.3.測漏控制機不可接近水源,以免損壞機台及發生漏電事故.4.測漏機台之開關不可接近水源, 以免發生漏電事故.5.保養前請關閉氣源及電源,機台及面板清潔用軟濕布擦拭即可.6.測漏控制機背部之過濾器應定時檢查.四.校驗程序1.確定進氣源為4-8Kg/c㎡, 以压力足够压住MODEL不漏气为准。
Bosch SMT500 Leak Detector 漏气检测仪操作指南说明书
2SP01501467 | REV A | 4.2021Bosch Automotive Service Solutions IncSafety PrecautionsBEFORE OPERATING THIS TOOL, ALL OPERATORS SHOULD READ AND UNDERSTAND THIS DOCUMENT AND FOLLOW ALL SAFETY WARNINGS AND INSTRUCTIONS.KEEP THESE INSTRUCTIONS WITH THE TOOL FOR FUTURE REFERENCE. IF YOU HAVE ANY QUESTIONS, CONTACT YOUR BOSCH REPRESENTATIVE OR DISTRIBUTOR.DANGERWhen an engine is operating, keep the service area wellventilated or attach a building exhaust removal system to the engine exhaust system. Engines produce carbon monoxide, an odorless, poisonous gas that causes slower reaction time and can lead to death or serious personal injury.WARNING:• All diagnostic work should be performed with the engine off • Do not leave a vehicle unattended while equipment is connected or operating• Operates on a 12-volt battery: connect to battery (+) and chassis ground (-)• Vapor chamber can become hot. Do not lift or carry by vapor chamber• Do not perform tests near a source of spark of ignition • When working with the fuel system, work in a well-venti-lated area• Always wear the appropriate safety protection• Wear OSHA standard eyewear and protective gloves when using this equipment•When working with hydraulic or fuel lines, be careful that liquids under pressure do not escape and create a dangerous condition. Use adequate ventilation and make sure there are no sparks or possibility of sparks that may ignite any vapor.• Wear an American National Standards Institute (ANSI) Z87.1 approved eye shield when testing or repairing vehicles.• Objects propelled by whirling engine components or pressurized liquids escaping may cause personal injury.•Set the parking brake and block the wheels before test-ing or repairing a vehicle. It is especially important to block the wheels on front-wheel drive vehicles because the parking brake does not hold the drive wheels.• Do not drive the vehicle and operate the software at the same time.• Maintain adequate clearance around moving components or belts during testing.• Moving components and belts can catch loose clothing, body parts, or test equipment and cause serious personal injury or tool damage.•Automotive batteries contain sulfuric acid and produce explosive gases that can result in serious injury due to ignition of gases. Keep lit cigarettes, sparks, flames, and other ignition sources away from the battery at all times.•Refer to the service manual for the vehicle being ser-viced. Adhere to all diagnostic procedures and precau-tions. Failure to do so could result in personal injury or otherwise unneeded repairs.• Use only specially designed replacement parts (brake hoses and lines) for ABS equipped vehicles.• After bleeding the brake system, check the brake pedal for excessive travel or a ”spongy” feel. Bleed again if either condition is present.•When installing transmitting devices (Citizen Band radio, telephone, etc) on ABS-equipped vehicles, do not locate the antenna near the ABS control unit or any other con-trol unit.•This equipment has been tested and found to comply withthe limits for a Class B digital device, pursuant to Part 15 of the FCC Rules. These limits are designed to provide reasonable protection against harmful interference in a residential installation. This equipment generates and radiates radio frequency energy and, if not installed and used in accordance with the instructions, may cause harm-ful interference to radio communications.• Do not operate the tool with a damaged cord or connector. Replace damaged cords and connectors immediately.• Do not expose tool to rain, moisture, or snow.• Verify that cords are located where they will not bestepped on, tripped over, or otherwise become a safety hazard or subjected to damage or stress.•Do not store or leave your tool near a heat source such as a radiator, fireplace, stove, electric heater, or other heat-generating appliance or otherwise expose it to tempera-tures in excess of 60ºC (140ºF). When heated to excessive temperatures, battery cells could explode or vent, causing personal injury or risk of fire.CAUTION:• Do not place the tool on the distributor of a vehicle.Strong electromagnetic interference can damage the tool.• Never disconnect or reconnect any electrical connec-tor while the ignition is on. Powertrain Control Module(PCM) damage may result.SP01501467 | REV A | 4.2021Bosch Automotive Service Solutions Inc3SpecificationsL x W x H 8 in. x 10 in.x 12.5 in. (20 cm x 25 cm x 33 cm)Weight10.3 lb (4.5 kg)Shipping weight 18 lb (8 kg)Power supply12 volts DC; input power supply 11.5–14 VDC Power consumption 8 ampsOutput pressure0.47 PSI / 13.0 in. H20 / 0.032 BAR Operating temperature 30°F to 115°F (-1°C to 46°C)Operating humidity No restrictions Operating altitude No restrictions Vapor output hose 10 ft (3 m)Power supply cables 10 ft (3 m)Operating modes Vapor test cycle/Air only test cycle Pressure SupplyOnboard micro air compressor Micro-compressor duty cycle 100%Housing materialHigh-impact PC/ABS polycarbonate Vapor chamber material Billet aluminum Vapor chamber assembly Bolted Vapor chamber warrantyLifetime4SP01501467 | REV A | 4.2021Bosch Automotive Service Solutions IncReference Guide1. Compound pressure gauge• Indicates amount of pressure or vacuum • Allows for decay/leak down test to confirmrepair is 100% complete 2. Flow meter• Measures leak size as small as 0.010-in.3. Flow control knob• Open flow control valve to allow vapor/pressure into the system• Close flow control valve to lock out systemfor pressure decay testing 4. Reset button• Used for service functions only 5. Air-only test button• Begins 5-minute air-only cycle to testwithout vapor• Blue light indicates onboardmicrocompressor is generating air-only 6. Vapor test button• Begins 5-minute vapor cycle • Red light indicates vapor cycle •Push again to stop testing7. Power indicator light•Green light indicates adequate power8. Fluid fill port• Turn counter clockwise to removedipstick 9. External gas input• 1/4-in. NPT threaded port• Connects external compressed gas(inert gases such as nitrogen or CO2)10. Battery power cables• Connects to 12-Volt DC battery(+) andchassis ground(-)11. Vapor output hoseSP01501467 | REV A | 4.2021Bosch Automotive Service Solutions Inc 5AccessoriesOEM-Approved Vapor-Producing Fluid169500005Vapor-producing fluid will perform over 1,000 typical tests (500+ per bottle)IMPORTANT: Contains no dye/contami-nantsSchrader Valve Removal Tool6522-5EVAP Service Port Adapter6522-4Daylight Spectrum LED Cordless LightSMT-01Bright white beam finds even the tiniest wisps of vapor under the hood or chassisCap Plug Kit6522-6Seals a variety of openings to pressurize system for testingEasy INTAKE™SMT-02Award-winning Easy INTAKE™ is an inflatable block off bladder with a pressurized vapor pass-through that allows technicians to test an entire intake or exhaust system quickly and easily6SP01501467 | REV A | 4.2021Bosch Automotive Service Solutions IncSetupFILL/ADD VAPOR PRODUCING FLUID1. Remove fluid fill dipstick.2. Pour vapor producing fluid into fluid fill portuntil fluid level is near top of the fill line onthe dipstick.3.Replace fluid fill dipstick Notes:• First time fill requires approx. 2 oz (60 ml).• Check fluid level every 75–100 tests.• Never use dyes, solvents, or other contaminantsin intake or exhaust systems. They may coat and/or harm critical sensors and catalysts.• Fill fluid to maximum fill line on dipstick.CONNECT TO POWERThis machine runs on a fully-charged 12-voltbattery.1. Connect red lead (+) to battery’s positiveterminal.2.Connect black lead (-) to chassis ground.Power indicator light:Solid green light Machine has adequatepower Flashing green light Improper power; supplied voltage is too high or toolowNo lightNo power. See TroubleshootingTesting for LeaksTESTING WITH SMOKE1. Connect vapor output hose to system thatis to be tested. See Diagnostics section for more detail.2. Push vapor test button to begin a 5-minutevapor cycleVapor indicator light:Solid red lightVapor is being generated Flashing red lightSee Troubleshooting No lightNo vapor is being generated3. Turn Flow Control Knob counter-clockwiseto release smoke / pressureNote: Flow meter indicates flow and measuresleak size.4. Use provided Halogen Inspection Light tolocate leaks5. Perform repair(s) as neededTESTING WITH AIR-ONLY1. Connect vapor output hose to system thatis to be tested. See Diagnostics section for more detail.2. Push air-only test button to begin a 5-minutevapor cycle.Air-only indicator light:Solid blue light Machine has adequate power 3. Turn flow control knob counter-clockwise torelease pressure.Note: Flow meter indicates flow and measures leak.SP01501467 | REV A | 4.2021Bosch Automotive Service Solutions Inc7Verify RepairsPERFORM DECAY / LEAK DOWN TEST 1. Pressurize the sealed system.2. Lock out system by turning flow control knobclockwise to the fully closed position.OBSERVE PRESSURE GAUGE FOR DECAYPressure holdsNo leaks; repair completePressure decreases Leak(s) exist; repairnecessaryNOTE: Not all systems are designed to be 100%sealed.DiagnosticsIntake System and Vacuum LeaksThis procedure will locate leaks in vacuum lines as well as manifolds, EGR valves, oil seals, gaskets, solenoids, o-rings, ducting, throttle shafts, diaphragms, canisters, and more.Note: For best results, test in a draft-free area.1. Remove the air filter housing from ducting.2. If the vehicle has a round inlet tube from theair filter, place the cone adapter into the duct toward the engine.3. Put the vapor supply hose into cone adapterto introduce vapor into the system.4. Use daylight spectrum LED cordless light tolocate leaks.Alternative method:1. Select an appropriate vacuum line to accessthe vacuum system (i.e. a brake booster supply line before the check valve).2. Seal all system openings.• Air Intake must be sealed to prevent vapor from leaking back through the intake.• To seal the intake, use cap plugs, a latex glove, or plastic wrap around the filter.3. Put vapor output hose into cone adapter tointroduce vapor into the system.4. Use daylight spectrum LED cordless light tolocate leaks.EVAP LeaksLeaks in the EVAP system, or fuel vapor recovery system, are frequently the cause for check engine lights. Using a diagnostic leak detector, these leaks can now be quickly diagnosed and repaired, making them profitable services for repair facilities.1. To access the EVAP service port, remove thegreen cap.2. Remove Schrader valve using the Schradervalve removal tool.Note: Schrader valve has left-handed threads; turn clockwise to remove.3. Connect the EVAP service port adapter tothe service port.4. Use a scan tool to close the vent solenoidto close EVAP system from atmosphere. (If vent solenoid does not close, intermittent solenoid may have failed.)8SP01501467 | REV A | 4.2021Bosch Automotive Service Solutions Inc5. Input vapor into the system through adapter.6. Remove the fuel cap until dense vapor isexiting the filler neck.7. Replace the fuel cap and continue pumpingvapor into the system.8. As the system fills with vapor and the systempressure equalizes, observe the flow meter and pressure gauge.9. When pressure gauge reaches its maximumpressure, the flow meter will indicate leak size.Note: Flow meter will drop to zero if there are no leaks.10. Use the daylight spectrum LED cordless light to inspect under the hood and trace the route of the EVAP system on the undersideof the vehicle for leaks.11. Repair the system as needed.After all repairs have been made, retest the system using the decay or leak down testing method with air only.12. Input air into EVAP system until fullypressurized.13. Lock out system by turning the flow controlknob to the fully closed position.If leaks are repaired properly, system will hold pressure.If pressure decays or leaks exist, repeat above procedures until all repairs are complete.Exhaust LeaksThis test is most effective when exhaust system is cold; thermal expansion may cause small leaks to seal.1. Insert Easy INTAKE™ into the end of thetailpipe. If the vehicle has dual exhaust with cross over system, plug the other tailpipe to seal the system.2. Put vapor output hose into Easy INTAKE™ tointroduce vapor into the system.Note: A hot catalytic converter may consumesome of the smoke.Under-Dashboard LeaksMany vehicles have a common vacuum line, leading from the engine compartment through the firewall, under the dashboard.This line supplies vacuum to climate controlfunctions and other vacuum-operated systems.1. Disconnect the vacuum line, under the hood,at its source.2. Input vapor into the vacuum line.3. Observe the flow meter and pressure gaugewhile changing the climate controls from heat to vent, to defrost, etc.Note: Change in the flow meter or pressure gauge reading will indicate which system is leaking.4. Set the climate control to the leaking system.5. Use the daylight spectrum LED cordless light to locate under-dash leaks.Central locking system leak inspection isperformed in the same manner.Activate control solenoids while introducingvapor into the system.SP01501467 | REV A | 4.2021Bosch Automotive Service Solutions Inc 9MaintenanceCheck Fluid Level1. Remove fluid-fill plug from fluid fill port.2. Pour OEM-approved vapor agent into fluid-fill port until fluid level is near top of the fluid-fill port.3. Replace fluid-fill plug.Check fluid level every 75–100 tests.Clean Flow Meter1. Disconnect air supply and power from themachine.2. Remove the flow meter’s top plug.3. Invert the machine to remove flow meter ball.4. Apply isopropyl/rubbing alcohol to a longcotton swab to clean flow meter tube.5. Use a dry cotton swab to dry flow meter tube.6.Wipe flow meter ball clean with dry cloth.Do not use alcohol / cleaners on flow meter ball.7. Reinstall the flow meter ball and the top plug.Drain Vapor Hose1. Elevate the machine2. Allow the entire vapor hose to hangdownward.3. Place a container beneath the nozzle tocapture fluid.Draining the vapor hose takes approximately 5 minutes.10SP01501467 | REV A | 4.2021Bosch Automotive Service Solutions IncTroubleshootingProblem SolutionNo green light• Check polarity• Ensure 12-volt battery is fully charged • Reconnect power cablesGreen light flashing • Power supply must be between 11.5 and 14 VDC • Connect to a fully charged 12-volt battery • Never use battery charger as power source Amber or red light flashing • Open circuit/internal component • Contact technical supportNo air flow• Open the flow control valve• Ensure hoses are not kinked or pushed into machine Insufficient vapor• Check fluid level• Open the flow control valve• Ensure hoses are not kinked or pushed into machine Flow meter ball sticking • Tap face of flow meter• If problem persists, clean flow meter Gauge bouncing or flow meter bouncingDrain vapor hoseHigh pressure readingEnsure hoses are not kinked or pushed into machine11 NotesSP01501467 | REV A | 4.2021 Bosch Automotive Service Solutions Inc。
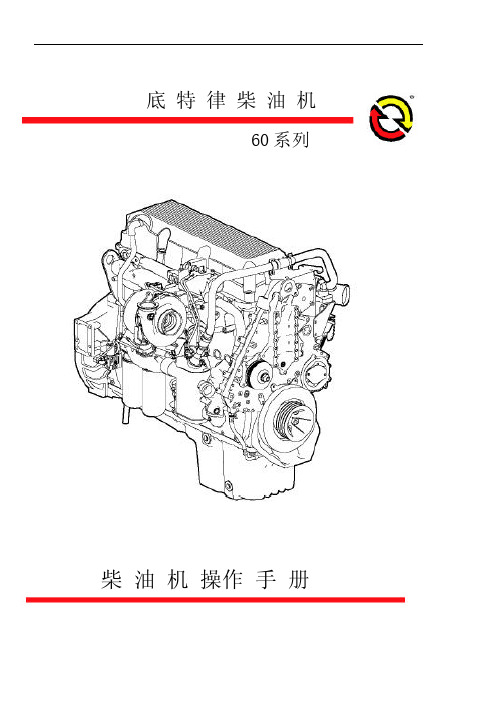
底特律s60使用手册
柴 油 机 操作 手 册底 特 律 柴 油 机60系列基本知识章节12 保留更改权利,恕不通告(版本06/04)柴 油 机 型 号 和 序 列 号 规 定 图 1 柴油机序列号和型号的位置柴油机的序列号以及型号用激光蚀刻在气缸体左侧,位于进气管下及浇铸的底特律柴油机标志上方(从飞轮端看) 见图1序列号型号保留更改权利,恕不通告(版本 06/04) 15图3 启动前检查滑油液位以便留出冷却液膨胀空间。
更多详细的建议,参考本手册的基础知识章节中如何选择冷却液部分。
3. 在加注完冷却系统后系统内截留的空气必须被驱除。
为达到这个目的,允许柴油机打开压力盖来暖机。
在变速箱处于空档时,提高柴油机转速到1000rpm 并按要求给冷却器加冷却液。
4. 检查确定冷却器的前端以及空气交换冷却器(如果装配了的话)没有堵塞并且没有残渣。
滑油系统检查 新的或最近大修的柴油机,或储存6个月或更长时间的柴油机,其旋转部件以及轴承上的滑油膜在柴油机首次启动时可能不够。
注意: 启动时不充分的润滑会引起柴油机部件严重损坏。
在柴油机初次启动时为确保所有的轴承表面立即有滑油液流,柴油机滑油系统应使用市场上买得到的滑油压力预注器进行预注。
如果这做不到,摇臂室盖应拆除并用干净的滑油冲洗摇臂。
冲洗的滑油应与曲轴箱中使用的滑油相同。
预注滑油后,添加滑油使液面达到测深尺正常标注位。
见图3。
润滑剂的建议,参考本手册基础知识章节中如何选择润滑油章节。
特殊库存 柴油机在工作期内特殊时期的库存(例如过冬),冷空气内部的正常水分(总存在于空气中)会凝结在油底壳内。
保留更改权利,恕不通告(版本 06/04) 19警告: 热 油为避免被热油烫伤,不要在摇臂室盖打开时操作柴油机。
应进行检查确定原因。
气启动器——由于大多数压缩空气储存柜有限的容积以及启动周期相对短的持续时间,在启用空气启动器前确定柴油机启动准备已完成。
按如下步骤启动配备气启动器的柴油机: 1. 检查空气储存柜的压力。
3-轮机说明书-20151021
目次1总则 (4)1.1概述 (4)1.1检验和试验 (4)1.2油漆 (5)2动力系统 (5)2.1动力系统组成 (5)2.2动力系统运行条件 (6)2.3推进系统运行方式 (6)2.4柴油发电机组的原动机 (6)2.5吊舱推进器 (7)2.6发电机舱、集控室及机修间布置 (7)2.7动力装置保障系统及设备 (8)2.8燃油系统 (8)2.9滑油系统 (9)2.10冷却水系统 (10)2.11排气系统 (11)2.12压缩空气系统 (11)2.13海水管系防腐防污系统 (11)2.14动力定位系统 (12)2.15监测和控制及安全保护系统 (14)3船舶系统 (15)3.1概述 (15)3.2水灭火系统 (15)3.3舱底水系统 (16)3.4压载水系统 (17)3.5固定式CO2灭火系统 (18)3.6机舱高压细水雾灭火系统 (19)3.7生活污水收集处理系统 (20)3.8舱底油污水处理系统 (20)3.9空调系统(含空调舱室冬季采暖) (21)3.10全船通风系统 (24)3.11冷藏系统 (27)3.12淡水系统 (28)3.13专用冷却水系统 (31)3.14全船漏水及泄水系统 (33)3.15阀门遥控系统 (33)3.16全船液舱注入、透气、测量系统 (33)3.17全船液位遥测系统 (34)3.18损管辅助决策系统 (35)1总则1.1概述本船轮机设计依据:CCS现行《钢质海船入级规范》及修改通报中国船舶检验局现行《国际航行海船法定检验技术规则》及修改通报《1974年国际海上人命安全公约》《1973年国际防止船舶污染公约》所有电气设备、仪表、电缆均采用船用及有CCS(或国际知名船级社证书)证书的产品。
动力定位满足CCS现行《钢质海船入级规范》及修改通报对DP-2的要求。
机舱自动化满足CCS最新海船规范AUT-0附加自动化标志(即机器处所周期性无人值班)船的要求。
所有机械设备、阀件、箱柜的铭牌、警告牌等用中文书写。
- 1、下载文档前请自行甄别文档内容的完整性,平台不提供额外的编辑、内容补充、找答案等附加服务。
- 2、"仅部分预览"的文档,不可在线预览部分如存在完整性等问题,可反馈申请退款(可完整预览的文档不适用该条件!)。
- 3、如文档侵犯您的权益,请联系客服反馈,我们会尽快为您处理(人工客服工作时间:9:00-18:30)。
1 概述本船轮机部分遵照中国船级社CCS《钢质海船入级规范》(2009);CCS《散装运输液化气体船舶构造和设备规范》(2006)及修改通报;CCS《材料与焊接规范》(2009);CMSA《船舶与海上设施法定检验规则-国际航行海船法定检验技术规则》(2008)及其修改通报进行设计,满足入级要求。
以下的说明将根据最终的比较、电力负荷计算、设备制造厂和规范的要求进行优化。
所有设备的设计和供应均能满足规范的要求。
轮机自动化部分按“BRC”要求进行设计。
1.1 机舱位置机舱位于本船的艉部。
监视室布置在机舱内主甲板层。
1.2 应急发电机间应急发电机间布置在艉楼甲板的后方。
1.3 推进系统配置推进系统包括:—主机;—减速齿轮箱;—轴;—定距螺旋桨。
1.4 燃料与环境条件主机可燃用180cst(50℃)即1500秒(雷氏一号黏度100F)重油。
辅机、应急发电机及焚烧炉等燃用船用轻柴油。
重油系统设有二个重油舱、一个重油日用油柜和一个重油沉淀柜。
轻油系统设有二个轻油舱,一个轻油沉淀柜和二个轻油日用柜。
指定的燃料等级符合ISO8217。
在没有特殊规定的前提下,环境温度值应参照ISO3046:大气压力 : 1 bar环境温度 : 0~45°C海水温度 : 32℃吸入空气温度 : 45°C1.5 辅助设备下面给出的机械设备的技术参数以主、辅机及其他设备的制造厂商提供的数据为准。
除了柴油发电机组是为其他设备提供电源外,其他的辅助设备为电驱动。
1.6 机舱自动化机舱自动化满足CCS规范“BRC”标志的相关要求。
2 轴系轴系包含以下几个部分:—螺旋桨—艉轴—轴管及轴承—密封装置2.1 螺旋桨本船选用的定距螺旋桨的参数如下:数量:1型式:定螺距桨材料:锰铝青铜螺旋桨直径:~3.40 m叶片数:52.2 艉轴艉轴包含以下几个部分:—螺旋桨轴—联轴器—中间轴轴与齿轮箱之间通过有键法兰连接,与螺旋桨采用有键连接,轴由锻钢锻造。
设一套轴接地装置,它与船体相连,并且安有监视系统。
2.3 艉轴承在艉轴的前后分别设有前轴承和后轴承,尾管轴承采用白合金轴承,可通过对艉轴变位所引起艉轴运行状况的变化进行监视,以延长艉轴的大修期。
2.4 艉轴密封艉轴承采油润滑,尾轴管密封采用辛伯来克斯或类似型式,防沙型,设有防渔网装置。
3 主推进系统3.1 主机3.1.1 说明主机为船用柴油机,直列、四冲程、直喷、水冷、增压柴油机。
推进装置的自动化和遥控系统按照制造厂商及规范的要求设置,并且在监视室和驾控台能够对它进行监控。
主机所需的标准工具均随机附带。
3.1.2 技术参数数量:1型号:8320Zcd-8型式:直列、四冲程、直喷、水冷、废气增压柴油机缸数:8缸径/行程:320/440 mm持续功率:2206 kW (3000PS)额定转速:525 r/min燃油耗油率:205+5%g/kW.h滑油消耗率:≤1.7 g/kW.h冷却方式:闭式循环水冷却起动方式:压缩空气起动旋向:顺时针(面向飞轮视)自动化等级:按照CCS对“BRC”标志的要求而定上述主机输出功率是在以下工作条件下取得的:海水温度:32℃低温淡水温度:(38℃)环境温度:45℃大气压力:1 ba相对湿度:60%主机的装配必须按照主机厂的要求进行。
附件及备件:—机带滑油泵,滑油冷却器—废气涡轮增压器:按制造厂商的标准—空气冷却、淡水冷却器、海水泵、淡水泵及管系—飞轮—气起动阀—空气瓶—气起动截止止回阀—按制造厂商提供全套工具—主机转速和涡轮增压器转速计3.2 齿轮箱本船选用的减速齿轮箱为单输入、单输出、可逆转型。
齿轮箱与主机之间用弹性联轴器联接。
齿轮箱的技术参数:型号:GWC52.59数量:1减速比:2.9643:1附件及备件:—齿轮箱备用滑油泵—滑油冷却器及温度调节旁通阀—按制造厂商的标准提供油滤器3.3 弹性联轴器型号:RATO-S3120型式:弹性橡胶联轴器。
额定扭矩:50 kNm4 锅炉选用一台约200kW废气热油锅炉,可利用主机的废气来加热热油。
加热的热油可直接对重油舱柜及分油机加热器等进行加热。
锅炉能满足本船在最低环境温度下航行所需的热量。
废气热油锅炉的技术参数将根据废气的量确定。
在4m平台右舷后面设热油锅炉储存柜。
废气热油锅炉应带热油循环泵二台,一台备用,循环泵的参数根据热油产量确定。
5 发电机组5.1 柴油发电机组主柴油发电机组布置在机舱内。
每台柴油发电机组均由一台四冲程、高速、直列水冷的柴油机驱动。
经过负荷计算后选用的机组参数如下:数量:3持续功率:每台200 kW( 400 V, 50 Hz)转速:1500 r/min起动方式:电正常航行工况下,使用一台即可满足全船所需用电;在卸货或消防时,两台可并车使用。
5.2 应急兼停泊发电机组应急兼停泊发电机组由一台直列、增压柴油机驱动,并且将其布置在艉楼甲板后方的应急发电机间内。
技术参数如下:额定功率:90 kW( 400 V, 50 Hz)转速:1500 r/min起动方式:电/弹簧蓄能器在设计的过程中,充分考虑发电机间的通风、进气和排气系统以及足够的维修空间。
在适当的位置设置漏水口,并且设有有效的措施避免由恶劣天气或海况带来的海水进入。
6 辅助设备下面给出的辅助设备的技术参数,将以最终确定的制造厂商提供的为准。
技术参数的修改是允许的,因为它必须满足本船主体及性能的调整和安装,使它们不至于受到影响。
6.1 系统描述6.1.1 冷却水系统6.1.1.1 海水冷却系统在机舱的左右舷分别布置了一个海水箱(高位和低位)。
海水吸入管延伸至海水箱的底部,防止空气的进入。
海水箱由一根直径为300mm的海水总管连接,在与海水箱相连的进水阀之后均设有粗水滤器。
每个海水箱都设有相应的透气口、压缩空气吹洗及海水防腐装置。
在本船的艏部设有一个单独的海水箱,为应急消防水泵提供水源。
6.1.1.2 主机冷却水系统主机自带有海水泵一台、淡水泵一台,另设有电动淡水备用泵一台,主机备用海水泵由总用泵兼作。
主机淡水出机后,经过淡水温度调节阀和淡水冷却器,由主机机带淡水泵抽吸泵入主机淡水进口,完成淡水冷却循环。
当机带淡水泵故障时,由电动淡水备用泵替代。
主机设有独立的膨胀水箱。
主机膨胀水柜内装功率为10kw的带温控的加热器一只,带控制箱。
另外,在主机淡水泵出水管分一路,专供主机喷油器冷却模块冷却用。
冬季主机在冷车起动之前,应开启柴油机油水预热装置对主机淡水进行预热。
主机机带海水泵由海水总管吸入海水,经泵排出经主机空冷器后,分为二路,一路至滑油冷却器、淡水冷却器后排出舷外,另一路至齿轮箱,对它们进行冷却后,分别排出舷外。
当机带海水泵出现故障时,总用泵可作为主机海水泵的备用泵。
6.1.1.3 辅机冷却水系统发电机组柴油机组的冷却海水由辅机海水冷却泵提供,全船共设一台辅机海水冷却水泵。
辅机自带的淡水泵完成自身的淡水冷却循环。
辅机海水冷却泵由海水总管吸入海水,完成对各自的冷却后排出舷外。
每台发电机组柴油机均自带有淡水膨胀水箱。
集中式空调装置、机舱监视室空调均采用海水冷却,并设置一台空调冷却水泵提供冷却水源。
另外设一台备用泵作为辅机和空调冷却的备用泵,该泵平时作为制氮装置冷却水泵。
空压机采用风冷。
6.1.1.4 应急兼停泊发电机冷却系统按规范和制造厂商的规定,本船的应急发电机组是通过散热冷却器进行风冷。
6.1.2 燃油系统主机可燃用180cst(50℃)燃料油,辅机组、应急发电机组、焚烧炉等燃用轻柴油。
重油系统设重油舱二个,重油沉淀柜一个,重油日用油柜一个,燃料油分离机及加热器二套,轻油分离机及加热器一套,燃油供油单元一套,重油输送泵二台。
重油系统采用热油加热。
主机重油沉淀柜、日用柜采用热油加热,另加设电加热器。
主机供油单元采用热油-电混合加热。
轻油系统含两个柴油舱,一个沉淀柜和二个柴油日用柜,一个应急兼停泊柴油发电机组柴油日用柜和二台柴油输送泵。
沉淀柜应安装高—低位开关,自动根据液位的变化启动输送泵,自动向沉淀柜补充柴油,设高高位开关,自动停止输送泵。
重油沉淀柜亦具有自动补油功能。
重油溢油舱,轻油溢油舱设高位报警,在机舱值班室有声光信号。
燃油系统还设有燃油污油舱一个,燃油污油泵一台。
燃料油分离机能够24小时运转。
燃料油的净化可采用一套净化装置,也可采用两套净化装置并联或串联持续净化。
设置一套轻油分离机及管路,以便对柴油进行净化。
净化装置分离出来的污水和其他杂质应排至渣油舱;重油和轻油可由任意一舷分别注入重油舱和轻油舱。
每个日用油柜均设有供油管、注入管、溢流管、透气管、油位计等。
每个日用燃油柜都设有低液位报警。
所有油柜、油泵及滤器的下方均设有油盘。
油盘的泄油引至污油舱。
污油舱设有高液位报警,舱内污油由污油泵排至岸上接收设备。
油渣泵将污油泵至焚烧炉污油柜,并可自动关停,污油再由污油柜自动泵至焚烧炉。
燃油系统设有气动遥控快关阀装置,可在机舱外控制。
应急兼停泊发电机组燃油柜的燃油专供应急发电机组使用,油柜内储油可供应急发电机组至少使用18小时以及停泊8小时使用,并设置有保证至少使用18小时的低位液位报警及超高位液位报警。
应急发电机油柜装液位计,出口设手动速闭阀,可在应急发电机室外进行手动关闭。
6.1.3 滑油系统6.1.3.1 主机滑油系统本系统设有滑油储存舱一个、滑油循环舱一个、污油舱一个、电动滑油输送泵一台、滑油手摇泵一台、主机机带滑油泵一台、主机滑油备用及预供泵一台、主机滑油冷却器一套、主机喷油器冷却模块一套、冷却模块滑油箱一只、齿轮箱滑油备用泵一台、滑油分离机及加热器一套等。
设主机滑油沉淀柜(4m3)在机舱4米平台甲板,装带温控的5kW电加热装置,滑油沉淀柜旁装控制箱。
主机滑油沉淀柜设透气管(通艉楼甲板)、放残阀(设漏斗,由管路排至污油舱)油位计,设手动阀可将柜里滑油放回主机滑油循环柜的管路。
滑油储存舱可由艉楼甲板注入口注入滑油。
滑油储存舱设有液位测量装置及空气管等。
主机为干式油底壳。
主机滑油循环舱设在双层底。
其舱内滑油由主机自带滑油压油泵排出,经滑油双联滤器、自动调温阀及主机滑油冷却器后,进入主机内润滑;主机滑油系统中的自动调温阀,可将滑油进机温度控制在适宜范围内;主机油底壳的油通过设在主机油底壳前后的管路自流到主机滑油循环舱。
主机滑油备用及预供泵可在主机起动前对主机提供润滑油,同时作为主机滑油压油泵的备用。
滑油分离机可对滑油循环舱内的滑油进行循环净化处理,以延长滑油使用时间、提高主机使用寿命。
滑油使用到更换期时,排至舷外接收设施。
设有管路可将主机滑油循环舱内的滑油抽至污油舱和舷外,设有管路和手摇泵可将滑油储存舱的滑油抽出至主机滑油循环舱。
主机喷油器冷却模块及冷却模块滑油箱系统的冷却介质采用CD40机油。
