博朗6系 说明书
博朗Max 6合1体温计用户手册说明书

thermometerQuick-start GuidePress the FACE button and keep holding it down whilst approaching the centre of the forehead until you see the temperature displayed inside the rectangle.Too FarToo closeCorrect distanceIf, when pressing the “face” button, the projection shows CAL (“face” and “home” lights will flash), press the “face” and “home” buttons simultaneously and direct the projection onto an internal wall or another hard surface. Release the buttons. Now the device is calibrated to the room temperature and ready to take accurate body temperature measurements when pressing the “face” button.To take temperature of objects, walls etc., press the “home” button.The 6-in-1 Thermometer is an infrared thermometer,Therefore, when the “face” button is pressed, the 6-in-1 Thermometer software automatically applies a correction factor and thus the resulting value is comparable to that experienced in more commonly used temperature-taking methods, such as underarm (axillary), oral or rectal, or other core temperature locations as preferred by the user..An oral reading is generally 0.2°C (0.4°F) higher than an axillary reading while a rectal or core reading is usually0.8°C (1°F) higher (see no.7).The 6-in-1 Thermometer temperature reading taken on thetemperature reading for them.4. HOW TO USE4.1 Taking the body temperature: FOREHEAD• When using for the first time, insert 4 AAA batteries as explained in no.11 Replacing batteries.• Open the protective cap by rotating it 90° (see fig. 2).• Point the 6-in-1 Thermometer at the forehead.• Press the “face” button and hold it down. The two aiming lights will turn on and you will see the temperature reading projected onto the forehead between or overlapping the sides of the projected rectangle shape. • While keeping the 6-in-1 Thermometer perpendicular to the centre of the forehead, move it back or forth until the temperature reading is positioned evenly inside the rectangle (see fig. 2): if the thermometer is too close, or too far away, the temperature reading will overlap the sides of the rectangle (see figs. 3 and 4).• When the temperature reading sits evenly inside the rectangle, the thermometer is at the correct distance (see fig. 5); release the button, keep the thermometer steady while the projection flashes and then read the temperature value.If necessary, you can immediately take another reading. After the measurement has been taken, the light on the(recommended for professional use only).Proceed as you would do for a forehead reading (see no.4.1), but press the “home” button : the projected reading will appear on the surface.After the measurement, the projection of the temperature value will remain visible for about 10 seconds. If it is difficult to see the temperature value (for example, on transparent, shiny or irregular surfaces, such as bathwater or soup) then release the button and direct the projection onto a solid, preferably dark, surface. This time you will not need to worry about holding the thermometer the correct distance from the surface as, in this case, the thermometer is not taking a temperature, but merely projecting the temperature value that has already been taken.5. AMBIENT TEMPERATURE and MEMORY FUNCTION The “Mem” button lets you see the ambient temperature and call up the last 9 temperature readings (memory function).• Aim the device at any uniform and opaque surface.• Press once the “Mem” button: the projection will show the letter “A” , (Ambient) alternating with the ambient temperature value, and the light of the “Mem” b utton will turn itself on.• Press the “Mem” button again, and the projection will show the number 1 alternating with the last temperature value taken. The light of the button which had been used for that measurement (“face” or “home”) will turn itself on. If you push the button again before the memory’s light turns itself off, the number 2, alternating with the second to last temperature taken will be projected, and the light of the used button will turn itself on, and so on.6. ROOM TEMPERATURE CALIBRATIONIf, when pressing the “face” button, the projection shows “CAL” , (“face” and “home” lights will flash) this means the device needs to be stabilised (see no.2.1.2).In this instance, the thermometer will not let you take a measurement, as it would not be correct. On the contrary, it will activate the Automatic Quick Calibration System (AQCS). Now you have two possibilities:1. Wait about 5 minutes without touching the thermometer, until the AQCS ends.2. Perform the MQCS (Manual Quick Calibration System) procedure as follows:focus the thermometer on an internal wall or wardrobe with uniform temperature and at a point between approximately between 80 and 150 cm (30 and 60 inches) from the surface press the “face” and “home” button simultaneously (see fig. 8) (lights will flash).• once the correct distance is reached (CAL inside the rectangle, fig. 5), release the button: the projection will flash slowly showing the room temperature.To ensure a reliable temperature reading, do not focus the thermometer on an outside wall, window, source of heat or cold (radiator, air conditioner, lamp, computer, surface in contact with the human body, etc.).The thermometer is now ready to take a reading and willIf necessary, these settings can be changed as follows: • when the thermometer is off, aim the thermometer at any flat surface.• press and hold the “Mem” button; the projection will show the letter “A” and after about 8 seconds it will change, showing the settings in sequence:…..C...…….F……..Or…….rEc……..Ax…….Cor…• when the desired setting appears, release the button.appears.DESCRIPTION: “E.1” is projected alternately withthe symbol “bAt” ( ),or the unit does not turn on at all.PROBLEM: the batteries are dead. SOLUTION: remove thebatteries immediately and replace them (see no. 11).DESCRIPTION: the projection reads "E.8". PROBLEM: the thermometer was moved before the light started flashing, or the area is subject to strong electromagnetic fields. SOLUTION: wait until the light starts to flash before moving the thermometer; make certain that there are no mobile or cordless telephones in the vicinityDESCRIPTION: the projection shows “CAL” and the lights of the “face” and the “home” buttons flash. PROBLEM: the thermometer has not stabilised. The symbol “CAL” and the lights indicate that you should perform an MQCS. SOLUTION: perform an MQCS (see no. 6).DESCRIPTION: "Hi.4" not guaranteed. DESCRIPTION: "Hi.4" appears on the projection. PROBLEM: the room temperature is too high(above 45°C / 113°F).SOLUTION: move toanother, cooler site.DESCRIPTION: “Lo.5"and the temperature valueare projected alternately.PROBLEM: If you havepressed the “face” button:the room temperature isbetween 10 and 15.9°C(50 and 60.6ºF).If you have pressed the“home” button”: the room temperature is between 5and 9.9°C (41 andDESCRIPTION: the projection reads PROBLEM: the room temperature is too low (below 10°C or 50°F if you habutton ORbelow 5°C or 41°F if you habutton.SOLUTION: move to another, warmer room. DESCRIPTION: "Hi.2" and the value are projected alternately. PROBLEM: if you have pressed the “face” button: the temperature is over 40°C/104°F. SOLUTION: seek medical attention. DESCRIPTION: the projection reads "Hi.2". PROBLEM: if you’ve pressed the “face” button: the temperature detected exceeds the limit for operation with this button (>42,5°C or >108.5ºF ).If you’ve pressed the “home” button: the temperature detected exceeds the limit for operation with this button (>80°C or >176°F ). SOLUTION: temperature reading cannot be taken. DESCRIPTION: the projection reads “Lo.3”. PROBLEM: the forehead temperature appears to be too low (<34.0°C or<93.2°F if you have pressed the “face” button OR <1°C/33.8°F if you’ve pressed the “home” button).SOLUTION: if you have pressed the “face” button: make certain the sensor is not dirty or damaged and that the subject has not come from a cold room.If you have pressed the “home” button: the temperature readingcompliance with IEC 62471.Follow instructions for useATTENTION: read thewarningsDevice designed for continuous useApplied part: type BFProtected against insertion of objects >12.5 mm andagainst vertical drippingwater when tilted up to 15°.Recyclable materialDispose of the device incompliance with applicablelegislation regarding electrical equipment andbatteries.Brother Max 6-in-1 ThermometerUS 6,196,714 - US 6,527,439 - US 7,001,066 - US 7,651,266 - US 8,128,280 - EP0909377 -EP1051600B1 - EP1283983B10051Manufactured in Italy by TECNIMED srl 12, P.le Cocchi , 21040 Vedano O. (VA) - ITALY****************Tel. +39 0332 402350。
博朗耳温计中文说明书

医生及妈妈们心目中最理想的品牌!最多医生诊所及妈妈推荐,比以前更温和!美国几乎所有的儿科医生都用博朗体温计,目前国内使用博朗4520的医院有上海红房子和瑞金,杭州儿童医院等等.德国博朗4520耳温计是BRAUN系列产品的最高端型号一秒体温计,人体工程学外型,把握更加舒适.全新护耳柔垫设计,更小的测量口径,柔软有温和,更适合婴幼儿,更能保健全家健康。
舒适、适合全家大小使用,最温和的体温测量工具;安全、全新设计柔软侦侧头,安全不伤耳道;快速测量体温,仅需一秒;准确经医院使用测试证明,测温准确.德国博朗4520耳温计是BRAUN系列产品的最高端型号一秒体温计,人体工程学外型,把握更加舒适.全新护耳柔垫设计,更小的测量口径,柔软有温和,更适合婴幼儿,更能保健全家健康。
舒适适合全家大小使用,最温和的体温测量工具;安全全新设计柔软侦侧头,安全不伤耳道;快速测量体温,仅需一秒;准确经医院使用测试证明,测温准确.初生的宝宝发烧了,量体温是年轻父母最头疼的事,因为一般的耳温计测量时间长,宝宝常常”不合作”.现在好了,德国博朗”一秒耳温计”,只需往宝宝耳朵里一放,一秒钟不到,温度多少立刻精确显示,不论躺着还是坐着都可以用,孩子无痛苦!-一秒八次测温,耳套检测警示-Flexible tip(4000系列独有)柔软弹性探头-更小测量口径,测量更准确-耳套自动弹出装置-贴心凸纹按钮设计,测量不滑手-保留前8次温度记忆-ExacTemp技术(4000系列独有)配合回馈系统:有指示灯光和声音提示测得正确温度,提示是否没有正确放置.-使用时间更长1.产品包装中都有哪些东西打开包装产品共有3样东西:一个硬盒保护安放支架+送的21个耳套+耳温计一个2.产品所用电池说明刚买的产品中含有电池,但是电量不是很足,可以用1-2个月,建议1-2月后换电池,电池是5号电池。
3.几个按键说明I/O:按一下开机,长按就是关start:测量前按一下,灯会闪烁,表示进入测量的状态了。
博朗产品说明书全系列

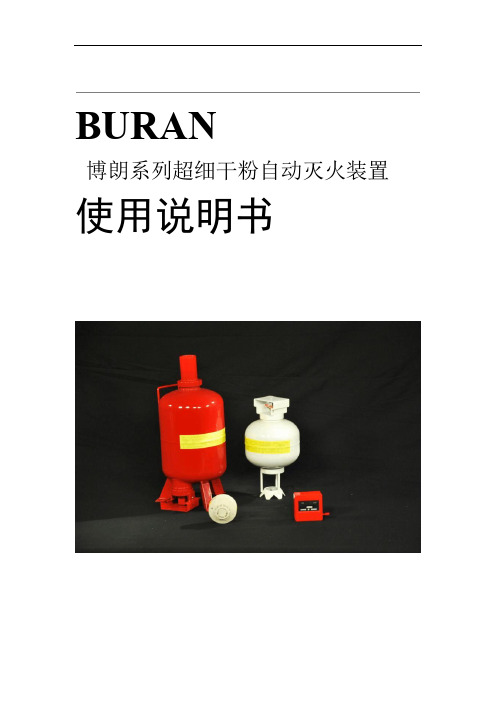
BURAN博朗系列超细干粉自动灭火装置使用说明书南京燕苑博朗消防设备有限公司1目录悬挂式超细干粉灭火装置 FZXA2.5-BURAN第一部分保管注意事项结构和工作原理 4 运输、1 适用范围 2 技术性能 3售后服务装箱单 8 安装注意事项5 6 维护注意事项 7FZXA5-BURAN 第二部分悬挂式超细干粉灭火装置保管注意事项 4 技术性能 3 结构和工作原理运输、1 适用范围 2售后服务维护注意事项 7 装箱单 8 5 安装注意事项 6FZXA8-BURAN 悬挂式超细干粉灭火装置第三部分运输、保管注意事项适用范围 2 技术性能 3 结构和工作原理 4 18 维护注意事项 7 装箱单售后服务 6 5 安装注意事项自动温感启动器第四部分手动启动功能模块主要技术指标概述1 2 探测器性能特点 3 4 安装方法 6 使用方法维护5安装注意事项第五部分备注第六部分2第一部分 FZXA2.5-BURAN悬挂式超细干粉灭火装置1 适用范围1.1 能迅速扑灭A、B、C类火灾和带电电气火灾。
如生产车间、办公室、小型仓库、商店、配电房等层高比较小的相对封闭空间及火车、船舶等交通工具消防使用。
1.2 防爆标志ExibIIBT32 技术性能2.1 外形尺寸(含固定架;mm)直径……………………………………200±5高度……………………………………375±52.2 灭火装置重量(Kg)………………………………………………………6.0±0.52.3 灭火超细干粉重量(Kg)…………………………………………………2.5±0.1252.4保护面积、体积(不密闭程度5%)A类火灾B、C、E类火灾保护面积保护体积保护体积保护面积3223mm mm1887292.5自动温感启动器启动温度(℃)…………………………………………≥702.6启动电流(A)………………………………………………………………≥12.7 检查电启动的安全电流(mA)…………………………………………≤1502.8 喷射时间(秒)………………………………………………………………≤52.9 灭火时间(秒)……………………………………………………………≤12.10 使用环境温度(℃)………………………………………………-40~+502.11 装置启动有效期(年) (10)2.12 可人控电启动或与火灾自动报警系统配套使用。
博朗IRT6520中文说明书家用版

博朗IRT6520中文说明书家用版一、产品概述博朗 IRT6520 是一款高性能的家用体温计,它采用了先进的红外线技术,能够快速、准确地测量人体体温。
无论是成人还是儿童,都能方便地使用这款体温计进行体温监测。
二、产品特点1、快速测量只需几秒钟,就能获得准确的体温测量结果,节省您的时间。
2、高精度采用先进的传感器和算法,确保测量结果的准确性和可靠性。
3、多功能显示屏幕清晰显示测量结果,同时还会显示上次测量的体温,方便对比。
4、适合不同人群可用于测量儿童和成人的额头、耳部体温,满足家庭中不同成员的需求。
5、易于操作简单的按钮设计,让您轻松上手,无需复杂的操作步骤。
三、产品组成1、体温计主体这是测量体温的核心部分,包含了传感器、显示屏和操作按钮。
2、保护套用于保护体温计,防止在不使用时受到损坏。
3、电池为体温计提供电源,确保其正常工作。
四、使用方法1、准备工作取出体温计,确保其外观完好无损。
安装电池,按照电池仓内的正负极指示进行安装。
2、测量额头体温按下电源按钮,启动体温计。
将体温计的探头对准额头,距离约 3 5 厘米。
按下测量按钮,体温计会发出“哔哔”声,表示测量开始。
几秒钟后,体温计会显示测量结果。
3、测量耳部体温轻轻向外拉耳朵,使耳道伸直。
将体温计的探头插入耳道,确保探头与耳道紧密贴合。
按下测量按钮,等待测量结果。
五、注意事项1、在测量体温前,应确保被测量者处于安静状态,避免剧烈运动、进食或喝热饮等。
2、测量额头体温时,应避免头发、汗水或化妆品的干扰。
3、测量耳部体温时,要注意清洁耳道,防止耳垢影响测量结果。
4、如果测量结果异常,建议多次测量以确认。
5、请勿将体温计暴露在高温、潮湿或强磁场环境中。
6、当体温计显示屏显示电量不足时,请及时更换电池。
六、清洁与保养1、每次使用后,用干净的软布轻轻擦拭体温计的探头和机身。
2、如探头有污垢,可用棉签蘸少许酒精轻轻擦拭。
3、请勿将体温计浸泡在水中或用湿布擦拭电池仓。
小度写范文博朗IRT6520中文说明书家用版模板

博朗IRT6520中文说明书家用版博朗irt6500/6520/6020中文说明书产品描述1——耳套(20个/盒)2——位置探测器3——测温头4——exactemp指示灯5——更换耳套按钮6——显示屏年龄选择及记忆功能按钮8——电源键9——测温键10——电池盖11——保护盒博朗耳温计适用于所有年龄人群的体温测量和监控。
仅供家庭使用。
注意事项:若出现未明原因的焦躁、呕吐、腹泻、脱水、食欲不振或活动不适、痉挛、肌肉疼痛、发抖、脖颈酸痛、排尿疼痛等症状,不管背景指示灯亮起何种颜色、被测温者是否发烧,均请咨询医生。
若耳温计显示温度升高(irt6520型号的背景指示灯变黄或变红),请咨询医生。
本产品工作环境的温度范围为:10-40℃(50-104℉)。
切勿将本产品暴露于极限温度(50℃/122℉),切勿置于过湿环境中(>95%rh)。
本产品必须与博朗耳温计配套的耳套(lf40)使用。
儿童在服用抗生素、止痛剂或退烧药的情况下,不应仅靠体温计读数来判定其病症严重程度。
耳温计指示的温度升高可能是病情严重的信号,尤其是出现在年老衰弱、免疫力低下者或婴幼儿身上时。
当出现温度升高或当您对下列人员进行测温时,请立即接受专业咨询。
①出生3个月以下的婴儿(若温度超过37.4℃或99.4℉,请立即咨询医生);②60岁以上的病人;③糖尿病患者或免疫力低下人群;④卧床病人;⑤器官移植者;⑥发烧的症状在老年病人身上较难甚至无法发现。
本产品包含小零件,或被儿童吞食引发窒息危险。
请将本产品置于儿童接触不到的地方。
博朗耳温计使用方法1、摘掉防护盖、按电源键内部自测时,显示屏显示全部过程。
最后一次测得的温度将在显示屏显示5秒钟。
3、如果有需要,耳套指示灯将闪烁。
为获得精确读数,请确保每次测量前换上新的或干净的耳套。
将耳温计探测头插入盒子中断耳套后拔出,新的耳套便戴在探测头上。
请注意:博朗耳温计戴上耳套才能工作。
4、利用agesmart年龄选择功能按钮选择年龄,如下图所示。
博朗剃须刀系中文使用说明指导书

保留这些说明我们产品设计符合最高质量标准,功效和设计。
我们期望您喜爱新博朗剃须刀。
本产品仅限于家用。
描述1.箔刀盒2.箔刀盒释放按钮3.剃须刀头锁动开关4.弹出式鬓角修剪器5.开关6.设置按钮(敏感度)7.设置按钮(密集度)8.复位按钮9.剃须刀显示器10.剃须刀电源插口11.旅行盒12.专用电源线充电推荐充电环境温度为41华氏度到95华氏度或5摄氏度到35摄氏度。
极端低温或高温条件下,电池可能无法正常或完全充电。
推荐剃须环境温度为60华氏度到95华氏度或15摄氏度到35摄氏度。
为了延长使用时间,不要将剃须刀暴露在温度高于50摄氏度或122华氏度环境下。
·使用电源线连接剃须刀至电源插座充电最少一小时。
·一次充满电可提供高达50分钟无绳剃须,这可能会依据你胡须生长改变。
剃须刀显示器剃须刀显示器显示电池充电状态。
在充电过程中或使用剃须刀时,对应绿色充电状态会闪烁。
当电池充满电绿色充电状态将连续点亮。
在完成充电几分钟后,剃须刀切换到待机模式:显示关闭当剃须刀打开,电池电量不足时,红色指示灯闪烁。
剩下电量还将足够用于2到3个剃须。
使用你剃须刀个性化你剃须刀使用(—)⑥和(+)⑦按钮,你能够为你脸不一样部位和特定需求选择最好设置。
不一样设置经过开关键⑤结合指示灯指示·深蓝色(强力剃须)·浅蓝色(通常)·白色(为你脸敏感地域进行一个根本舒适剃须,如颈部)为根本快速剃须我们推荐(+)设定。
当下次切换时候,上次使用设置将被激活。
完美干剃小贴士为了取得最好剃须效果,博朗提议您遵照3个简单步骤:1.一直洗脸之前刮胡子2.在任何时候,保持剃须刀垂直于你皮肤3.绷紧你皮肤,逆着胡须生长方向刮怎样使用按开关键⑤来操作剃须刀·旋转剃须刀头和自动浮动箔,调整到适应你脸轮廓每个部分。
·剃部分难剃地方(比如鼻下),以一定角度滑动剃须刀头锁定开关③到后面位置去锁定旋转头。
2015版博朗系列产品说明书手册

ABC 超细干粉
灭火剂贮存形式
非贮压式
非贮压式
充装质量(质量偏差) 2.5Kg(0%~5%) 5Kg(0%~5%)
装置总重 全淹没空间详细尺寸 (长*宽*高)单位:米 灭火浓度(克/立方米) 保护面积 电引发器电阻(单支)
6Kg
2.51×1.93×3.53
采用 D 类特殊干粉灭火剂的博朗系列干粉灭火装置特别适用于金属火灾的扑救,如钾、钠、 镁等金属燃烧形成的火灾。譬如:烷基 D 类火灾(如三乙基铝助催化剂配加系统火灾)。 1.1.2 该系列产品可以和配套的独立于消防报警系统的博朗系列温控启动模块(70℃±5 或 85℃ ±5℃)、手启反馈模块、延时启停模块、手启延时模块的灵活组合应用形成无源单独/组网自成体 系消防灭火系统。
FZXD5-BURAN FZBA8-BURAN(C) FZBA3-BURAN
-40℃~+50℃ 直径 270 高 400
D 类普通干粉
-40℃~+50℃ 高 290 长 580
ABC 超细干粉
-50℃~+90℃ 直径 250
高 430 厚 162 ABC 超细干粉
FFZ-ACT8-BURAN
FZZA8-BURAN
-50℃~+90℃ -50℃~+90℃
外形尺寸
直径 200 高 375
直径 270 高 400
灭火剂种类
ABC 超细干粉 ABC 超细干粉
FFX-ACT8-BURAN
FZXA8-BURAN
-50℃~+90℃ 直径 270 高 480
ABC 超细干粉
FFX-DPT5-BURAN FFB-ACT8-BURAN FFB-ACT3-BURAN
Bosch TDS60 Serie I 6 EasyComfort 5 商品说明书

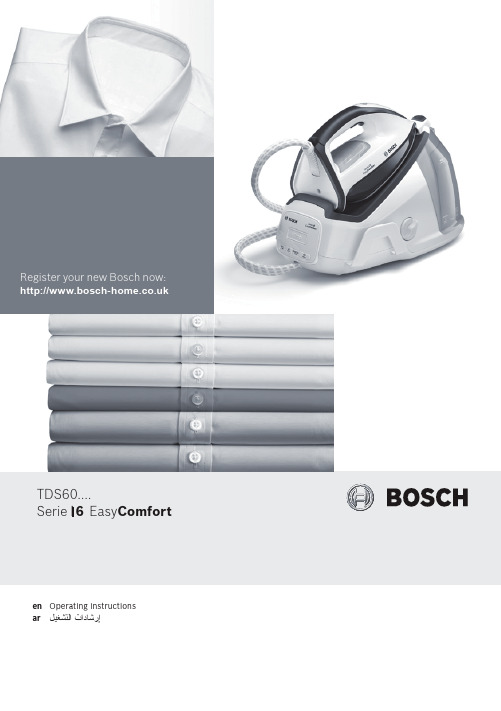
en Operating instructions arليغشتلا تاداشرإ* Model dependent* Model dependent EasyComfort for simple, fast and safe ironing.Discover the new way of ironing with EasyComfort – no more changing the temperature of the iron and tedious pre-sorting! Now all ironable materials, from ultra fine delicates to extra thick fabrics, are creasefree in a flash with a single temperature setting. Which means more time to do other things.1. “on / off” button with indicator light2. “Calc'nClean” descaling button with indicator light3. “Water tank empty” button with indicator light4. Energy saving “Eco” button with indicator light5. Steam hose6. Mains cable7. Mains cable and steam hose storage holder8. Boiler cap / “Calc’nClean” scale collector *9. Water tank 10. Level mark for maximum filling 11. Filling lid 12. Iron pad 13. Iron lock system “SecureLock” *14. Steam release button 15. Iron indicator light 16. Soleplate 17. “Calc'nClean” container *2x* Model dependent* Model dependent 1 Press the steam release button (14) for ironing with steam.Important: When placing the iron on the pad, be sure to first insert the heel in the upper side of the control panel, as shown in the figure.Tip: For better ironing results, iron the last strokes withoutpressing the steam release button (14) to dry the garment.This appliance has a special function for tackling difficult creases.1 Press the steam release button (14) two times inquick succession (double-click). Powerful shots ofsteam will be released.Can be used to remove creases from hanging clothes, curtains, etc.1 Hold the iron in an upright position 15 cm away from the garment to be steamed.2 Press the steam release button (14) repeatedly with pauses of at least 5 seconds.Warning! : never point the steam jet at garments being worn, or at people or animals.If the energy saving setting is selected, you can save energy and water and still achieve good results when ironing most of your garments.1 Press the energy saving button “Eco” (4). The indicator light will come on.2 To switch back to the normal energy setting, press the “Eco” button again. It is advisable to use the normal energy setting to get optimum results on thick and very wrinkled fabrics.* Model dependent* Model dependent* Model dependent* Model dependentليدوملا بسح *ليدوملا بسح *ليدوملا بسح *ليدوملا بسح *2xليدوملا بسح *ليدوملا بسح *نايب ةبملب دوزم “فاقيإ/ليغشت“ رز .1“Calc’nClean“ ةيريجلا تابسرتلا ةلازإ رز .2نايب ةبملب دوزمنايب ةبملب دوزم “غرافلا ءاملا نازخ“ رز .3 ةبملب دوزم(يداصتقا) “Eco“ ةقاطلا ريفوت رز .4نايبراخبلا موطرخ.5 ءابرهكلا لباك .6راخبلا موطرخو ءابرهكلا لباك نيزخت تيبم .7 ةيريجلا تابسرتلا عمجم / ةيلاغلا ءاطغ .8* “Calc’nClean ”ءاملا نازخ.9 .ىصقلأا ءلملا ىوتسم ةملاع .10ءلملا ةحتف ءاطغ .11ةاوكملا ةداسو عضو .12 * “SecureLock“ ةاوكملا لفق نيمأت ماظن .13راخبلا قلاطإ رز.14ةاوكملل نايب ةبمل .15ةاوكملا ةدعاق .16"Calc’nClean" ءاعو .17.نامأو ةعرسو ةلوهس لكب يكلل EasyComfort ماظنةاوكملا ةرارح ةجرد رييغتل نلآا دعب ةجاح لا – EasyComfort ماظن عم يكلل ةديدج اقرط فشتكا سبلاملا عيمج حبصتس ةرارحلا ةجردل يداحلأا طبضلا عضو لضفبو !لمملا قبسملا زرفلل ءوجللا وأ ىلإ لاوصو ةقدلاو ةموعنلا ةقئاف ةساسحلا تاجوسنملا نم اءدب رصبلا حمل يف ةشمرك نودب يكلل ةلباقلا.ىرخلأا ماهملاب مايقلل تقولا نم ديزم ريفوت ينعي امم .ةكامسلا ةغلاب تاجوسنملاليدوملا بسح *Customer Service Great BritainBosch Customer ServiceGrand Union HouseOld Wolverton Road Milton Keynes MK12 5PT UK +44 (0)344 892 8979 IRL +353 (0)1450 2655 002 DS60 EasyComfort GB/AR 12/16 9001226329。
- 1、下载文档前请自行甄别文档内容的完整性,平台不提供额外的编辑、内容补充、找答案等附加服务。
- 2、"仅部分预览"的文档,不可在线预览部分如存在完整性等问题,可反馈申请退款(可完整预览的文档不适用该条件!)。
- 3、如文档侵犯您的权益,请联系客服反馈,我们会尽快为您处理(人工客服工作时间:9:00-18:30)。
博朗6系说明书
A:充电
1、将开关钮向下推【能看见“OFF”标记】。
2、用滑动板使充电头从剃须刀推出来。
然后插入墙壁上的电源插头。
绿色指示灯会亮。
3、剃须刀可以在100V-240V之间的电压连接充电。
4、剃须刀在充电8小时后会充满自停。
5、剃须刀充满电后连续工作时间约30分钟。
6、充电后用滑动板将充电头移回剃须刀里。
7、为了保证蓄电池的长寿,请注意:a在环境温度5-35度之间进行
充电以及储存剃须刀,b不要将剃须刀长久的与电源连接。
、3
B:进行剃须
1、确保剃须刀充分的充电。
2、切勿让水或者其他液体进入剃须刀。
3、皮肤干燥时剃须效果最佳。
因此最好在洗脸前或洗脸后过一段时
间再使用剃须刀。
4、使用时将剃须刀刀头放在皮肤上快速移动,既进行圆周运动又进
行无循环运动。
另外可用另外的空手绷紧皮肤。
5、胡须出现的更多能剃的更短,颈部的毛发同样的可以剃掉。
6、请注意:您的皮肤可能需要2-4个星期的时间不能完全适应此独特飞利浦剃须刀系统。
7、剃须结束后将保护盖盖好。
、3
C:清洁
1、清洁时请确保电源开关未打开。
2、使用飞利浦剃须刀专用毛刷进行清洁。
3、每周清洁一次胡须储藏室,每两个月清洁一次刀头。
4、可以使用能除掉油脂的液体(例如酒精)清洁剃须刀刀头。
清洁完毕之后请加上一滴专用润滑油,这样可以使刀头得到润滑,同时可以保证剃须的舒适性,并保证刀头更长的使用寿命。
5、为了避免混淆,每次清洁都要分开剃须刀刀头(网罩和刀片),既每个网罩和刀片不能混淆。
这点是很重要的,因为每组网罩和刀片是相互磨合的。
若将网罩和刀片调换的话,可能需要几个星期以后剃须刀才会达到最佳剃须效果。
