美国海军陆战队格斗教程
美国海军陆战队格斗术教材(Part 4)

~Follow-on by releasing the aggressor as he falls to the ground and transition to your firearm. See figure 5-20.Same Side Grab: From FrontThe same side grab from the front technique can be used when the aggressor grabs your pistol inthe holster with his left hand.Figure 5-20. Wristlock Technique.T echnique~Begin with the aggressor facing you and grabbing the pistol in your holster with his left hand. ~With your right hand, trap the aggressor’s right hand by grasping his hand. Apply pressure against your body and on the pistol to trap it in its holster.~Step back with the right foot, rotating the hip (right side) to the rear, at the same time with your left hand, strike the aggressor in the upper torso area (simulating a strike to thetrachea). Striking surface will be the webbing between thumb and pointer finger.~Follow up by releasing the aggressor’s hand, doubling the distance and transition to your firearm.See figure 5-21.Figure 5-21. Same Side Grab: From Front.Same Side Grab: From RearThe same side grab from the rear technique can be used when an aggressor grabs your pistol in the holster with his right hand.T echnique~Begin with the aggressor behind you and grabbing the pistol in your holster with his right hand.~With your right hand, trap the aggressor’s right hand by grasping his hand. Apply pressure against your body and on the pistol to trap it in its holster.~Execute a reverse wristlock using the following technique:•Place the palm of your right hand on the back of the aggressor’s right hand and wrap your fingers across the fleshy part of his palm below his little finger.•Twist the aggressor’s hand to the right while placing the hand against your chest. Bring up the left hand to support the right hand by grabbing the aggressor’s hand in between both hands, mimicing praying. Apply downward pressure on his hand against the chest. Leave the aggressor’s hand on the chest to fully control him and to gain leverage. The aggressor’s hand should be rotated 90-degrees so that his palm is facing left.•Step back with your right foot to maintain better balance and lean forward to use body weight to add additional pressure to the joint.•Follow up by releasing the aggressor and transition to your firearm.See figure 5-22 on page 5-30.Figure 5-22. Same Side Grab: From Rear.Section VIIFirearm DisarmamentThe purpose of firearm disarmament is to disarm the aggressor and control the situation by per-forming counter to the pistol, either front or rear.Refer to appendix A for corresponding safeties 1, 2, 6, 8, 9, and 13.CAUTIONTo prevent injury during training, the aggressor should grip belowthe trigger housing only, keeping his finger out of the trigger housing atall times.Counter to Pistol: FrontThe counter to the pistol to the front technique is performed when you are unarmed and your aggressor is in front of you pointing a pistol at your head or chest. The technique is the same if the aggressor sticks the pistol under your chin.T echnique~Begin with the aggressor presenting a pistol in his right hand to your chest. The pistol must be touching or very close to you for this technique to work.~Place your hands in a submissive posture even with your shoulders, elbows into the body, and palms facing the aggressor. Make a submissive verbal statement.~Clear your body from the line of fire by rotating your torso bringing the right shoulder back and, at the same time, grabbing the aggressor’s wrist in a C-grip with your left hand pushing the weapon offline. Maintain control of the aggressor’s arm.~Step into the aggressor with your right foot and grab the weapon with your right hand in a C-grip by placing your thumb underneath the pistol and your fingers over top of the pistol.This rotates the pistol in the aggressor’s hand. An incidental forward horizontal elbow strike to the aggressor is possible while removing the pistol from his grip.~Step back to create distance from the aggressor and transition to employ follow-on actions by performing an expedient press check on the firearm.See figure 5-23 on page 5-32.Counter to Pistol: RearThe counter to the pistol to the rear technique is performed when you are unarmed and your aggressor is behind you pointing a pistol at the back of your head or your back.T echnique~Begin with the aggressor presenting a pistol in his right hand to your back. The pistol must be touching or very close to you for this technique to work.Figure 5-23. Counter to Pistol: Front.~Place your hands in a submissive posture even with your shoulders, elbows into the body, and palms facing away from you. Make a submissive verbal statement and take a quick look in order to identify which hand the weapon is in.~Turn into the aggressor with your left foot, pivoting on your right foot while rotating your torso.The movement with the left foot should be deep enough to set up for the subsequent leg sweep. Use your left forearm to knock the weapon offline, doubling the distance between the weapon and your body, clearing you from the weapon’s line of fire. Keep your hands up.~Quickly over hook the aggressor’s right arm with your left arm trapping it in your armpit between the torso and the biceps, execute a right chin jab/palm heel strike.~Execute a leg sweep taking the aggressor to the ground. Maintain control of the aggressor’s right arm.~Place your right hand on the aggressor’s left shoulder or upper arm and your left palm on your right wrist to further control his arm and to affect an armbar.~Execute an armbar and continue to exert steady pressure against the arm to force the aggressor’s release of the weapon. Use your right knee to control his hips and/orabdominal area.~Once the aggressor releases the weapon, release his arm, retrieve the weapon, and step back to create distance from him. Execute follow-on actions by performing an expedient press check in order to ensure that a round is chambered in the firearm.See figure 5-24 on page 5-34.Figure 5-24. Counter to Pistol: Rear.Section VIIIKnife TechniquesThe purpose of knife fighting is to kill or cause enough damage and massive trauma to stop the aggressor by executing a block for a reverse strike or a block for a straight thrust.Refer to appendix A for corresponding safeties 1, 2, 3, and 14.Block for a Reverse StrikeThe block for a reverse strike is effective against an aggressor that is excuting a reverse strike.T echnique~From the modified basic warrior stance, move forward right, outside the arc of the aggressor’s attack.~Block the attack with your left arm and knife. Keep your left arm bent so that your forearm makes contact with the aggressor’s triceps. Make contact with the knife and slash the aggressor’s forearm.~Maintain control of the aggressor’s arm and follow through with at least three follow-on techniques to the available target areas.See figure 5-25 on page 5-36.Block for a Straight ThrustThe block for a straight thrust is effective against an aggessor that is executing a straight thrust.T echnique~From the modified basic warrior stance, bend at the waist, moving your hips backwards andjumping backwards with both feet moving away from the attack, hollowing out. Thrust bothhands out forcefully, with your left hand making contact palm side down on the aggressor’sforearm. Your right hand holds the knife, making contact on the aggressor’s forearm with theknife. The knife is parallel to the fingers of your left hand.~Slash through the aggressor’s right arm, maintain control of it with your left hand and followthrough with at least three follow-on techniques to the available target areas.See figure 5-26.Figure 5-25. Block for a Reverse Strike.Chapter 5: Brown Belt Marine Corps Martial Arts Program 5-37For Official Use OnlyFigure 5-26. Block for a Straight Thrust.T HIS P AGE I NTENTIONALLY L EFT B LANK. For Official Use OnlyCHAPTER 6Black BeltThe Black Belt is the fifth belt ranking within MCMAP. Upon qualifying as a Brown Belt,all Marines are highly encouraged to continue MCMAP sustainment training in order toadvance to Black Belt. At an advanced level, the purpose and principles remain the same asoutlined in all of the previous belts.Black Belt Requirements.Prerequisites Recommendation of reporting seniorComplete Brown Belt sustainment and inte-gration trainingAppropriate level PME completeTraining Hours Minimum of 20.7 hours, excluding remedialpractice time and testingSustainment Hours Minimum of 20 hours of sustainment,excluding integration training time andpractice time for testingFor Official Use Only6-2MCRP 3-02B Chapter 6: Black BeltFor Official Use Only Section IBayonet TechniquesThe purpose of bayonet techniques is to disable or kill the aggressor. Refer to appendix A for corresponding safeties 1, 2, 4, 7, 8, 9, and 14.Bayonet Training: Stage OneStage one of bayonet training focuses on basic posture, movement, and sequence of movementsagainst a compliant target:•The placement of the right hand on the pistol grip allows greater generation of force whenexecuting the forward thrust, which is the primary offensive bayonet technique. Additionally,it allows you to transition immediately to assault fire as needed by moving the finger back tothe trigger. For safety reasons, the finger is kept off of the trigger when executing bayonettechniques, this prevents an accidental discharge and protects the finger.•The left hand is placed on the handguards in a position that is comfortable for the individual.If the hand is placed too far forward it causes an over extension of the left hand and mitigatessome of the power and control that is generated with the offensive bayonet techniques.•The buttstock locked into the hip is critical because it provides stability during a bayonetengagement when locking up with an aggressor or ensuring optimum power is generatedwhen executing the thrust or any of the other offensive bayonet techniques.•The blade of the bayonet is always pointed at the aggressor in order to facilitate a rapidengagement. Movement should be within an imaginary box that is shoulder-width wide from your neck to your waist.Bayonet Training: Stage TwoStage two of bayonet training adds the movement against multiple aggressors and integrates multiple weapons systems and bayonet techniques.Bayonet Training: Stage ThreeStage three of bayonet training develops the ability to react effectively in the dark. Using youreyes effectively at night requires the application of the principles of night vision such as darkadaptation, off center vision, and scanning. Applying night vision principles alone will not guar-antee a victory in a low light environment. It is necessary to combine these techniques with all ofthe others that you have practiced such as movement, posture, and technique. Low light engage-ments also require you to adjust your approach and close speeds due to uncertain terrain.Chapter 6: Black Belt Marine Corps Martial Arts Program 6-3For Official Use OnlyDark AdaptationDark adaptation allows the eyes to become accustomed to low levels of illumination. It takesapproximately 30 minutes for you to be able to distinguish objects in dim light.Off Center VisionOff center vision is the technique that allows your attention to be focused on an object withoutlooking directly at it. When you look directly at an object, the image is formed on the coneregion of your eye, which is not sensitive at night. When you look slightly off center (optimum isusually 6 to 10 degrees of an object), the image is formed on the area of your retina containingrod cells, which are sensitive in darkness.ScanningScanning uses off center vision to observe an area or an object. Since rod cells only retain animage for 4 to 10 seconds, you must shift your eyes slightly so fresh rod cells are used. This isaccomplished by moving your eyes in short, abrupt, irregular movements over and around your primary target.Common ErrorIt is common for the Marine to wait too long and thrust too late, also known as cocking theweapon. When at closing distance, you should begin to thrust the bayonet trainer so that you canengage the aggressor at the longest possible distance. As a result of waiting too long to thrust,you get caught up and entangled with your aggressor, the bayonet trainer, or both and tend to pullthe weapon back too far with your arms. The results put the Marine at a serious disadvantage forthe following reasons:•It completely disrupts the Marine’s momentum. Often the Marine will find it necessary tocompletely stop and reverse direction of movement to clear the blade.•Pulling the weapon back too far puts it in the Marine’s weaker range of motion, which nega-tively impacts the power and ability to execute follow-on bayonet techniques.•Cocking the weapon at any time serves to telegraph the Marine’s intent to thrust the bayonet.Allowing the aggressor to turn this into two, one-on-one engagements increases the chances ofthe Marines being separated and killed without the support or cover of his fellow Marine. Whilesometimes unavoidable, this is the least desirable of all outcomes.6-4MCRP 3-02B Chapter 6: Black BeltFor Official Use Only Section IISweeping Hip ThrowA sweeping hip throw is particularly effective if the aggressor is moving forward or pushing onyou. The sweeping hip throw is used to take your aggressor to the ground if your aggressorwidens his stance in an attempt to prevent you from executing the hip throw. Execution of thesweeping hip throw uses the aggressor’s forward momentum. This is accomplished by sweepingyour aggressor’s supporting leg and simultaneously continuing to take him to the ground whileyou remain standing. When teaching the sweeping hip throw, walk the students through the tech-nique, step by step, working on the proper body position and execution.Refer to appendix A for corresponding safeties 1, 2, 6, 13, and 15. T echnique~Stand facing the aggressor in the basic warrior stance.~Grab the aggressor’s right wrist with your left hand.~Step forward with your right foot even with or slightly inside of the aggressor’s right foot. Yourheel should be between his feet, and your toes should be even with the aggressor’s toes.~Step back with your left foot, rotating on the ball of your right foot. Your feet should be inbetween the aggressor’s with your knees bent.~At the same time, rotate your waist and hook your right arm around the back of theaggressor’s body anywhere from his waist to his head, depending on the size of theaggressor. If the aggressor is shorter than you, it may be easier to hook your arm aroundhis head.•Hand placement should allow you to control the aggressor and pull him in close to you.•Your back side and hip should be up against the aggressor.~Rotate your hip up against the aggressor. Your hips must be lower than his. Use your righthand to pull the aggressor up on your hip to maximize contact.~Pull the aggressor’s arm across your body and, at the same time, slightly lift him off of theground by bending at the waist, straightening your legs.~Once the aggressor starts to come off of the deck, forcefully sweep his upper right thigh backwith your right leg.~At the same time, continue to pull the aggressor’s right arm forcefully to the left across yourbody to assist in bringing him to the deck.•If the aggressor cannot be easily lifted, your body positioning is not correct.•Students will execute a minimum of 10 fit ins per throw.See figure 6-1.Chapter 6: Black Belt Marine Corps Martial Arts Program 6-5For Official Use OnlyFigure 6-1. Sweeping Hip Throw.6-6MCRP 3-02B Chapter 6: Black BeltFor Official Use Only Section IIIGround FightingThe purpose of ground fighting is to apply the techniques that will allow you to get back to yourfeet as quickly as possible and cause damage to the aggressor by executing the face rip from theguard, the straight armbar from the scarf hold, and the bent armbar from the scarf hold. Refer to appendix A for corresponding safeties 1, 2, 6, and 10.Face Rip From the GuardThe face rip from the guard technique damages your aggressor and assists you in transitioningback to your feet as quickly as possible gaining a tactical advantage. It is executed when you arein the aggressor’s guard and the aggressor is trying to damage you by striking at your face andhead. T echnique~Lay on your back with the aggressor kneeling in your guard position.~The aggressor is trying to cause damage to you by striking your head.~Pull down on the back of the aggressor’s neck or head with both hands so that his head is onor next to your right shoulder, and his chin is facing outboard. Hug the back of theaggressor’s neck to keep him on your chest and to ensure that you have control of his head.~Reach around the back of the aggressor’s neck with your left arm and grab his chin with yourleft hand.~Place your right hand on the right side of the aggressor’s chin.~Twist the aggressor’s neck by pulling to the left with your left hand and pushing up with yourright hand.~Push off of the ground with your right foot while blocking the aggressor’s right leg with yourleft leg. Continue to exert pressure on his neck, coming to the mount position over top of him.~Continue to apply pressure to the aggressor’s chin and face with your right hand and follow-on with strikes with your left hand.See figure 6-2.Chapter 6: Black Belt Marine Corps Martial Arts Program 6-7For Official Use OnlyFigure 6-2. Face Rip From the Guard.6-8MCRP 3-02B Chapter 6: Black Belt For Official Use Only Straight Armbar From a Scarf HoldA straight armbar from a scarf hold technique causes pain compliance in your aggressorand assists you in transitioning back to your feet as quickly as possible in order to gain atactical advantage. T echnique~Begin with the aggressor lying on his back. You sit to his right with your back/right sideagainst the right side of his chest/ribs. Place the majority of your weight on your right hip.Wrap your right arm around the back of the aggressor’s neck and grasp his right triceps withyour left hand.~Spread your legs to better maintain your balance and to reduce the chance of the aggressorrolling you.~Release the aggressor’s triceps with your left hand and grab his right wrist. Apply downwardpressure with your left hand on his arm so that it is straight across your right leg. Maintaincontrol of his head with your right arm.~Drape your left leg over the aggressor’s right forearm and apply downward pressure byforcing your left knee toward the deck, simultaneously applying upward pressure with yourright leg in a scissoring motion. Maintain control of your aggressor’s arm.~Keep your head and chin tucked to avoid being grabbed or choked by the aggressor’s freehand. During training, apply slow, steady pressure giving your training partner a chance totap out. For joint destruction, quickly scissor legs while maintaining control of your aggressor.See figure 6-3.Figure 6-3. Straight Armbar From a Scarf Hold.Bent Armbar From a Scarf HoldA bent armbar from a scarf hold technique causes pain compliance in your aggressor and assists you in transitioning back to your feet as quickly as possible in order to gain a tactical advantage in a fight. Attempt to put the aggressor in a straight armbar of the straight armbar from a scarf hold technique as shown in figure 6-3. The aggressor will often try to bend his arm to avoid the straight armbar from a scarf hold technique.T echnique~Elevate your right knee over the aggressor’s right wrist and trap his wrist in the bend of your right knee.~Press your right knee back to the ground while drawing your right foot toward your buttocks.At the same time, clasp your hands together and pull up on the aggressor’s head to apply additional pressure to the shoulder.~Keep your head and chin tucked to avoid being grabbed or choked by the aggressor’s free hand. During training, apply slow, steady pressure giving your training partner achance to tap out. For joint destruction, quickly draw your legs back and jerk up on your aggressor’s head.See figure 6-4.Figure 6-4. Bent Armbar From a Scarf Hold.Section IVUnarmed Manipulation: Neck-Crank TakedownMarines operate within a continuum of force, particularly in support of peacekeeping- or human-itarian-type operations. In these situations, Marines must act responsibly to handle situations without resorting to deadly force. Unarmed restraints and manipulation techniques, such as a neck-crank takedown, can be used to control an aggressor and gain the tactical advantage. Refer to appendix A for corresponding safeties are 1, 2, 6, and 10.T echnique~Begin in a static position with your feet in line and shoulder-width apart in front of the aggressor. Step in with the right foot while quickly placing your left hand behind theaggressor’s head and firmly grasping his upper neck/lower head. At the same time, quickly place your cupped, right palm on the aggressor’s chin with your fingers extended across the left side of his face so that he cannot pull away.~Pull your left hand down and to the left as you forcefully push the aggressor’s chin up and to the right to off balance him.~Step back with your left foot and continue to apply pressure to the aggressor’s neck, forcing him to the deck.~Once the aggressor is on the deck, maintain control by applying pressure, keeping his head on the deck. Additionally place your knee on your aggressor’s shoulder for control.~Return to the basic warrior stance, creating a safe distance from the aggressor and maintaining awareness of your surroundings.See figure 6-5 on page 6-12.Figure 6-5. Neck-Crank Takedown.Section VChokesThe purpose of a choke is to render your aggressor unconscious or gain control of a close combat situation through less than lethal force. Chokes are performed by either closing off the airway to the lungs, thereby preventing oxygen from reaching the heart or by cutting off the blood flow to the brain.When executed properly, a blood choke takes between 8 to 13 seconds for the aggressor to lose consciousness. The air choke is least preferred because it takes longer to render the aggressor.A blood choke, such as the triangle choke and the guillotine choke is performed on the carotid artery that carries oxygen-enriched blood from the heart to the brain. The carotid artery is located on both sides of the neck. When executed properly, a blood choke takes between 8 and 13 sec-onds for the aggressor to lose consciousness. The blood choke is the preferred choke because the intended effect is for the aggressor to quickly lose consciousness, ending the fight. A blood choke is used to render your aggressor unconscious or gain control of a close combat situation through less than lethal force.An air choke is performed on the windpipe or trachea, cutting off the air to the lungs and heart. When executed properly, an air choke takes between 2 and 3 minutes for the aggressor to lose consciousness. Due to the length of time it takes to stop the fight with an air choke, air chokes are not recommended and will not be taught as part of MCMAP. This section covers the triangle choke and the guillotine choke.Refer to appendix A for corresponding safeties 1, 2, 6, 10, 11, and 12.Triangle ChokeThe purpose of the triangle choke is to render an aggressor unconscious and quickly get back to your feet to gain the tactical advantage. This technique is executed if the aggressor is on top of you and your legs are wrapped around the aggressor’s waist. In the following scenario, the aggressor is trying to pass your guard position and gain the tactical advantage.T echnique~Begin by lying on your back with the aggressor kneeling between your legs in your guard position.~The aggressor tries to pass your guard position by reaching back with his right arm and attempting to throw your left leg over his head.~As the aggressor tries to throw your left leg over his head, turn your body slightly to the left, quickly place the back of your left knee along the right side of the aggressor’s neck.~Bend your left knee so that your calf is applying pressure on the back of your aggressor’s neck. If necessary, elevate your hips slightly to help achieve the position.~With both hands, grasp your aggressor’s left wrist and pull it forcefully toward your left hip.~Maintain control of your aggressor’s left arm, lift your right leg off of the deck, and place the back of your right knee on the top of your left ankle.~Exert pressure on your aggressor’s neck by pushing your right heel toward your buttocks.You can make this technique more effective by pulling on the back of your aggressor’s head with both hands and thrusting your hips up.See figure 6-6.Figure 6-6. Triangle Choke.Guillotine ChokeThe purpose of a guillotine choke is to render an aggressor unconscious and quickly get back on your feet to gain the tactical advantage. This technique is performed when the aggressor is trying to tackle you by either grabbing both of your legs or grabbing around your waist and forcing you to the ground to gain a tactical advantage. This technique can be performed from either the standing position or from the ground.T echnique~Begin by standing facing each other.~As your aggressor tries to tackle you, wrap your right arm around his neck and clasp your hands together, then wrap your right leg around his left leg.~By arching your back straight and pulling upward with the clasp of your hands, the force against the neck will cause your aggressor to choke out.~If the engagement reaches the ground, wrap both legs around your aggressor’s body (guard position), maintaining a tight clasp around the aggressor’s neck.~Use your ankles to separate the aggressor’s legs. Make sure that you arch your back and apply pressure with your legs and arms at the same time, causing the aggressor to choke out.See figure 6-7.Figure 6-7. Guillotine Choke.Section VIKnee BarThe purpose of the knee bar is to apply joint manipulation to the aggressor’s knee in orderto escape from a hold by executing the rolling knee bar or the sitting knee bar to gain a tactical advantage.Refer to appendix A for corresponding safeties 1, 2, 5, 6, 10, and 13.Rolling Knee BarThe purpose of rolling the knee bar is to apply joint manipulation to the aggressor’s knee in order to escape from a hold and gain a tactical advantage. This technique requires that your arms remain free.T echnique~The aggressor executes a rear bear hug leaving your arms free.~Execute a rear horizontal elbow strike to loosen the aggressor’s grasp.•Horizontal elbow strikes are aimed at the head, but for training purpose they will be thrown in the air, do not make contact with your training partner.•Other distracters such as the vertical stomp to instep and the rear head-butt can beexecuted in a live situation.~Step out slightly with your right foot, bending at the knees and the waist.~Reach between your legs with both hands and firmly grasp the aggressor’s right leg at or below the knee.~Execute a forward shoulder roll and pull the aggressor’s right leg close against your torso.~Upon completing the forward shoulder roll you should be lying on your hip with the aggressor’s leg held tight against your torso.•Your left leg should be between the aggressor’s legs, tight to his groin, your left footsupported by your right foot. Keep your knees bent and pinched together so you can control the aggressor’s upper leg.•The aggressor’s knee should be at or slightly above your groin.~Maintain control of the aggressor’s leg and arch your hips into his knee while pulling back with your whole body. Your arms, which are holding his leg to your torso, and your feet will also cinch the aggressor’s leg and pull.~Thrust your hips forward quickly while yanking back on the aggressor’s leg for joint destruction. During training, apply slow, steady pressure for the submission with yourtraining partner.See figure 6-8.。
海军陆战队内部不外传的摔擒、擒敌拳,格斗技巧(不要乱转载)
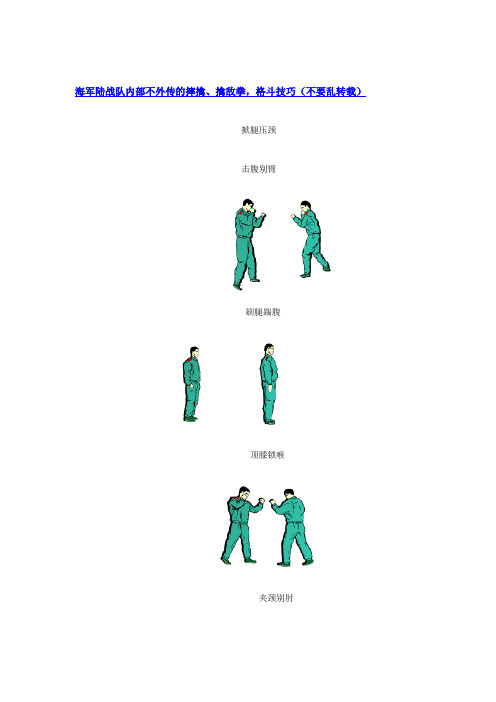
海军陆战队内部不外传的摔擒、擒敌拳,格斗技巧(不要乱转载)掀腿压颈击腹别臂刷腿踹腹顶膝锁喉夹颈别肘抱腿跪裆[/url]擒敌拳1-16动连贯动作擒敌拳是一种以击打技术、防击打技术和擒拿技术为主的综合练习,是武警部队的必学科目。
经常练习擒敌拳可以熟练动作要领,锻炼身体的协调性和灵活性,增强攻防击打的能力。
其与前套擒敌拳的区别在于:排除了僵化古板的动作,增强了实战效果,使受训者身体的各部位得到了具体全面的发挥和体现。
擒敌拳1-16动分解动作擒敌拳16动-预备姿势预备姿势:在立正的基础上,听到“擒敌拳预备”的口令,身体左转成格斗势。
如下图:[/url][/url]立正格斗式一、直拳横踢动作要领:左直拳,接右直拳,接右横踢,右脚落步,出左直拳(不收回),右拳置于下颌,两眼目视前方。
如下图:要求:击打迅猛连贯。
[/url][/url][/url][/url] 12 3 4二、抱腿顶摔动作要领:左脚在右脚后垫步,左拳置于下颌,随即起右腿前蹬,右脚向前落步,上体前俯,成右弓步,同时两手前伸,与膝同高,掌心相对;随即肩向前顶,两手后拉置于腹前,两眼目视前下。
如下图:要求:垫步前蹬快,抱腿顶摔猛。
[/url][/url][/url]1 23 4三、勾摆连击动作要领:左脚向前上步,左勾拳,接右勾拳,接左摆拳(不收回),右拳置于下颌,两眼目视前方。
如下图:要求:上步勾拳连贯迅猛。
[/url][/url][/url]1 2 3四、抱臂背摔动作要领:进步同时,左手向外挡抓,掌心向外,右脚向左前上步,右手前伸上挑,掌心向上,置于左手前,随即左脚向右脚后背步,两腿弯曲;上体迅速向左后转体弯腰,两手猛力下拉,同时两腿蹬直(两脚左右相距约一脚之长),臀部上顶,两手变拳置于身体左侧;身体左转,右脚下踹,左拳置于下颌,右拳置于大腿外侧,两眼目视前下方。
如下图:要求:转体、弯腰、下拉、蹬腿迅速连贯。
[/url][/url][/url][/url]1 2 3 4五、侧踹勾拳动作要领:右脚在左脚后垫步,左侧踹,左脚落地,左臂左上格挡;接右勾拳(不收回),左拳置于下颌,目视前方。
美国海军陆战队格斗术教材(Part 3)
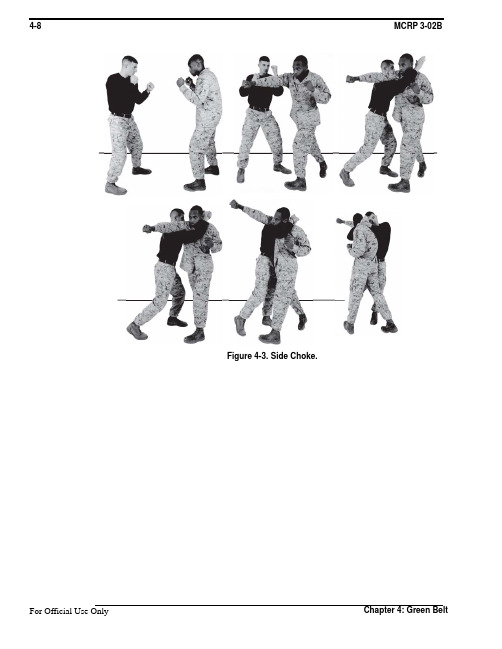
Figure 4-3. Side Choke.Section IIIShoulder ThrowThe purpose of a shoulder throw is to bring an aggressor to the ground and gain the tactical advantage in a fight. If an aggressor is moving toward you to attack, a shoulder throw can be used to take him to the ground while you remain standing. A shoulder throw is particularly effec-tive if the aggressor is moving forward or pushing on you. Execution of the shoulder throw uses the aggressor’s forward momentum.There are a minimum of 10 fit ins for each throw during sustaining. Walk through the technique, step by step, working on proper body positioning and execution.Refer to appendix A for corresponding safeties 1, 2, 6, 13, and 15.Fit in~Stand facing the aggressor in the basic warrior stance.~Grab the aggressor’s right wrist with your left hand and pull it into your left hip.~Step forward with your right foot to the inside of the aggressor’s right foot. Your heel should be between the aggressor’s feet and your toes should be even with the aggressor’s toes.~Step back with your left foot, rotating on the ball of your right foot. Your heels should come close together as if you were in the position of attention. Your feet should be in between the aggressor’s feet with your knees bent.~At the same time, under-hook the aggressor’s right arm with your right arm, pinching his arm between your biceps and forearm. You may grasp the aggressor’s upper arm with your right hand for more control.•Hand placement should allow you to control the aggressor and pull him in close to you. •Your backside should be up against the aggressor. Your hips should be slightly lower than your aggressor’s hips.~Pull the aggressor’s arm across your body. Lift the aggressor by straightening your legs and bending slightly at the waist.CAUTIONHave students stop prior to throwing the aggressor to the deck. Practicethis step prior to continuing.~Pull your aggressor’s arm down and away with your left hand while bending straight over at the waist; throw your aggressor over your right shoulder.~Return to the basic warrior stance.See figure 4-4.Figure 4-4. Shoulder Throw.Section IVCounter to StrikesA counter to a strike counters the aggressor’s attack and allows the Marine to gain thetactical advantage.Refer to appendix A for corresponding safeties 1, 2, 3, 6, 10, 11, 12, 13, and 15.Counter to a Round PunchThe counter to a round punch will stop your aggressor’s forward attack and gain control ofthe situation.T echnique~From the basic warrior stance, begin with the aggressor extending his right arm as if executing a round punch, forward-left to the inside of the aggressor’s attacking arm.~This immediately moves your body out of the line of attack and places you inside the strike.Do not move backwards. You increase your chances of being hit because the outside of your aggressor’s arm is moving faster than the inside and this is where all the power is generated. ~Attack with both arms bent so that your forearms make contact with the aggressor’s biceps and forearm. Block the attack with the force of a strike, applying the principle that every block is a strike.~With your left arm, over hook the aggressor’s right arm at or slightly above the elbow.~Control the aggressor’s arm by pinching it between your bicep and torso and execute a right inside knife hand strike to the right side of your aggressor’s neck.~Grab the back of your aggressor’s neck with the right hand, apply downward pressure, execute a right vertical knee strike to the aggressor’s available target areas. After a minimum of three combination strikes, create distance between you and your aggressor. Return to the basic warrior stance.See figure 4-5.Figure 4-5. Counter to a Round Punch.Counter to a Round KickThe counter to the round kick is used when the aggressor executes a round kick with his right leg. A counter to a round kick allows you to take your aggressor to the deck and gain the tactical advantage over the situation.T echnique~Begin with the aggressor extending his right leg, approximately waist level or slightly higher, in a round kick fashion. As the student’s proficiency increases, the technique can be taught so that the student can defend against an aggressor executing a round kick.~From the basic warrior stance, forward-left to the inside of the aggressor’s attacking leg.~This moves your body out of the line of attack and places you inside the power of the strike. ~At the same time, block your aggressor’s attacking leg with the meaty portion of your forearms. Do not bend down to block the attack. Make two points of contacts on the attacking leg with both of your arms.~Wrap your left arm over the aggressor’s attacking leg, at or below the knee, and trap it between your bicep and torso.~With your right hand, forcefully grasp the aggressor’s face, push forward and to the left to further off balance the aggressor.~For greatest effectiveness and efficiency of movement, you would insert your fingers deeply into the aggressor’s eyes as you grasp his face. Executing a chin jab is acceptable.~Simultaneously execute a leg sweep and drive the aggressor to the deck by pushing with your right arm against your aggressor’s upper torso.See figure 4-6.Figure 4-6. Counter to Round Kick.Section VLower Body StrikesLower body strikes are used to stop an aggressor’s attack or create an opening in his defense in order to launch an attack. The legs provide the most powerful weapons of the body with which to execute strikes because they use the largest muscles of the body and are less prone to injury. The feet are the preferred choice for striking because boots protect them. The feet, heels, and knees of the legs are used to execute knee strikes, kicks, and stomps. Never kick high, because this jeop-ardizes your balance and leaves you more vulnerable to a counterattack.The push kick is executed when the aggressor is in front of you and you need to stop an aggressor’s attack or to create an opening in his defense in order to launch an attack. The striking surface is the ball of the foot. Primary target areas of the body are the aggressor’s upper torso, any targets below the waist line, and the front of the thighs all the way down to the knees.T echnique~ Always keep your right knee waist high or parallel to the deck.~Always keep your hands up to protect yourself from any strikes.~Make contact on the aggressor’s abdomen with the ball of your rear foot. There is limited movement on one leg, so keep in mind that it is difficult to change the direction of a kick after it is initiated.~Follow through the target area by thrusting your hips forward toward your aggressor.~Rapidly return to the basic warrior stance.See figure 4-7 on page 4-16.Figure 4-7. Push Kick.Section VIUnarmed ManipulationsThe purpose of unarmed manipulations is to teach Marines how to operate within the continuum of force, particularly in support of peacekeeping- or humanitarian-type missions. In these situa-tions, Marines must act responsibly to handle situations without resorting to deadly force. Unarmed restraints and manipulation techniques such as enhanced pain compliance, the reverse wristlock come-along, and controlling techniques can be used to control an aggressor.Refer to appendix A for corresponding safeties 1, 2, 6, 8, 9, 10, and 13.Enhanced Pain ComplianceApplying two points of pain enhances control and leverage while applying a technique.T echnique~From a reverse wristlock, continue to control the aggressor’s right hand with your right hand.Use your left hand to pull down and apply pressure on the aggressor’s radial nerve. When pressure is added to the radial nerve, do not loosen your right hand’s grip on the reverse wristlock. See figure 4-8 on page 4-18.•Pressure can be added to the nerve by moving out and down, in a circular motion.•It is acceptable to strike with the left hand before grabbing the radial nerve is.~From the basic wristlock, maintain control of the meaty portion of the aggressor’s left handwith your right hand, use the left hand to maintain control of the lower forearm and elbow withthe palm side up. Taking the left thumb and pushing it into the aggressor’s ulnar nervelocated just above the joint will add pressure. Pulling up on the elbow in the oppositedirection of the hand also adds pressure. See figure 4-9.Figure 4-8. Enhanced Pain Compliance From a Reverse Wristlock.Figure 4-9. Enhanced Pain Compliance from a Basic Wristlock.~From the wristlock come-along, maintain control of the wrist with both hands, and lock theaggressor’s elbow with the forearms. Apply pressure against the finger joints to bend them away from each other, splitting the fingers in opposite directions. See figure 4-10.Reverse Wristlock Come-AlongThe reverse wristlock come-along is effective when transporting a subject from one location toanother. It can be used as follow-on technique to the reverse wristlock. T echnique~With your right hand, execute a reverse wristlock. Instead of stopping the rotation at90-degrees, continue the rotation until the aggressor’s palm is facing straight up towardthe sky.~Ensure you keep the aggressor’s hand close to your chest.~With your left hand, grab the meaty portion of the aggressor’s thumb and as much of thepalm as possible.~With your right hand, collapse the aggressor’s right arm by applying pressure or striking theinner portion of his elbow.~At the same time step forward with the left foot pivoting on the ball of your right foot so thatyou are facing in the same direction as your aggressor.~With your right hand pull the aggressor’s elbow to your chest as you bring your left arm highinto your aggressor’s armpit.~Maintain upward pressure with your left arm to keep your aggressor off balance.~Keep pressure on your aggressor’s wrist by rotating your palm toward you while keepingdownward pressure on the hand to maintain compliance over your aggressor.~Your right hand will move on top of the aggressor’s right hand. Keep your elbows tight tocontrol the aggressor’s arm.Figure 4-10. Enhanced Pain Compliance from a Wristlock Come-Along.See figure 4-11.Note: For enhanced pain compliance release with your right hand andre-grasp the bottom two fingers on the aggressor’s hand and pull themdown and away from his hand.Figure 4-11. Reverse Wristlock Come-Along.Controlling TechniquesOpposite Side GrabThe opposite side grab is effective if someone tries to grab your wrist.T echnique~Begin with the aggressor grabbing your right wrist with his right hand.~Trap the aggressor’s right hand in place on the right wrist with the palm of your left hand.~Rotate your right hand to reach up and grasp the aggressor’s right forearm while maintaining downward pressure on the aggressors trapped right hand, with your left hand.~The target area to grasp on the right forearm is the radial nerve.~Apply downward pressure in and down with both hands until the aggressor is forced to one knee and is effectively controlled.See figure 4-12.Figure 4-12. Opposite Side Grab.Same Side GrabThe same side grab is effective if someone tries to grab your wrist.T echnique~Begin with the aggressor grabbing your right wrist with his left hand.~Rotate your right palm upward.~Grab the backside of the aggressor’s hand with your left hand, palm side up, wrapping your fingers around the meaty portion of his thumb.~Continue to rotate the aggressor’s palm outboard until control or compliance is achieved. See figure 4-13.Figure 4-13. Same Side Grab.Section VIIKnife TechniquesThe purpose of knife techniques is to cause enough damage and massive trauma to stop an aggressor by properly executing a counter knife strike from a vertical attack and a forward strike. Refer to appendix A for corresponding safeties 1, 2, 6, 8, 9, 10, and 13.Counter to a Vertical Strike With Follow-on TechniquesT echnique~From the modified basic warrior stance, move forward, inside the arc of attack.~Block the attack, over and in front of your head, with your left arm. The arm is bent so that your forearm makes contact with the aggressor’s forearm.~At the same time execute a vertical thrust into the aggressor’s neck and follow through with at least three more killing techniques, preferably thrusting to available target areas. Control the aggressor’s attacking arm throughout.See figure 4-14.Figure 4-14. Counter to a Vertical Strike.Counter to a Forward Strike With Follow-on TechniquesT echnique~From the modified basic warrior stance, move forward-left, inside the arc of the attack.~Block the attack with your left arm bent so that your forearm makes contact with the aggressor’s forearm.~At the same time, use the blade to block the aggressor’s upper arm or bicep. Then slash downward on the biceps dropping your body weight to develop maximum force.~Follow through with at least three more killing techniques preferably thrusting to available target areas on the aggressor. Control the aggressor’s attacking arm throughout.See figure 4-15.Figure 4-15. Counter to a Forward Strike.Section VIIIWeapons of OpportunityThe purpose of weapons of opportunity is to enable each individual Marine to be creative and utilize any object on the battlefield in order to inflict maximum damage to the aggressor. A Marine should be ready and able to use anything around him to serve as a weapon. This may mean throwing sand or liquid in an aggressor’s eyes to temporarily impair his vision or execut-ing blocks: the block for a vertical strike, the block for a forward strike, the block for a reverse strike, and the block for a straight thrust. Weapons of opportunity blocks are effective when you are blocking attacks and the aggressor is using a weapon of opportunity. In any given confronta-tion, a Marine must use whatever it takes to win and move on to the next aggressor.Refer to appendix A for corresponding safeties 1, 2, 3, 4, and 14.Block for a Vertical Strike With Follow-on StrikesAll blocks being taught in this lesson will begin from the one-handed carry or two-handed carry. When the aggressor has a weapon, blocks are executed with your weapon.T echnique~Begin in the modified basic warrior stance with a one-handed grip. The aggressor extends his right hand in a vertical attack.~Move forward to get your body inside the arc of attack. This movement gets you inside the aggressor’s strike and his generated power. When you step in forcefully, you prevent the aggressor from developing power in his swing and you stop his momentum.~Block the aggressor’s weapon by making two points of contact to disperse the impact of the attack.~Block the aggressor’s weapon by positioning your weapon so it is perpendicular to the aggressor’s weapon. If your weapon is not perpendicular to the aggressor’s weapon, the aggressor’s weapon can slide through and make contact on you.~With the muscular portion of your left forearm, block the aggressor’s wrist or forearm with two points of contact. Control the arm with your left arm or grip the arm with your hand tomaintain control.~If you are closer to the aggressor, use your weapon to block the aggressor’s arm. It is the same movement, except now you block the aggressor’s arm with both your weapon and your arm.~Follow up with strikes to lethal target areas on the aggressor.See figure 4-16 on page 4-28.4-28MCRP 3-02B Chapter 4: Green Belt For Official Use Only Block for a Forward Strike With Follow-on Strikes T echnique~Begin in the modified basic warrior stance with a one-handed carry. The aggressor extendshis right hand in a forward strike.~ Move forward-left to get your body inside the arc of the attack.~To disperse the impact of the attack, block with two points of contact. Block the aggressor’swrist or forearm with the meaty portion of your left forearm and maintain control of the arm.~Strike the aggressor’s attacking biceps with your weapon.Figure 4-16. Block for a Vertical Strike.Marine Corps Martial Arts Program4-29For Official Use Only ~Control the arm with your left arm or grip the arm with your hand to maintain control.~Follow up with strikes to lethal target areas.See figure 4-17.Block for a Reverse Strike With Follow-on StrikesT echnique~Begin in the modified basic warrior stance with a one-handed carry. The aggressor extends his right hand in a reverse strike.~Move forward-right to get your body inside the arc of the attack.Figure 4-17. Block for a Forward Strike.Chapter 4: Green Belt4-30MCRP 3-02B Chapter 4: Green BeltFor Official Use Only ~To disperse the impact of the attack, block with two points of contact. Block the aggressor’sweapon by positioning your weapon so that it is perpendicular and making contact with theaggressor’s weapon.~With your left arm, block the aggressor’s forearm with the muscular portion of your forearm. Ifyou are in closer to the aggressor, block the aggressor’s triceps with the back of your leftforearm and strike his forearm with your weapon.~Control the arm with your left arm or grip the arm with your hand to maintain control.~Follow up with strikes to lethal target areas. See figure 4-18.Block for a Straight Thrust With Follow-on Strikes T echnique~Begin by facing the aggressor with his right arm straight out in front of him, simulating astraight thrust.~Block your aggressor’s attack by striking his arm perpendicular with yours as you stepforward-right with your right foot, to the outside of your aggressor’s left foot.~With your left hand, reach across the block and grasp and control your aggressor’s attackinglimb. This will prevent a follow-on attack with his weapon and leave him open for you.~Follow up with strikes to lethal target areas.See figure 4-19.Figure 4-18. Block for a Reverse Strike.Marine Corps Martial Arts Program4-31For Official Use Only Figure 4-19. Block for a Straight Thrust with Follow-on Strikes.Chapter 4: Green Belt4-32MCRP 3-02B Chapter 4: Green BeltFor Official Use Only Section IXGround FightingIn any close combat situation, the fight may end up on the ground. The purpose of groundfighting techniques is to allow you to return to your feet as quickly as possible and regain thetactical advantage. Techniques that can be used in ground fighting are the armbar from the mountposition and the armbar position from the guard position. Refer to appendix A for corresponding safeties 1, 2, 6, and 10.Armbar From Mount PositionThe armbar from the mount position is effective for causing damage to an aggressor’s arm pro-viding you with a tactical advantage and allowing you to get on your feet. T echnique~Begin with the aggressor on his back, on the ground.~Sit astride on the aggressor’s abdomen. Both legs are bent, with your knees touching theground. Use your weight and hips to control your aggressor. Keeping all of your weight onyour knees makes it easier for the aggressor to maneuver and escape.~The aggressor attempts to choke or push you off of him with straight arms.~Place both palms in the center of the aggressor’s chest. Your right arm will weave over theaggressor’s left arm and your left arm under his right arm. Post the majority of your weight onyour two hands pinning the aggressor to the ground.~Keep your right hip/upper, inside thigh in constant contact with your aggressor’s body,creating pressure on the aggressor’s left triceps. Turn your body to face left and swing yourright leg over the aggressor’s head.~Pull your feet in toward your buttocks to trap his body and pinch your knees together to traphis arm, hug his left arm to your chest and sit back with your upper body to straighten andlock out the aggressor’s arm.~Maintain pressure against the aggressor’s neck with the back of your right foot and againsthis side with your left foot underneath his armpit. Your legs are on either side of theaggressor’s left arm. Use your hips to make pressure into the aggressor’s elbow in thedirection of his left pinky. Your aggressor’s left palm should be facing the sky.~Falling back quickly and thrusting your hips up strongly against the aggressor’s elbow canbreak or dislocate the aggressor’s elbow. It is important to do this slowly in training in orderto give your training partner an opportunity to tap out and avoid injury. The aggressor willtap out by tapping on the deck three times, on himself three times, or by verbally sayingtap-tap-tap .~ Return to your feet, gaining the tactical advantage. You can follow-on with controllingtechniques to lethal force depending on the temper and intent of your adversary.See figure 4-20.Chapter 4: Green Belt Marine Corps Martial Arts Program 4-33For Official Use OnlyFigure 4-20. Armbar From Mount Position.4-34MCRP 3-02B Chapter 4: Green Belt For Official Use Only Armbar From Guard PositionThe armbar from the guard position is effective for causing damage to an aggressors arm andproviding you with a tactical advantage and allowing you to get on your feet. T echnique~Begin by lying on your back with the aggressor kneeling between your legs with his handsaround your neck. Wrap your legs around the aggressor’s waist.~Trap the aggressor’s hands on your chest by crossing your hands on your chest so that yourforearms are resting on his/her forearms.~With the cutting edge of your right heel, strike the outside of the aggressor’s left thigh. Thiswill cause the aggressor to jerk to that side.~Quickly move your head to your left and swivel your hips to your right while maintainingpositive control of your aggressor’s left arm. Simultaneously, bring up both of your legs sothat they are on the right side of the aggressor’s body.~Bring your right leg down, hooking the aggressor’s neck and head, and exert downwardpressure to roll him over on his back. Grasp and maintain control of the aggressor’s left arm.~You should end up sitting up with your legs bent over the aggressor while maintaining controlof his left arm. Your buttocks are tight against the aggressor’s shoulder. Move closer to youraggressor if necessary. Your legs are on either side of the aggressor’s right arm.~Keeping your legs and knees bent, maintain pressure against the aggressor’s neck with theback of your right foot and your left foot underneath his armpit against his side. Squeeze yourknees together, tightly locking in the aggressor’s arm.~Pull the aggressor’s arm straight up and fall back sharply, pulling his arm to the side in thedirection of his little finger. Your aggressor’s left palm should be facing the sky. This actionwill break the aggressor’s arm. Raise your hips slightly and pinch your toes in around theaggressor’s shoulder to maintain control and to generate power in the break.~Return to the basic warrior stance.See figure 4-21.Marine Corps Martial Arts Program4-35For Official Use Only Figure 4-21. Armbar From Guard Position.Chapter 4: Green BeltT HIS P AGE I NTENTIONALLY L EFT B LANK. For Official Use OnlyCHAPTER 5Brown BeltThe fourth belt ranking within MCMAP is Brown Belt. Upon qualifying as a Green Belt,all Marines are highly encouraged to continue MCMAP sustainment training in order toadvance to Brown Belt. Brown Belt is the introduction to advanced fundamentals of eachdiscipline. Brown Belt is the minimum training goal of all infantrymen. Purpose andprinciples remain the same as in Gray Belt.Brown Belt Requirements.Prerequisites Recommendation of reporting seniorComplete Green Belt sustainment andintegration trainingComplete PMETraining Hours A minimum of 18.5 hours, excluding remedialpractice timeand testingSustainment Hours A minimum of 15 hours of sustainment,excluding integration training time andpractice time for testingFor Official Use OnlySection IBayonet TechniquesThe purpose of bayonet techniques is to disable or kill the aggressor. When engaging in combat, mindset, more often than not, will be the determining factor of success or failure, regardless of technical proficiency. Anyone can train in a martial skill, but few have the mind and will to use their skills to kill or injure. Mindset is often the mental trigger in the defining moment that forces you to commit to an aggressor with the goal of injury or death.If faced with one-on-two engagements, two-on-one engagements, or two-on-two engagements, execute the bayonet techniques such as the straight thrust and the slash that you learned earlier in your martial arts training.The following bayonet training principles are applied to bayonet fighting:Disrupt. A disrupt creates an opening in the aggressor’s defense by bringing the aggressor’s weapon off line.Entry. Entry is the movement that is made in order to get inside the aggressor’s defense and find a path to the target. A movement can be a step forward or a small step to an oblique to get within striking distance of the aggressor.Modified Basic Warrior Stance. All movement begins and ends with the basic warrior stance.Channeling the Aggressor. Move using the approach and close principles of movement while attempting to place one aggressor in front of the other. Use the angles of approach learned earlier in your martial arts training.Refer to appendix A for corresponding safeties 1, 2, 4, 7, 8, 9, and 14.One-on-Two EngagementT echnique~Assume the modified basic warrior stance.~Stagger two aggressors, approximately 10 meters in stationary positions, away from you. See figure 5-1.Figure 5-1. One-on-Two Engagement.~Execute movement toward aggressor.~While moving toward aggressor, use angles of approach to place one aggressor in front of the other.See figure 5-2.Figure 5-2. One-on-Two Engagement.~Use an economy of motion and no hesitation while moving toward aggressors.~Utilize natural terrain features and/or obstacles to channel aggressors along with movement. ~Attempt to engage one aggressor at a time. Do not hesitate at any time.~The primary technique used is the straight thrust, unless a disrupt is needed to disrupt your aggressor.~When at closing distance, the student should begin to thrust bayonet trainer so that the students can engage the aggressor at the furthest possible distance.Two-on-One EngagementT echnique~Assume the modified basic warrior stance.~Place two Marines, in a stationary position, 10 to 20 meters away from the aggressor.See figure 5-3.Figure 5-3. Two-on-One Engagement.~Execute movement toward the aggressor.~While moving toward the aggressor, do not allow him to use angles of approach to place one Marine in front of the other.~Stay together in a manner that allows Marines to attack simultaneously, covering each other’s movement and attack. This can be accomplished by either staying shoulder-to-shoulder or within a 90-degree angle of approach to each other. Communication with each other is essential.See figure 5-4.Figure 5-4. Two-on-One Engagement.~Use an economy of motion and no hesitation while moving toward the aggressor.~Utilize natural terrain features and/or obstacles to canalize the aggressor along with movement.~The primary technique used is the straight thrust, unless a disrupt is needed to clear a path for your blade.Two-on-Two EngagementT echnique~Two Marines assume the modified basic warrior stance.~Stagger two aggressors in a stationary position, 10 to 20 meters away from the other Marines.See figure 5-5.~Execute movement toward the aggressors.~While moving toward the aggressors, use angles of approach to place one aggressor in front of the other. At the same time, do not allow the aggressors to use angles of approach and movement to place you in front of the other Marine.。
美军战斗技巧--炸毁

FM 21-75NONELECTRIC SYSTEMTo prepare a nonelectric firing system,take these steps:STEP 1. Clear the cap well of a blockof TNT or push a hole about the sizeof a blasting cap (3 cm [1% in] deepand .65 cm [¼ in] in diameter) in ablock of C4 explosive.STEP 2. To help prevent a misfire,cut and discard 15-cm (6-in) lengthof fuse from the free end of the timeblasting fuse. That part of the fusemay have absorbed some moisturefrom the air through the exposedpowder in the end of the fuse.B-2FM 21-75 STEP 3. Determine what length offuse is needed. To do this, first computethe burning time of a 91.4-cm (3-ft) sec-tion of fuse. Divide this burning timeby 3 to find the burning time of 30.5 cm(1 ft) of fuse. Next, determine the timeit takes to reach a safe distance fromthe explosion. Now divide the time re-quired to reach that distance by theburn time of 30.5 cm (1 ft) of fuse. Thiswill give the number of centimeters(ft) of fuse needed.STEP 4. Inspect the nonelectric blast-ing cap to make sure it is clear offoreign matter.STEP 5. Gently slip the blasting capover the fuse so that the flash chargein the cap is in contact with the end ofthe time fuse. DO NOT FORCE THEFUSE INTO THE CAP.STEP 6. After seating the cap, crimpit 3.2 mm (1/8 in) from the open end ofthe cap. Hold it out and away fromyour body when crimping.B-3FM 21-75STEP 7. When using TNT, insert theblasting cap into the cap well. Whenusing C4, place the cap into the holemade in the C4 and mold the C4 aroundthe cap. DO NOT FORCE THE CAPINTO-THE HOLE.STEP 8. Insert the free end of the fuseinto an M60 fuse igniter and secure it inplace by screwing on the fuse holder cap.B-4FM 21-75STEP 9. To fire the fuse igniter, re-move the safety pin, hold the barrel in one hand. Take up the slack, before making the final strong pull. If the fuse igniter misfires, reset it by pushing the plunger all the way in. Then try to fire it as before. If it still misfires, replace it.STEP 10. If a fuse igniter is not avail-STEP 11. Then light the inserted match head with a burning match or strike the inserted match head on a matchbox.If the fuse burns but the explosive charge does not go off, there is a misfire. Wait 30minutes before trying to clear it. If the misfire charge was not tamped (nothing packed around it), lay another charge of at least one block of able, split the end of the fuse and place C4 or TNT beside it. If it was tamped, place at the head of an unlighted match in the least two blocks of C4 or TNT beside it. Do not split. Make sure the match head is move the misfire charge. The detonation of the touching the powder train.new charge should detonate the misfire charge.B-5FM 21-75Have the other soldier do the samething with the other end of the wireat the charge position. At the firingposition, touch the bare ends of thetwo strands to the galvanometer/cir-cuit tester posts. The needle on thegalvanometers should not move, norshould the light on the circuit testercome on. If the needle does not moveor if the light does not come on, thewire has a break — replace it.If the wire has no short when tested,test it for a break. Have the soldierat the charge position twist thebare ends of the strands together.Then touch the two strands at thefiring position to the galvanometers/circuit tester posts. That shouldcause a wide deflection of the gal-vanometer needle or cause thecircuit tester light to come on. Ifthe galvanometers needle does notmove or if the light does not comeon, the wire has a break — replace it..B-7FM 21-75STEP 3. At the firing position, checkthe blasting cap with a galvanometersor circuit tester to make sure it doesnot have a short. Remove the shortcircuit shunt and touch one cap leadwire using the galvanometers, the needleshould make a wide deflection. If itdoes, the cap is good.If the needle fails to move or onlymakes a slight deflection, replaceof C4 plastic explosive, push a hole init about the size of a blasting cap.the cap.STEP 5. Position the charge. Thensplice the lead wires of the cap to theWhen using the circuit tester, thelight should come on when thehandle is squeezed. If it does not,replace the cap.STEP 4. Move to the charge positionand, if the charge is a block of TNT,clear its cap well if the charge is a blockfiring wire (pigtail knot).B-8FM 21-75 STEP 6. Insert the cap into the capwell of the TNT and secure it with thepriming adapter, or insert the cap intothe hole made in the C4 and mold theexplosive around the cap.STEP 7. Move back to the firing posi-tion and check the wire circuit withthe galvanometers or circuit tester(same technique as described earlier).If the circuit checked out and the blastingmachine does not set off the charge, there is amisfire.If an untamped charge misfires, inves-tigate at once. If the charge is tamped, wait30 minutes before investigating, then takethese steps:STEP 1. Check the firing wire connec-tion to the blasting machine to be surethat the contacts are good.STEP 2. Make two or three moreattempts to fire the charge.B-9FM 21-75STEP 3. Try to fire it again using another blasting machine.STEP 4. Disconnect the firing wire from the blasting machine and shunt (twist together) the ends of the wire.STEP 5. Move to the charge position to investigate. Take the blasting machine with you.STEP 6. Check the entire circuit, in-cluding the firing wire, for breaks and short circuits.STEP 7. Make no attempt to remove the primer or the charge.STEP 8. If the fault has not been found, place a new primed charge beside the misfire charge.STEP 9. Disconnect the old blasting cap wires from the firing wire and shunt the ends of the blasting cap wires.STEP 10. Attach the new blasting cap wires to the firing wire and fire the new charge. This should also detonate the misfire charge.B-10。
美军战斗技巧--移动方式
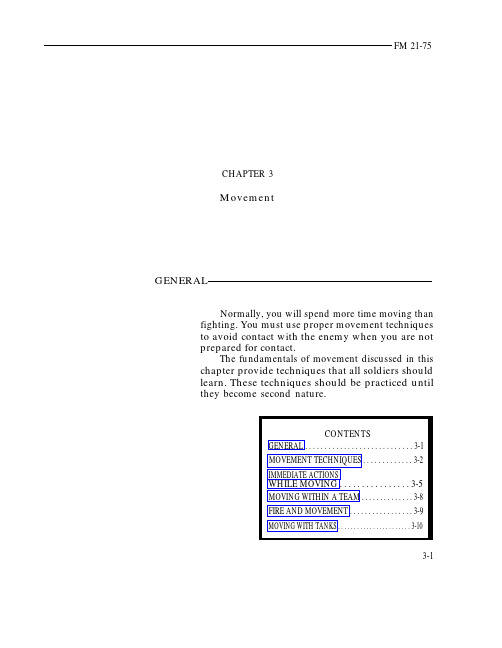
FM 21-75CHAPTER 3MovementGENERALNormally, you will spend more time moving than fighting. You must use proper movement techniquesto avoid contact with the enemy when you are notprepared for contact.The fundamentals of movement discussed in this chapter provide techniques that all soldiers shouldlearn. These techniques should be practiced untilthey become second nature.3-1FM 21-75ment is very low and enemy fire or observation prevents you from getting up. Keep your body flat against the ground. With your firing hand,grasp your weapon sling at the upper sling —swivel. Let the front handguard rest on your forearm (keeping the muzzle off the ground),and let the weapon butt drag on the ground.To move, push your arms forward and pull your firing side leg forward. Then pull with your arms and push with your leg. Continue this throughout the move.The high crawl lets you move faster than the low crawl and still gives you a low e this crawl when there is good concealment but enemy fire prevents you from getting up.Keep your body off the ground and resting on your forearms and lower legs. Cradle your weapon in your arms and keep its muzzle off the ground. Keep your knees well behind your buttocks so your body will stay low.To move, alternately advance your right elbow and left knee, then your left elbow and right knee.The rush is the fastest way to move from one position to another. Each rush should last from 3 to 5 seconds. The rushes are kept short to keep enemy machine gunners or riflemen from tracking you. However, do not stop and hit the ground in the open just because 5 seconds have passed. Always try to hit the ground behind some cover. Before moving, pick out your next covered and concealed position and the best route to it.Make your move from the prone position as follows:Slowly raise your head and pick your next position and the route to it.Slowly lower your head.Draw your arms into your body (keep-ing your elbows in).Pull your right leg forward.Raise your body by straightening your arms.Get up quickly.Run to the next position.3-3FM 21-75It is hard to move quickly on rough ter-rain, but the terrain may provide good cover.In such terrain, it may be best to take coverand wait for flares to burn out. After they burnout, move out of the area quickly.REACTING TO GROUND FLARESThe enemy puts out ground flares aswarning devices. He sets them off himself orattaches tripwires to them for you to trip onand set them off. He usually puts the flares inplaces he can watch.If you are caught in the light of a groundflare, move quickly out of the lighted area. Theenemy will know where the ground flare is andwill be ready to fire into that area. Move wellaway from the lighted area. While moving outof the area, look for other team members. Try tofollow or join them to keep the team together.REACTING TO AERIAL FLARESThe enemy uses aerial flares to light upvital areas. They can be set off like ground 3-6FM 21-75flares; fired from hand projectors, grenadelaunchers, mortars, and artillery; or droppedfrom aircraft.If you hear the firing of an aerial flarewhile you are moving, hit the ground (behindcover if possible) while the flare is rising andbefore it bursts and illuminates.If moving where it is easy to blend withthe background (such as in a forest) and youare caught in the light of an aerial flare, freezein place until the flare burns out.If you are caught in the light of an aerialflare while moving in an open area, immediatelycrouch low or lie down.If you are crossing an obstacle, such as abarbed-wire fence or a wall, and get caught inthe light of an aerial flare, crouch low and staydown until the flare burns out.The sudden light of a bursting flare maytemporarily blind both you and the enemy.When the enemy uses a flare to spot you, hespoils his own night vision. To protect yournight vision, close one eye while the flare isburning. When the flare burns out, the eye thatwas closed will still have its night vision.3-7FM 21-75MOVING WITHIN A TEAMYou will usually move as a member of a wedge, determined by the type weapon he team. Small teams, such as infantry fire teams,carries. That position, however, may be changed normally move in a wedge formation. Each by the team leader to meet the situation. The soldier in the team has a set position in the normal distance between soldiers is 10 meters.3-8FM 21-75You may have to make a temporary changein the wedge formation when moving throughclose terrain. The soldiers in the sides of thewedge close into a single file when moving inthick brush or through a narrow pass. Afterpassing through such an area, they shouldspread out, again forming the wedge. Youshould not wait for orders to change the for-mation or the interval. You should changeautomatically and stay in visual contact withthe other team members and the team leader.The team leader leads by setting theexample. His standing order is, FOLLOW MEAND DO AS I DO. When he moves to the left,you should move to the left. When he getsdown, you should get down. When he fires, youshould fire.When visibility is limited, control duringmovement may become difficult. Two l-inchhorizontal strips of luminous tape, sewn directlyon the rear of the helmet camouflage band witha l-inch space between them, are a device fornight identification.Night identification for your patrol capcould be two l-inch by 1/2-inch strips of luminoustape sewn vertically, directly on the rear of thecap. They should be centered, with the bottomedge of each tape even with the bottom edge ofthe cap and with a l-inch space betweentwo tapes.FIRE AND MOVEMENTWhen a unit makes contact withthetheenemy, it normally starts firing at and movingtoward the enemy. Sometimes the unit maymove away from the enemy. That technique iscalled fire and movement. It is conducted eitherto close with and destroy the enemy, or to moveaway from the enemy so as to break contactwith him.The firing and moving take place at thesame time. There is a fire element and a move-ment element. These elements may be singlesoldiers, buddy teams, fire teams, or squads.Regardless of the size of the elements, the actionis still fire and movement.The fire element covers the move of themovement element by firing at the enemy.This helps keep the enemy from firing backat the movement element.The movement element moves either toclose with the enemy or to reach a better posi-tion from which to fire at him. The movementelement should not move until the fire elementis firing.Depending on the distance to the enemyposition and on the available cover, the fireelement and the movement element switch rolesas needed to keep moving.Before the movement element movesbeyond the supporting range of the fire element(the distance within which the weapons of thefire element can fire and support the movement3-9FM 21-75element), it should take a position from which it can fire at the enemy. The movement element then becomes the next fire element and the fire element becomes the next movement element.If your team makes contact, your team leader should tell you to fire or to move. He should also tell you where to fire from, what to fire at, or where to move to. When moving, use the low crawl, high crawl, or rush.MOVING WITH TANKSYou will often have to move with tanks.When you must move as fast as the tanks, you should ride on them. However, riding on a tank makes you vulnerable to all types of fire. It also reduces the tank’s maneuverability and the ability to traverse its turret. If contact is made with the enemy, you must dismount from the tank at once.To mount a tank, first get permission from the tank commander. Then mount from the tank’s right front, not its left side where the coax machinegun is mounted. Once mounted, move to the rear deck, stand, and hold on to the bustle rack. If there is not enough room for you on the rear deck, you may have to stand beside the turret and hold onto a hatch or hatch opening.When riding on a tank, be alert for trees that may knock you off and obstacles that may cause the tank to turn suddenly. Also be alert for enemy troops that may cause the tank to travers its turret quickly and fire.Riding on a tank is always hazardous and should be done only when the risks of riding are outweighed by the advantages of riding.3-10。
特种兵训练

?
1:早晨5:30起床,在每人身上加上20公斤的重物跑5000米。
2:8:00训练挂勾梯上下300回。穿越30米铁丝网来回300趟。
3:10:00上健身房:15公斤哑铃举150下,拉力器100下,臂力棒100下。
4:13:30抗暴晒形体训练:平举着ak47,枪口用绳子吊着一块砖头,一动不动晒2个小时。
8:5天一次中国式铁人三项:负重跑步2000米,游泳2000米,骑自行车2000米。
9:7从8000米高空一跃而下。
12:30天一次野外生存训练,带上3天的食物在野外生存7天,行军一千余公里,还要背上枪支弹药和生存用品,途中还要执行上级准备的突围,反突围,侦察敌情,攀登悬崖等演
接着到了午餐的半个小时后时间,开始进行格斗搏击训练,(在特警队中有很多新兵之前都是散打 或 跆拳道 冠军,但刚到部队后却大都被老兵 轻而易举 的丢翻,但这些高手经过长期艰苦的搏杀训练之后个个都能成为战场上的“杀人机器”)~~~~~在格斗搏击训练中,对手都以抽签决定,有2个1组,4个1组,甚至6个1组,最开始是在泥地了搏斗,到了后期就直接在水泥地上格斗,以至很多老兵身上都留下永不消散的淤伤……
高标准的训练当然要有高标准的后勤保障。特种战士的射击训练弹药是以箱来计数的,所以特种战士在射击时就像打乒乓球一样不加思考不用瞄准,全凭感觉持枪就打,说打敌左膝不伤右腿。
?
今天的中国特种战士有了上述基本功还不够,他们更要上天入海地上跑,玩熟声光电波和电脑。走进某特种部队训练场,坦克、装甲车、越野车、飞机、直升机、动力伞、尖端电子设备应有尽有,特种战士训练得生龙活虎。
5:16:00训练射靶1个小时,之后练倒功《高高向后跃起1。5米,用背重重的砸向水泥地》散打,硬气功等。
美军海军陆战队训练课程
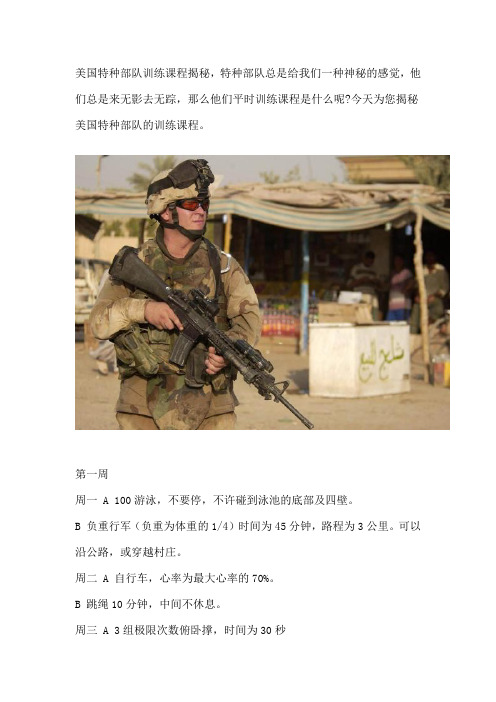
美国特种部队训练课程揭秘,特种部队总是给我们一种神秘的感觉,他们总是来无影去无踪,那么他们平时训练课程是什么呢?今天为您揭秘美国特种部队的训练课程。
第一周周一 A 100游泳,不要停,不许碰到泳池的底部及四壁。
B 负重行军(负重为体重的1/4)时间为45分钟,路程为3公里。
可以沿公路,或穿越村庄。
周二 A 自行车,心率为最大心率的70%。
B 跳绳10分钟,中间不休息。
周三 A 3组极限次数俯卧撑,时间为30秒B 3公里长跑(中速,时间为8—9分钟)C 3组爬绳,5公里行军,时间为1小时15分钟沿公路/1小时40分钟穿越村庄周四 A 自行车,心率为最大心率的70%B 40码冲刺(共10次,组间休息为30秒)C 150米游泳周五 A 5公里行军,时间为1小时15分钟沿公路/1小时49分钟穿越村庄周六 A 3组极限次数的仰卧起坐与俯卧撑(每组时间为30秒)B 3组极限次数的引体向上C 200米游泳周七休息所用装备:防水冲锋衣,快干腰带这一周的训练与游泳有关,所以必须配备一些防水快干的装备,有了这些专业装备美国特种兵训练时才能游刃有余。
第二周周一 A 8公里行军,时间为2小时沿公路/2小时40分钟穿越村庄 - 周二 A 自行车,心率为最大心率的70%,时间为20分钟周三 A 3组极限次数的仰卧起坐,俯卧撑与引体向上(30秒为一个循环)B 5公里长跑(中速,时间为8—9分钟)C 3组每组为30—50次的深蹲,负重为自重的1/4,每次蹲到大腿与小腿垂直周四 A 300米游泳周五 A 10公里行军,时间为3小时沿公路/4小时穿越村庄(负重为体重的1/3)周六 A 3组极限次数的仰卧起坐,俯卧撑与引体向上(35秒为一个循环)B 自行车,心率为最大心率的80%,时间为20分钟 !C 150米游泳 -周七休息所需装备:体能训练T恤这周的训练以跑步为主,需要一款宽松排汗和快干的衣服,无疑美国海军体能训练T恤是最合适的装备。
海军陆战队训练

海军陆战队训练海军陆战队训练是美国海军陆战队士兵的专业训练,旨在培养他们的专业技能和机动性。
海军陆战队的训练是一种全方位的专业训练,包括体能训练、格斗训练、武器训练、战术训练、指挥训练、夜间行动训练、水上作战训练等等。
此外,还有一些特殊训练,如反恐训练、警卫训练、情报训练、野外生存训练等。
海军陆战队训练不仅要求士兵们掌握各种专业技能,而且要求他们具备出色的体能。
因此,士兵必须定期进行基础体能训练,体能训练一般由仰卧起坐、俯卧撑、深蹲、跳绳、攀爬、拉伸等组成,以提高士兵的体能和耐力。
格斗训练是海军陆战队训练的重要组成部分,士兵必须学会空手格斗、使用棍棒、刀剑等武器,并培养他们的投掷、擒抱、抗击等技能。
武器训练是海军陆战队士兵必备的技能之一,士兵要掌握各种射击技巧,如步枪、冲锋枪、机枪、狙击步枪、火箭筒等。
在训练中,士兵必须掌握各种武器的装备、携带、操纵、操作等技能。
须掌握战术知识,如进攻战术、防御战术、侦察战术、突击战术等,以及如何使用地形、天气等因素来优势。
指挥训练是海军陆战队士兵必备的技能之一,士兵要学会指挥小队作战,如何分配任务、如何控制小队成员行动、如何应对不同形势等,以及如何分析敌人的战术行为,提出有效的战略和作战计划。
夜间行动训练是海军陆战队训练的重要组成部分,士兵必须掌握夜间行动的技能,如如何在黑暗中行走、如何避开敌人的注意力、如何看清目标并准确打击等。
水上作战训练是海军陆战队训练的重要组成部分,士兵必须掌握水上作战技能,如如何使用船只、如何操纵船只、如何搭乘浮动装置等,以及如何搜索、追击海上目标等。
反恐训练是海军陆战队训练的重要组成部分,士兵必须掌握反恐技能,如如何应对恐怖袭击、如何逃离危险区域、如何抵抗恐怖分子等。
警卫训练是海军陆战队训练的重要组成部分,士兵必须学会携带武器、进行警戒巡逻、应对紧急情况、抵抗攻击者等技能,以保护重要目标和人质。
须掌握情报收集、情报分析、情报处理等技能,以及如何及时发现敌人的移动、行动,给出有效的作战决策。
- 1、下载文档前请自行甄别文档内容的完整性,平台不提供额外的编辑、内容补充、找答案等附加服务。
- 2、"仅部分预览"的文档,不可在线预览部分如存在完整性等问题,可反馈申请退款(可完整预览的文档不适用该条件!)。
- 3、如文档侵犯您的权益,请联系客服反馈,我们会尽快为您处理(人工客服工作时间:9:00-18:30)。
美国海军陆战队格斗教程第1章:近身格斗所有示范与右格斗式为例,所有动作都可以左右格斗式互换近身格斗的内容包括:近身格斗的类型、身体武器、人体要害、人体穴位等等。
这些都是近身格斗所需掌握的基本原则。
如果能在不同情况下的近身格斗中遵循和正确应用这些基本原则能有效保护自己和自己的同伴。
1、近身格斗的距离:近身格斗包括3种类型:远距离格斗、中距离格斗、近距离格斗。
在实战过程中各种距离相互不断转化直到一方被打败。
远距离格斗:指利用步枪,刺刀,棍棒,或工具进行搏斗。
中距离格斗:指用匕首、拳击或腿击进行的格斗。
近距离格斗:打斗双方缠抱在一起时用肘膝进行的格斗。
2、身体武器手臂:手、前臂、肘是手臂部分能够使用的武器。
这些部位作为攻击武器的形式有:拳击、手刀、掌击、指击、格挡、肘击等等。
拳:用于击打脆弱的组织如咽喉等区域。
用拳攻击时的接触面为拇指以外的其余四指的根部或小指外侧。
手掌外沿:俗称手刀攻击对手要害或软组织。
掌:由于手掌的原因多用于托击对方下巴,格挡等。
指:常用于刺击或扣挖敌人的眼睛,抓拿对方咽喉、裆部等要害部位。
手臂:用前臂进行防御性格挡,或抡击对手。
肘:近距离中具有强大杀伤力的武器。
腿:用脚掌、脚趾、脚跟、脚背踢击或踩跺对手。
脚趾攻击时不要赤脚。
膝:和肘一样是近距离打斗中最具杀伤力的利器。
在近距离格斗中由于距离太短用腿踢击不大可能,膝则可以发挥威力。
当第一次用膝攻击使对手低下头时,可用膝做第二次攻击对手头部,如被击中对手必败。
3、人体要害在近身格斗中应做到用自己最大力量攻击对手最薄弱的身体要害,力求速战速决。
对手要害部位随着移动的变化不断暴露出来的,人的要害部位分布在人体的头部、颈部、躯干、四肢和裆部。
头部:头部的人体要害有眼睛、鼻子、下颌、耳朵、太阳穴等,重击头部可以令对手休克或死亡。
双眼:身体最柔软最脆弱的部位,是人体要害的最佳攻击目标。
佯攻对手双眼可以诱惑其使用上肢进行防御,这样可以使其将其他要害暴露利于自己的二次攻击。
鼻子:鼻子是一个非常敏感又容易被击伤的器官。
攻击对手鼻子可以使其视力模糊。
这有利于进行二次攻击。
一部份人对鼻子进行过抗击能力训练,他们鼻子有一定的抗击打能力,所以在攻击对手鼻子时应做到全力以赴。
耳朵:攻击对手耳朵可以使其鼓膜破裂。
重击此处还可以使对手麻痹休克甚至死亡。
下颌:下颌被重击会导致昏迷。
也可以伤及其牙齿和舌头。
颈部:脖子前部和咽喉部位是一个没有任何骨骼保护的软组织区域。
重击此处容易造成休克断气甚至死亡。
颈动脉:颈动脉位于下巴下方脖子两侧的地方。
重击此处可以阻止血管向大脑供血从而造成对手休克或死亡。
颈椎:位于头和肩部之间的脖子后面。
这里是脊椎连接大脑的神经丛。
重击颈椎可以造成巨大的疼痛、瘫痪甚至死亡。
躯干包含的人体要害有如下几处:锁骨:俗称衣领骨,容易被打断,从而限制其手臂的活动。
太阳神经丛:攻击胸口中心处会造成呼吸困难。
肋骨:重击肋骨会造成动作迟缓甚至造成内伤。
肾脏:攻击此处除了会造成动作迟缓外还可能造成死亡。
裆部:此处也没有任何骨骼保护的软组织。
裆部是防御的重要区域,即使被轻轻击中也会疼痛不忍,被重击者会受到内伤甚至死亡。
手脚:虽然对手脚的重击不会对生命造成太大的威胁,如果四肢或关节被击伤会影响到攻击的进行。
4、人体穴位和神经丛人体身体分布着许多对疼痛敏感的区域点,这些我们把它叫做穴位。
这些敏感点一旦受到重击会造成行动不便,从而导致受制于人。
通过打击这些点能让对手意志消沉、动作迟缓。
这样就使得以后的致命或非致命的攻击变得容易。
对于这些穴位的打击一个是连续快速的踢打,再一个是精确的定点打击。
人中:位于鼻子正下方。
乳突:位于耳根后下方。
天突:位于喉咙下方凹陷处,即两锁骨相对中心点。
肩神经丛:位于肩关节前。
桡神经丛:前臂内侧位置虎口:位于拇指和食指相连肌肉处。
血海:位于股骨附近的大腿内侧。
梁秋:位于腓骨附近的大腿外侧。
丘墟/内庭/中封:用鞋子前端-侧沿或跟部攻击以下部位,踝关节下面凹口处(丘墟)、上脚面中心顶点处(内庭)、足与小腿正面连接处(中封)。
第2章:格斗以下动作以右格斗式示范。
所有动作都可以左右格斗式互换。
格斗是徒手搏杀的一种技巧。
格斗通常使用手,肘,膝盖,脚,和身体一些部位做为武器。
海军陆战队员必须知道如何有效地进行攻击。
他们还必须知道如何对付对手。
1、攻击的要点放松肌肉当进行重拳攻击的时候,放松肌肉十分重要。
因为这样具能提高攻击速度还可以减少身体疲劳。
在近身搏斗中让肌肉放松可以使得整体移动速度和出拳的速度提高。
手臂肌肉的放松能够提高出拳速度。
击打到目标时瞬间爆发不但能使目标受到毁灭性打击还能保护自己的的手腕和手不受到伤害。
发力方法发力要点:--》在攻击中旋转臀部和肩膀进行发力。
--》在打斗中前后移动始终保持重心平衡。
--》把自身的重量全部传输给对手,始终保持身体由上到下或由下到上的攻击路线。
快速恢复格斗式当出拳攻击后,迅速收回拳头是很重要的。
一旦攻击完成,需要迅速恢复格斗式并放松身体。
恢复格斗式的目的:--》将拳头和手臂迅速收回是为了保护自己受到对手的攻击。
--》阻止对手的攻击。
--》为下一轮攻击进行准备。
攻击意图攻击前一些细微的动作能够反映攻击者的意图。
尽量放松身体有助于隐藏攻击动机。
通常情况下,未受过训练的人攻击前的一些表情和一些细微的动作能反映出他攻击的意图,比如脖子的肌肉紧张,面部肌肉紧张等。
这表示攻击即将进行。
如果对手是经过特殊训练,就能轻易的躲过攻击,或者将攻击减少到最小。
拳头在打斗中是最常用的武器。
大多数人在打斗中第一反映是用拳头进行攻击。
在猛烈的拳头攻击下能够将人击晕或击倒。
因为他是人体最为坚硬的部位。
用它击打人体柔软的部位更容易将对手击毙。
正确应用拳击能够最大限度的杀伤对手而且能减少反作用力对手的伤害。
基本拳法拳头的正确握法:四指自然弯曲,拇指屈曲横叠于食指和中指间。
握拳示范图在未攻击前拳、臂、肩应尽量放松。
在出拳时放松肌肉能减少肌力的阻碍,提高出拳速度。
在进行进攻拳头即将接触目标瞬间,才骤捏紧加速发力,全身力量集中到拳面。
这样可以增加打击的破坏力并保护手和手腕不受到伤害。
当进行攻击的时候保持手臂手腕及身体移动路线在同一直线上,这样可以避免手腕受到伤害。
直拳直拳是一种沿着直线攻击的拳法。
它是一种快速高效的攻击方法。
利用直拳攻击和接近对手具有一定的隐蔽性不易被对手察觉。
其攻击部位为人体柔软区域。
直拳攻击要领:--》在打直拳时,在猛然击中目标瞬间,手腕前臂和拳头迅速向内拧转。
--》攻击部位为拳头第一二指关节。
--》攻击完成后应迅速收回攻击手臂恢复格斗式。
后手直拳以右格斗试为例后手直拳指右左手完成攻击的拳法。
后手直拳攻击力比前手直拳威力较大,它的力量由腿蹬地产生反作用力经过转跨摆肩在到手臂完成发力。
后手直拳的要领:--》转动臀部(转跨)肩部前送,重心稍前移,手臂前伸对准目标出拳,在接触到目标瞬间拳心向下拧转,并使力量向前延伸(意念力量贯穿目标)。
--》攻击时后脚蹬地将重心转移到前脚。
--》用拳头的食指和中指关节攻击目标。
--》攻击后迅速将手收回,恢复到格斗式。
勾拳勾拳是一种从对手视线下方进行攻击的重拳。
这是一种在身体中线由下至上的攻击方法。
通常中线部位防守较弱甚至没有防守,当对手被勾拳击中下巴或下颌的时,能使对手昏迷或造成对手自己将舌头咬断的攻击效果。
攻击要点:--》手臂弯曲,拳心内收。
手臂弯曲程度取决于和对手的距离。
--》旋转臀部和肩部出拳攻击对手下颌或下巴。
--》攻击部位为拳头前一二指关节。
--》攻击后迅速将手收回。
摆拳摆拳是一种威力强大的近战拳法。
攻击要点:--》摆拳攻击对手上半身时,保持手肘弯曲并迅速拧转臀部和右肩。
--》攻击部位为拳头第一二指关节处,在拳头未接触到目标时继续拧转肩部和臀。
--》迅速收回手臂,恢复格斗式。
上半身攻击武器攻击对手是以击晕(倒)和控制对手为目的。
手、手臂、手肘都可以用来攻击对手。
这些部位的攻击方法包括:拳击、掌击、手刀、指戳,肘击等等。
这些攻击方法根据实战情况的不同而采取不同的方法进行攻击。
攻击原则这里有一些能让攻击有效实施的原则。
爆发力,力量的传输对有效打击对手是非常重要的。
这要求我们在攻击中做到以下几点:--》旋转臀部和肩膀到攻击时的动作要协调一致。
--》向前向后移动身体时始终保持直线移动。
--》把身体质量通过旋转或移动使其转化成攻击力量。
攻击对方时始终保持由上到下或由下到上的攻击轨迹(路线)。
肌肉状态让手臂保持放松状态直到接触到攻击目标瞬间才让肌肉紧张发力。
在接触到目标时务必保持肌肉紧张最大化(最大爆发力),这样可以保证目标受到最大力量的打击又能保护手腕和手不受到伤害。
拳头在未接触到目标一瞬间也是处于放松状态。
当击中目标时保持力量继续向前灌输。
击中目标后继续保持镶嵌灌输力量的状态(意念力量穿透攻击目标),这样可以产生强大的破坏穿透破坏力。
保证对手受到最大的伤害。
攻击对方的薄弱,柔软的部位才能最大限度的杀伤对手。
移动移动是让自己寻找到适合攻击对手的位置同时也能起到保护自己的目的。
移动由格斗式开始到攻击结束为止。
攻击时使用左手还是右手主要取决以下几点:--》攻击时的角度。
--》对手的角度。
--》对手所暴露出容易受到损害的部位。
攻击对手薄弱目标攻击是为了最大限度的伤害敌人。
和比赛不一样的是我们的攻击不是靠精湛的技术取得比分,而是以最大限度伤害对手为目的的。
这就需要攻击对手的薄弱区域。
格挡格挡目的是为了格挡敌人的进攻,格挡部位为拳头的小手指侧面的肌肉。
格挡要点:--》握起拳头,手臂弯曲45-90度,(右格斗式)向左转动臀部和肩部带动手臂。
--》当接触到对方时继续转动臀部和肩部。
--》当接触到对方时旋转手腕击打对手。
戳击下巴戳击下巴可以将对手的脖子和脊椎造成损伤。
攻击部位为手掌根部攻击要点:--》手臂弯曲90度,手掌向上,手指自然弯曲。
--》在攻击身体前保持手臂弯曲,在攻击时手指自然微微分开。
--》(右格斗式)站立左脚向前跨一步以便接近对手。
双脚距离约肩宽。
膝盖弯曲。
--》保持右臂弯曲状态接近对手,猛然击打对手下巴。
攻击时配合转臀发力。
沿对方胸口中心由下到上攻击对方。
手刀手刀是近身搏杀中最具有杀伤力、应用最为广泛的技能。
攻击部位为小手指以下手腕以上的手掌边缘。
由于手刀扁平可以轻易避开头盔和防弹衣攻击对方颈部。
刀手的攻击角度有:内、外、垂直3种。
外刀手外刀手的攻击要点:--》四指伸直,拇指内收。
--》微收右手。
同时,向后转动右臀部和右肩膀。
--》然后向前转动臀部和肩部猛然发力,平行击向对方颈部。
(如下图)内手刀内手刀发力要点:--》四指伸直,拇指内收。
--》把右手放到左肩膀的上方,接着转动右肩膀,发力击向对方颈部。
--》在攻击时向右转动臀部和肩部。
(如下图)垂直手刀攻击时沿直线攻击的手刀。